3D Product Rendering vs Photography: 2026 Guide
Last updated: February 2026
What You Will Learn
What 3D product rendering actually is (and what it is not)
What “real” product photography covers in 2026
Head-to-head: speed, cost, realism, and conversion impact
When rendering wins, when photography wins, and when to combine both
Practical workflows for e-commerce teams
Specs and channel requirements (Amazon, Shopify, Meta)
Virtual product photography: where it fits between rendering and a real shoot
Image quality controls that prevent “fake-looking” results
What you can do before samples exist (pre-launch imagery)
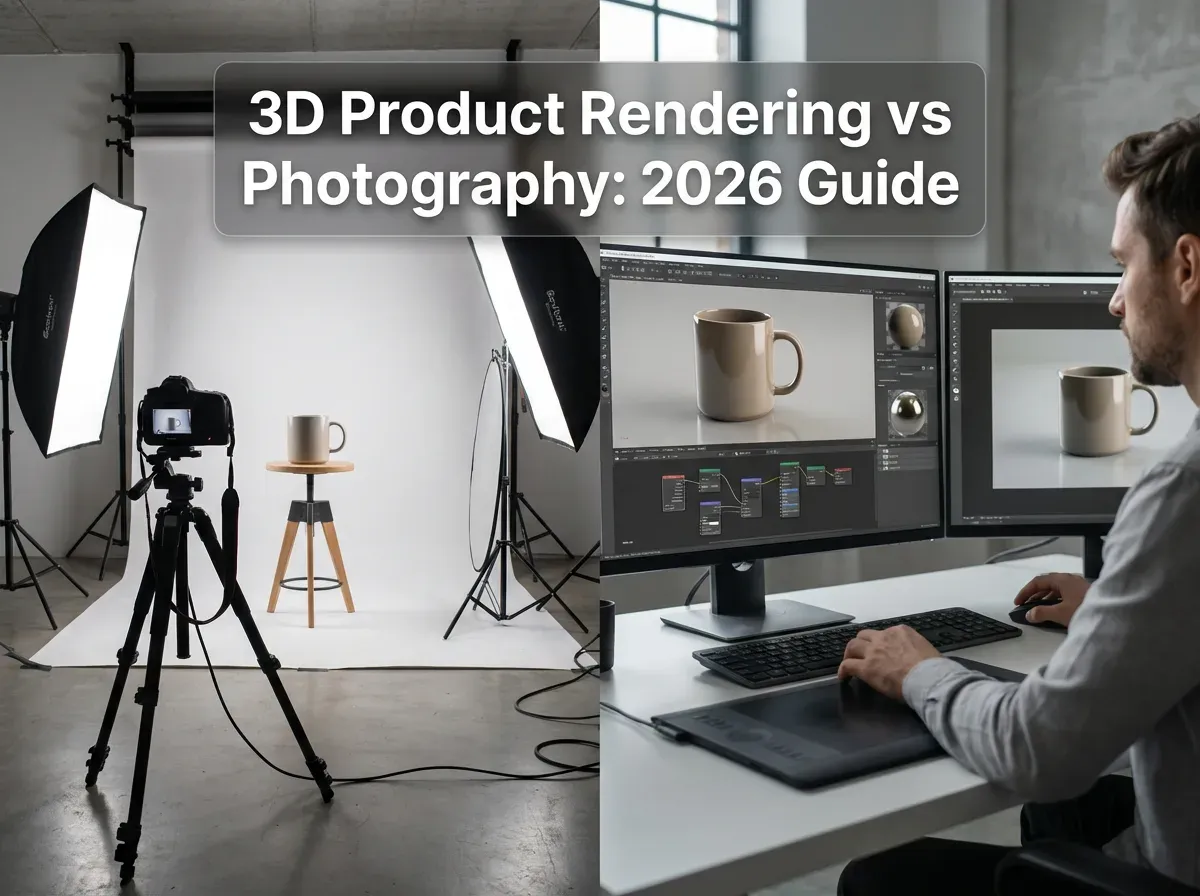
You have a launch coming up, your ad spend is booked, and your product page still has “temporary images.” Sound familiar? This is where the 3D product rendering vs photography debate gets very real. You do not just need images. You need images that match your brand, meet marketplace rules, load fast, and help shoppers understand what they are buying.
The reality is that both approaches can win, and both can quietly drain budget if you pick the wrong one. Photography can deliver true-to-life texture and authenticity, but it often slows down when you need dozens of angles, colorways, or seasonal updates. 3d product rendering can scale variations fast, but it only works when your models, materials, and lighting direction are handled with care.
This guide breaks down what each option is best at, what it costs in time and effort, and how to choose based on your catalog and growth plans.
What 3D product rendering actually is (and what it is not)
.webp)
3d product rendering is the process of building a digital model of your product, then generating “photos” from that model by simulating cameras, lighting, materials, and environments. In practice, this means you can create consistent angles, shadows, and reflections without physically reshooting the product.
Here’s the thing: rendering is not a magic shortcut if you do not have accurate geometry and materials. If the fabric weave, gloss level, or translucency is wrong, shoppers will feel it. They might not say “the roughness map is off,” but they will bounce because the product looks fake.
Two common rendering paths you will see
Product 3D rendering from CAD: common in furniture, consumer electronics, and anything already designed in 3D.
3D modeled from scratch: common when you only have photos or physical samples, and need an artist to rebuild the product.
If you want a deeper 3D overview, this hub page on product rendering is a useful companion read.
What “real” product photography covers in 2026
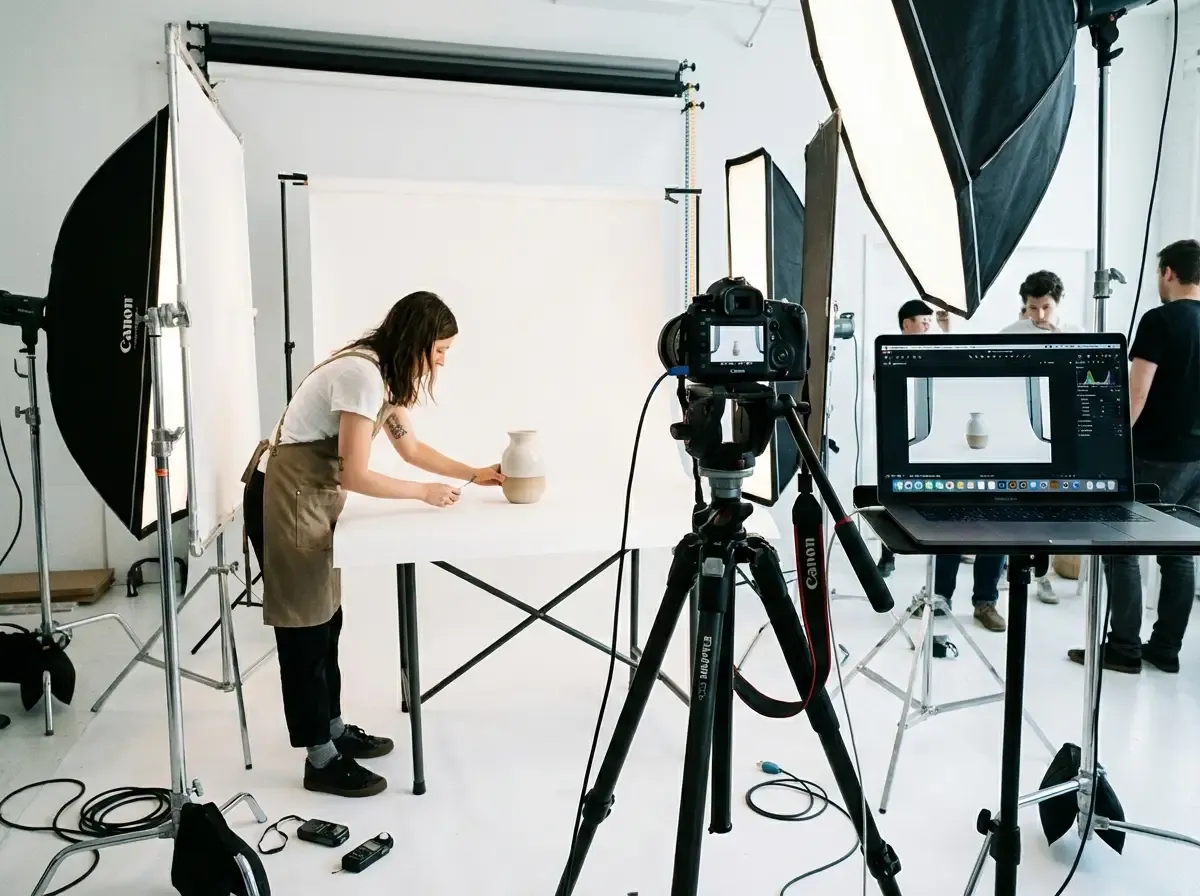
Most teams hear “product photography” and think camera, lights, and a white sweep. In reality, e-commerce photography is a production pipeline: shoot planning, styling, capture, retouching, file prep, and ongoing updates.
From a practical standpoint, the best way to shoot product photography depends on your channel mix. A Shopify PDP might need lifestyle, detail macros, and UGC-style images. Amazon might demand clean, consistent, white background product photography with strict framing rules.
The three photo types most stores rely on
White background product photography for marketplaces, catalogs, and consistency.
Lifestyle and context shots for ads and landing pages.
Specialized sets like ghost mannequin product photography for apparel volume and fit clarity.
If your basics are shaky, start with the pillar on product photos. It is the foundation for everything else you do.
3D product rendering vs photography: what actually matters for e-commerce
Consider this: your customer does not care how the image was made. They care if it answers their questions fast. So the “winner” depends on what you sell, how fast you release products, and how many variants you need to show.
Speed and scalability
Rendering wins when you have lots of SKUs, angles, or colorways. Once the model is built, you can generate new views without shipping samples back to a studio. This is why 3d rendering product photos are so common in furniture, lighting, and consumer electronics launches.
Photography can scale too, but it often scales by adding people, space, and coordination. If you are doing weekly drops, the scheduling overhead becomes the bottleneck.
Realism, trust, and returns
Photography tends to win on “believability” for tactile products: skincare textures, food, handmade goods, and anything where micro-details affect perceived quality. Shoppers trust real imperfections, especially in lifestyle images.
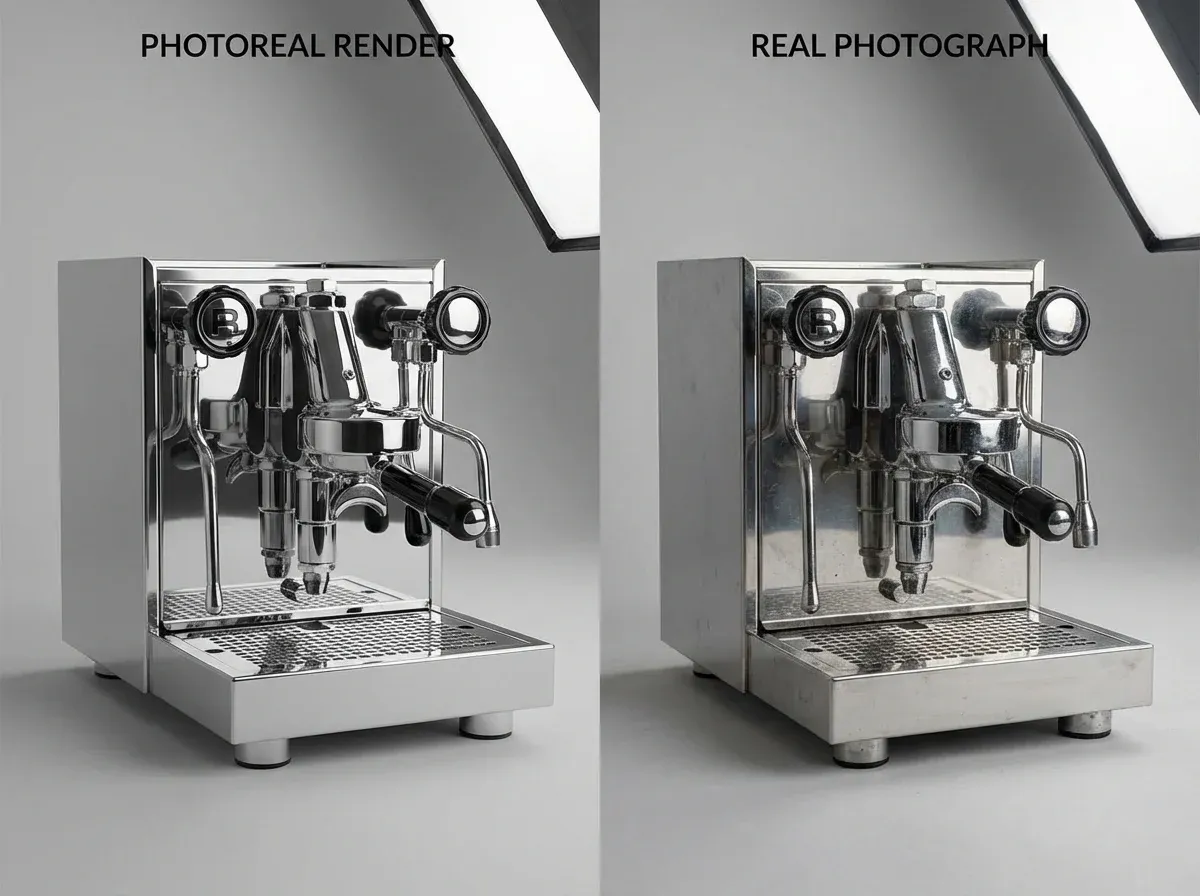
Rendering can be photoreal, but you need strong art direction. The moment reflections look too perfect or shadows look floaty, conversion can suffer, and returns can rise because expectation did not match reality.
Iteration and testing
What many businesses overlook is how often they need new images after launch. You might want five new hero backgrounds for a seasonal campaign, or you might need to A/B test a new angle for a Meta ad.
One example is using AI image tools to generate background variations quickly without re-rendering or reshooting. Tools like ProductAI can create multiple scene options fast, which is handy for creative testing when your product cutout is already solid.
If you want a straight comparison version of this topic, see product photography vs 3d rendering.
When 3D rendering wins, when photography wins, and when combining both is smartest
3D product rendering is usually the better choice when
You already have CAD files, or your manufacturer can provide them.
You sell configurable products (colors, finishes, bundles) and cannot shoot every combination.
You need consistent angles across a large catalog.
You want to support interactive experiences like augmented product views.
Photography is usually the better choice when
Texture and authenticity drive buying decisions (beauty, food, artisanal).
You rely on lifestyle, people, or “in the wild” context.
You need proof of real-world scale and imperfections.
The hybrid approach most fast-growing brands end up using
Hybrid is common: render for the catalog core (consistent angles, colorways), then shoot hero lifestyle for ads and brand storytelling. This keeps costs predictable while still giving you authenticity where it matters.
Now, when it comes to rendering at volume, many teams use a service for the heavy lift. If you are evaluating vendors, this guide on product rendering service is a good next step.
Practical workflows you can use this quarter
You do not need to pick one approach forever. You need a workflow that matches your release cadence and your team’s capacity.
Workflow A: Photography-first, then scale variations
Shoot a strong hero set (front, back, detail, scale reference).
Standardize cutouts and shadows for consistency across SKUs.
Create background and placement variations for ads and seasonal creative.
If your pain is “we have the product, but we cannot keep up with new scenes,” try an AI background tool like AI Background Generator to test multiple concepts quickly.
Workflow B: Rendering-first, then add credibility shots
Render catalog angles for every SKU and variant.
Photograph 1–2 “truth” images per product line to anchor realism.
Use consistent lighting direction so renders and photos can live together.
Workflow C: Marketplace compliance on autopilot
If you sell on Amazon, a clean white image is table stakes. Whether you shoot or render, you still need consistent framing, pure background, and sharp edges.
For quick compliance checks and replacements, a tool like the Free White Background Generator can help you create marketplace-friendly versions without a full reshoot.
For more on using AI-generated images without losing quality, see ai product rendering.
Channel requirements and creative reality checks
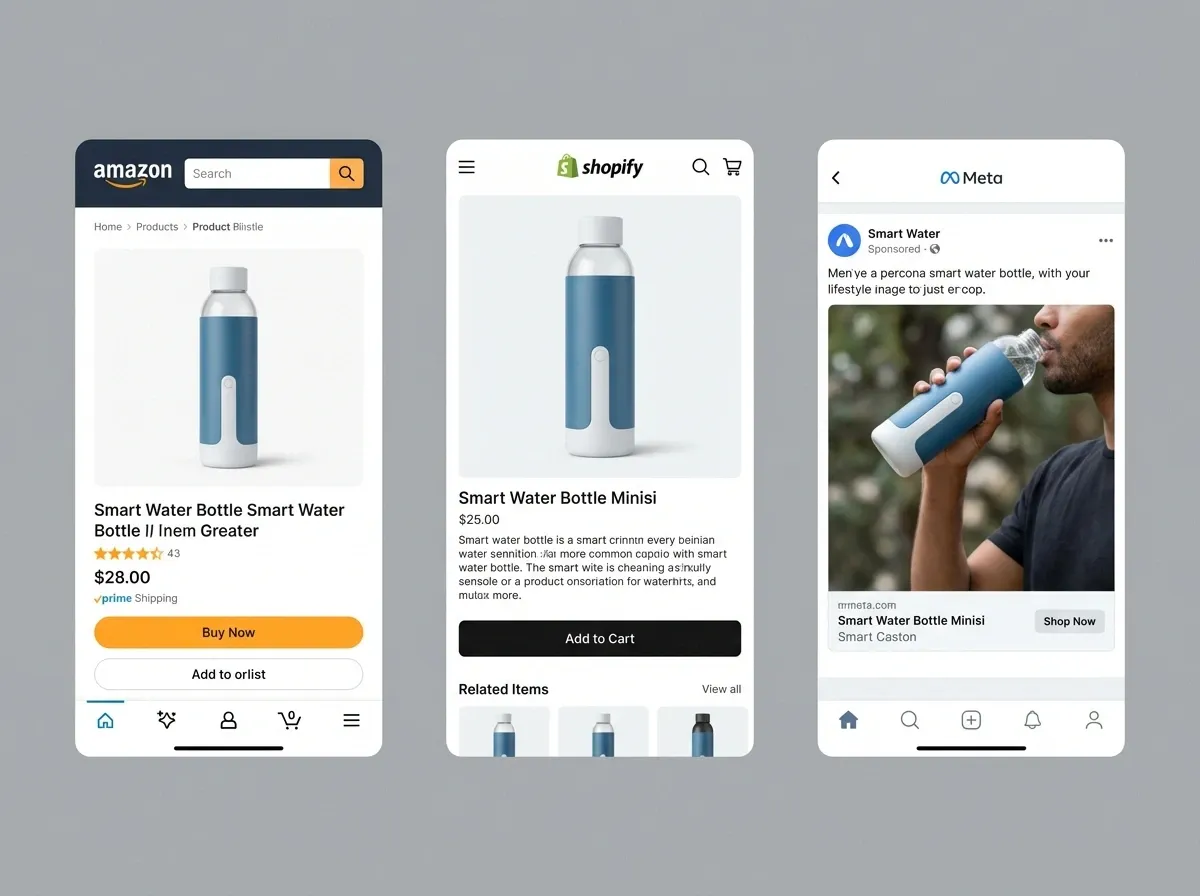
Decision-making gets easier when you map “image types” to where they will be used. Your PDP, your Amazon listing, your Meta ads, and your email banners do not need the same thing.
Amazon and marketplaces
Marketplace rules tend to reward consistency over creativity. White background product photography (or a white-background render) is typically the main image standard, with strict limits around props and text. If you are searching for “amazon product photography service near me,” you are usually trying to solve speed and compliance, not artistry.
Shopify and DTC PDPs
DTC pages need clarity plus persuasion. That might mean flat lay product photography for quick scanning, detail zooms for materials, and a hero lifestyle image that signals your positioning. Renders can work here, but make sure your materials look honest and your scale is believable.
Paid social
Paid social rewards iteration. The team that tests 20 creatives often beats the team that perfects 2. This is where rendering and AI workflows can shine, as long as your product representation stays accurate and your brand look stays consistent.
Virtual product photography: where it fits between rendering and a real shoot
You will hear “virtual photography” used in two different ways. Sometimes it means creating images from a full 3D model, basically rendering with a marketing workflow. Other times it means starting with a real product cutout and generating new scenes around it.
From a practical standpoint, virtual product photography is a workflow decision. You are trying to get more usable creative out of the assets you already have, without reopening a full shoot production every time marketing needs a new angle, setting, or campaign concept.
Here is where it tends to work best:
If you have a strong 3D model, you can produce a consistent “core image set” across SKUs, then re-render new environments when campaigns change.
If you have strong photography, you can keep the product honest and generate fast background variations for ads and seasonal creative.
If you sell on marketplaces, you can treat compliant white images as a repeatable output, not a one-time shoot milestone.
The reality is that “virtual” does not mean “effortless.” You still need standards: angles, lens look, lighting direction, and a clear definition of what counts as on-brand.
Image quality controls that prevent “fake-looking” results
If you want to avoid the uncanny valley effect, you need a few quality controls that apply whether you are rendering, shooting, or generating variations with AI.
Start with a repeatable “core image set”
Pick a small set of required angles and crops, then lock them in. When every SKU has the same front, 3/4, side, and detail conventions, the catalog feels trustworthy. This also makes it easier to spot the one SKU where the lighting or scale is off.
Match lighting logic, not just brightness
Shoppers notice when highlights contradict the environment. If the scene suggests a soft window light but your product has sharp specular reflections, it reads as composited. For renders, this is about believable light sources. For photos and AI variations, it is about keeping shadow direction and softness consistent.
Protect product-critical details
Text on labels, small ports and buttons, stitching, and edge transitions are the first places “almost realistic” breaks. Build your workflow so those details are checked at full resolution before you export final images for the PDP or marketplace.
Do a return-risk pass before you scale
Think of it this way: the images that look best are not always the images that sell best long-term. Before you roll a look across 200 SKUs, sanity check a few high-return drivers: color accuracy, size cues, and any material behavior shoppers are picky about (gloss, translucency, fabric texture).
What you can do before samples exist (pre-launch imagery)
One of the most overlooked advantages of 3d product rendering is speed to market when physical samples are late. If your product is still in development but you have CAD, drawings, or a consistent spec, you can often build usable imagery earlier than a traditional shoot would allow.
This is not just about having something to post. Pre-launch imagery can support real work:
Building your PDP layout and testing which angles answer the most questions.
Creating ad placeholders so your creative team can plan messaging and formats.
Aligning stakeholders on packaging, colorways, and what “on-brand” looks like before inventory lands.
Consider this: the earlier you define your image standards, the less chaos you create when the product finally arrives. Even if you still plan to shoot lifestyle later, rendering can reduce the scramble and let photography focus on credibility and story.
Frequently Asked Questions
Is 3d product rendering cheaper than photography?
It depends on what you already have. If you have CAD files and a repeatable product structure, 3d product rendering can be cost-effective across many SKUs and variants. If you need a 3D artist to model everything from scratch, the first unit cost can be higher than a simple studio shoot. The better comparison is total cost of updates: if you change colors, finishes, or packaging often, rendering can reduce reshoot cycles and the logistics of moving samples.
Does 3D rendering hurt conversion because it looks “fake”?
Not automatically. Photoreal rendering can convert extremely well when materials, lighting, and scale are handled correctly. Problems show up when surfaces look too perfect, shadows do not match the environment, or the product appears to float. If your shoppers are detail-sensitive (beauty, fashion, handmade), you may want a hybrid approach: use renders for consistent catalog angles, then add a few real photos that prove texture and real-world use.
What is the best way to shoot product photography for a small catalog?
If you have under 50 SKUs and the products are physically easy to shoot, a tight studio workflow often wins. Start with a consistent light setup, tripod, and repeatable camera settings. Build a simple shot list: hero, side, back, detail, scale reference, and packaging. Then create templates for cropping and export so every listing looks consistent. If you are doing this in-house, focus on repeatability over fancy styling. Consistency sells.
How do you set up product photography at home without a big budget?
A small product photography setup can be simple: a table, a sweep (paper or vinyl), two lights with diffusion, and a tripod. The biggest upgrade is controlling reflections and shadows, not buying a more expensive camera. Use flags (black foam board) to shape highlights and keep shiny products from looking messy. Shoot tethered if possible so you can spot issues early. When you scale, invest in repeatable positioning marks so each SKU lands in the same frame.
What is a product rendering tutorial supposed to teach, and what will it not cover?
A good product rendering tutorial covers the basics: modeling, UVs, materials, lighting, camera setup, and rendering outputs. It usually does not cover “e-commerce art direction,” which is the part that matters for sales. You still need a visual standard: lens choice, consistent angles, correct scale cues, and realistic surface behavior. If your output needs to match existing photography, you also need color management and a clear lighting reference so renders and photos feel like one catalog.
Can I mix real photos and 3D renders on the same product page?
Yes, and many brands do. The key is consistency. Keep perspective and lighting direction similar, match color temperature, and avoid having one image look like a sterile studio while another looks like a warm lifestyle scene unless that contrast is intentional. A common pattern is: use renders for the clean angle set and variants, then use photography for the hero lifestyle shot and close-ups of texture. This gives shoppers both clarity and confidence.
How should I edit product photography so it still feels honest?
Editing should reduce distractions, not change the product. Remove dust, fix minor scratches, correct white balance, and ensure the product color is accurate. Be careful with aggressive smoothing and over-sharpening, especially on fabrics and skin-related products. If you change shape, hide seams, or shift color beyond reality, returns tend to rise because the product does not match expectation. Your goal is “best true version,” not “different product.”
Where does AI fit in if I am choosing between rendering and photography?
AI usually fits in the middle, after you have a solid base image. You can use AI to generate new backgrounds, create seasonal scenes, or produce faster creative variations for ads. For example, ProductAI includes tools like a background generator and white background generation that can speed up iteration once your product cutout is clean. Think of AI as a production accelerator, not a replacement for accurate source visuals or good creative direction.
Is flat lay product photography better than 3D rendering for apparel?
Flat lay works well for speed and for products where silhouette and styling are the main story. It is also forgiving if you are a small team. 3D can help when you need consistent views across many variants, but apparel is hard to render convincingly because cloth behavior and micro-texture are tricky. For many brands, ghost mannequin photography plus a few lifestyle images is the best balance. If you do render apparel, invest in strong material scans and fit references.
What should I do if I need lots of images fast for a launch?
Start by prioritizing what drives the sale: a clean hero image, clear scale cues, and two to three detail shots that answer common objections. If you can render from CAD, rendering can generate the angle set quickly. If you can only photograph, simplify your set and shoot in batches. Then create additional variants for ads and seasonal creatives through controlled edits, or AI background variations. Speed comes from limiting decisions and standardizing output.
What is virtual product photography, and is it the same as 3D rendering?
It depends how the term is being used. Some teams use “virtual product photography” to mean photoreal images generated from a full 3D model, which is essentially rendering with a marketing pipeline behind it. Others use it to mean taking a real product cutout and generating new environments around it, which is more like virtual staging. In both cases, it is a way to scale image production without repeating full shoots for every new campaign.
Can 3D rendering replace photography for Amazon main images?
Sometimes, yes. A clean, accurate white-background render can meet the same practical goal as white background product photography: clarity and compliance. The risk is not the background, it is accuracy. If the render is even slightly off in color, proportions, or material behavior, you may see more returns or negative reviews. If you go the render route, validate it with at least a few real reference photos so you are not guessing on texture and finish.
Key Takeaways
3d product rendering excels when you need scale, variants, and consistent angles across a growing catalog.
Photography typically wins on tactile realism, lifestyle credibility, and products where texture drives trust.
A hybrid workflow often delivers the best ROI: render the catalog core, shoot a few “truth” images for authenticity.
Channel needs matter: marketplaces favor clean compliance, while DTC PDPs and ads reward context and iteration.
AI tools can accelerate variations after you have solid source visuals, especially for backgrounds and compliant white images.
Conclusion
If you are trying to choose between 3d product rendering and photography, start with one question: where is your bottleneck? If it is variants, angles, and speed, rendering usually gives you a more scalable system. If it is trust, texture, and “this is what you will actually receive,” photography tends to do the heavy lifting.
Think of it this way: your catalog needs consistency, your marketing needs volume, and your brand needs credibility. That is why many teams end up combining approaches, then using AI to speed up the smaller iterations like backgrounds and seasonal creative. If you want to refine your image pipeline, check your current product photos standard first, then decide what should be rendered, what must be shot, and what can be generated as a variation.
If you want to see AI product photography in action, explore ProductAI free tools to test background and white-image variations.
Last updated: February 2026
About the Author
Giles Thomas, Ecommerce & AI Product Photography Expert – Founder, AcquireConvert.
Giles helps e-commerce teams build scalable product imagery workflows that balance realism, speed, and cost across marketplaces and DTC sites. His work focuses on practical visual standards and modern production systems—combining photography, 3D rendering, and AI-assisted iteration to improve conversion and reduce creative bottlenecks.

Hi, I'm Giles Thomas.
Founder of AcquireConvert, the place where ecommerce entrepreneurs & marketers go to learn growth. I'm also the founder of Shopify agency Whole Design Studios.