3D Virtual Photography Without a Camera (2026 Guide)
.webp)
Last updated: February 2026
What You Will Learn
What 3D virtual photography actually means
When virtual beats a camera (and when it does not)
The core workflows: 3D models, 360s, and AI edits
Virtual photography is also a production model (remote shoots vs fully digital)
Lighting, shadows, and “realism” without a studio
E-commerce use cases: ads, PDPs, marketplaces, and A/B tests
Virtual product photography software: what to look for (and what to ignore)
File formats, resolution, and output requirements for e-commerce
A simple QA checklist for virtual imagery
Skills, roles, and what “virtual photography jobs” look like
How to get started with a simple, low-risk plan
You have products ready to sell, ads ready to run, and a launch date that is not moving. Then the usual bottleneck hits: you need new images. Maybe your photographer is booked out, shipping samples is a headache, or you need 20 variations for different marketplaces and seasonal campaigns.
That is where 3d virtual photography starts to look less like a “cool experiment” and more like a practical production workflow. Instead of capturing a new shot every time you need a different angle, surface, prop, or location, you create a digital product once, then generate images from it on demand. Think of it as building a reusable visual asset you can “shoot” forever.
This article breaks down what virtual photography is, what you can realistically achieve without a camera, and how e-commerce teams use it to ship faster creative. If you are still building your fundamentals, start with the broader guide to product photos and come back when you are ready to scale.
What 3D virtual photography actually means
When people ask “what is virtual photography?”, they are usually describing one of three things:
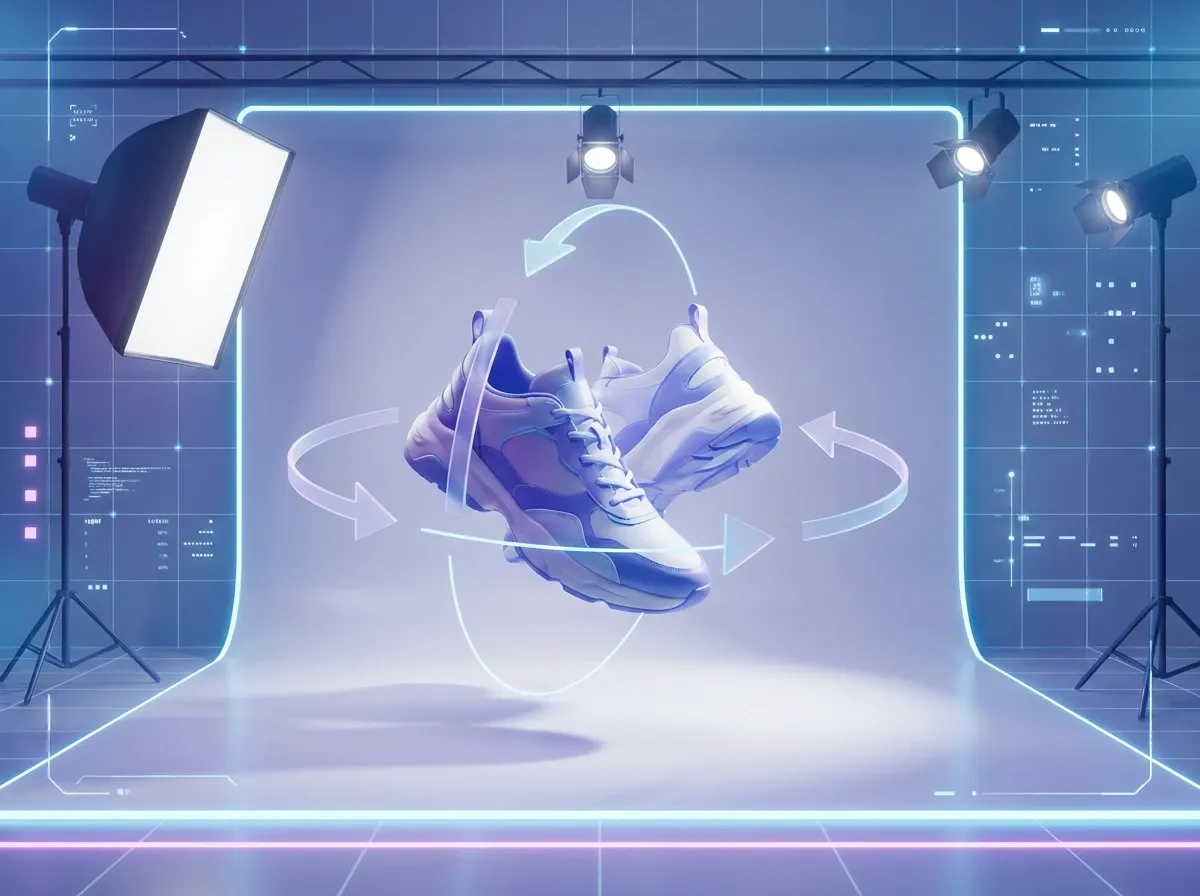
3D virtual photography: you “photograph” a digital 3D model inside software, choosing camera angle, lens, lighting, and background.
360 product views: a set of frames that rotate the product, captured either from a real turntable shoot or rendered from a 3D model.
AI-assisted product photography: you start with a real photo, then use AI to change the background, clean up reflections, add context, or create variations.
In practice, most e-commerce brands use a hybrid. They keep a core set of real product images for accuracy, then use virtual workflows for speed and iteration. If you want the deeper technical side of 3D capture and output, this guide on 3d photography is a useful companion.
When virtual beats a camera (and when it does not)
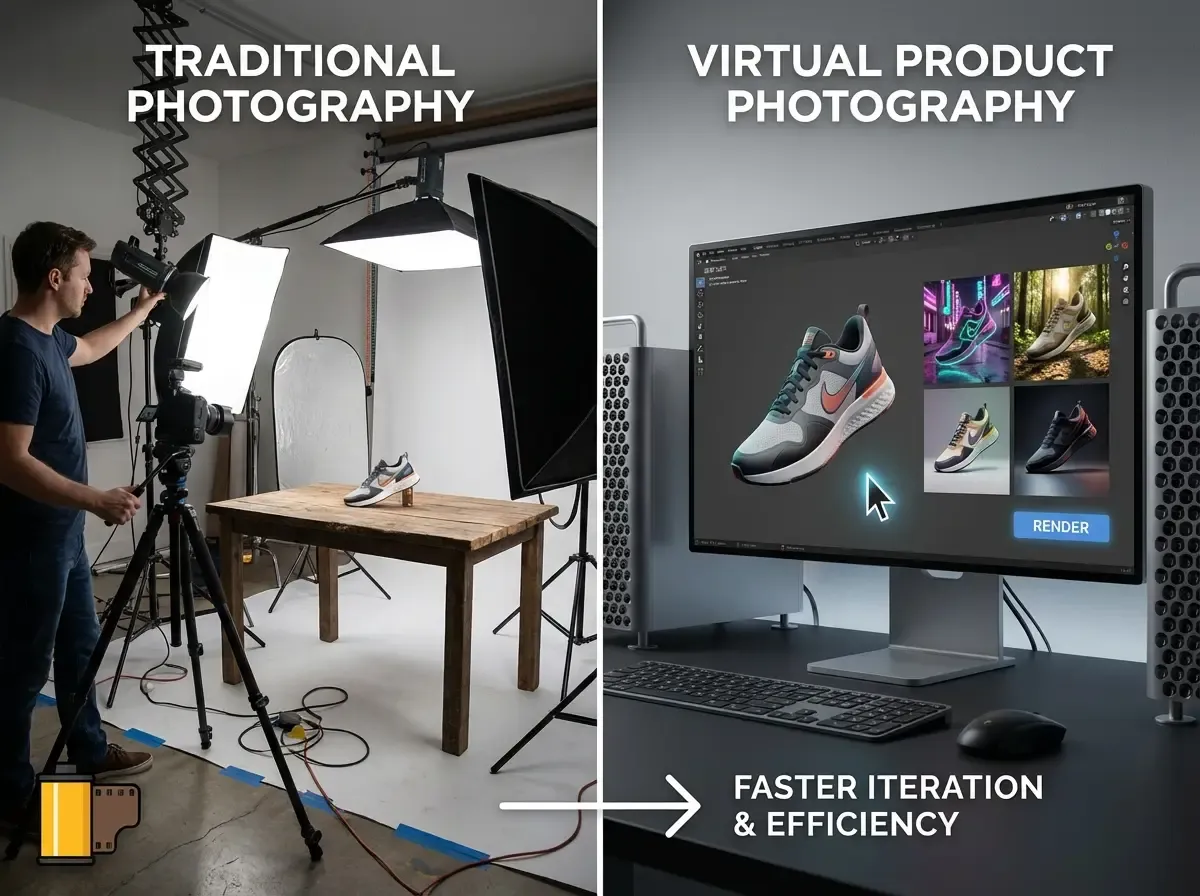
Virtual wins when variation is the real goal
Here is the thing: for most stores, the expensive part is not taking one hero image. It is producing all the variations you need across channels. Different crops for Meta, different aspect ratios for marketplaces, seasonal backgrounds, bundles, and localized creative.
Virtual photography shines when you want fast iteration. Once your product exists as a high-quality 3D asset (or you have clean source photos), you can produce new angles and scenes without reshooting. That makes it easier to run A/B tests on your PDP and ads, and to refresh creative without adding weeks to your calendar.
Real cameras still matter for truth and texture
The reality is: some products are hard to “fake” convincingly. Think soft goods with complex folds, translucent packaging, cosmetics with subtle specular highlights, or anything where tiny surface texture signals quality.
Also, compliance-heavy categories care about accuracy. If you sell regulated items, you may need documentation-grade imagery where the safest option is controlled photography. This is especially relevant in niches like pharmaceutical photography, where consistency and clear labeling are not negotiable.
The core workflows: 3D models, 360s, and AI edits
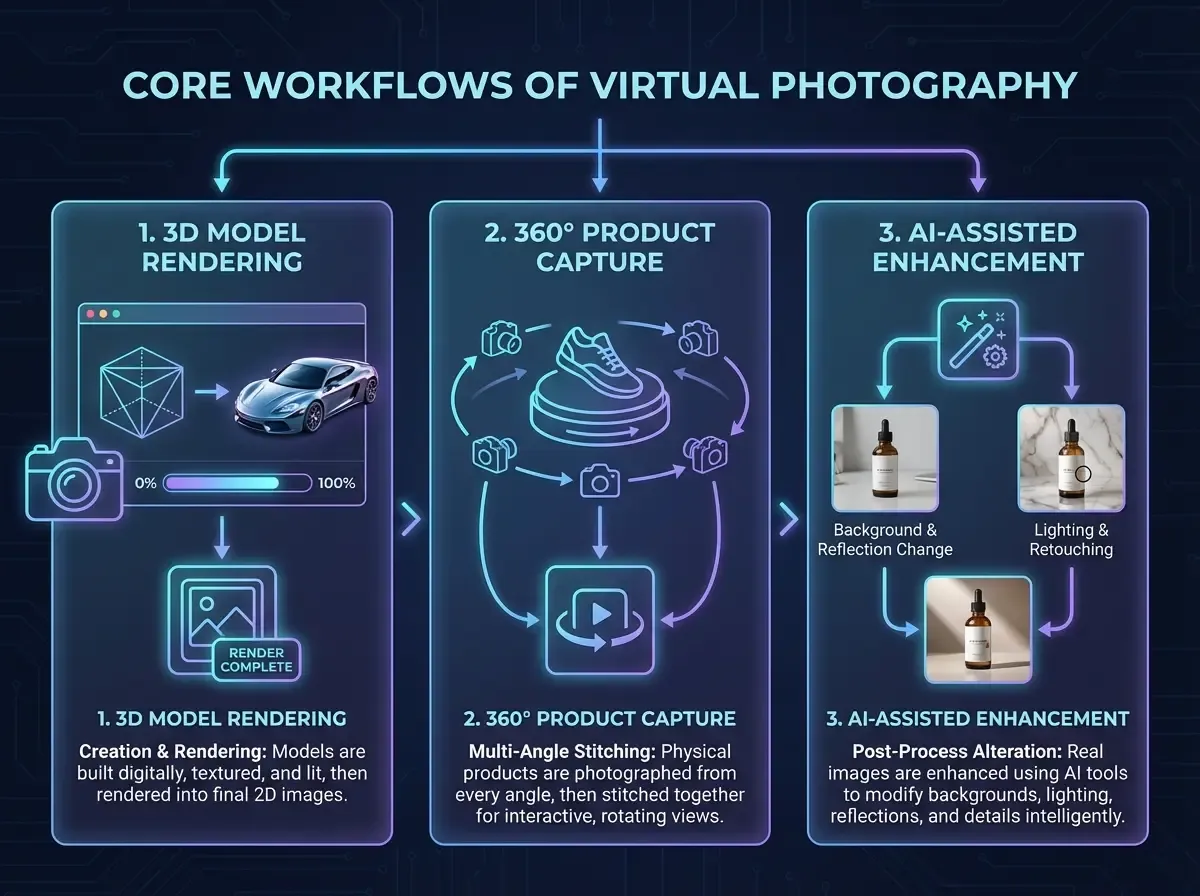
Workflow A: Build a 3D model, then “shoot” it forever
This is the classic virtual product photography studio approach. You create a 3D model from CAD files, photogrammetry, or 3D scanning. Then you render stills, 360 spins, or animations from any angle.
From a practical standpoint, you should treat the model as a long-term asset. A good model can support your PDP, marketplaces, wholesale line sheets, and future packaging updates. If you are evaluating how to produce and manage those assets, see this breakdown of 3d model photography.
Workflow B: Capture once, generate variations with AI
If you do not have a 3D model, you can still get a lot of “virtual” mileage out of one strong source photo. The key is quality input: sharp image, clean edges, and lighting that is not fighting the product.
One example: tools like ProductAI can help you generate background and scene variations quickly from a single product photo, which is useful when you need creative volume without scheduling another shoot.
Now, when it comes to execution, keep the workflow simple. Start by creating a few controlled backgrounds for ads and PDP sections, then expand into lifestyle scenes after you have a consistent “look.” You can experiment with tools like the AI Background Generator or a more hands-on option like the Background Swap Editor to see what style directions hold up on your actual storefront.
Workflow C: 360 and 3D for “confidence building” on PDPs
360 product views and simple 3D spins help shoppers answer one question: “What will this look like in real life?” They reduce uncertainty, especially for products where shape and proportions matter (furniture, footwear, bottles, and devices).
Consider this: if your returns are driven by “not as expected,” a better sense of volume can be worth more than another lifestyle photo. Your job is not to impress people with tech. It is to remove doubt.
Virtual photography is also a production model (remote shoots vs fully digital)
A lot of people use “virtual photography” to mean “CGI” or “AI backgrounds.” But there is another meaning you will run into in e-commerce: a remote shoot where the product is photographed in a real studio, and you direct it virtually.
From a decision-making standpoint, it helps to separate these models:
Fully digital: 3D model renders, AI-generated scenes, or AI-edited source photos. No studio day required once your base asset exists.
Remote studio production: a real camera, real lighting, real props, but you do not have to be there in person. You approve sets, angles, and takes over a live session, then get edited outputs.
Here is why this matters: if your category depends on real texture, true-to-life materials, or strict accuracy, remote studio workflows can remove travel and scheduling friction without forcing you into full 3D. On the other hand, if your bottleneck is “we need 50 variants by Friday,” fully digital workflows are usually the better fit.
Consider this as a simple rule: use remote studio production when truth is the main risk, use digital workflows when volume is the main risk.
Lighting, shadows, and “realism” without a studio
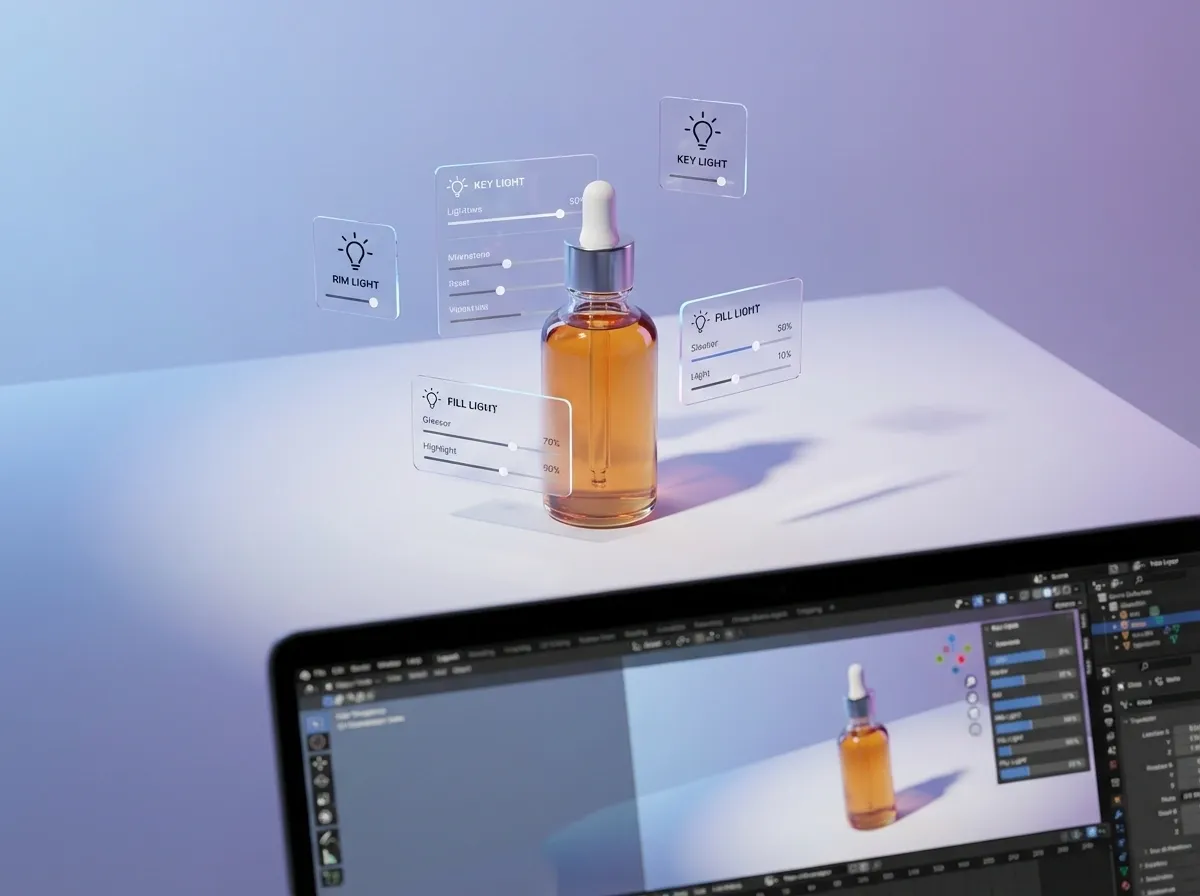
Good virtual lighting is still lighting
A lot of people assume virtual means you can skip lighting knowledge. You cannot. The difference is that you are shaping light with sliders and HDRI maps instead of softboxes and flags.
If you already know basic product photography lighting techniques, you have an advantage. The same principles apply: define a key light, control fill, decide how hard the shadows should be, and protect highlights on glossy surfaces.
Match the “physics” shoppers expect
What many businesses overlook is how quickly customers notice when gravity feels wrong. The product looks like it is floating, shadows point the wrong direction, or reflections do not match the environment.
In practice, this means you should be obsessive about contact shadows and scale. Even a simple flat lay composition needs believable shadow softness and correct proportions. If you are creating scenes that imply a real place, use reference photos. This is also why location-inspired backgrounds need restraint. This article on Location Backgrounds for Product Photography explains what tends to look authentic versus “stock-like.”
Use “brand consistency” as your realism shortcut
You do not need every render to be indistinguishable from a camera shot. You need consistency. If your storefront has a clear visual system (color palette, shadow style, horizon line, prop language), customers will trust it because it feels intentional.
E-commerce use cases: where virtual photography pays for itself
1) Faster launches and SKU expansions
If you launch seasonal products or drop new colorways often, virtual workflows reduce the time between “final sample” and “live on site.” A single approved model or base photo can support dozens of variations.
That matters because merchandising does not wait for production. Your competitors will happily ship ads with “good enough” creative while you are still booking studio time.
2) More ad creative, not more meetings
Paid social platforms reward freshness. Virtual photography makes it easier to test different hooks without inventing an entirely new shoot concept every week. Swap context, change angle, adjust crop, repeat.
If you want a practical checklist for AI-created images that still look professional, this guide on Tips for Professional AI-Generated Product Photos is worth bookmarking for your creative team.
3) Cleaner PDP storytelling
Your PDP needs clarity first, then persuasion. Virtual photography helps you build a consistent narrative: hero, angle set, close-ups, scale cues, and context scenes that highlight benefits.
If you are currently debating whether you should invest in rendering or stick with photography, read product photography vs 3d rendering. It will help you choose based on business constraints rather than aesthetics.
4) Marketplace compliance and reusable “white background” assets
Marketplaces often demand clean, consistent images. Even if you use lifestyle scenes for ads, you still need standardized images for Amazon-style listings and catalog feeds.
Virtual production can generate consistency, but it only works if your base asset is accurate. Build one “source of truth” for color and shape, then generate derivatives. If you see color drift, stop and fix the pipeline rather than patching each image.
Virtual product photography software: what to look for (and what to ignore)
There is no single “best” virtual product photography software because the right tool depends on what you are actually trying to produce: new angles from a 3D model, a 360 spin, or faster lifestyle variations from a base photo.
What matters is whether the software supports a repeatable process your team can run every week, not whether it has the longest list of features.
Features that actually matter in e-commerce
Consistency controls: the ability to keep the product unchanged while you vary background, props, and lighting style.
Masking and edge quality: clean cutouts, especially around hairline edges, transparent packaging, and reflective surfaces.
Batch thinking: even if the tool does not “batch export,” you should be able to produce a consistent set of outputs without rebuilding prompts and settings from scratch for every image.
Scene realism fundamentals: believable shadows, correct scale, and light direction that matches the environment.
A QA-friendly workflow: easy to review side-by-side variations so you can spot drift in logo shape, label text, proportions, and color.
What to ignore (because it usually does not help conversion)
Extreme realism demos that do not match your actual product category. If your catalog has glossy packaging, metallic foils, or translucent parts, test with your hardest SKU first.
One-click “style” presets that change the product itself. If the tool cannot keep your SKU accurate, the output is not usable for most PDP and marketplace needs.
Novelty scenes. If a background does not add clarity, scale, or brand context, it is often just noise.
Think of it this way: the winning tool is the one that protects truth, produces volume, and stays consistent across your catalog.
File formats, resolution, and output requirements for e-commerce
Virtual photography workflows can fail at the last step: delivery. You can have beautiful images that still look soft on a PDP, crop badly in ads, or get rejected by marketplaces.
From a practical standpoint, you want a simple output standard your team follows every time.
Resolution: start with where the image will live
For PDPs, you generally want enough resolution for zoom without creating massive files that slow the page. For paid social, you want the platform’s preferred aspect ratios and a safe crop so key details are not cut off in different placements.
If you are producing multiple channels, do not treat “one export size” as a shortcut. Build a small set of export templates: square, 4:5, 16:9, and a high-res master you can crop down later.
Format: pick the smallest file that still looks clean
JPEG is still common for product imagery because it is lightweight. PNG is useful when you need transparency or crisp edges, but it is heavier. WebP can be a strong choice for modern storefronts because it tends to compress well while staying sharp.
The important part is consistency: choose a format strategy and stick to it so your images load fast and your catalog looks uniform.
Background requirements: do not let “almost white” sink you
Marketplaces that require a white background can be strict. “Off-white with a shadow that turns gray” can get flagged, and inconsistent whites across variants make your listing gallery look messy.
Whether you are generating images from 3D or editing a source photo, define a standard background color and shadow density. Then QA against that standard, rather than eyeballing every export from scratch.
A simple QA checklist for virtual imagery
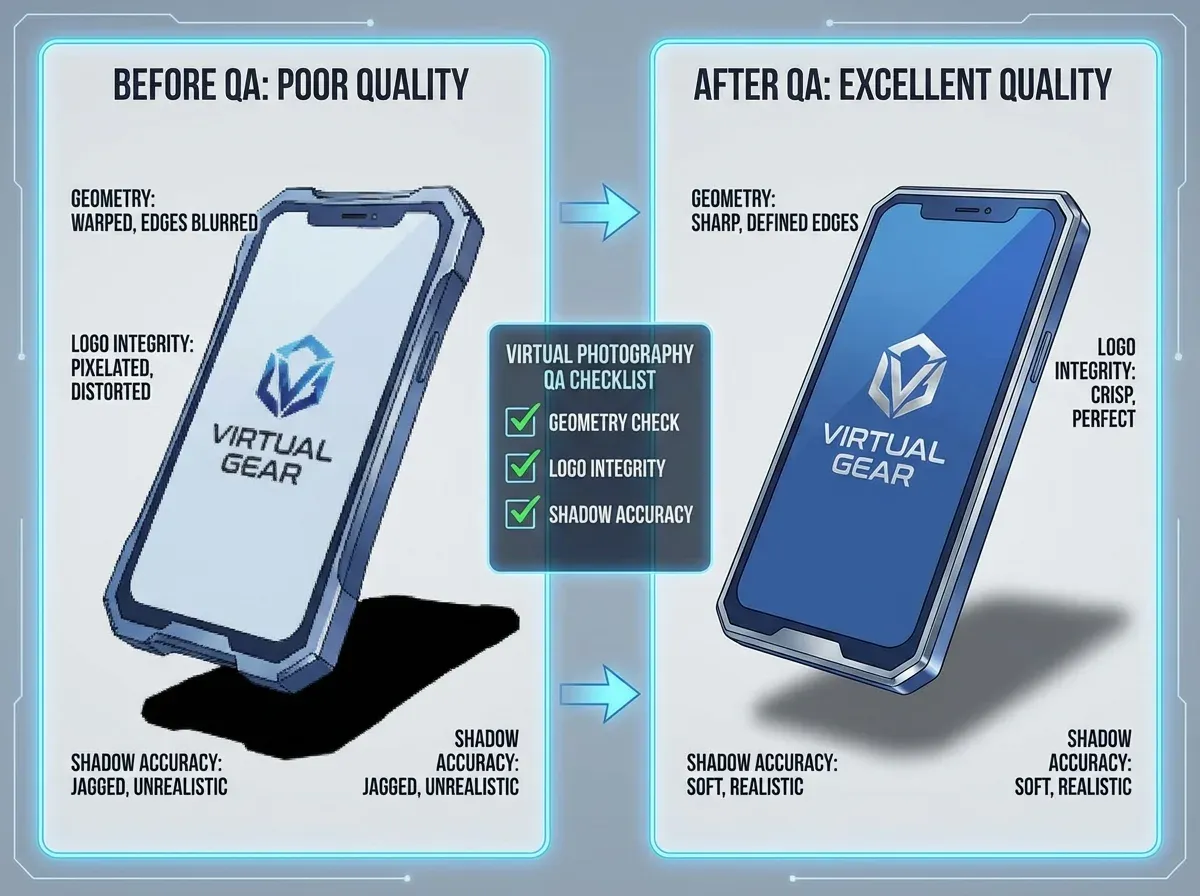
The fastest way to lose trust with virtual images is to ship small errors at scale. One wrong label, one warped logo, one inconsistent cap shape, and you have created customer doubt and support tickets.
What many businesses overlook is that QA is not an “extra step.” It is what makes virtual production safe enough to run faster than studio photography.
Quick checks that catch most problems
Geometry and proportions: does the product silhouette match your real hero image? Watch for stretched corners and “melted” edges.
Logo and text integrity: are letters sharp, correctly spaced, and not subtly altered?
Color drift: compare to a known-good reference image under neutral light.
Contact shadow: does the product feel grounded, or is it floating?
Reflection logic: on glossy packaging, do highlights match the environment you placed it in?
Crop safety: do you have enough margin for different placements and responsive layouts?
One operational tip that saves time
Run QA on the first three images of a new “style” before you generate the other fifty. If the first three are correct, you can scale. If the first three are wrong, scaling just multiplies cleanup costs.
Skills, roles, and what “virtual photography jobs” look like
Common roles inside a virtual photography pipeline
If you are looking at virtual photography jobs or hiring freelancers, it helps to recognize the sub-skills. A “virtual photographer” can mean different things depending on the workflow:
3D artist (modeling, materials, UVs, texturing)
Lighting and rendering specialist (photoreal shading, shadow control, render settings)
AI image editor (prompting, compositing, cleanup, consistency checks)
Creative producer (briefs, brand standards, platform specs, approvals)
What to test in a trial project
Think of it this way: you are not just buying images. You are buying a repeatable system. In a paid test, ask for 3 outputs: a clean marketplace image, a branded PDP hero, and one lifestyle scene. If they can keep geometry, color, and shadows consistent across those three, they are probably a good fit.
A note on “virtual photography classes”
A virtual photography class can be valuable if it teaches fundamentals, not just software buttons. Prioritize courses that cover materials, lighting logic, and composition, because those skills transfer across tools and platforms.
How to get started with a simple, low-risk plan
If you want to try 3d virtual photography without committing to a full 3D pipeline, start with one SKU and one channel. The goal is to validate speed and quality, not to rebuild your entire creative workflow in a week.
A practical 7-step pilot
Pick one product with clear shape and minimal transparency.
Define success: “10 ad variations in 2 days,” or “new PDP imagery without reshooting.”
Collect your best source assets: pack shot, label close-ups, brand colors, and any CAD files.
Create a style guide: shadow softness, backgrounds, crops, and do-not-change rules.
Produce variations, then QA for accuracy (logos, text, proportions, color).
Deploy and measure: CTR, CVR, add-to-cart, and return reasons.
Decide whether to invest in 3D modeling, AI variation, or a hybrid.
One example approach is to keep your hero images grounded in reality, then use AI for controlled variation. Tools like ProductAI can speed up those variations so you can test more concepts without multiplying shoot days.
Frequently Asked Questions
Is 3D virtual photography the same as 3D rendering?
They overlap, but the intent is slightly different. 3D rendering is the technical output: generating a 2D image from a 3D scene. 3D virtual photography is the workflow and mindset: you are “shooting” a digital product the way a photographer would, choosing angles, lenses, lighting, and composition for merchandising goals. In e-commerce, what matters is whether the images build trust and sell the product, not what you call the pipeline. If you are deciding between approaches, compare constraints like timeline, product complexity, and number of variations you need.
What is the biggest mistake brands make when going virtual?
They chase realism before consistency. A slightly stylized look that is consistent across your catalog often performs better than a mix of “almost real” renders with different shadows, scales, and color tones. Shoppers read inconsistency as risk. Start with a repeatable lighting setup and a clear set of do-not-change rules (logo shape, label text, product proportions). Once you can produce ten images that look like they belong together, then push into more ambitious lifestyle scenes and complex materials.
Can I do virtual product photography without a 3D model?
Yes. Many teams start from a strong real product photo and use AI editing to generate variations, especially backgrounds and simple scene context. This can be a smart entry point when you do not have CAD files or the budget for modeling. The limitation is viewpoint change. You can convincingly change the setting, but generating truly accurate new angles is harder without a 3D asset. If your business needs lots of angles or 360 spins, a 3D model becomes more valuable over time.
How do I keep colors accurate in virtual photography?
Color accuracy is mostly a process problem. Use a color reference (or real product photos as a benchmark), lock your lighting setup, and avoid re-editing each image individually. If you use AI tools, build guardrails: keep the product masked, restrict changes to the background, and check output on multiple screens. For marketplaces and regulated categories, consider a final approval step where someone compares images to a real sample under neutral light. Consistent white balance and controlled highlights are often more important than “perfect” saturation.
Does virtual photography reduce returns?
It can, but only if it improves shopper understanding. Virtual imagery helps most when it clarifies shape, scale, and key details that are hard to show in one hero shot. 360 views can reduce uncertainty, and cutaways or exploded views can explain features. If your returns are driven by quality issues or shipping damage, better imagery will not fix that. Measure return reasons before and after changes, and tie the project to specific shopper questions you want to answer on the PDP.
How should I think about “product photography lighting techniques” in a virtual setup?
The same fundamentals apply. You still need a key light direction, controlled fill, and a plan for reflections. In a virtual scene, you are simulating softboxes and bounce cards with area lights and environment maps. The big advantage is repeatability. Once you dial in lighting that flatters the product, you can reuse it across SKUs and variations. The risk is over-lighting. If everything is evenly bright with no shadow shape, the product looks flat and less premium.
Are there legitimate “virtual photography jobs,” and what skills matter most?
Yes, and the roles are diversifying. Some jobs are classic 3D: modeling, texturing, and rendering. Others are closer to creative ops: producing variations, maintaining brand consistency, and prepping assets for Shopify and ad platforms. For AI-heavy roles, the valuable skill is not “prompting.” It is art direction plus QA: knowing what looks wrong, fixing small details, and delivering consistent output at volume. If you hire, ask for before-and-after examples and a clear description of their workflow.
Can virtual photography help if I sell on Etsy, or is it only for big brands?
It can help smaller sellers too, especially for speed. If you are juggling product creation, listings, and marketing, you probably cannot reshoot every time you want a seasonal look. Start with simple, controlled improvements: cleaner backgrounds, consistent crops, and a repeatable flat lay style. Virtual tools can support that by generating variations from one good base image. Just keep the “handmade trust” factor in mind. Overly synthetic scenes can hurt if your buyers expect authenticity and real materials.
Is it worth hiring a local studio (like product photography San Diego or Las Vegas) if I plan to go virtual?
Often, yes. A strong real shoot can be the best foundation for virtual workflows. Local studios can capture accurate hero images, details, and color references that you can reuse for months. Then you can layer virtual techniques on top for variation. This hybrid approach is common: use real photography for truth, and virtual production for speed. If you go this route, tell the studio up front that you want clean cutouts and consistent lighting that will hold up for background swaps and compositing.
What is the difference between virtual photography and “product staging”?
In e-commerce, people often use these terms interchangeably, but they point to different outcomes. Virtual photography usually means you can control the camera, lighting, and scene around a product that is either a 3D model or a cleanly cut out image. Product staging is typically narrower: placing a product into a context scene so it looks like it lives in a real environment.
Staging is useful for ads and lifestyle sections because it helps customers imagine usage. But for PDP clarity, you still need clean angles, detail shots, and consistent backgrounds. Treat staging as a layer on top of your core image set, not a replacement for it.
How much should I charge for virtual product photography work?
Pricing depends less on “per image” and more on what is being produced: a one-off hero render, a full set of catalog angles, or a system that outputs variations across multiple SKUs.
If you are buying services, push for clarity on what is included: number of angles, number of backgrounds, revision rounds, and whether you are paying for the creation of a reusable 3D asset or just final images. If you are selling services, the clearest way to price is usually to separate “asset creation” (modeling or cleanup) from “production” (variations and exports). That keeps the project aligned with value, and it avoids endless revision loops.
Is there such a thing as free virtual product photography software?
There are free trials and freemium tools, but “free” usually comes with tradeoffs: limited exports, watermarks, slower queues, or fewer controls for consistency.
From a practical standpoint, the cheapest way to start is to pick one SKU and test whether you can get outputs that meet your store’s standards. If you can, you can justify paying for the tool or the service because it replaces either studio time or design time. If you cannot keep the product accurate, free does not matter, because you cannot ship the images.
Key Takeaways
3D virtual photography is about repeatable variation, not replacing every camera shot.
Consistency beats hyper-realism for most e-commerce catalogs.
Without a 3D model, you can still go “virtual” by generating controlled variations from one strong photo.
Lighting fundamentals still apply, even when the lights are digital.
Start with a one-SKU pilot and measure impact on creative speed and conversion metrics.
Conclusion
3d virtual photography without a camera is not magic, but it is a real operational advantage when you need more content than your studio calendar can handle. The brands that get value from it treat it like production: clear inputs, a defined visual system, and a QA process that protects accuracy. They also choose the right tool for the job. Use 3D models when you need new angles and 360 views. Use AI-assisted workflows when you need fast background and scene variation from a solid source image.
If you are deciding what to invest in next, map it back to the business outcome: faster launches, more ad tests, clearer PDPs, or fewer “not as expected” returns. Then run a small pilot and let performance data guide the next step.
If you want to explore AI-driven variations, try a couple of free tools and see how your products hold up.
Last updated: February 2026
About the Author
Giles Thomas, Ecommerce & AI Product Photography Expert – Founder, AcquireConvert.
Giles helps e-commerce teams improve conversion performance by building scalable product imagery workflows, including 3D rendering pipelines and AI-assisted variation. His work focuses on balancing speed, consistency, and accuracy so brands can ship more creative without sacrificing shopper trust.

Hi, I'm Giles Thomas.
Founder of AcquireConvert, the place where ecommerce entrepreneurs & marketers go to learn growth. I'm also the founder of Shopify agency Whole Design Studios.