Giles Thomas, Author at Acquire Convert - Page 8 of 21
Categories
Email Marketing

How To Grow Your Shopify Mailing List


Why you need to grow your Shopify mailing list

Building an audience for your business is by far the most important thing you can do in ecommerce marketing.

The best product or service is useless without anyone to sell it to.

Some people think email is old, not very trendy and that it doesn’t work anymore.

They are simply wrong.

Email still outperforms paid customer acquisition and social by a long way.

Not only that it gets the support of industry leaders across disciplines.

Famous List Building Quotes

Here are some quotes on building an email list from some of the most successful list builders ever:

“I have literally built a multi-million dollar business on the strength of my email list. Ninety percent of my income comes from it. Even today, my email list is still my number one business priority—and asset.”

Michael Hyatt, michaelhyatt.com, 115,000 subscribers

“Without a doubt, our email list is the best investment we’ve ever made.”

Douglas Karr, marketingtechblog.com, 100,000 subscribers

“Email is the most important channel for you to cultivate.”

Michael Stelzner, socialmediaexaminer.com

“When I started this blog, I made the newbie mistake of not including a way to accumulate email addresses. No newsletter, no opt-in form – nothing.”

Pat Flynn, smartpassiveincome.com, 75,000 subscribers

“The biggest social media mistake I’ve ever made. Email matters. People don’t change their email addresses. Facebook, Twitter, Google+, people join and drop that pretty often. But changing your email address is a hassle.”

Jon Acuff, acuff.me, 100,000 subscribers

Email beats Social and Paid Customer Acquisition

The data doesn’t lie, email is more popular than social.

According to a study 85% of people use email whilst only 62% use social media.

This study included ALL social media sites, so comparing a single social network like Facebook against email for example would show that email is even more popular.

Email is a single, unified distribution platform for communicating with all your customers.

Social is spread out across multiple channels and therefore more expensive and time consuming to manage.

Email engagement is higher

Email open rate is around 25% as an industry average and click through rate is 3.5%.

This is way better than social and paid. Facebook organic reach (equivalent to open rate) is only 6%!

And Twitter click through rates are 6 x worse than email at 0.5%!

Litmus an email marketing analytics firm collected data showing email has a higher return on investment than social and paid.

When you don’t believe the stats, nothing speaks louder than dollars!!

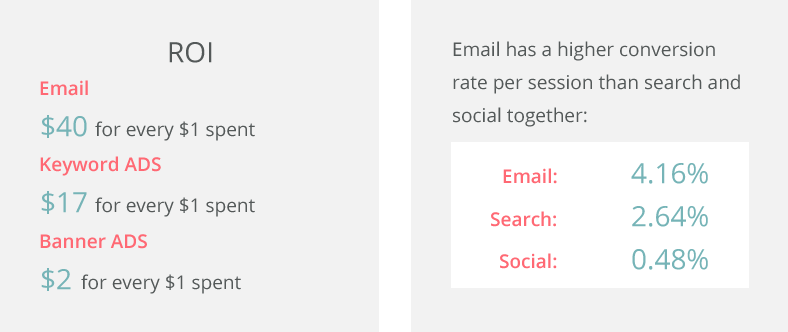
Email has a higher return on investment at a $40 dollar return for every dollar spent.

Paid and and social have much lower ROI.

Permission Marketing

Seth Godin popularized the term permission marketing.

Permission marketing is the opposite of interruption marketing. Marketers get consent from the prospect before advancing them down the sales funnel.

They ask before they sell.

Email is the best form of permission marketing, you ask for the persons email address. Their most personal form of contact other than their phone number and a better one to sell to them on.

You then have a direct channel to add value, people rarely change their email address so it is often a lifelong channel.

Build a Blog Marketing Community

A blog marketing community is a group of followers and subscribers that want the information you share.

It is your list of potential customers.

Today’s successful business owners are using a new strategy for selling.

And it’s based on helping first, and generating revenue second.

The time is now to start embracing change.

The people and companies still using interruption marketing will be quietly usurped by the permission marketers focusing on adding value and building a loyal email list.

Start now. Build an email list, add value to the list with content and resources and finally once you’ve nurtured your prospects; sell.

Finding A Niche, Sub Niche, Sub Niche

The internet is a crowded place, it is hard to get through the noise and get eyeballs on your content.

The best way to do this is to be known for one thing.

No, not ‘marketing’ or ‘travel’.

Not even ‘email marketing’ or ‘backpacking’.

The smart marketers go after a niche, sub niche, sub niche.

And don’t worry, once you own that NSNSN you can move onto another and another until you are big enough to target broader niches.

Why should I target a NSNSN?

Firstly, SEO. You are not established and therefore cannot rank for broad terms like ‘email marketing’. Instead shoot for medium competition keywords around your NSNSN.

For example:

A blog about conversion rate optimization could start with a focus on optimizing the checkout process for ecommerce conversion rate optimization.

Only blog and guest post about this one topic until you build up at least 10 posts on your site and 10 – 20 guest posts on the topic.

It is better to be THE person or company in a NSNSN than to be no one in a niche or sub niche.

I have talked about using personas in the past also to personify your target customer in my landing page optimization checklist post.

Make sure you know who you’re targeting (hint: not everyone).

Quant Based Marketing

Quant Based Marketing is when you work backwards from your end goal to a solution.

Now you know you need to build an email list you probably wondering:

“How many emails do I need”

Well this is not so easy to say, small email lists can generate huge profits if the list are nurtured properly.

We can use quant based marketing to work this out.

Start with your revenue target, divide it by the cost of your product or service and then look at your conversion rates from the last time you monetized your list.

Note: If you don’t have previous data for conversion rate then 2% is a good starting point for information products.

For example:

You need $50,000, your product costs $175, therefore you need roughly 286 sales.

Your last conversion rate eg the number of people for every 100 list members who bought the product was 3%.

Divide the number of required sales by the previous conversion rate.

285 / 3 = 95

Times this number by 100 and you have your required list size.

95 * 100 = 9500

Therefore if 3% of the 9500 list bought the product it would be 286 sales and roughly $50,000 in revenue.

So in our example we need 9500 emails.

The next question is how long do we have to collect them?

6 months.

Ok so 6 months is roughly 182 days.

9500 / 182 = 53 emails per day.

This is the most important figure.

We can focus on collecting 52 emails a day for six months and this should get us to our £50,000 in revenue if the email list converts at 3% conversion as last time.

Focus on your highest converting traffic sources

Another truly important reason to track your daily email capture rate is so you are focussed on which marketing efforts generate the most emails.

Look at your google analytics referral traffic for example.

You should set up a goal in your google analytics for when someone signs up to your list, give it a monetary value.

A destination goal is good, the page they land on once they double confirm their email from your transactional email.

Then you can see which sources drive the most goal completions, have the highest conversion rate and the highest potential revenue generation.

Do more of what works and improve the campaigns that do not return your investment.


Chapter 2: Design Your Blog for Optimal Lead Generation

We are going to look at 20 ways you can capture emails on your blog.

1. The Homepage Landing Page

A lot of your traffic will land on your homepage, the common belief is to show a little bit about every part of the website and link to their respective pages. Like a summary page.

This is wrong.

Use your homepage as a landing page to collect emails.

Sell the visitor by focussing on their biggest pain point and sell them the benefits of joining your email list.

Not the features, eg what they will get (a pdf, weekly emails, gardening tips)

But the benefits, the results of them getting those things (more sales, revenue, a better garden).

Also offer an incentive, not just generic information but something specific to the biggest pain point your audience has.

This technique was popularized by Derek Halpern of social triggers and is known as the Feature Box.

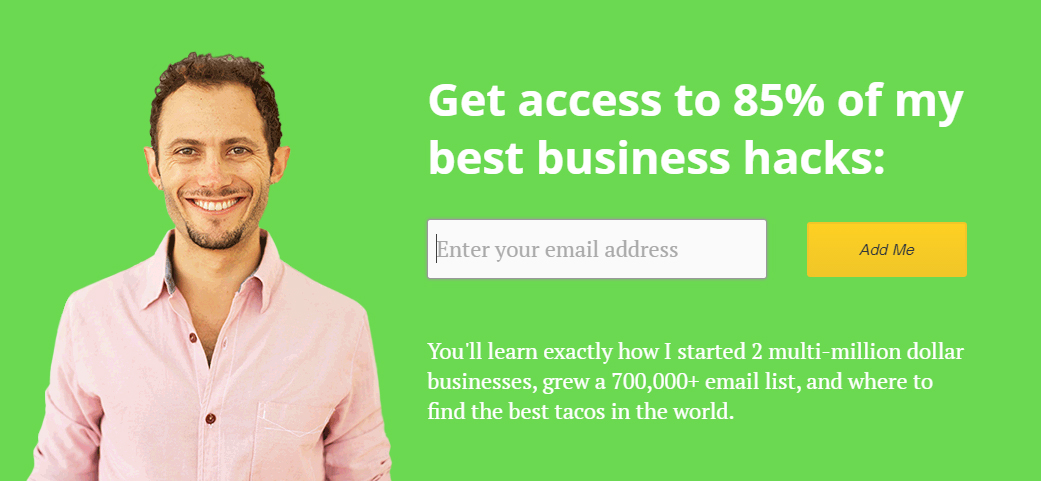
Here is a great example on the Okdork.com homepage.

Instead of a homepage he has a landing page, the biggest pain point for his audience is business growth.

Therefore he offers hacks to help them grow bigger businesses.

The feature box is also great for helping you perfect your one sentence pitch.

Distilling your company vision into one sentence.
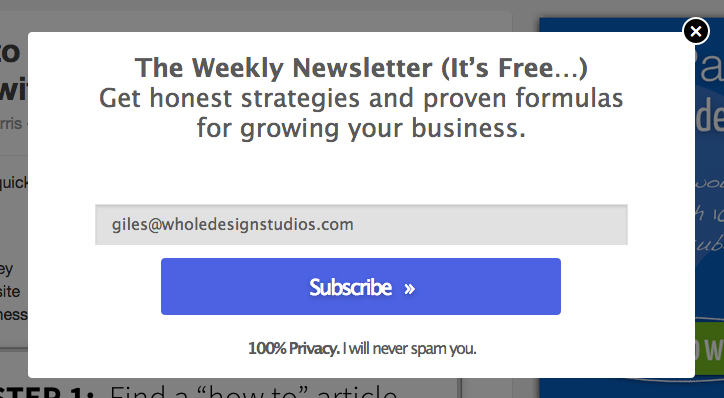
3. Popups

Let me guess, everybody hates popups right?

Wrong!

That is not what the data tell us, and I’d take data over opinion any day.

Data from the social media scientist showed that when using a popup on their site bounce rate maintained the same and subscription rates doubled!

Just as famous entrepreneur and Paypal founder Peter Thiel famously said:

“What do people agree merely by convention and what is the truth”

Don’t be a sheep, look at the data, do not listen to the consensus.

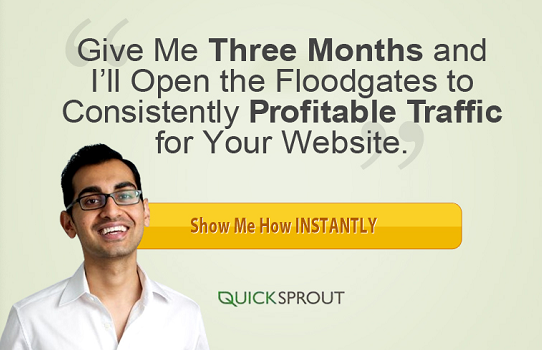
Again focus on key pain points like Neil Patel does here, traffic is a common problem for many website owners.

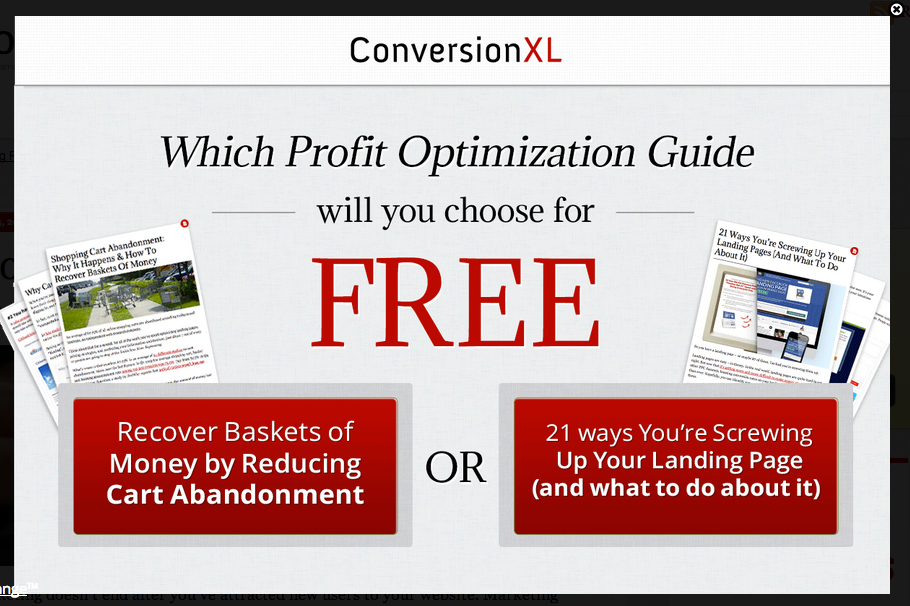
4. Make them feel like they’re missing a trick

Use copy in your popup close dialogs that makes the user feel stupid or contradicts their situation.

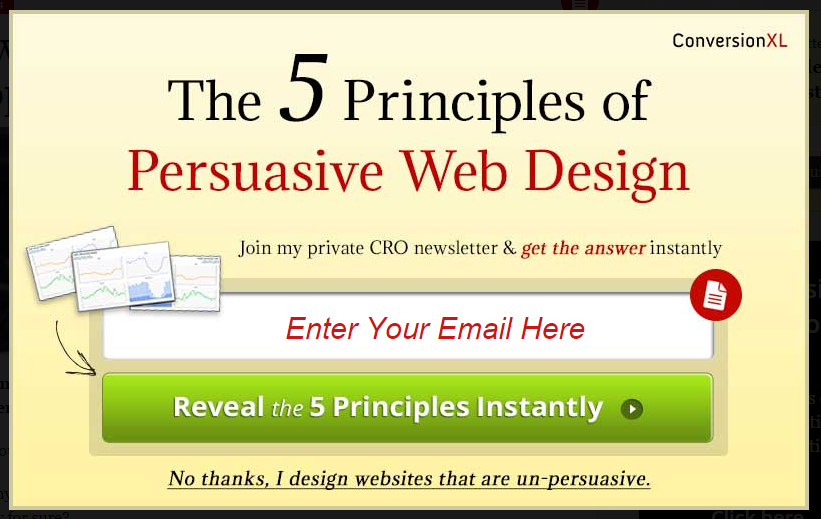
Here Peep Laja of Conversionxl.com instead of a close icon uses the text.

“No thanks, I design websites that are unpersuasive”

When trying to get you to sign up for persuasive web design techniques.

This makes you feel like a plonker (english slang for stupid)

And you find it hard not to opt-in!

5. Auto fill emails in popups

Lead pages gives you the ability to auto fill emails from people who have already signed up to content on your site.

This reduces the friction to them opting in again and removes a barrier to entry.

It also makes it easier when progressively profiling customers.

eg Getting different information from them at different stages of the buying process.

6. Video opt-in

Wistia offers a great feature where you can ask a visitor for their email halfway through a video in order to be able to watch to the end.

This is called the Wistia turnstile.

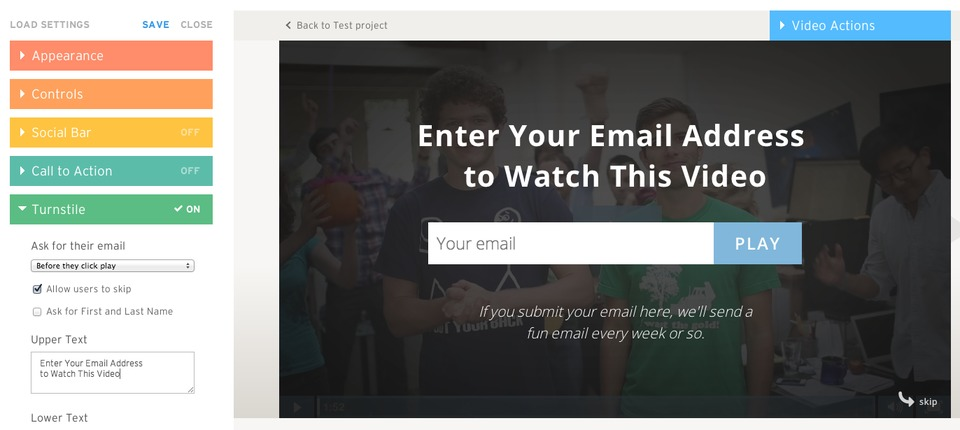
Create a piece of content, hook them in with a question and don’t answer it until after the video turnstile.

Just like the Content Cliffhanger Technique this uses information loops or the zeigarnik effect to increase conversions.

7. Opt-In Mid Blog Post

Some longer form content (and your content should be long) can be broken up with an opt-in mid post.

Some feel this distracts the user, but if you make the offer relevant to the post and the users original search intent; what they typed into google to get to your blog post.

Then I think it is still a value add.

8. Sticky footer

The sticky footer opt-in, much like the hello bar but at the bottom of your page can work well on large monitors.

You can hide and show this using standard media queries on small devices or screens with less height where it would cover too much of the content and ruin the user experience.

9. Byline

As seen on VideoFruit the marketing blog by Bryan Harris you can add an opt-in next to the author byline.

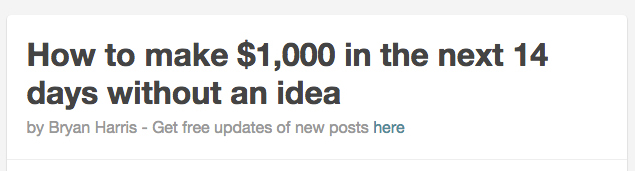
This can trigger a lead pages or any popup box to capture emails.

10. Bottom of blog post

Many blogs put a generic opt-in at the bottom of each blog post.

For example:

The thinking is if the user reads to the end of the article it was enjoyable and provided value and they are therefore open to opt-in to more content from you.

11. Sidebar Opt-Ins

Sidebar opt-ins are very common in blogs. I suggest moving away from the standard generic email opt-in box here and use the space to link to a landing page.

The landing page should focus, just like the homepage, on a core pain point of your audience.

Here offer them a very high value resource, a free video course for example or a case study

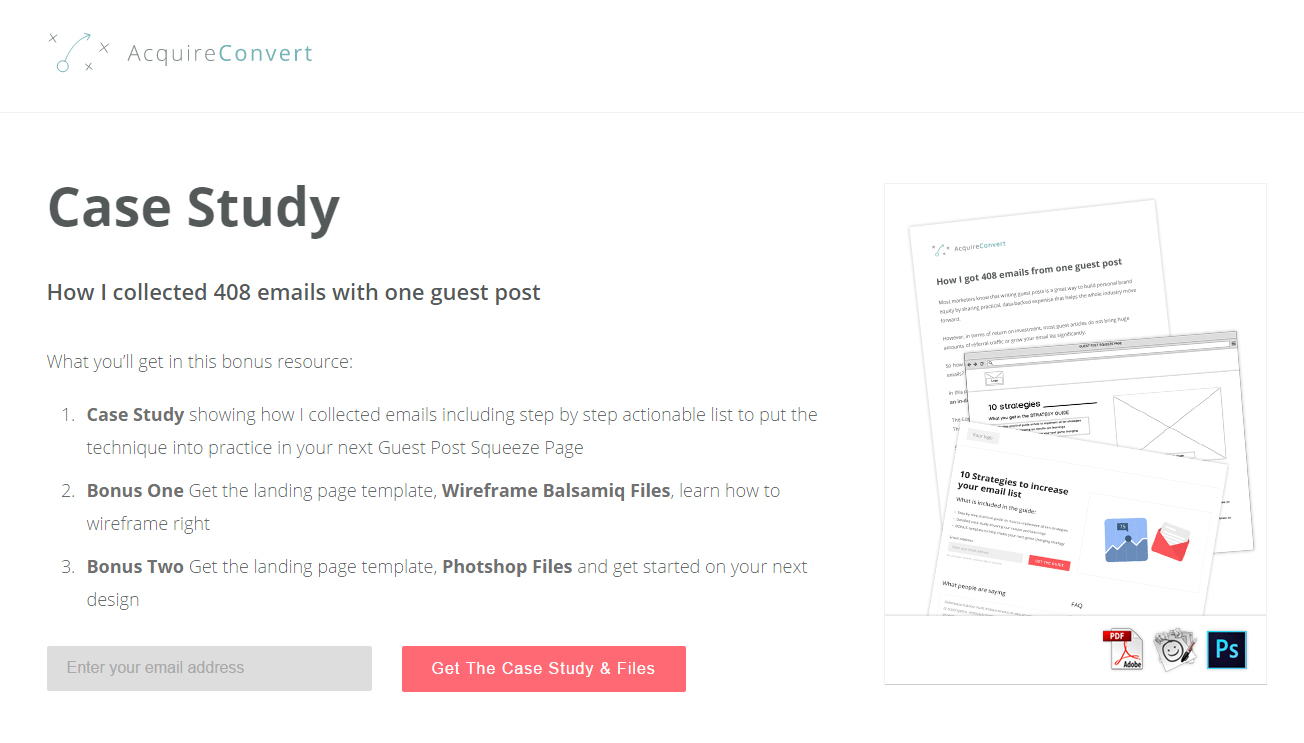
If you cannot link them to a landing page use a popup or lead pages box.

If you want to keep it traditional and have an email opt-in inline within the sidebar, follow Neil Patel’s lead.

Give away something of real world value, here he uses pricing psychology to push for the opt-in.

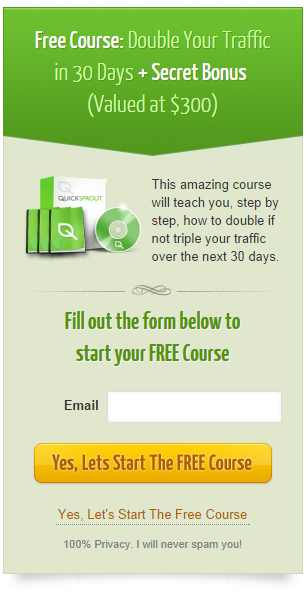
The course is valued at $300 but he is giving it away for free, this incentive increases conversions.

12. Redirect First Time Commenters

When someone takes the time to make a comment on one of your posts, you know they are interested and engaged with the topic.

This means they are very close or very open to opt-in to more similar content.

A great way to leverage this is to redirect first time commenters to a landing page with an opt-in.

You can use this Yoast plugin to direct those first timers to a squeeze page, remember to add value and offer a resource. Don’t just offer ‘free updates’.

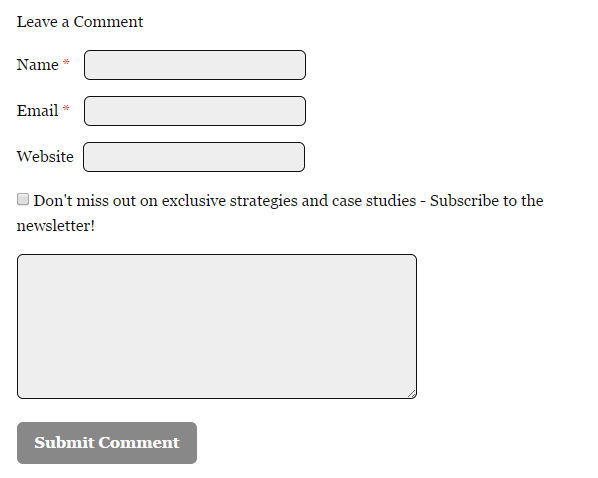
Alternatively you can simply add an opt-in checkbox to the comment form. Meaning people can join the list while commenting, pretty hassle free.

13. Make your about page a newsletter sign up page

Most people talk about themselves on their about pages. Their company, website, hobbies even.

This is ok, people need a person to relate to and more and more we see people being used as brands in today’s online marketing world.

However the about page is a the perfect opportunity to collect emails too.

For example:

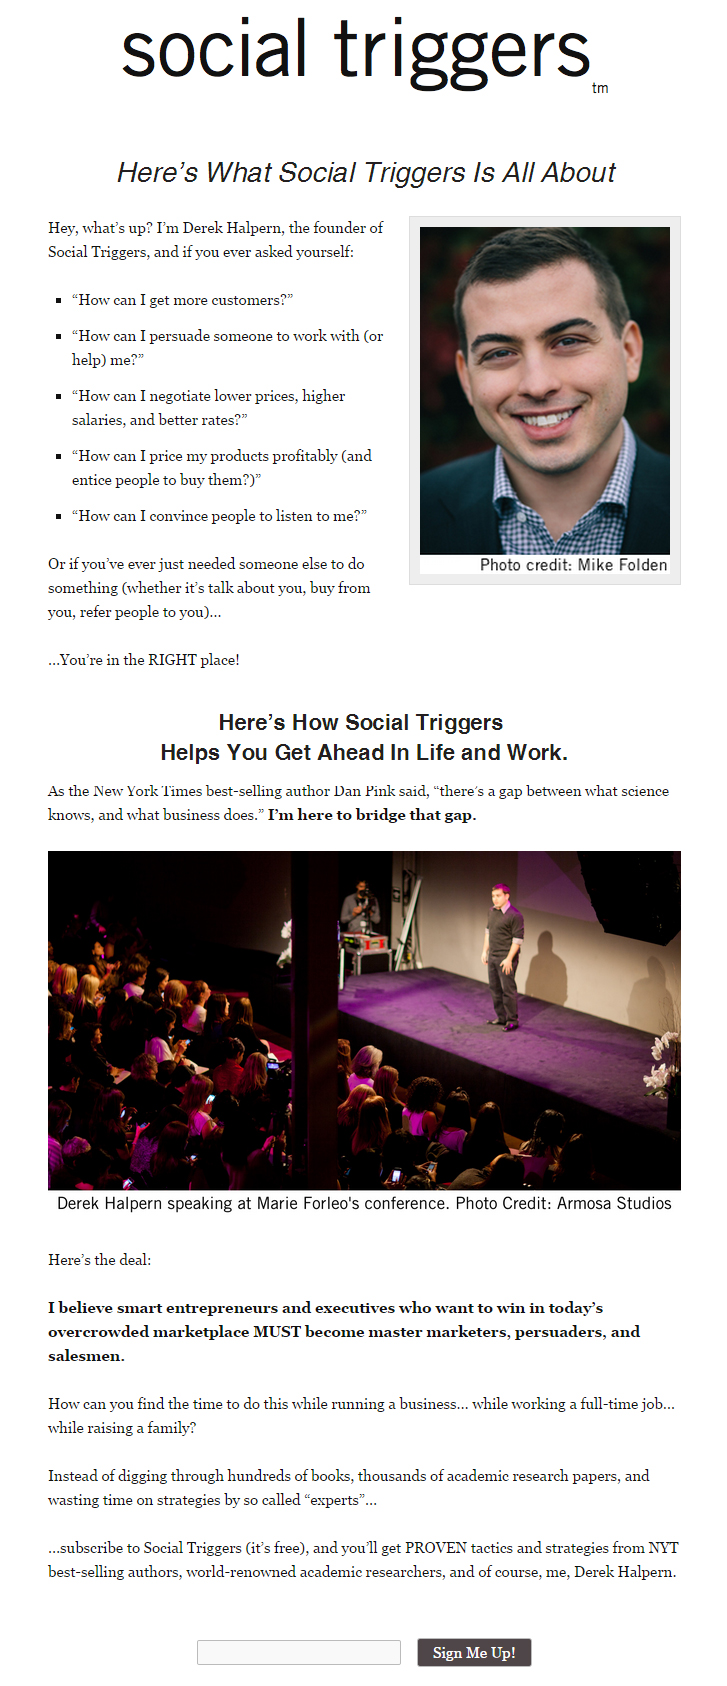
On Derek Halpern’s blog here you can see he lists his audiences pain points.

He focuses on aligning himself with their problems, not talking about himself.

He follows up with social proof and an opt-in to round off the top of the page.

He also removes the main navigation, strange for an ‘about’ page no? Well that is because it is a squeeze page, not an about page!

Make your about page a landing page and collect more emails.

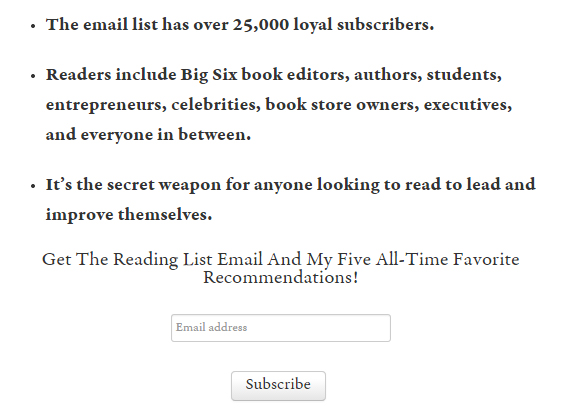
14. Newsletter sign up page

Having a stand alone page just for signing up to your newsletter can work great.

Ryan Holiday well known media strategist offers a monthly reading guide and uses social proof to drive sign ups.

“over 25,000 loyal subscribers”

He leverages his current list size to show credibility.
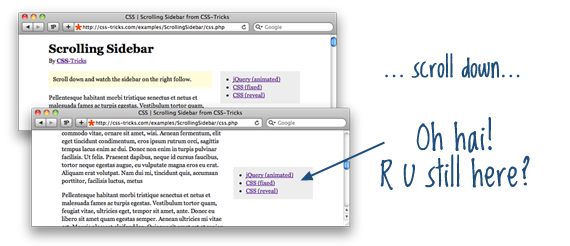
15. Sticky Widget

Having a fixed sidebar that stays at the top of the page when the user scrolls means your opt-in is always visible.

If it is accessible at all times, at whatever point in the page, you are likely to get more opt-ins.

Of course test this against a non sticky control, as data doesn’t lie and best practices should be tested not used blindly.
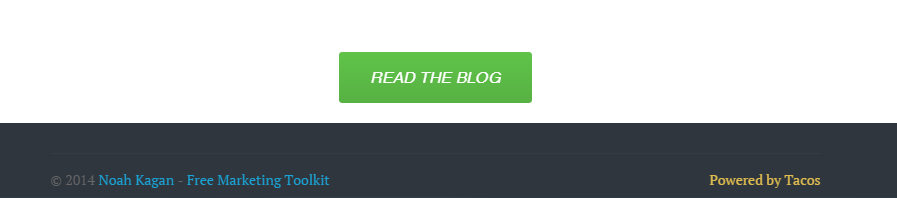
16. Footer of site

Don’t be afraid to think out of the box when adding in opt-in links.

You never know where people are looking on your site.

Noah Kagan puts a highly contrasted cta in his footer and sends people to a landing page.

17. Hello Bar

Popularized by the Hello Bar the horizontal opt-in bar seen here at the top of the screen is a good way to catch the reader’s attention without covering the content and annoying them.

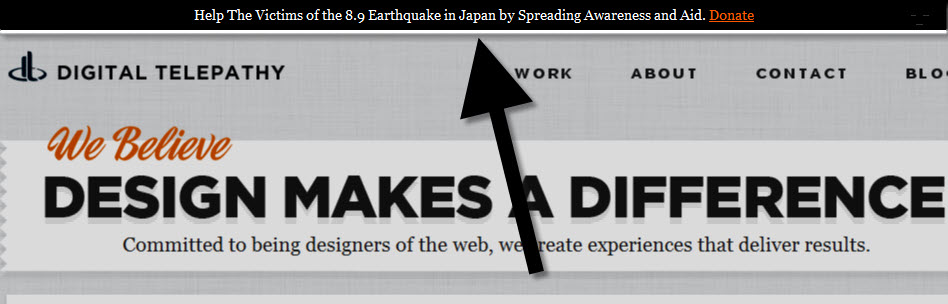
You can link to a squeeze page or simply include the email input within the bar.

18. Hack Polls to collect more emails

Using polls in your sidebar is a great way to not only do customer development but also to collect emails.

Ask people a question and offer a giveaway, an incentive to give their opinion.

Require their email address to submit the poll.

A great example is this candle quiz.

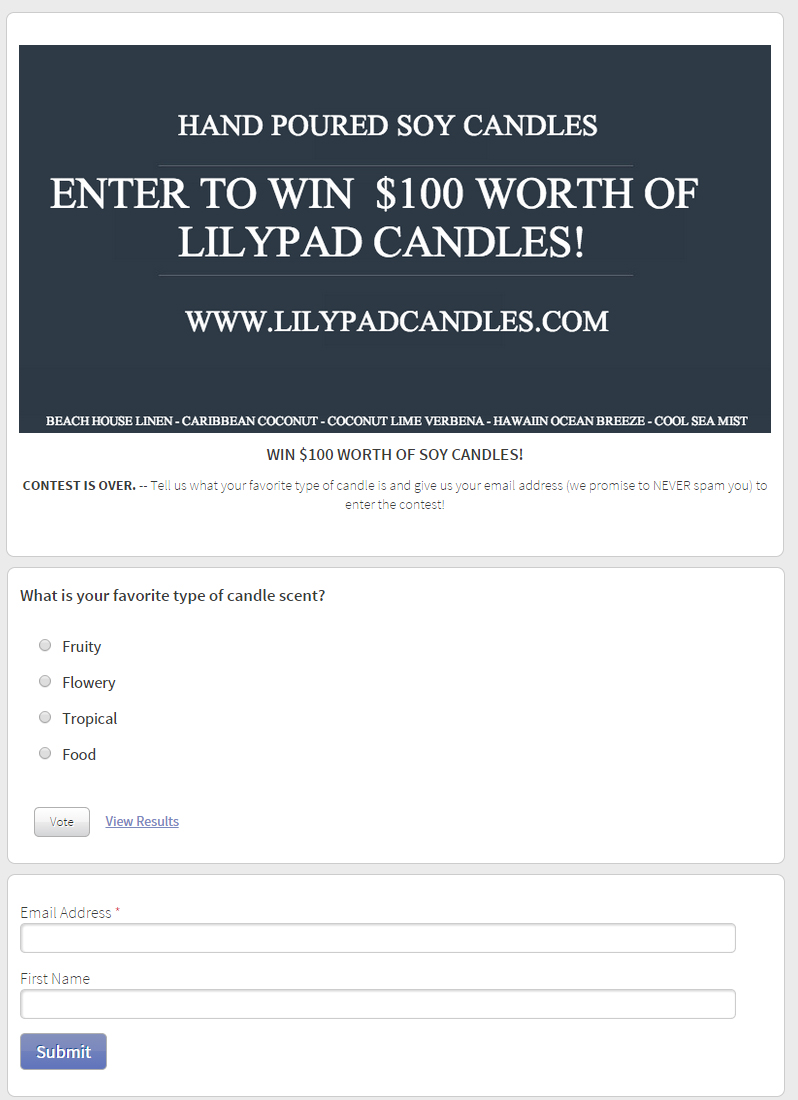
You get to answer a question, maybe win a prize and collect their email.

Not only do you get an email but you also learn more about the customer, in this instance their candle scent preferences.

You can then use this data in your business to improve products and services and how relevant they are to your target market.

19. Exit Intent

When someone tries to leave your blog and moves their mouse to the cross on the browser tab you show them a popup.

Bounce Exchange are the leaders in this technology.

The popup basically creates an additional page view for the user, significantly increasing your chance of email capture.

20. Survey customers with Qualaroo

Customer surveying is a key part of any companies customer development.

Alberta university managed to leverage their surveys using qualaroo to build their email list.

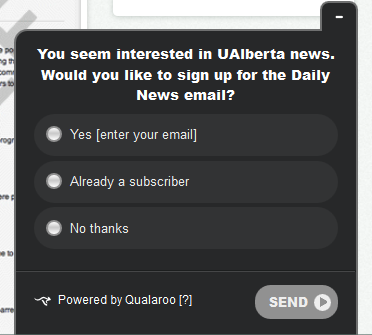
Using qualaroo to capture user feedback you can simply subscribe through the form when prompted to ask a question.

It increased their daily opt-in rate from 1/2 to 12/15.

The reason this technique is so important is that it not only generates emails but also acts as a form of customer development. Giving you a feedback loop for your products and services.


Chapter 3: Increase Conversion Rate of Your Website

Once you have set up your site to collect more emails.

You need to test it and optimize it.

You should use a/b testing tools, a conversion rate optimization process and these marketing hacks to improve it.

Make sure your thank you page is set up for high conversions

When someone signs up to your list, make sure to use a double opt in.

This is to reduce the number of spam emails you receive and it is also a way of qualifying leads.

Only those who are genuinely interested in being a part of the community will go to their inbox and double opt in.

There are some key things to keep in mind when creating a double opt in sequence.

Send them to a thank you page

Rather than let them see the generic Mailchimp, Aweber or Campaign monitor opt in confirmation as below.

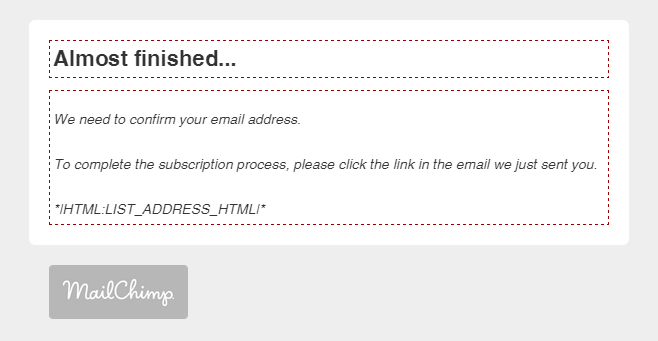
Craft a custom thank you page that increase conversions.

Here is a great example from Brian Dean of Backlinko.

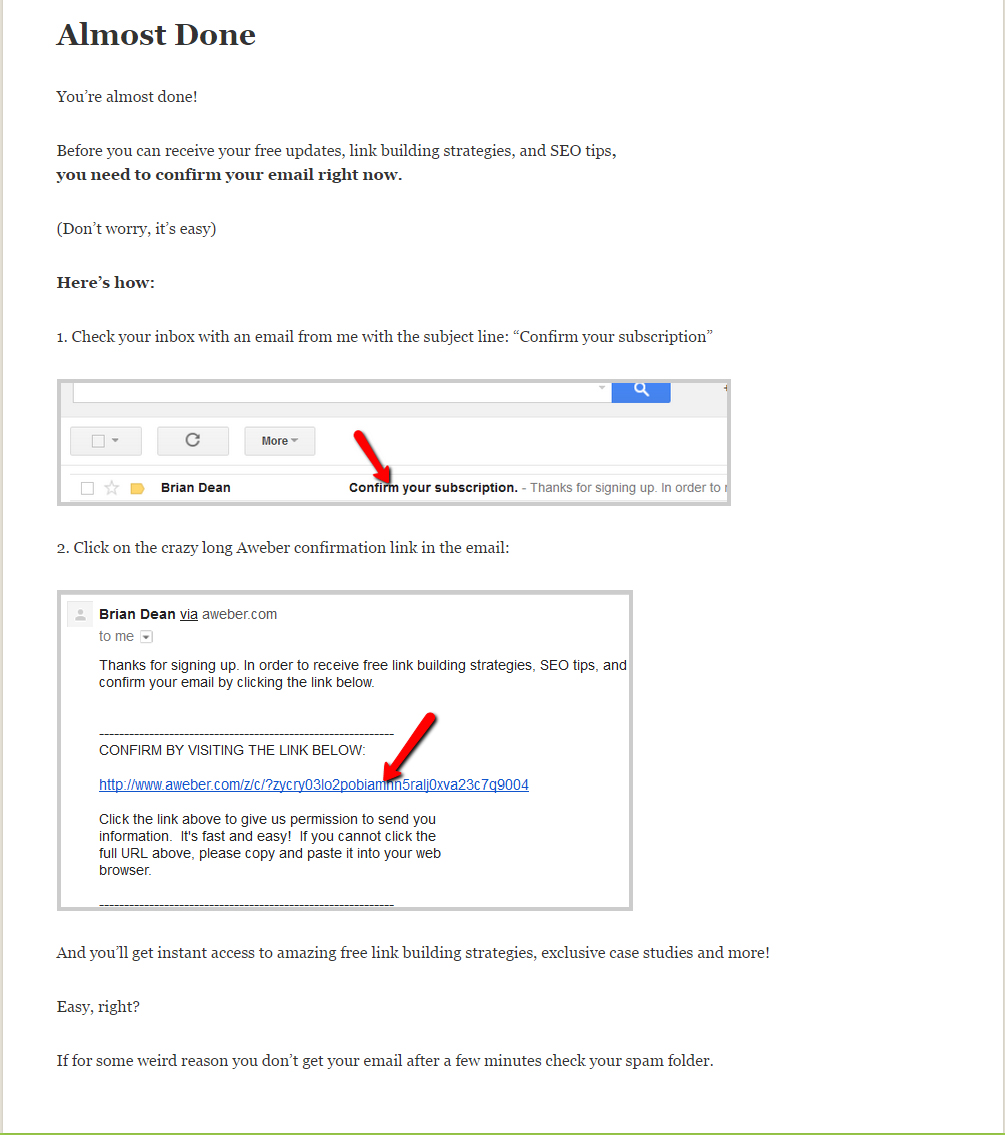
First he resells the value of signing up, ‘seo tips’.

He then let’s them know it is easy to complete the signup process.

He not only tells them to check their mail for the double opt in email, he even includes screenshots to show how they look and where to click.

This link then sends them to a custom confirm page, again no mailchimp out of the box solutions here.

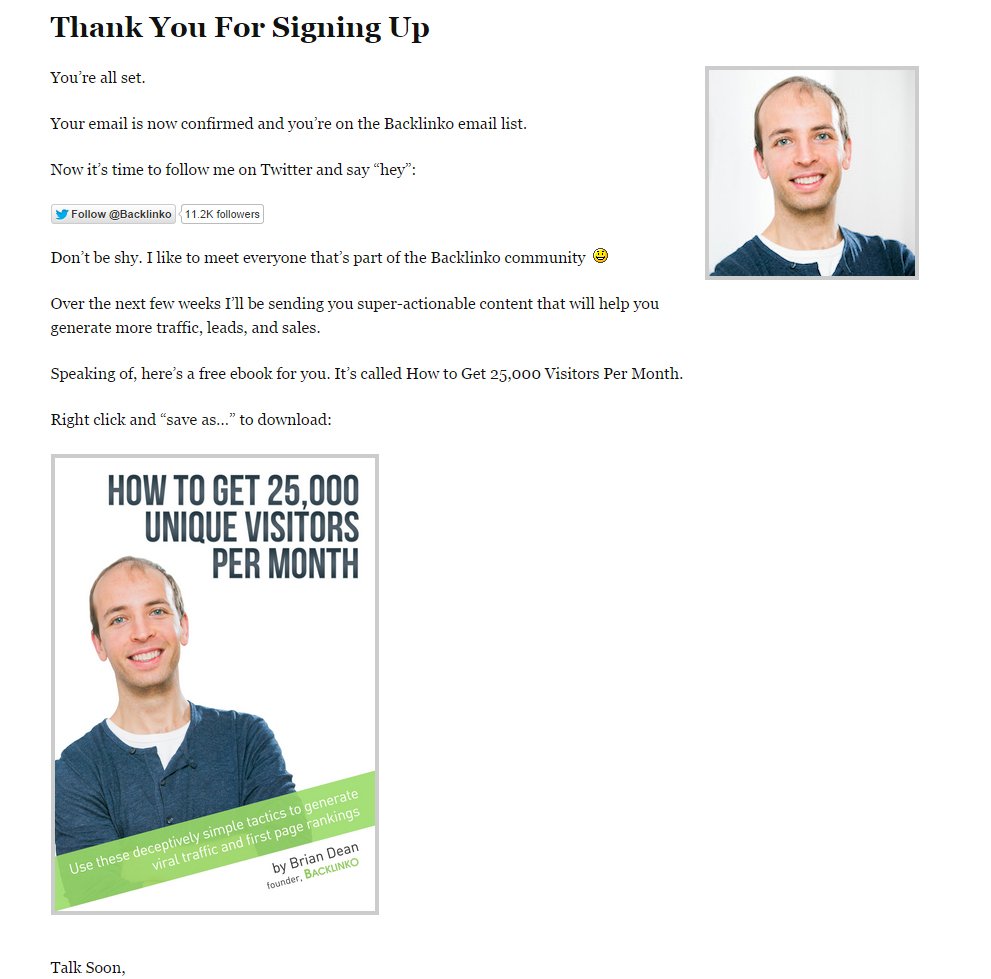
He cross pollinates his accounts by asking them to follow him on twitter and immediately adds value with a free resource.

Brian tells them he will be sending them more emails, planting a seed and prompting them to look out for future mail from him.

Angelo Lo Presti aka Superjab uses emotional triggers and humour in his double opt in to increase his confirmation conversion rate.

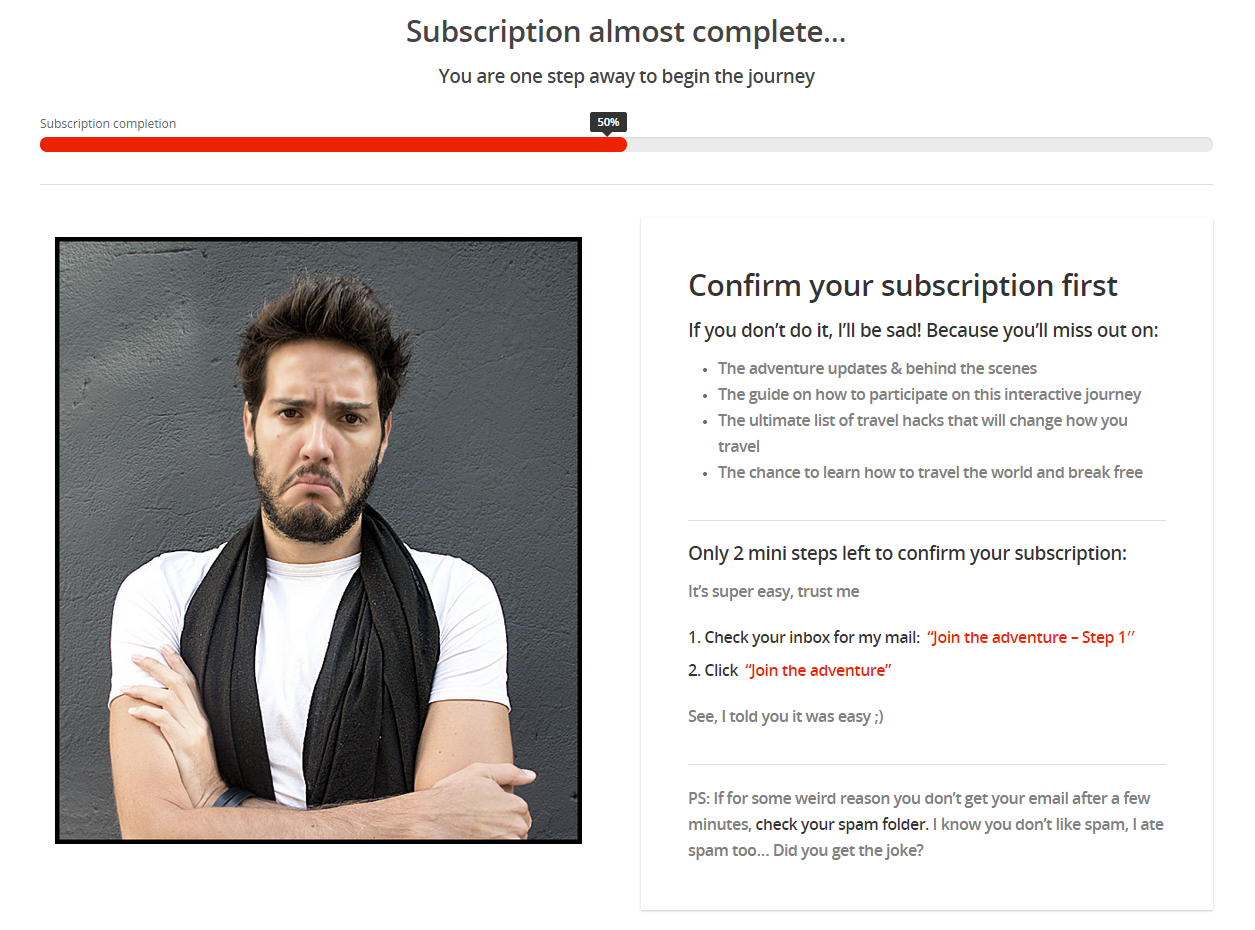
First he shows a sad picture and gives detailed and actionable steps on how to complete the sign up process.

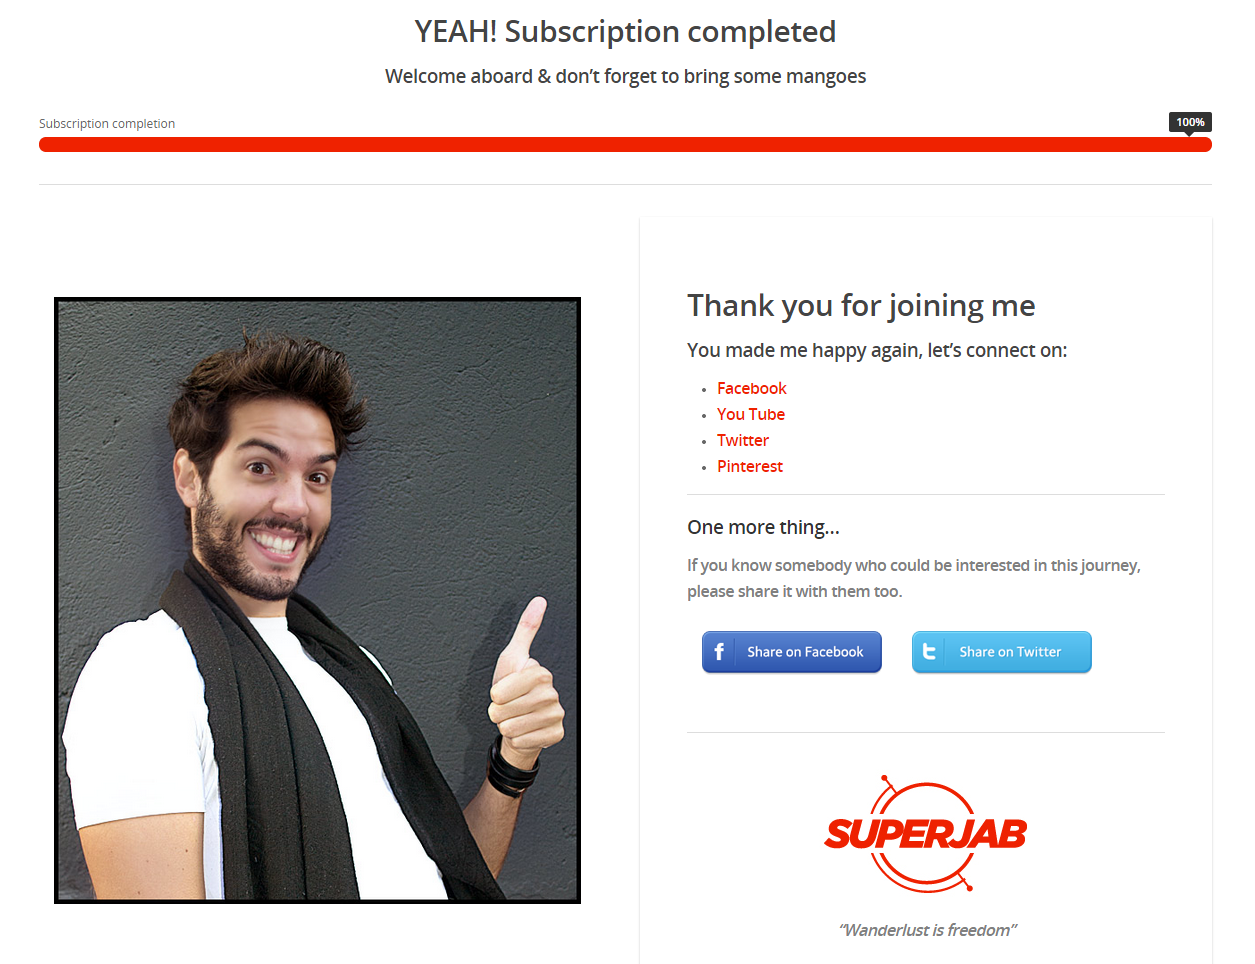
Once confirmed he shows a funny image of him looking much happier and a call to action to follow him on social networks and to share the website with friends.

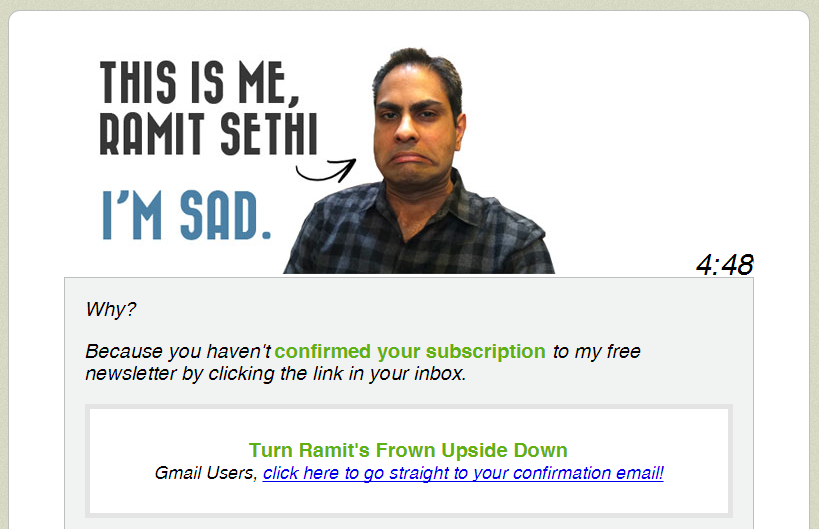
Ramit Sethi takes this one step further and makes it even easier to find the double opt in email.

He provides a link to your account (for gmail users) that searches for the emails from him.

The link opens up a new window with your gmail showing the email you need to open, making it painless and very fast to confirm your email.

Use click and scroll tracking to optimize your conversion rate

Using tools that analyse user behaviour can give valuable insights into how people use your website.

Scroll tracking lets you see how far down the page people scroll and where the most common areas are that people pause on.

You can then align the data with the position of your CTA and test to see if this increases conversion rate.

In Crazyegg if an area is white it means people spend the most time on this section.

Here we can see that I have aligned my opt in to be the centre of the scroll focus area.

Also on my agency home page below you can see a click tracking report.

We can see the clicks are focussed on the menu and main call to action for the page.

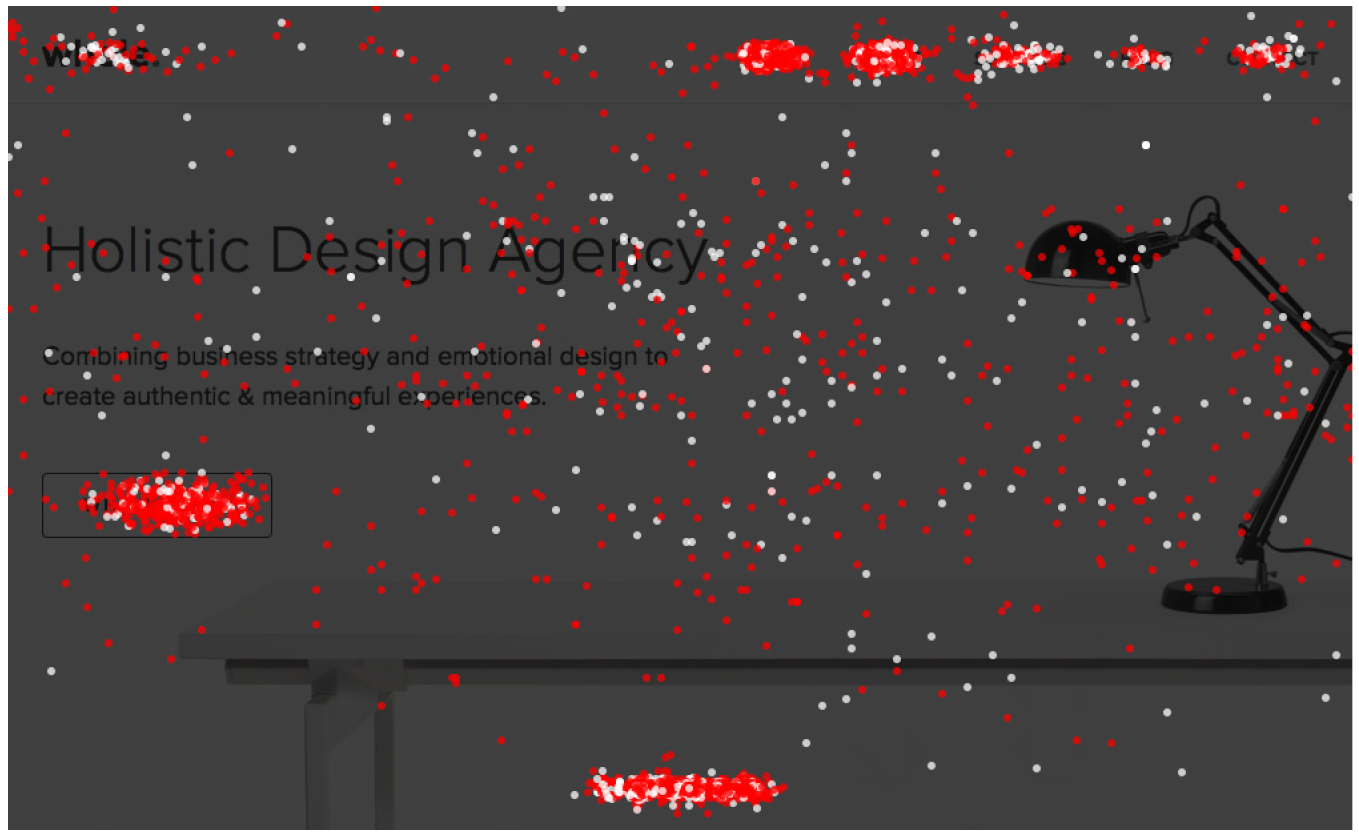
Make sure people are clicking where you want and following the sales funnel you planned when designing the site and visitor flow.

You can also use the click tracking data to see where people are clicking that you don’t want and then remove those distractions.

Don’t forget about the paradox of choice.

NOTE: I take a much deeper look into tracking in my premium Conversion Rate Optimization Course.

Better Copywriting

Copywriting is a huge, huge, huge part of marketing.

All you have to do is look at the design execution of famous marketers sites.

None of them look pretty.

But! They have taken the time to do customer development, they understand them on a deep level and therefore know how to speak to them with their copy.

When writing the headlines for your email opt-ins consider this great hack:

Write down the exact phrases your customers use when talking about their problems.

“Sometimes I feel like my websites is invisible”

“My content is great but no one reads it”

Then flip what they say around and turn it into copy.

“Ever feel like your website is invisible?”

Using the exact phrases and words your customers use means you are really speaking directly to them, in their language.

No complicated words or confusing texts.

Better Supporting Copy & Images

Giving someone a reason to sign up to your list is good but not enough.

An email is a valuable thing and people won’t give it up easily.

Use a bullet point list and supporting images below the headline to explain the benefits of your offer.

For example:

Headline: Sign up for gardening tips and tricks

Bullets:

And learn how to:

  • Maintain your grass year round
  • Remove weeds permanently
  • Recycle water and reduce your water bill

These benefits can focus on pain points you have learnt from speaking to your customers or potential customers directly.

Get out of the building and start talking to your prospects, use your learnings to create supporting text for your opt-ins.

CTA

Better Button Copy

Writing great headlines and supporting copy for your opt-ins is crucial and so is the button copy.

Make sure to align your button copy with the headline.

For example:

Headline: Sign up for gardening tips and tricks

Button: Get gardening tips

Connecting the two will align the click with what the reader skim reads.

Also use words that initiate actions.

‘Get’, ‘Download’.

A good way to write button copy is to write down what happens when you click on a button literally and then write that on the button.

For example:

Literally: You download a pdf on gardening tips

Button: Download Your PDF

CTA

Better button design

Many people suggest the colour of your buttons matters.

And yes of course one colour could win over another in an a/b test.

Contrast and visual hierarchy however are proven ways to improve your conversion rate.

Make sure your button stands out and is first in the visual hierarchy of the page.

This can be through using a bold colour, which is not used elsewhere on the site other than for the cta.

Or by having very contrasting text on your button compared to the background colour.

The button size also can improve conversion as seen in this case study, so do not be afraid to go big.

Reduce form fields

When asking a visitor to complete a task make sure to make it as easy as possible.

When collecting emails, my opinion is all you need is the email.

No name, no birthday and definitely no address.

Reduce the number of form fields in your email opt-ins to test to see if it increases conversions.

This is not always good when creating leads for a business however.

A qualified lead for some businesses require more data, so think about what your business requires to move that person onto the next stage in the buying process.

Add Testimonials to your site

Visual website optimizer wrote a case study that showed when Wikijobs added testimonials to their site their conversion rate improved by 34%.

A good best practice is to try to get a testimonial from a respected person in your industry.

This will have more impact and meaning to the visitor than a random testimonial.

Also keep the testimonial inline and close to the opt in.

This will add to the supporting copy under the headline as a reason to sign up to your offer.

Designing an opt in that converts

Let’s take the previous few tips and wireframe the ultimate opt in form for your website.

We will create a sidebar opt in as many of you will have one already you can improve easily.

Note: If you follow these steps and see improvements let me know and get featured on the blog as a case study!

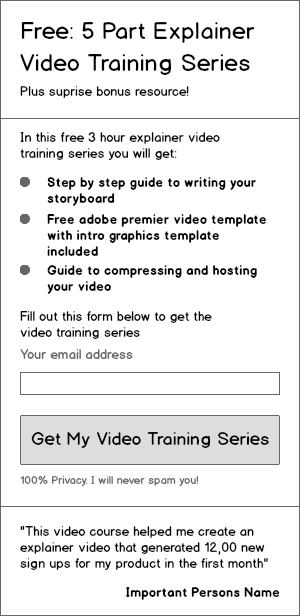
You can see we write benefit driven bullet points highlighting common pain points around creating a video.

How do I storyboard the video?

How do I set up Adobe Premiere?

How do I compress the video and where do I upload it to?

We clearly direct them to fill out the form.

Assure them the email is safe, removing reservations is a big conversion changer.

We also use a testimonial to show the course gives great results, we sell the benefits of taking the course not the features.

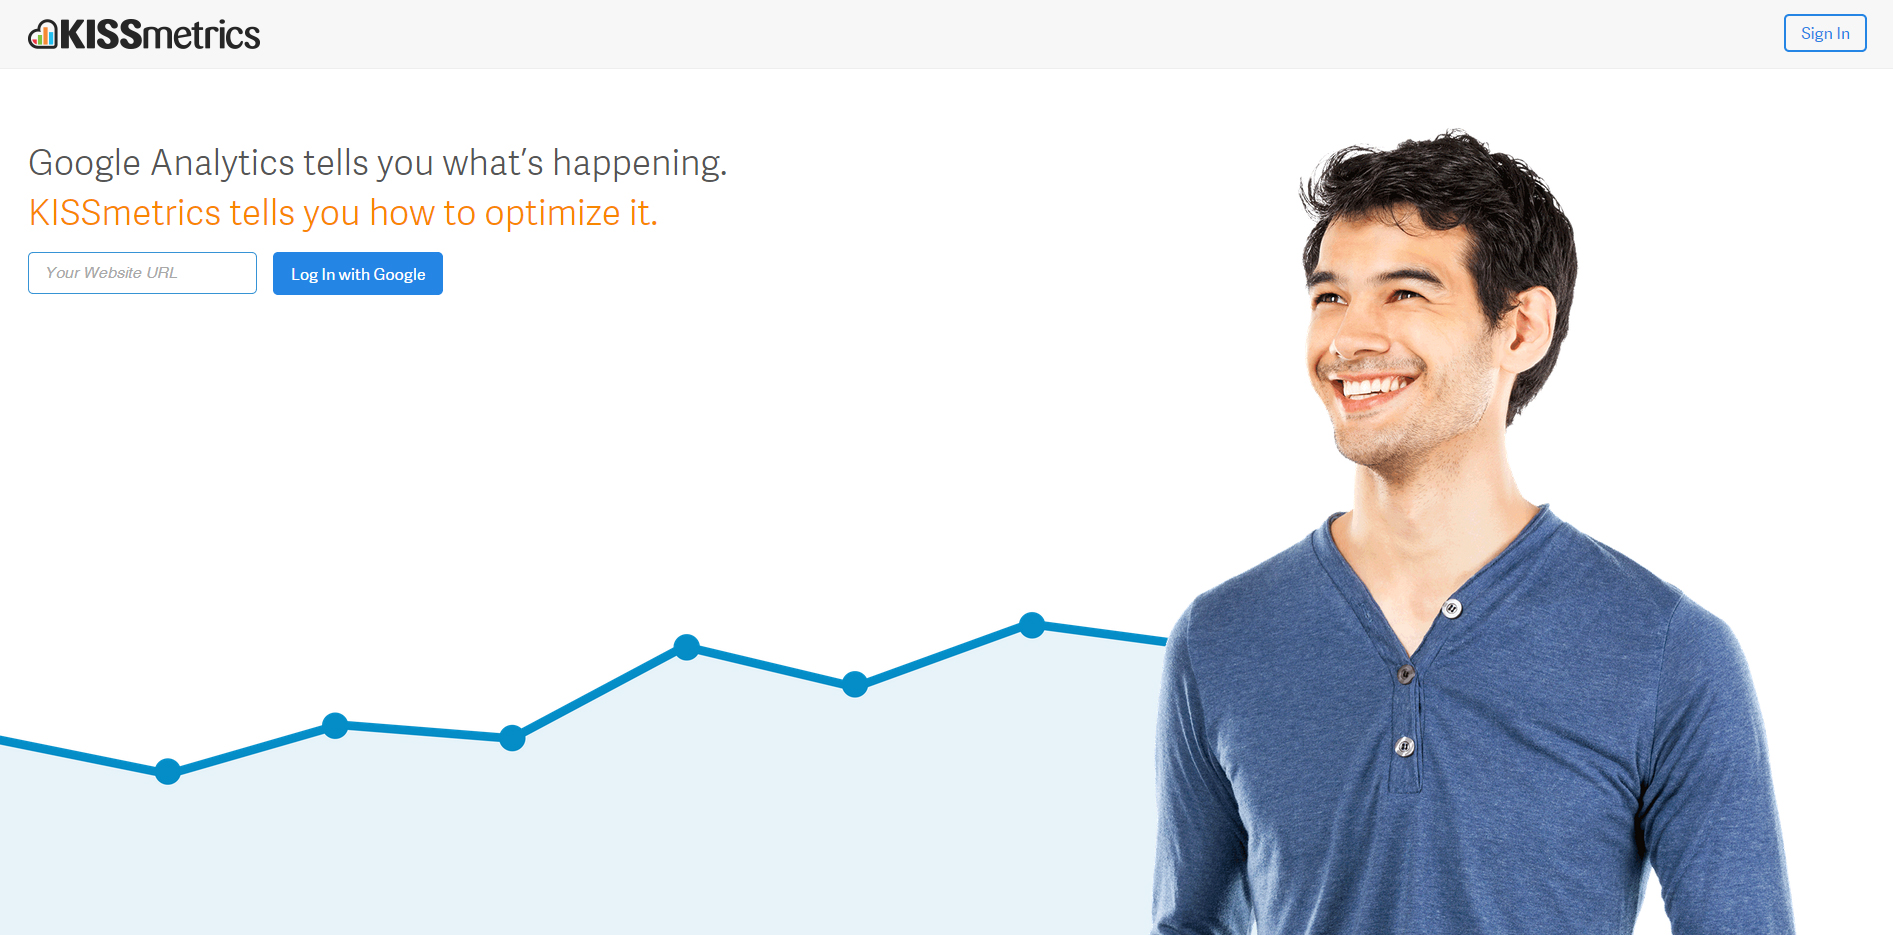
Use images of people, smiling people

In this case study Highrise of 37signals used photos of their customers to increase conversions.

People relate to each other, we’re human. Using photos of people we can relate to as in this case study makes the connection even stronger.

When you use photos of people in your call to actions conversions can increase, especially when the people are smiling and look in the direction of the call to action.

This is called ‘Line of sight’ and the thinking is the person’s eyes in the image direct the user towards the cta.


Chapter 4: More Techniques to Get Emails

Cross pollinate

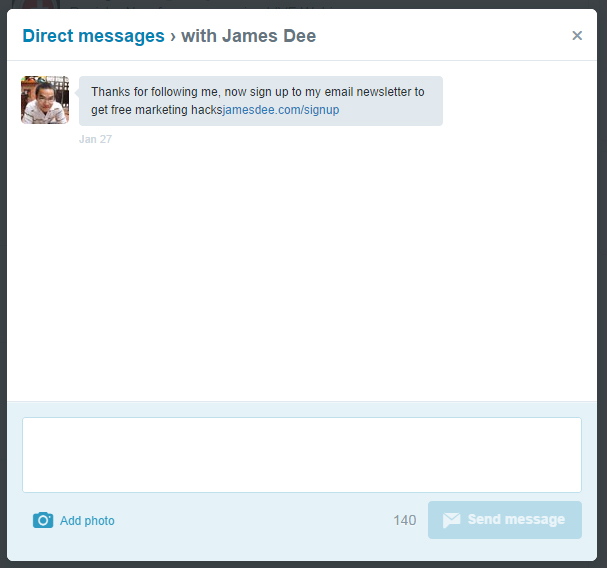
Every time someone follows you on a social network prompt them to join your email list.

For example:

You can send a new twitter follower a direct message asking them to sign up.

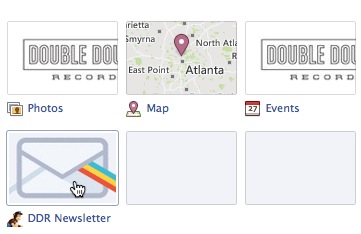
Facebook email opt in tabs are also a great way to cross pollinate Facebook followers onto your list.

Mailchimp has a free facebook app for this.

Create social media groups and threads

You can leverage social media groups on Facebook, Linkedin and Google+ to name a few including similar forum threads.

Find threads or groups with large followings and answer their questions.

Try to simply add value here, after 10 or 20 posts you can link back to your blog, but don’t just use these groups and forums as syndication.

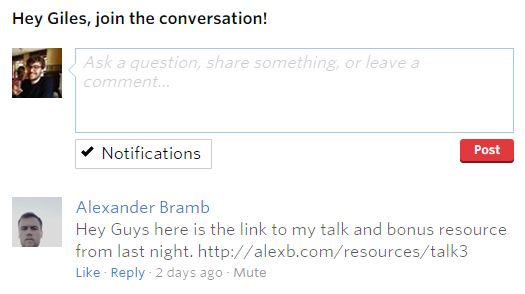
Host free in person workshops or meetups

Start a local meet up in your industry, talk at an existing large one or create a free workshop in your niche to collect emails in person.

If you talk at a large meetup, offer people a bonus resource aligned with your talk.

Give them the link to the landing page at the end of the talk and in the meet up thread.

Use a quiz to generate emails

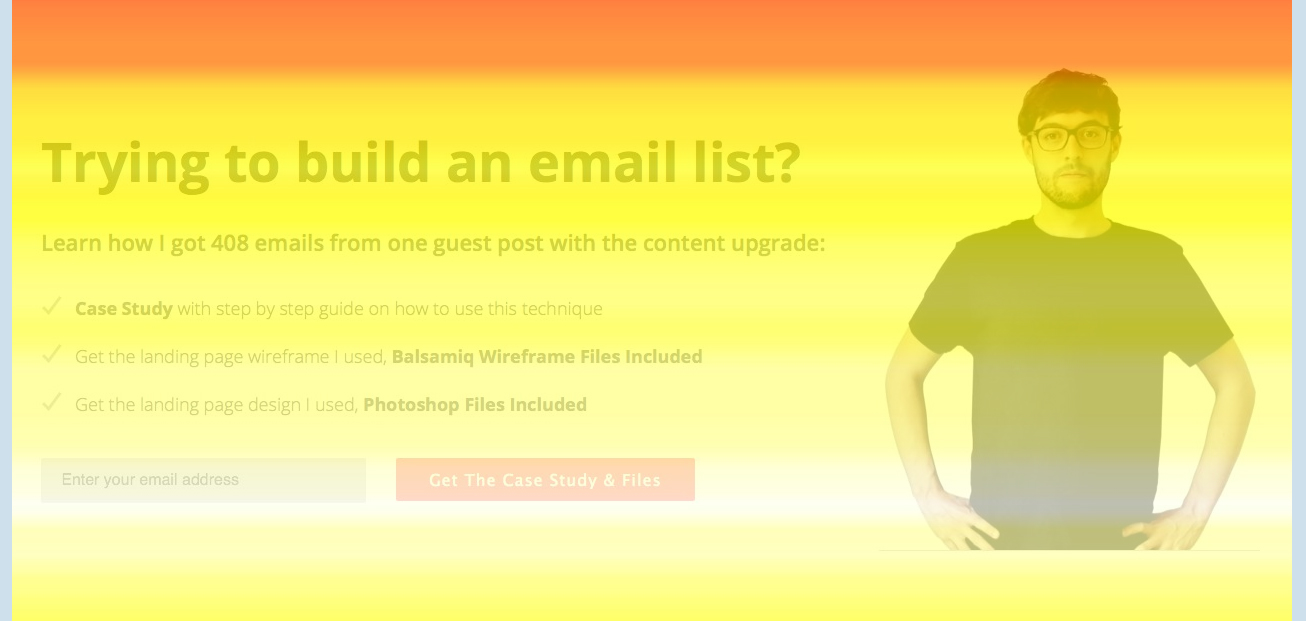
I wrote a case study on how I used a quiz to generate 408 emails from one guest post referral link.

Add a qr code to your print marketing

A QR code is an image you can scan with your smart phone that has a hyperlink embedded within it.

You can embed a link to a squeeze page from your print material using a qr code.

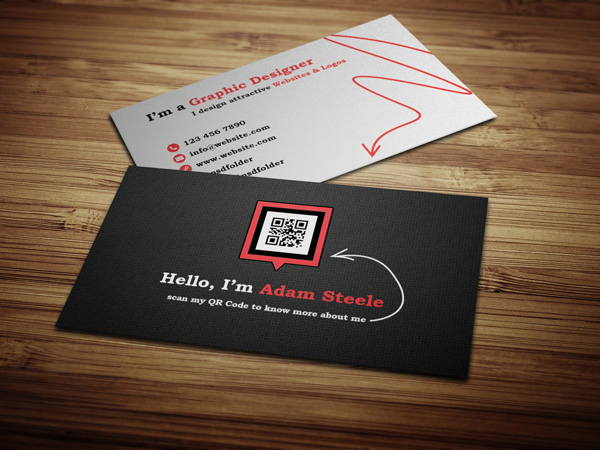
This is what is called an IRL (in real life) marketing hack.

Create a free tool

Creating free tools is a killer way to collect emails. Beware however, these emails often convert at a lower rate than those earned through content.

This is because people are signing up for the freebie not because they want to learn more about your topic.

An example tool is MarketGrader by Hubspot which looks at the SEO and backlink information of your website and gives recommendations for improvement.

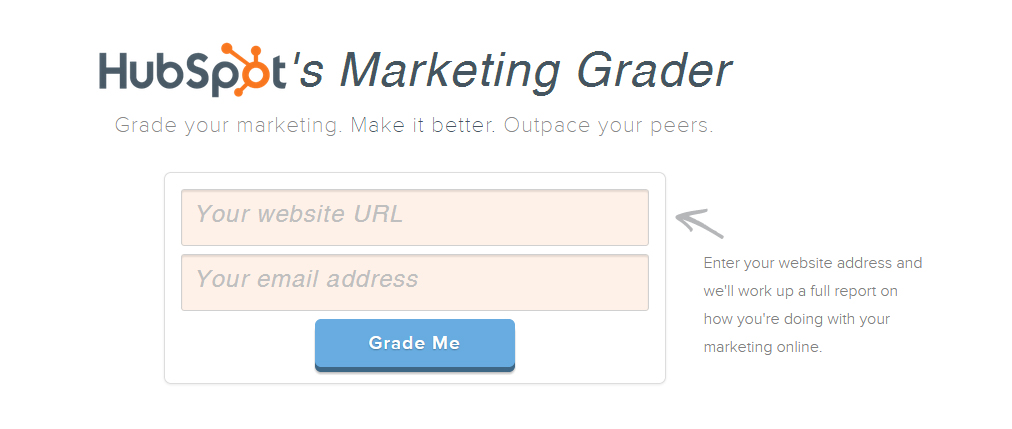
You need to enter your email to get the free review.
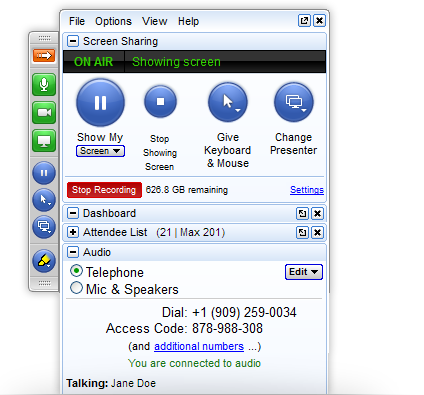
Webinar

Webinars are a great way to sell products and to collect emails.

The beauty is they have scarcity, a marketing psychology hack, built right into them.

They have a maximum capacity, so you can say only X spaces left.

They are also time dependant, so you can say only X hours to sign up.

The main reason to do a webinar is because few people do!

They are hard and require preparation and presentation skills.

A high barrier to entry for this marketing hack means few people do it well, these are things you should focus on to differentiate yourself from your crowded space.

Run a contest

Running a contest, especially those with virality and growth hacking built into them can be explosive for list growth.

Nathan Barry a design and marketing blogger and product creator used this technique to give away expensive design software.

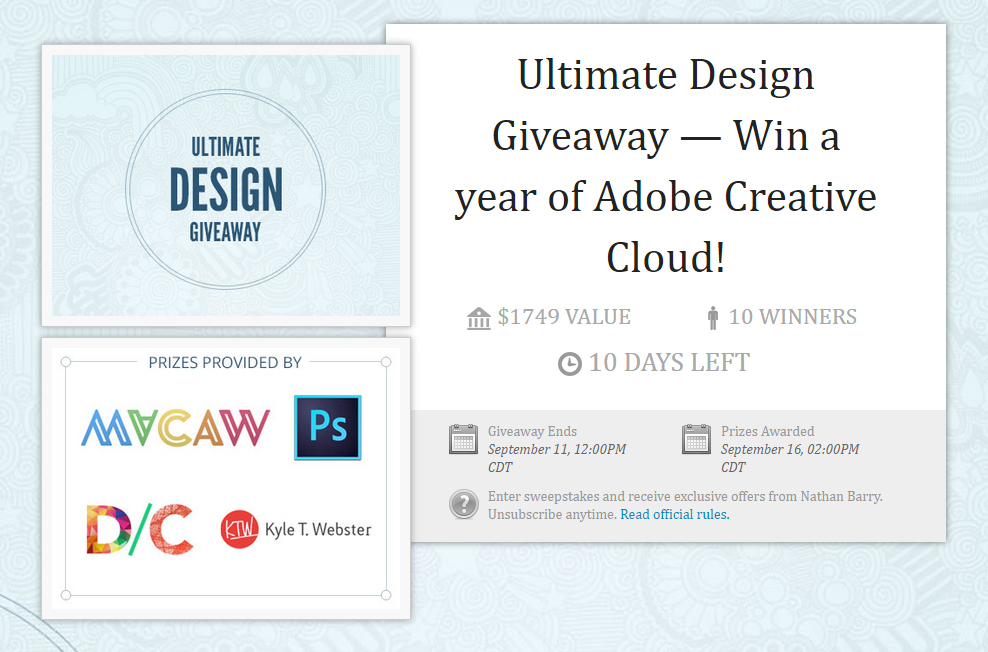
A great growth hack is to build referral into the contest rules. So the more people that you refer the more entries into the competition you get.

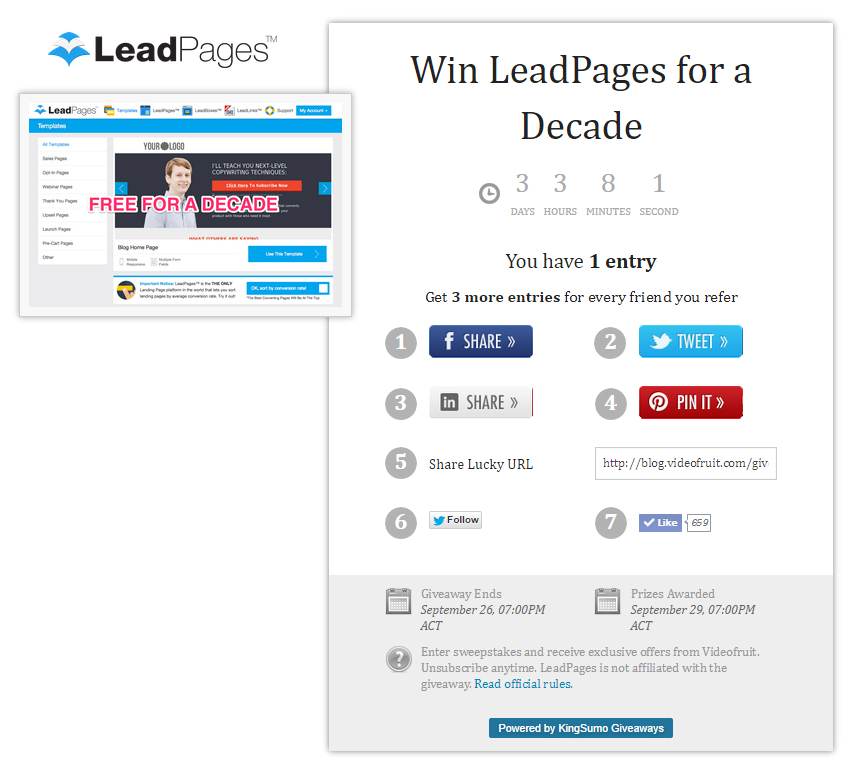
People want to win if the prize is of high value, as seen in these two examples.

So they share and refer as many people as possible.

Helping you to collect more and more emails.

Crowdsource a free course

email1k.com is a free 30 day list building course from Appsumo. The course is written and sponsored by guest bloggers and partners.

This is a great tactic, Appsumo leverages their huge reach to create high quality content at little to no time/cost in comparison to making it themselves.

Becuase they have a large audience, people will contribute for free. Another rason you should be building that list!

They also leverage all the influencers within the courses networks.

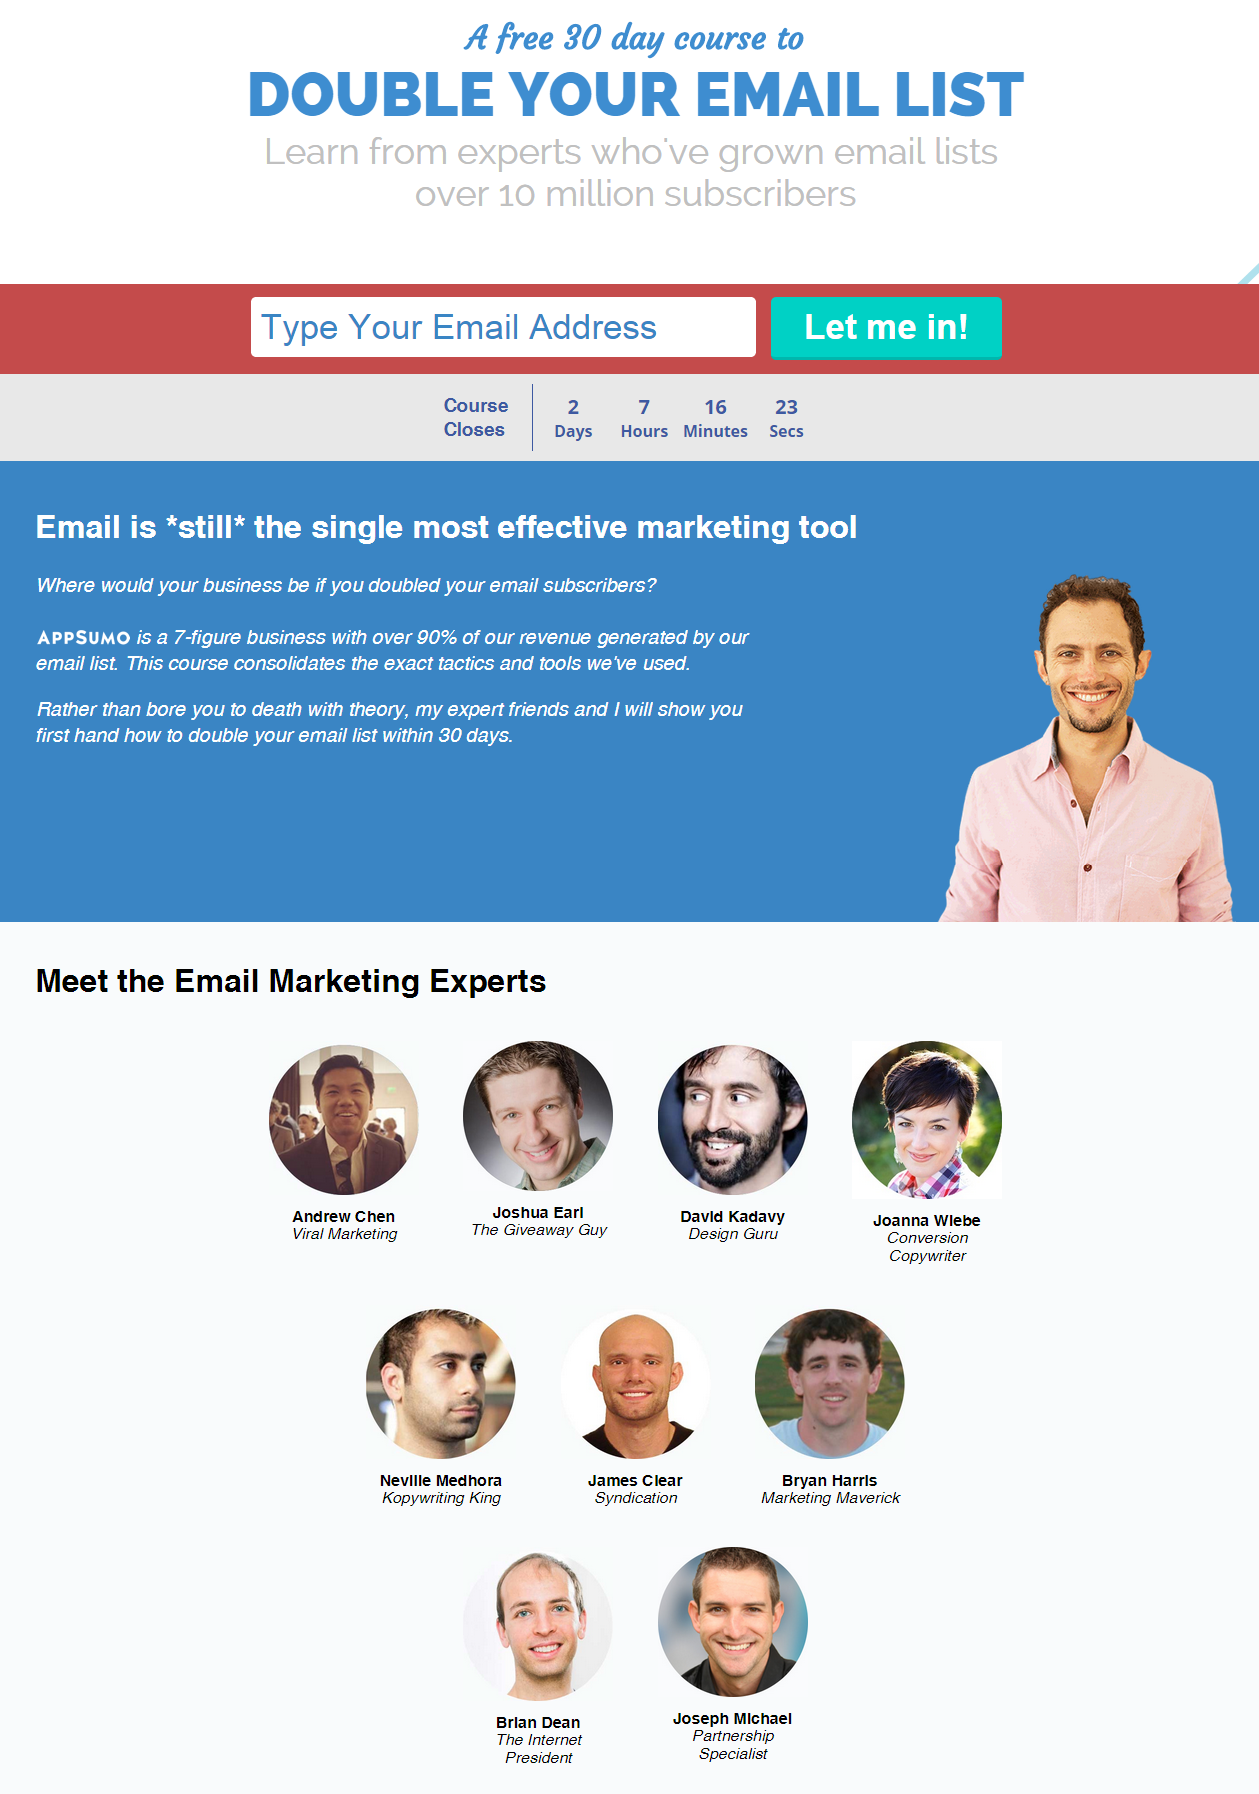
You have to tweet about the course to get access, this means it gets more eyes balls and free distribution through peoples personal social networks.

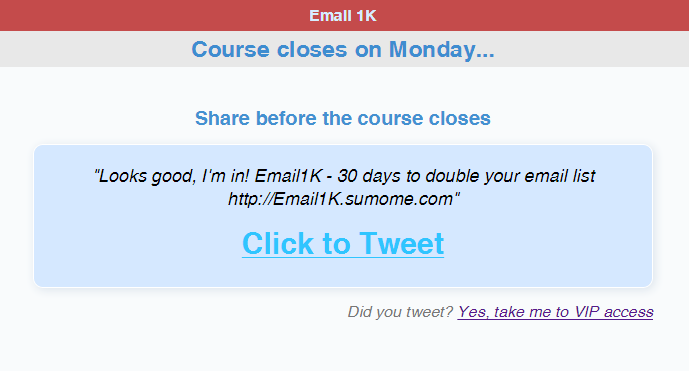
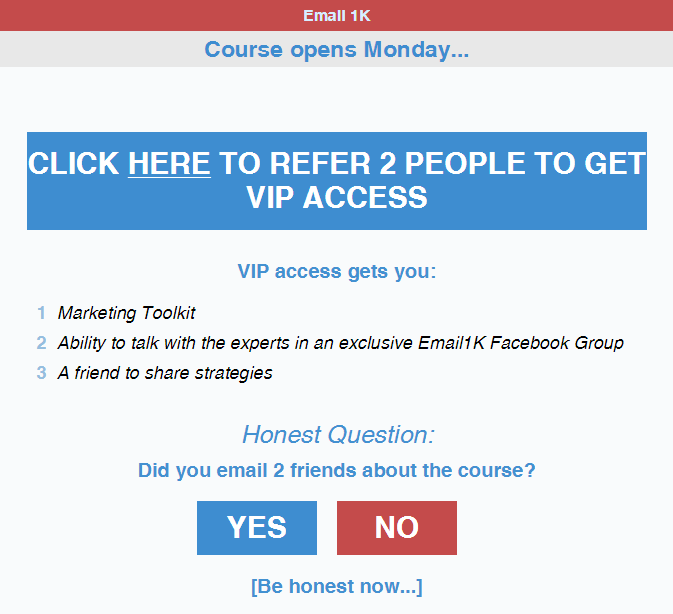
They also build virality into the course by offering access to a VIP section if you share the course with two people.

Leverage your reach as much as possible, ok so maybe you don’t have the klout of top people in your industry, but there are always people lower than you that you can mutually help.


Chapter 5: Little Known Growth Hacks for List Building

Find new verticals

One unknown list building strategy is to move from your niche and into a new vertical.

Take for example this guide, it can work for all types of industries.

I can tweak the content and tailor it to different markets easily.

Chris Guillebeau has become known in many verticals, he is known in the travel, entrepreneurship and artist industries.

Think of crossover between industries and personality types too.

I often find tech entrepreneurs especially marketers are interested in exercise or the quantified self movement.

Hack Foursquare if you are brick and mortar

If you are a brick and mortar store you can use foursquare and swarm to prompt people to join your email list when they check in.

Offer them an incentive like a coupon or voucher for immediate use!

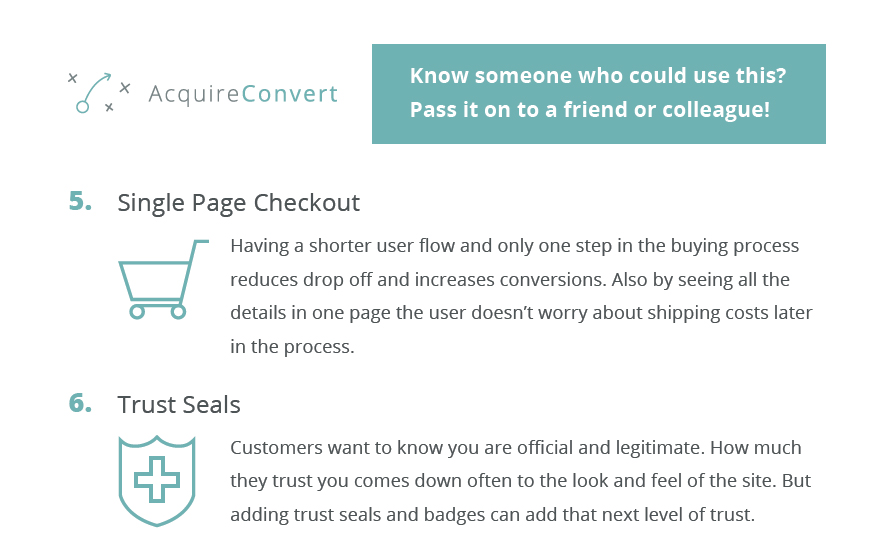
Newsletter forward to a friend

At the bottom of every email you send, if it is transactional or a newsletter.

Give the reader the option to share the email with a friend easily.

Email signature

You can apply the same principle to your email signature. Hotmail famously used this growth hack.

Hotmail was able to grow virally just by adding.

“PS. Get your free email at Hotmail”

to the signature of each person.

Over a few weeks you can get potentially hundreds of free emails.

Add email opt ins link to downloadable content

If you offer free pdf downloads and ebooks, this is a huge opportunity to growth hack.

Prompt people to share the resource with other people who may benefit from it or ask them to sign up to your list.

If the resource was passed on by a friend the reader might not be on your list yet.

It is simple to embed a link in a pdf so don’t delay, go update all your resources and make sure they ask people to share them and have links to your email list sign up page.

Create a fiverr gig

Offer a high value video training course on Fiverr for only, you guessed it, $5!

People will easily pay for the premium content at such a low rate and you get their email address too.

You then need to ask people to join your list so you move the email out of Fiverr and into your list, then you own the audience.

Create a Udemy Course

Growthhut.com wanted to see if they could monetize a Udemy course, what they ended up finding out was they could leverage it to build their email list!

They created a course on Website Flipping inside Udemy and created some free coupons for users.

They promoted the course on reddit.com, they got 500 sign ups in 24 hours!

Overnight 500 email list, targeted too!

However with Udemy you don’t get to keep the emails, they are locked inside.

You can however email all the people who joined the course, the emails come from Udemy making them look very official. This is good for open rates.

You can then ask them to join your core list by incentivising them.

Moving the email from Udemy to your list and your ownership.

Twitter unkown email hack

Replying to mentions on twitter can be a great way to build brand equity. Especially if they are personalised.

When replying to them you can also ask for an email.

Using twitter’s lead generation cards you can embed an ask.

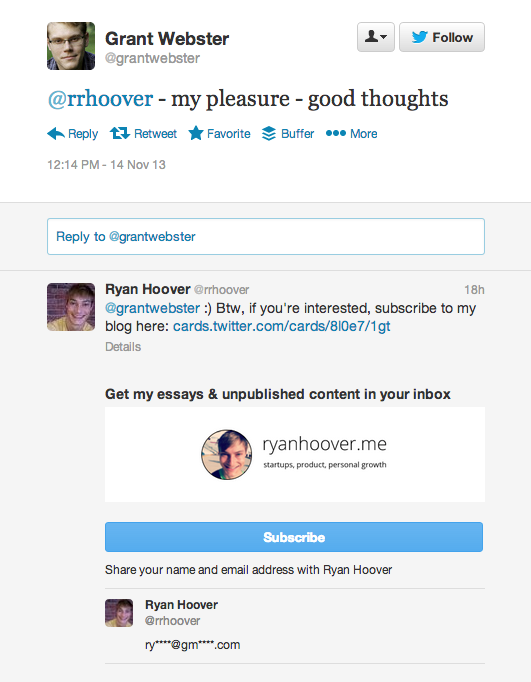
With a single click they join your email list.

The conversion rate is crazy!

Because they are already aligned with your content and took the time to thank you, they are ready to be converted.

Youtube Annotations

You can leverage youtube annotations and lower thirds to drive traffic and sign ups to your list.

Include the domain name in the video and ask people to check it out.

You can link to a landing page from the youtube video description below.

Don’t forget to use a google url builder link so you can track the specific traffic and emails from each marketing effort!

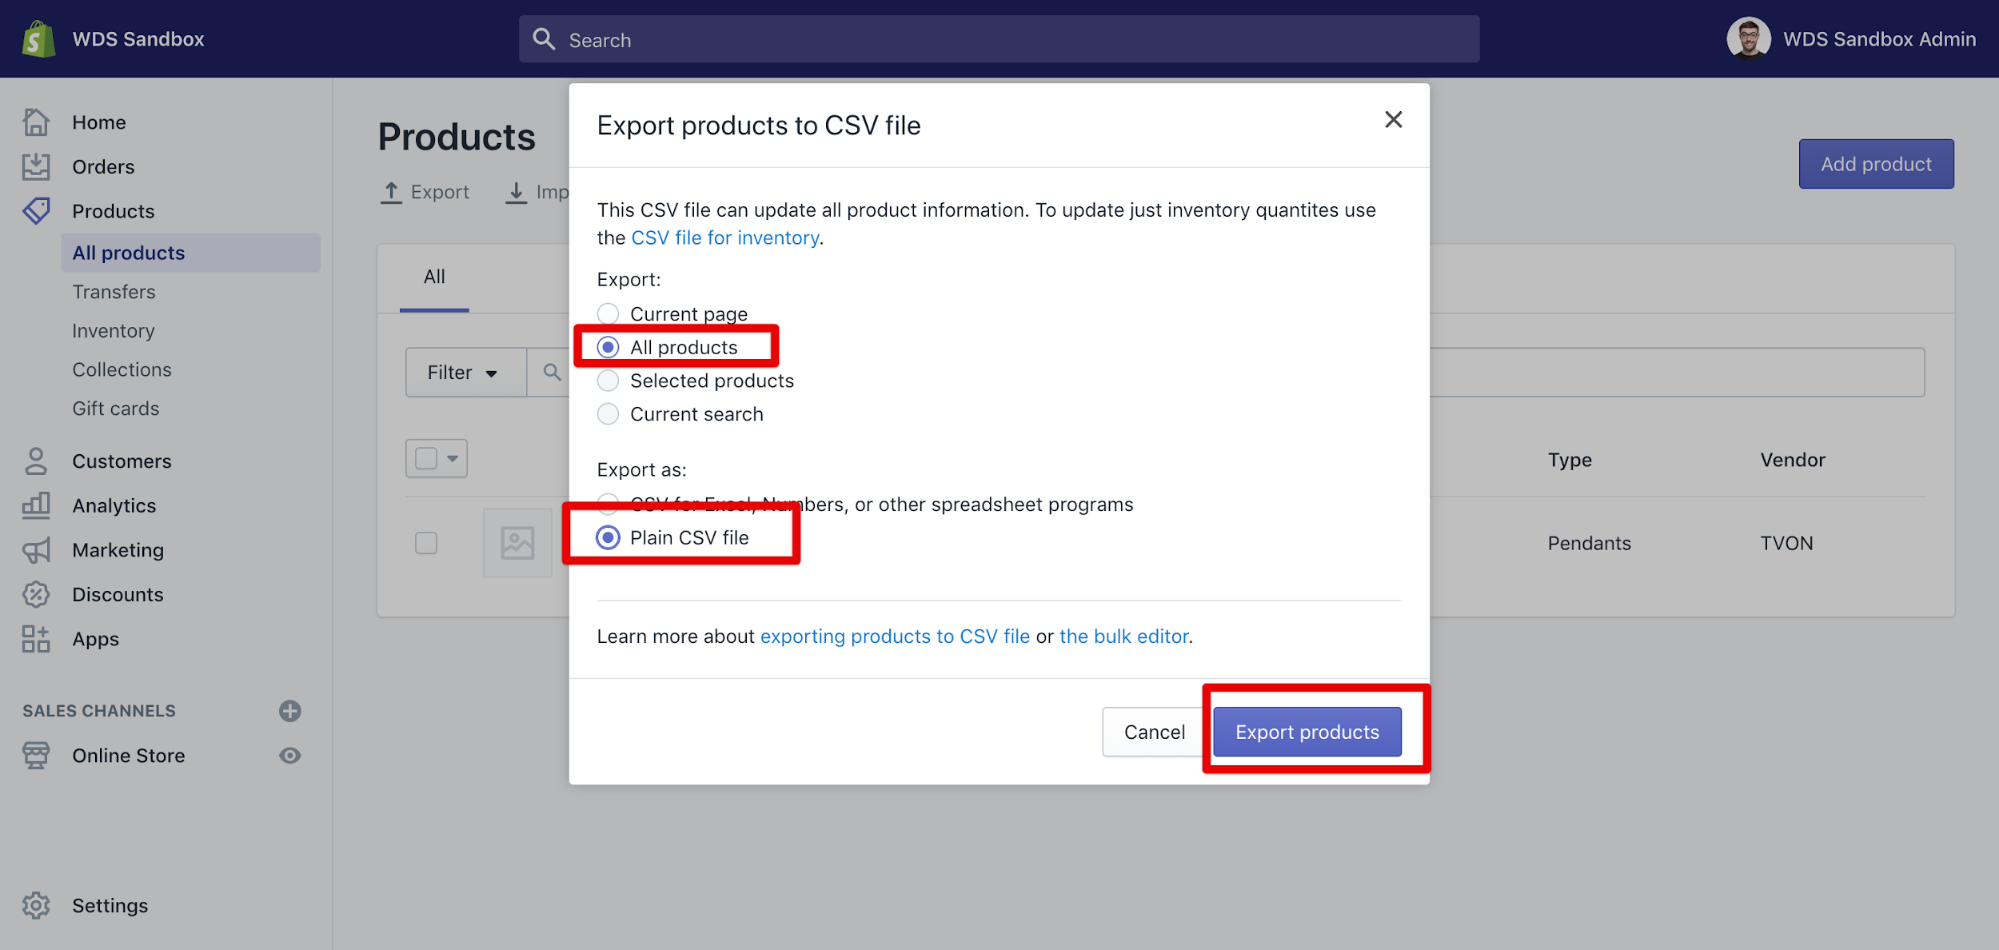
The Linkedin Email Hack

Most people don’t know but your linkedin account is a huge untapped resource for emails.

You can actually export the email addresses of all the people that you are connected with on linkedin!

Here’s how:

Click on connections

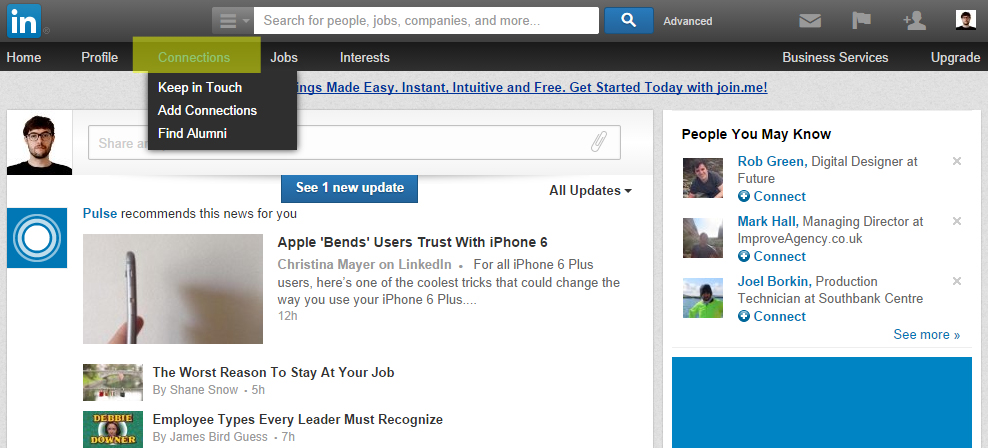
Then click on settings

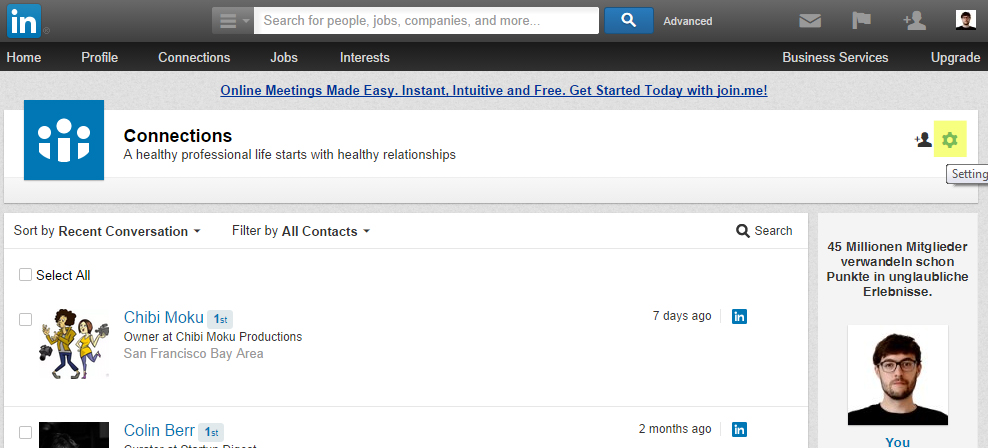
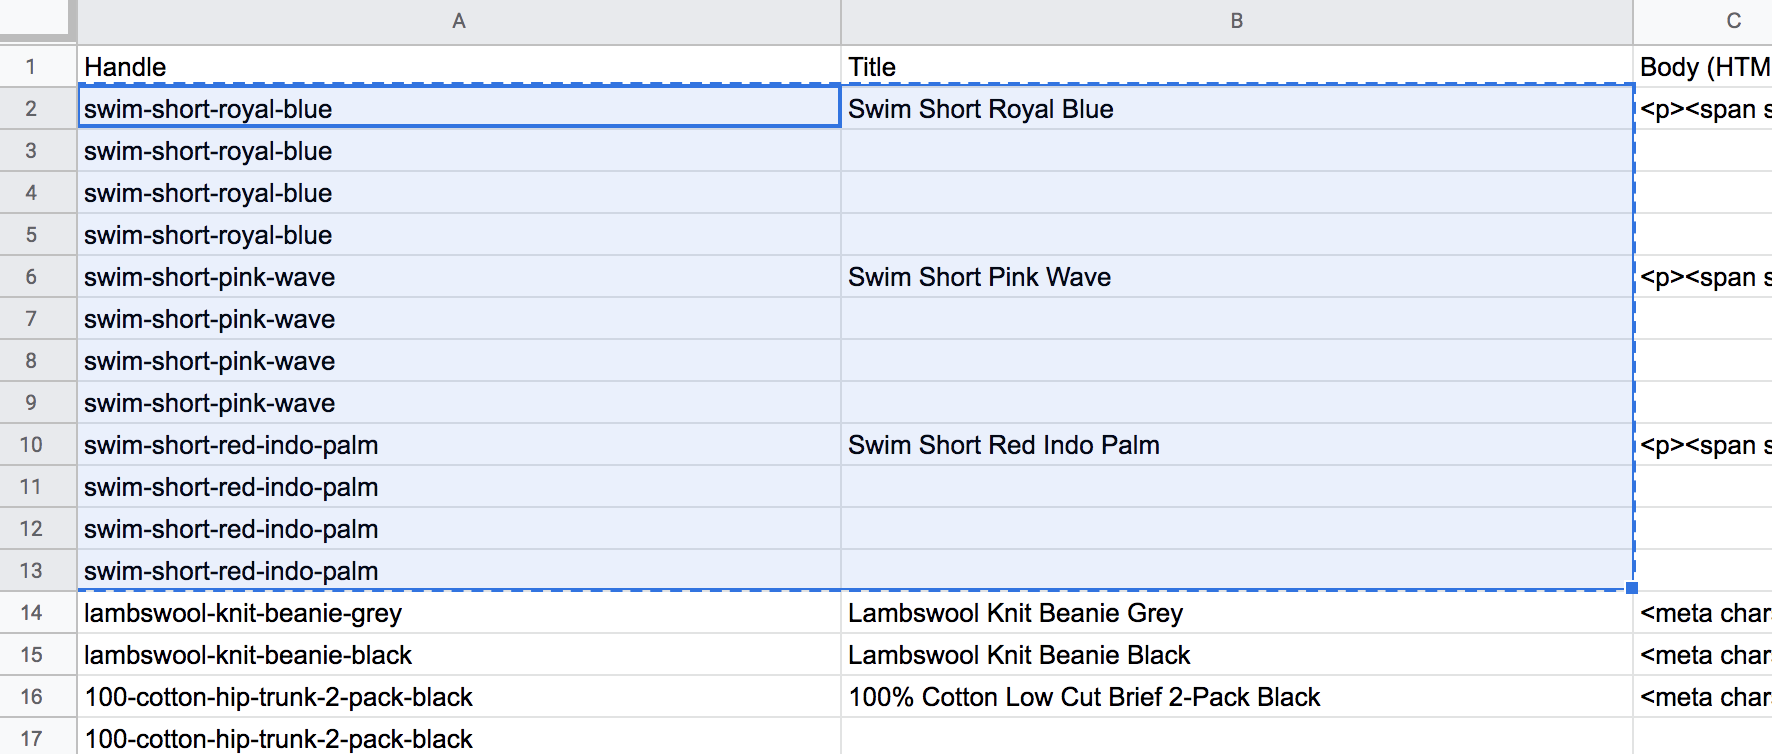
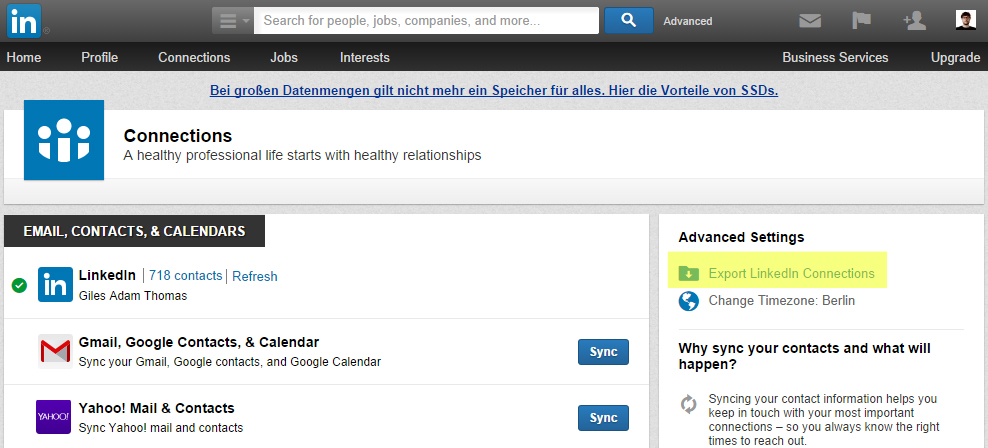
Under advanced settings click on ‘Export Linkedin Connections’

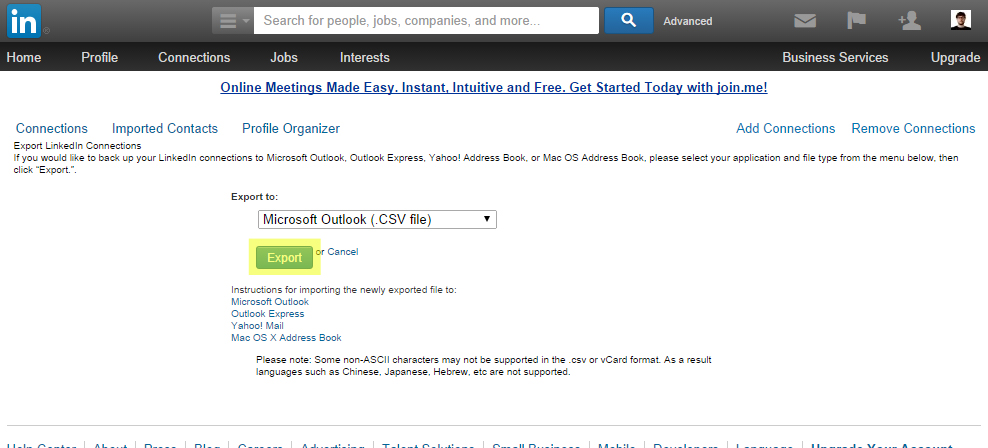
Then export as a csv and import into your mail provider

Next you want to move them from your newly acquired linkedin email list to your core email list.

This will help qualify who is a valuable email and who to delete, as the emails are not targeted to your niche topic.

Shoot for a conversion rate between 2% – 5%.

Send the Linkedin list and email with a call to action to opt-in to the core list, use an incentive!

To increase this here are some tips:

  • Be very active for a couple of days in your feed before sending the email
  • Include the word linkedin in the email subject line and first line of email
  • Include a screenshot of your linkedin bio image so they know who you are

Use BuiltWith.com To Steal Your Competitor’s Hacks

What is a great way to get better at something?

Copy someone who is really good at it, right?

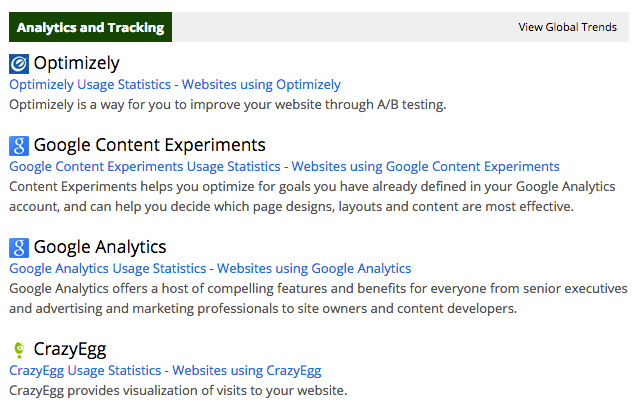
You can use builtwith to spy on the tech your competitors or guru’s are using.

Just put their web address into builtwith.com

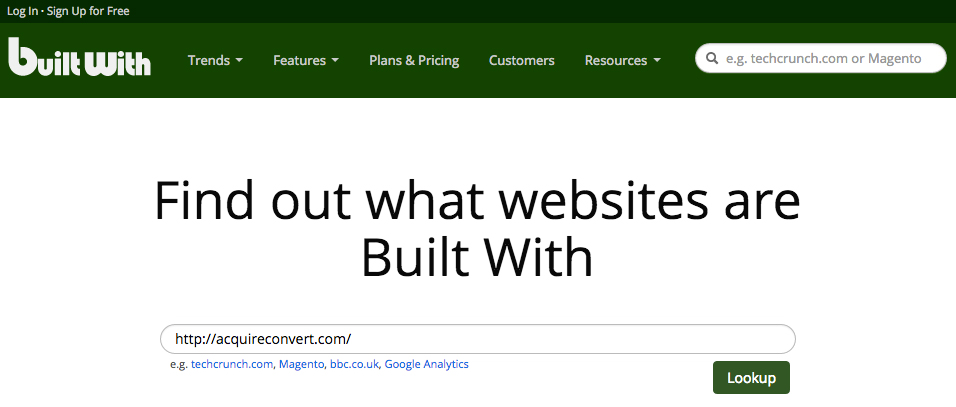
Then scroll down to the analytics and tracking section, here you can see what tools and suites they are using for testing and marketing hacks.

Create a Facebook tab to growth hack emails

Tabsite.com let’s you create custom tabs on your facebook page and run giveaway’s.

Alter-Ego Comics leveraged this technique to giveaway three action figures to those who liked their facebook page.

Alter-Ego Comics’ giveaway worked really well because alongside offering a giveaway relevant to their audience, they leveraged friend networks (you got additional entries for every friend who liked the page) to build their list.

When everything was said and done, 120 people joined their email list. Not bad for their first Facebook giveaway!

Use Facebook ‘One Click Actions’

Actionsprout.com is an app you can use to create facebook landing pages with one click actions.

UNICEF created a landing page to ask people to join their list for further information on how they could help Syrian children.

UNICEF is well aware that narrative and emotion drives action.

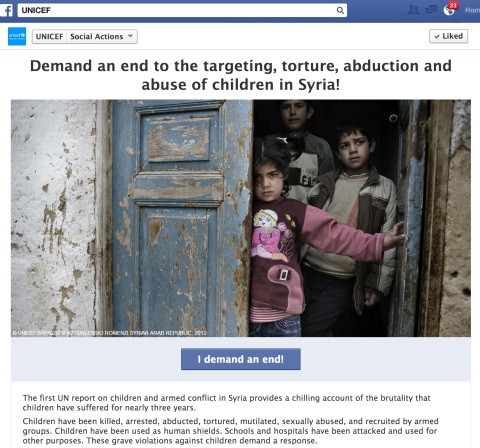
If you click on the ‘I demand an end!’ button at the bottom of the page you auto join the UNICEF email list.

They also added another feature that is important: a way to create a CTA within the Facebook feed by adding a feedback option.

Facebook updates normally have the like, comment and share buttons. With ActionSprout, you can add a button that backs up your CTA.

UNICEF used that feature to add a Demand button.


Chapter 6: Building Brand Equity with Lead Nurturing

Now you know the importance of email, how to setup your blog for optimal email capture, how to optimize the blog and some cool and little known growth hacks for email.

Let’s look at what to do once you get those emails.

Don’t sell.

Then don’t sell.

Later don’t sell anything.

Nurture your list, add value and listen to Albert Einstein!

“Try not to become a man of success, but rather a man of value.”

Albert Einstein

It is much easier and cheaper to keep existing customers than to get new ones.

True customers, who are brand ambassadors are not easy to find. The fact that someone signs up to your list is reason enough to show them a really great time.

Autoresponders

Autoresponders are the best way to nurture your list and add value.

Using marketing automation like autoresponders is a cheap and very effective way to build brand equity.

A drip email series (autoresponder) should focus on your audiences core pain point.

It can be the answer to their biggest questions.

An average drip email series might be 5-6 emails, with one email sent every four or so days.

Here are my top tips for writing an autoresponder sequence:

1. Make sure to create open story loops also known as the ‘zeigarnik effect’

This simply mean start an idea in one email but don’t finish it until the next, like the cliffhanger technique or a good tv series.

You can cement this by using a ‘Ps.’ section at the end of the email.

Remind them of the open loop and that you will close the loop in the next email.

This also teaches people to always read to the end to see the ‘Ps.’ section.

Giving you better completion rates for reading and more added value to the reader.

2. Try to use a story as the emotional delivery vehicle, this means try to make the content a narrative

People like to digest content in the form of stories.

Humans like narrative not facts. Think about how can you make the email one long narrative?

Start the story in the first email and finish it in the last, have sub plots that run from email to email to keep people engaged.

3. Focus on listing their biggest pain points in the first email to get them hooked in

Eg If you were creating a UX course

In the first email, focus on your audiences biggest worries.

“It is hard to find one centralized place to learn ux.

There are a lot of different confusing sources of information.

With no clear structure – what to learn in what order.”

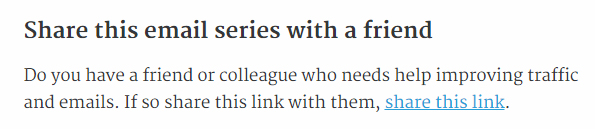
4. Include a share with friends link

Include a link at the bottom of every email in the series which links to the opt-in page for the email series.

That way if someone forwards it to a friend, they can opt-in to the whole sequence and you get another email.

Conclusion

I hope you found this guide to list building valuable.

It is really important to keep your email list at the top of your marketing and business priorities.

Ensure your website and blog are set and optimized monthly to make sure you are capturing as many emails as possible!.

Don’t forget these are potential customers and sales not just emails.

And more importantly don’t forget these emails are people, nurture them like a good friendship.

Help them on the first 6 or 7 points of contact and add value, sell them eighth. This new way of selling will change your business forever.

Share This Guide

Please share this guide with friends and co-workers. As I mentioned before it won’t cost you anything but it is not free. So all I ask is you share it with two friends as payment please.

Got Any Feedback or Tips?

Please let me know if you have any cool hacks not mentioned here that helped you build your email list by filling in the super short survey below. If your tip is awesome I’ll add it to the guide and quote you!

I really value your feedback and want to update and improve this resource as we learn and grow together.

Categories
SEO

Shopify SEO: Complete Ecommerce Guide [2024]

This is a practical guide to Shopify SEO.

I’ll walk you through each step in the ecommerce SEO process.

In this in-depth free training course you’ll learn:

Table of contents

  • Shopify SEO basics
  • Shopify keywords research
  • Shopify website architecture
  • Shopify on-page SEO

If you sign up to my supplementary email course you can also learn:

  • Technical SEO for Shopify
  • Shopify content marketing & blogging
  • Shopify link building
  • Advanced Shopify SEO strategies 
  • Shopify SEO case studies 
  • Shopify SEO tutorials & training
  • Shopify SEO experts
  • Shopify SEO apps & tools

In short: if you want more traffic and ecommerce sales from SEO, you’ll love this guide.


About the author

I’m Giles Thomas.

Founder of Shopify marketing agency Whole Design Studios.

I started learning SEO in 2012 and really struggled to get the traffic and sales I wanted and needed.

Jump to today and alongside building my own 7 figure business from SEO, I’ve helped 100s of Shopify stores rank page #1 with my SEO services and 1000s of ecommerce websites get more traffic with my free and paid SEO training.


Shopify SEO basics

Do I need SEO for my website?

If you’re new to ecommerce or the Shopify platform, you might be asking yourself.

“Do I need SEO for my website?”

The answer is definitely yes.

Let’s learn why you need SEO by studying some statistics.


Shopify SEO Statistics

39% of all global ecommerce traffic comes from SEO. (source)

The top 3 Google search results get 75.1% of all the clicks. (source)

Only 0.78% of Google users click on something from the second page. (source)

So if you want to get traffic and sales for your Shopify store, you need to be:

  • Driving at least 40% of your traffic from SEO
  • Listed in the top 3 results for your important keywords
  • Ranking on the first page

Now we know SEO is essential to ecommerce, let’s learn some SEO terminology.


Shopify SEO Glossary: Terms and their meanings

Before we jump into learning about SEO, let’s learn the most important terminology and their meaning.

That way you can understand this in-depth SEO guide.

  • Search engine
    • Website or application (like Google or Bing) that collects a directory of all the worlds useful websites. When someone searches a keyword or “search query” (see below) it uses an algorithm to show the most relevant and high-quality website to answer the user’s question.
  • Algorithm
    • A set of steps search engine applications take to chose which website is the best to show to help with the user’s question.
  • SERPs
    • SERPs or search engine results pages are the pages you see on search engines like Google when you type in a keyword. Normally you see the webpages title, URL and description. So the user can learn more about each website and page before clicking.
  • Keyword 
    • Your SEO keywords are the words and phrases in your website that make it possible for users to find your store using search engines.
  • Search query
    • A keyword that a user types into a search engine to find websites, webpages and information to answer their question.
  • Sitemap
    • A list of the pages on a website for search engines to read and add to their directory.
  • Index
    • An index is another name for the database or directory collected and used by search engines to recommend people websites. Helping them answer questions.
  • Crawl
    • The process of searching through websites pages and technical information to add it to a database or directory.
  • Backlink
    • A backlink is simply a link from one webpage to another webpage.
    • An external backlink is a link from one website to another website.
    • An internal backlink is a link from one webpage to another webpage in the same website.
    • The anchor text is the text string the backlink is wrapped around.
    • A “do follow” link passes the SEO link power from one page to another page.
    • A “no follow” backlink tell search engines not to pass the SEO link power between pages.
  • CTR
    • CTR or click-through rate in SEO, is the percentage of people that click on a website in a search engine results page.
  • Black / white hat SEO
    • Black hat SEO is a collection of SEO strategies that do not follow search engine best practices.
    • White hat SEO is a collection of SEO strategies that follow search engine best practices and focus on the user experience.
  • Meta tags
    • Meta tags are HTML tags in the code of your webpages. The two most important are title tags and meta descriptions. The text in these tags are visible in search engine results pages.
  • URL
    • A URL OR uniform resource locator is simply a web address link https://myshop.com that points to a unique webpage.
  • Analytics
    • Are a system for recording and measuring a set of data. In SEO we use analytics to record data like traffic, traffic source, traffic volume, revenue and user behaviour. We can analyse this data to improve our store’s traffic and sales.
  • Conversion / conversion rate
    • A conversion happens when a user completes an important action on your website. Like completing a purchase or joining your email list. Conversion rate is the percentage of users who complete an action.
  • SEO vs SEM
    • SEO is search engine optimization, improving your organic search engine listings. SEM is search engine marketing, paying to be at the top of search engines with ads.
  • Domain authority and PageRank
    • Originally created by Google to rank the quality and quantity of backlinks to a page to help decide which websites to show in SERPs. Now many popular SEO tools like Ahrefs/Moz use a score out of 100 to show the power of a website (domain authority/rank) and a score out of 100 to show the power of each individual webpage.

What is Shopify SEO?

Search engine optimization (SEO) is the process of getting your website to show up in search engine results pages or SERPs. The basic step by step is:

  • Making a website (or Shopify store)
  • Getting search engines like Google or Bing to find and list your store in search results pages
  • Optimizing your site so it is ranked as near to the top of the first page as possible for your important keywords
  • Getting traffic (and ecommerce sales) from those rankings to your website

When you use a search engine (like Google) they scan their database of websites and choose which is the best websites to show for that keyword.

The top ten websites listed on the first page are chosen based on relevancy, authority and usefulness.

Simply put, those websites are related to the keywords niche and can answer the users questions quickly and well.


Is Shopify good for SEO?

Shopify is an ecommerce platform.

Ecommerce sales are mostly driven through or started with a search engine.

So naturally, the team at Shopify made the platform so you can follow SEO best practices.

So, the short answer is yes, Shopify is good for SEO.

Some great features are:

  • Meta tags
  • XML Sitemap
  • 301 redirects
  • Canonize URLs

For most ecommerce stores revenue and SEO budgets, Shopify’s SEO feature set more than covers their needs.

There are however a few drawbacks:

  • The URL structure for product and collection pages are not ideal
  • Site architecture is also therefore not ideal
  • You don’t have access to your robot.txt files (not that important in 2019)
  • Creating content or non-product / category pages is hard (WordPress is much easier)
  • Page load times and site speed is slow when using too many Shopify apps

We’ll explain these points in detail later in the guide, so don’t worry if that sounded like a foreign language.


How do I do SEO on Shopify?

Now we’ve learned a few SEO basics, let’s answer the question that is one everyone’s mind:

“How do I do SEO on Shopify?”

SEO on any ecommerce platform would be broadly the same process.

The main difference is technically where and how to add SEO metadata into your store.

SEO for Shopify is a 6 step process:

  1. Shopify keywords research
  2. Shopify website architecture
  3. Shopify on-page SEO
  4. Technical SEO for Shopify
  5. Shopify content marketing & blogging
  6. Shopify link building

Let’s jump into the first step Shopify keyword research.


Shopify keyword research

The first step in the ecommerce SEO process is Shopify keyword research.

For this tutorial, I will use a fictional mens underwear brand.

What are ecommerce SEO keywords?

As we learnt earlier, your SEO keywords are the words and phrases in your website that make it possible for users to find your store using search engines.

For example, someone who wants to buy toys for their pets may search for pet toys, dog toys, cat toys, toys for pets, toys for dogs, toys for cats, etc.

Keywords can be defined and should be chosen based on a few different attributes:

  • Short-tail and long-tail keywords
  • Commercial and informational intent keywords
  • High and low competition keywords
  • High and low volume keywords

Let’s dig in:

  • Short tail or broad keywords are less specific and cover a wider topic area. In the previous example, pet toys would be a broad keyword as it doesn’t specify the kind of pet or kind of toy. Broad keywords are generally harder to rank for in search engines based on competition. In the case of pet toys, you would be competing against well-known brands in the pet industry as well as almost every other pet supplies retailer.
  • Long-tail keywords are more specific and cover a narrower topic area. Most of the keywords in the previous example are too broad to be considered long-tail keywords, whereas a phrase like organic toys for large dogs would be a good example of a long-tail keyword.

Keywords should also be chosen with regards to intent. People who search for specific keyword phrases typically have one of two intentions.

  • People with commercial intent search for keywords in order to make a purchase. For example, someone searching for best toys for Dachshunds is likely looking to buy the best toys for a Dachshund. Commercial intent keywords are typically chosen for your ecommerce product and category (or collection) pages.
  • People with informational intent search for keywords to learn more about a topic, but not necessarily make a purchase. For example, someone searching for homemade toy ideas for small dogs is likely looking for information on how to make toys for a small dog at home. If you are a seller of pet toys, you wouldn’t want to optimize your online store’s product pages using informational intent keywords. That said, you could optimize blog content on your website for informational intent keywords, you could then use your informational content to lead readers to your store.

Another important thing to consider when doing keyword research is the competition for the keywords you are interested in targeting.

  • High competition keywords are typically broad or short-tail keywords. Large established brands already rank for these keywords. Outranking them will take a lot of time and money.
  • Low competition keywords are just the opposite. The brands and websites that rank for these keywords now have some domain authority and SEO power. But it is possible to rank alongside them on the first page.

PRO TIP: If a keyword has Google shopping ads listed at the top or the side of the page then it is likely a commercial intent keyword. As people are willing to pay for that traffic an can make profit from it.

While some keyword research tools will give you a rating (low – medium – high) or score to help you determine the competition level for particular keywords, the easiest way to see who you would be up against in search results is to simply search for those keywords in search engines and see who ranks on the first page for them.

PRO TIP: Use searchlatte.com when searching for keywords. This tools allows you to choose to see the search results from a specific country and allows you to stop your search history from affecting the results.

Above, you can see that the competition for pet toys is strong.

First, you are competing against Google Shopping ad campaigns, which allows advertisers to put their products right on the first page of search results. As we learned earlier this is SEM.

Next, you are competing against big brands like PetSmart. Chewy, Petco, and Amazon. 

While not impossible (depending on the time and money you have to devote to your search engine optimization strategy), outranking established brands like these using broad keywords will be extremely difficult. Therefore, pet toys would be considered a keyword with a high level of competition.

Alternatively, if you look at the above example for organic dog toys, you can see that the major brands are no longer at the top of search results.

And neither are the Google Shopping ads, which in this example, are to the right of the search results.

Fewer people may search for organic dog toys when compared to the search volume for pet toys.

But thanks to the more specific keywords, you can almost guarantee the people who perform a search for organic dog toys have strong commercial intent for a specific type of product.

And while the websites that appear first in the above search results are still strong domains in terms of domain authority and PageRank, they do not have the high authority that established brands would have.

Hence, it would be easier to rank well on the first page of search results against these domains versus PetSmart. Chewy, Petco, and Amazon.

Therefore, organic dog toys would have a lower level of competition compared to pet toys.

The best part about more specific, long-tail keyword phrases is that you can optimize specific and broad keywords simultaneously.

  • High volume keywords get a lot of monthly searches, they are typically short-tail keywords.
  • Low volume keywords get fewer monthly searches and are typically long-tail keywords.

NB: However this is changing with the rise of voice search, more on that in the advanced Shopify SEO strategies.

We’ll go into more practical detail on how to determine long and short tail keywords, keyword intent, volume and competition in the next section.

Let’s get started with the how-to section.


Step 1: Inventory

Before you start your keyword research you want to compile all your products and collections into a Google sheet.

This will then allow you to see how many product and collection keywords you need to find.

We’ll also find and chose a keyword for your homepage too.

Any informational intent keywords we find we can save into a special list for your blog, we’ll then learn how to prioritize those keywords for your blogs content plan.

The easiest way to do this would be to simply export them from Shopify.

Jump into your Shopify admin, click:

Products > all products > then ‘Export’

Then choose ‘all products’ and ‘plain csv file’.

Then CSV file will be emailed to your Shopify account email address.

NB: If you don’t have products or you’re just starting a new ecommerce website, like a dropshipping store, then your keyword research can inform the products you choose to add to the store.


Step 2: Create a Google sheet

Create a blank Google sheet.

[Here is a link to a Google Sheet template we made, you can simply click ‘File’ and ‘Make a Copy’ and the template will be copied to your Google Drive root folder where you can edit it and save it for later.]

Next, add 3 tabs to the bottom of the sheet, we’ll collect and organise your keywords in these tabs.

In the ‘Potential keywords’ tab add in these headers.

We’ve added in headers that match some of the keyword attributes we learned about earlier.

Now we have a place to save all our keyword ideas.

Then copy all the individual products from your CSV file and paste them into the ‘Chosen keywords’ tab.

Just copy and paste the ‘handle’ and ‘title’ tab into your ‘Chosen keywords’ tab. You want to add in the SKU column too so you have a unique identifier for each product if you get confused.

Here is an example of what it might look like.

You’ll need to manually add in collections and one row for your homepage.

It is better to keep a row for every SKU then we can paste your update info back into your product sheet and re upload to Shopify without too much hassle and manual reorganizing.

Once we complete our keyword research, we’ll choose keywords and match them to your homepage and product and collection pages.

Now we are ready for some keyword research!

Let’s load up some SEO tools to help with the research.


Step 3: SEO Tools

In the interest of keeping this process simple, practical and actionable. I’m not going to use every tool and follow every possible keyword research process.

Instead, like the Pareto principle, I will rely on 20% of tools and process that bring in 80% of the keywords we need.

The tools and websites we’ll use for our keyword research process are:

  • Google suggest aka Keywordtool.io
  • Google related searches
  • Google keyword planner
  • Ahrefs.com 7 days for $7 USD trial

Google suggest aka Keywordtool.io

The first step is to choose your #1 short-tail keyword. The keyword that best represents your ecommerce category.

For example, in this tutorial, we are working on our imaginary mens underwear Shopify store. We sell briefs, boxer briefs and straight-up boxers.

The first keyword I will type into Google is ‘mens underwear.’

As soon as I start typing, Google suggest creates a list of long-tail and related keywords.

The quickest and easiest way to get all these lovely keywords in your sheet is to jump over to keywordtool.io.

This tool will also find suggestions that don’t necessarily begin with the phrase but simply include it, Google suggest only does this sometimes.

Pop in the keyword and see the results. The tool found 450 keywords! Wow, great start.

Make sure to check the country and language you selected.

Now you can copy them and paste them into your spreadsheet in the ‘All keywords’ tab.

You can now repeat this process for each of your category pages.

Our three main category pages are, ‘mens briefs’, ‘mens boxer briefs’ and ‘mens boxers’.

You can search for a few variations for example, ‘mens underwear briefs’ or simply ‘mens briefs’.

Next you want to repeat the process for your most important product SKUs or all of them if you only have a few.

The point of product keyword searches is to find color, size and other modifier variations.

For example we sell ‘Black mens short-cut boxer briefs’.

‘Black’ is a color modifier, ‘short-cut’ is a style modifier. You can also use price modifiers like ‘cheap’ or ‘high-end’.

Material types are also typical product keywords variations in ecommerce.

For example ‘Cotton button down shirt’. 

This can be taken further to describe the material, ‘100% Organic cotton’.

The list of modifiers here is more or less endless depending on the niche of ecommerce store. So really dig into what differentiates your product, whether it be price, quality or something simple like free next day delivery. Then look for variations of your core product keywords with those modifiers added.

Again, add any keyword ideas that Keyword Tool creates to the ‘All keywords’ tab and then move onto the next section.

Google related searches

Google offers a section of related keywords for search users who do not find the content they want. You can search for your #1 short-tail keyword on Google and scroll down to the bottom of the first page of search results to see these related keywords.

You can also click on these searches and look at their related searches. I recommend doing that for your short-tail and collection page keywords. Then paste the results into the sheet in the ‘All keywords’ tab.

Don’t worry if your sheet looks messy like this when you paste, I will show you how to remove duplicate keywords and empty rows with Google sheet add-ons later in the guide.

Google keyword planner

Google offers a powerful keyword research tool inside of Google Ads called the Google Ads Keyword Planner. If you’ve never used Google Ads, you will need to create an account using your current Google account or a new Google account.

One of the tricky parts of setting up a new Google Ads account is the setup wizard. If you start it by entering your email and website information in the form below, you will have to create your first Google Ads Ad and enter your billing information before you can access Google Ads Keyword Planner. To bypass this when creating a new account, be sure to click the ‘Create an account without a campaign’ link above the form asking for your email address and website.

Clicking on the link will take you to an account setup page that only requires you to enter some basic location and time zone information without having to create an ad or enter your billing information. From there, you will be able to access the Google Ads Keyword Planner from the tools menu or this link.

Get keyword suggestions and additional data

Keyword planner offers three ways to get additional keyword suggestions as well as additional information about each keyword in order to determine its usage and competition. 

The first is by entering one or more keywords about your product or services. Let’s enter our #1 short-tail keyword.

Make sure to check the language and country selection are correct.

You can choose multiple locations, for example if you want to target all English speaking countries. I would advise to have a single country location to target with your SEO at first. We’ll set this up in Google Search console later in the guide.

You’ll get hundreds of keyword suggestions.

Now you could start to filter them in the keyword planner, but I prefer to download the whole list and complete the filtering process in Ahrefs.

I find the average monthly searches in Google to be inaccurate compared to Ahrefs.

Download the whole list, and then copy and paste just the keyword column into your ‘All keywords’ tab in your Google sheet.

Just drag the file into Gdrive, right click and choose open with Google sheets.

You can repeat this process for your category page keywords to get more keyword ideas.

Download, convert your file, copy and paste those to your ‘All keywords’ tab too.

You can also search with a website.

Using a competitor is the best option.

You can then download all the keyword ideas again and add them to your ‘All keywords’ tab in the Google sheet.

NB: You will see the competition level (Low, Medium, or High) based on the number of advertisers creating ads using Google Ads and the suggested bid amount if you were to create an ad targeting people who search for that keyword. This IS NOT the SEO competition level, again we’ll use Ahrefs to determine how hard a keyword is to rank for.

Get additional data about your own keywords

You can also get average monthly search volume from Google ads keyword planner for keyword you already found.

But again, we’ll use Ahrefs for this info as I believe it to be more accurate.

Ahrefs $7 USD for 7 days trial

Next hop on over to Ahrefs.com. (I have no affiliation with them and make no commision from this link)

Get started with the trial.

Choose the standard plan.

Then complete the checkout and activate your account from your email.

I signed up to the free trial for this guide, just so we get the same Ahrefs experience, rather than using my Agency account.

Next go through the set up, you can just fill in the essentials as below for now.

For the sake of the set up, I’ll use a Shopify mens underwear store I found on Google.

NB: Don’t forget to note your trial expiration one day before in your calendar so you can unsubscribe and avoid further charges as needed.

Now we have access to Ahrefs we can use the keyword explorer, found in the header menu:

Be careful not to start rushing and making keyword searches, because you only get a few per day.

The next step is to search your #1 short-tail keyword and all your category page keyword in the keywords explorer tool to find more ideas, which you can again export and add to your ‘All keywords’ list. We’ll then analyse the complete list in Ahrefs and get the list of keywords for our ‘Chosen keywords’ tab.

Jump into the keyword planner and search your core keyword.

Make sure you check the Google tab and the location setting near the search button.

In the sidebar, focus on two of the options, ‘Having same terms’ and ‘All keyword ideas’.

You can then either roughly select the keywords that match your brand or export all the keywords to a CSV. I’d go with the later as we’ll organise and sort keywords in the next step.

Export from the top right.

Make sure you DO NOT check the ‘Include SERPs’ option as this will end your export plan limit in one go more or less! You don’t need this info as of right now.

Once you you’ve searched for your main and category page keywords in the keyword explorer and export the results. You can copy and paste them from the CSV into the Google sheet ‘All keywords tab’.

At this point you should have found A LOT of keyword options.

I found 7095 in total.

Before we copy and paste all the keywords we found to date into Ahrefs and analyse them, it’s best we clean up the list.

Duplicate the sheet as a back up.

First remove all the blank rows, you’ll need to install this Google sheets add on:

https://gsuite.google.com/marketplace/app/remove_blank_rows/1031742376501

Then click on ‘Add-ons’ in the header menu in G sheets.

And click on ‘Remove blank rows’, then ‘Delete/hide blank rows/comuns’.

Choose to delete them.

Then you need to install this Google sheets add on called ‘Remove duplicates’:

https://gsuite.google.com/marketplace/app/remove_duplicates/347814268012

Then you can select the whole column in G sheets and click on ‘Find duplicate or unique rows’.

Choose duplicates:

Check if you column has a header, you do not need to check ‘Match case’ You can leave ‘Skip empty cells’ checked.

Choose ‘Delete rows within selection’ as we already have a back-up of all your keywords.

Now you are left with no spaces and only unique keywords.

Then next steps is to create a keyword list in Ahrefs so we can analyse and save the Potential keywords’ for our Shopify store.

Navigate to the keyword explorer tab again and scroll to the bottom to the keywords lists section.

Create a new list and name it.

Now we have a place to save our ‘Potential keywords’.

The next step is to copy all the keywords from your cleaned up ‘All keywords’ tab and paste them into the Ahrefs keyword explorer tool.

The first thing you will notice is that you can’t find keyword data for some of the keywords. That just means they don’t get enough monthly searches to care about, so don’t care about them. Moving on.

So know you’ll see all your keywords loaded up with keyword data in Ahrefs, this is the exciting part!

Before we start going through and show you how to add keywords you want to save to your list, let’s first recap some of the terminology we learnt in the basics section as it applies to the Ahrefs interface.

‘KD’ means keyword difficulty. As Ahrefs says: ‘Keyword Difficulty estimates how hard it will be to rank in the top 10 organic search results for a given keyword in a given location.’

‘Volume’ is how many people search for that keyword per month in your selected country.

‘Clicks’ is how many of the searches turn into clicks.

‘CPC’ is how much people pay for Google ads for those keywords. A good indicator of whether a keyword can drive revenue to a business. Obviously keywords people spend more on have a higher chance of being ‘buying intent’ keywords. But also a higher chance of being competitie to rank organically for.

‘Parent topics’ can help you to structure your site and understand keyword hierarchy in your niche. We’ll get to that in the ‘Site architecture’ step next.

‘SERP’ is a great way to see what the rankings look like now.

You need to be cautious of keywords where the KD looks low, but when you open the SERP the top ten results have DR (domain rank as you might remember) of 70-80+.

You should always eyeball the SERPs of a keyword before committing to it. Don’t just take the KD on face value.

With that info let’s skim through a few example results and choose if we want to target those keywords.

First keyword is ‘Speedo’, a branded keyword so we’ll skip that.

Next up ‘boxer briefs’ is perfect, some would leave out ‘boxers’ as it is too high KD at 47. But I’d add all those keywords in for now, we can imply choose not to assign them to a page in the third tab ‘Chosen keywords’.

Check for sex based queries, if you are focused on one gender, skip keywords that don’t match.

Also watch out for location based keywords, unless you have or plan on having a brick and mortar store, these keywords can be left out also.

Also look out for colors, if you already know your product color variations.

As a rule of thumb I’d choose keywords from 0 – 20 KD for a brand new domain, 0 – 10 being the KD level you likely have any chance of ranking for. I’d also skip keywords with less than 150 monthly searches, unless they exactly match a product or product category.

Now spend some time reading through every keyword, if the keyword fits check it, at the end of each page, scroll to the top and add the keywords to your list.

Once I sorted through all the keywords I had 268 keywords to export.

Once you are done, click export in the top right and (leaving include SERPs unchecked) choose all rows and Microsoft excel then export.

You can now copy and paste the whole export into your ‘Potential keywords’ tab like this.

As I mentioned my final list of potential keywords was 268.

A lot less than the 7k of keywords we originally found.

This is because some keywords were too low volume, some to high competition. Some didn’t match the brand or mentioned competing brands (useful for PPC).

The next step is to match the homepage and all the category and products pages we added to the ‘Chosen keywords’ tab to keywords from our list.

You will also typically find keywords that work well for sales events and blog content which we can group together.

The selection process is quite simple.

First freeze the top row.

Then order the ‘Volume’ column Z – A.

Now start to scan down the keyword list and look for keywords with difficulty less than 10.

The first keyword fits this bill and has a huge search volume.

You’ll want to cross reference this difficulty score by looking at the SERPs in Ahrefs to make sure that it’s a fair score of competition level.

‘boxer briefs’ is quite short tail and I doubt it’s a level 6 to rank for!

As you can see most of the sites are in the DR 80-90s. Including Amazon, Macy’s and Calvin Klein. Unless you have an enterprise budget or venture capital for SEO you can forget ranking for this keyword.

So we won’t be assigning this keyword to a page.

Continue to run through the list and start to mark good keywords into potential choices for the homepage, collection pages, products pages, blog content and sales pages.

Mark them green so you can find them later.

You don’t have to choose the final keyword to focus each page on yet. You can simply mark them green for one more final review and selection process.

Think of this step as another filter before the final pick. A short list so to speak.

Again focus on the highest volume keywords with the lowest competition. Don’t forget to check the competition level by eye in the SERPs in Ahrefs.

Collection page keywords will typically be plural or describe a group of products. For example: ‘mens designer boxers’. Where as a product page keyword will describe an individual product often with a modifier. For example: ‘red swim shorts’.

Also think about product / keyword fit. How closely does the keyword match the product you are selling. You need to balance between search volume and fit. Longer tail keywords than more accurately and exactly describe your product will typically have lower search volumes. Although this is changing with voice search, more on that in the advanced section below.

The final step in the selection process is to pick one keyword for each page from your keywords that are marked green and paste them next to the product in the ‘Chosen keyword’ tab.

Fill up the ‘New url’, ‘Difficulty’ and ‘Volume’ tab with data for all the products, collection pages and homepage.

Shopify website architecture

Ecommerce information architecture is the structure your site takes. How the pages are organized together.


Ecommerce information architecture meaning:

“Information architecture is the process of organizing, structuring and labeling information so that it is both easy to find and use.”

The easiest way to think of a Shopify sites structure is to group page types.

  1. Homepage or domain root
  2. Pages (About, contact etc)
  3. Collection / category pages
  4. Product pages

The most important rule of thumb for information architecture is the KISS principle.

“Keep it stupid simple”

The Three-click rule says:

“A user of a website should be able to find any information with no more than three mouse clicks”

That means we want to limit the depth of our sitemap to three clicks or even two.

For example to visualize site depth we can use breadcrumbs:

Homepage > Collection pages > product pages

This would be the best case scenario for your ecommerce sitemap.

Of course if you have a lot of SKUs you may want to add in sub collection pages:

Homepage > Collection pages > Sub collection pages > product pages

If you want to use a visual tool to plan your sitemap I recommend Writemaps. Simple and free for 1 sitemap so no need to subscribe or pay. Here is an example of the best case scenario created in Writemaps.

If we add in some example URLs for our boxer shorts Shopify store it could look something like this:

Sadly this is not the way the Shopify URL structure works. So let’s recreate the above sitemap as close to perfect as possible with Shopify URL structure.

The downside from an SEO perspective here is that the URLs for collections, products and pages are not ideal.

You see, most of your backlink will point to your homepage, let’s take a random Shopify store as an example, All Birds.

You can see they have 3-4k domain backlinks (great work!)

Around 3k point to the homepage. That’s 75% of backlinks!

The link juice is then passed down from the homepage to the collection pages and then (the sub collection pages if you have them) and then the product pages.

So if you have a very deep website structure the link juice is diluted too much by the time it reaches your product pages and you they won’t rank.

So for Shopify to have the additional layer in their URL structure that defines the page type or taxonomy (pages, collection products) causes the link juice to be diluted as it’s passed to the pages.

Aside from structuring your collections or taxonomies you also need to think about ontology.

If taxonomy is the arrangement of topics into a hierarchical structure. In ecommerce this translates into assigning items to one or more categories.

Then ontology is assigning topics into structures that explain the relationship between pages.

For example related products or related categories.

Ontology is important because in information architecture we are not only thinking about structure we are also considering navigation.

Your Shopify site structure should be beautifully balanced between SEO best practices and usability best practices.

We have to care about findability, discoverability, and usability as well as SEO.

Here are some examples of functionality you should consider for navigation, filtering and search to improve usability as part of your information architecture:

  • Top level categories or mega menu in website header
  • Faceted filtering on collection and search results pages 
  • Sorting on collection and search results pages
  • Breadcrumbs
  • Related products and categories

If you have a large number of SKUs then you need to decide how to trade of between SEO and usability.

Best case for SEO would be a shallow sitemap, this means your filtering and sorting functionality must be well designed otherwise it is too difficult to filter and find the right products.

Best case for usability would be sub categorization into sub collections. At the same time ensuring the sitemap is not too deep as to dilute SEO juice.

And don’t forget about the role of vocabulary and copy in naming your navigation links.

When it comes to naming your collections you can look at past historic site search data in Google Analytics.

Then review the terms people search. The most commonly searched for short tail keywords are good candidates for collection names in your top level category menu.

You also need to cross reference your SEO keyword research for collection pages with this search data to make sure your H1 includes the correct keyword.

For labeling content such as page headers, make sure headers are large enough to be clearly visible when landing on collection pages. This will help reduce bounce rate and increase dwell time. This will in turn improve your SEO rankings and PPC ROAS.

If you are unsure how to group together your collections, for products catalogs that are trickier to segment you can use a methodology from UX called card sorting.

This simply means you have your end user or potential customer sort out all your products into piles or collections as they see them. A user data driven approach to creating and assigning taxonomies.

The fastest way to perform a card sorting user study is to use an online tool.

Once you have decided on your collections and site structure we can jump back into your ‘Chosen keyword’ tab and assign each product to its respective collection.


Shopify on-page SEO

Now we have completed our keyword research and website structure we can work on on-page SEO.

In this step, we’ll create your on-page content and merge it along with your keyword research into your product Google sheet / CSV for import into Shopify.

We’ll learn each element you need to optimize, show you a practical example and give you a template to copy too.

These are the elements we need to optimize for every page in your store.

  • Meta title, description and URL
  • Page headers
  • Product descriptions / page content
  • Images
  • Internal links

Meta title, description and URL

The meta title and description are the content you see in a Google SERP page listing.

You can edit them in Shopify at the bottom of each product page here:

Our job is to take the keyword we chose for each page and write a great title, description and update the URL.

For the title, the best place to include your keyword is at the front of the sentence.

You also want to try to include the category, brand name and modifiers. Mixing and matching or using a template as you go.

You should limit the characters to 50-60 for meta titles, so you may not be able to fit in all those elements.

Let’s create a template and then apply it to our mens black boxer shorts product page example above.

[Keyword] + [Product name] | [Category or Main Keyword] | [Brand]

Becomes:

Men’s Boxer Shorts in Black | Men’s Underwear | Brand (53 Characters)

You could also add emojis into the title to try to get more clicks as I did in this blog post here:

For the description, we are limited to around 150-160 characters.

Let’s create another template and then apply it to our mens black boxer shorts product page example again.

[Keyword] + [Long tail keyword] + [Product feature] + [Modifier]

Becomes:

Men’s short-cut black boxers. Made in soft and breathable cotton poplin. Perfect underwear for the gym, poolside or bedroom. Free shipping, 14-day returns.

Other examples of modifiers could be ‘Free returns’, ‘Deal’, ‘Sale’.

You can also experiment with adding in brackets, numbers and positive phrases to increase click-through rate from SERPs.

More on that in the advanced SEO chapter.

For the URL you simply want to use the keyword, and the keyword only. Shorter URLs perform better.


Page headers

The page headers are the H1 and H2s on the page that are wrapped in those respective HTML tags.

This is a H1 HTML tag:

<H1>Men’s Boxer Shorts in Black | Men’s Underwear | Brand</H1>

Here is where your H1 should sit within the page layout or content hierarchy.


You can edit it in Shopify here:

Best case scenario is that you have more or less the same page title as meta title. Just remove the additional sections like brand name.

Here’s the template:

[Keyword] + [Product name] | [Category or Main Keyword] | [Brand]

Becomes: 

Men’s Boxer Shorts in Black

For other page headers you need at least one H2 with the keyword present again.

On the cupandleaf.com site they have a nice ‘why’ section which naturally allows them to include the keyword on the page again in a H2 tag.


Product description

The product page description is a lot of work if done right.

Most first position rankings in Google have nearly 2000 words of content!

I’d shoot for at least 800 words for each product page.

If you have loads of SKUs, just pick the top 10-25 products and write for those.

You want to include your keyword at least 3 times.

Also include LSI or latent semantic indexing keywords, that’s just a fancy way of saying related keywords.

Here is a hit list of things to include in your product page content:

  • Value proposition
    • Why to buy this product
    • What it is / or does
    • How its unique
  • Description of product
  • Include the keyword at least 3 times
  • LSI Keywords
  • Customer reviews
  • Customer success stories or user generated content
  • Related products and categories
  • How to use the product sections
  • Ingredients / sourcing / product quality information
  • Guarantee or returns policy
  • FAQ (although ideally these questions will be answered in your copy)

Images

Next you need to optimize your images.

Make sure the first and main product image filename is the keyword.

Eg: mens-boxer-shorts-black.jpg

And the alt text is the keyword too, in Shopify you can edit that here:


Internal links

Internal links already exist within your breadcrumbs, navigation and sidebar filtering in ecommerce. But it is important to create internal links from your best content to your most important product pages.

For example, if you wrote a blog post on the ‘Best boxer briefs 2019’ and it gained a lot of backlinks, the first backlink on that blog page should point to your boxer brief collection or product page.

Passing the link juice over to those money pages you want to rank.


Compile your product upload sheet

Now that you know practically how to undertake on-page SEO optimization to a basic level you should create this content for all your pages.

Then fill in the ‘URL’, ‘SEO Title’ and ‘SEO Description’ columns on your ‘Chosen keywords’ sheet.

You can of course manually add in all the date via the Shopify admin, but the sheet method is normally faster unless you have less than 10 products.

Once complete, copy and paste those columns back into your Shopify product export sheet.

You’ll be overwriting your old URLs or Handles with new ones that match your new page keyword.

Which means you’ll also need to create some 301 redirects in Shopify.

This will send any traffic that goes to the old pages from backlinks or Google search results that are not updated and forward it to the next page URL.

We recommend to use Easy Redirects by ESC Shopify app as it’s free and easy to use.

You simply need a sheet with the old URLs in one column and the new URLs in the next column. In the third column you can put 301 but it is not required.

Then click ‘File’ > ‘Download’ > ‘CSV’.

You can then use the ‘Bulk upload’ feature to then import the CSV into Shopify.

Now upload the product sheet, download it from Google sheets and import it to Shopify. It’s best to delete all the products from the store first before you upload. Because your products now have new URLs so they won’t overwrite the old products.

Check the ‘Replace any products’ option too.


That wraps us the beginning of this Shopify SEO guide.

If you want to get the rest of the chapters sign up here and we’ll email you the next chapter right away.