How to Take Good Product Photos (2026 Guide)
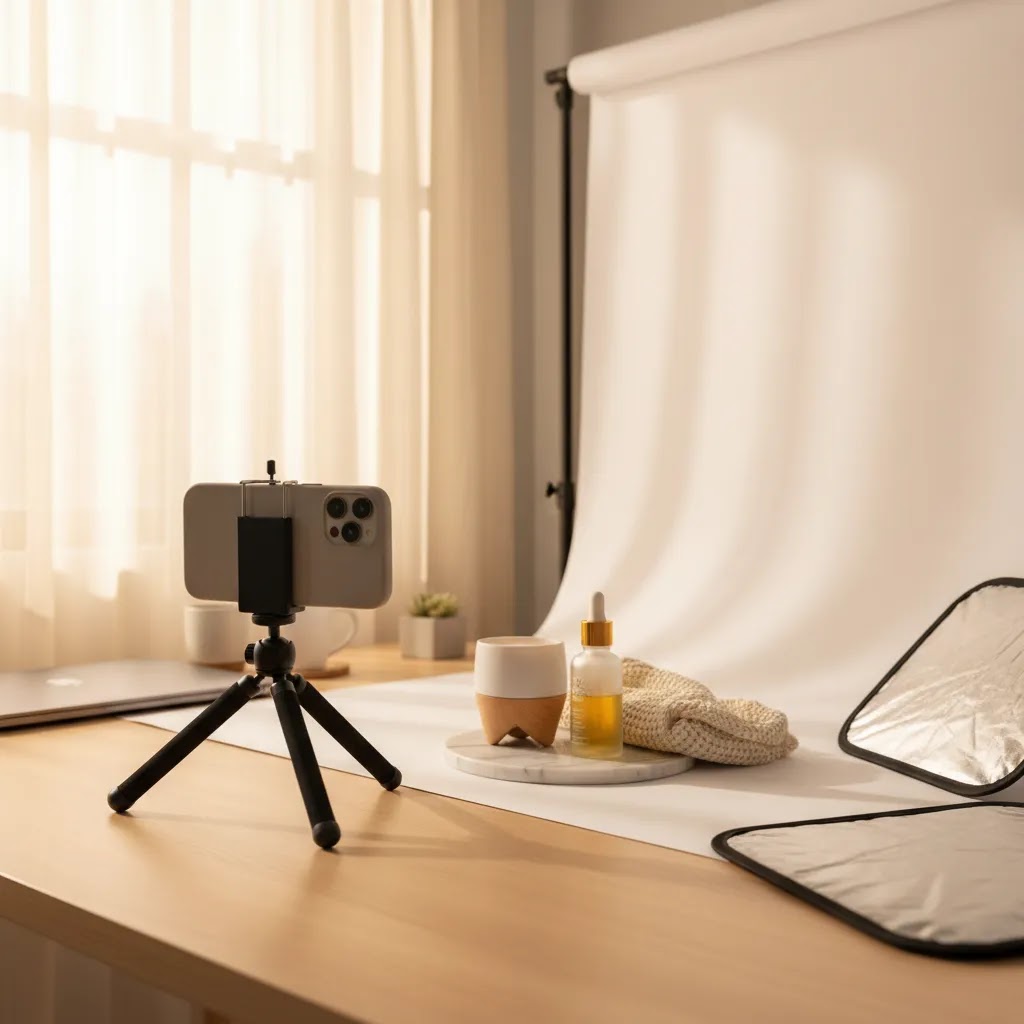
If you sell online, your product photos do a big part of the selling before your copy ever gets read. The good news is that you do not need a DSLR, studio rental, or agency shoot to create images that look clean, trustworthy, and conversion-focused. In many cases, your phone is enough if you control light, composition, consistency, and editing. This guide shows you how to take good product photos with practical steps you can use at home, whether you run a Shopify store, sell on Etsy, or need better images for marketplaces and ads. If you want to understand the full home setup first, our guide to a product photography studio is a useful companion before you start shooting.
Contents
What good product photos actually need to do
Good product photos are not just about looking nice. They need to reduce uncertainty. A shopper should be able to understand size, texture, color, finish, shape, and quality in a few seconds. That matters on Shopify product pages, collection pages, Google Shopping listings, paid social ads, and marketplace thumbnails.
For most store owners, the target is consistency before perfection. If every image in your catalog has similar lighting, framing, and editing, your store looks more trustworthy. That can matter more than chasing a highly stylized look on a small budget.
Your phone can absolutely handle this if you focus on a repeatable process: steady lighting, a clean background, correct focus, multiple angles, and light editing. If you want to blend phone photography with newer workflows, AI can help with retouching and scene generation, but it works best when your original photo is solid. You can see where that fits in our coverage of ai photoshoot workflows and broader ai product photography options.
How to set up your phone for better results
The fastest way to improve your images is not buying more gear. It is setting up your phone correctly and removing variables that make photos inconsistent.
Start with the rear camera, not the selfie camera. The rear lens usually gives you better image quality and detail. Clean the lens first. A fingerprint-smudged lens can ruin sharpness and contrast before you even tap the shutter.
Turn on grid lines in your camera settings. This helps you keep products level and centered, which matters if you are shooting a catalog with multiple SKUs. Use the same distance from the product each time so your product pages look uniform.
Avoid digital zoom. If you need a tighter crop, move the phone closer or crop later. Digital zoom often reduces detail, which is especially noticeable on fabrics, jewelry, beauty packaging, and handmade products.
Tap to focus on the product, then adjust exposure manually if your phone allows it. Most phones let you slide brightness up or down after focusing. Slightly reducing exposure often preserves highlights on white packaging or reflective surfaces.
If possible, use a tripod or phone stand. Even a small desktop mount helps. Stability improves sharpness and lets you maintain the same framing from shot to shot. This is especially helpful for lifestyle images, flat lays, and clothing photography where small angle changes can make a catalog feel messy.
How to take product photos with your phone (iPhone and Android checklist)
Here is the thing: most phone product photos fail for boring reasons. Smudged lenses, inconsistent settings, and software modes that look nice on faces but make products look wrong. If you want ecommerce consistency, a short checklist before you shoot saves a lot of reshoots later.
A quick “before you shoot” checklist (phone-specific)
Start with these every time, especially if you are photographing multiple SKUs for a Shopify launch or restock.
iPhone vs Android tips that impact catalog consistency
Both iPhone and Android can produce strong product photos. The difference is how aggressively each phone processes the image. That processing can change color and contrast between shots if you are not careful.
Practical file handling for Shopify (cropping, exports, naming)
From a practical standpoint, you want images that look consistent on your Shopify product detail page, your collection grid, and on mobile.
A practical step-by-step shooting process
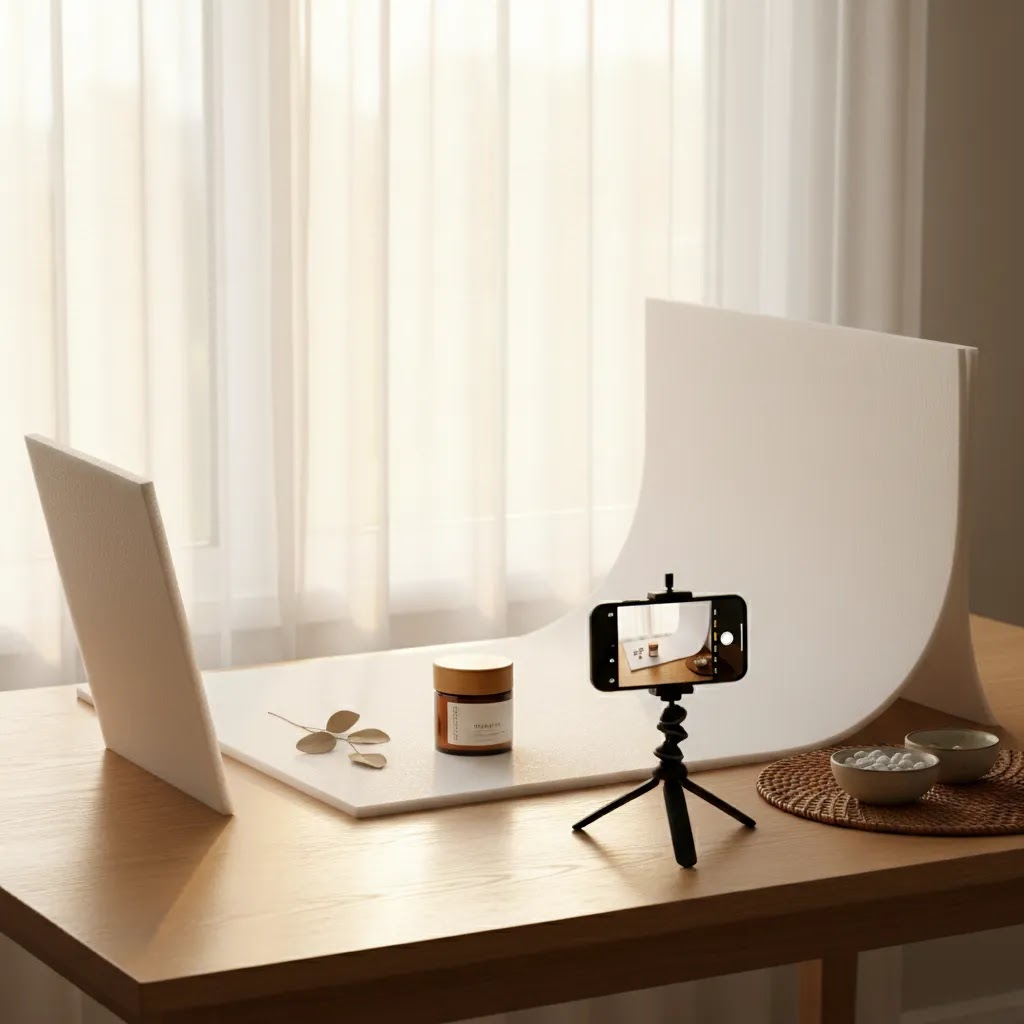
1. Choose one light source and control it. Natural window light works well for many products. Place your setup near a window with indirect light, then use a white foam board or poster board on the opposite side to bounce light back and soften shadows. Do not mix window light with warm household bulbs unless you want extra color correction work later.
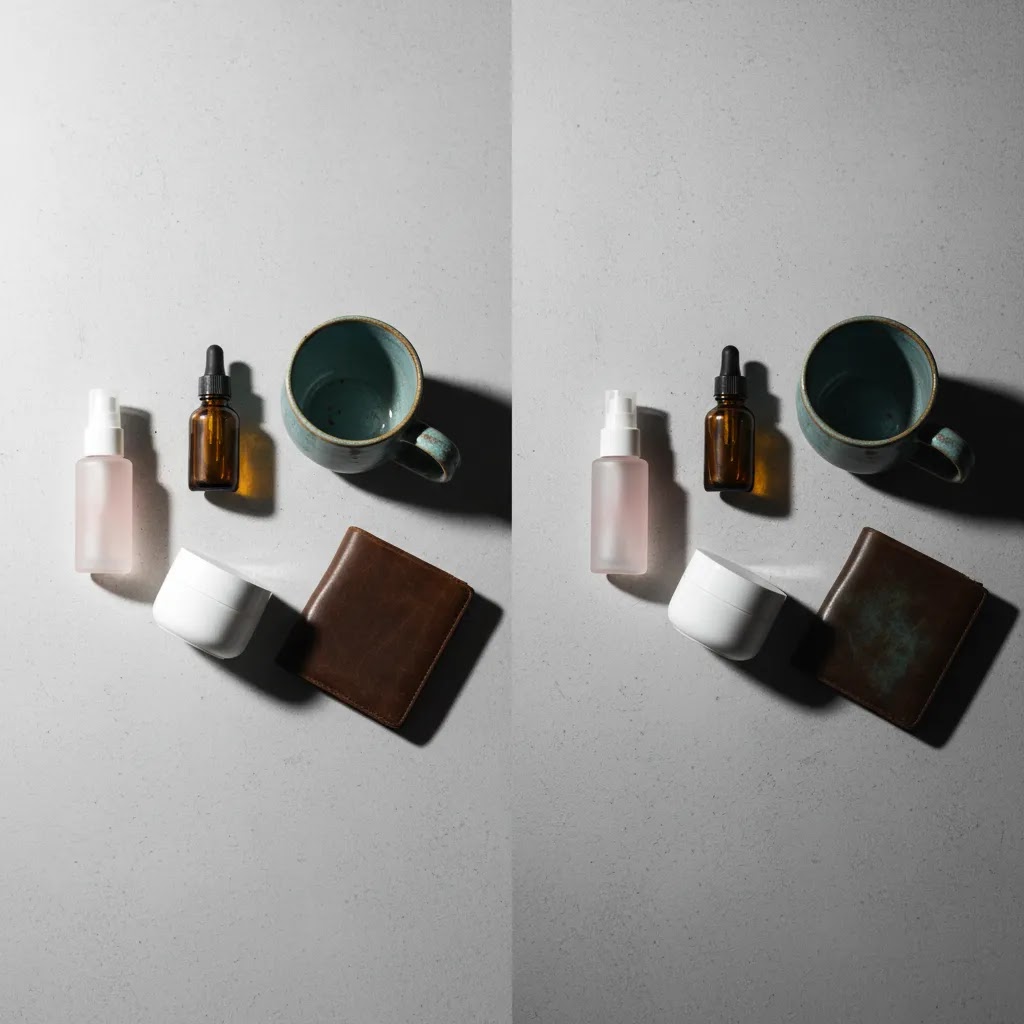
2. Keep the background simple. For standard ecommerce images, white, off-white, or light gray backgrounds are usually the safest choice. They keep the product clear and work well across marketplaces. If you need inspiration for category-level image standards, explore AcquireConvert's Catalog Photography resources.
3. Style only what supports the sale. Props should add context, not distraction. A skincare bottle may benefit from a clean bathroom-style setup. A phone case usually does not need five decorative objects around it. If you sell cosmetics, visual experimentation can overlap with tools such as an ai makeup generator, but your core product image still needs clarity first.
4. Shoot a consistent angle set. At minimum, capture a front view, side view, back view, close-up detail, scale shot, and in-use image if relevant. For clothing, add hanging shots, folded shots, fabric close-ups, and fit-context images where possible. This is how you take better product photos that answer buyer objections before they ask.
5. Leave space around the product. Do not crop too tightly in-camera. Extra space gives you flexibility for different storefront formats, ads, and marketplace image requirements.
6. Shoot more than you think you need. Tiny shifts in glare, wrinkles, and focus are easier to spot on a larger screen later. Give yourself options instead of trying to nail everything in one frame.
How to take good product photos at home (simple DIY setup examples)
What many store owners overlook is that “at home” does not mean “random.” You want a setup you can repeat. The more repeatable it is, the faster you can shoot new SKUs, and the more consistent your Shopify catalog looks.
Setup 1: Window-light tabletop setup (the fastest reliable option)
This is the simplest setup that still produces clean results for a lot of ecommerce categories.
This tends to work best for packaged goods, candles, skincare, ceramics, and anything matte or semi-matte.
Setup 2: DIY light tent or light box (best for small reflective products)
If you sell items that reflect everything around them, like glossy packaging, jewelry, metal accessories, or small glass bottles, a light tent can make your life much easier.
The reality is that a light tent can make products look “clean,” but you still need to pay attention to dust, fingerprints, and label alignment. Shiny products show everything.
Setup 3: Continuous lights with diffusion (best for repeatability)
If you shoot often, or you cannot rely on consistent window light, continuous lights can be a good upgrade. You do not need a complex studio, you need predictable light.
This setup is usually a good fit for apparel flat lays, product bundles, and any brand that wants to keep the same look year-round.
Common at-home constraints and how to handle them
Most home shoots run into the same problems. Fixing them is usually about control, not equipment.
Mini-examples by category (so you can avoid common mistakes)
Consider this when you are building your own shot process.

How to edit without making photos look fake
Editing matters because your phone image is usually the starting point, not the final asset. The goal is a clean, accurate product photo that still represents the item honestly.
Start with exposure, white balance, contrast, and crop. Correct color temperature first so whites look neutral. Then make small exposure adjustments so the product feels bright but not washed out. Be careful with saturation. Over-editing can create return issues if the delivered item looks different from the product page.
Background cleanup is often the biggest upgrade for ecommerce teams shooting at home. If your original setup is strong, tools can save time on repetitive edits. For example, ProductAI offers an AI Background Generator, a Free White Background Generator, and an Increase Image Resolution tool. These can help when you need cleaner catalog images, white-background variations, or sharper exports for storefront use. Product availability and terms should be checked directly with the provider.
If you need more hands-on editing, ProductAI also lists a Magic Photo Editor and a Background Swap Editor. These may suit merchants who want to test alternate scenes without re-shooting every SKU. If you are comparing editing-first tools, our piece on photoroom is a practical next read.
Pros and Cons
Strengths
Considerations
Who this approach is for
This workflow is a strong fit for independent ecommerce store owners, Etsy sellers, Shopify merchants, and small brand teams that need better images without a full production budget. It works especially well for beauty, accessories, home goods, packaged products, and smaller apparel items where lighting can be controlled at home.
If you are validating demand, launching a new collection, improving weak product page imagery, or trying to increase catalog consistency, your phone is often enough to get started. If you sell luxury products, highly reflective items, or need advanced campaign creative, a studio workflow may still be the better long-term choice.
AcquireConvert recommendation
For most merchants, the right next step is not buying more equipment. It is building a repeatable photo system you can use every time a new SKU arrives. That means one shooting location, one lighting setup, one angle checklist, and one editing workflow. This is the kind of practical execution AcquireConvert focuses on for store owners who need results they can actually implement.
Giles Thomas brings a useful perspective here as a Shopify Partner and Google Expert. That matters because product photos are not just a design decision. They affect click-through rate, on-page confidence, merchandising, and how your products appear across sales channels. If you want to go deeper, start with our Product Photography Fundamentals section, then compare newer workflows around AI-assisted editing and scene generation through our catalog photography guides.
How to choose the right photo workflow
If you are deciding whether to keep shooting with your phone, add editing tools, or invest in a larger setup, use these criteria.
1. How many products do you shoot each month?
If you only add a handful of new SKUs each month, a phone-based setup is often practical. If you add dozens every week, consistency and time management become bigger concerns. In that case, templates, tripods, fixed lighting, and editing tools matter more.
2. What kind of products do you sell?
Soft goods, matte packaging, crafts, and many beauty products are usually manageable at home. Glass, metal, glossy surfaces, and transparent products are less forgiving. Those categories often need more advanced control over reflections and highlights.
3. Where will the images be used?
Marketplace thumbnails, Shopify collection pages, product detail pages, email campaigns, and paid ads all have different needs. White background images are often best for core product listings. Lifestyle shots usually help on product pages and social placements. Plan your shot list around the channels that actually drive sales.
4. How important is speed versus originality?
If speed matters most, editing tools and AI-assisted background workflows may help you publish faster. If brand distinctiveness matters more, you may want a custom physical setup and original lifestyle scenes. Both can work, but choose deliberately.
5. Can you repeat the process consistently?
Consistency is the real standard. A shopper should move from one product page to the next without feeling like every item came from a different store. Same light, same crop style, same editing rules, and same image order usually outperform random one-off shots.
If you are ready to refine your workflow, start simple. Test one hero image style, one white-background standard, and one detail shot format. Review your product pages on mobile before finalizing, since many buyers will see your images there first.
Platform and channel requirements (website, Instagram, marketplaces)
Now, when it comes to using your photos across channels, the same image does not always work everywhere. The goal is not to create a totally different photoshoot per platform. It is to plan your shot list and your crops so you can reuse assets without your product getting cut off, looking inconsistent, or losing detail.
How channel use changes your shot list and crops
Your Shopify store usually needs a clean, legible hero image first. Then it needs support images that answer objections: close-ups, scale, and context.
Collection thumbnails and grids reward consistency. If one product is shot close and another is shot far away, your collection page looks messy. That can make the whole brand feel less considered, even if each single photo is “good.”
Instagram and paid social formats often favor taller crops because they take up more screen space on mobile. That is why leaving extra negative space around the product during the shoot matters. You can crop for 1:1, 4:5, or other placements later without reshooting.
Marketplaces often have stricter expectations for the first image. They typically reward clear backgrounds, obvious product framing, and minimal distractions. Lifestyle images can still help, but they usually belong later in the image set, not as the main thumbnail.
Basic image consistency standards worth following
Even if you are shooting at home, you can set simple standards that make your store look more premium.
Editing priorities by channel
Think of editing as prioritizing the job the image needs to do.
Frequently Asked Questions
Can I really take professional-looking product photos with just my phone?
Yes, in many cases you can. The biggest factors are lighting, stability, background, and editing discipline, not just camera hardware. A modern phone can produce strong ecommerce images if you use indirect light, keep framing consistent, and avoid heavy filters that distort the product.
What is the best lighting for product photos at home?
Indirect window light is often the best starting point because it is soft and flattering. Place the setup near a window and use a white reflector on the opposite side to soften shadows. If you need repeatability across many shoots, a simple continuous lighting setup may be more reliable.
Should product photos always have a white background?
Not always, but white backgrounds are usually the safest choice for primary product images. They keep attention on the product and work well for marketplaces and clean Shopify layouts. Lifestyle and contextual photos can then support the sale by showing scale, use, or brand personality.
How many photos should I upload for each product?
Most stores benefit from at least five to seven useful images per product. Include a hero shot, alternate angles, close-up details, scale reference, and an in-use or styled image if relevant. The right number depends on product complexity and how much visual explanation buyers need.
How do I take good clothing product photos with a phone?
Use even lighting, remove wrinkles first, and decide on a consistent format such as flat lay, hanger, mannequin, or model shot. Show the front, back, fabric texture, key details, and fit context where possible. Clothing buyers often need more visual information than hard goods buyers.
What phone camera settings should I use?
Use the rear camera, turn on grid lines, tap to focus on the product, and adjust exposure manually if your phone allows it. Avoid digital zoom and heavy portrait effects. If available, use the standard lens rather than extreme wide-angle views that can distort product shape.
Do I need editing software after taking the photo?
Usually yes, at least for small adjustments. Basic edits like exposure correction, white balance, crop, dust removal, and background cleanup can make a noticeable difference. The goal is not to change the product but to present it clearly and accurately for shoppers.
When should I use AI tools for product photography?
AI tools can be useful after you have a solid original photo. They may help with background cleanup, white background creation, resolution enhancement, or testing alternate scenes. They are most effective when used to speed up repetitive work, not to cover for poor lighting or weak source images.
Are phone photos good enough for Shopify product pages?
For many merchants, yes. If the photos are sharp, color-accurate, well-lit, and consistent, they can work very well on Shopify product pages. The main question is whether the images reduce uncertainty and help shoppers understand what they are buying.
How do I click good product photos?
Use one soft light source, keep the background simple, and stabilize your phone. Clean the lens, use the rear camera, and avoid Portrait mode. Tap to focus on the product, lower exposure slightly if highlights are blowing out, and use a timer so you do not shake the shot.
How do I make my product photos look professional?
Professional-looking product photos usually come down to consistency and control. Use the same lighting setup each time, shoot the same angle set for each SKU, and keep crops and background style consistent across the catalog. Edit for accurate color, clean up dust and small distractions, and avoid filters that change what the product really looks like.
How to take excellent product photos?
Think of excellent product photos as photos that answer questions quickly. Shoot a clean hero image, then add close-ups that show texture and key details, a scale reference, and an in-use shot if it helps explain the product. Use stable lighting, keep the product sharp, and check images on mobile before you publish to your store.
What is the 20 60 20 rule in photography?
The 20 60 20 rule is a simple way some photographers think about image mix and focus. In ecommerce terms, it can be a useful guideline: around 60% of your image set should be clear, standard product coverage (hero, angles, details), around 20% can be lifestyle or in-use context, and around 20% can be creative shots that support brand and marketing. It is not a strict rule, but it helps you avoid a product page that is all “pretty” shots with not enough clarity.
Key Takeaways
Conclusion
If you have been putting off a product reshoot because you thought you needed better equipment, start with the phone you already have and improve the process around it. Better lighting, steadier framing, cleaner backgrounds, and more disciplined editing can go a long way toward creating good product photos that support trust and sales. For ecommerce operators, that is usually the real goal. If you want the next step, explore AcquireConvert's catalog photography resources, compare AI-assisted workflows, and use Giles Thomas's practitioner-led guidance to build a product image system that fits your store, your team, and your growth stage.
This content is editorial and provided for educational purposes. It is not a paid endorsement unless explicitly stated otherwise. Tool availability, features, and pricing are subject to change, so please verify current details directly with the provider. Any results from product photography improvements will vary by store, product type, traffic quality, and implementation.

Hi, I'm Giles Thomas.
Founder of AcquireConvert, the place where ecommerce entrepreneurs & marketers go to learn growth. I'm also the founder of Shopify agency Whole Design Studios.