Product Photography Studio Guide for Ecommerce (2026)
If you run an ecommerce store, your product photography studio setup has a direct effect on how shoppers judge quality, trust, and fit before they ever read your copy. The challenge is that “studio” can mean very different things. For one merchant, it is a spare room with lights, a sweep, and a tripod. For another, it is an outsourced professional product photography studio. For others, it now includes AI-assisted workflows for backgrounds, retouching, and catalog production. This guide helps you evaluate those options without hype. You will see what matters for conversion-focused ecommerce use, where DIY works well, where hiring a product photographer makes more sense, and where AI can save production time without lowering your visual standards.
Contents
What a product photography studio needs to do
A product photography studio for ecommerce is not just a place to take attractive pictures. Its job is to create a repeatable system for product pages, collection pages, ads, marketplaces, and retention campaigns. If your images look inconsistent from SKU to SKU, shoppers notice. If your lighting shifts, white backgrounds are muddy, or product scale is unclear, your conversion rate may suffer even if your traffic is strong.
For most online stores, a useful studio workflow should produce three image types consistently:
The best setup depends on your catalog size, margin structure, launch frequency, and how visually demanding your niche is. Apparel, beauty, jewelry, and home decor usually need more nuanced styling than commodity accessories. If you are building a scalable image process, the broader Catalog Photography category is a useful place to compare related workflows and tools.
Here’s the thing: “repeatable” needs to mean repeatable across every place you sell, not just your Shopify product page. A studio process is doing its job when you can publish a consistent image set to Shopify, reuse it in email and paid social without awkward crops, and still meet marketplace requirements without scrambling for a reshoot.
Your three studio options
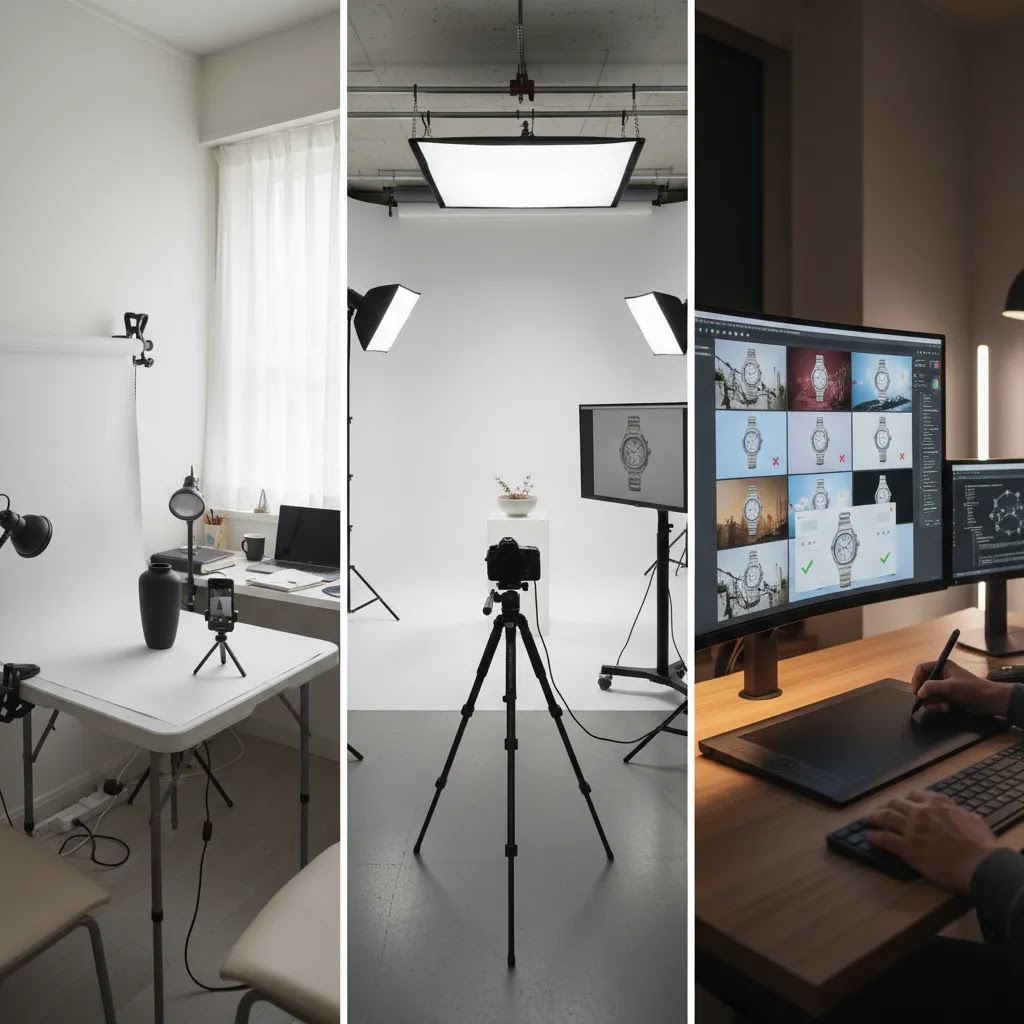
Most ecommerce brands end up choosing between three models.
1. DIY product photography studio
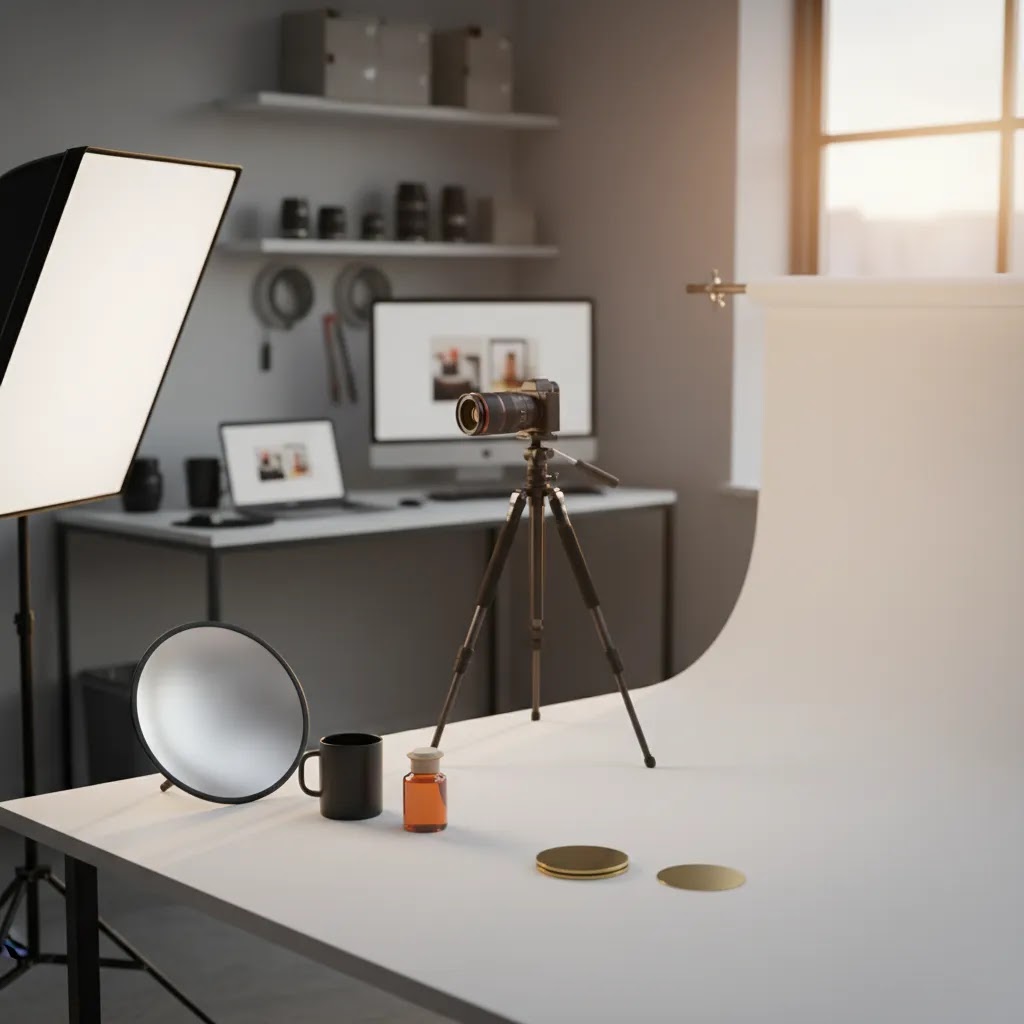
This is usually the best starting point for merchants with a manageable SKU count and standardized products. A DIY product photography studio setup often includes a table, sweep backdrop, continuous lights or strobes, tripod, and basic editing workflow. It gives you control and can work especially well for replenishable catalogs where products change slowly.
2. Professional product photography studio
This route is often best when your products need high-end styling, on-model work, highly accurate color, or large-scale catalog output. A professional product photography studio may also be the right choice when internal time costs are higher than outsourcing. If you are comparing software-assisted cleanup with traditional production, our page on photoroom can help frame where automated editing fits alongside studio work.
How to work with a professional product photography studio (briefing, shot list, and QC checklist)
Hiring a studio is not just a creative decision. It is an operations decision. The way this works in practice is simple: the clearer your brief and deliverables, the more consistent your catalog becomes, and the fewer painful revision loops you end up managing.
What many store owners overlook is that studios are typically set up to produce a consistent “style,” but not automatically your style. You have to give them the rules.
Before the shoot, send a package of inputs that makes consistency possible:
A lightweight shot list template is usually enough to prevent missed deliverables. For most SKUs, think in terms of:
Now, when it comes to quality control, build a basic revision workflow into the project from day one. Agree on what “accurate” means for color, and how it will be checked. If you sell color-sensitive products, you may want to provide a physical reference sample and confirm how the studio monitors color during retouching. Also define file delivery specs and organization:
Consider this: the biggest “hidden cost” with outsourcing is not the shoot itself, it is inconsistent output that forces you to patch images everywhere you sell. A good brief and QC process prevents that.
3. AI-assisted product photography studio
This model combines real product photography with AI-based editing, compositing, and background generation. It can be practical for stores that need faster turnaround, more testing assets, or visual variation for campaigns. It is most effective when used to support a real ecommerce image workflow rather than replace all photography. For a deeper look at that trade-off, see our guides to ai photoshoot workflows and ai product photography.

Key features to evaluate
If you are choosing a product photography studio setup for ecommerce, assess it like an operator, not like a hobbyist. These are the features that usually matter most.
Consistency across the catalog
Your hero images need uniform framing, lighting, crop ratios, and color treatment. This matters more than having one stunning image and twenty average ones. Consistency improves the shopping experience on Shopify collection pages, search results, and retargeting ads.
Lighting control
Product photography studio lighting determines how professional your catalog feels. Look for a setup that lets you repeat the same result every time. Soft light works for most products, but reflective items need more careful flagging and diffusion. If you are still building fundamentals, the Product Photography Fundamentals section is a strong next step.
Background flexibility
White background imagery is still essential for many product pages and marketplaces, but modern ecommerce usually needs more than that. You may need transparent backgrounds, seasonal color variants, or campaign-style scenes. AI tools can help here when the source image is strong.
From the current product data available, useful options include:
Editing speed
Most merchants underestimate post-production time. A “studio” that saves ten minutes on every SKU may be more valuable than one that produces marginally prettier shots. Fast cleanup, background replacement, and retouching matter when you are launching new products weekly.
Current tool data also shows practical editing utilities such as Magic Photo Editor, Increase Image Resolution, and Remove Text From Images. These are particularly useful when you need channel-specific variants for PDPs, social ads, or marketplace listings.
Catalog scalability
If you have 20 SKUs, almost any reasonable setup can work. If you have 2,000, your process needs to be fast, documented, and repeatable. This is where template-based shooting, fixed lighting positions, standardized camera settings, and batch editing start to matter a lot more than artistry alone.
Product photography studio pricing, budgeting, and ROI math
Most store owners are forced to make a studio decision before they have clean cost visibility. That is when you end up with surprises, like a “reasonable” shoot quote that turns expensive once you add shipping, styling, and revision cycles.
There is no single market rate, but there are common pricing models you will see:
Hidden costs are where most budgets break. Watch for these items that are easy to underestimate:
From a practical standpoint, a simple way to estimate what you are really paying is to calculate cost per usable image and cost per SKU.
Think of it this way: if a SKU “needs” eight images but you only end up using five because the rest do not match the brief, your effective cost per usable image goes up fast. The same thing happens if you need to re-shoot every time you add a new sales channel or change your Shopify theme crops.
The reality is that cheaper can become more expensive when image quality creates operational drag. Color mismatch can lead to avoidable support tickets and returns. Inconsistent catalog photography can make collection pages look unpolished. Slow production can delay launches, which is a real cost even if it does not show up on an invoice. You do not need to chase perfection, but you do need a workflow that keeps your catalog consistent and current.
Pros and Cons
Strengths
Considerations
Who each option is for
DIY studio is usually best for early-stage to growth-stage stores with simple products, frequent launches, and an owner or team member willing to build a repeatable system.
Professional studio is often right for premium brands, larger catalogs, or categories where styling and color accuracy are central to purchase decisions, such as beauty, jewelry, or apparel.
AI-assisted studio workflows fit stores that already have decent source photography and want to accelerate editing, create more campaign assets, or test visual concepts without a full production cycle.
If you sell visually sensitive products such as cosmetics, cross-category AI workflows can also be relevant. For example, beauty merchants may want to review related content on the ai makeup generator side of product imagery before rolling out broader creative automation.
AcquireConvert recommendation
For most ecommerce store owners, the best choice is not “DIY versus professional versus AI.” It is a staged workflow that uses each where it adds the most value. Start with a controlled base setup for clean catalog photography. Outsource the shots that genuinely require advanced styling or specialized lighting. Then use AI-assisted editing to create variants, clean up backgrounds, and speed up asset production.
That operator-first approach reflects how Giles Thomas typically frames ecommerce decisions as a Shopify Partner and Google Expert: pick the process that supports merchandising speed, clear product communication, and scalable acquisition, rather than chasing visual novelty for its own sake. If you are comparing the wider stack around product presentation, our guide to ecommerce ecommerce tools is a good next step. It helps connect image production decisions with the rest of your store growth workflow.
How to choose the right setup
Use these five criteria to decide what kind of product photography studio is right for your store.
1. Start with your product type
Flat, matte, consistently shaped products are much easier to shoot in-house. Reflective, translucent, textured, or wearable products usually push you closer to a professional setup. If your returns are often caused by color mismatch or material confusion, image quality should get more weight in your decision.
2. Look at launch volume, not just current catalog size
A small store with weekly drops may need a faster process than a large store with a stable catalog. If your team is constantly waiting on fresh assets, your studio choice needs to optimize throughput. This is one reason many merchants pair a simple in-house setup with AI-based scene generation and cleanup tools.
3. Price your time honestly
The cheapest-looking route on paper is not always the best operational choice. If you or your team are spending hours every week on shooting, clipping, cleanup, and exports, that cost should be part of your decision. A professional product photography studio may be more efficient if you sell high-margin products or need polished launch assets.
4. Separate catalog needs from campaign needs
Your PDP hero image has a different job than an Instagram ad or email banner. A practical setup often uses one workflow for clean product page assets and another for lifestyle or promotional creative. Tools like Creator Studio and Place in Hands, both listed in the current product data, can help support campaign-style variations after the base product image is captured.
5. Think in terms of repeatability
The right product photography studio setup is the one your team can actually repeat next month. That means documented camera positions, saved lighting diagrams, standard export specs, and clear rules for editing. If you are tempted by a 360 product photography studio, ask whether your shoppers truly need spin views to make buying decisions or whether more detail shots would do more for the same effort.
For Shopify merchants specifically, the best image workflow is usually the one that keeps product launches moving while maintaining trust on collection pages and product templates. Your studio decision should support merchandising velocity as much as visual quality.

Frequently Asked Questions
What is a product photography studio for ecommerce?
It is a repeatable setup, whether in-house, outsourced, or hybrid, for producing product images used on product pages, collection pages, ads, marketplaces, and email campaigns. The key is consistency. A studio should help you capture and edit images at a standard that supports trust and clear buying decisions, not just produce one-off attractive photos.
What equipment do I need for a DIY product photography studio?
Most stores can start with a camera or recent smartphone, tripod, sweep backdrop, two lights, diffusion, reflectors, and basic editing software. The exact product photography studio equipment depends on your products. Reflective or highly textured items often need more control. Start simple, then upgrade only after your workflow proves repeatable.
Is a professional product photography studio worth it?
It often is for premium products, difficult lighting situations, or catalogs where styling and color accuracy affect returns and conversion. It may also be worth it if your team lacks time to produce assets internally. The best test is whether better images support clearer product understanding and faster merchandising without slowing launches too much.
Can AI replace a product photography studio?
No, not fully for most ecommerce brands. AI is usually strongest when supporting a real photo workflow through cleanup, scene generation, resizing, or background changes. If the source image is poor, AI output often shows it. Many merchants get better results by using AI to extend and speed up a studio process rather than replace capture entirely.
What is the best lighting for product photography studio work?
Soft, controlled, repeatable lighting is usually best. For catalog images, the goal is accurate color, shape, and surface detail. Continuous softboxes are practical for many DIY setups, while more advanced studios may use strobes for tighter control. The right answer depends on whether your products are matte, reflective, transparent, or wearable.
Do I need a 360 product photography studio?
Only if shoppers benefit from seeing the full object in motion or from multiple rotational angles. For some products, such as footwear, collectibles, or high-consideration accessories, 360 views may help. For many stores, though, well-shot front, side, detail, and scale images deliver more value with less cost and production complexity.
How do I choose between DIY and outsourced photography?
Look at product complexity, internal time, launch speed, and quality requirements. DIY works well when products are standardized and your team can follow a repeatable setup. Outsourcing is often better when products are visually demanding or when delays from internal production are costing you momentum. A hybrid model is often the most practical answer.
Does location matter if I want a product photography studio in the USA or UK?
Sometimes. If you need frequent reshoots, physical styling collaboration, or quick sample turnaround, local access can help. If your process is well documented and products ship easily, a remote studio can still work well. Merchants searching for a product photography studio in USA or product photography studio uk should weigh logistics as heavily as creative quality.
How much should I pay a photographer for a product shoot?
It depends on how they price the work and what you need delivered. Some photographers charge day rates, some charge per image, and some charge per SKU or per set. Your best starting point is to define your deliverables clearly, such as how many final images per SKU, what backgrounds, what crops, what retouching level, and what usage you need across Shopify, ads, and marketplaces. Once that scope is clear, quotes become comparable.
How much does a product photo shoot cost?
Costs vary based on complexity, styling, and volume. A simple catalog shoot for a small set of standardized products is usually priced differently than a styled shoot with models, props, or advanced retouching. Shipping products to a studio, paying for revisions, and requesting multiple aspect ratios for different channels can also change the real total. If you want a practical budgeting view, estimate cost per usable image by including shooting, editing, and management time, not just the initial quote.
What is the 20 60 20 rule in photography?
People use “20 60 20” in different ways, but in product photography it is often a simple reminder that results are not just about gear. A common interpretation is that a smaller portion comes from the camera itself, while most of the outcome comes from lighting control, setup consistency, and post-production. For ecommerce, that maps well to reality: consistent lighting, repeatable framing, and disciplined editing standards usually matter more than chasing a new camera body.
How can I get into product photography?
Start by building a repeatable catalog workflow before you chase creative variety. Pick one product type, shoot it on a simple background, and practice consistent lighting and framing. Then build a basic editing process and export spec that matches real ecommerce needs, like Shopify product pages and collection grids. If you want to do this commercially, practice delivering a full image set per SKU with consistent naming and file delivery, because that operational reliability is what brands tend to pay for.
What should Shopify store owners prioritize first?
Prioritize clean hero images, consistent framing, accurate color, and enough detail shots to reduce buying hesitation. On Shopify, shoppers often move quickly between collection pages and PDPs, so image consistency matters a lot. Build the image system that supports those buying paths first, then layer in lifestyle and campaign creative after that foundation is solid.
Key Takeaways
Conclusion
The right product photography studio is the one that helps you publish reliable, conversion-supporting images without creating a bottleneck for your store. For many merchants, that means a hybrid approach: controlled in-house capture for core catalog needs, selective outsourcing for higher-end creative, and AI-assisted editing for speed and flexibility. That balance is usually more practical than committing fully to one method.
If you want to keep evaluating your options, explore AcquireConvert’s specialist resources on catalog production, AI-supported imagery, and ecommerce growth. Giles Thomas brings a useful operator perspective as a Shopify Partner and Google Expert, which is exactly what you want when visual decisions affect product pages, ads, and merchandising performance at the same time.
This article is editorial content created for educational purposes and is not a paid endorsement unless explicitly stated otherwise. Pricing, product features, and tool availability are subject to change, so verify current details directly with the provider before making a decision. Any performance outcomes discussed are illustrative only and are not guaranteed.

Hi, I'm Giles Thomas.
Founder of AcquireConvert, the place where ecommerce entrepreneurs & marketers go to learn growth. I'm also the founder of Shopify agency Whole Design Studios.