How to Take the Perfect Product Photo (2026)
A strong product photo can shape how shoppers judge quality, trust, and value before they read a single line of copy. If you run a Shopify store, that matters because your product image often does the selling work that an in-store experience would normally handle. The good news is that you do not need a full agency setup to create clean, persuasive visuals. You need a repeatable process, the right lighting choices, and a practical editing workflow. If you are still deciding whether to build a DIY setup or invest in a product photography studio approach, this guide will help you make that call. I will walk you through the steps experienced ecommerce operators use to get consistent product shots that look professional and support conversion.
Contents
Why Product Photos Matter for Ecommerce
Your product photo is not just a creative asset. It is part of your conversion funnel. On collection pages, it helps shoppers decide what deserves a click. On product pages, it reduces uncertainty around color, material, scale, and finish. In ads and social posts, it can influence click-through quality before shoppers even reach your store.
For most ecommerce brands, the best product images do three jobs well. They show the item clearly, they present it in a way that fits the brand, and they remove friction from the buying decision. That is why professional-looking photos are usually less about expensive gear and more about consistency.
If you are exploring AI-assisted workflows, it can also help to compare traditional shooting with an ai photoshoot process or broader ai product photography options. For many Shopify merchants, the most practical setup is a hybrid one: capture clean source images first, then use editing or AI tools to standardize backgrounds, improve presentation, and produce additional creative variations.
Step-by-Step: How to Take the Perfect Product Photo
1. Start with the goal of the image
Before you shoot, decide where the image will appear. A white-background marketplace image has a different job than a lifestyle hero image or a paid social creative. If you skip this step, you usually end up reshooting later.
A simple planning list helps:
2. Prepare the product carefully
Small flaws become obvious in close-up photography. Dust, fingerprints, bent labels, scratched surfaces, loose threads, and uneven packaging all create more editing work later.
Keep a prep kit nearby with:
Preparation often saves more time than editing. That is especially true for reflective packaging, cosmetics, jewelry, and apparel.
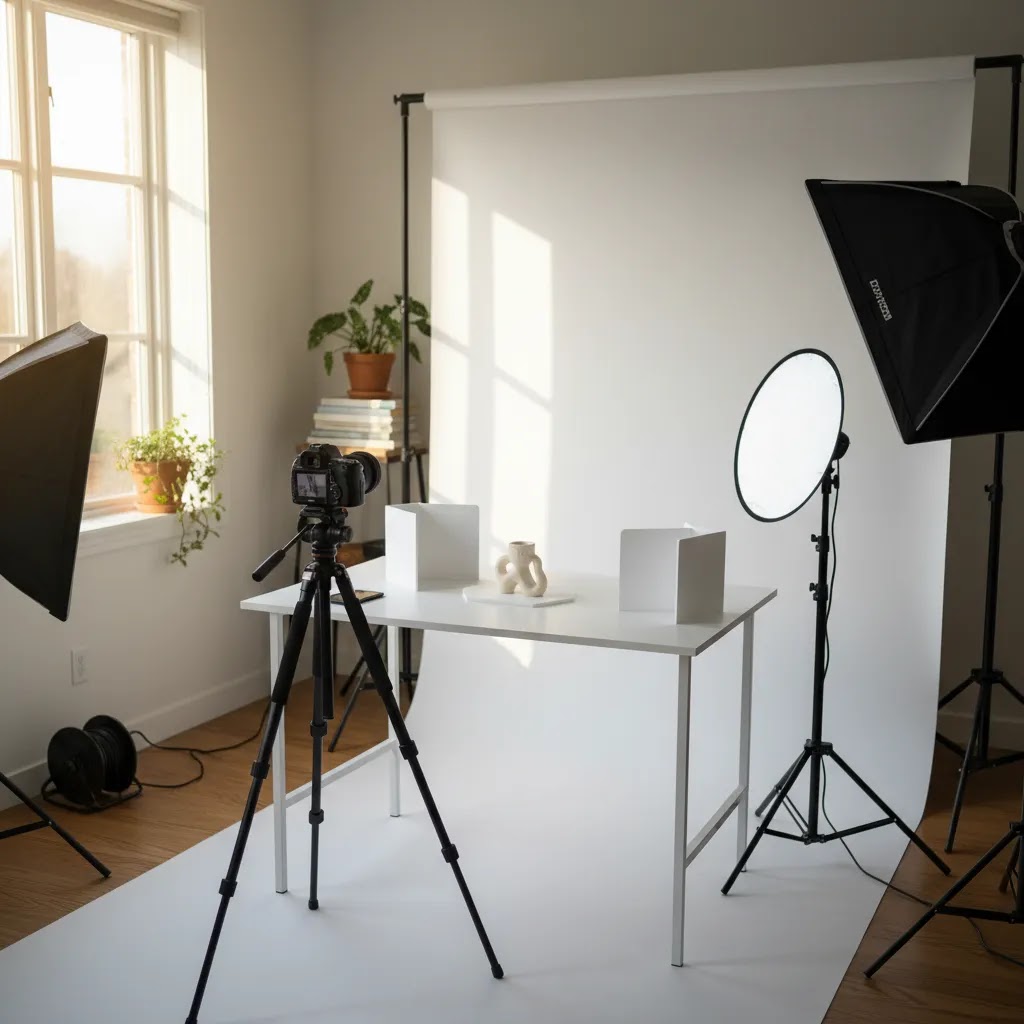
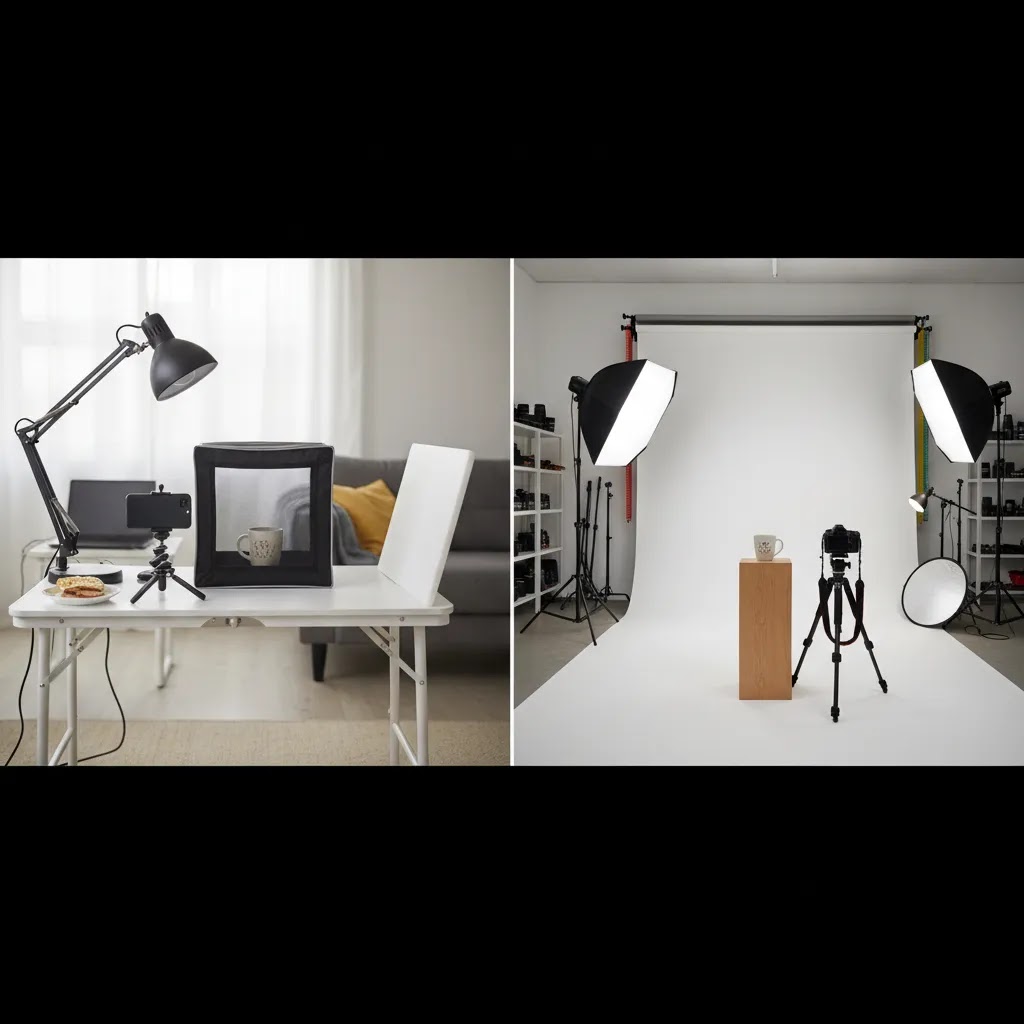
3. Build a simple, repeatable product photo setup
You do not need a complicated product photo studio to get strong results. For many small brands, a table near a window or a compact tabletop setup is enough. The important part is repeatability.
Your core setup should include:
For catalog images, white or light neutral backgrounds are usually the safest option. For premium brands, a slightly textured backdrop can work if it does not distract from the item.
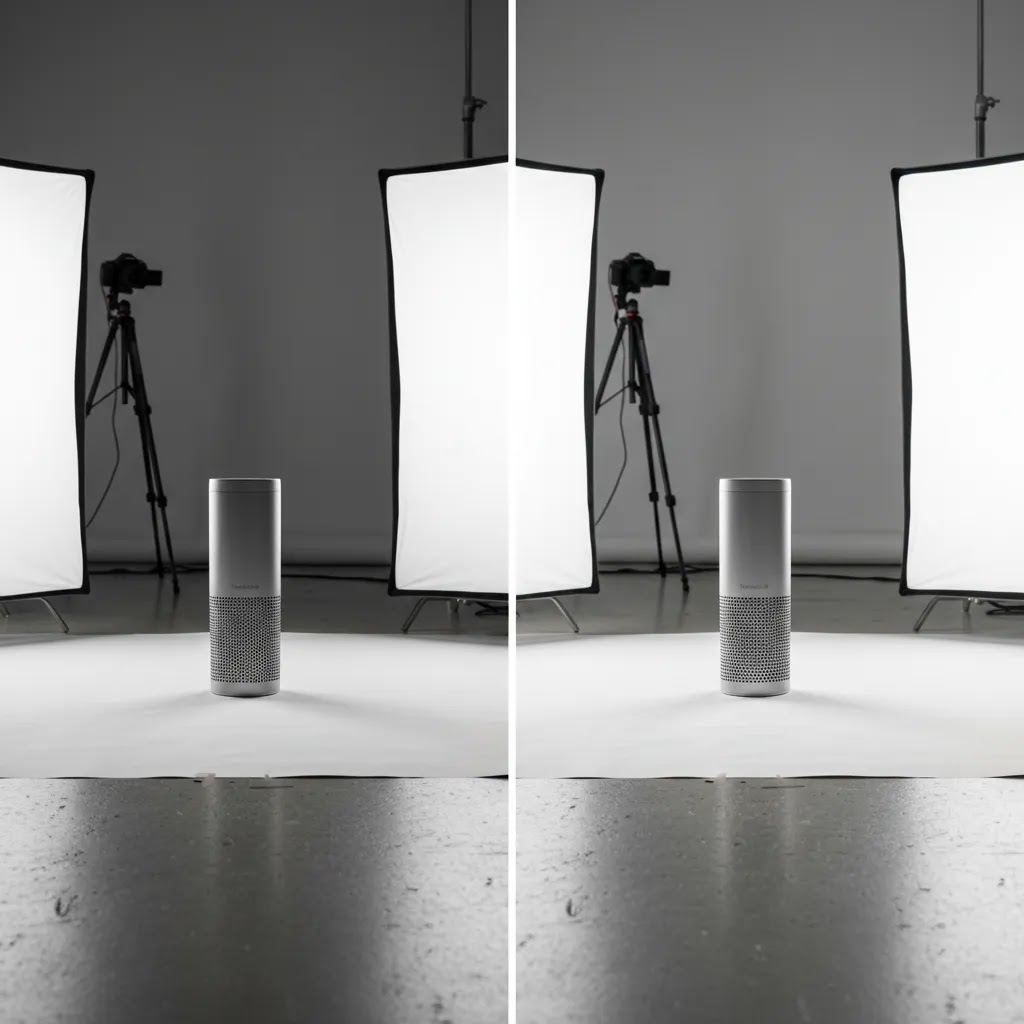
4. Get the lighting right
Lighting is where most product photos succeed or fail. Clean light shows texture and color accurately. Poor light creates harsh shadows, yellow color casts, and dull-looking products.
Natural window light works well if it is bright but indirect. Direct sun tends to create hard shadows and blown highlights. If you need consistency across many SKUs, artificial lights are often better because you can repeat the same setup any time of day.
If lighting is the part you struggle with most, spend extra time studying practical product photo lighting setups before buying more equipment. Better placement often matters more than pricier gear.
Basic lighting rules:
5. Stabilize your camera or phone
A blurry product photo feels low trust, even when shoppers cannot explain why. Use a tripod, phone stand, or stable mount every time. That lets you lower shutter speed if needed and makes batch shooting much faster.
Most newer phones are good enough for many ecommerce use cases if the lighting is strong. A dedicated camera helps with lens flexibility and fine control, but camera choice matters less than setup discipline.
6. Compose for clarity first
Your hero image should make the product instantly understandable. Keep the frame clean. Avoid props unless they support scale or use context. Leave enough margin around the product so the image does not feel cramped in collection grids or ad placements.
Common shot list for ecommerce:
For fashion, beauty, and personal care brands, context images matter more because customers want to imagine the product in real life. That is where adjacent creative tools, including an ai makeup generator workflow for cosmetics concepts, may help during campaign production. Still, your clean catalog shot should come first.
Product photo ideas and shot types that sell (beyond the basics)
Here is the thing, the basic angle set gets you to “acceptable,” but it is usually not enough to answer the questions shoppers have right before they buy. The strongest product photo sets do two things at once: they make the thumbnail clear, and they reduce uncertainty on the product page.
Consider expanding your shot list with a few high-performing categories:
The way this works in practice is you choose ideas based on product type and buying behavior:
From a practical standpoint, you can also map image types to funnel stage. Your collection page thumbnail needs instant clarity and consistent cropping. Your product detail page images need reassurance, such as size, texture, and what is included. Your ad creatives can be more experimental, but you still want the product to stay the hero.
Creative shots are only helpful when they stay conversion-focused. Avoid clutter, keep the product dominant in the frame, and standardize your angles so shoppers can compare variants quickly. That last part matters more than many store owners expect, especially on Shopify collection grids where inconsistent framing can make a store feel messy.
7. Shoot more variations than you think you need
Take multiple exposures and angles even if the first frame looks good on the camera screen. Small differences become obvious on desktop monitors and mobile product pages. Batch work also gives you alternatives for testing thumbnails, ads, and email creatives.
Experienced store owners usually create a master set that includes:
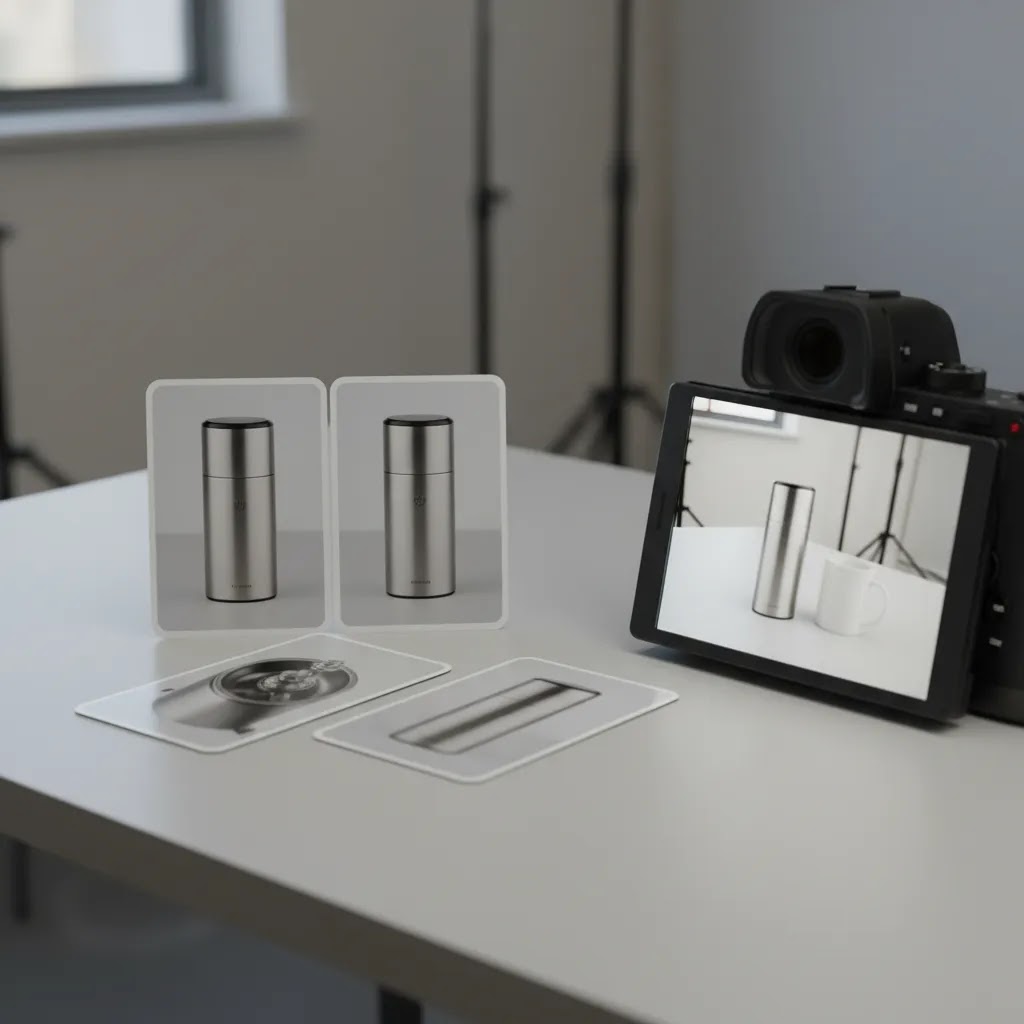
8. Edit the image for consistency
Editing is where your image becomes commercially usable. At minimum, correct exposure, crop consistently, clean dust, and remove distractions. For catalog work, a consistent background and matching shadows across the range can make your store look more polished.
Some merchants use traditional retouching software. Others use a dedicated photoroom style workflow for background cleanup and fast asset production. The best choice depends on how many SKUs you manage and how much manual control you want.
If you want to speed up repetitive tasks, current tool options from the product data include:
These tools can be useful, but they work best when the original shot is already clear and well lit. AI editing can improve presentation, but it rarely fixes a fundamentally weak source photo.
9. Export for the channels you actually use
Do not upload one oversized file everywhere. Prepare images for your storefront, paid ads, social channels, and marketplaces separately if needed. Keep file sizes reasonable so pages still load quickly. On Shopify, image quality and speed need to stay balanced because slow pages can hurt user experience.
What makes a “marketplace-ready” product photo (white background standards + common rejection issues)
If you sell on marketplaces, or even if you just want a clean, consistent Shopify catalog look, “on white” means more than “I removed the background.” The reality is marketplaces and ad platforms tend to reward consistency, and they may flag images that look edited poorly even if the product itself is fine.
A marketplace-ready white background image typically has:
Common issues that create problems, either with customer trust or with channel requirements:
Now, when it comes to using AI background tools, they can save a lot of time, but you still need a quality check step. For many Shopify store owners, the simplest QA process is to review images at 100 percent zoom for edge quality, then check them again as thumbnails in a collection grid. If the cutout looks clean only when it is large, but messy when it is small, you may need to adjust your crop, tweak the background, or do light manual cleanup.
Think of it this way, AI cutouts are usually good at straightforward shapes, but they can struggle with transparent, reflective, or very fine detail edges. If you sell glass, jewelry, chrome packaging, or anything with semi-transparent material, plan extra review time and try to keep lighting and angles consistent so the catalog output stays uniform.
10. Review the photo on an actual product page
This final step is often skipped. A product image may look great in isolation and still fail on the page because of awkward cropping, inconsistent aspect ratio, or poor mobile display. Review the image in your theme, on desktop and mobile, before approving the full batch.
Tools That Can Help You Create Better Product Photos
If you want faster turnaround or more creative flexibility, a few AI-assisted tools from the current product set may support your workflow:
There is a trade-off here. AI tools can help you create more outputs from fewer source photos, which is useful for lean ecommerce teams. But if your brand relies on exact material texture, highly regulated product claims, or precise color accuracy, you should review every edited asset carefully before publishing.
For broader inspiration and workflows, the Catalog Photography hub is a useful starting point.
Product Photo Cost: DIY vs Hiring a Product Photography Service
Most Shopify store owners eventually hit the same question: should you keep shooting in-house, or pay for professional product photo help? The answer is not just about cash cost. It is about consistency, speed, and whether image production is becoming a bottleneck for launches and marketing.
DIY product photo cost: what you typically pay for
DIY costs usually come in two categories: one-time setup, and ongoing labor.
One-time setup is your basic kit, like lights, a backdrop, a tripod or phone mount, and small styling tools. You might already own some of this. If you do not, the total can range widely depending on whether you buy entry-level gear or invest in higher-end lighting for more control.
Ongoing labor is the part many store owners underestimate. It includes prep, shooting, file management, editing, exporting, and quality control. Even with AI tools speeding up background cleanup, you still need human review for accuracy, consistency, and brand fit. If product photography regularly steals time from merchandising, customer support, or paid media, it is worth treating that time as a real cost.
Hiring a product photography service: how pricing is usually structured
Professional services typically charge in a few common ways:
What you are paying for with a service is usually less about camera ownership and more about a repeatable production system. That includes consistent lighting, controlled styling, retouching standards, predictable turnaround, and the ability to handle tricky products like reflective packaging or transparent materials.
What changes the quote (and why your catalog details matter)
Quotes can vary a lot based on the details you send. The variables that tend to move pricing and timelines include:
If you want accurate quotes, start by defining what “done” means. For example, a consistent 3-angle “on white” set for every SKU, plus one in-use shot for your top sellers. That level of clarity makes it easier to compare options and keep the output consistent across your Shopify store.
When outsourcing is usually worth it
DIY is often the right move early on, especially when you are still learning what your customers respond to. Outsourcing tends to make more sense in a few predictable situations:
For most Shopify store owners, a hybrid approach is the practical middle ground. Keep a DIY setup for quick launches and testing, then outsource periodic refreshes, hero products, or complex categories that are costly to get wrong.
Pros and Cons
Strengths
Considerations
Who This Approach Is For
This step-by-step process is a good fit for Shopify merchants, marketplace sellers, and growing ecommerce brands that want better product images without outsourcing everything immediately. It is especially useful if you are managing your own product launches, refreshing old listings, or trying to standardize image quality across a mixed catalog.
If your store has a small team, this workflow gives you a practical baseline. If you already work with photographers or editors, it can still help as a briefing framework so your shots stay commercially focused rather than purely aesthetic.
How to Choose the Right Product Photo Setup for Your Store
There is no single best setup for every merchant. The right choice depends on your catalog, margins, creative volume, and how much control you need.
1. Match the setup to your product type
Flat, matte, simple products are much easier to photograph than reflective packaging, apparel on models, or translucent items. If your products are visually demanding, invest in lighting and test time before spending on extra accessories.
2. Decide where DIY stops being efficient
DIY works well when you have a manageable SKU count and a clear style guide. If you are photographing dozens of new products each month, or need campaign imagery on top of catalog shots, the labor cost starts to add up. At that point, a hybrid workflow with AI editing or outside support may be more practical.
3. Separate catalog needs from brand storytelling
Your clean main image and your styled campaign images serve different purposes. Many stores struggle because they try to make one image do both jobs. Keep your catalog image clear and conversion-focused, then build supporting lifestyle assets around it.
4. Be realistic about editing capacity
If you or your team do not have time for detailed retouching, choose a simpler shooting style that minimizes cleanup. White backgrounds, stable camera positions, and good prep reduce post-production pressure. If you need extra speed, AI-supported editing can help, but only if your review process is strict.
5. Think about future scalability
What works for 20 products may not work for 500. Standardized angles, naming conventions, export sizes, and editing rules matter more as your catalog grows. This is where Giles Thomas's practical ecommerce perspective is useful. As a Shopify Partner and Google Expert, his guidance consistently reflects how visual assets affect not just design, but merchandising, paid traffic performance, and the shopping experience across channels.
If you want a deeper look at studio decisions, AI workflows, or visual production strategy for online retail, AcquireConvert is a useful specialist resource to keep nearby. You can explore related guides on ai product photography, compare practical ai photoshoot workflows, and check commercial tool evaluations when you are ready for the next step.
Frequently Asked Questions
What is a product photo?
A product photo is an image designed to show a product clearly for selling, usually in an ecommerce store or marketplace listing. A good product photo does more than look nice. It communicates details shoppers cannot physically verify online, such as size, texture, finish, color, and what is included. For Shopify stores, product photos also shape how your collection grids look, how your product pages feel, and how ads perform when the image is the first thing a shopper sees.
How to make a product photo?
Start with a clean product and a repeatable setup: stable camera or phone mount, consistent background, and controlled light. Shoot a simple angle set first, then add close-ups and in-use context where it reduces buying uncertainty. Edit for consistency across your catalog by correcting exposure, cropping the same way, cleaning dust, and standardizing backgrounds. If you use AI tools for background removal or scene creation, review the output carefully before publishing so edges, shadows, and product color still look accurate.
How much does a product photo shoot cost?
It depends on whether you do it yourself or hire help. DIY costs typically include a one-time setup for lights, backdrop, and a tripod, plus ongoing time for prep, shooting, editing, and QA. Professional product photography services often price per image, per SKU packages with a set number of angles, or tiered volume rates for larger catalogs. Your quote can change based on SKU count, the number of angles, whether products are reflective or transparent, whether you need lifestyle scenes, and whether turnaround is rushed. For many stores, the decision comes down to whether internal time and editing capacity are limiting growth.
Can I take a professional product photo with my phone?
Yes, in many cases you can. A newer smartphone, good lighting, a stable mount, and basic editing are often enough for ecommerce catalog images. The limiting factor is usually not the phone itself. It is inconsistent lighting, poor prep, or weak composition. For complex products, a camera setup may still give you more control.
What is the best background for a product photo?
For most ecommerce stores, a white or light neutral background is the safest starting point because it keeps attention on the item and works well across themes and marketplaces. Lifestyle backgrounds can help with storytelling, but they should support the product rather than compete with it. Keep your main image clear and distraction-free.
How important is product photo lighting?
It is one of the most important factors. Good lighting affects sharpness, perceived quality, color accuracy, and how premium the product looks. Even expensive cameras struggle in poor light. If your images feel flat or inconsistent, lighting is usually the first thing to fix before changing gear.
Should I hire a product photo service or do it myself?
That depends on volume, complexity, and internal capacity. DIY works well for simple products and lean teams that can follow a repeatable process. A product photo service may make more sense if your products are difficult to shoot, you need campaign-grade creative, or your team cannot keep up with editing and production demands.
What is the difference between a product photo editor and an AI product photo editor?
A traditional product photo editor usually gives you manual control over retouching, color, cropping, and cleanup. An AI product photo editor can automate tasks like background replacement, scene generation, or resolution improvement. AI can save time, but manual review is still important, especially for accurate product representation.
Can AI generate product photos without a real photoshoot?
Sometimes, but quality varies by use case. AI-generated images may work for concepting, secondary creative, or rapid experimentation. For core product page images, many merchants still get better results from real source photography plus AI-assisted editing. That approach tends to preserve product accuracy while still improving efficiency.
Do I need a full product photo studio setup?
No. Many store owners can start with a table, a backdrop, diffused light, and a tripod. A full studio helps when you need higher volume, stronger consistency, or more control over difficult products. Start with the smallest setup that can produce repeatable results, then upgrade only when your workflow demands it.
What image types should I prioritize first for my Shopify store?
Start with a clean hero image, two to four alternate angles, and one detail shot. If fit, scale, or use context matters, add an in-use image as well. This gives shoppers enough visual information to make a decision without overwhelming the page. After that, build extra assets for ads and social channels.
Should I use 3D product photo assets?
3D product photo formats can be helpful for certain categories, especially where shape, detail, or configuration matters. They are not necessary for every store. For many merchants, well-shot static images still do the job. Consider 3D when standard photography cannot communicate the product clearly enough.
Key Takeaways
Conclusion
The perfect product photo is usually not about perfection in a creative sense. It is about clarity, consistency, and helping a shopper feel confident enough to buy. If you can build a repeatable workflow for prep, lighting, shooting, and editing, your product images will usually improve faster than you expect. For growing ecommerce brands, that can support stronger merchandising and a more polished store experience over time.
If you want to keep improving, AcquireConvert is a practical resource for store owners weighing DIY photography against AI-assisted workflows. You can explore the wider Catalog Photography content, review studio planning advice, and compare tools through the lens of real ecommerce use cases shaped by Giles Thomas's experience as a Shopify Partner and Google Expert.
This article is editorial content created for ecommerce education. It is not a paid endorsement unless explicitly stated otherwise. Tool availability, features, and pricing are subject to change, so verify current details directly with each provider before making a decision. Any workflow or tool discussed here may improve efficiency or presentation in some cases, but results will vary by product type, execution quality, and store context.

Hi, I'm Giles Thomas.
Founder of AcquireConvert, the place where ecommerce entrepreneurs & marketers go to learn growth. I'm also the founder of Shopify agency Whole Design Studios.