Product Photography at Home (2026 Guide)
If you run an ecommerce store, strong visuals affect more than aesthetics. They shape click-through rate, perceived value, and whether a shopper trusts your product enough to buy. The good news is that product photography at home can look polished without a rented studio, as long as you get the setup right. For most small Shopify brands, the goal is not magazine-level production on day one. It is consistent, conversion-friendly imagery you can produce repeatably. If you are still deciding what kind of setup makes sense, start with this guide alongside our advice on building a product photography studio. This article walks you through the practical choices that matter most: space, light, backgrounds, camera settings, styling, and where DIY works well versus where editing tools can save time.
Contents
What Product Photography at Home Really Involves
Professional product photography at home is less about expensive gear and more about control. You need consistent light, a repeatable shooting angle, clean backgrounds, and a process you can use across your catalog. That matters for ecommerce because your PDPs, collection pages, ads, and marketplaces all benefit from visual consistency.
For many store owners, at home product photography works best for products that are small to medium-sized, straightforward to style, and not highly reflective. Skincare, packaged goods, accessories, handmade items, and folded apparel often fit this model well. Clothing product photography at home can also work, especially for flat lays, ghost mannequin alternatives, or simple hanging shots. Fashion product photography at home becomes more demanding once you add live models, complex lighting, or editorial-style creative direction.
A strong DIY workflow usually includes three image types: clean white-background images for product pages, a few lifestyle shots for storytelling, and cropped images sized for social and paid creative. If you want to speed up variant creation or scene changes after the shoot, it can help to pair your workflow with resources on ai product photography. Used carefully, those tools may help fill gaps without replacing the need for clear source images.
You do not need to recreate a commercial studio. You need a simple system that makes your products look trustworthy, accurate, and easy to compare.
Product Photography at Home Ideas (Simple Shots You Can Repeat)
Here’s the thing: the fastest way to get “pro-looking” results at home is not chasing more props. It is building a small set of shot concepts you can repeat across your catalog, so your Shopify collection pages look consistent and your creative team (even if that is just you) is not reinventing the wheel for every SKU.
Simple shot concepts that work for most products
1. The clean packshot (your baseline)
This is your “front view, product centered, consistent crop” image. Keep it boring on purpose. On Shopify, this is the image that carries your collection page grid, and it is the one shoppers use to compare options quickly.
2. Flat lay (especially for apparel, kits, bundles)
Flat lays are reliable at home because you control wrinkles, spacing, and alignment. They are also great for bundles because you can show what is included without needing model styling. From a practical standpoint, mark your overhead tripod position so each product lands in the same frame.
3. Simple lifestyle by a window (context without chaos)
One window-led lifestyle angle can do a lot of work if it stays on-brand. Keep the environment simple: one surface, one background, one light direction. The goal is to show use and scale without turning it into an editorial shoot.
4. On-color background variations (for ads and promos)
After you have your core white set, shoot the same angle on one brand color (or a neutral like light gray). This gives you instant variety for email banners and paid social. If you plan to add text overlays later, choose a color that keeps contrast high and doesn’t fight your packaging.
5. Hands-in-frame for scale and trust
Hands add a real-world size reference, and they often increase perceived authenticity because shoppers can “feel” the product better. Keep the hand styling consistent (clean nails, minimal jewelry unless it fits your brand) and repeat the same grip and angle across SKUs.
6. Before and after, or “problem and solution”
This works well for cleaning products, beauty tools, organizers, and anything with a visible outcome. Keep it honest: same lighting, same framing, same surface. If you exaggerate the difference with lighting changes, shoppers may read it as misleading rather than helpful.
Phone-first composition tips tied to ecommerce outcomes
Keep angles consistent across a product line
Pick one hero angle per category (straight-on, 45-degree, overhead) and stick to it. The reality is that inconsistency shows up most on collection pages, where shoppers scan quickly and anything “off” looks less trustworthy.
Leave negative space for crops and placements
Ads, social, and even Shopify theme layouts will crop your image in different ways. If you frame too tight, you limit where the image can be used. Give your product breathing room so you can crop square, 4:5, and 16:9 without losing key details.
Plan for text overlays (without ruining the product)
If you know you will add “New,” “Bestseller,” or a promo message in paid social, compose so there is a clean area where text could go. That usually means placing the product slightly off-center or leaving clean background space above or to one side.
How to get multiple looks from one setup (without buying more gear)
What many store owners overlook is how much variety you can get by changing small variables while keeping the same core lighting and camera position.
Swap surfaces, keep the background
Keep your sweep or wall the same, and swap what the product sits on: white foam board, light wood, matte black board, textured fabric. That one change can create “collections” of looks while still feeling consistent.
Rotate the product, not your camera
To keep your catalog uniform, lock your tripod and rotate the product in measured steps (front, 45-degree, side). That makes editing and cropping simpler because your framing stays consistent.
Change backdrop distance to control shadow style
Move the product closer to the backdrop for cleaner, softer shadows. Move it farther away to get a more noticeable shadow for lifestyle-like depth. Think of it this way: distance is a shadow control tool, not just a styling choice.
Flip your light direction for a fresh “set”
With the same window or softbox, switch the light from camera-left to camera-right. For many products, that creates a noticeably different look without changing your space or buying anything.
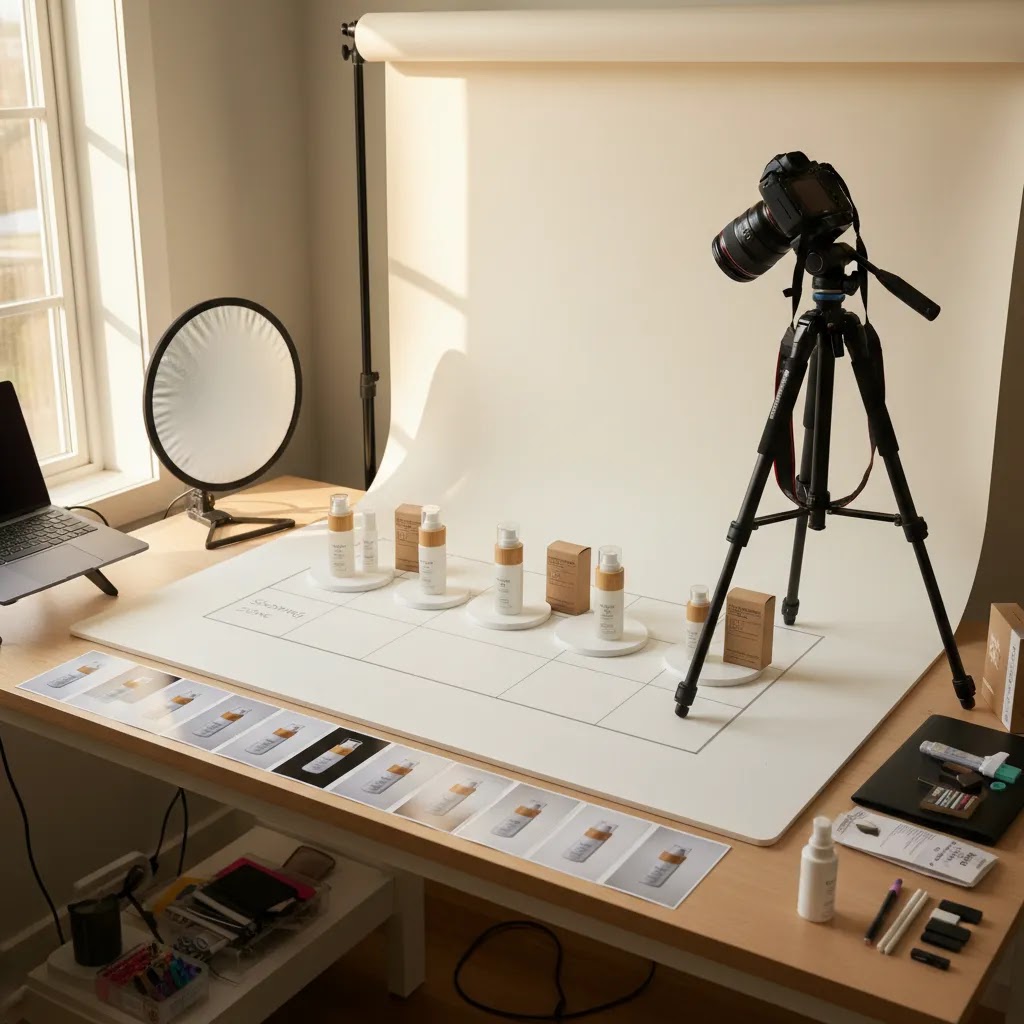
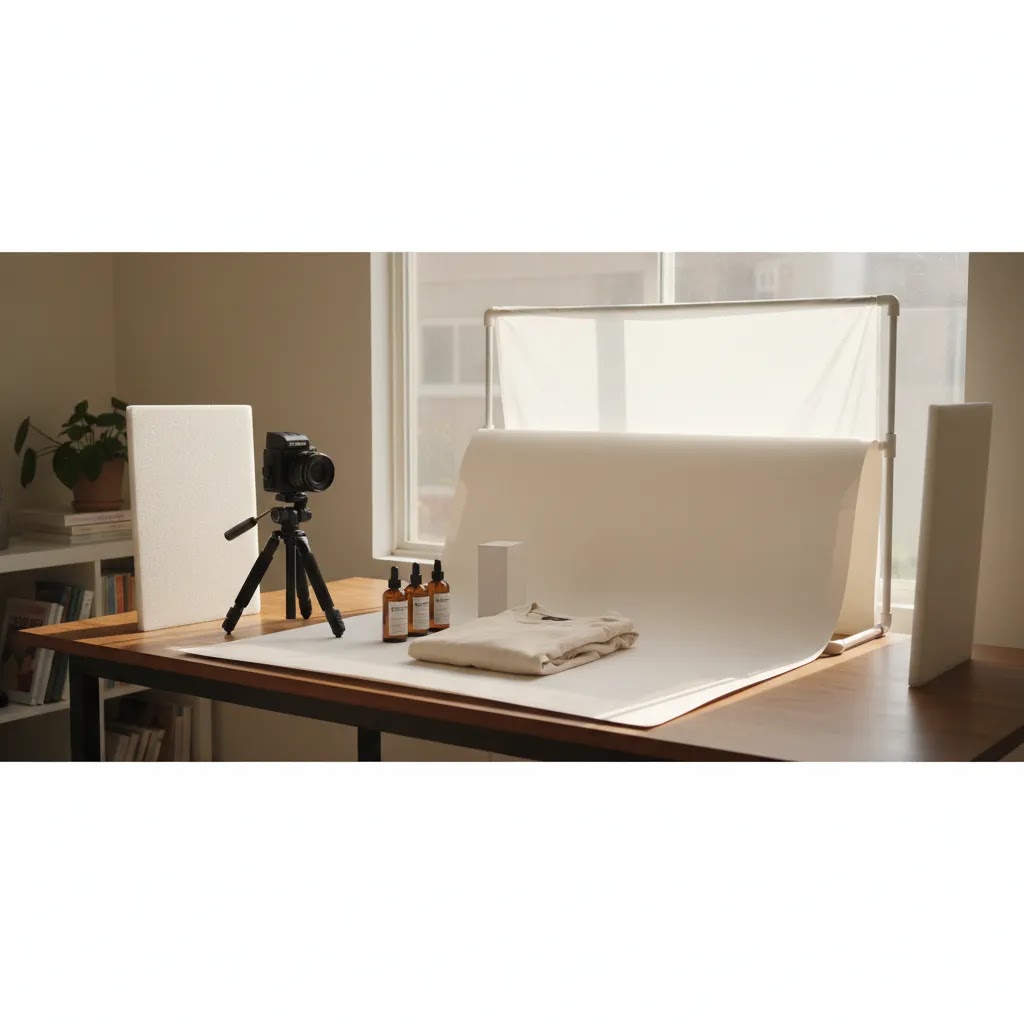
What You Need for Pro-Looking DIY Shots
1. A repeatable shooting space
Your product photography home setup should live somewhere you can return to without rebuilding everything each time. A folding table near a window, a corner with blackout control, or a spare room can all work. Mark tripod position and product placement with tape so your framing stays consistent across sessions.
2. Light you can control
Lighting for product photography at home is the main differentiator between amateur-looking and polished results. Window light works well if it is indirect and consistent. Add a diffuser such as a sheer curtain or soft fabric to reduce harsh shadows. If natural light changes too much through the day, continuous softbox or LED lighting gives you more reliable output.
3. Backgrounds that match your selling channel
White backgrounds are still the safest default for most ecommerce catalogs because they keep attention on the product and work across marketplaces. A simple sweep made from white paper, foam board, or acrylic often does the job. If you want more variety without storing multiple physical sets, AI-assisted editing tools such as AI Background Generator or Free White Background Generator may help create cleaner outputs from your original shots.
4. Stable capture
A recent smartphone can absolutely handle DIY product photography at home if you stabilize it. Use a tripod and avoid handheld shooting for core catalog images. Tap-to-focus, lower exposure slightly if highlights are blowing out, and keep lens height consistent. If you use a camera, a standard focal length and aperture around f/8 to f/11 often helps keep detail sharp for small products.
5. Editing that improves clarity, not accuracy
Good editing removes distractions while preserving the actual product. Clean dust, fix white balance, crop consistently, and keep colors realistic. If your original files are slightly soft, tools such as Increase Image Resolution may improve usability for web assets. For more stylized outputs after the core packshots are complete, our piece on ai photoshoot covers where AI-generated scenes may fit into an ecommerce workflow.
6. Product-specific styling choices
Creative product photography ideas at home should still support conversion. Skincare product photography at home often benefits from clean props, gentle reflections, and bright tonal palettes. Apparel usually needs shape, scale, and texture accuracy more than decorative sets. Cosmetics brands experimenting with on-model visuals may also find adjacent inspiration in our coverage of the ai makeup generator category.
DIY Light Control: Reflectors, Bounce, and Diffusion (What to Use and When)
Good home lighting is not just “buy a light and point it at the product.” The way this works in practice is shaping light: you soften it, you bounce it back into shadows, and sometimes you remove light to add definition. These are the same fundamentals a studio uses, just with simpler tools.
DIY tools that make the biggest difference
White bounce (foam board)
A piece of white foam board is one of the most useful tools for product photography lighting at home. Place it opposite your main light to fill in shadows and make labels more readable. This is especially helpful for dark packaging where the “unlit” side can go muddy.
Negative fill (black card)
If your product looks flat, you may actually have too much fill. A black card placed near the shadow side absorbs light and increases contrast, which helps define edges on white products against a white background. It is also useful for adding shape to matte items that otherwise look lifeless.
DIY diffusion (tracing paper or a white shower curtain)
Diffusion spreads light and softens reflections. If a window is too harsh or a bare LED is creating hard shadows, add diffusion between the light source and the product. Keep it safe around hot lights, and avoid anything that could touch a bulb.
A simple light tent for small items
For small reflective products (jewelry, glossy cosmetics, glass bottles), a light tent can reduce harsh specular highlights because the product “sees” an even white surface instead of the room. It is not magic, but it often makes a hard category more manageable for solo shoots.
Where to place bounce and fill (simple positioning that works)
Start with one main light at about 45 degrees
Position your main light (window or softbox) in front of the product and slightly to one side, around 45 degrees from the camera. This usually gives you a clean highlight and enough shadow to show depth.
Place white bounce on the opposite side
On the darker side of the product, place a white board just out of frame. Move it closer to increase fill, move it farther away to keep more shadow. If the product label is hard to read, this is often the first fix to try.
Use negative fill close to the product when edges disappear
If you are shooting a white product on a white sweep and it blends into the background, bring in a black card on one side. This creates a darker edge line and helps the product “separate” without needing heavy editing.
Diffuse between the light and the product, not behind it
Diffusion works best when it is between the light source and the product, because that is what changes the quality of light hitting the surface. If your shadows are too hard, your diffusion is likely too far away, too small, or not covering enough of the light source.
Quick troubleshooting: what to change first
If you see glare on glossy packaging
Move your light more to the side (or higher), then add diffusion. Glare is often about angle, not brightness. You can also rotate the product slightly so the hotspot moves off the label. If you are using a phone, tap to focus and reduce exposure slightly so highlights do not blow out detail.
If shadows look muddy and details disappear
Add white bounce on the shadow side and move it closer. If your main light is far away, bring it closer too. Bigger, closer light is typically softer and easier to control.
If your background is uneven (gray corners, darker gradient)
Increase distance between product and background so less shadow falls onto the sweep, and aim your main light more at the background, not just the product. Also check you are not blocking light with your tripod or your own body when shooting.
Pros and Cons
Strengths
Considerations

Who This Approach Is Best For
Product photography at home is a strong fit for Shopify merchants and growing ecommerce brands that need a practical in-house workflow. It makes the most sense if you launch products regularly, need quick image updates, or want to test merchandising changes before paying for a full professional shoot.
This approach is especially useful for founders selling skincare, supplements, accessories, home goods, stationery, and similar categories where controlled tabletop photography covers most needs. It can also work for apparel brands handling flat lays or simple hanger shots. If your brand depends on luxury styling, complex reflections, or editorial campaign imagery, a hybrid model is often smarter: shoot core packshots at home and outsource hero images selectively.
AcquireConvert Recommendation
For most store owners, the smartest move is not asking whether DIY is good or bad. It is deciding which parts of the workflow should stay in-house. Giles Thomas approaches this from a practical ecommerce angle as a Shopify Partner and Google Expert: use home photography for fast catalog maintenance, new product testing, and simple conversion-focused imagery, then layer in editing or specialist help where needed.
If you are building your process, explore the broader Catalog Photography hub and our Product Photography Fundamentals resources. If your next question is whether software can speed up cleanup and background work, our coverage of photoroom is a useful next step. AcquireConvert focuses on the choices that matter to actual ecommerce operators, especially Shopify brands balancing speed, consistency, and conversion impact.
How to Choose Your Home Setup
If you are figuring out how to do product photography at home, choose your setup around product type, volume, and channel requirements rather than gear hype.
1. Match the setup to your product
Small packaged products are usually the easiest place to start. A tabletop, two lights or a good window, white sweep, and tripod can be enough. Clothing product photography at home often needs more vertical space, stronger lighting, and careful handling of wrinkles and fit. Jewelry, glass, and glossy cosmetics usually require more control and patience.
2. Decide what “good enough” means for each channel
Your Shopify PDP needs clean, accurate images with zoom-friendly detail. Social creative can be looser and more experimental. Marketplace listings often require plain backgrounds. If one shoot has to serve all three, start with the most restrictive requirement first, then create derivatives afterward.
3. Prioritize lighting before camera upgrades
Store owners often assume they need a better camera, but product photography lighting at home matters more. A smartphone with controlled light typically beats an expensive camera under poor lighting. Buy stabilization, diffusion, and bounce tools before chasing more megapixels.
4. Build a simple shot list
A repeatable list saves time and keeps merchandising consistent. For each SKU, aim for front, back, side, detail, scale reference if relevant, and one or two lifestyle angles. This helps customers compare products and often reduces uncertainty on product pages.
5. Know where AI editing fits
AI can support a DIY workflow, but it should start with a strong source image. Background cleanup, scene variation, and minor enhancements may save time. It is less dependable when the original photo has poor focus, inaccurate color, or heavy glare. Use AI to extend your workflow, not to rescue avoidable capture problems.

Frequently Asked Questions
Can I do professional product photography at home with a phone?
Yes, in many cases you can. A modern smartphone with a tripod, soft light, and a clean background can produce strong ecommerce images. The limiting factor is usually lighting control rather than the phone itself. For Shopify product pages, sharpness, accurate color, and consistency matter more than owning advanced camera gear.
What is the best lighting for product photography at home?
Indirect natural light is a solid starting point if it stays consistent during your shoot. If you need more control, continuous LED or softbox lighting is usually the better option. The main goal is soft, even illumination that keeps product detail visible without harsh reflections or distracting shadows.
How do I create a product photography home studio in a small space?
Use a small table, white sweep backdrop, tripod, and one controllable light source near a wall or window. Keep your setup modular so it can be stored quickly. Mark positions with tape so you can rebuild the same scene later. That repeatability matters more than square footage for most ecommerce catalogs.
Is white background photography still the best option for ecommerce?
For many catalogs, yes. White backgrounds are versatile, clean, and accepted across many selling channels. They make products easier to compare and usually keep page design focused. Lifestyle images still matter, but they work best as supporting visuals rather than replacing your core packshot set.
How many photos should I take for each product?
Most stores benefit from a minimum set that covers front, side, back, detail, and one context shot where helpful. Apparel may need fit and fabric close-ups. Skincare may need packaging detail and texture context. The exact number depends on product complexity, but every image should answer a likely buyer question.
What are the biggest mistakes in DIY product photography at home?
The most common issues are mixed lighting, cluttered backgrounds, inconsistent framing, oversaturated editing, and not cleaning the product before shooting. Another frequent problem is skipping a repeatable process, which leads to a collection page full of images that feel unrelated. Consistency usually matters more than creativity at the start.
Does DIY photography work for skincare product photography at home?
Often, yes. Skincare products are well suited to tabletop photography if you manage reflections and keep labels readable. A bright background, diffused light, and a few restrained props can work well. Clear packshots should come first, then you can add lifestyle or texture-led scenes to support ads and social content.
Should I outsource some parts of the workflow?
That is often the most practical option. Many brands handle basic catalog photography in-house and outsource advanced retouching, campaign creative, or difficult product categories. A hybrid setup keeps costs and turnaround manageable while still giving you access to higher-production imagery where it matters most.
What is the 20 60 20 rule in photography?
The 20 60 20 rule is usually shorthand for balancing your image around three priorities: one main “hero” area (the product) and supporting elements that do not compete with it. In practical product photography at home terms, it is a reminder that most of the visual attention should land on the product itself, while props, background texture, and styling stay secondary.
For ecommerce, that typically means keeping your product clear and dominant in the frame, keeping the background simple enough that it does not distract, and using props sparingly so they support scale or usage. It is a guideline, not a requirement, and for core packshots you will usually ignore it and keep the product as close to 100 percent of the focus as possible.
What is the 400 rule in photography?
The “400 rule” is commonly used as a quick rule of thumb around exposure and sensitivity, usually pointing people toward staying at lower ISO values (often ISO 400 or below) when possible to reduce digital noise and keep details clean. That matters for product photos because noise and smudgy detail can make labels, textures, and finishes look lower quality than they are.
If you are shooting on a phone, you do not usually set ISO directly. Your best workaround is adding more light, using a tripod, and tapping to lower exposure slightly if highlights are clipping. If you are using an entry-level camera, keep ISO low, and instead use a slower shutter speed with a tripod when the product is not moving. Consistency across your catalog often matters more than chasing a perfect number, so treat “400” as a direction, not a rule you must follow.
What is the 50 50 rule in photography?
The 50 50 rule is often referenced as “balance your light” so you are not overexposing highlights or crushing shadows, basically aiming for an even exposure where detail is preserved on both ends. For product photography, the translation is simple: keep highlights from blowing out on labels or reflective packaging, while still keeping shadow areas bright enough to show texture and shape.
On a phone, this usually means tapping to focus on the product, then dragging exposure down slightly until label details are safe. On a camera, you might use exposure compensation, check your histogram if available, and adjust lighting placement so reflections fall to the side instead of right on the key details. Consider this a consistency tool: the more repeatable your exposure and lighting are, the easier it is to make a catalog look cohesive.
Key Takeaways
Conclusion
Product photography at home is a realistic option for many ecommerce brands, especially if your immediate goal is consistency, speed, and clear product presentation. You do not need a perfect studio to create images that support trust and help shoppers evaluate what you sell. You do need a system: controlled light, stable framing, sensible editing, and product-specific styling choices.
If you want the next step, use AcquireConvert as your specialist resource for practical ecommerce visuals. Explore our catalog photography guides, review your options for AI-assisted workflows, and compare tools through a Shopify-focused lens shaped by Giles Thomas’s experience as a Shopify Partner and Google Expert. That way, you can build a workflow that fits your store now and still scales with your catalog later.
This content is editorial and intended for educational purposes. It is not a paid endorsement unless explicitly stated otherwise. Pricing, product features, and tool availability are subject to change, so verify current details directly with the provider. Any workflow, tool, or photography recommendation may improve efficiency or image quality in some cases, but results will vary by product type, execution, and store context.

Hi, I'm Giles Thomas.
Founder of AcquireConvert, the place where ecommerce entrepreneurs & marketers go to learn growth. I'm also the founder of Shopify agency Whole Design Studios.