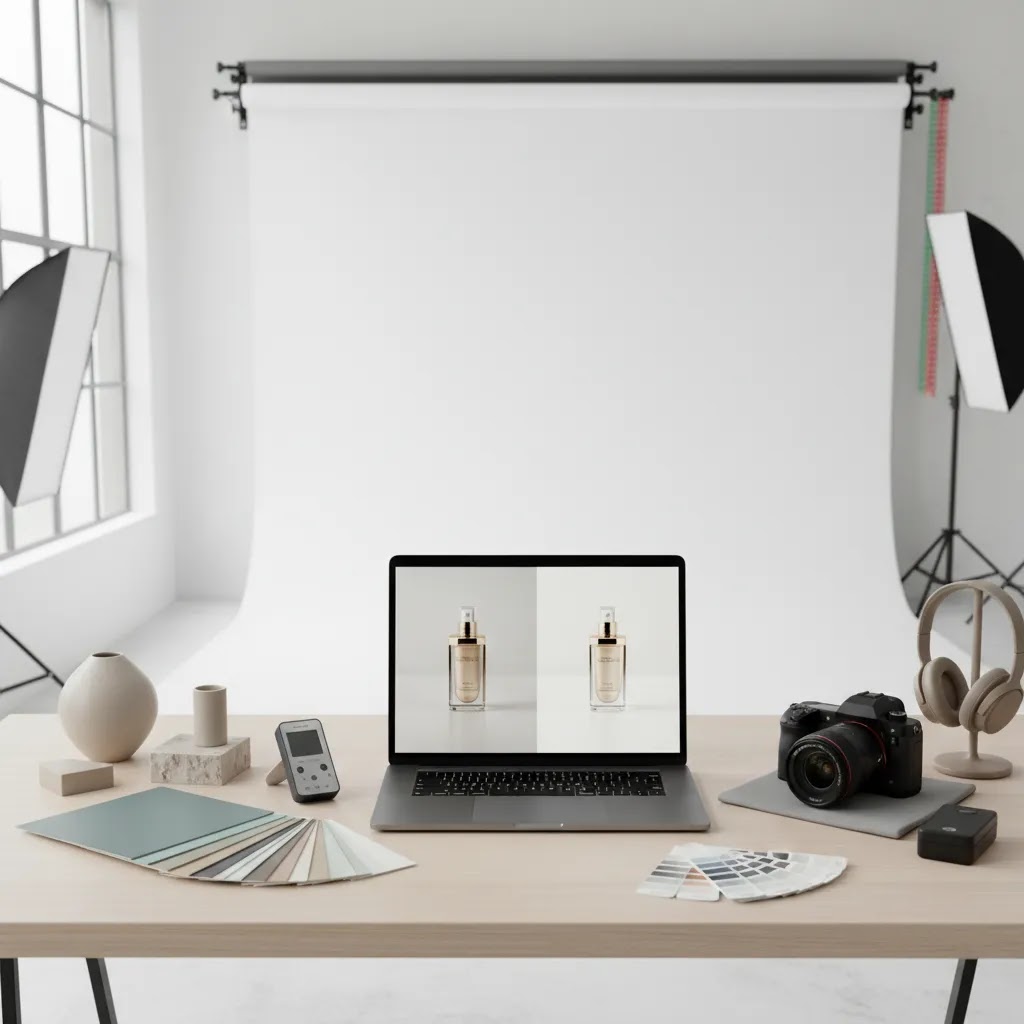
Product Photography Editing (2026 Guide)
If your product photos are technically clear but still not converting the way you want, the problem is often not the camera. It is the edit. Good product photography editing helps you remove distractions, standardize your catalog, and present products in a way that feels trustworthy on Shopify product pages, Amazon listings, and paid social creatives. That matters because shoppers make fast visual judgments. A polished image can support click-through rate, perceived value, and buyer confidence. If you are still refining your overall image workflow, start with this guide to a product photography studio. In this article, I will break down what to edit, where AI fits, which tools are useful, and how to decide between doing it yourself, using AI, or outsourcing to a service.
Contents
What product photography editing actually covers
For ecommerce, editing is not just about making a photo look nicer. It is about making the image more useful in a sales context. That usually means consistent backgrounds, accurate color, clean edges, balanced shadows, proper crop ratios, and export settings that work across storefronts and marketplaces.
Most store owners need a repeatable process more than a perfect one-off retouch. If you sell dozens or hundreds of SKUs, consistency becomes the real goal. Your hero image needs to match the rest of the collection, variant images need to feel visually aligned, and lifestyle shots need to support the same brand standard.
This is also where AI has become practical. Tools now help with background replacement, white background creation, cleanup, and scene generation. If you are comparing newer workflows, these guides on ai photoshoot and ai product photography are useful next reads.
For most merchants, the right editing setup sits somewhere between manual retouching in Photoshop and full outsourcing. The best option depends on your catalog size, margin profile, brand standards, and how fast you need new images live.
A practical product photography editing workflow (step-by-step)
Here is the thing. Most image issues in Shopify stores are not caused by a lack of tools, they come from an inconsistent workflow. If your editing process changes from product to product, your collection grids look messy, your variants feel mismatched, and you end up re-editing the same images every time you launch a new campaign.
This workflow is designed for real ecommerce catalogs. It balances speed with quality, and it gives you a clear place to use batch edits, a clear place to use manual edits, and a simple quality gate before anything goes live.
1. Import and organize your source images
Start by importing images into one working folder per product, then subfolders for angles or variants. If your team is handling multiple shoots, include shoot date or supplier name so you can trace inconsistencies later. From a practical standpoint, organization is part of editing. It reduces mistakes when you are replacing images on Shopify or exporting for ads.
2. Select your hero image first
Pick the main image you want to use as the primary product image before you start heavy edits. This is the image that will appear in your collection grid, Shopify search results, and often in Google Shopping previews, depending on feed setup. Choose the cleanest angle with the clearest silhouette and the least work required to make it accurate.
Once the hero is chosen, use it as your reference for the rest of the set. Color, crop, and shadow style should match that hero image, not the other way around.
3. Run baseline batch edits across the full set
Batch edits are where you get the biggest time savings. Apply baseline corrections consistently across the entire set for that product, or across a product line shot under similar lighting. Typical baseline edits include exposure, highlights and shadows control, and white balance correction.
Think of it this way. Batch editing is for global consistency, not perfection. You want all images to feel like they belong in the same catalog before you do any detailed retouching.
4. Use AI where it is safest and most repeatable
AI is typically strongest when the task is repetitive and the output can be easily checked. For most Shopify store owners, the safest AI wins are background work, simple cleanup, and resizing. Background removal, white background creation, and background swapping can be huge time savers, as long as you review edges and shadows before publishing.
AI can also help with small cleanup tasks like removing dust, small scratches, or unwanted text. Just be careful with anything that changes the product itself. If AI removes texture, alters logos, or smooths away details shoppers care about, that is a signal to switch to manual retouching for that image.
5. Do manual retouching on the images that actually matter
Manual editing is where you protect accuracy and brand trust. Focus your detailed retouching on your hero image, your top selling products, and any image where AI introduces artifacts. This is where you fix edge quality, refine shadows, correct color drift, and remove distractions without flattening texture.
Now, when it comes to time management, do not treat every image equally. You usually get better results by polishing fewer images to a higher standard than trying to perfect every angle for every SKU.
6. Export and upload in a controlled way
Export your final assets into an upload-ready folder that matches your Shopify image order. If you plan to reuse the same images for marketplaces or ads, create separate exports for each channel so you do not constantly resize and recompress the same file.
When uploading to Shopify, keep your sequence consistent across products. Your first image is typically the hero, then alternate angles, detail shots, and usage or scale shots. Consistency in ordering reduces shopper confusion and makes your store feel more intentional.
7. Run a simple quality gate before you publish
What many store owners overlook is that the last 2 minutes of quality control prevents hours of cleanup later. Before images go live, check them in the same context customers will see, including collection grids and on mobile.
Use this quick gate:
If an image fails the gate, fix it now. Publishing first and correcting later often leads to mismatched imagery across Shopify, ads, and marketplaces.

What strong ecommerce image editing should include
Whether you use Photoshop, an AI product photography editing app, or a specialist service, there are a few capabilities that matter most.
1. Background control
A clean background is often the first edit you need. White backgrounds are essential for many marketplaces, while transparent or styled backgrounds are useful for DTC storefronts and ad creatives. Relevant tools from the current product set include Free White Background Generator, AI Background Generator, and Background Swap Editor.
2. Resolution and clarity improvements
If your original shots are slightly soft or too small for zoom, upscaling can help, though it should not be treated as a replacement for strong source photography. Increase Image Resolution is built for this job. In practice, it is most useful when reworking older catalog images that need to meet current storefront requirements.
3. Cleanup and object correction
Text overlays, distracting props, dust, edge issues, and visual clutter can weaken product pages. For cleanup tasks, Remove Text From Images and Magic Photo Editor can support a faster workflow than doing every adjustment manually.
4. Context creation for merchandising
Some products sell better when customers can imagine scale or usage. That is why in-hand or lifestyle presentation matters. Place in Hands is relevant here, especially for beauty, accessories, and small packaged products where context supports perceived value.
5. Workflow speed for growing catalogs
If you launch products often, editing speed matters almost as much as image quality. A tool like Creator Studio may suit merchants who need one place to create and revise multiple visual assets without bouncing between disconnected apps.
The broader takeaway is simple. Professional product photography editing is less about advanced retouching effects and more about repeatability, accuracy, and commercial usefulness.
Export settings and file standards for Shopify, marketplaces, and ads
Strong editing is only half the job. If you export the wrong format, compress too aggressively, or crop inconsistently, your images can look soft, load slowly, or display unpredictably across Shopify themes, marketplaces, and paid social placements.
Consider this. Export standards are what turn a good edit into a reliable catalog system.
File format: JPEG vs PNG vs WebP
Most ecommerce product photography exports end up as JPEG. It is widely supported, compresses well, and works for the majority of product images where you do not need transparency.
PNG is useful when you need transparency, for example if you are overlaying a product on colored backgrounds in creative, or if your design system relies on transparent assets. The trade-off is that PNG files can be much larger, which can slow page load if you upload them directly to Shopify without careful compression.
WebP can deliver smaller file sizes at similar quality, but your workflow depends on where the image is being used. Shopify themes generally handle modern formats well, but some marketplaces and ad workflows still expect JPEG or PNG. If you export WebP, test it end-to-end in the exact places you will use it, including feed-based channels.
Dimensions and file size: keep quality without bloating your pages
For Shopify product pages, you typically want enough resolution for zoom and modern screens, without uploading huge files that slow down your store. A practical approach is to export larger master images, then check how your theme renders them and whether they load quickly on mobile connections.
If your images feel slow, the fix is often not a smaller image on the page. It is a better export and compression approach. Many themes will request different sizes automatically, but they still need a sensible source file to work from.
Crop ratios by use case: product page vs collection grid vs paid social
Crop ratio consistency is what makes a catalog feel premium. If your collection page shows half your products cropped tight and the other half floating in space, it looks chaotic even if each individual photo is high quality.
Use one consistent crop ratio for your main product set across your Shopify catalog. Then create alternate crops for channels that have different placement rules, such as paid social creatives or marketplace image slots. For paid social, you often need multiple versions because placements vary. The way this works in practice is that you keep one master edit, then export different crops per channel, rather than re-editing the image from scratch.
Transparency and shadows: avoid surprises across backgrounds
If you are exporting with transparency, check how your shadow behaves on different backgrounds. A shadow that looks natural on white may look dirty or overly heavy on a colored background. If you are using AI to generate or enhance shadows, review at 100 percent zoom and on a few backgrounds before you use that asset in ads.
Naming and organization: make Shopify uploads and replacements safer
File naming sounds boring until you are replacing images across 200 products and you accidentally upload the wrong variant. A simple system reduces errors and speeds up collaboration.
Many stores use SKU-based naming, plus angle or variant identifiers. For example, include the SKU, then a short suffix like front, side, detail, or variant color name. The goal is not perfection. It is to make it obvious what you are uploading, what you are replacing, and what belongs to each product.
This also helps if you sell across multiple channels. If your master files are named consistently, exporting separate sets for Shopify, Amazon, and ads becomes straightforward, and you are less likely to lose track of which image is the current approved version.
Pros and Cons
Strengths
Considerations

Common product photography editing mistakes (and how to fix them)
The reality is that most product photo edits fail in predictable ways. If you know what to look for, you can catch issues quickly before they reach Shopify product pages, Google Shopping feeds, or paid ads.
Halos and rough cutouts around the product
This is one of the most common artifacts from background removal and fast masking. You will see a light outline around the product edge, or jagged edges around details like handles, straps, hair, or transparent packaging.
Fix: zoom in and inspect edges at 100 percent before exporting. If you are using AI background tools, re-run the cutout with a cleaner source image, then refine problem areas manually. Pay special attention to curves and semi-transparent materials, where automation is more likely to fail.
Unnatural shadows and “floating” products
If the product looks like it is hovering, your shadow is either missing, too sharp, or placed inconsistently with the rest of your catalog. AI-generated shadows can also be the wrong direction, or too dark for the background.
Fix: pick a consistent shadow style for your catalog. Then match softness and direction across products. If you are using AI for shadow creation, treat it as a starting point, not a final output. Review in a collection grid view, because floating products often look acceptable on a single product page but feel wrong in a grid.
Bad reflections on glossy or metallic products
Reflective products like jewelry, stainless steel, glass, and glossy packaging are tough. AI cleanup can accidentally remove real reflections that convey material quality, or add reflections that do not match the product shape.
Fix: use manual retouching for reflective products more often than you would for matte packaged goods. Keep reflections believable and consistent with the lighting in the original shot. If the reflection is confusing the cutout tool, simplify the background during photography next time, because editing is rarely the cleanest fix for complex reflections.
Over-smoothing textures that shoppers care about
Skin, fabric, leather grain, paper texture, and product finishes can get flattened when you apply aggressive noise reduction, clarity edits, or AI cleanup. This can make the product look unreal, or lower perceived quality because it feels plastic.
Fix: reduce the strength of smoothing and cleanup tools, and preserve micro-texture in your hero images. If you sell apparel, fabric texture is part of the decision. If you sell premium cosmetics, finish and color are part of the expectation. Do not edit those signals away.
Color accuracy problems from white balance drift
Color drift happens when different products, or even different angles of the same product, are edited with slightly different white balance. Blacks can turn gray or blue. Whites can turn yellow. Variant colors can become inconsistent across the catalog.
Fix: use a reference in your workflow. That can be a consistent baseline edit preset, a known neutral background, or even a real product reference under natural light. Also check your images on multiple screens. One monitor can hide issues that show up immediately on mobile.
Category-specific pitfalls to watch
Some categories punish sloppy edits more than others.
If you are unsure whether to trust AI on a specific product type, start with background and cropping only. Then decide if the category can tolerate more automation after you see real customer feedback and returns data.
Who this approach is for
This approach suits ecommerce teams that already understand the value of product images but want a more practical editing system. If you run a Shopify store with a growing catalog, seasonal launches, or frequent creative testing, a defined editing workflow is usually worth setting up. It is especially helpful for merchants in apparel, beauty, accessories, home goods, and packaged products where image consistency directly affects perceived quality.
It is also a strong fit if you sell across Shopify, Amazon, Etsy, or Meta ads and need the same product adapted for different format requirements. If your niche relies on visual transformation, such as cosmetics, this related guide on an ai makeup generator shows how adjacent categories are approaching AI-assisted visuals.
AcquireConvert recommendation
At AcquireConvert, the goal is to help store owners choose workflows that are commercially useful, not just visually impressive. That is why this topic matters. Giles Thomas brings a practical operator perspective as a Shopify Partner and Google Expert, which is especially relevant when image decisions affect product page performance, Merchant Center compliance, and ad creative production.
If you are comparing software options, see our coverage of photoroom for a closer look at a product-focused editing workflow. You can also explore the wider Catalog Photography section and the Background Removal & Editing category for more specialized guidance. The best next step is to review your current product image pipeline, identify the slowest editing task, and solve that bottleneck first.

How to choose the right editing workflow
Store owners usually have three realistic choices: manual editing, AI-assisted editing, or outsourced professional product photography editing. Here is how to evaluate them.
Catalog size and SKU churn
If you have a small catalog with premium products, manual retouching or a specialist service often makes sense. You have fewer assets to manage, and each image may justify more attention. If you launch new SKUs weekly, AI-assisted tools can make more sense for background edits, resizing, and rapid variation creation.
Brand sensitivity
Brands with strict visual identity standards need tighter control. That includes cosmetics, luxury accessories, and high-AOV products where color accuracy and texture matter. In these cases, AI can still help, but it should be reviewed by a human before publication. If your category is less sensitive, such as simple packaged goods, automation may be more workable across a larger portion of the workflow.
Channel requirements
Amazon product photography editing is usually stricter than editing for your own Shopify storefront. Marketplaces may require white backgrounds, limited props, and clearer compliance with image policies. Your DTC store has more freedom to use branded scenes and lifestyle composites. Choose tools that let you build both without recreating the asset from scratch each time.
In-house skill level
If nobody on your team is comfortable in Photoshop, do not build a workflow around it just because it is powerful. The better system is the one your team will actually use consistently. AI tools and focused editors can remove friction, but they still need quality control. Set up a simple review checklist for crop, color, edge quality, scale realism, and export format.
Commercial impact, not just visual polish
The best image edit is the one that helps customers buy with confidence. That means your workflow should support product clarity, accurate expectations, and faster merchandising. Before switching tools, pick one product set and test a revised image standard. Review engagement metrics, on-page behavior, and customer feedback. You may find that consistency and speed matter more than advanced retouch detail.
For many stores, a blended setup works best: shoot clean originals, use AI for repetitive edits, then apply manual review for hero images and best sellers. That usually gives you a sensible balance of control and throughput.
Frequently Asked Questions
What is product photography editing?
Product photography editing is the process of improving product images after the photo is taken. In ecommerce, that usually includes background cleanup, white balance correction, cropping, retouching, shadow control, resizing, and exporting assets for Shopify, Amazon, or ad platforms. The goal is not just visual polish. It is clearer merchandising and more consistent presentation.
How to edit photos for product photography?
A practical approach is to start with consistent baseline edits across the full image set, then polish only the images that matter most. In many cases that means: select your hero image, apply batch exposure and white balance corrections, do background cleanup, refine edges and shadows, then export the right crops and formats for Shopify and your other channels. If you use AI, it is typically safest for background work, simple cleanup, and resizing, then do a quick human quality check before publishing.
What is product image editing?
Product image editing is a broad term for any post-production work applied to product photos. It can include basic corrections like brightness and color, plus ecommerce-specific tasks like background removal, consistent cropping for collection grids, shadow control, retouching dust and defects, and exporting sizes that load fast and display cleanly across Shopify, marketplaces, and ads.
Is Photoshop still the best option for product photography editing?
Photoshop is still one of the most flexible options for detailed retouching and advanced control. It is often the better fit for brands that need precise masking, color correction, and layered edits. That said, it is not always the best fit for a small ecommerce team. Focused AI tools and editing apps can be faster for repetitive catalog tasks.
How can AI help with product photography editing?
AI can help with background removal, white background creation, scene generation, resolution enhancement, cleanup, and quick merchandising variations. It is especially useful for reducing repetitive work across large product catalogs. The trade-off is that AI output still needs review. Unrealistic edges, shadows, proportions, or color shifts can slip through if you publish too quickly.
What are the best AI tools for product photography editing?
Based on the current product data available for this article, useful options include AI Background Generator, Free White Background Generator, Background Swap Editor, Magic Photo Editor, Place in Hands, Increase Image Resolution, and Creator Studio. The best one depends on the task. There is no single best tool for every catalog, brand style, or sales channel.
What is the best app to edit product photos?
The best app depends on what you need to do most often. If your biggest bottleneck is background work and fast catalog variations, an AI-first editor may be the better choice. If you need precise control over masking, color, and texture, a more manual tool may be a better fit. Many Shopify teams end up with a blended workflow: AI for repetitive edits, then manual review and touch-ups for hero images and top sellers.
What is the 20 60 20 rule in photography?
The 20 60 20 rule is often used as a simple way to think about effort allocation. In ecommerce product photography editing, you can apply a similar idea: spend most of your time on the images that drive the most value. For many stores, that means putting the highest attention on hero images and best sellers, then using faster, repeatable edits for the rest of the catalog. The exact split varies by catalog size and brand standards, but the principle is to avoid treating every SKU and every angle as equally important.
Do I need professional product photography editing for a Shopify store?
Not always. If your catalog is small and visually central to the sale, professional editing may be worth it for hero images and top sellers. For broader catalogs, many merchants use AI or simpler editing apps for routine tasks and reserve professional help for campaign visuals, home page assets, or premium product launches. The decision usually comes down to scale and standards.
What matters most for ecommerce product photography editing?
The most important factors are consistency, color accuracy, clean composition, and channel fit. Customers need to understand what they are buying quickly. If the product is unclear, cropped awkwardly, or shown unrealistically, conversion may suffer. Your editing process should help shoppers evaluate the item with confidence, not distract them with overly styled or confusing imagery.
How is Amazon product photography editing different from DTC editing?
Amazon usually has stricter image requirements, especially for main product images. White backgrounds, minimal distractions, and clearer compliance standards are more important there. On a DTC Shopify store, you have more room for branded layouts, texture shots, lifestyle scenes, and richer visual storytelling. Many merchants create separate exports for each channel from the same edited source file.
Can a product photography editing app replace a photographer?
No, not fully. Editing apps improve and adapt existing images, but they do not replace the value of a strong original shot. Lighting, angle, styling, and product preparation still matter. AI can reduce the amount of post-production work required and create some useful variations, but source image quality remains one of the biggest factors in the final result.
How do I know if my edited images are too aggressive?
A good rule is to compare the edited image with the real product in natural light. If the color, finish, scale, or texture feels noticeably overstated, pull the edit back. Also check customer service feedback and return reasons. If shoppers frequently mention that the item looked different online, your editing may be creating expectations the product cannot meet.
Key Takeaways
Conclusion
Product photography editing can have a real effect on how shoppers perceive your store, but the smartest approach is usually the one you can apply consistently across your catalog. For some brands, that means Photoshop and careful retouching. For others, it means AI-assisted editing that speeds up background work and image variations without slowing your launch cycle. What matters most is that your visuals stay accurate, useful, and aligned with how customers actually shop. If you want more practical guidance, explore AcquireConvert’s category pages and product-focused reviews for hands-on advice shaped by Giles Thomas’s experience as a Shopify Partner and Google Expert. Use this article as a working checklist, then refine one part of your image process this week.
This article is editorial content for educational purposes and is not a paid endorsement unless explicitly stated otherwise. Tool availability and features are based on current data provided at the time of writing. Pricing was not available in the supplied product data and should be verified directly with each provider. Any performance or conversion impact from product photography editing will vary by store, product category, traffic quality, and implementation.

Hi, I'm Giles Thomas.
Founder of AcquireConvert, the place where ecommerce entrepreneurs & marketers go to learn growth. I'm also the founder of Shopify agency Whole Design Studios.