Product Photography Setup at Home (2026 Guide)
If you run an ecommerce store, your product images do more than make the page look good. They shape trust, reduce hesitation, and often influence whether a shopper keeps browsing or adds to cart. The good news is that a solid product photography setup at home does not need a rented studio or expensive gear. For many Shopify merchants, a spare table, controlled lighting, and a repeatable workflow are enough to produce clean catalog images. This guide walks you through what to buy, what to skip, and how to build a setup that fits your products and margin profile. If you want the bigger-picture version of how home shooting compares with a dedicated product photography studio, start there after this article.
Contents
What a good home setup actually needs
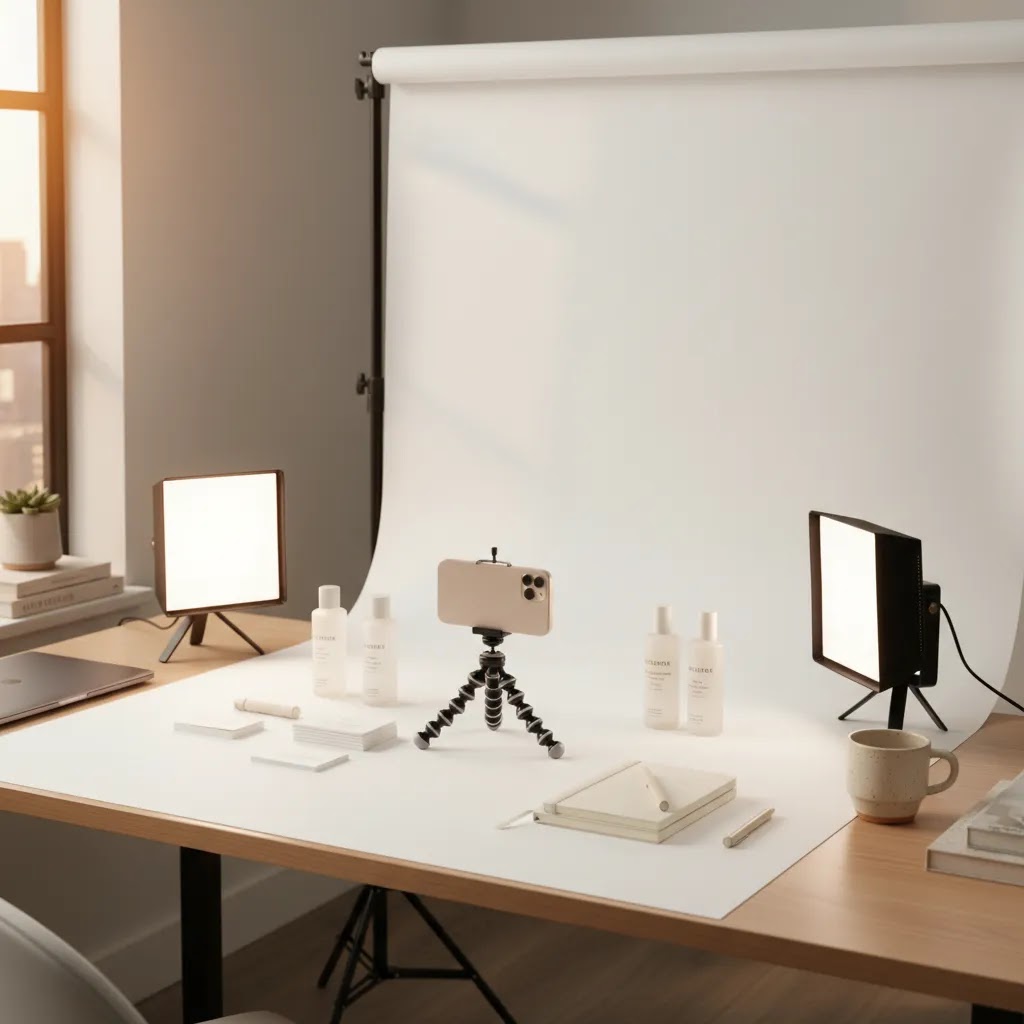
A reliable product photography setup at home is less about having more equipment and more about controlling variables. For ecommerce, the goal is consistency. Your hero images, angle shots, close-ups, and detail photos should look like they belong to the same brand, even if you shot them over several days.
At minimum, most store owners need four things: a stable shooting surface, controlled light, a clean background, and a camera or smartphone that can reproduce color and detail consistently. If you sell jewelry, cosmetics, accessories, stationery, or other compact items, a small product photography setup can work extremely well in a home office or spare room. If you sell larger items such as footwear, apparel on mannequins, or home goods, you will need more space and broader light coverage.
For catalog use, clean white-background shots usually matter first. Lifestyle and social content can come second. That is why many merchants start with a basic at home product photography station for product pages, then later expand into styled scenes or ai photoshoot workflows for campaign creatives.
If you are building an image workflow for Shopify, think beyond the first shoot. Ask whether you can repeat the setup every time new inventory arrives. That repeatability matters more than owning professional-grade gear you rarely use.
Core equipment for a practical DIY setup
Your product photography setup equipment should match your SKU type, order volume, and image standards. A handmade candle shop and a beauty brand have different needs. Still, most ecommerce operators can build a strong product photography studio setup at home around the same essentials.
If you need fast cleanup or alternate backgrounds, tools such as AI Background Generator, Free White Background Generator, and Background Swap Editor can help extend a home workflow. They are most useful after you already have a decent source image. They do not replace lighting, composition, or accurate product representation.

Product photography setup cost and buying priorities (what to buy first, what to skip)
Most store owners do not fail at home product photography because they bought the wrong camera. They fail because they bought a pile of accessories without solving the fundamentals: stable framing, controllable light, and a background that stays clean.
From a practical standpoint, your costs typically fall into three buckets, depending on how repeatable you need the results to be and how many SKUs you are shooting.
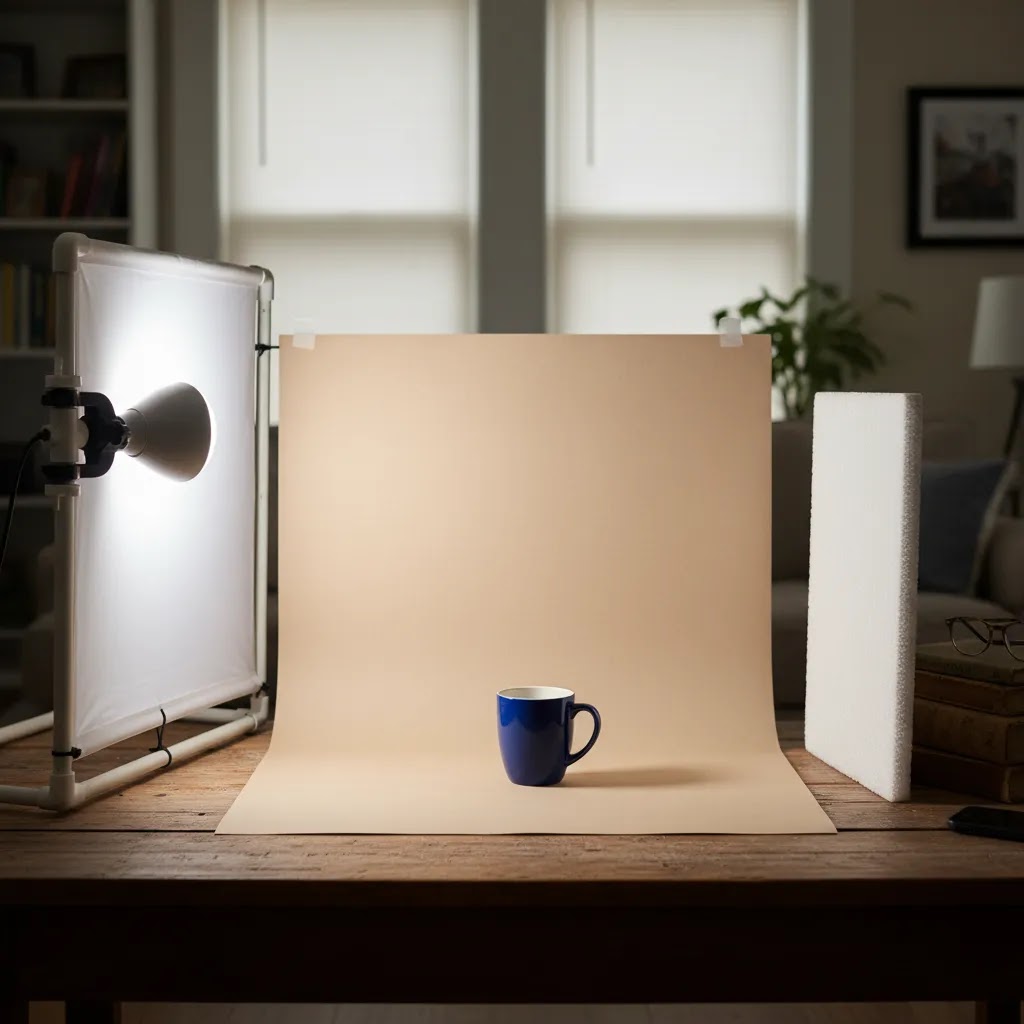
A starter setup is usually a tripod, a simple background, and one controllable light (or a window-light routine you can repeat). This tier can work well for low volume catalogs, early-stage Shopify stores, or products that are matte and forgiving.
A “repeatable catalog” setup is where many growing brands land. Think two matching continuous lights with diffusion, a sturdy tripod, a dedicated sweep or backdrop system that you can keep assembled, and reflectors or flags. This tier tends to reduce reshoots and editing time, which is often the real cost center once you are adding new inventory every week.
A more advanced home setup typically adds bigger diffusion surfaces, more control tools (flags, stands, clamps), and sometimes lenses or a dedicated camera body if you need consistent depth and tighter detail work. This tier is less about “better quality” in a general sense and more about handling hard products: reflective packaging, transparent bottles, or anything where small lighting changes create big visual differences.
Now, when it comes to buying priorities, here is the order that usually saves the most time and frustration:
What many store owners overlook is that “all-in-one kits” can be the most expensive way to learn. You get a lot of pieces, but not necessarily better light. To judge whether a kit is worth it, focus on stability and light quality: do the stands hold position, can you diffuse the light evenly, and can you keep color consistent between shooting days. More accessories do not fix uneven lighting.
If you are searching for setup cost numbers, treat them as ranges, not rules. Pricing varies, and your real cost depends on whether you already have a usable phone, whether you can leave a station set up, and how strict your product page standards are. The goal is to invest in the parts that reduce reshoots, not the parts that look impressive on a shopping list.
How to get your lighting right
Lighting is the part that usually separates a usable DIY product photography setup from one that looks inconsistent. If your product colors shift from shot to shot, or shadows feel random, shoppers may read those images as lower trust even if they cannot explain why.
For a product photography lighting setup at home, start with one of these approaches:
A strong product photography light setup should aim for consistent exposure, neutral color, and enough separation from the background. This is where many store owners benefit from reading broader product photo lighting guidance before buying more gear.
Reflective items need extra care. Glass, foil labels, glossy packaging, and polished metal often show your room in the reflection. In those cases, larger diffusion surfaces and careful light placement matter more than stronger bulbs. If you sell cosmetics, visual cleanup and presentation standards overlap with workflows you might also see in content about an ai makeup generator, where precision around edges, tones, and finish is especially important.
Camera settings that make home product photos look consistent (and when to break them)
If you want a catalog that looks cohesive, you need a baseline. Not a perfect “one size fits all” exposure, but a starting point that you can repeat, then adjust in small, controlled steps.
Here is a simple baseline that works for a lot of home product photography, especially if you shoot on a tripod with continuous lights:
Now, if you are shooting on a phone, the principle is the same even if the controls look different. Your goal is to lock the variables that cause “random” results. Use a tripod, tap to set focus, and lock exposure if your camera app allows it. If your phone supports Pro or Manual mode, keep ISO as low as it will reasonably go and avoid letting the phone constantly change brightness between frames.
Color consistency is the other half of the job. Most of the time, bad color comes from auto white balance reacting to every small change in the scene, or from mixed lighting. The fix is usually simple:
The reality is that most home setups fail in predictable ways. Here are the common ones and what to do before you buy more gear:
When should you break the baseline? Usually for creative reasons or product requirements. Clear glass may need a brighter background. Dark products may need more negative fill to keep edges defined. Reflective packaging may need you to prioritize highlight control over raw brightness. The key is to change one thing at a time, record what you changed, and keep everything else stable so you can recreate the result next week.
Fixing reflections and glare on shiny products (glass, glossy packaging, metal)
Shiny products are where most home setups get exposed, because the product acts like a mirror. If you can see the room, the camera, or the light source as a bright hotspot, shoppers will see it too.
Think of it this way: you are not “lighting the product,” you are lighting what the product reflects. That is why controlling the room matters more than buying a stronger light.
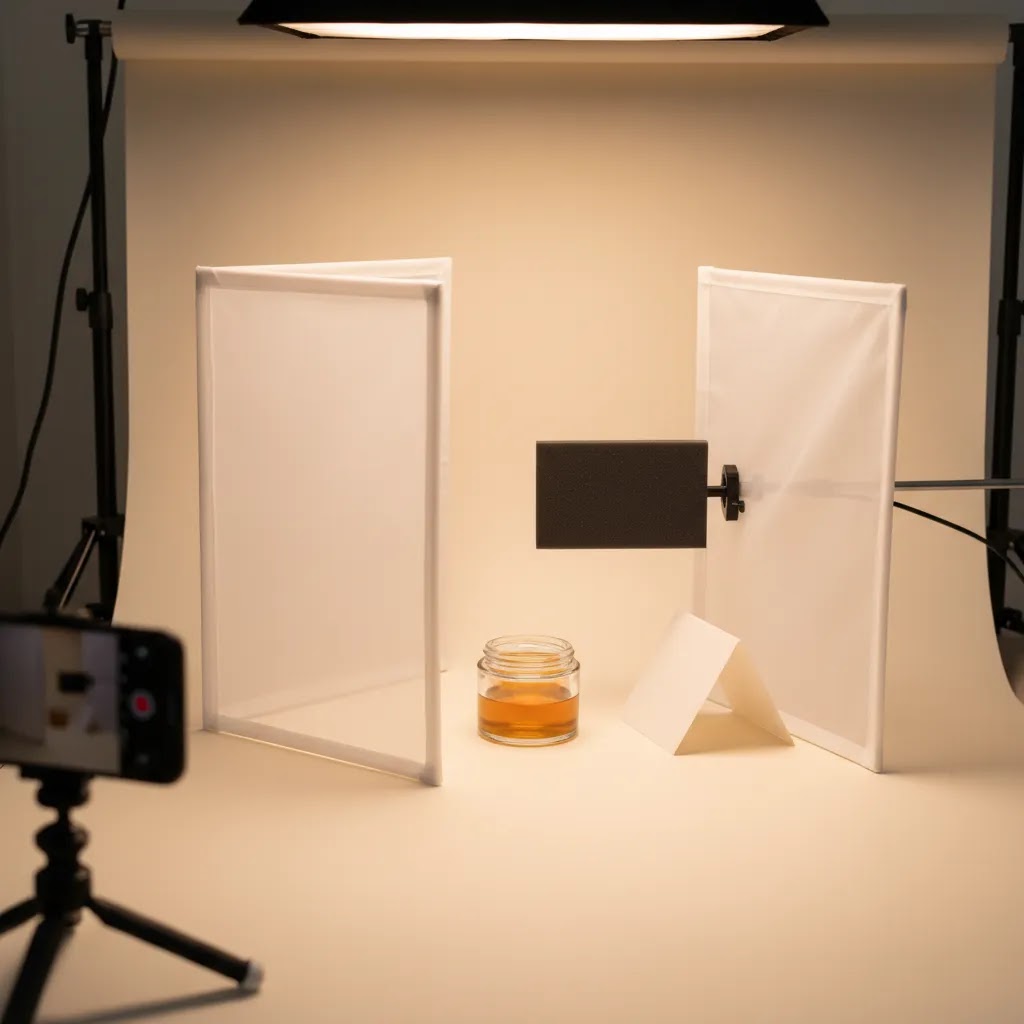
Start with diffusion size and placement. Bigger diffusion, placed close to the product, typically creates smoother reflections and fewer harsh hotspots. If your diffusion is small and far away, you often get a tight, bright glare patch that destroys label readability.
Light placement matters more with reflective items. Small moves can change everything. If you see a white glare stripe across a logo, move the light left or right, or raise it slightly, instead of turning brightness up. Brightness usually makes glare worse.
Now, when it comes to getting definition, black cards (often called flags) can do more than reflectors. A black card placed just outside the frame can create a clean dark edge on chrome, glossy bottles, and shiny packaging. That edge definition is what stops reflective products from blending into a white background.
A light tent can help, but it has trade-offs. It is great for speed and for reducing chaotic reflections, especially for small items. The downside is that it can flatten the product. If your shots look too “even” and lifeless, add negative fill by placing black cards on the left and right sides of the tent opening, or pull the product slightly forward so you can create a bit more direction in the light.
Here is a practical troubleshooting checklist you can run when reflections are the thing holding your catalog back:
If you want to go further, a circular polarizing filter on a dedicated camera lens can sometimes reduce glare on certain surfaces. It is not a universal fix and it will not remove every reflection, but in some cases it can help you control specular highlights. If you are on a phone, you can still solve most reflection problems with diffusion, light placement, and flags.
How to build your product photography home setup
Here is a practical sequence that works for many merchants creating a product photography setup diy workflow at home:
This approach works well for small product photography setup needs and for growing brands that add new SKUs weekly. If you want speed in post-production, a tool like photoroom can be worth evaluating for background cleanup and fast ecommerce image preparation. If you want broader automation ideas, see our take on ai product photography and where it fits into a real store workflow.
For lifestyle variants, you can extend the same station rather than building a second studio. Swap the background, add props carefully, and keep the hero angle consistent with your catalog shots. That makes your product pages feel cohesive instead of patched together from different shoots.
Who this setup works best for
A home setup is usually the right fit for merchants who need control, speed, and lower upfront overhead. It works especially well for Shopify store owners with small to medium products, frequent new arrivals, and a need to update product pages without waiting on an agency or photographer.
This route is a strong match if you sell handmade goods, cosmetics, supplements, stationery, jewelry, accessories, or packaged products with repeatable dimensions. A smartphone product photography setup at home can be enough if your product is well lit and your images are primarily for product pages, email campaigns, and organic social.
It is less ideal if you sell highly reflective luxury items, large furniture, or apparel that needs advanced styling, model work, or complex set design. In those cases, a hybrid approach often works better: shoot simple catalog images in-house and outsource premium campaign visuals only when needed.
AcquireConvert recommendation
For most ecommerce operators, the best setup is the one you can repeat accurately every time inventory lands. That usually means starting with controlled lighting, a tripod, and a simple white-background workflow before adding more creative complexity. Giles Thomas brings a practical operator view to this topic as a Shopify Partner and Google Expert, which matters because product images do not just affect aesthetics. They shape conversion quality, ad readiness, Merchant Center compliance, and how trustworthy your product pages feel.
If you are comparing manual shooting with newer AI-assisted workflows, browse the broader catalog photography resources on AcquireConvert. You can also review our content on ai photoshoot and ai product photography to see where automation may help and where a proper shoot still matters. For many merchants, the most sensible path is not all-manual or all-AI. It is a clean home setup supported by selective editing and background tools where they save real time.
How to choose the best setup for your store
There is no single best product photography setup for every business. The right choice depends on five practical factors.
1. Product size and surface
Small matte products are easiest to shoot at home. Reflective, transparent, or oversized products are harder. If you sell glass bottles, chrome hardware, or shiny packaging, invest first in diffusion and control rather than more camera body features.
2. Volume of new SKUs
If you add products often, optimize for repeatability. A permanent station, marked positions, and a simple shot list will outperform an impressive but inconsistent setup. High-SKU stores benefit from workflows that reduce per-product editing time.
3. Channel requirements
Think about where the images will be used. Product page hero images, collection pages, Meta ads, email campaigns, marketplaces, and Google Shopping may all need slightly different crops or backgrounds. Your studio setup should support those requirements without forcing a full reshoot every time.
4. Team skill level
If you or your staff are not photographers, choose equipment that is forgiving. Continuous lights, tripod shooting, and phone-based capture can be smarter than more advanced gear that introduces complexity. A product photography setup amazon shopping list can look appealing, but buying more items than your team can actually use often slows you down.
5. Post-production tolerance
Some brands are happy to do careful retouching. Others need speed. If you want minimal editing, spend more time getting the set right before shooting. If you are comfortable with light cleanup, AI-assisted tools may save time on background work, resizing, or removing distractions. For example, Increase Image Resolution and Remove Text From Images may help with selective fixes, but they are still downstream tools. They work best after a controlled shoot, not instead of one.
If you are unsure where to begin, start lean: tripod, two lights, white sweep, reflectors, and a fixed process. Once that system is delivering consistent images, then test whether AI tools, extra props, or more advanced lighting actually improve your output enough to justify the added complexity.
Pros and Cons
Strengths
Considerations
Frequently Asked Questions
What is the minimum equipment needed for product photography setup at home?
For most ecommerce sellers, the minimum is a smartphone or camera, a tripod, a white background, and a controllable light source. Add foam boards for bounce and shadow control. That basic setup is enough for many small products if your goal is clean catalog imagery rather than complex campaign creative.
Can I use a smartphone for at home product photography?
Yes, in many cases you can. A recent smartphone with manual exposure control, good lighting, and stable tripod placement can produce strong ecommerce images. The biggest limitation is usually not the phone itself. It is inconsistent lighting, shaky framing, and too much reliance on automatic processing.
What is the best lighting for a diy product photography setup?
For repeatability, continuous LED lights with diffusion are often the most practical choice. They let you see shadows and highlights in real time, which is helpful if you are not a trained photographer. Window light can work too, but it changes throughout the day and is harder to standardize.
How much space do I need for a small product photography setup?
Not much. Many merchants can work from a desk, folding table, or small corner in a home office. What matters more than square footage is your ability to leave enough room for the product, background sweep, and light placement without casting unwanted shadows or creating reflections.
Should I buy a lightbox for product photography?
A lightbox can be useful for very small products and simple white-background shots. It reduces setup time and helps soften shadows. The trade-off is that images can look flat if you rely on it for every SKU. Brands that need stronger shape or premium styling often outgrow it quickly.
What background is best for product photography home setup?
White is usually the safest starting point for ecommerce because it keeps the focus on the product and works well for product pages and many marketplace requirements. Paper sweeps, foam boards, or white vinyl are common choices. Your best option depends on product size, finish, and how often you shoot.
Can AI tools replace a product photography setup?
Not fully. AI tools can help with background generation, cleanup, alternate scenes, or image enhancement, but they still work best when the source image is solid. For ecommerce trust, shoppers need visuals that accurately represent the product. A proper shoot and AI editing often work better together than either approach alone.
How do I keep my Shopify product images consistent?
Use a fixed shot list, mark tripod and product positions, keep your lighting unchanged, and edit with the same settings across batches. Consistency often matters more than artistic variety on product pages. It helps your store feel organized and can reduce friction as shoppers compare variants or browse collections.
Is a home setup good enough for Google Shopping and marketplaces?
It can be, provided the images are clear, accurately represent the item, and meet the platform's formatting and policy requirements. Home-shot images often work well for smaller products when lighting and background are controlled. Always verify current image specifications with each sales channel before publishing.
What are the best camera settings for product photography at home?
A solid baseline is typically low ISO for clean detail, a mid aperture if you are on a dedicated camera (often around f/8 for many product shots), and a shutter speed that gives you the exposure you need while shooting on a tripod. For phones, the equivalent is locking focus and exposure so the phone does not change brightness and color between frames. Use one lighting type, avoid mixed lighting, and keep white balance fixed if your device allows it.
How do I stop glare and reflections in product photos?
Use larger diffusion close to the product, and adjust light placement to move hotspots off logos and labels. Add black cards (flags) just outside the frame to create clean edge definition on shiny surfaces. If a light tent makes the product look flat, add negative fill with black cards near the tent opening to bring shape back.
How much does a product photography setup at home cost?
It depends on what you already have and how strict your catalog standards are. Many stores start with a tripod, a simple background, and one controllable light, then move to a more repeatable setup with two diffused lights and better background control as SKU volume grows. Pricing varies, but you will usually get more consistency by investing in stable support and controllable light before upgrading your camera.
How do I take product photos with my phone that look professional?
Put your phone on a tripod, use consistent lighting with diffusion, and lock focus and exposure so the phone does not “hunt” between shots. Keep the same distance and angle for each SKU, clean the product before every frame, and use a simple background sweep to avoid horizon lines. If your phone has a Pro mode, keep ISO low and avoid mixed lighting so color stays consistent.
Key Takeaways
Conclusion
A smart product photography setup at home is really a systems decision. You are building a repeatable process for launching products faster, keeping your catalog visually consistent, and giving shoppers clearer reasons to trust what they see. For most ecommerce brands, that means simple gear, controlled light, and a workflow you can recreate without friction. If you want to go further, AcquireConvert is a useful next stop for merchants comparing shooting methods, AI-assisted editing, and broader catalog image strategy. Explore our catalog photography resources, review our guides on ai photoshoot and ai product photography, and use Giles Thomas's practitioner-led insights to make decisions that fit your store rather than following generic advice.
This article is editorial content created for educational purposes and is not a paid endorsement unless explicitly stated otherwise. Tool capabilities and availability may change over time. Results from any photography setup, workflow, or software are not guaranteed and depend on your products, lighting conditions, skill level, and ecommerce requirements. Always verify current product details and policies directly with the provider before making purchase or workflow decisions.

Hi, I'm Giles Thomas.
Founder of AcquireConvert, the place where ecommerce entrepreneurs & marketers go to learn growth. I'm also the founder of Shopify agency Whole Design Studios.