Product Photography Stand: Choosing the Right One (2026)
If you sell physical products online, the right product photography stand can make your workflow more consistent, your images more repeatable, and your product pages more credible. That matters whether you are shooting skincare jars on a tabletop, apparel accessories for Shopify collections, or short-form product photography video for ads. A stand is not the most glamorous part of a studio setup, but it often decides how stable your framing, lighting, and angles will be. If you are still mapping out your full setup, start with this guide to a product photography studio. In this article, I’ll walk through the stand types worth considering, the trade-offs between fixed and rotating setups, and how to choose based on your catalog, content goals, and store stage.
Contents
What a product photography stand actually does
A product photography stand is any support system that helps you hold your camera, phone, lights, product, or rotating platform in a controlled position. For ecommerce, the goal is not artistic spontaneity. It is repeatability. You want your hero images, collection thumbnails, comparison shots, and ad creatives to look like they belong to the same brand.
For most store owners, a stand improves three things. First, it reduces blur and framing inconsistency. Second, it speeds up batch photography because you are not rebuilding the setup for every SKU. Third, it gives you cleaner inputs for editing, whether you handle post-production manually or use ai photoshoot workflows to create additional scenes and variants.
If you sell on Shopify, this matters even more because collection pages, PDP galleries, and paid social creatives all work better when product imagery follows consistent sizing, angles, and spacing. A weak stand setup usually shows up later as mismatched crops, awkward shadows, and extra editing time.
The main stand types to consider
Not every product photography stand solves the same problem. Choosing the right one starts with the kind of content you need to create regularly.
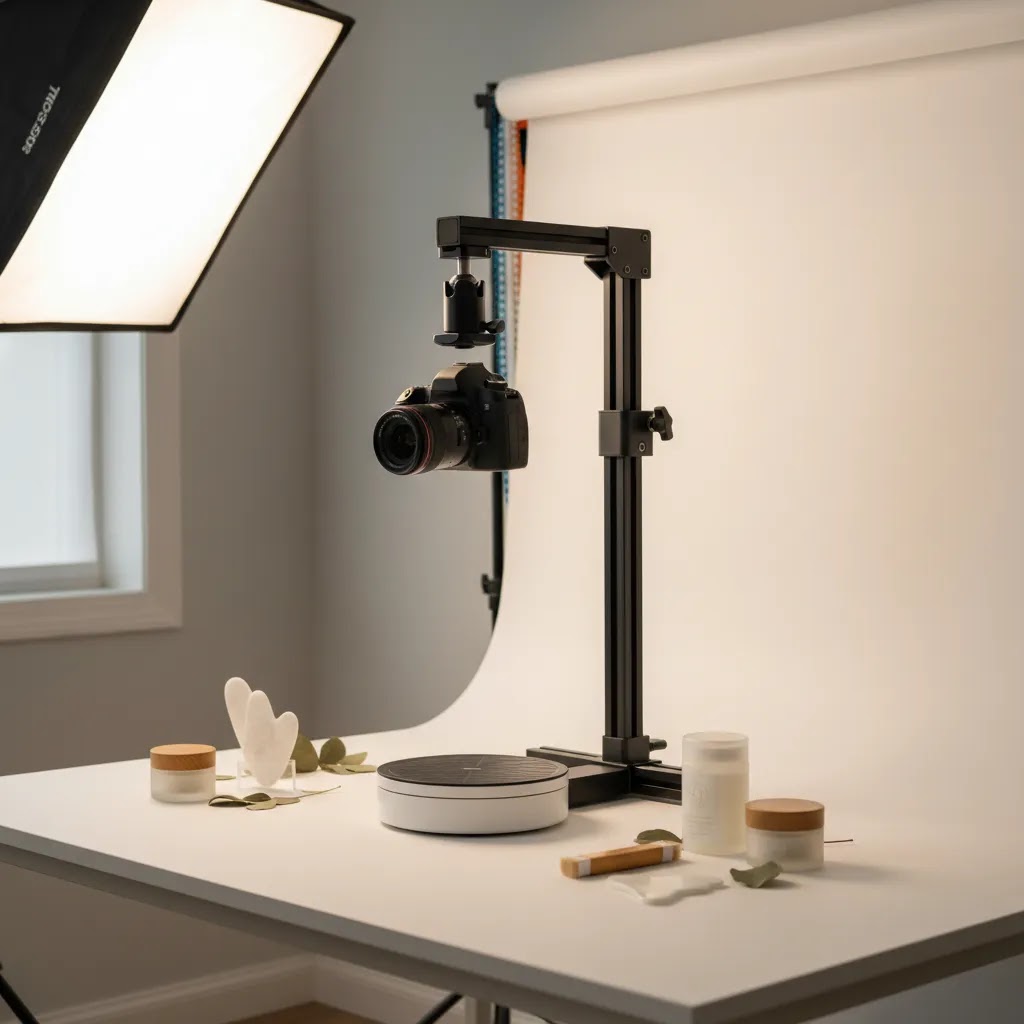
1. Tabletop camera stands
These are designed to hold a phone or camera above or beside a shooting surface. They are a good fit for small products such as cosmetics, jewelry, supplements, packaged foods, and electronics accessories. If your catalog is compact and you mainly need still images, this is often the most practical starting point.
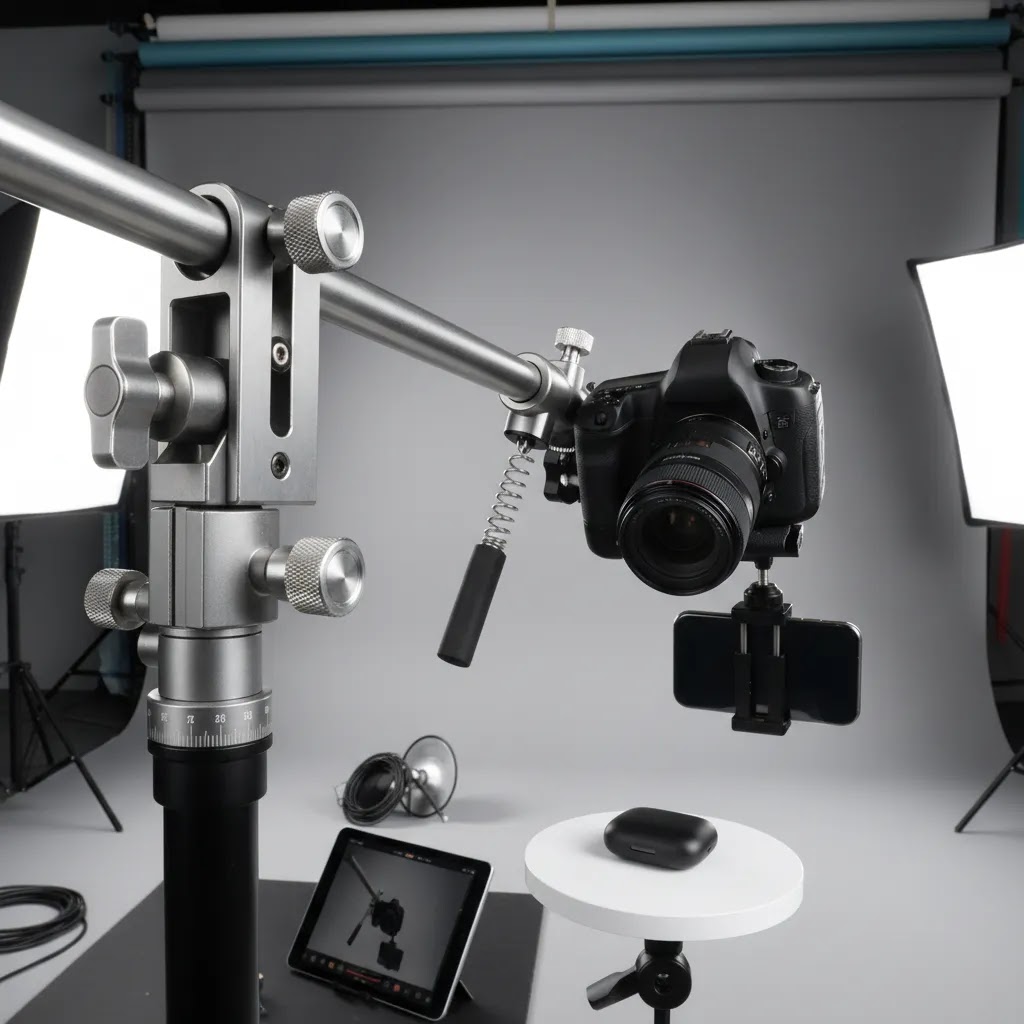
2. C-stands and boom stands
These are more common in professional product photography because they support overhead angles, heavier gear, and more precise positioning. They give you flexibility, but they also take more space and may be more than a solo merchant needs for a home setup.
3. Product support stands
These hold the actual item in place using rods, clips, or suspended mounts. They are useful for footwear, bottles, beauty products, and items that need to appear floating or perfectly upright. They can save editing time if the support is small and easy to retouch.
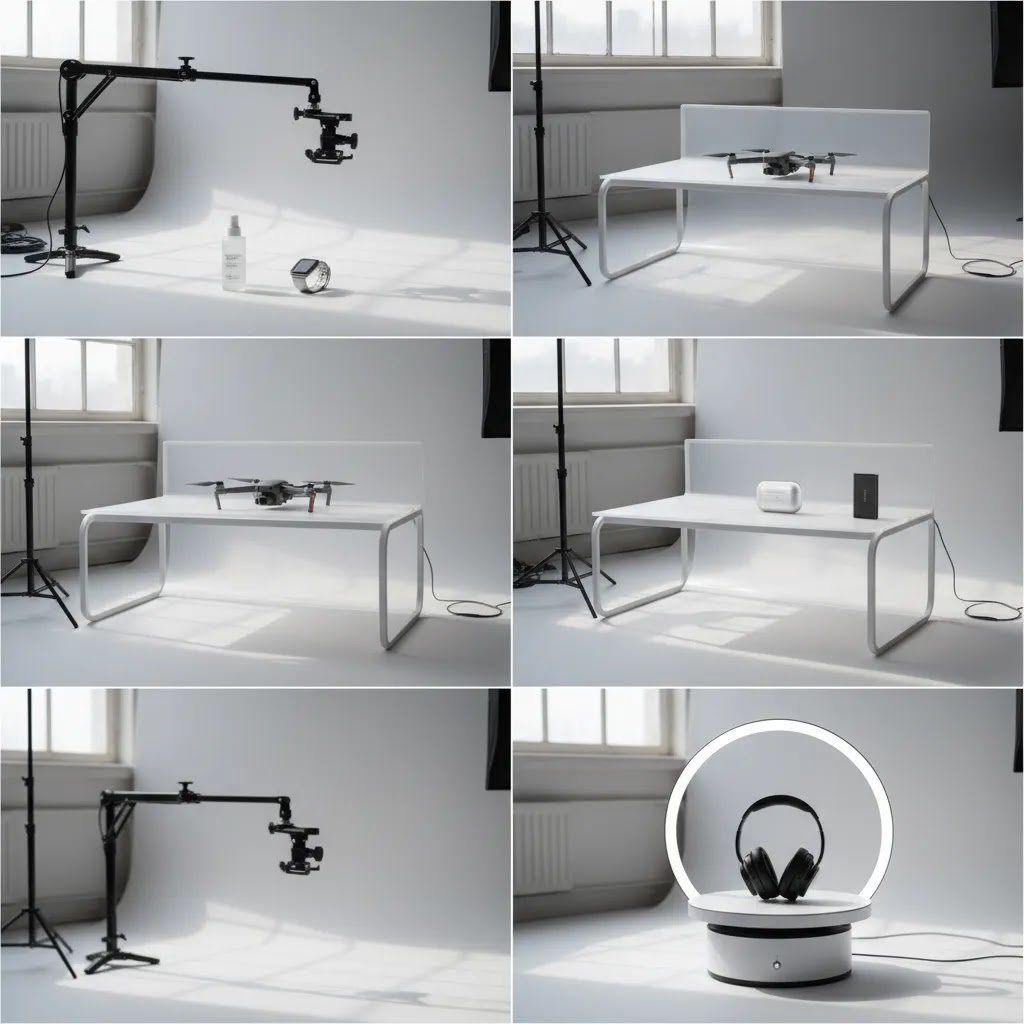
4. Rotating stands and turntables
A product photography rotating stand or 360° product photography stand is best if you need multi-angle content, spin views, or short videos for landing pages and marketplaces. These are especially useful for electronic product photography, watches, home goods, and premium packaging where form factor helps drive conversions.
5. Tent-compatible stand setups
If you use a product photography tent, you may want a compact stand that fits within or above the tent opening. This setup can work well for reflective products and beginner-friendly white background shots, though larger items may outgrow it quickly.
Tabletop photography table vs stand (and when you need both)
A lot of product photography frustration comes from mixing up three different pieces of gear: the stand (holds the camera or phone), the shooting table (creates the background sweep), and a light tent (controls reflections and softens light). They solve different problems.
A tabletop camera stand is about repeatable framing. It lets you lock in a consistent angle and distance so every SKU is shot with the same crop and horizon line.
A product shooting table, often called a sweep table, is about repeatable background and shadows. It is the curved surface that creates that clean “infinite” white look without a visible corner line. For many Shopify catalogs, a sweep table can reduce the amount of background cleanup you need because the edge line is not there in the first place.
A light tent is about light control, especially for reflective and glossy items. It can be a fast way to get usable results for metals, glass, chrome, and shiny packaging, but it can also limit your camera angles and make larger products awkward to fit.
From a practical standpoint, here are some decision rules that tend to hold up:
If you shoot small items and you mainly want consistent crops, start with a tabletop stand and a simple flat surface. If you have to spend lots of time removing the back edge of your background paper, or your shadows keep changing from SKU to SKU, that is when a sweep table starts to earn its keep.
If you shoot apparel flat lays, your “table” is really the set. You want a large, flat, consistent surface and an overhead position you can repeat. In many cases, getting the top-down camera position stable and repeatable matters more than upgrading the camera body.
If you shoot reflective products, a tent setup can be the difference between one hour of shooting and two days of chasing highlights in editing. Consider this: you may get a bigger workflow improvement from controlling reflections than you will from buying a heavier stand.
What many store owners overlook is workflow speed. If you are producing Shopify catalog content in batches, consistency is not just about aesthetics. It affects how quickly you can shoot, crop, and upload. A stand helps you keep the same framing. A table helps you keep the same background and horizon. For some catalogs, using both is what makes the whole system feel “repeatable” instead of improvised.
What features matter most for ecommerce
Store owners often compare stands based on height or materials alone. That misses the bigger point. The right stand is the one that supports your content workflow, not just your camera.
Stability comes first. If the stand wobbles, every shot becomes slower to capture and harder to match later. This is especially important for zoomed-in macro shots, product photography video, and 360 rotating camera stand for product photography setups.
Adjustability is next. Look for quick changes in height, arm angle, and shooting position. If you photograph products of different sizes, a stand that locks reliably at multiple positions is more useful than one fixed to a single overhead angle.
Footprint and workspace fit matter more than many merchants expect. A large stand in a small room creates lighting problems, awkward shadows, and storage friction. A smaller tabletop system may outperform a bulkier pro setup if you shoot often and need fast resets.
Compatibility with rotation and video matters if you plan to create richer media. If your roadmap includes spin sets, reels, or 3D-style visuals, a rotating stand can be a better investment than a basic fixed mount. Pair that with guidance on Product Video & Animation if video is becoming part of your product page strategy.
Editing workflow fit also counts. Many merchants now combine physical shoots with ai product photography to expand scene variety, resize assets, or test alternate backgrounds. A stand that helps you capture clean, centered source images makes those downstream workflows much more efficient.
Load capacity, height range, and materials: the specs that prevent wasted purchases
Once you know which stand type you are shopping for, specs matter because they determine whether the stand stays stable in the positions you actually use. Many stands look fine at minimum height. They fail when you extend them and add real weight.
Maximum load is the first number to sanity-check. It is not just the camera body. It is the camera, the lens, the phone mount or ball head, and sometimes a mic or small light if you are filming. If you use a mirrorless camera with a heavier lens, a stand that is “fine for phones” can start to sag or slip.
Height range and center column extension determine whether you can get true top-down shots without awkward compromises. A common failure mode is buying a stand that technically reaches the height you want, but only when the center column is fully extended. That is when wobble tends to show up, especially if you are tapping the shutter or recording video.
Boom arm reach matters any time you are shooting overhead. You are not just trying to get the camera above the product, you are trying to get it above the product without the stand legs showing up in frame, and without putting the whole setup in a tip-prone position. If you need overhead flat lays, look closely at how far the arm reaches and whether it is designed to hold position without “arm creep,” where the camera slowly droops over time.
Base width and counterweight support are what keep overhead rigs safe. The reality is that an overhead camera position shifts the center of gravity. If the base is narrow, or the stand is light, it can become unstable. For boom setups, counterweights or sandbags are often part of what makes the system usable, not an optional add-on.
Clamp and mount types are easy to ignore until they waste your time. Phone clamps should grip securely without pressing buttons. Camera mounts should lock firmly so your framing does not rotate between shots. If you plan to switch between phone and camera, check how quickly you can swap mounts without rebalancing the whole rig.
Think of it this way: the specs you care about depend on the content. Macro shots punish vibration. Top-down flat lays punish instability and poor reach. 360 product photography video can punish both, because even small shakes become obvious during rotation. If your workflow includes a turntable, remember you are building a system. The stand, the camera mount, the rotation platform, and your lighting need to work together without wobble, drift, or constant re-leveling.
Pros and Cons
Strengths
Considerations
Who should buy which type
If you run a lean Shopify store and shoot small products in-house, start with a tabletop camera stand. It is usually enough for white background photography, product bundles, and social creatives. If you need more overhead flexibility for flat lays or package compositions, move up to a boom-style option.
If your products benefit from motion, shape, or all-angle inspection, a product photography rotating stand is the better fit. This is common for beauty packaging, electronics, premium accessories, and giftable items. If your niche relies on visual polish, like cosmetics, there can also be crossover value in tools and workflows related to an ai makeup generator for campaign-style creative exploration.
If you outsource most final production but still need rough internal content, choose something compact, quick to set up, and easy for non-specialists to use. The best stand is often the one your team will actually use consistently.
AcquireConvert recommendation
For most ecommerce brands, the smartest approach is to choose a stand based on workflow maturity, not aspirational studio gear. If you are still standardizing your image process, begin with a stable fixed setup that helps you shoot repeatable catalog images. Once you know your product angles, lighting pattern, and editing process, then consider adding rotation or video capability.
That practical approach reflects how experienced operators usually build content systems. Giles Thomas, through AcquireConvert’s Shopify and ecommerce-focused guidance, consistently frames decisions around what store owners can implement and sustain. If you are evaluating whether to keep shooting in-house, improve your process, or mix real photography with editing tools, explore the broader Catalog Photography resources on AcquireConvert. If you are also comparing post-production options, this review of photoroom is a useful next step.
How to choose the right stand
Here are five criteria that matter most if you sell online and care about speed, consistency, and usable output.
1. Match the stand to your product size and weight
Small skincare bottles, phone cases, and jewelry need a different setup than lamps, backpacks, or boxed appliances. For compact goods, a tabletop stand may be ideal. For larger or heavier products, stability and arm reach become more important than portability.
2. Decide whether stills or motion matter more
If your product wins on texture, detail, or packaging, still photography may be enough. If buyers need to understand dimensions, contours, or moving parts, a 360° product photography stand or rotating platform may justify the extra setup time.
3. Think about your editing process before you buy
A clean, centered capture is easier to crop, resize, and adapt across channels. This matters whether you edit in Photoshop, use mobile tools, or test AI-assisted background and scene workflows. Good source images reduce friction everywhere else.
4. Consider your platform requirements
Shopify product photography standards are not enforced as a single rigid rule set, but consistent aspect ratios, clear backgrounds, and coherent galleries usually create a better on-site experience. Your stand should support the kinds of shots your theme, apps, and merchandising style need.
5. Be realistic about space, storage, and team skill
If your setup takes 20 minutes to assemble, you are less likely to use it for routine product launches or restocks. A smaller stand that lives on a shelf and can be deployed in three minutes may produce more value over time than a more advanced system that stays packed away.
A practical buying rule is this: choose the least complicated stand that reliably supports the images and videos you actually publish. You can always expand later once your catalog, ad spend, and production needs justify it.
DIY product photography stand setups (what works, what to avoid)
A DIY product photography stand can be a reasonable move if you are early-stage, you have a small catalog, or you are still testing what angles you actually need for your product pages. It can also be useful if your goal is to find a repeatable top-down position before you spend money on a stand that may not fit your space.
The way this works in practice is to focus on repeatability, not perfection. A minimum viable DIY rig usually has a stable base, a fixed overhead position, and consistent markers so you can put the product back in the same place every time.
You can get surprisingly far if you can do three things: keep the camera position locked, keep the product position locked, and keep the lighting direction consistent. If any of those move between shots, your edits get slower and your Shopify gallery starts to look mismatched.
Now, when it comes to what to avoid, most DIY setups fail in predictable ways. They wobble when you tap the shutter, they drift out of level over time, or they become tip hazards once you push the camera out for an overhead flat lay angle. Video makes this worse because small vibrations show up clearly, and 360 workflows can exaggerate any inconsistency across frames.
Upgrade triggers are usually obvious. If you are reshooting because framing is inconsistent, if you need to batch 30 to 100 SKUs without stopping to re-level, or if you are adding product photography video and rotation, you will typically save time by moving to a proper stand. DIY can help you prove the angle and the workflow. It usually struggles when you need speed, safety, and repeatability at scale.
Frequently Asked Questions
What is the best product photography stand for beginners?
For most beginners, a tabletop stand is the best place to start. It is compact, easier to control, and usually enough for smaller ecommerce products. If you mainly shoot for Shopify product pages, this type of stand can help you create cleaner, repeatable images without turning your entire room into a studio.
Do I need a rotating stand for ecommerce product photos?
No, not always. A rotating stand is most useful when your product shape is a selling point or when you want 360 views and short motion clips. For simple white background images, a fixed stand often does the job well. The extra value comes when motion helps shoppers understand the product better.
Is a 360° product photography stand worth it for Shopify stores?
It can be, especially for premium, design-led, or technical products. If your customers benefit from seeing multiple sides before buying, 360 visuals may support confidence. Still, the setup only makes sense if your theme, media workflow, and team can publish and maintain those assets consistently.
Can I use a phone with a product photography stand?
Yes, many merchants do. A stable phone setup can work very well for smaller catalogs, social content, and quick PDP updates. The key is consistent lighting and secure mounting. A stand matters because even a strong phone camera struggles when framing changes from shot to shot.
What products benefit most from a rotating stand?
Products with shape, texture, or physical detailing tend to benefit most. Think electronics, beauty packaging, watches, footwear, gift boxes, and home accessories. If front-on stills hide important features, a product photography rotating stand can help show the item more clearly without requiring a full lifestyle shoot.
Does a stand matter if I already use AI editing tools?
Yes. AI tools work better when the source image is sharp, centered, and well lit. A stand will not replace editing, but it usually improves the base file you are editing from. That can make background changes, cutouts, and scene generation more predictable and less time-consuming.
Should I buy a stand or a product photography tent first?
It depends on the problem you are trying to solve. If your main issue is camera shake and inconsistent angles, buy the stand first. If your issue is uncontrolled reflections or messy shadows on small reflective items, a tent may help more. Many store owners eventually use both together.
How does a stand help with product photography video?
A stand helps keep your framing stable, especially for close-up motion shots, top-down demos, and rotating product clips. That matters for reels, PDP media galleries, and paid social ads. Stable framing also makes editing easier because cuts, crops, and overlays line up more cleanly.
Do I need professional gear for electronic product photography?
Not necessarily. Electronics often need clean edges, controlled reflections, and detail shots more than expensive studio gear. A reliable stand, good light control, and thoughtful angles can go a long way. You may only need a more advanced setup once your content volume or quality requirements increase.
What is the difference between a product photography stand and a backdrop stand?
A product photography stand is built to hold your camera or phone in a stable, repeatable shooting position, often overhead for tabletop work. A backdrop stand is built to hold background paper or fabric behind the product. They are often used together, but they solve different problems. If your images have inconsistent framing, the camera stand is usually the fix. If your backgrounds are wrinkled, uneven, or hard to keep consistent, that is where a backdrop stand or sweep setup helps.
What height should a product photography stand or table be for top-down shots?
The “right” height depends on your camera, lens or phone focal length, and the crop you want for your Shopify product images. The practical goal is to get high enough that the full product fits in frame with some breathing room, while staying low enough that the setup stays stable and you are not forced to use the stand at full extension. In many cases, you will get more consistent results by picking one height and marking it, then adjusting your product position and crop rules rather than constantly changing the stand height.
How much weight should a product photography stand support for a camera and lens?
It should support the combined weight of your camera body, your heaviest lens you plan to use for product work, and the head or mount you attach to the stand. If you shoot overhead with a boom arm, stability matters as much as rated load because leverage increases tip risk and sag. If you are close to the stand’s limit, you may see slow droop, vibration, or slipping locks, especially during video.
What is the best stand setup for clothing photography on a tabletop?
For tabletop clothing shots, the most reliable setup is typically an overhead position that stays fixed between products, paired with a large, flat shooting surface. Flat lays are all about repeatability, consistent crop, and consistent lighting direction. If you are batch-shooting a collection, keeping the camera position locked and using position markers for where the garment should sit can make your gallery look more consistent and reduce editing time.
Key Takeaways
Conclusion
The right product photography stand is the one that helps you create consistent assets without slowing your team down. For many ecommerce brands, that means starting simple: stable support, repeatable framing, and enough flexibility to handle your core product range. If motion content is part of your growth plan, then a rotating setup may be worth adding once your catalog process is already under control. AcquireConvert focuses on practical guidance for store owners making these kinds of decisions, with Giles Thomas bringing a Shopify Partner and Google Expert perspective to ecommerce execution. For the next step, explore more on Catalog Photography and review related workflows before you buy gear you may not fully use.
This article is editorial content and not a paid endorsement unless explicitly stated otherwise. Pricing, product specifications, and availability are subject to change and should be verified directly with the provider or manufacturer. Any workflow, conversion, or performance benefits mentioned are not guaranteed and may vary by store, product type, team setup, and implementation quality.

Hi, I'm Giles Thomas.
Founder of AcquireConvert, the place where ecommerce entrepreneurs & marketers go to learn growth. I'm also the founder of Shopify agency Whole Design Studios.