Cosmetic Photography for Beauty Products (2026)
Cosmetic photography sits in a tricky spot for ecommerce. Your images need to feel polished enough for beauty shoppers, accurate enough to build trust, and flexible enough to work across Shopify product pages, collection pages, ads, email, and social. That is why beauty product visuals often need more planning than standard packshot photography. Texture, finish, reflectivity, packaging, and shade accuracy all matter.
If you sell makeup or beauty products online, strong photography can help shoppers understand what they are buying before they ever test it in person. This guide breaks down what good cosmetic photography looks like, how to plan shoots for conversion, and where AI-assisted workflows fit. If you also want to explore digital beauty visuals, our guide to an ai makeup generator is a useful next step.
Contents
What cosmetic photography needs to do for ecommerce
Beauty shoppers are visual shoppers. They want to inspect packaging quality, see color payoff, understand texture, and get cues about brand positioning. A basic product image on white may be enough for marketplace compliance, but it rarely carries the whole conversion job on its own.
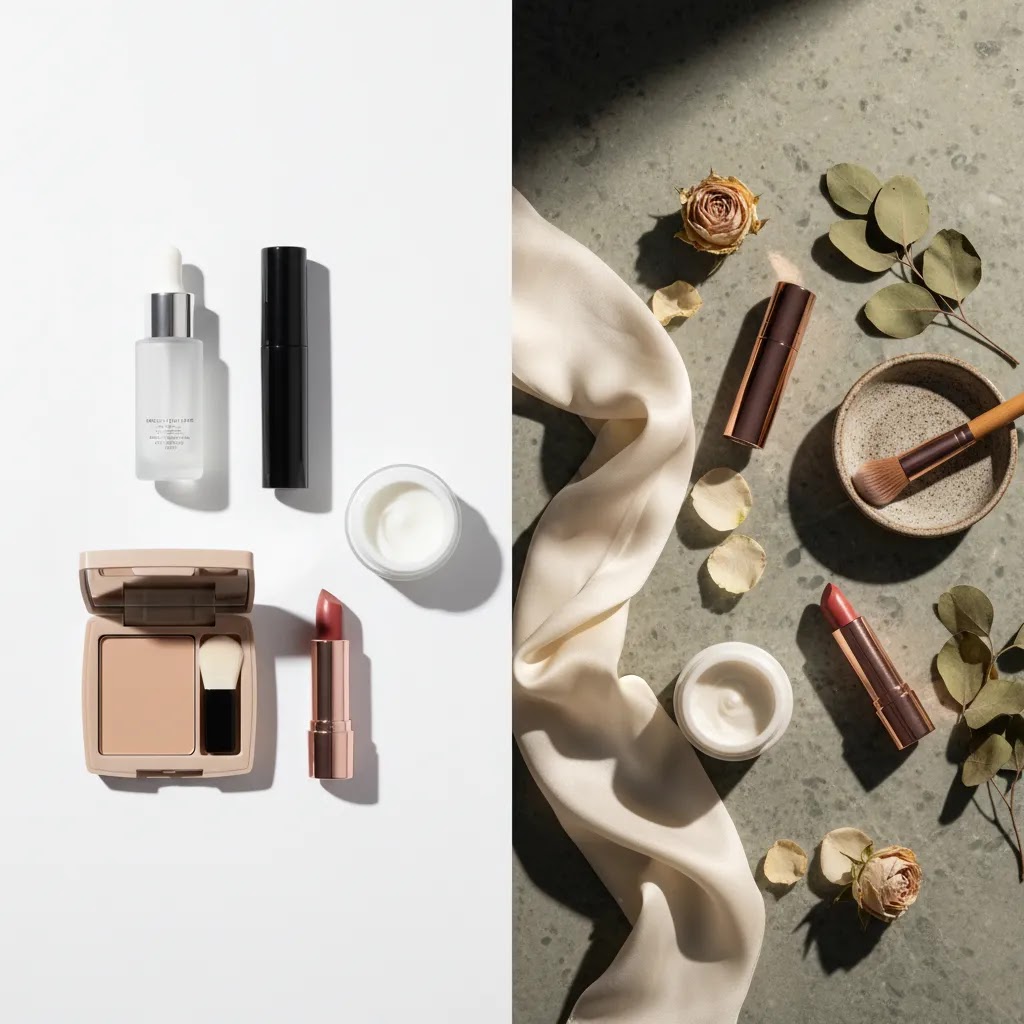
For most Shopify beauty brands, cosmetic photography works best as a mixed image system. You usually need clean white-background images for the product page gallery, lifestyle or still life images to communicate brand feel, close-up texture shots for formulas, and campaign-style assets for paid ads or landing pages. That mix is especially important if you sell premium skincare, color cosmetics, or giftable beauty items.
Practical store owners should think in terms of image roles. One image confirms the product. Another image explains scale. Another supports perceived quality. Another reduces uncertainty around shade, finish, or use case. That is the difference between pretty photography and useful photography.
If your store spans multiple beauty categories, it also helps to study adjacent formats such as skincare product photography and perfume photography, because each product type puts different pressure on lighting, styling, and post-production.
Key elements of effective cosmetic photography
1. Accurate lighting comes first
Cosmetic photography lighting has to balance realism and polish. Too flat, and the product looks generic. Too dramatic, and shoppers may question color accuracy. For ecommerce, soft directional light often works well because it keeps label details readable while still showing shape and material. Reflective packaging, metallic caps, and glossy tubes usually need more control than matte cartons or jars.
2. Texture shots do real conversion work
For makeup and skincare, texture often sells the product as much as the packaging. Foundation smears, lipstick swatches, cream peaks, powder close-ups, and serum drips can help shoppers understand finish and consistency. These images may reduce uncertainty, especially for first-time buyers who cannot test products in person.
3. Props should support the product, not bury it
Creative cosmetic photography often uses mirrors, acrylic blocks, stone surfaces, water, flowers, brushes, or pigment spills. Used well, props create mood and brand coherence. Used badly, they distract from the item you are trying to sell. A good rule is simple: if a prop does not clarify the aesthetic, ingredient story, or target customer, remove it.
4. Multiple outputs matter more than one perfect hero shot
Many beauty brands overinvest in one campaign image and underinvest in their core ecommerce set. In practice, you need a repeatable system that gives you product page images, thumbnails, collection assets, ad creatives, and social variants. That is especially true if you launch products frequently or test seasonal offers.
5. Editing should keep trust intact
Retouching is normal in beauty photography, but over-editing creates risk. If the package color, finish, or formula appearance is noticeably different from what the buyer receives, returns and dissatisfaction can follow. For ecommerce, the best editing improves clarity, removes distractions, and keeps the product representation believable.
That is where lightweight tools can help. For example, teams producing high volumes of product images may use an AI Background Generator for alternate scenes, a Free White Background Generator for marketplace-ready cutouts, or Increase Image Resolution when resizing older assets for modern storefronts. These can be useful for speed, but they still need human review for shade accuracy and brand consistency.
If you are building a broader visual workflow, it is also worth browsing AcquireConvert’s Cosmetics Photography and E Commerce Product Photography resources to see how image requirements change by product type and sales channel.
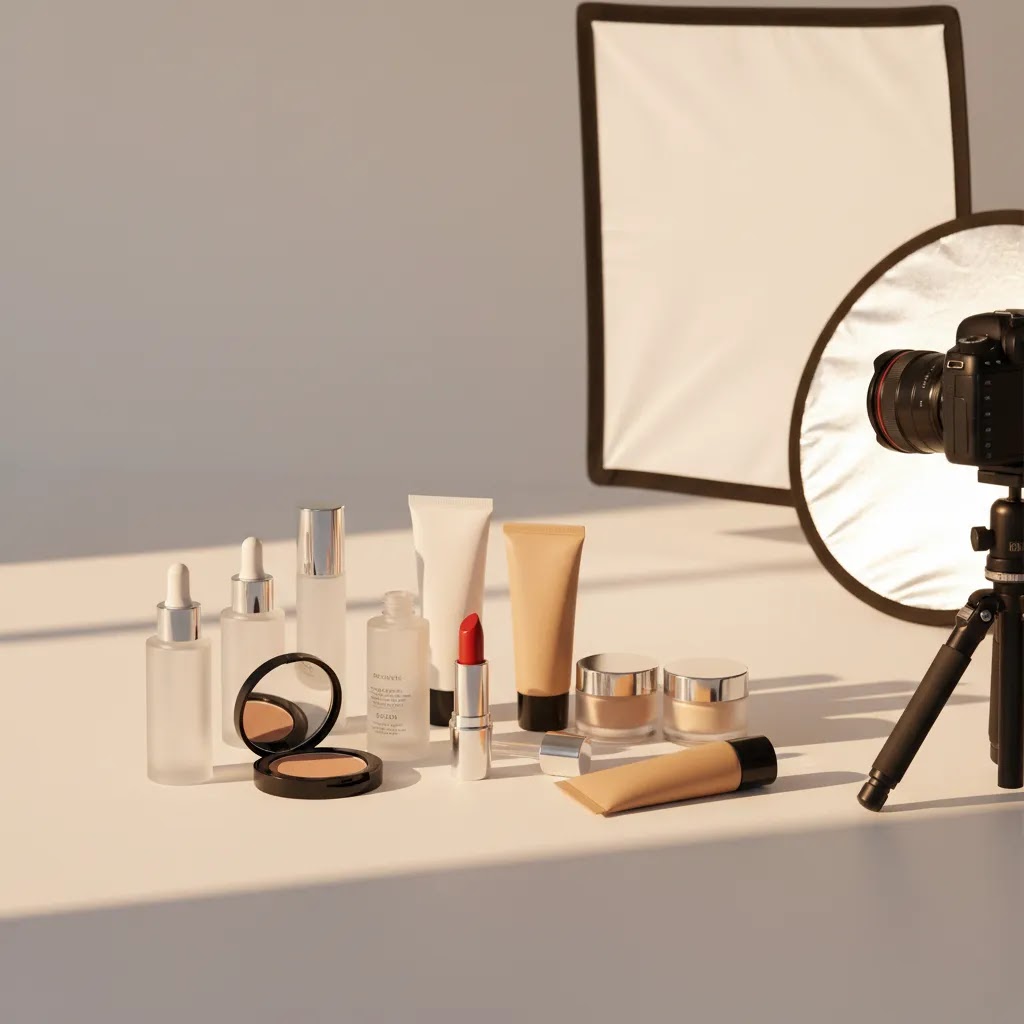
How to photograph cosmetics: a practical setup (home or small studio)
Here is the thing, most cosmetic photography problems are not solved in Photoshop. They are solved by building a repeatable setup that controls reflections and keeps color consistent from SKU to SKU. You do not need a huge studio to do that. You need a predictable table, predictable light, and a workflow you can repeat every time you add a product to your Shopify catalog.
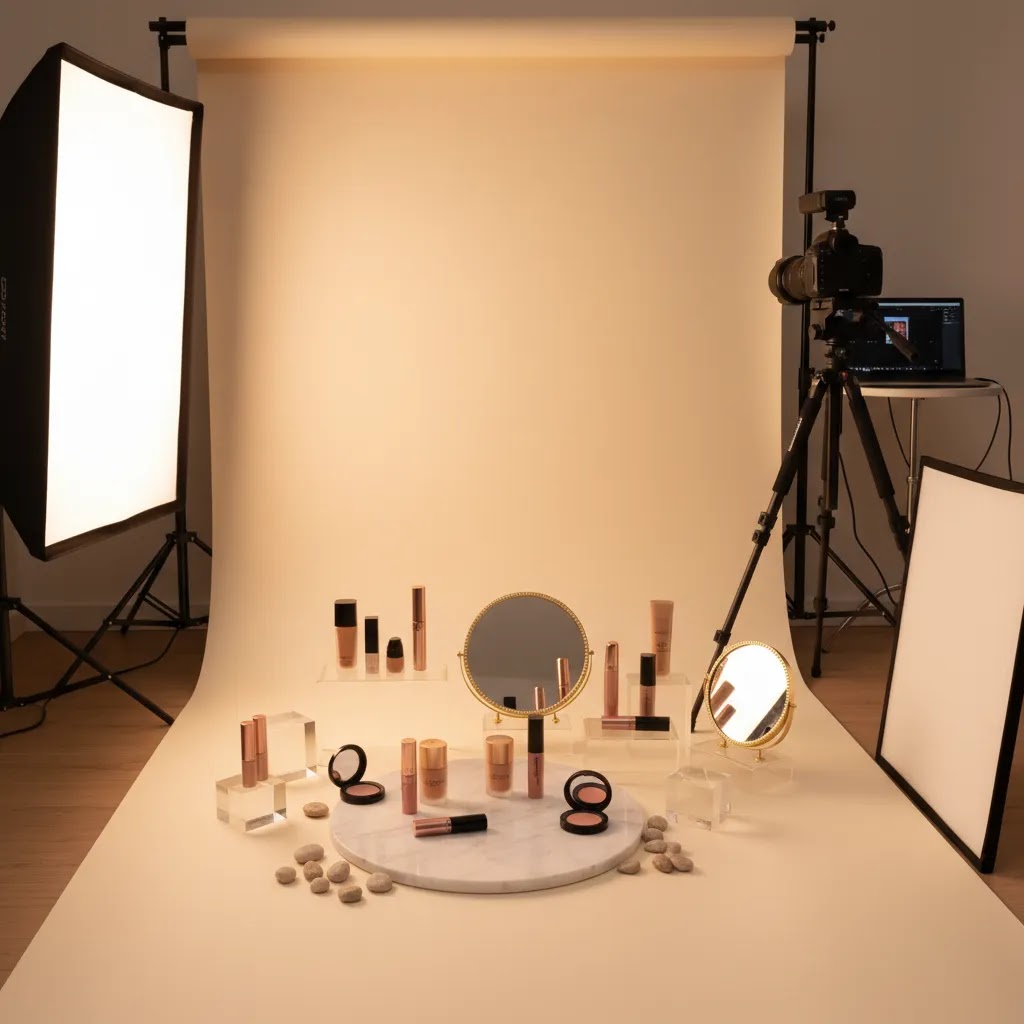
A simple tabletop setup you can repeat
Start with a small table near a space where you can control ambient light. A lot of store owners make life harder by mixing window light with a lamp and then wondering why the shade looks different every time. Pick one primary light source and stick with it.
For most ecommerce cosmetics, a continuous LED light with a softbox-style diffuser, or a strobe with a softbox, is a practical choice because it gives you soft, controllable light. The key is diffusion. Diffusion is what turns a harsh point light into a clean highlight on glossy packaging.
From a practical standpoint, you also want two basic modifiers on hand:
Glossy and metallic packaging behaves like a mirror. It will reflect whatever is in front of it, including your room, your camera, and your bright ceiling. The fastest fix is usually not changing the product. It is changing what the product is reflecting by placing diffusion and flags close to the item.
Camera basics that actually matter for ecommerce
You can shoot cosmetics with a modern phone, but a camera with a macro-capable lens makes consistency easier, especially for label detail and texture. Either way, a tripod matters. It keeps angles consistent, helps you shoot at lower ISO for cleaner files, and makes it easier to match framing across variants.
For lens choice, a focal length in the 50mm to 100mm range (full-frame equivalent) is typically a safe zone for product work. It avoids the distortion you can get with wider lenses, which can make cylindrical bottles and compacts look subtly warped on a product page.
For settings, you are usually balancing sharpness with depth of field:
If shade accuracy matters, think of it this way: your goal is not a “pretty” color. Your goal is a consistent reference color that matches what the customer receives. A simple workflow is to shoot a gray card at the start of each lighting setup and use that as your reference when editing. Even if you are using AI-assisted tools later, starting with a consistent base image makes everything downstream more reliable.
A quick shoot flow for one SKU (so you do not redo lighting)
What many store owners overlook is that cosmetic photography gets slow when you jump between creative shots and packshots randomly. You end up moving lights, changing surfaces, then trying to get back to your clean white setup and it never matches.
A simple flow that tends to work well is:
This approach keeps your catalog images consistent and stops you from rebuilding your lighting twice in the same session. For Shopify, that consistency is part of conversion. It makes the product page feel trustworthy, especially when shoppers compare multiple SKUs in a collection.
Pros and Cons
Strengths
Considerations
Cosmetic photography lighting patterns for reflective packaging (and how to fix common problems)
A lot of cosmetic photography ideas online look great, but they skip the part you actually need as a store owner: what lighting shape created that clean reflection on a chrome cap, or that smooth gradient on a curved bottle. The reality is that reflective packaging is less about “more light” and more about “bigger, cleaner reflections.”
Three practical lighting patterns that work for beauty packaging
Strip highlight for bottles and tubes
This is the classic beauty look where you see a long, clean highlight running down a cylindrical product. You create it by putting a tall, narrow diffused light source to the side of the product, then rotating the product until the highlight sits where you want it. A strip softbox is one way to do it, but you can also fake the same look with a standard soft source plus a tall diffusion panel close to the product.
Once you have the highlight, use black flags to control spill and keep the opposite side from looking washed out. This gives you shape and keeps labels readable.
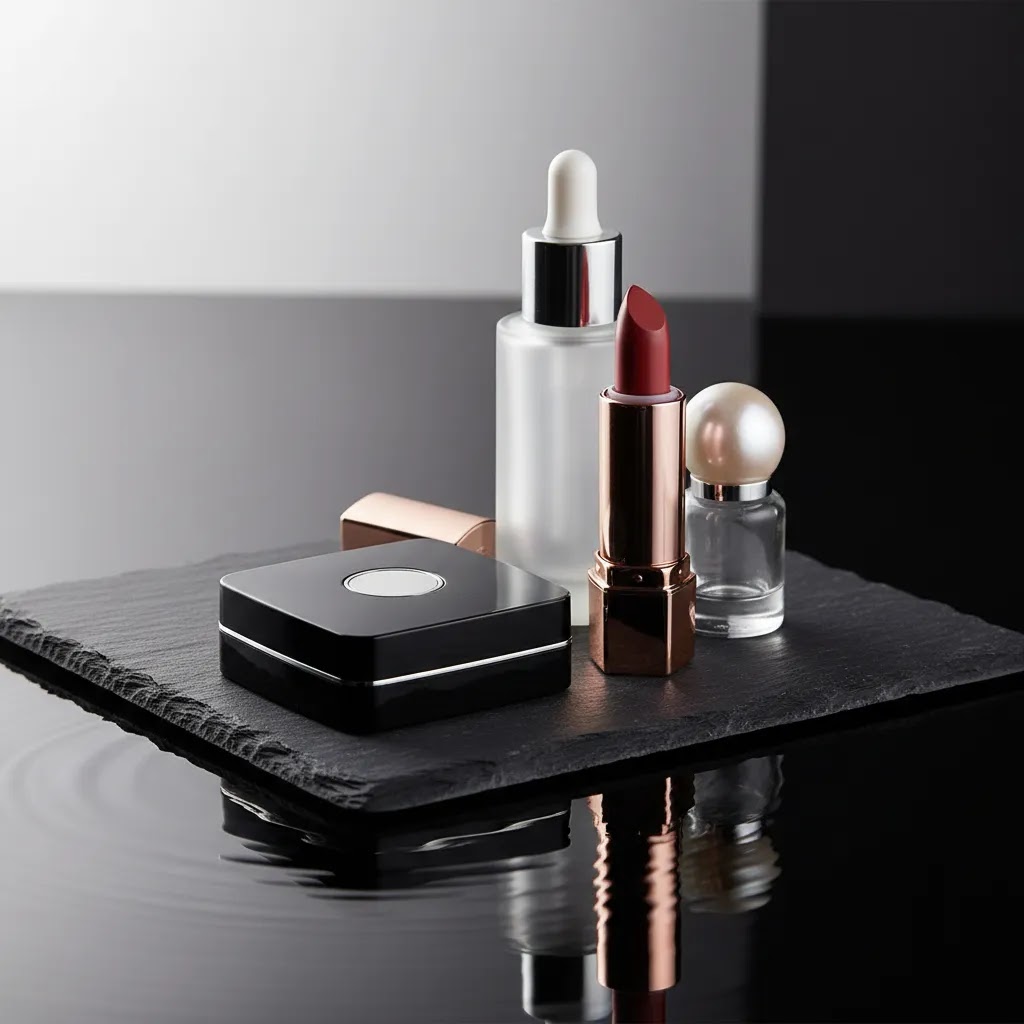
Large diffusion “tent” for chrome, metallics, and high gloss
If a cap or compact is acting like a mirror, you often need to give it a single, clean thing to reflect. A diffusion tent approach does that. You surround the product with large white diffusion so the reflections become smooth and continuous, then you add small black cards where you want edges and definition.
This approach is especially useful for premium compacts, mirrored packaging, and glossy black bottles where messy reflections can make the product feel cheap.
Flagging and negative fill to shape reflections
Flagging is simply placing black cards strategically to subtract light. It is one of the fastest ways to make a product look expensive. For cosmetic photography lighting, negative fill helps you create crisp edges, separate the product from a white background, and reduce unwanted glare on curved surfaces.
Think of flags as “shadow tools,” not “light blockers.” You are sculpting reflections into a controlled look that holds up on a Shopify product page thumbnail.
Common problems and fixes (the stuff that causes reshoots)
Blown highlights on chrome caps
If the highlight is pure white with no detail, your light source is usually too small, too close, or not diffused enough. Increase diffusion, increase the size of the reflected white surface, and reduce the intensity. In many cases, moving the light farther away and enlarging the diffusion area gives a smoother result than just turning the light down.
Label glare that hides text
Glare usually means the reflection angle lines up with your camera. The fix is often a small shift in the product rotation, camera height, or light position, not a full rebuild. Try raising the light slightly and angling it down so the specular reflection moves off the label.
Hot spots on curved bottles
Hot spots happen when the reflected source is too concentrated. The diffusion tent approach helps, but you can also place diffusion closer to the product so the reflection becomes larger and softer. Then add black flags to bring back shape.
Fingerprints and micro-scratches
Beauty packaging shows everything. Wear gloves or handle products with a clean microfiber cloth. Clean the product right before shooting, not at the start of the day. If you are shooting multiple SKUs, build “wipe and inspect” into your flow before every hero frame.
Dust control on high gloss
Dust is usually not visible until you light the product properly, then it is everywhere. Keep a small air blower, microfiber cloths, and a soft brush at the set. From a retouching cost standpoint, removing dust across dozens of images adds up fast, so a few seconds of cleaning can save a lot of editing time later.
When a circular polarizer helps, and when it can backfire
A circular polarizing filter can reduce glare on some surfaces, and it can be useful for certain label issues or reflective plastics. But it is not a magic fix for everything. On metallics, a polarizer may do very little. On some glossy packaging, it can make the product look unnaturally “matte,” which can hurt realism for ecommerce shoppers.
Use it like a test tool. Shoot a frame with it, shoot a frame without it, and compare which version looks more like the product in hand. For shade-sensitive products, always prioritize what is believable over what is “perfectly glare-free.”
Who this approach is for
This approach fits Shopify beauty brands, DTC makeup stores, skincare founders expanding into color cosmetics, and agencies producing visual assets for ecommerce clients. It is especially relevant if your products rely on visual appeal to justify price, communicate quality, or explain formula differences.
It also suits growth-stage stores that need a practical content system rather than one-off creative shots. If you are refreshing PDP images, improving ad creative, or trying to make a small catalog look more premium, cosmetic photography deserves focused attention. If you are still deciding whether to build internally or outsource, our guide to choosing a product photography studio can help frame that decision.
AcquireConvert recommendation
At AcquireConvert, we look at beauty photography through an ecommerce lens first. Giles Thomas’s experience as a Shopify Partner and Google Expert shapes that approach. The question is not just whether an image looks good. It is whether it helps a shopper move forward with confidence on a product page, collection page, Shopping listing, or ad creative.
For most beauty brands, the best setup is a layered one. Start with consistent core packshots. Add texture and ingredient visuals where they clarify the formula. Then build a small bank of branded still life assets for campaigns and merchandising. If you want to test digital-first creative alongside traditional photography, revisit our ai makeup generator article for a more commercial evaluation of where AI visuals can and cannot help.
The goal is not maximum production. It is the right mix of images for the way beauty customers actually shop online.
How to choose the right cosmetic photography approach
Match the image style to the product type
Not every beauty product needs the same visual treatment. Lip products and complexion products usually need more attention to shade and texture. Skincare often leans into ingredients, routine context, and clean visual cues. Fragrance tends to reward moodier styling and reflective control. Start by asking what the shopper most needs to understand before buying.
Decide what belongs in-house and what should be outsourced
If you launch often, keep a small in-house workflow for white-background and basic social assets. If you need campaign imagery, high-end retouching, or difficult reflective products, outsourcing may be worth the cost. The right answer depends on your catalog size, team skills, and publishing velocity.
Build a repeatable shot list
One of the most useful ecommerce habits is standardization. For each SKU, create a required shot list such as hero on white, back label, open product, texture shot, scale reference, and one lifestyle or still life image. This saves time, keeps product pages consistent, and helps merchandising teams work faster.
Use AI selectively, not blindly
AI tools can support cosmetic photography workflows, especially for background cleanup, alternate scenes, or asset variation. Tools such as Background Swap Editor, Magic Photo Editor, and Creator Studio may help teams move faster on creative testing. But if you sell shade-dependent products, always review outputs carefully. AI can support production speed, but it should not be trusted as the final word on color realism.
Prioritize trust over style
The best cosmetic photography feels aspirational without becoming deceptive. Ecommerce beauty images should still answer practical shopper questions. Can I see the cap finish? Is the tube matte or glossy? What does the formula look like? How large is the item? The more clearly your photography answers those questions, the more likely it is to support stronger buying intent.
Cost and budgeting: how much does a product shoot cost (and what changes the price)
If you have ever asked for a quote and gotten wildly different numbers back, it is usually not because someone is trying to confuse you. Cosmetic photography pricing swings because the scope can be completely different, even for the same number of products. The fastest way to control cost is to control the shot list, the retouching expectations, and the usage needs up front.
What typically drives the cost of a cosmetic product shoot
SKU count and variants
A “single product” can turn into many deliverables fast. If you sell a foundation with 20 shades, you may need a consistent packshot for each shade, plus one or two hero visuals used across the range. If your packaging changes per shade, your workload multiplies.
Shot list complexity
White background packshots are usually faster than creative sets. Add texture shots, swatches, open-product frames, group bundles, or ingredient scenes, and the time per SKU goes up. Still life cosmetic photography can be efficient, but only when the styling is repeatable across multiple products.
Retouching level
Basic cleanup is one thing. High-end beauty retouching is another. Removing dust, smoothing label imperfections, fixing micro-scratches, and perfecting reflections on chrome can be time-consuming. This is a big reason two studios can quote very different numbers for “the same” shoot.
Props, sets, and surfaces
If the photographer is sourcing custom props, building sets, or doing water effects, budget will rise. A simple surface library and a consistent prop kit can keep this under control if you are producing regular campaigns.
Model vs no model
Once you introduce hands, faces, or lifestyle scenes, you are paying for additional production. This can be worth it for certain categories, but it is a separate decision from your core ecommerce packshots.
Usage and licensing
Some shoots are quoted primarily for ecommerce usage, others include broader marketing rights. If you plan to use images in paid ads, large campaigns, or packaging, clarify that early. Licensing expectations can change the price structure.
Turnaround time
Rush timelines usually cost more, because they compress shooting, editing, and revision cycles. If you have a product launch calendar, you can often save money by planning photography earlier and batching SKUs.
How to scope a quote with less risk (and fewer surprises)
Consider this, the goal of a quote is not just a number. It is a shared definition of what “done” looks like. A good scope usually includes:
If you care about shade accuracy, mention it. Ask how they handle color management and consistency across multiple shooting days. Even a simple agreed process, like referencing a gray card or a standardized lighting setup, can reduce mismatch across your catalog.
In-house vs studio: a practical framework for growing catalogs
For most Shopify store owners, the best answer is often a mix, not a pure in-house or pure outsourced strategy.
In-house tends to make sense when: you need speed, you launch frequently, and your baseline packshots are straightforward. A consistent tabletop setup can handle a lot of the day-to-day catalog work, especially if you standardize your angles and crops.
Outsourcing tends to make sense when: you have difficult reflective packaging, you need premium still life assets for campaigns, or you want a higher-end retouching finish than your team can produce reliably.
The way this works in practice for many growing beauty catalogs is:
This helps you protect budget while still raising the visual ceiling where it matters most, such as your highest-traffic product pages and your paid acquisition creatives.
Frequently Asked Questions
What is cosmetic photography?
Cosmetic photography is product photography focused on makeup, skincare, fragrance, and beauty items. For ecommerce, it usually includes clean packshots, texture images, detail close-ups, and branded still life scenes. The goal is to show the product accurately while also communicating quality and brand positioning in a way that helps shoppers make purchase decisions.
How is cosmetic photography different from regular product photography?
Beauty products often need more precision around lighting, reflections, and texture. Shoppers may care about subtle finish differences, shade cues, packaging materials, and formula appearance. That means cosmetic photography usually requires tighter control than standard catalog work, especially for glossy packaging, metallic details, and products where color accuracy affects buyer trust.
What lighting works best for cosmetic photography?
Soft directional light is a strong starting point because it shows form without creating harsh glare. The exact setup depends on the product. Reflective bottles and chrome caps often need flags and diffusers. Matte packaging is usually more forgiving. For ecommerce, the safest approach is lighting that keeps labels readable and colors believable while still giving the product shape.
What props should I use for cosmetic photography?
Use props that support the product story. Mirrors, acrylic risers, stone, glass, water effects, flowers, brushes, and ingredient references can work well. Keep the prop choice tied to the brand and formula. If the item is a clinical skincare product, clean minimal styling may fit better than highly decorative props. In most cases, less is more.
Can I do cosmetic photography at home for my Shopify store?
Yes, many smaller brands start that way. A controlled table setup, diffused light, a tripod, and a simple background can produce usable ecommerce images. The key is consistency. If your product line grows or your visual standards rise, you may later outsource more advanced shots while keeping basic catalog photography in-house for speed and cost control.
Do I need both white-background and creative images?
Usually, yes. White-background images help with clarity, consistency, and channel compliance. Creative images help communicate brand identity and product appeal. Most beauty brands benefit from using both. The white-background image does the practical selling work, while the creative image supports merchandising, ads, and emotional positioning on the storefront.
Can AI tools replace cosmetic product photography?
Not entirely. AI tools can help with editing, scene variation, and production speed, especially when you need alternate backgrounds or campaign concepts. But for beauty ecommerce, realism still matters. Packaging details, shade representation, and formula texture need careful human review. AI is most useful as a support layer, not as a full replacement for reliable source photography.
What should be included in a cosmetic photography shot list?
A practical shot list often includes a front hero image, side or back packaging view, label close-up, open-product shot if relevant, texture or swatch image, scale cue, and one branded creative image. If you sell bundles or kits, include grouped shots too. The exact list should reflect how shoppers evaluate that product category before buying.
How many cosmetic photos should a product page have?
Many beauty product pages benefit from five to eight well-planned images rather than one or two generic shots. The right number depends on the complexity of the item. Shade-sensitive products, kits, and premium packaging often need more visual explanation. The focus should be on usefulness, not volume. Each image should answer a shopper question or reinforce confidence.
How to photograph cosmetics?
Photograph cosmetics with a controlled tabletop setup: one consistent light source, diffusion to soften reflections, and bounce cards or black flags to shape glossy packaging highlights. Use a tripod for repeatable angles, lock your white balance for consistent color, and work through a repeatable flow per SKU, starting with clean packshots, then detail shots, then textures and creative still life. For shade-sensitive products, use a consistent reference, then review edits carefully to keep results believable.
How much does a product shoot cost?
Pricing varies based on your scope. Cost is typically driven by SKU count, shot list complexity, retouching level, props and sets, whether models are involved, licensing or usage requirements, and turnaround time. To reduce surprises, define deliverables per SKU, background types, required crops for Shopify and ads, and how many revision rounds are included before you approve the final images.
What is the 20 60 20 rule in photography?
The “20 60 20” rule is a planning idea some photographers use to balance coverage and creativity. It often means: 20% safe, must-have images (your clean packshots and required views), 60% consistent variations and supporting images (details, alternate angles, texture shots), and 20% experimental or campaign-style images (creative still life, new lighting looks, props). For ecommerce, the value is making sure your essential Shopify product page images are done first, before you spend time on higher-risk creative frames.
Can old makeup cause dermatitis?
It can for some people. Older makeup may harbor bacteria or change in texture and ingredients over time, which could irritate skin or trigger contact dermatitis, especially around the eyes and lips. If a product smells off, changes color, separates, or causes irritation, it is typically safer to stop using it and check guidance from a healthcare professional if symptoms persist.
Key Takeaways
Conclusion
Good cosmetic photography is not just about making beauty products look attractive. It is about reducing hesitation, showing product quality clearly, and giving shoppers the visual proof they need to buy online. For makeup and beauty brands on Shopify, that usually means combining accurate packshots, texture-focused detail images, and a few branded creative assets that strengthen merchandising and ad performance.
If you are refining your beauty image strategy, AcquireConvert is a strong place to keep researching. Explore more from our cosmetics and ecommerce photography resources, compare AI-assisted creative options, and see how practical store owners structure image systems that support conversion. Giles Thomas’s Shopify and Google experience keeps the advice grounded in how ecommerce actually works, not just how a photo shoot looks on paper.
This article is editorial content and not a paid endorsement unless explicitly stated otherwise. Pricing for any referenced tools is subject to change and should be verified directly with the provider. Any performance outcomes from better photography will vary by product, brand, traffic quality, offer, and store execution, so results are not guaranteed.

Hi, I'm Giles Thomas.
Founder of AcquireConvert, the place where ecommerce entrepreneurs & marketers go to learn growth. I'm also the founder of Shopify agency Whole Design Studios.