3D Product Photography Setup From Scratch (2026)
If you sell online, your images have to do more than look good. They need to reduce hesitation, show detail clearly, and help shoppers feel confident enough to buy without touching the product. That is where 3d product photography can help. A strong setup can give you spin views, more angles, and a more tactile buying experience than standard flat shots alone. If you are still mapping out your wider product photos workflow, this guide will help you decide what to buy, what to skip, and how to build a setup that fits your store. The goal is not to overspend on gear. It is to create a repeatable system that works for your catalog, your available space, and the level of visual detail your customers actually need before they add to cart.
Contents
What a 3D product photography setup really includes
For most ecommerce brands, 3d product photography does not mean building cinema-grade CGI from day one. More often, it means creating interactive product imagery using a controlled physical setup, a turntable, consistent lighting, and software that stitches or displays multiple angles. That can range from a basic 3d spin product photography workflow for a few hero SKUs to a higher-volume system for apparel accessories, beauty, electronics, or home goods.
The practical value is simple. Shoppers can inspect shape, texture, ports, closures, labels, and finish from more than one angle. That usually matters most for products with tactile details or higher consideration purchases. If you are comparing this with a standard 360 product photography workflow, the overlap is substantial. Many store owners use the terms interchangeably in buying discussions, even though the production methods can vary.
Your setup should support three things: image consistency, operational speed, and a final output your storefront can actually load and display well. For Shopify merchants especially, that last point matters. Fancy visuals are only helpful if they fit the product page experience rather than slowing it down or complicating theme integration.
3D product photography formats: what you are actually creating
Here is the thing. Before you buy a turntable or commit to a workflow, you need to be clear about the output format you want on the product page. “3D product photography” gets used as a catch-all, but the format changes what you need to capture, how you export, and how it behaves on mobile.
Hemispherical vs full spherical capture
Hemispherical is a top-facing rotation. Think of a product sitting on a turntable where the camera stays at one angle, and you capture the product rotating 360 degrees horizontally. For most Shopify product pages, this is the practical default because it shows the sides, back, labels, and key details without adding a lot of production overhead.
Full spherical usually means more than one row of rotations, so shoppers can see the product from higher and lower viewpoints, not just around the equator. This can look great for certain products, but it multiplies your capture time and file handling. In many cases, full spherical is overkill unless your product has important details on top and bottom surfaces that customers genuinely need to inspect, or you are producing premium assets for a hero SKU.
360 spin sequences vs “true” 3D models
A 360 spin is typically an image sequence, basically a set of photos captured at fixed rotation increments. A viewer then swaps frames as the shopper drags. This is still photography, just displayed interactively.
A true 3D model is different. It is usually a CGI model or a photogrammetry-style capture that results in a mesh and texture, and it can be rendered from any angle. That can be useful for configurators or AR workflows, but it is a different production process with different costs, tools, and skill requirements.
Interactive viewer vs exporting individual frames
From a practical standpoint, you will usually end up with one of two storefront outcomes:
For Shopify store owners, the decision often comes down to performance and usability. If the viewer feels laggy on mobile, or if it pushes key product information down the page, it can hurt the buying experience even if the imagery is technically impressive. That is why testing a single collection first is usually smarter than rolling it out across the entire catalog.
A quick decision guide by product category
Think of it this way. Most stores do not need every format. They need the format that answers buyer questions with the least friction.
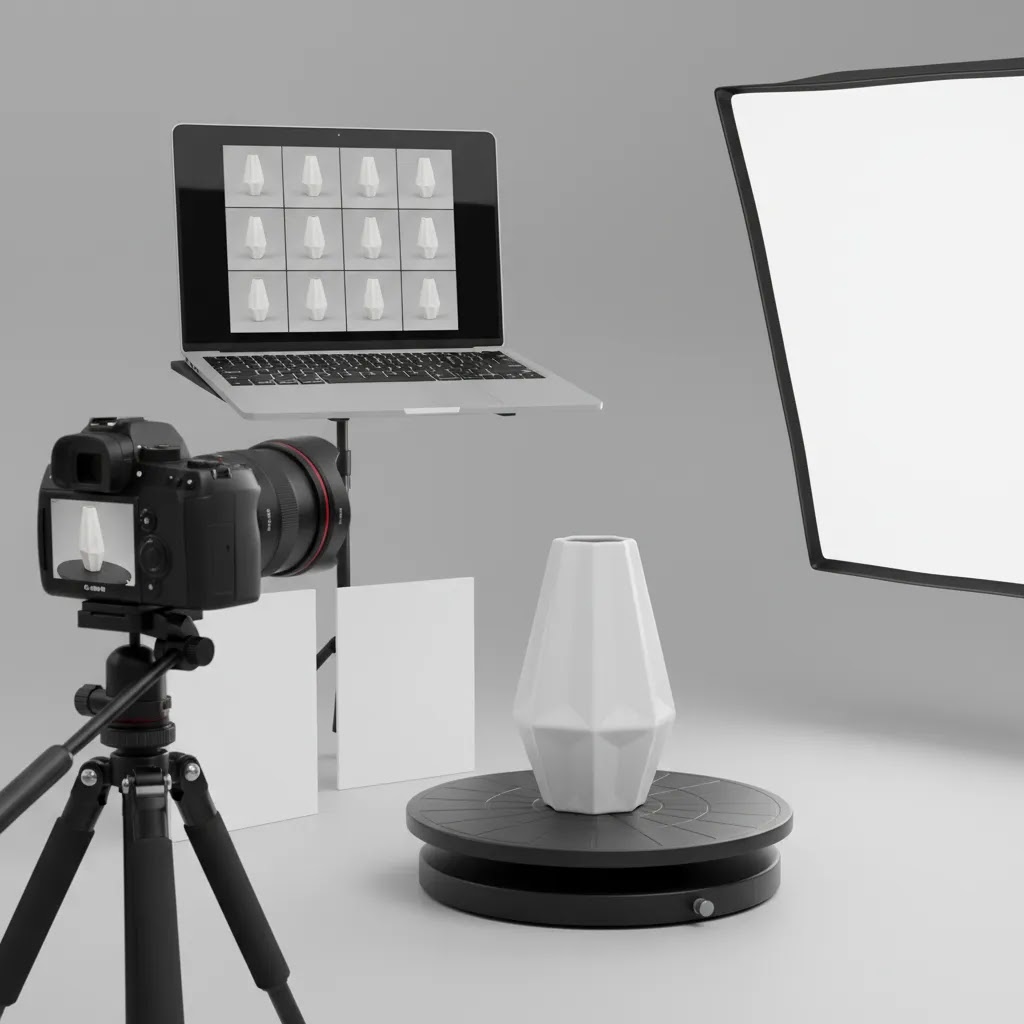
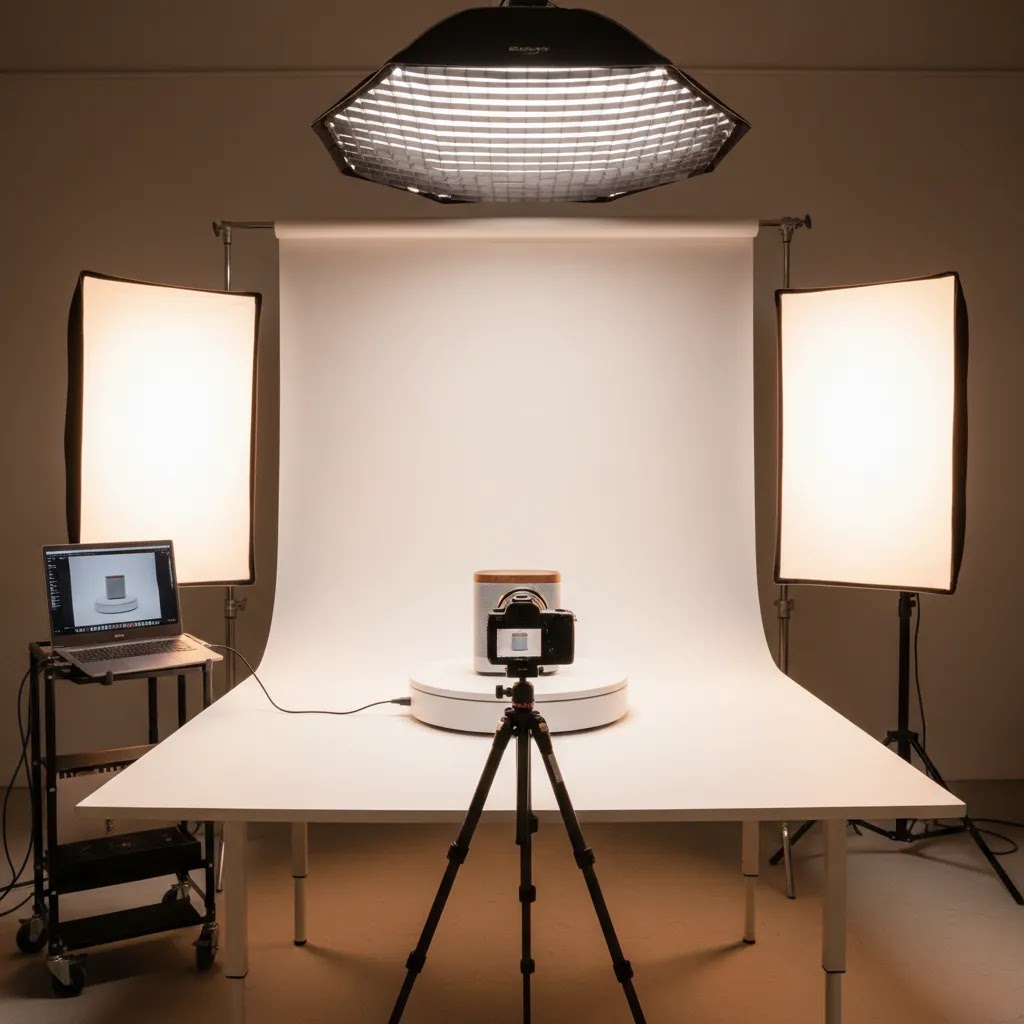
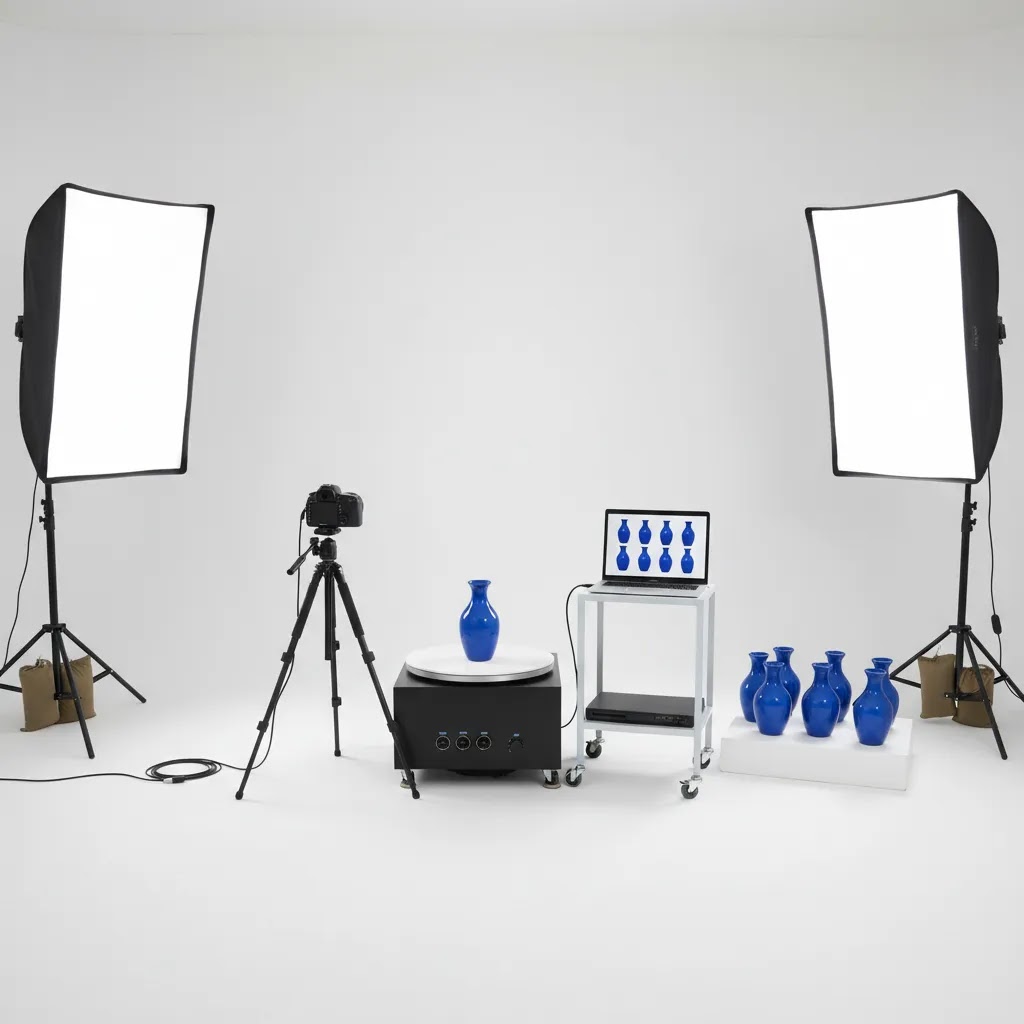
The core setup components
A workable setup usually comes down to six parts: camera, lens, support, lighting, turntable, and software. You do not need the most expensive version of each. You need the right combination for your products.
1. Camera and lens
A mirrorless or DSLR camera gives you the most control, especially for reflective or textured products. A smartphone can work for testing a 3d product photography app workflow, but image consistency becomes harder as you scale. If your catalog includes jewelry, cosmetics, or small electronics, a lens with decent close-focus performance is worth prioritizing.
2. Tripod or fixed rig
The camera position should not shift between frames. Even small movement creates alignment problems later. A solid tripod is often enough for a starter setup. If you are shooting at higher volume, a fixed rig saves time and reduces retakes.
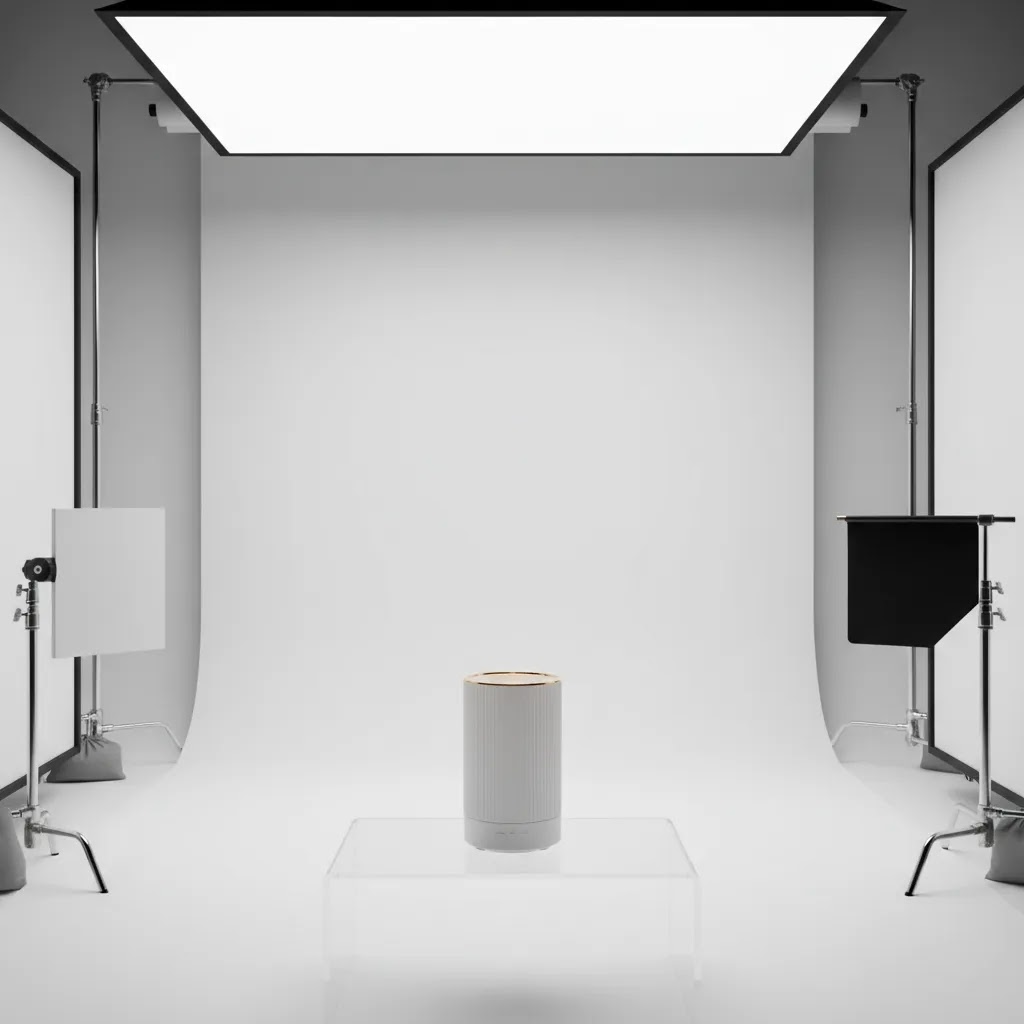
3. Lighting
Continuous soft lighting is often the most practical choice for store owners learning this in-house. You can see shadows and reflections as you work. Strobes can produce excellent results, but they add complexity. If your products need clean marketplace-ready images too, study White Background Photography principles alongside your 3D workflow. White on white product photography is especially demanding because edges can disappear without careful separation and light control.
4. Turntable
A 3d product photography turntable is what makes the workflow repeatable. Manual turntables are slower but inexpensive. Motorized turntables are better if you want evenly spaced rotations and faster batch production. Check weight capacity before buying. A setup that works for candles may fail with heavier cookware or boxed sets.
5. Background and shooting surface
Use a sweep, acrylic surface, or matte background that fits the finish of your products. Glossy items often benefit from a controlled studio tent or diffusion panels to tame reflections. If you are still designing the wider room layout, this guide to a product photography studio is a useful next step.
6. Editing and display software
This is where many merchants either save time or create extra friction. Your software needs to help with background cleanup, consistency, output sizing, and storefront-ready exports. For image prep, tools from ProductAI can help streamline repetitive edits. For example, Free White Background Generator is useful when you need marketplace-style white outputs, while Increase Image Resolution can help if source files need extra polish before publication. If your priority is workflow experimentation rather than a full studio overhaul, these kinds of tools may reduce manual editing time, though results still depend on source image quality and your review process.
Capture workflow and consistency: settings, frame counts, and automation
What many store owners overlook is that 3D and 360 capture is less about taking “nice photos” and more about producing a consistent sequence. A single weak frame can create a visible jump in the spin. If you want your output to feel premium, you need repeatability.
Frame counts: 24 vs 36 vs 72 (and why it matters)
The frame count controls how smooth the rotation looks and how heavy the asset becomes on your product page. Common choices are:
Consistency is the point. Pick a frame count per category, then stick to it. Viewers and stitching tools typically assume predictable increments. If you mix random angles, you can end up fighting alignment problems or uneven rotation speed.
Camera settings that keep spins consistent
If you want consistent frames, you usually want consistent camera behavior. Auto settings can drift between frames and create flicker. That is why many workflows use:
The reality is that small issues show up fast in motion. If you notice wobble, it is often a leveling or centering problem. Make sure the turntable is level, the product is centered, and the camera is aligned so the product does not drift left and right during the spin. Parallax can also bite you if the product shifts relative to the background, which is another reason stable support and a fixed camera position matter.
Naming conventions and file handling (so you do not lose your mind later)
Once you start shooting multiple SKUs, file handling becomes part of the workflow. A simple naming convention can save hours. For example, keeping a predictable structure like SKU-angle or SKU-frame number helps you avoid mixing sequences between similar-looking products. This matters even more if you use software that expects frames in order to build a viewer output.
When automation becomes worth it
For a small catalog, you can rotate manually or use a basic motorized turntable and trigger the camera yourself. As volume grows, automation starts to matter because it reduces reshoots and speeds up production. Common upgrades include:
Consider this before you buy into a more complex rig. If your bottleneck is editing or storefront implementation, more capture speed will not fix the underlying problem. The best system is the one that balances shooting, editing, and publishing without creating a pile of unfinished SKUs.
Pros and Cons
Strengths
Considerations
Who should build this setup
This approach fits stores that sell products where inspection drives conversion. Think higher-AOV goods, detail-heavy items, premium packaging, or products shoppers often compare side by side before buying. It is especially useful for Shopify merchants who already have traffic and want product pages to do more of the selling.
If your catalog is small, you can build a lean setup in-house and test a few priority SKUs first. If you run a large catalog, the real question is throughput. You need a workflow that your team can repeat without constantly tweaking lights, crop ratios, or export settings. For simpler products, a standard 360 view may be enough. For premium products, you may want a more polished 3D presentation with stronger retouching and interaction design.
AcquireConvert recommendation
Before you invest in gear, map the buying job your images need to do. That is the practical approach Giles Thomas pushes across AcquireConvert as a Shopify Partner and Google Expert. For some stores, 3d product photography is worth the effort because it answers objections and helps visitors inspect products more confidently. For others, better lighting, stronger standard imagery, and faster page performance may produce more value first.
If you are evaluating tools and implementation options, start with AcquireConvert’s broader 3D Product Photography resources and then compare display options with this guide to 360 photo software. That combination gives you the strategic and practical view: what to create, how to display it, and what level of complexity makes sense for your store right now.
How to choose the right setup for your store
1. Start with product type, not gear. Small matte products are much easier than reflective glass, polished metal, or translucent packaging. If your products are visually complex, prioritize controllable lighting and stable shooting support before spending on premium software.
2. Decide whether you need interactive rotation or just more angles. Some stores assume they need a full 3D experience when a sequence of strong stills would do the job. If your customers mainly want to inspect the sides and back, a simpler 360-style presentation may cover the need with less production overhead.
3. Build for repeatability. A setup from scratch should save time after the learning curve, not create a custom process for every SKU. Mark camera positions, record light placements, and keep product spacing consistent on the turntable. This matters more than buying slightly better gear.
4. Match software to workflow. Merchants often focus on capture and ignore what happens after. You need a practical path for background cleanup, image consistency, exports, and storefront delivery. If your team handles editing internally, lightweight AI tools can help with repetitive tasks. ProductAI’s AI Background Generator can support concept or lifestyle variations, while Background Swap Editor is useful if you want to test alternate scenes for campaign assets. These are best treated as workflow aids, not a replacement for careful art direction where accuracy matters.
5. Consider page experience on Shopify. Rich imagery can help, but only if your product pages remain usable. Compress assets, test load speed on mobile, and make sure the media block fits your theme. Experienced ecommerce teams usually test one collection or a handful of best sellers first before rolling the format across the full catalog.
6. Budget for time as well as equipment. Even if your hardware costs are manageable, the real expense may be staff time, retouching, and QA. That does not mean you should avoid 3D. It means you should treat the setup like an operational process, not just a one-time purchase list.
Equipment and software ecosystem: what to look for beyond the basics
Once you move beyond a few test SKUs, it helps to think in systems. Gear choices affect your capture speed. Software affects your editing time and export consistency. If one piece is weak, the whole pipeline slows down.
Turntable features that matter in real production
Turntables are not all the same, even if they look similar in product photos. If you want consistent output across a catalog, evaluate:
Lighting modifiers and diffusion for reflective products
If you sell reflective packaging, glossy finishes, glass, or polished metal, the difference between “fine” and “great” often comes down to diffusion and light shaping. A softbox alone may not be enough. Diffusion panels, light tents, flags, and controlled negative fill can help define edges without turning the product into a mirror of your room.
For white on white outputs, separation is the hard part. You want a clean background, but you still need edge definition. In practice, that means controlling spill and placing lights so you can keep the product readable, not just bright.
Software capabilities to evaluate before you commit
From a practical standpoint, software should reduce labor, not add steps. When you are evaluating 3d product photography software or a viewer workflow, look for:
Planning for scale: presets, batching, and throughput
If you plan to scale beyond a handful of products, document your setup like an operational process. That means recording camera height, distance, lens settings, light placement, and turntable settings. It also means saving editing presets so your team can repeat results.
A simple throughput estimate can keep expectations realistic. Time one SKU from setup to export, including resets and basic editing. That gives you a rough items-per-hour figure, which you can use to decide whether you need indexing, tethered capture, or more structured batching. For most Shopify stores, this planning step is what prevents a “cool test” from turning into a never-finished production backlog.
Frequently Asked Questions
What is 3d product photography for ecommerce?
It usually refers to a product imaging workflow that shows items from multiple angles in a more interactive format than a single still. For ecommerce, that often means rotational image sequences, 360-style viewers, or enhanced visual presentations that help shoppers inspect products more closely before buying.
Do I need a motorized turntable to get started?
No. A manual turntable can work for testing the process on a few SKUs. A motorized option becomes more useful when you want evenly spaced rotations, faster throughput, and less inconsistency between frames. For scaling a catalog, it is often the more practical choice.
Can I use a phone instead of a camera?
Yes, especially for proof-of-concept tests or very small catalogs. The trade-off is consistency. Dedicated cameras give you more control over exposure, focus, and lens behavior. If your brand relies heavily on premium visuals, a camera-based setup will usually give you more reliable results over time.
Is 3d product photography the same as 360 product photography?
Not always, though store owners often use the terms interchangeably. In practice, many ecommerce workflows labeled as 3D are rotational image sequences shown in an interactive viewer. True 3D modeling or CGI production is a separate process with different costs and production requirements.
How does white on white product photography fit into this?
Many stores need both. White on white product photography is useful for marketplaces, clean PDP galleries, and comparison-friendly images. A 3D or 360 presentation adds richer visual inspection. The challenge is lighting products so edges, texture, and depth remain visible against a light background.
What products benefit most from a 3D setup?
Products with visible details, moving parts, premium finishes, or unusual shapes tend to benefit most. Examples include electronics, footwear, cosmetics packaging, home goods, watches, and accessories. If shoppers commonly ask for more angles before buying, that is usually a strong signal.
Do I need special software for display on my store?
Usually, yes. Capturing the images is only part of the process. You also need a way to export, compress, and display them effectively on your storefront. The right choice depends on your theme, performance requirements, and whether you need simple image rotation or more advanced interaction.
Should small Shopify stores build this in-house?
Often, yes, if they start narrow. Testing a few priority SKUs in-house can help you learn what your customers respond to without committing to a large production budget. If the workflow becomes too time-intensive, you can then decide whether to outsource or invest in a more permanent studio process.
Can AI tools replace a full 3D photography workflow?
No, not fully. AI tools can speed up editing, background work, and creative variations, but they do not remove the need for accurate capture, lighting control, and quality checks. For ecommerce, especially on high-consideration products, visual accuracy still matters more than novelty.
What is hemispherical vs full spherical 3D product photography?
Hemispherical typically means a single 360-degree rotation at one camera angle, so shoppers can inspect the product around the sides. Full spherical usually means multiple rows of rotations from different vertical angles, which can show more of the top and bottom but takes more time to capture, edit, and publish. For many Shopify product pages, hemispherical is the practical starting point, and full spherical is best reserved for products where extra viewpoints answer real buying questions.
How many photos do I need for a 360 or 3D spin (24 vs 36 vs 72)?
A common starting point is 24 photos, which gives 15 degree increments and keeps file weight manageable. 36 photos (10 degree increments) can look smoother for detailed or reflective products. 72 photos (5 degree increments) can look very smooth, but it increases capture time and page weight, so it is usually better for hero products rather than an entire catalog. The best choice depends on product detail level, how the viewer loads on mobile, and how much time you can commit per SKU.
What is the difference between 360 product photography and a 3D model?
360 product photography is usually a series of real photos taken as the product rotates, displayed as an interactive spin. A 3D model is a digital asset, often created in 3D software or via photogrammetry, that can be rendered from any angle. The production methods, tools, and costs are different. Many ecommerce “3D” experiences on product pages are actually 360 photo spins rather than true 3D models.
What equipment do I need for 3D product photography (turntable, cameras, software)?
At minimum, you need a stable camera setup (camera and lens plus a tripod or fixed rig), controlled lighting, a turntable that can rotate consistently, and software to process and export the image sequence for storefront display. As you scale, features like turntable indexing, tethered capture, and batch processing tools can reduce retakes and speed up production. The right combination depends on your product size, surface reflectivity, and the level of consistency you need across the catalog.
Key Takeaways
Conclusion
Starting 3d product photography from scratch does not have to mean building a complex studio on day one. The smartest path for most ecommerce brands is to begin with a controlled setup, test it on products where angles genuinely influence purchase decisions, and refine the workflow before expanding it. That is usually how experienced operators reduce waste and learn what improves the product page experience in practice. If you want a clearer picture of where 3D fits in your visual merchandising strategy, explore AcquireConvert’s related guides on 360 formats, software choices, and studio planning. Giles Thomas’s Shopify and ecommerce background makes the site especially useful if you want advice that stays grounded in what store owners can realistically implement.
This article is editorial content and not a paid endorsement unless otherwise stated. Pricing and product availability are subject to change, so verify current details directly with the provider. Any tools mentioned should be evaluated against your own store needs, workflow, and technical setup. Results from photography, software, or optimization changes may vary and are not guaranteed.

Hi, I'm Giles Thomas.
Founder of AcquireConvert, the place where ecommerce entrepreneurs & marketers go to learn growth. I'm also the founder of Shopify agency Whole Design Studios.