How to Shoot 360 Product Photography (2026)
If you run an ecommerce store, static product images do not always answer the questions shoppers have before they buy. A well-shot 360 spin can show shape, texture, proportions, and details that standard front-and-side shots often miss. That matters even more for products where fit, finish, or build quality influence conversion. If you are learning how to shoot 360 product photography, the good news is that you do not need a huge studio to get started. You do need a repeatable workflow, steady lighting, and the right expectations about where AI can help and where it cannot. This guide walks you through the setup, capture, editing, and publishing process step by step. If you want the wider context first, start with AcquireConvert’s guide to product photos for ecommerce.
Contents
What 360 product photography is and why stores use it
A 360 product shoot is a sequence of still images captured as the product rotates in small increments on a turntable. Those images are then stitched or sequenced into an interactive spin viewers can drag on the page. It is different from standard product photography because the goal is not one hero image. The goal is a consistent set of frames that creates a smooth rotational experience.
For ecommerce, this format is especially useful for products shoppers want to inspect from multiple angles. Think footwear, furniture, cosmetics packaging, electronics, collectibles, and premium accessories. In many cases, a 360 photography product experience may reduce uncertainty, which can support buying confidence. It will not replace strong standard images, lifestyle photography, or clear product copy, but it can make a product page feel much more complete.
It also helps to separate terms. A 360 product photography setup usually creates a rotating object spin from still images. A 360 view can refer more broadly to the interactive experience the shopper sees on the storefront. If you are selling on Shopify, that distinction matters because capture, editing, hosting, and front-end display may all involve different tools.
360 vs 3D product photography (expectations vs reality)
Here’s the thing: a 360 spin and a 3D model are not the same asset, and mixing them up can create an “expectations vs reality” problem for both you and your customers.
A 360 product spin is a sequence of real photos. The shopper can rotate through frames, usually left to right, and inspect the product from the angles you captured. A 3D product asset is a true 3D model, which means the shopper can often move the camera around the object more freely, and in some cases view it in AR. That is a different production process, and it usually requires different publishing support too.
From a practical standpoint, 360 photography is great at revealing things shoppers care about during consideration: overall shape, seams, zippers, closures, ports, texture, and how reflective surfaces behave. It can make your product page feel more honest because the product “holds up” as it turns.
What many store owners overlook is what a 360 spin does not solve. A spin does not automatically communicate scale, how the product looks in a room, or how it fits on a person. It also cannot guarantee color accuracy across every device, especially if your lighting and white balance were not locked during capture. That is why standard stills and lifestyle images still matter, even if you publish a beautiful spin.
So when is 360 enough, and when might you consider 3D or AR? In many cases, 360 is the right first upgrade for products where construction details matter and you want a more complete inspection experience without a major production shift. 3D or AR tends to make more sense for higher-consideration products where spatial understanding is a core buying question, such as items that need to “fit” into a space, or products where interactive placement could reduce uncertainty. The trade-off is time and cost. 3D assets typically take longer to produce, require more specialized skills, and can add complexity to how you publish and maintain product media across your catalog.
The equipment you actually need
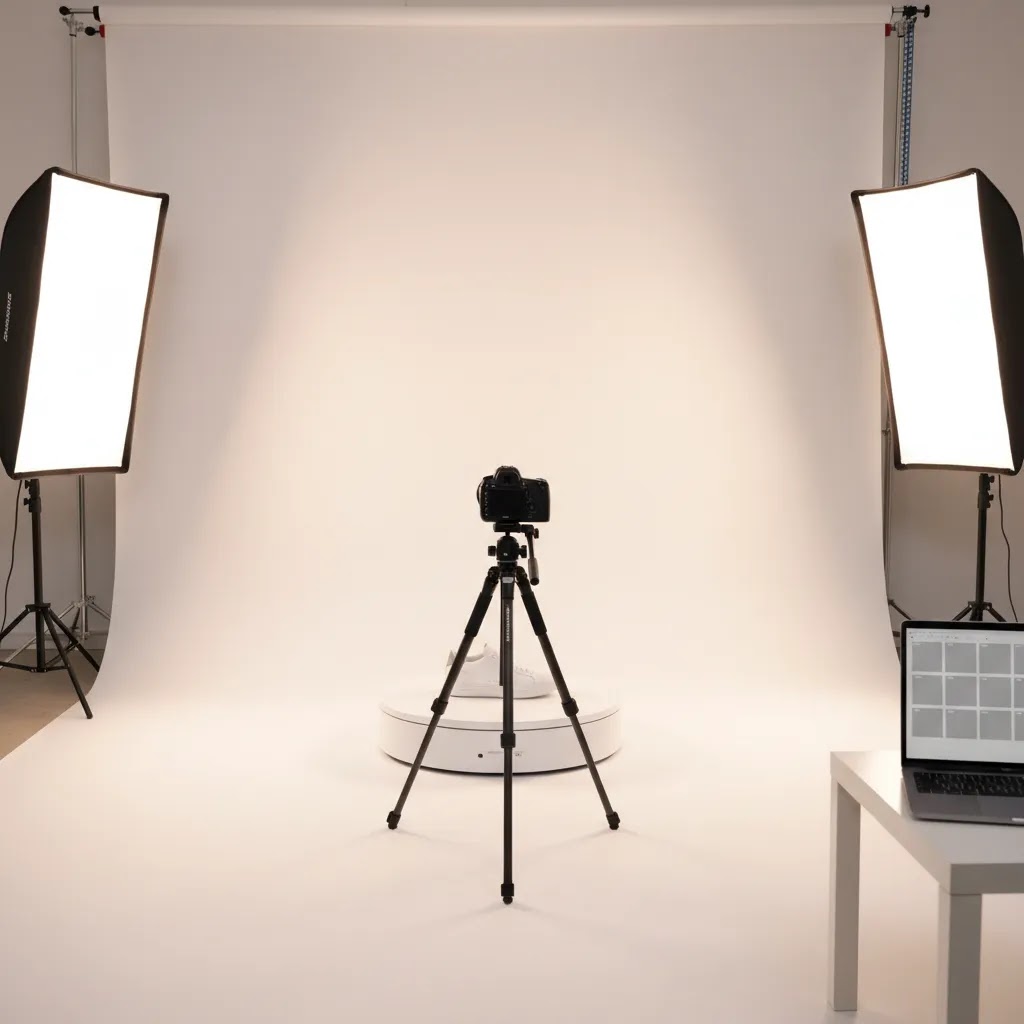
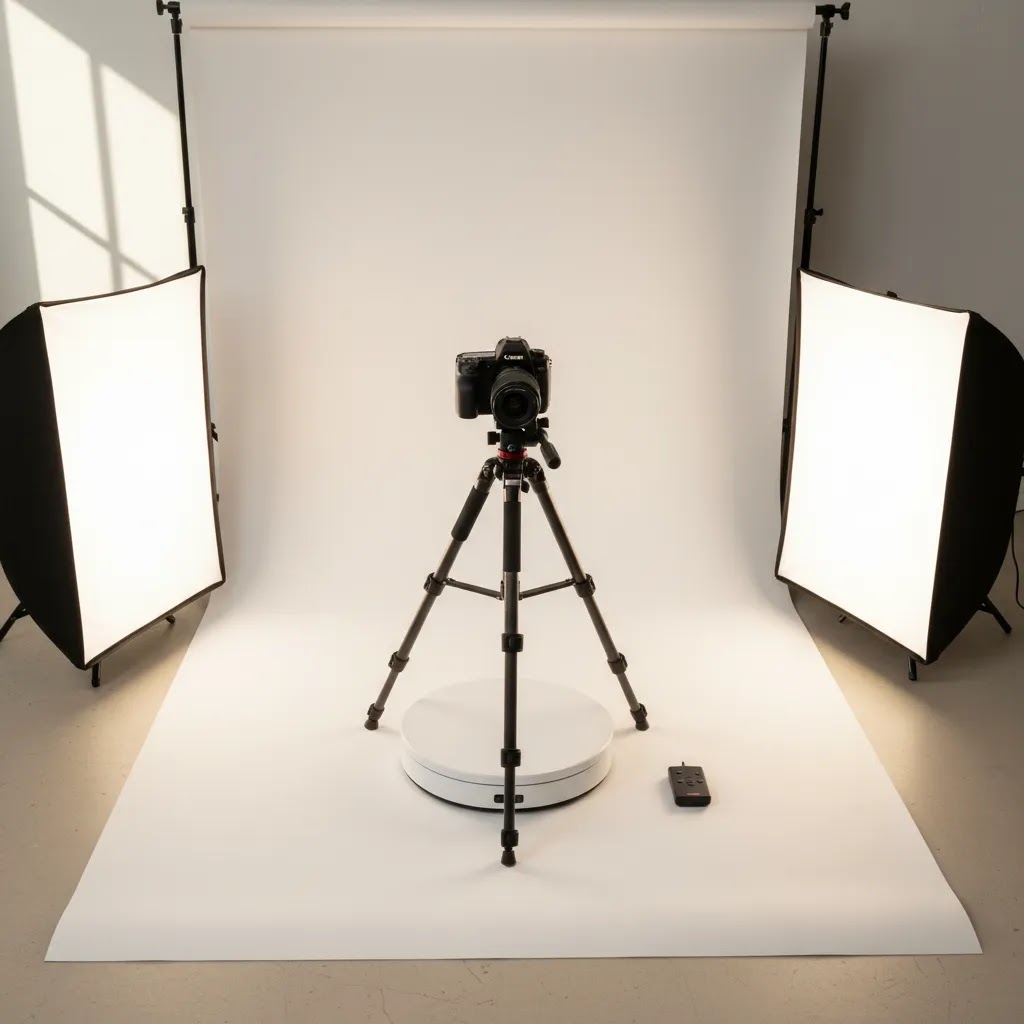
You can produce strong 360° product photography with a modest setup if consistency is your priority. The basics are a camera or recent smartphone, tripod, turntable, controlled lighting, and a clean background. What matters most is that nothing changes between frames except the product’s rotation.
If you already shoot SKUs in-house, your existing table, lights, and camera may be enough. If not, review AcquireConvert’s Product Photography Fundamentals and 3D Product Photography resources before buying more gear.
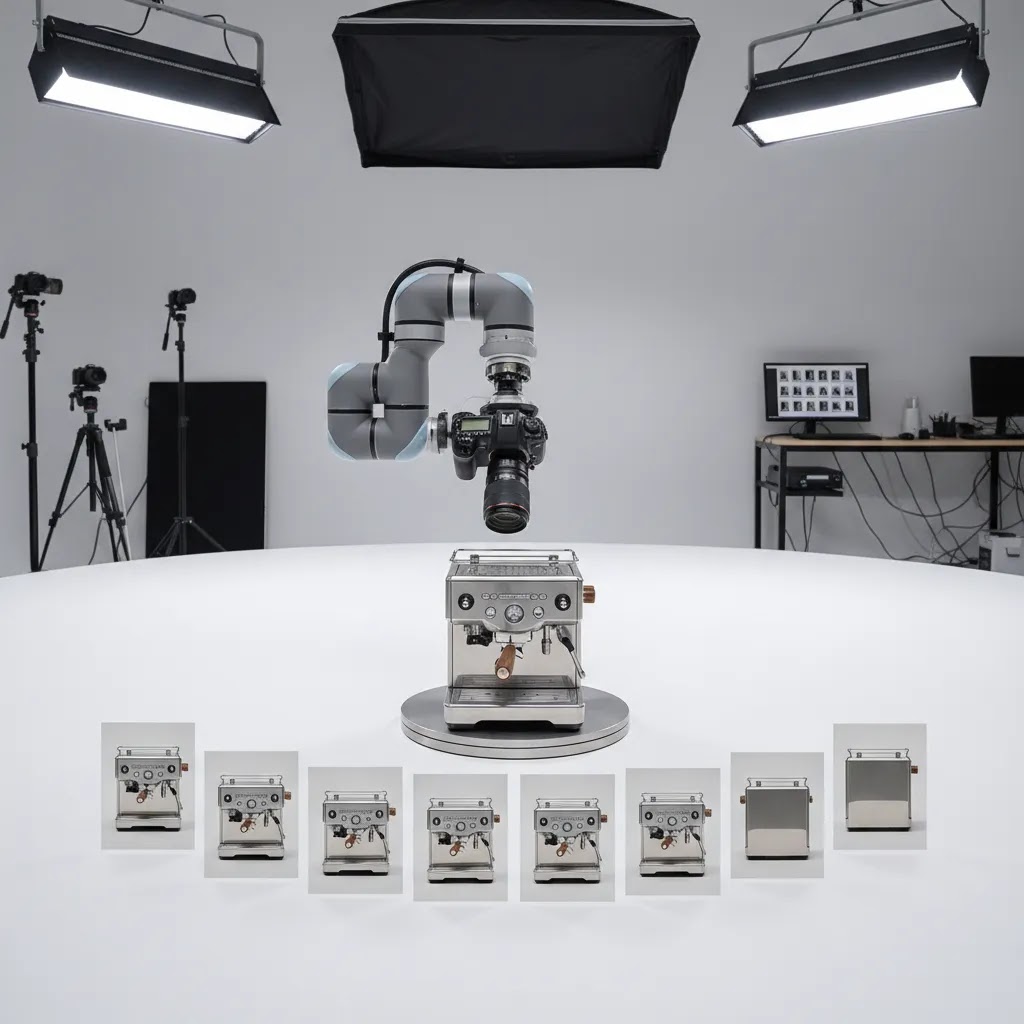
How to shoot a 360 product photo with a motorized turntable (and when it is worth it)
A motorized turntable changes your workflow in one main way: it makes rotation consistent. That sounds minor, but it tends to be the difference between a smooth-looking spin and a spin that feels slightly “off” even after careful editing.
With a manual turntable, you are responsible for rotating by the same increment every time, keeping the product centered, and avoiding small drift over a full rotation. That is totally workable for a pilot, especially if you are testing whether 360 content is worth adding to your Shopify product pages. For a handful of SKUs, manual is often the most practical starting point.
With a motorized turntable, you typically get:
Consider this: consistency is not only about the turntable. Your setup details matter just as much, and they are the first things to fix before you spend more on gear.
Level the turntable and your shooting surface. If the turntable is even slightly tilted, products can “walk” or settle differently as they rotate. Use a basic level and adjust the surface. It is a small step that prevents a lot of wobble complaints later.
Use centering aids so placement is repeatable. The reality is that eyeballing center works until it does not. A simple approach is to mark the center point and add guide rings for common product footprints. If you shoot the same type of item repeatedly, those guides save time and improve consistency across the catalog.
Avoid drift by using a marked plate or fixed stops. Even with a manual turntable, you can reduce rotation error by using a marked plate with degree increments. If your turntable design allows it, fixed stops can make each step more repeatable. The goal is that frame 1 and frame 24 line up exactly after a full rotation.
Now, when it comes to choosing a product photography spinner or turntable for ecommerce, focus on the specs that affect real-world catalog work:
For most Shopify store owners, a motorized turntable becomes worth it when you are past the “proof of concept” stage. If you are building a repeatable process for dozens or hundreds of SKUs, the time saved in capture, plus the reduction in reshoots, can justify the upgrade even if you still keep your lighting and editing setup simple.
How to shoot 360 product photography step by step
Step 1: Prepare the product. Clean dust, fingerprints, labels, and packaging damage before you shoot. Small flaws become obvious once shoppers can rotate the item. If the product reflects light easily, wear gloves while placing it on the turntable.
Step 2: Lock down the camera. Place your camera on a tripod directly facing the product. Set the frame so the item stays centered with a little breathing room around it. Use manual mode if possible. Lock your ISO, shutter speed, aperture, white balance, and focus. Auto settings create frame-to-frame variation.
Step 3: Build even lighting. Aim for soft light from both sides and avoid hard shadows behind the product. A light tent can help with smaller objects. For glossy products, move lights slightly higher and farther out to control reflections.
Step 4: Center the product on the turntable. This is where many beginners lose time. If the item is off-center by even a small amount, the spin looks like it wobbles. Use guides or tape marks on the platform so each product type sits in the correct position.
Step 5: Choose your frame count. A common starting point is 24 images for one full rotation, or one image every 15 degrees. For smoother motion, use 36 or 72 frames. More frames usually look better, but they also increase shooting and editing time. Start with 24 for proof of concept, then increase if the product needs it.
Step 6: Rotate evenly and capture each frame. If you are using a manual turntable, rotate by the same increment each time. A marked turntable helps a lot. Trigger the shutter remotely or with a short timer. Check every few frames to make sure the product has not shifted.
Step 7: Review before breaking down the set. Scroll through the sequence on your camera or computer. Look for jumps in exposure, focus issues, wobble, or inconsistent reflections. Reshoot immediately if needed. It is much faster than discovering a problem later.
Step 8: Capture extra detail images separately. Your 360 sequence is not the whole product page. Keep shooting close-ups, scale references, and standard stills. In practice, stores get the best results when 360 content supports the full image set rather than replacing it.
Editing, exporting, and where AI can help
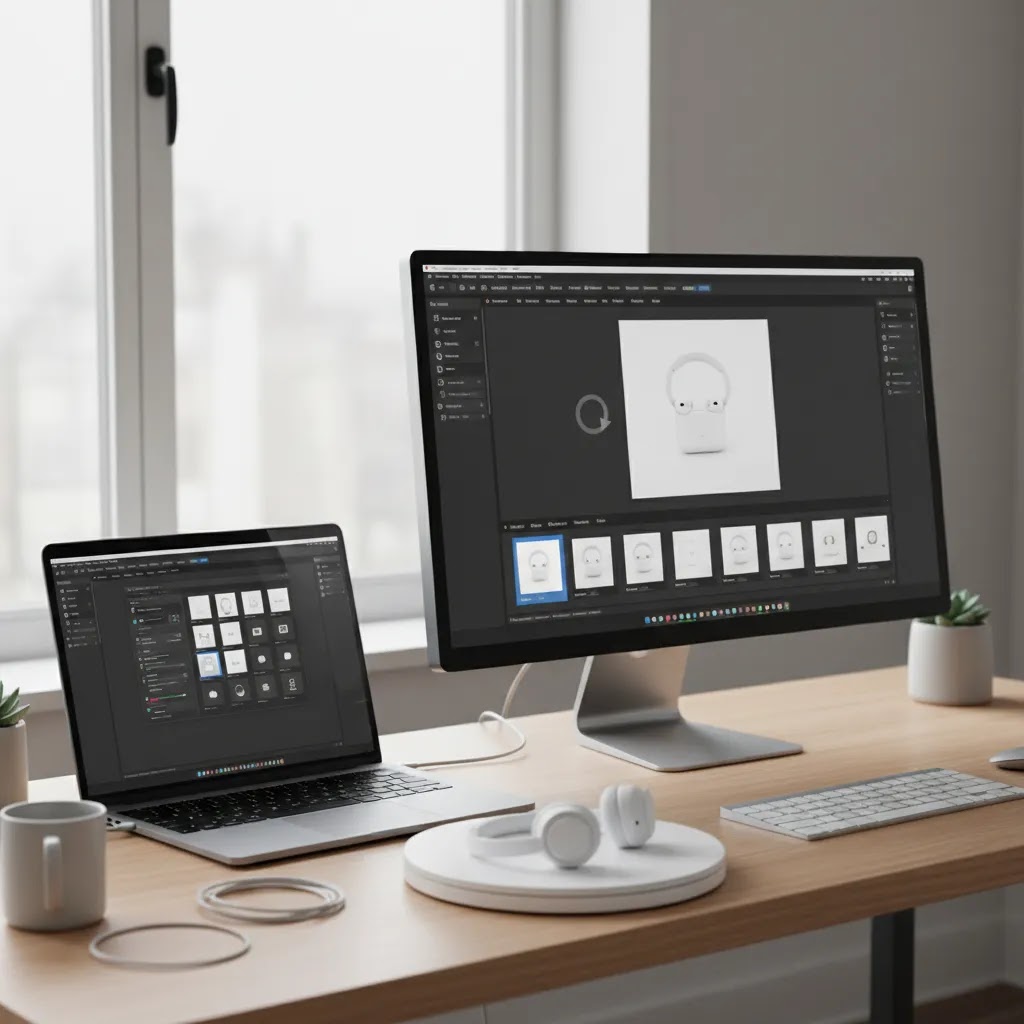
After capture, edit your images in batches so every frame matches in brightness, white balance, crop, and background treatment. Batch consistency matters more here than in a standard product shoot photography workflow. If one frame looks warmer or darker, shoppers notice it during rotation.
Your editing checklist should usually include:
AI tools can help on the cleanup side, especially for background editing, white background consistency, or resolution improvements. Based on current product data, relevant options include AI Background Generator, Free White Background Generator, Increase Image Resolution, and Background Swap Editor. These may speed up post-production for some catalogs, but they do not replace accurate lighting, product prep, or careful capture. If your sequence starts with inconsistent frames, AI usually cannot fully rescue the spin.
Once your image set is ready, you will need a viewer or hosting workflow to publish the spin on your store. If that is the next decision you are making, see AcquireConvert’s guide to 360 photo software to compare your options.
360 product photography apps and software: capture, stitch, host, and publish
One reason 360 projects stall is that store owners treat “software” as one decision. In reality, 360 workflows usually include a few tool categories, and you may not need all of them at the start.
Capture apps (often phone-driven). These help you take the sequence in the right order and keep spacing consistent, usually by guiding you through increments. They are useful for testing because you can validate the end-to-end process without building a full camera and desktop editing pipeline.
Desktop editing and batch processing. This is where you get consistency across frames at scale. If you are shooting a real catalog, your bottleneck is often not capture, it is batch editing and export control. The ability to apply identical crops, exposure tweaks, background cleanup, and naming conventions across dozens of sequences saves a lot of time.
Sequence assembly, sometimes called stitching. With 360 spins, “stitching” often means assembling or configuring a frame sequence so it plays smoothly in a viewer. You are not blending frames like a panorama. You are making sure the sequence order, rotation direction, and interaction feel correct.
Hosting and storefront viewers. At some point you need an interactive viewer on your product page. On Shopify, the viewer decision matters because it affects theme integration, mobile performance, and how much control you have over loading behavior. Some solutions load frames on demand, others preload more of the sequence, which can impact perceived speed.
When you are comparing “best 360 product photography software” options for ecommerce, the features that tend to matter in practice are not flashy. They are operational:
Think of it this way: your tool choice should match your catalog stage.
If you are testing the idea, start with a simple app-based capture flow and publish a limited number of spins. Your goal is to learn what customers do with the asset, and how much time your team spends per SKU, not to build the perfect system on day one.
If 360 becomes part of your ongoing merchandising, move toward a more controlled camera setup and a repeatable editing and export pipeline. That is usually where quality improves and production becomes predictable. It also makes it easier to keep file sizes under control, which matters for Shopify pages that need to load fast on mobile.
Pros and Cons
Strengths
Considerations
Who this approach is best for
This workflow is best for ecommerce teams that already have a basic product photography process and want richer product page visuals. It is particularly useful for Shopify merchants selling products where angles matter, such as shoes, bags, beauty packaging, electronics, furniture details, and premium accessories. If your returns are often driven by unmet expectations around size, finish, or construction, a 360 photography product setup may be worth testing.
It is less useful for products that change constantly, have very low average order value, or sell mainly from a single visual angle. In those cases, your time may be better spent improving hero images, product copy, bundles, or merchandising first.
AcquireConvert recommendation
If you are evaluating whether to add 360 spins to your store, treat it as a conversion support asset, not a novelty feature. Start with one product category where shoppers clearly benefit from inspecting all sides. Measure engagement, page performance, and operational effort before rolling it out across the full catalog.
That practical test-first approach fits how AcquireConvert covers ecommerce growth. Giles Thomas brings the perspective of a Shopify Partner and Google Expert, which matters when you are balancing richer product content with page speed, merchandising, and search visibility. For the next step, compare how 360s fit alongside standard 360 product photography guidance, broader 360 view implementation questions, and software considerations in the 360 photo software guide. That gives you a more complete path from capture to storefront execution.
How to choose the right 360 workflow for your store
There is no single best setup for every merchant. The right choice depends on your catalog, margin structure, team size, and how polished the final experience needs to be.
1. Start with product economics. Ask whether the SKU can justify the extra production time. A premium product with fewer but higher-consideration purchases often benefits more than a commodity item with thin margins.
2. Consider category fit. Products with meaningful side, rear, top, or texture details are stronger candidates. If one hero shot already tells the whole story, a 360 spin may add little.
3. Review operational capacity. Manual turntable shooting is realistic for small tests. If you plan to process many SKUs, standardization becomes critical. You will need documented camera settings, lighting positions, naming conventions, and editing presets.
4. Think about storefront performance. Interactive image sequences can add weight to a page. Compress files carefully and test on mobile. Richer media is only helpful if the page still loads quickly enough to keep shoppers engaged.
5. Be realistic about AI. AI can support editing and cleanup, especially for backgrounds or image enhancement. It is most useful after you already have disciplined capture. If you are searching for 360 product photography AI solutions, focus first on where AI fits in post-production rather than expecting it to replace the physical shooting process.
For many stores, the smartest move is to pilot the process with 5 to 10 products, document the workflow, then decide whether to keep production in-house or move to a more specialized setup.
Frequently Asked Questions
How many photos do I need for a 360 product spin?
Most merchants start with 24 images per rotation, which means one frame every 15 degrees. That is usually enough for a smooth basic spin. If your product has fine details or you want a more premium feel, 36 or 72 frames may look better. The trade-off is more capture time, more editing, and larger file sets.
Can I shoot 360 product photography with a smartphone?
Yes, you can, especially for testing the workflow on smaller products. The key is not the device alone. You still need stable framing, fixed exposure, even lighting, and precise rotation increments. A smartphone plus tripod, controlled lights, and a marked turntable can outperform a better camera used inconsistently.
What background works best for 360 product photography?
White is usually the safest starting point for ecommerce because it keeps the product clear and consistent across frames. It also fits many storefront styles and marketplace requirements. If your brand uses darker or more dramatic imagery, test carefully. Background inconsistency becomes very obvious in a rotating sequence.
How do I stop the product from wobbling during the spin?
Wobble usually happens because the product is off-center on the turntable or shifts slightly between frames. Use alignment marks on the platform and check balance before you begin. For unstable items, discreet supports or mounting aids may help, though you may need to retouch them out during editing.
Is 360 product photography worth it for Shopify stores?
It can be, especially for products where shoppers need more visual reassurance before buying. It is often most useful for premium, design-led, or detail-sensitive products. That said, not every store needs it. If your main bottleneck is weak product copy, unclear shipping policies, or poor hero images, fix those first.
Can AI create 360 product photography without shooting the product?
AI may assist with image cleanup, background editing, and enhancement, but a reliable ecommerce-ready 360 spin usually still depends on real source images. Synthetic outputs may be useful in some creative contexts, but they can introduce inaccuracies in shape, materials, or details. For store listings, accuracy should stay the priority.
What file format should I export for a 360 viewer?
That depends on the viewer or app you plan to use, but JPEG or WebP image sequences are common. Keep the dimensions large enough to show detail while staying mindful of page speed. Before exporting your entire catalog, test a single sequence in the exact storefront environment where customers will use it.
Do I need special software after I take the photos?
Usually, yes. You will need software or a platform that can organize the image sequence and display it as an interactive spin on your store. Some merchants also need hosting, compression, or app-based storefront integration. That is why software choice should be part of the workflow decision, not an afterthought.
Should I outsource 360 photography or do it in-house?
In-house makes sense if you have repeatable products, enough volume, and someone on the team who can own the process. Outsourcing may be a better fit if quality standards are high, the products are technically difficult to shoot, or you need faster throughput without building a studio capability internally.
How to take a 360-degree photo of a product?
Set a product on a turntable, lock your camera on a tripod, and keep lighting and exposure fixed. Take a sequence of still images as the product rotates in equal increments until you complete a full 360 rotation. Then batch edit the frames so they match, export web-friendly images, and publish them using a 360 viewer that can play the sequence as an interactive spin.
How to shoot a 360 photo?
Shoot a 360 photo by focusing on repeatability. Use stable framing, manual exposure, and even lighting, then capture a full rotation at a consistent step size such as 24 frames at 15 degrees each. Review the sequence before you break down your setup so you can reshoot immediately if you see wobble, exposure shifts, or focus issues.
What is the 20 60 20 rule in photography?
The “20 60 20 rule” is usually referenced as a simple way to think about what drives the final image: roughly 20 percent comes from your gear, 60 percent comes from lighting and technique, and 20 percent comes from editing. The exact percentages are not a technical standard, but the principle is useful for ecommerce. If your lighting and capture process are inconsistent, editing and AI tools can only do so much to make a 360 sequence feel smooth.
What is the 400 rule in photography?
The “400 rule” is a guideline used in night sky photography to estimate the longest shutter speed you can use before stars start to blur from Earth’s rotation, based on your focal length. It does not really apply to 360 product photography. For product spins, shutter speed is usually determined by your lighting and your need to avoid motion blur, and because your camera is on a tripod, you can often use slower shutter speeds as long as the product and camera stay completely still between frames.
Key Takeaways
Conclusion
If you have been wondering how to do 360 product photography without overcomplicating it, the answer is to focus on consistency before sophistication. A steady camera, repeatable lighting, accurate rotation, and careful batch editing will get you much further than expensive gear used without a process. For ecommerce stores, the real value is not the effect itself. It is helping shoppers inspect products with more confidence while keeping your catalog production manageable. If you want to go deeper, explore AcquireConvert’s related guides on product photos, 360 product photography, 360 view experiences, and 360 photo software. They will help you decide what belongs in your store’s next visual merchandising upgrade and what can wait.
This article is editorial content created for educational purposes and is not a paid endorsement unless explicitly stated otherwise. Pricing, features, and tool availability are subject to change, so verify current details directly with each provider before making a decision. Any results from 360 product photography, AI editing, or storefront changes will vary by store, product type, implementation quality, and traffic source.

Hi, I'm Giles Thomas.
Founder of AcquireConvert, the place where ecommerce entrepreneurs & marketers go to learn growth. I'm also the founder of Shopify agency Whole Design Studios.