Whether you’re just starting out on an exciting new venture, have a new idea for an ecommerce store that’s going to change the world, or you already have a Shopify store or use another platform and just want to take your business up a notch, this Shopify review will answer all your main questions.
We take you through all its main features. We cover its major strengths (and a couple of weaknesses). And we show exactly what you can and can’t do with it.
You’ll see how the platform has risen dramatically because it manages to balance simplicity (you can use Shopify with very little technical know-how) and functionality (it does everything that most stores need). All that at a very reasonable price point…
By the end of the review, you’ll have a clearer idea of whether the platform can serve your needs; and, if you’re already a Shopify user, you may pick up some new ideas about optimizing your store.
Shopify review: A little background on a big player…

In the most basic terms, Shopify is software that allows almost any one to sell almost anything online in a variety of different ways. But you probably know that already.
What you may not know is that Shopify started life in 2004, near the start of the rise of ecommerce. The company is based in Ottawa, Canada.
The idea was to provide a platform for people who knew almost nothing about the technical side of the deal (programming, coding, development) but who had products and services that they wanted to get out to the marketplace.
In short, they wanted to make online selling easy so that store owners could focus on what they’re best at – and leave the technical side to others without it costing the earth.
So Shopify created a fully integrated e-commerce solution that has become a market leader: a comprehensive platform that is flexible and customizable enough to be scaled up or down with your business – no matter which model you use.
It is affordable for almost any business, and can help you market, promote, and track sales of your products and services, as well as handling the purchase transactions.
And it’s still growing and becoming more sophisticated each year…
Shopify’s standout features: Ease of use & flexibility
Before we delve deeper into Shopify, let’s focus quickly on its real standout features.
Take a look around at the most successful types of businesses in 2018. The likes of Apple, AirBnB, Uber and so on. The one characteristic that connects them all is simplicity.
People increasingly demand ease of use: make it overly complicated and you’re just not going to get very far. But while almost every new tool, app, or piece of software claims simplicity, not many actually walk the talk.
Shopify does – and has it covered on two main fronts:
- A Shopify store is easy to SET UP and ADMINISTER – for you, the business owner
- It’s easy to SHOP – for your all-important customers (including on mobile)
This ease of use is combined with a flexibility that also makes it highly customizable. You get:
- A choice of design structures – so you can get the ‘nuts and bolts’ right;
- Design templates – for the look you need;
- Mobile responsiveness – for a great user experience;
- A product/service catalogue that’s simple to manage efficiently;
- A choice of online payment options.
There is more on each of these features below. For now, let’s just observe that Shopify sits in the ‘sweet spot’ of ecommerce platforms. It’s simple enough for first-time users to create a fully hosted store out-of-the-box from 100-plus optimized store designs and to manage it from the standard dashboard; but it also carries enough ‘extra’ features and apps that it also supports more sophisticated functionality. So more advanced store designers also tend to love it.
And performance remains consistently good for customers (uptime, load times etc.), no matter which setup your store requires.
Bottom line: most stores can get the setup, themes, and branding they’re after without having to jump through hoops to get there. But if you enjoy hoop-jumping, be our guest!
Who’s Shopify designed for?
Because of its flexibility and ease of use, Shopify is suitable for almost any store owner and any business: new or established, big, small, or medium-sized, product-based, service-based, subscription-based, Amazon-based, and so on.
In fact, it’s difficult to come up with a type of ecommerce business where you’d think: “Shopify’s not right”.
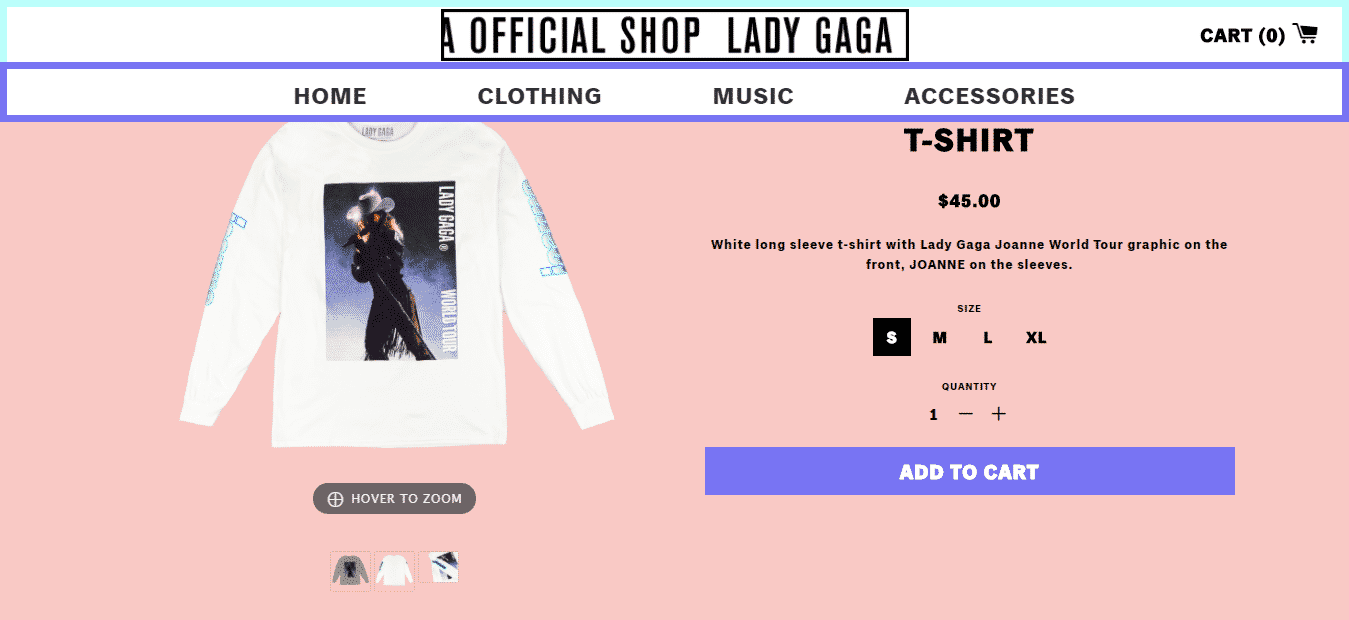
You’ll see from the pricing plans detailed below that there really is something for everyone – from the smallest of startups to Lady Gaga and beyond.
So, to summarize, Shopify is designed for:
- Sole traders with little or no experience in ecommerce and little technical expertise
- Small startups just setting out with an idea for a store and a few products
- Small businesses wanting to keep a tight handle on costs
- Medium-sized businesses looking to grow with their market but keep development costs down to a minimum
- Larger businesses wanting to scale up to the next level & boost revenues
- Offline ‘pop up’ stores or booths looking for a POS system
Most readers will be in the first three categories above: and you’ll find most features of Shopify ideal for what you want to achieve.
Different store options supported by Shopify

Shopify supports all of the following ecommerce business models:
- Dropshipping – where you don’t keep the products in stock but fulfill orders by purchasing them from a third party, who ships them directly to the customer. Shopify makes it easy to use this low-cost way of selling – no need to invest in inventory.
- Subscription models – Shopify allows for recurring orders to be placed with a simple app integration (Recharge).
- Blog post or Facebook BUY buttons – simply add a BUY button to blog posts or to Facebook pages to instantly turn your hard work into revenue. The entire customer experience takes place there rather than through a separate store.
- Amazon & eBay – a Shopify dashboard is all you need to connect to the huge markets available through the Amazon, eBay and Facebook channels – and you can easily manage listings, sales, revenue, and inventory from one central place.
- Affiliate selling – another effective way of selling from your own store but without the investment in inventory. All it takes is a Shopify app integration to make it happen.
- Enterprise selling – for high-volume enterprise-level stores, Shopify Plus offers a scaled-up version of their store and additional growth strategies.
- POS store options – you can also use Shopify offline, as POS software at your pop-up store or event booth. Take credit card payments for products and these sales will integrate with your online store sales records and inventory. This is all aided by the iPad app, which is included and which allows you to swipe customer credit cards.
Multi-channel sales models are supported by Shopify, potentially expanding your reach. You can sell on Facebook, Amazon, your blog, and from a pop-up booth, as well as from your online store, while keeping all the management and sales information centralized in one place.
Getting your store set up with the Shopify wizard
It’s actually possible to set up a new Shopify store within minutes. Even if you don’t really know what you’re doing, it’s really easy, thanks to the setup Wizard.
Here’s a step-by-step way to create your store:
- Tell them what you’re planning to do on Shopify…
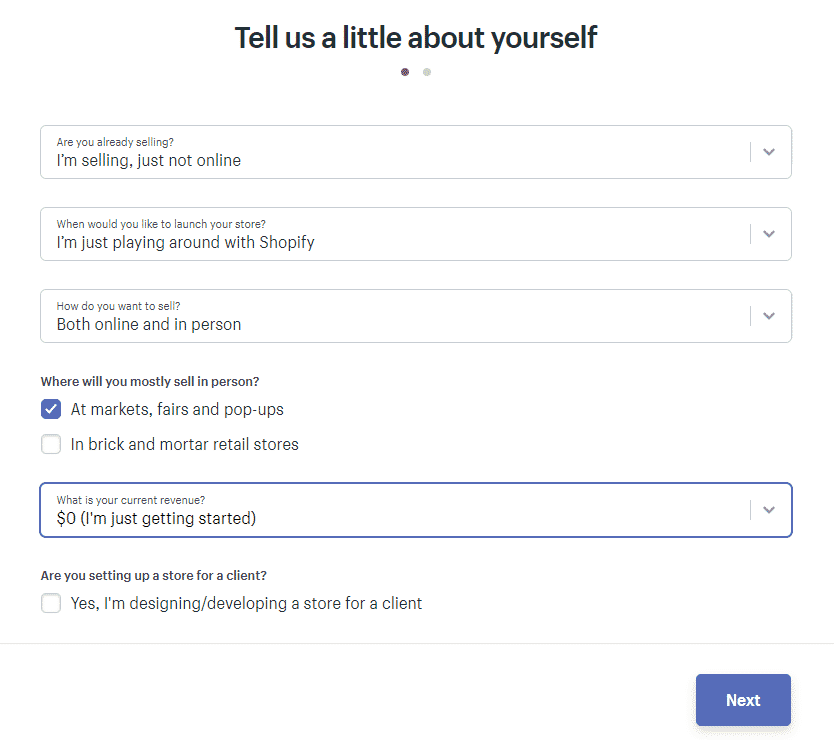
2. Provide a few contact details…
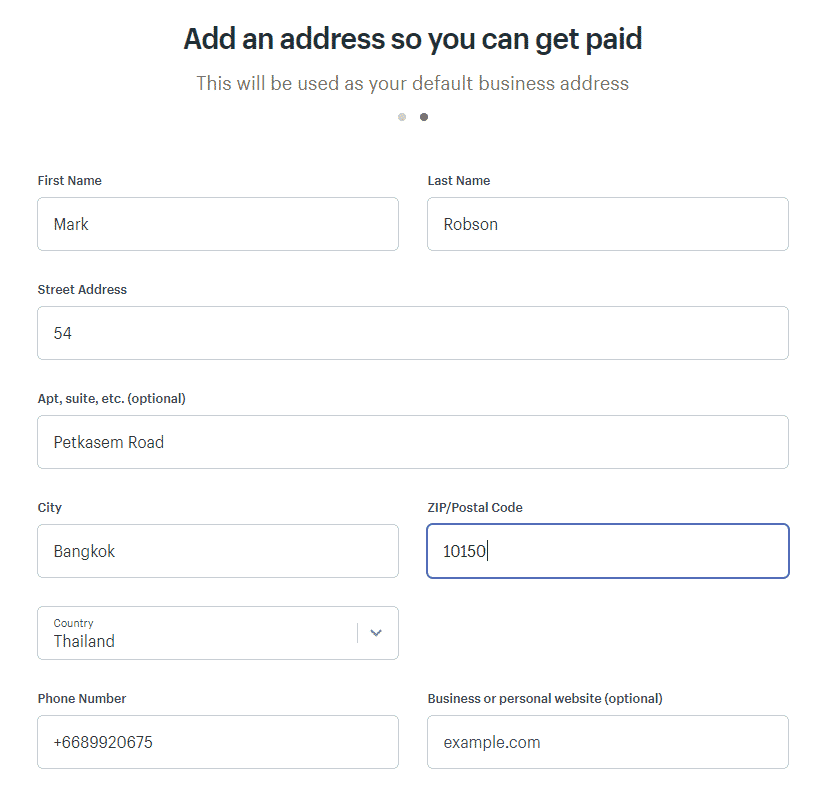
3. Start the trial & create your online store…
You’ll be prompted to select your plan here – but you can start creating your store without clicking on a plan and providing credit card details.
4. Choose a design for your store by selecting & customizing your theme
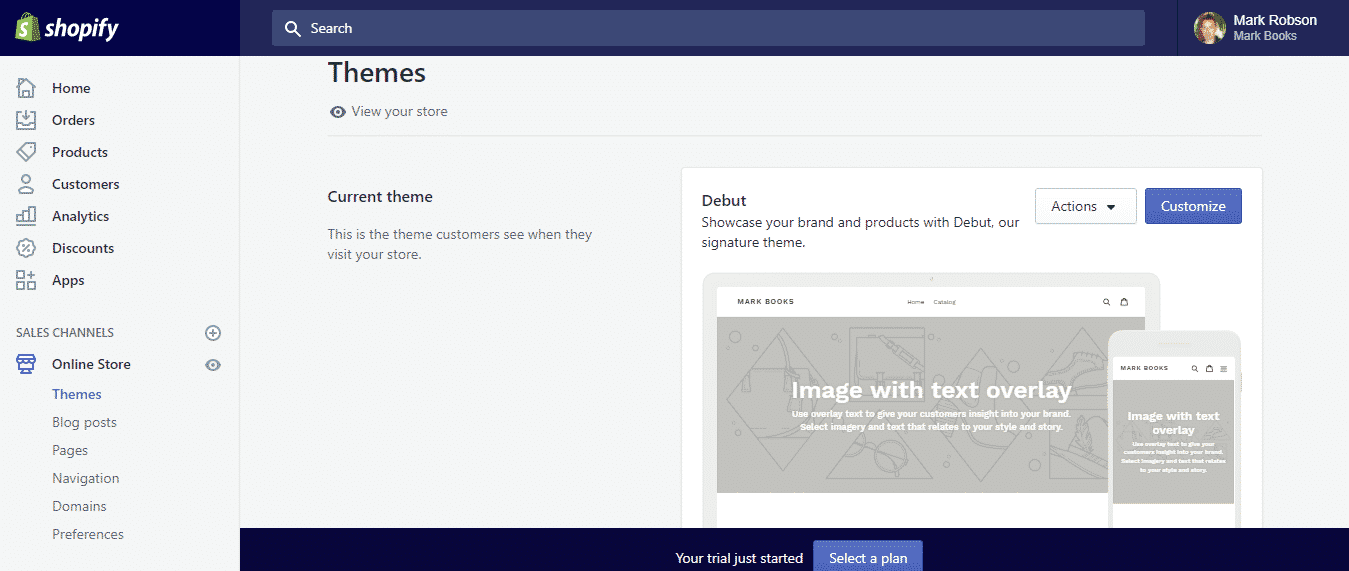
Your choice of Shopify themes
Getting the look right is important as you set up your store. It needs to represent your brand, be eye-catching, and showcase your products in the best light possible.
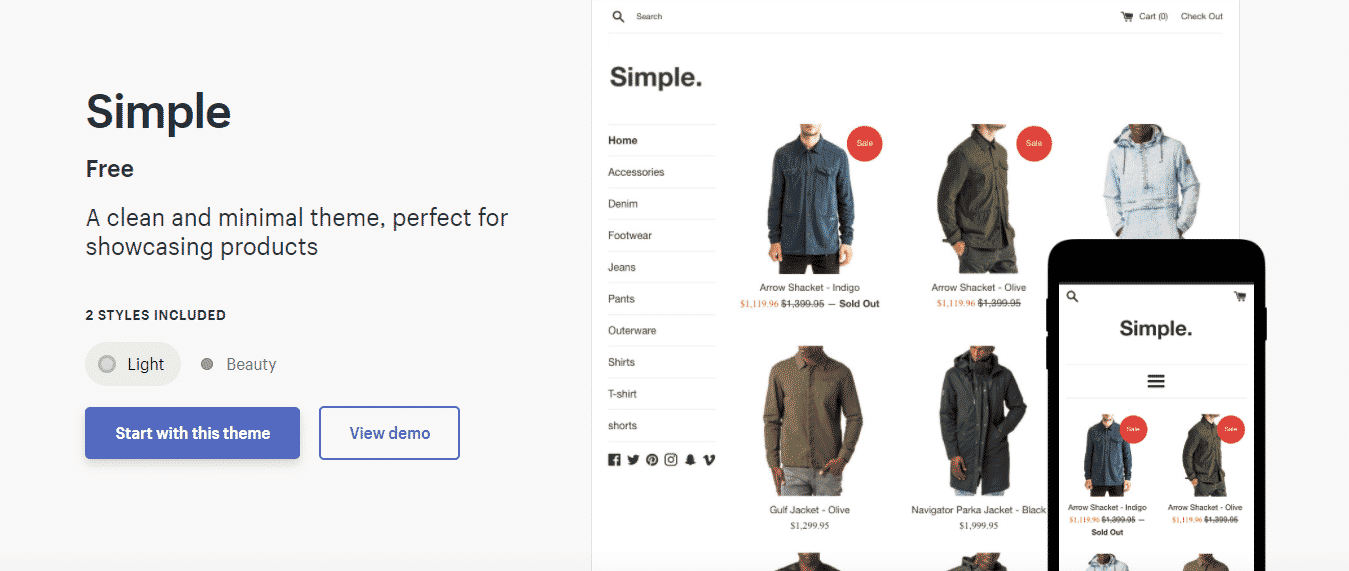
You’ll find over 100 different designs, with more on the way. Most of these are for sale but there are also more than 20 free themes. All themes are optimized for viewing on mobile as well as desktop and provide a slick user experience.
Do yourself a favor and get a paid theme as they are generally more customizable.
The templates save you from having to build your store entirely from the ground up. They are customizable in terms of colors, typography, headers, footers, home page elements (which products to feature, for instance). Simply use the template editor or use Shopify Sections (see below).
This set up allows store owners of any level of technical expertise to create a completely unique store. And nobody will ever know that you didn’t design it yourself – because there is no Shopify branding on it.
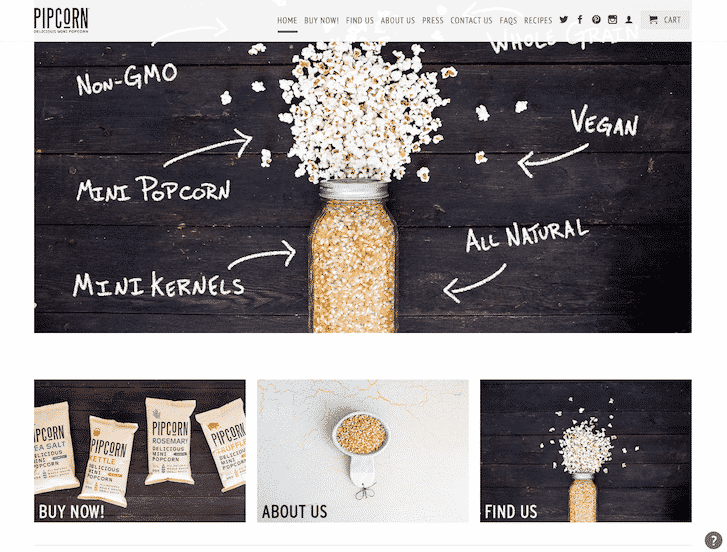
Here’s an example of one of the free ones available right now:
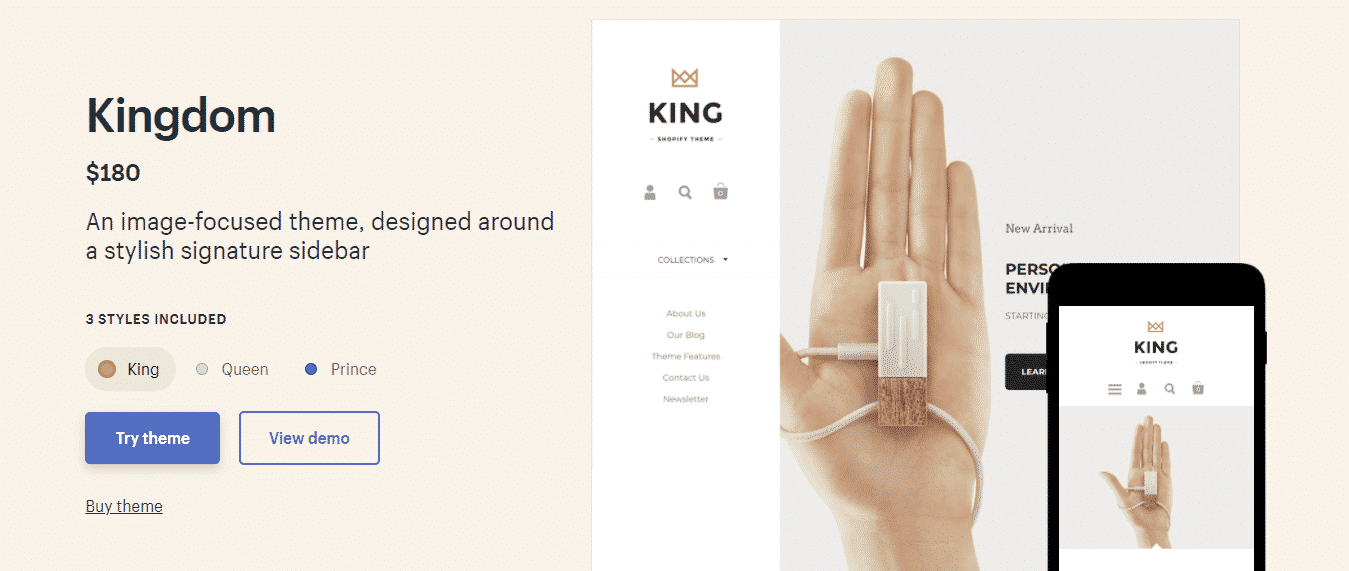
And here are a couple of the paid ones:

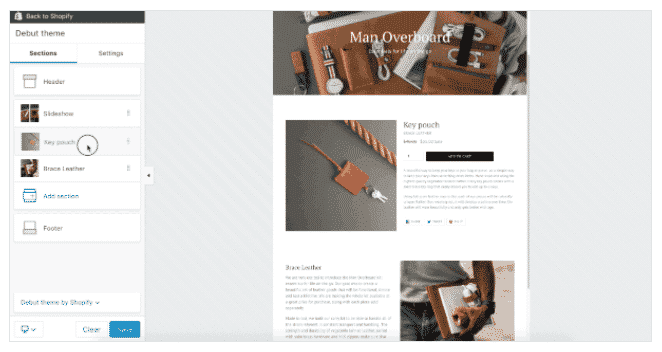
Customize using Shopify Sections
Using Shopify Sections, you can insert and position the elements you want on your homepage, with simple drag and drop technology.
This relatively recent addition (2016/2017) helps you insert the desired content into your homepage at the click of a button. You’re in control of creating the look and feel you want – whether it’s a certain type of product carousel, a slideshow, or something else.
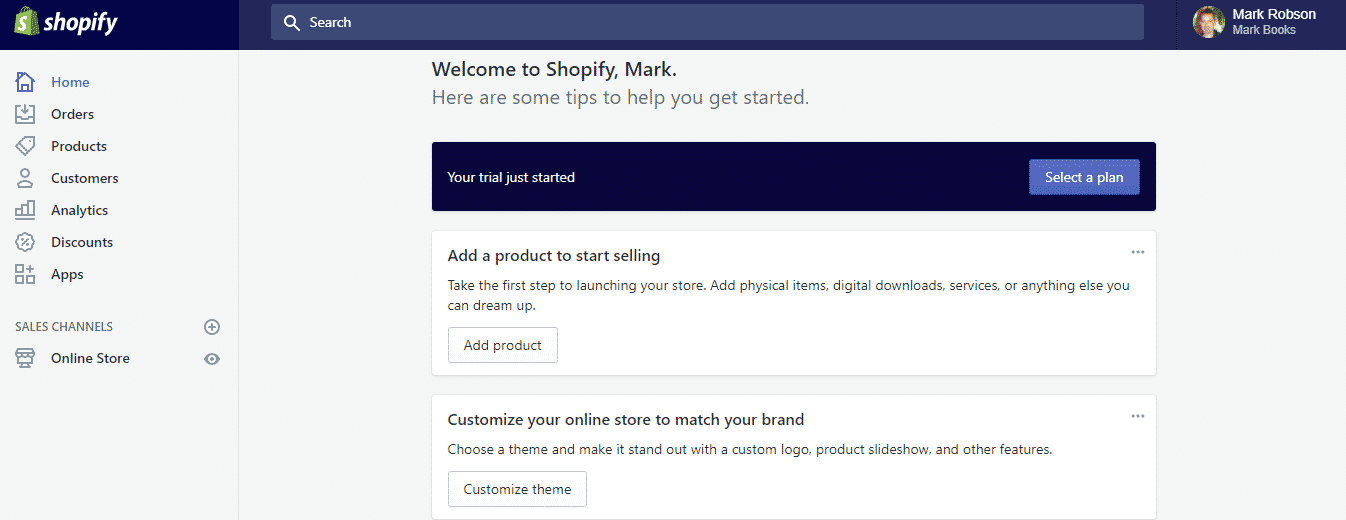
A very customer-friendly Interface
If you want a challenge, find an interface on an ecommerce platform that’s easier to use than the Shopify one!
For those used to the WordPress dashboard, this might remind you of it a little.
The Shopify interface makes it simple to manage all the key aspects of your Shopify store from one central location. It consists of a number of menu sections, listed down the left-hand side of the page:
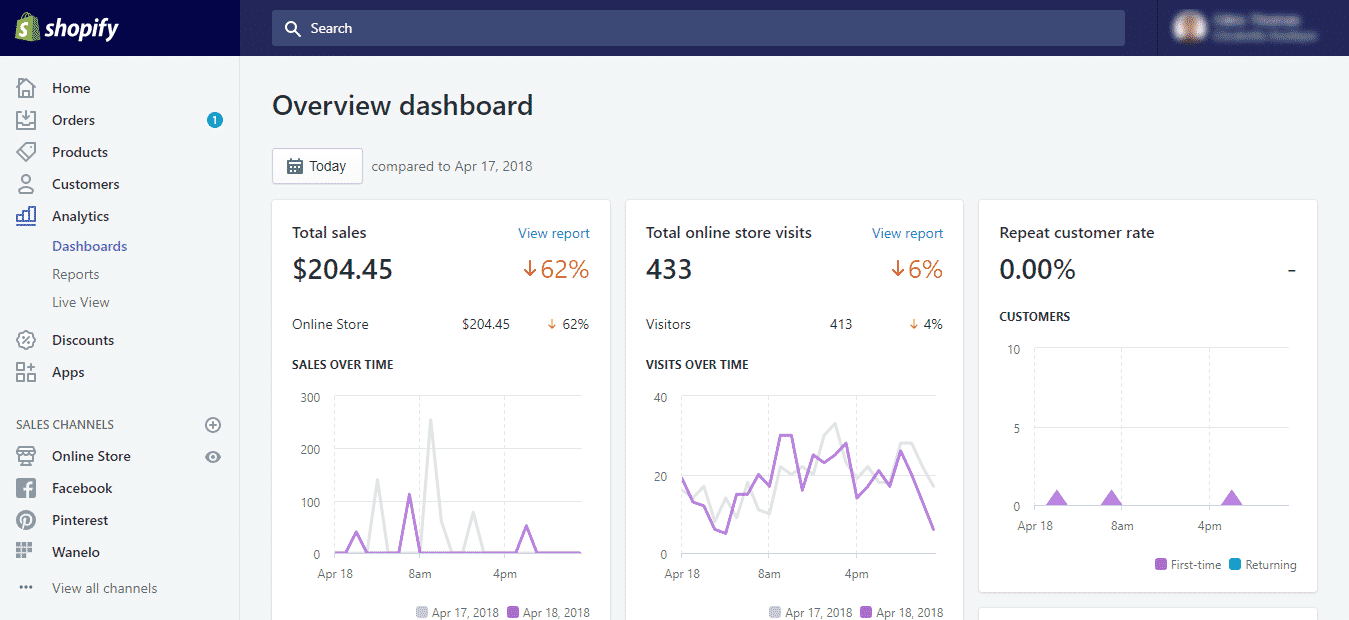
Home
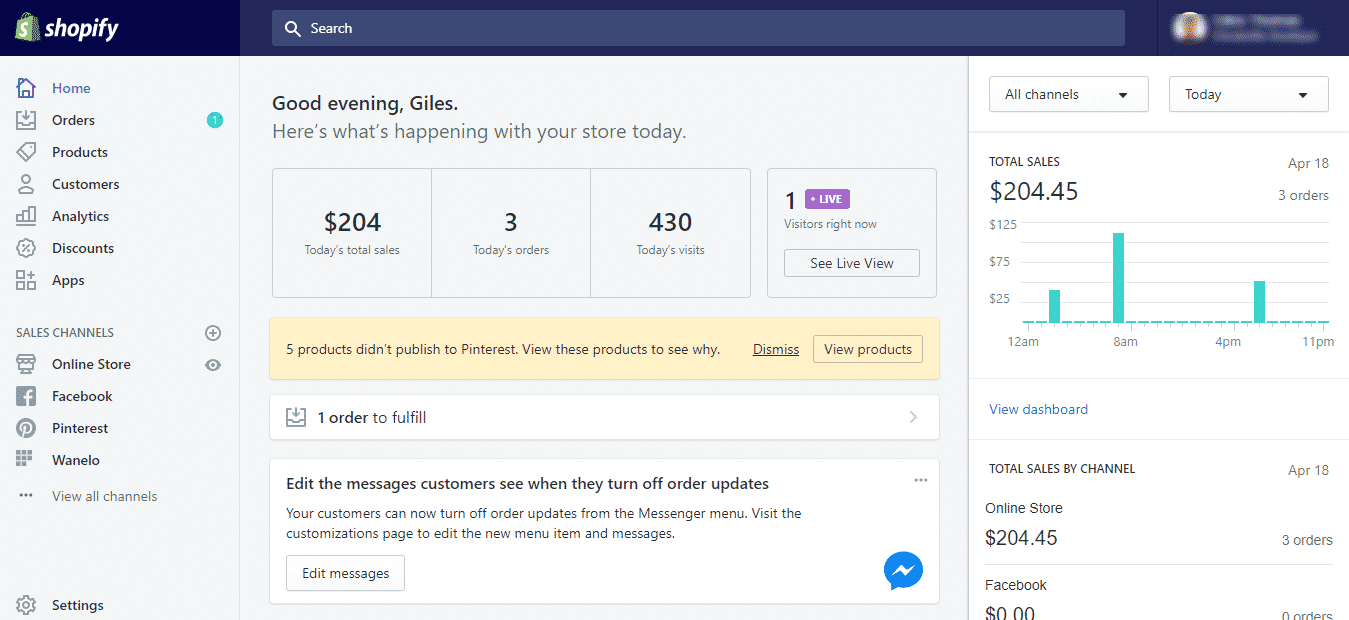
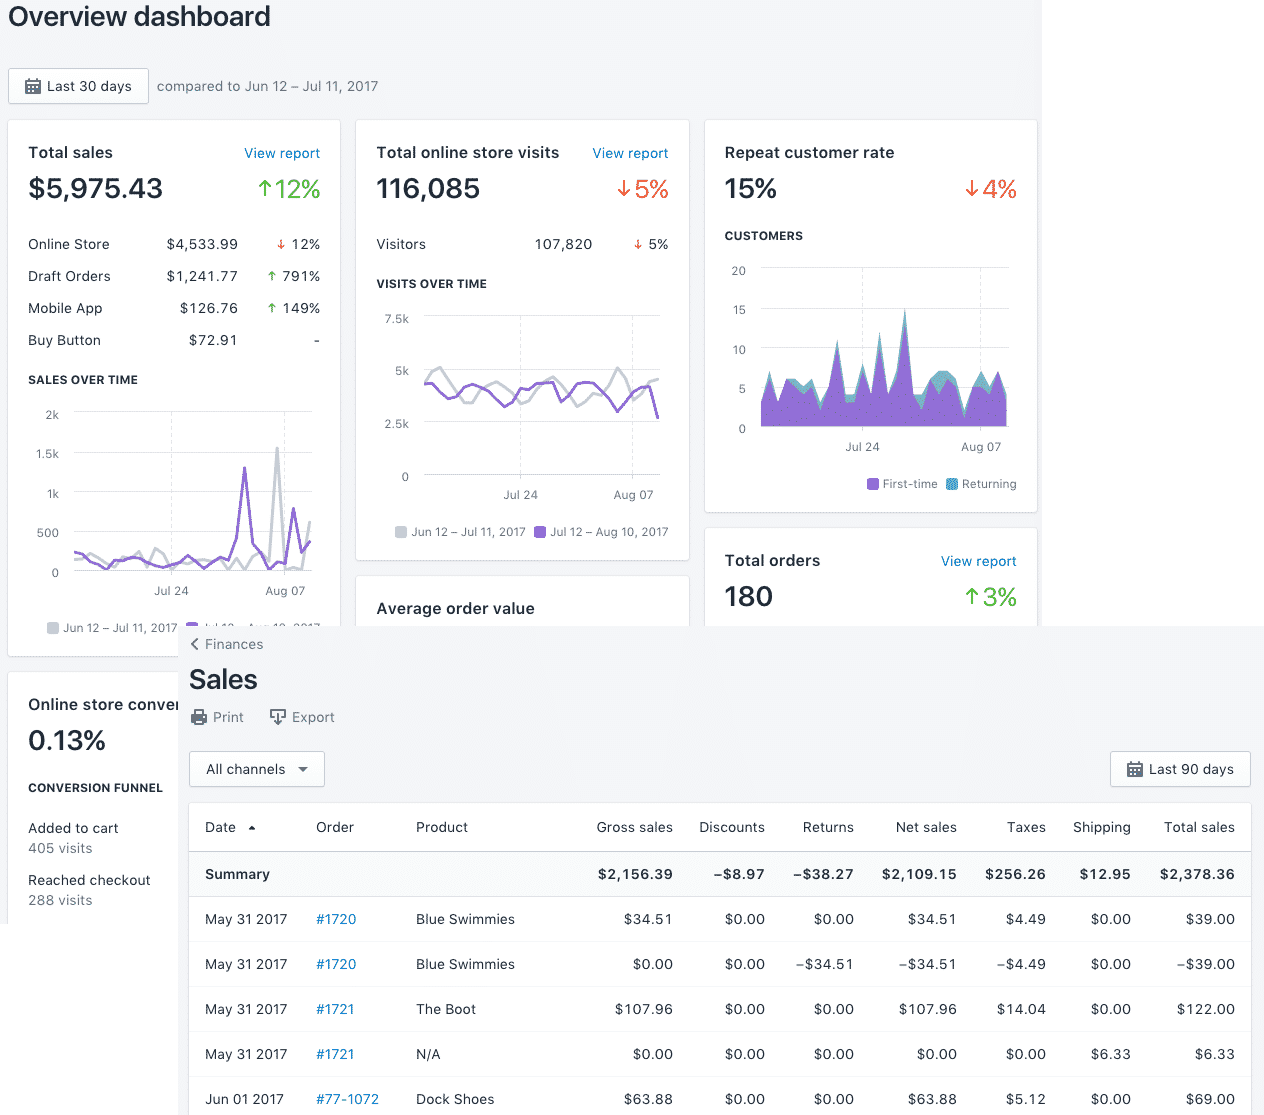
Provides a store overview, including today’s sales and visitors, recent activity, and Shopify announcements. A load of valuable information on this page.
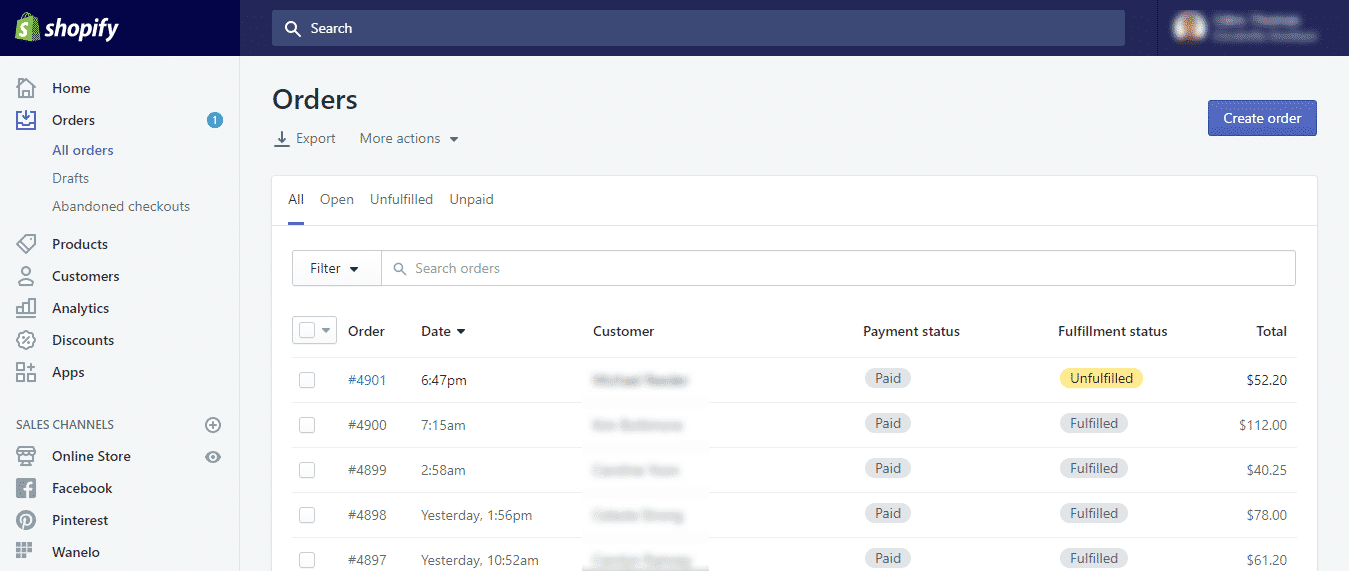
Orders
Manage, track and view all orders (fulfilled and unfulfilled) according to date/time. Create orders for phone-based customers. Also check and manage abandoned checkouts.
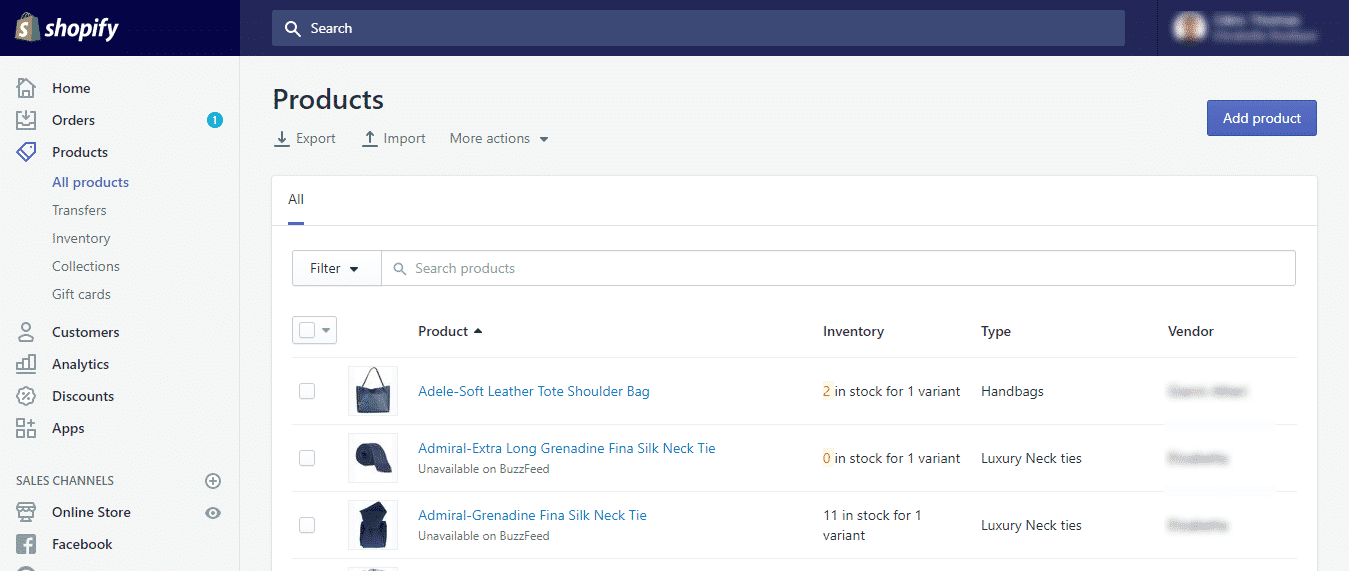
Products
Add products, import existing product inventory, manage and track inventory, organize products into collections and sell gift cards: everything to do with your products all centralized and arranged neatly.
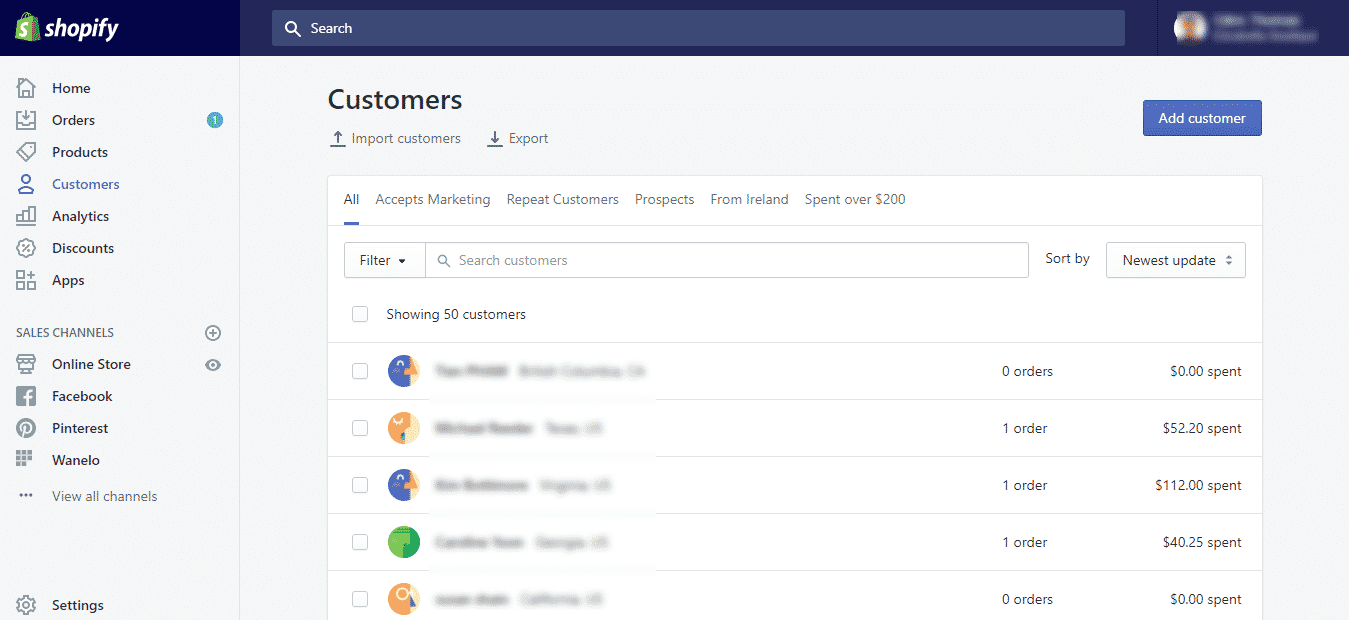
Customers
This contains every customer’s details and their purchase history – all neatly arranged. You can segment lists into repeat customers, highest spending customers (over a certain amount), those that accept marketing, etc.
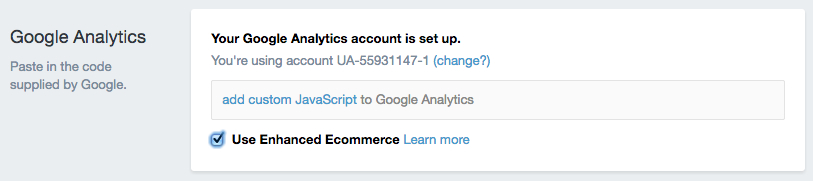
Analytics
This is where you track sales, refunds, taxes, and payments, as well as visitor numbers and conversion rates etc. More about these reports below.
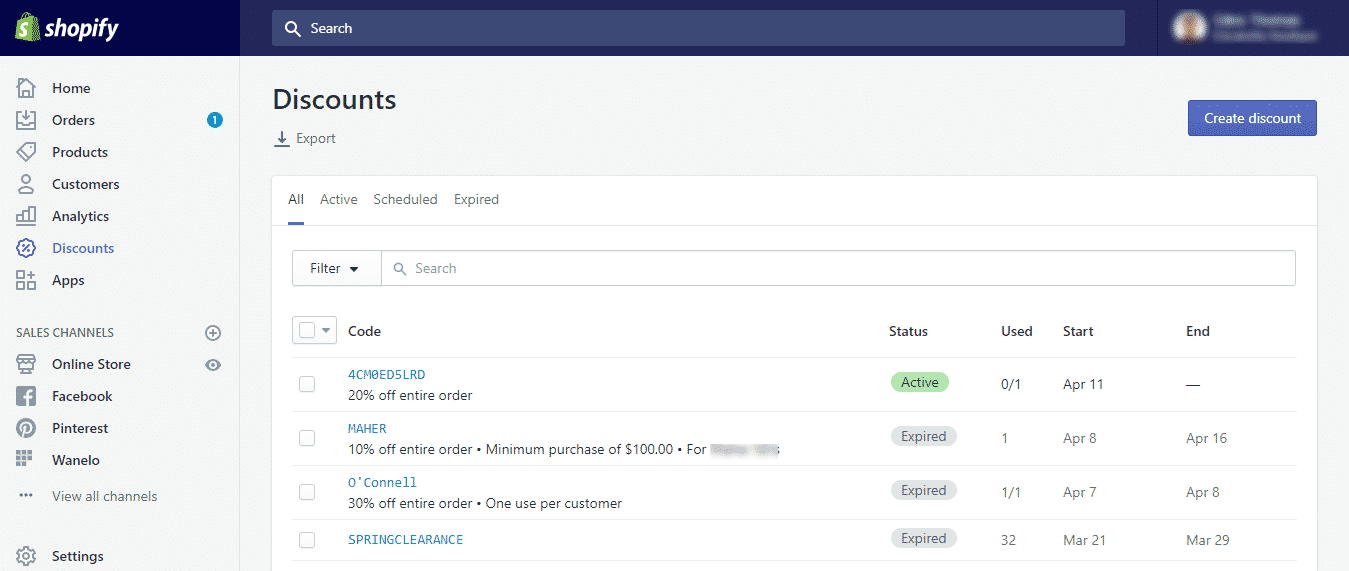
Discounts
Here you can create discounts and view all active, scheduled, and expired discount promotions that you have set up in your store.
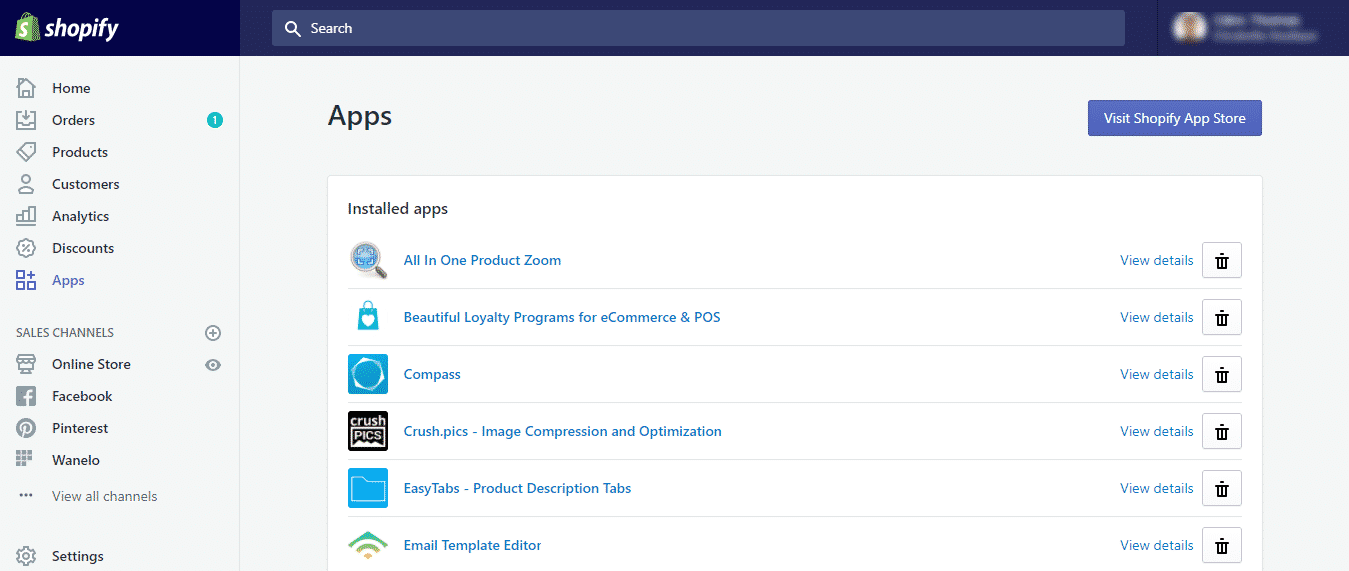
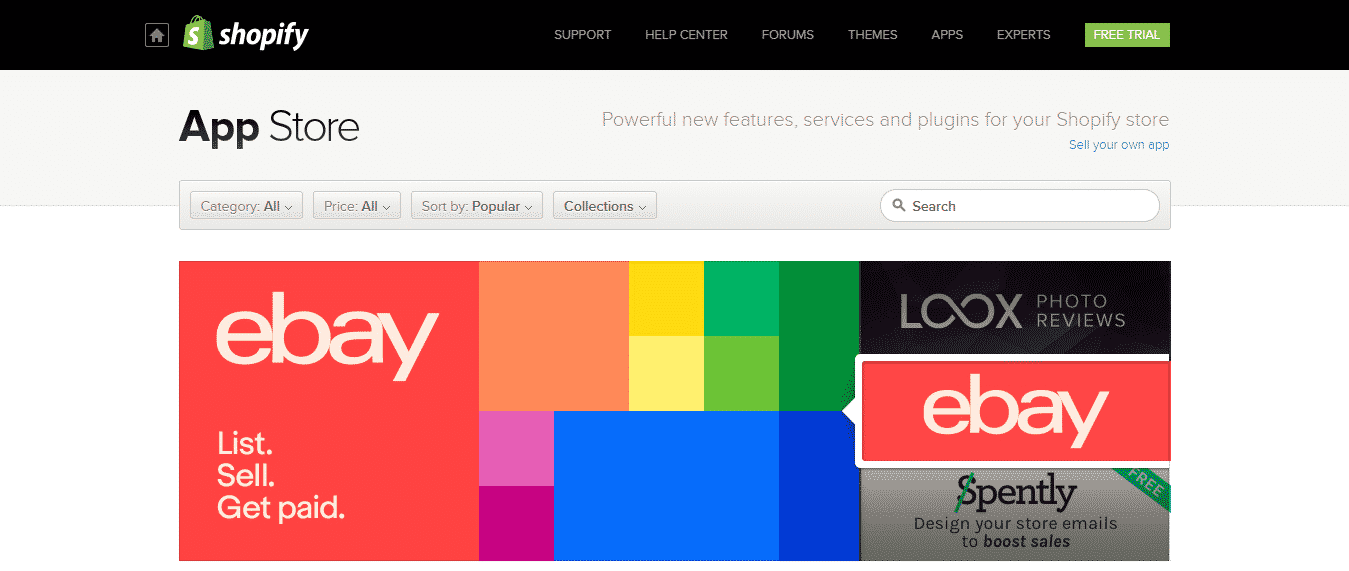
Apps
This section lists all the apps you use on your store and provides access to the Shopify App store, where you can download other innovative apps to help you with marketing & sales, social media, inventory, accounting, and shipping. More about this below.
Online store section
This section of the dashboard manages some important functions – including actually making your store visible to the world (if you haven’t yet done that).
The overview section will include an UNLOCK MY STORE button, which takes you to a page where you select the plan you want – more details about these below in the Pricing Plan section.
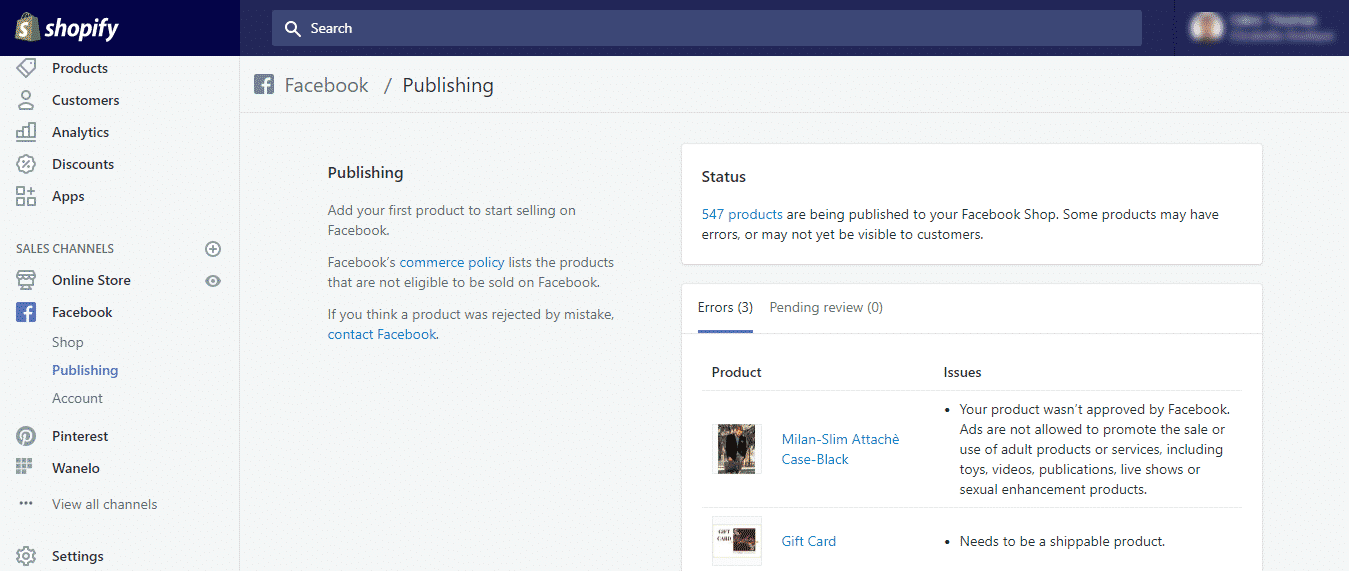
If your store is already ‘live’, the Online Store menu allows you to add additional features to your store that add depth and appeal for your customers and help you create new sales channels. These include:
Review & customize themes
Add blog posts & moderate comments

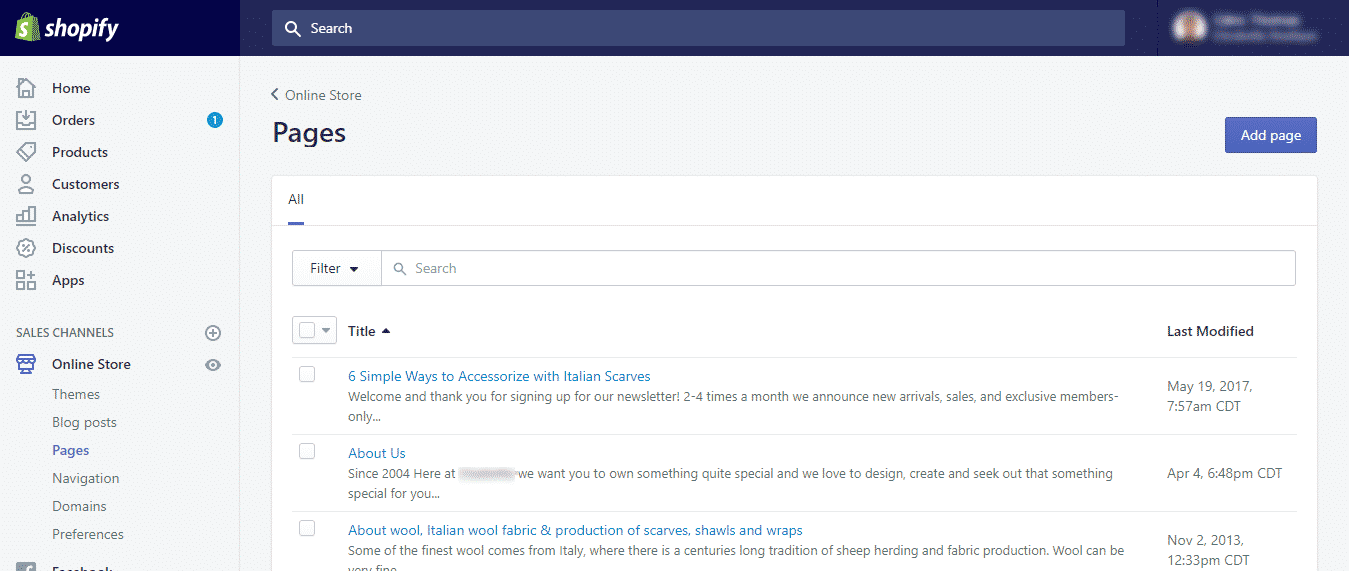
Add new pages such as About Us (and edit existing pages)
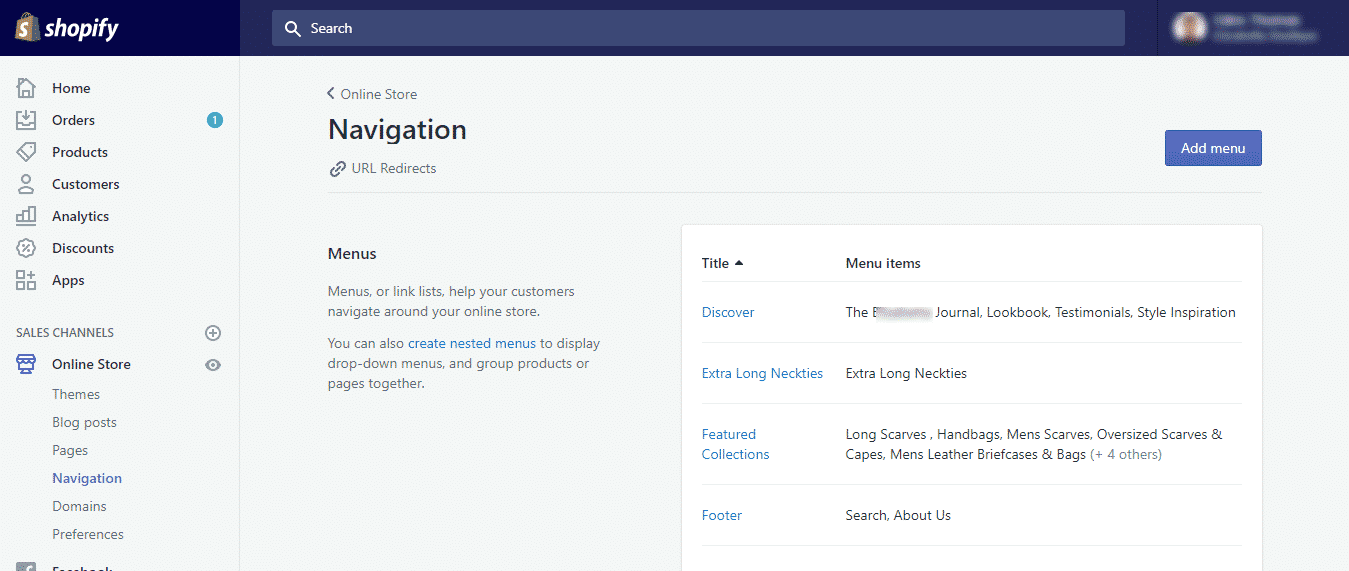
Set up menus and simplify navigation of your store
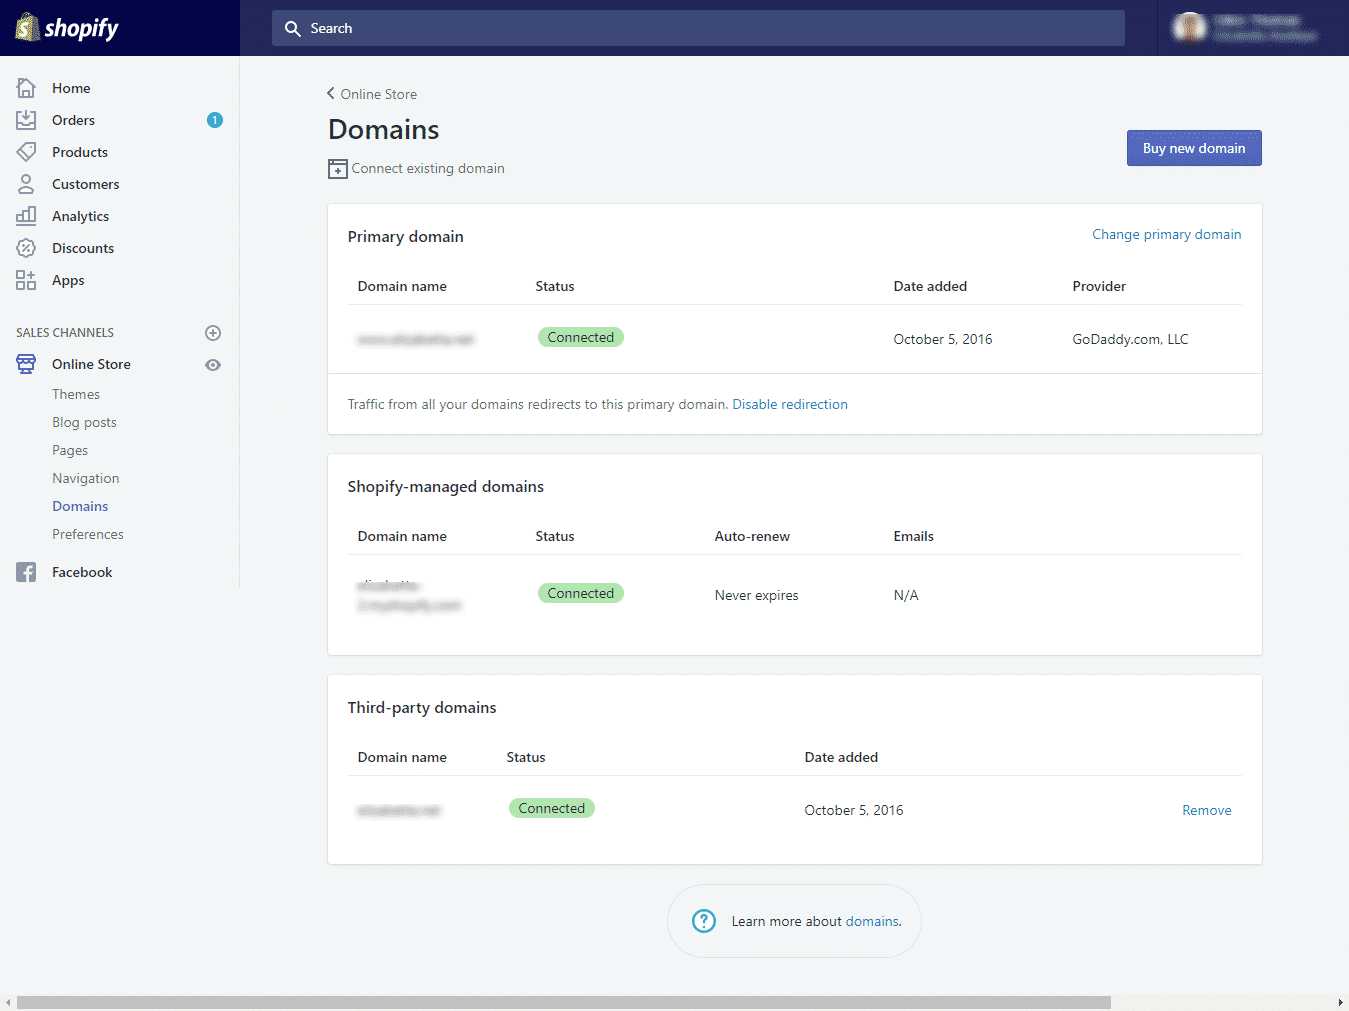
Manage your domains
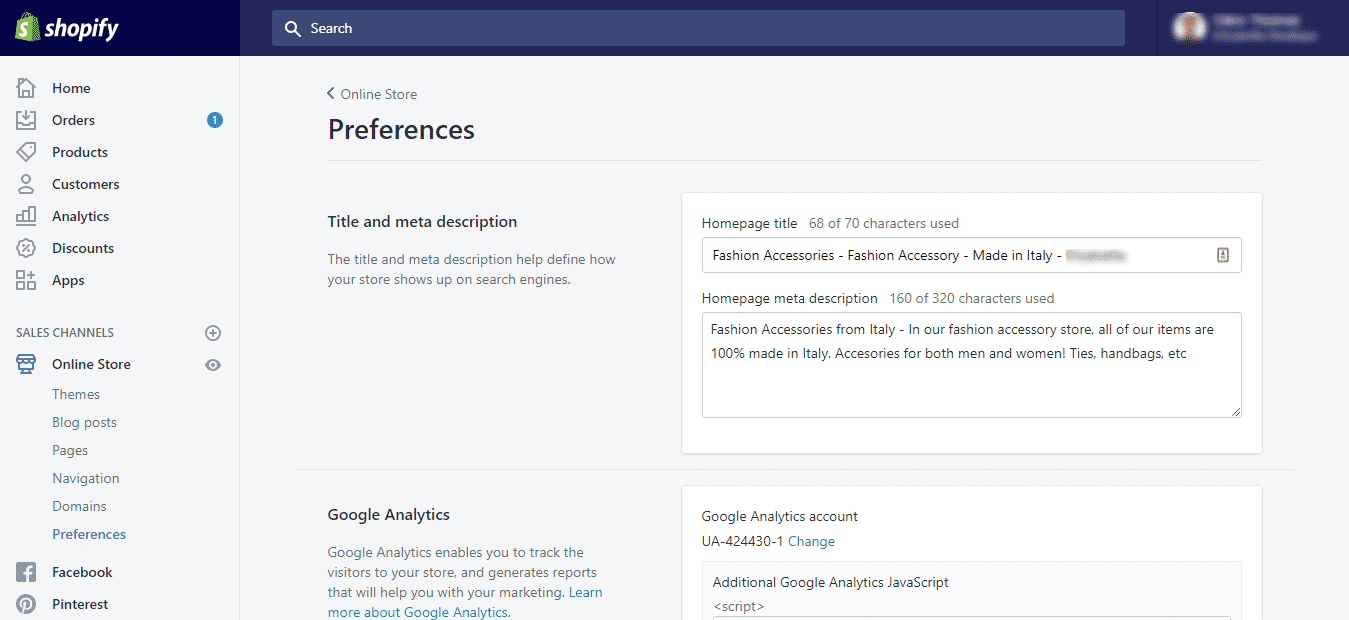
Set preferences for SEO, Analytics etc.
Administer your channels like Facebook, Pinterest etc.
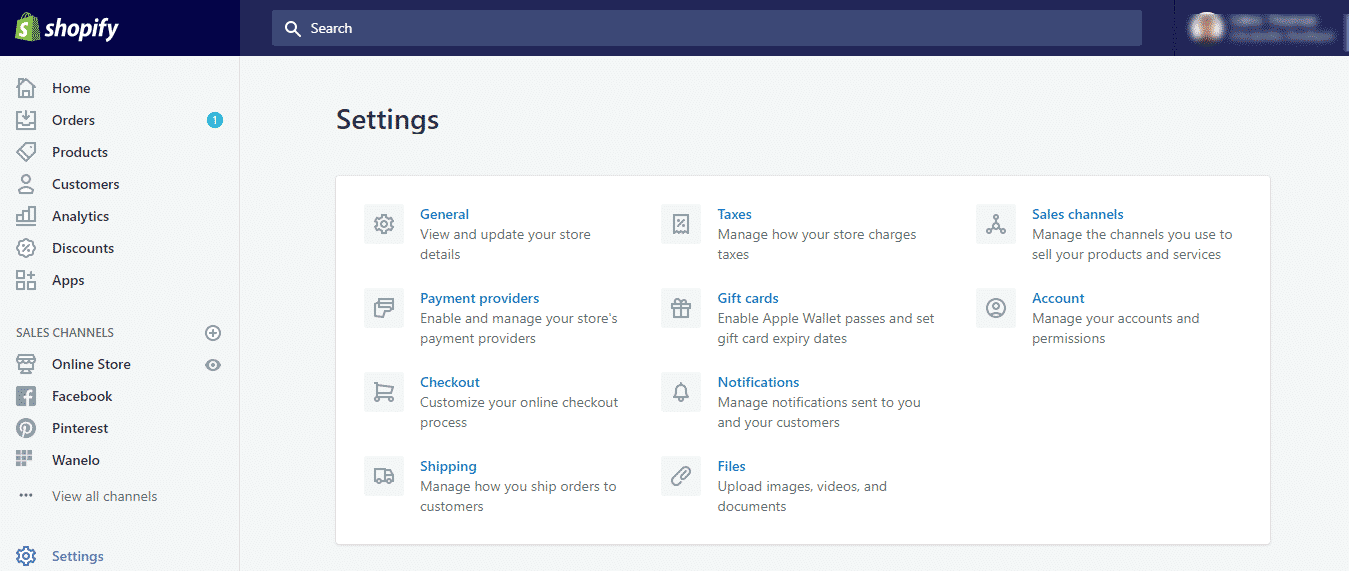
Settings section
In this section, you also get to customize the following aspects of your store, amongst others:
- Payment gateways – see below in detail;
- Checkout settings – refund policies, language, user accounts only or guest accounts allowed?
- Tax preferences – the more tedious financial stuff;
- Shipping details – shipping costs, international shipping arrangements, etc;
- Notifications – how you contact customers, message preferences when a new order arrives, etc.
To host or not to host?
For sole traders and startups especially, another useful aspect of Shopify is that it can host your domain name, as well as your website.
Small and medium businesses may want to look after these aspects themselves or use a third party web hosting service. But most small stores won’t want the hassle and will be busy enough without worrying about technical matters.
Besides, there are other advantages to keeping it all in one place, especially with a large player like Shopify, which runs powerful, secure, cloud hosting servers with excellent uptime, bandwidth, and speeds.
How customers pay for purchases: Shopify Payments
How is your store able to accept payments from customers? You need a payment gateway that connects your store checkout to the merchant account.
Shopify Payments allows customers to easily, conveniently, and securely make credit card payments for purchases from your store.
This will involve just the standard gateway fees and merchant account rates – but no additional commission fees from Shopify.
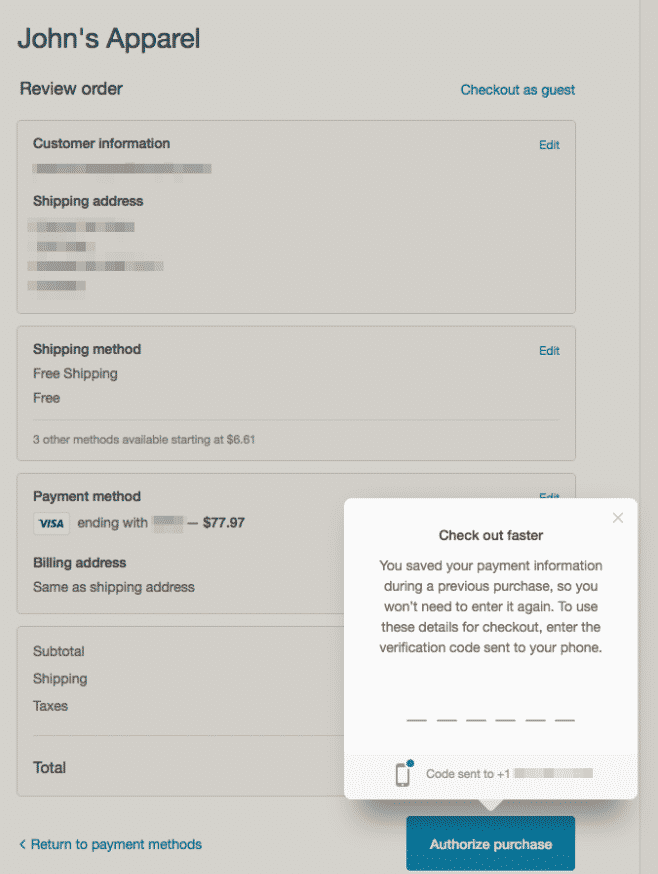
Shoppers simply enter their email address and a 6-digit verification code (which expires), thereby shortening the checkout process. All other information will be pre-filled, saving time for the customer.
Shopify Payments is the simplest, most cost-effective, and most popular way to accept online payments from your store.
Being already integrated with your store, there’s no need to set up any third-party payment gateway or merchant account if you go down this route. Everything is managed in one place using the in-built system.
Using Shopify Payments, you can:
- Accept all major credit cards from day one;
- Align your card rate to your Shopify plan – change it as you become more established and more aware of transaction volumes;
- Easily view order values and associated charges;
- Track pending payout balance and payout schedule;
- Use chargeback responses compiled by Shopify to recover lost sales.
In some locations, you may be liable for additional transaction fees on top of the card rate but this is not the case if you are based in the U.S., Canada, Australia, or the UK.
The Payments page allows you to set up manual payments (such as bank transfers, COD, etc.) and PayPal payments, as well as accepting credit cards through a variety of gateways.
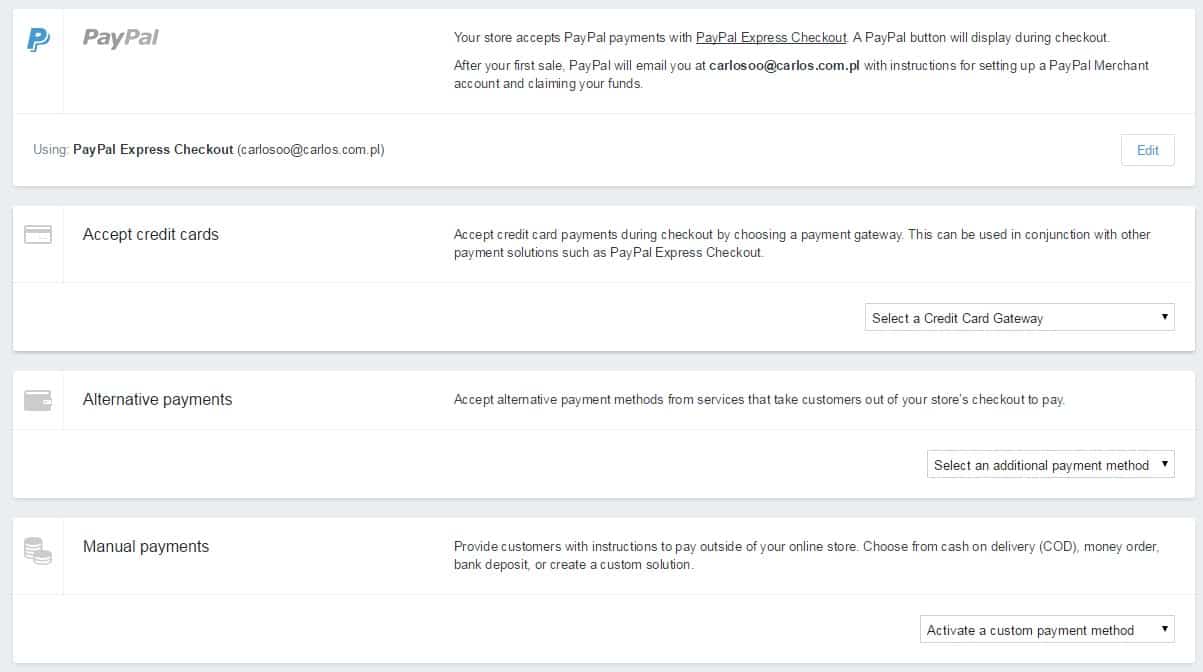
Rather than using Shopify Payments, store owners can choose a third-party payment processor from the 100-plus international external gateways.
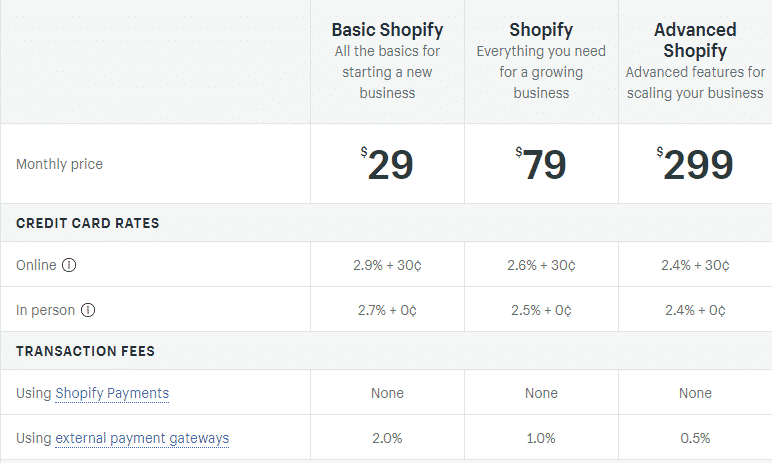
However, this will incur not only merchant account provider’s credit card fees and subscription fees (more details in the Pricing section) but the following commissions, dependent upon the plan selected:
- Basic – 2% commission
- Shopify – 1% commission
- Advanced Shopify – 0.5% commission
- Shopify Plus – 0.25% commission
Pricing plans
Shopify has competitive and flexible payment plans – which make running a store no more expensive than running a smartphone for many small business owners!
The basic pricing ranges from $9 per month (a simple BUY button) to $179 per month and includes four plans designed for small and medium businesses:
Shopify Lite (No online store) $9/month
Shopify Basic (includes online store) $29/month
Shopify Pro (more features for your store) $79/month
Shopify Unlimited (unlimited features) $299/month
Of course, these are the basic monthly fees – other costs are based upon transaction volumes.
Let’s take a closer look at what this could mean for you below…
Overview of the pricing plans
- Shopify Lite: $9/month
Shopify doesn’t heavily promote this option – you may not even be aware of its existence on the Shopify website!
This option is for those who want a BUY button added to a blog, a WordPress website or Facebook page: it allows you to monetize your content by enabling visitors to buy whatever it is you’re featuring.
There is no store or shopping cart – simply the ability to accept credit card payments and provide support. You get one user account only.
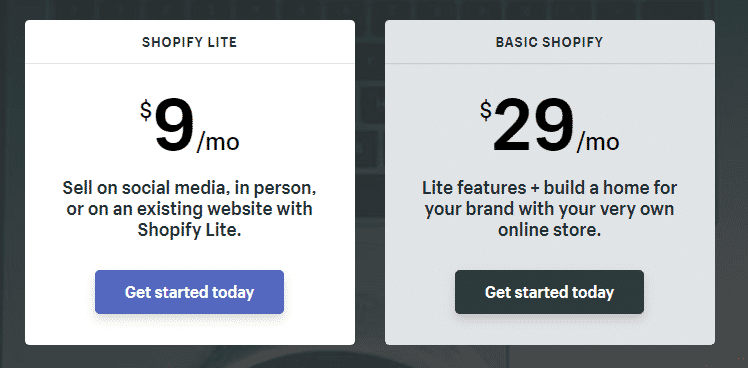
- Basic Shopify: $29/month
This option is probably the most popular amongst startups. $29 per month (plus 2.9% and 30¢ per transaction) gets you a fully-fledged Shopify store where you can showcase and sell unlimited products and services. It handles payments and all the back-end stuff.
It’s a good option for small businesses that need a website-based store (whether or not you already have a domain name), needing no more than 2 staff accounts and a cost-effective, smooth operation without having to think too much about the day-to-day workings of the store.
You even get access to the POS system for offline sales integration with your online store, as well as the ability to add a BUY button to your Facebook page.
- Shopify: $79/month
This option for $79 per month (plus 2.6% and 30¢ per transaction) is great for growing ecommerce businesses that need to take a step up from the ‘entry level’ plan. You can upgrade from the Basic plan easily when you get to this stage.
It’s a good option for businesses with sales of over $5000 (lower transaction fees) and that need up to 5 staff accounts.
It allows the sale of gift cards, as well as abandoned cart recovery emails, shipping discount packages, and professional reporting – plus all the features of the Basic plan.
- Advanced Shopify: $299/month
The $299 per month advanced option (plus 2.4% and 30¢ per transaction) includes more advanced analytics, as well as access for 15 users, and third-party calculated shipping rates.
It’s ideal for larger ecommerce businesses generating over $10,000 per month in revenue – that require unlimited space to grow traffic and sales and prefer to calculate shipping rates through a third party rather than through the Shopify partners (DHL, UPS and US Postal Service).
- Note: Shopify Plus
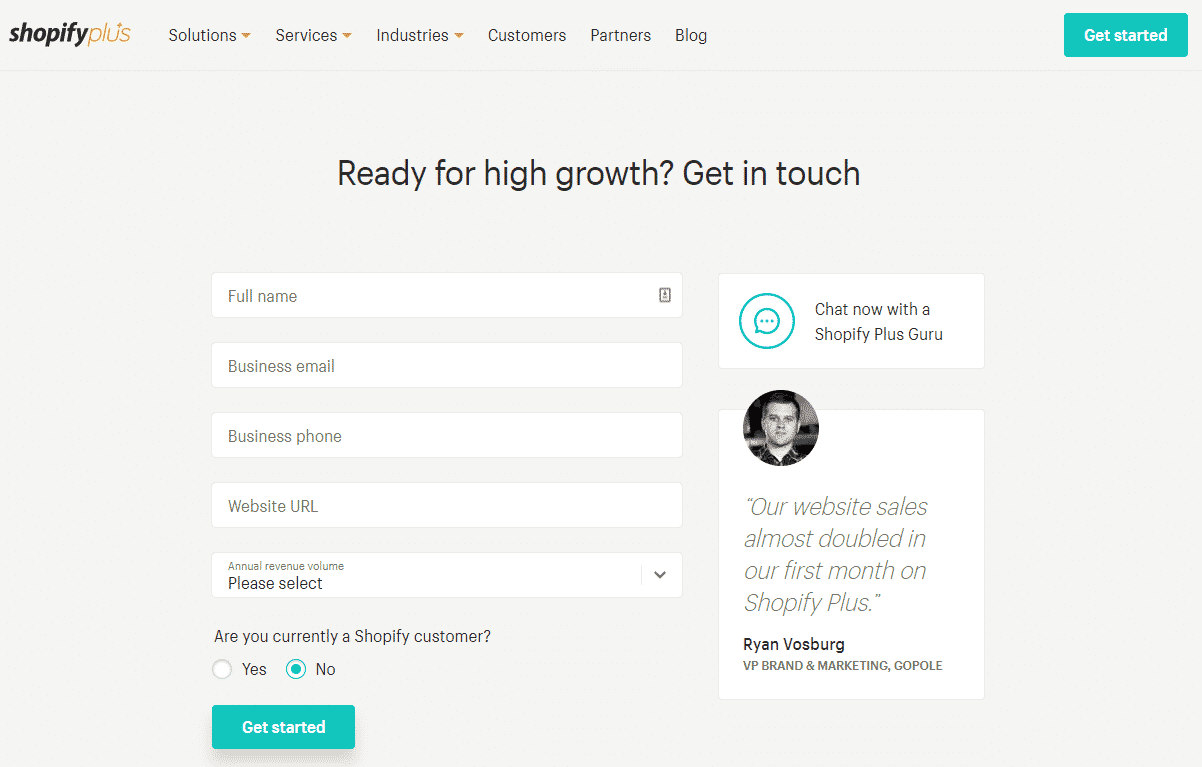
We won’t cover this one in much detail. It’s the enterprise plan that will be overkill for most readers and for which you need to apply to Shopify for pricing (starting at $2000 per month).
It’s worth noting here that every Shopify plan comes with unlimited bandwidth so your store should remain slick and fast-loading no matter the volume of traffic you receive.
Discounts and free trial
With the four main pricing options from Lite to Advanced, it’s easy to switch between plans as required. Simply upgrade or downgrade from month to month. Again, the Shopify Plus plan is different – you are locked in for 12 months minimum.
Note that Shopify offers a 10 percent discount if you commit to an annual payment with the four main plans.
Also note that there is a free, 14-day trial before committing to any plan. You will get access to all the features so that you can test the platform and decide which features you need at present – and what can wait.
Add-on app options
In addition to the main pricing plans that cover the general requirements for online stores, Shopify offers an impressive array of apps that integrate seamlessly with your store, as required.
It offers more apps than most other ecommerce solutions; hundreds of free and paid apps to enhance the look, feel, and functionality of your store – notably in the areas of marketing, social media, sales, shipping, and customer service.
Most apps in the app store can be trialed first so if they don’t work how you expected, you can simply uninstall and move to the next one.
New features always being added…
To give you an indication of the constantly evolving nature of Shopify, here are a few of the features that have been added in the past 12 months or so:
Shopify ‘Burst’
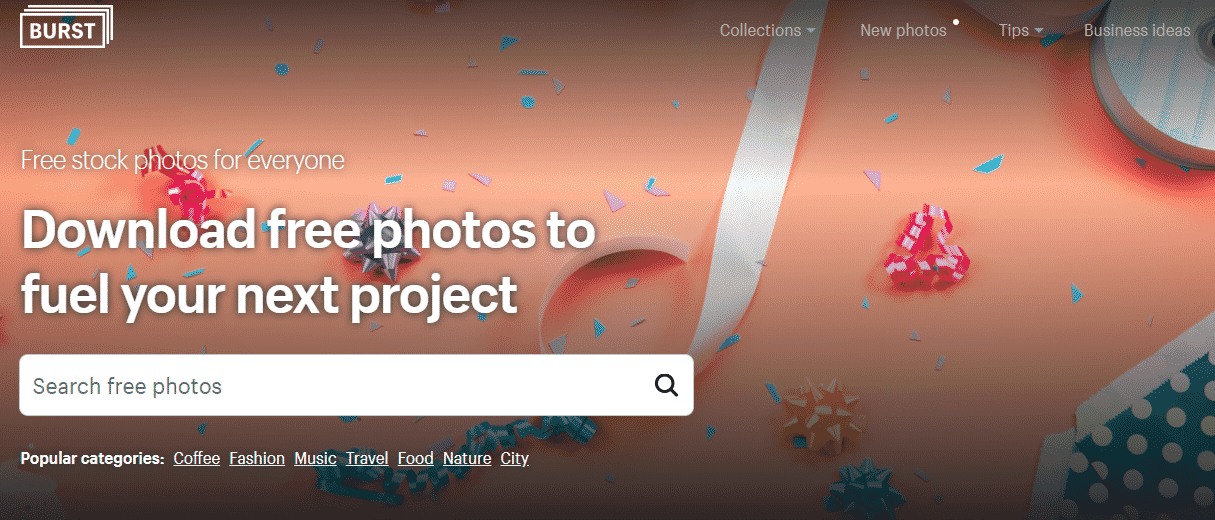
This feature provides free stock photos for commercial use, conveniently arranged into collections. It makes it easy to find the right images for use your website – without worrying about copyright infringements.
Shopify Burst also has nice little ‘value adds’ like marketing tips and business model insights.
Search bar on the dashboard
Shopify added a search bar at the top of the dashboard to make it easier to find what you’re looking for – like a particular product or customer.
Shopify Mac app
To access your Shopify dashboard from a Mac computer, you can simply launch the app rather than having to login through a browser.
BuzzFeed sales channel
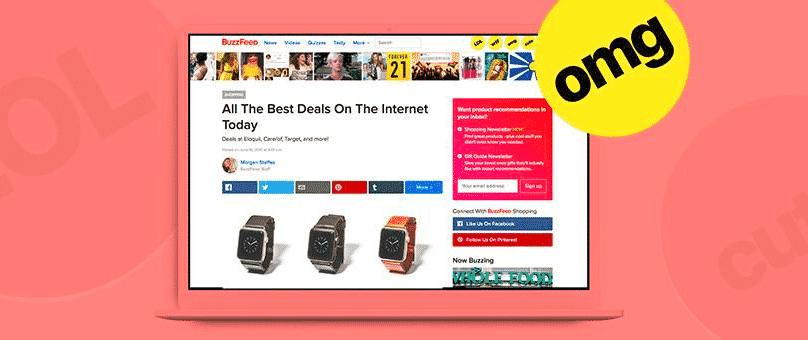
Get your products and services in front of a new audience with BuzzFeed sales channel integration on Shopify. By tagging products, BuzzFeed editors can locate them easier and this potentially opens up a huge new audience of 200 million users.
Checkout on your own domain
The customer checkout process was made easier and more seamless when, last year, Shopify enabled checkout from your store domain rather than the “checkout.shopify.com” domain. This was a free addition for all Shopify stores.
Google autocomplete for Shopify checkouts
Another improvement to the store checkout process was made last year when Shopify introduced Google Autocomplete. Again, this was a free improvement that speeds up the process and which was made available to all Shopify stores.
Selling on Amazon and eBay
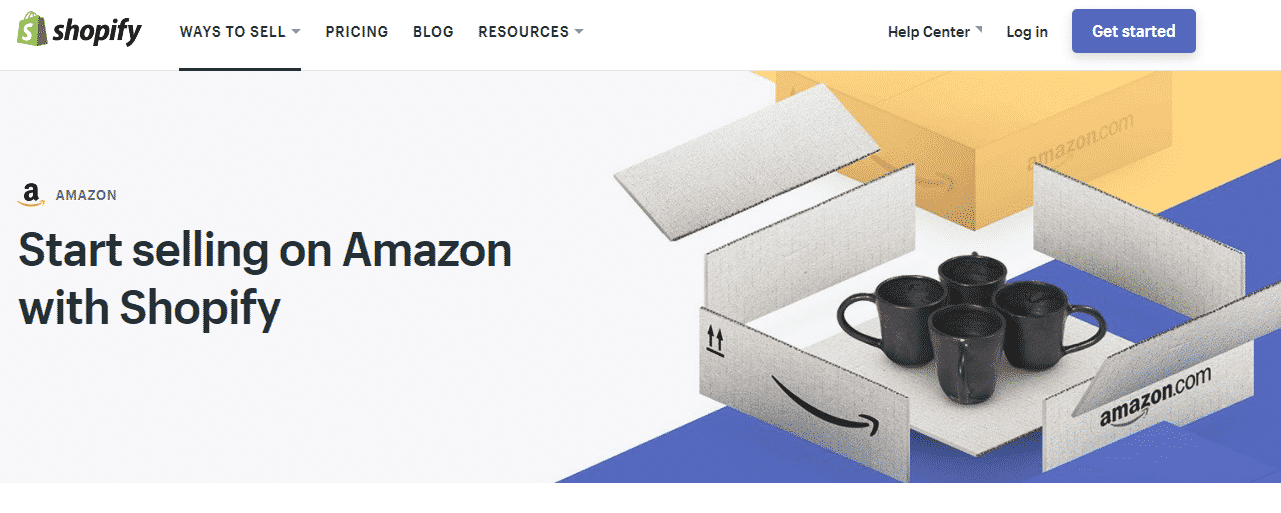
As mentioned earlier, Shopify store owners can now sell seamlessly on Amazon and eBay. New product categories have been created to help you create listings, manage inventory and fulfill orders to Amazon customers from your dashboard.
Shopcodes
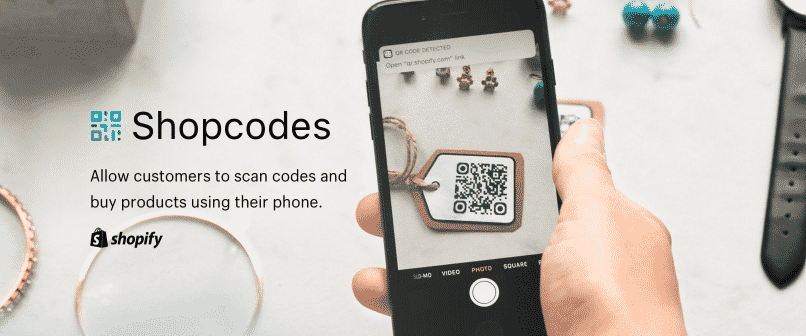
Shopify has also introduced Shopcodes. These are QR codes that can be generated from an app and scanned in order to direct shoppers to a specific product on your Shopify store. Great for packing inserts, pop-up stores, and offline ads.
Monitoring & tracking store performance
Any ecommerce software worth using must be able to show you how your store is performing.
From the Analytics section of the Shopify dashboard, you can generate arrange of clear, concise reports showing (amongst others):
- Gross product sales by product
- Gross product sales by month
- Gross sales by payment method
- Gross sales by traffic referral source
- Order sales by month/hour/billing address/customer/referral source etc
- Payments by method/channel
Built-in Shopify SEO & marketing tools
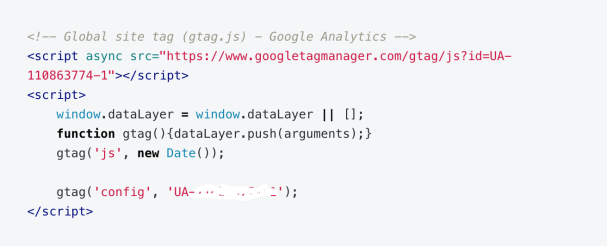
Shopify helps ensure that your store is found through organic search, with its built-in Search Engine Optimization (SEO) features. This SEO is also customizable, allowing you to add your own keywords for each page and change URLs to make them more SEO-friendly.
You may even receive periodic offers of free AdWords cash in your account, due to the partnership between Shopify and Google: another indication that Shopify stores are well-favored by Google.
To aid marketing efforts on the social networks, consider using the discount code coupon generator available with all the paid plans from Basic to Advanced.
You can also connect Shopify with your Twitter, Facebook and Instagram accounts (buttons are available via apps); and an email form is provided. However, you can be more effective with your social media and email marketing by downloading the appropriate apps from the App Store.
While Shopify helps you make a good start with SEO and marketing your store, you’ll probably want to implement more of a comprehensive marketing strategy to generate more interest and traffic.
Security

Security is understandably a big deal for ecommerce store owners and customers.
The Shopify payment system is hosted on a Level 1 PCI DSS compliant server and all pricing plans include 128-bit free SSL.
In short, this means that your data (and your customers’ data) is secure. What’s more, you can demonstrate security to your customers by displaying a security badge – this helps alleviate customer concerns about their data.
The vulnerability management area provides protection from fraudulent activity and you can limit access to your dashboard by granting or removing access privileges for staff.
Shopify also creates secure backups of all your data so that, in the event of a big disaster and your store completely crashing, it can be restored.
Customer support

You choose Shopify so that you don’t have problems – but all software can run into issues from time to time. What separates the best from the rest is how well these problems are dealt with.
The Ecommerce University provides access to eBooks, videos, and guides to help beginners in ecommerce get to grips with the basics.
Shopify also educates its customers on how to get the most out of the platform, via its blog. It also runs extensive support pages, with FAQs and tutorials. This is where you can get help in setting up your store and may be able to find solutions to other questions you have and instructions for optimizing your store, once you’re up and running.

Additional paid-for assistance for more complex issues is provided through its experts directory, if you have exhausted the other web-based options.
24/7 customer support is also available via phone, chat, and email.
Any negatives?
The above Shopify review has been almost entirely positive. Surely there must be some negatives about Shopify?
In the interests of balance, the following aspects may be ‘minus’ points for some store owners:
- The costs may mount up if you don’t choose Shopify Payments as your payment gateway. When you compare packages makes sure you compare like for like – what’s it actually going to cost (rather than just the stated monthly fees).
- Your level of control over the site is hindered by the lack of an FTP client and the proprietary Shopify coding. For most store owners, it won’t matter, as they will get all the features they want either out of the box or through the Shopify App store. For people with advanced coding and web development skills, who want more control over their store, this may be perceived as a negative.
Why we recommend Shopify

Ecommerce has changed the game in recent years. No longer does a store owner have to take out a bank loan in order to cover the overheads involved in getting products and services to market.
Software development companies like Shopify have made it very easy – and very cost-effective.
Who would have thought that you could set up a basic store for less than you spend on coffee every month? Or you could sell from a blog or Facebook page using the Lite plan for less per month than some people spend on coffee in a day!
By making a few smart choices, you can reach your market quickly and effectively – keeping costs down and profits up.
And, while there are other platform choices out there for you, Shopify is recommended for most readers because of its ease of use, flexibility, and range of features.
WordPress or Magento require some development knowledge; in the case of WordPress, it is a content management system that is not specifically designed for ecommerce, like Shopify is. WIX and Weebly may be a little too simple for your requirements and more difficult to scale.
Shopify occupies that ‘sweet’ middle ground that will suit most store owners and their customers.
You probably don’t have the technical expertise and/or motivation to develop a custom site yourself – and hiring professionals can get expensive. Besides, the monthly and annual payment options make Shopify affordable – and the ability to scale up as you grow without changing platform is attractive.
One of the standard Shopify pricing plans should work for most readers and will have all the features you could ever need. Whatever’s not there already built in, you can probably install with the optional apps.
And, with Shopify’s 99.94% uptime guarantee, robust security, and great load times, you can sit back, relax, and focus on growing your business without worrying too much about the tech side of your store.

Shopify provides a solid foundation to work from with all the necessary nuts and bolts in place. From there, the success of your store will depend on the effectiveness of your store’s marketing strategy.