Clothing Photography for Ecommerce (2026 Guide)
If you sell apparel online, your images do a lot of the work that an in-store fitting room, sales associate, and product display would normally handle. Strong clothing photography helps shoppers judge fit, fabric, color, texture, and overall quality before they commit to buying. Weak images do the opposite. They create hesitation, increase returns, and make even good products look average. This guide is built for ecommerce store owners who want a clearer process for planning, shooting, and improving apparel images, whether you work from home, hire a studio, or test AI-assisted workflows. If you also need inspiration on model-led visuals, this guide to photography fashion model techniques is a useful next read.
Contents
What Clothing Photography Needs to Do
Clothing photography for ecommerce is not just about making garments look attractive. It needs to answer buying questions fast. Can the customer understand the shape? Is the color accurate? Does the fabric look soft, structured, sheer, heavy, or stretchy? Are important details like seams, buttons, pockets, ribbing, or prints clearly visible?
For most Shopify apparel stores, the goal is consistency first, then creativity second. Your catalog should feel unified across product pages, collection pages, ads, and email campaigns. That usually means choosing a repeatable visual system with standard framing, lighting, crop ratios, and image order.
In practice, the best-performing stores usually combine a few image types rather than relying on one. They may use flat-lay clothing photography for tops and basics, ghost mannequin for shape, model photography for fit context, and close-up detail shots for material confidence. If you are refining the visual style of your brand, the broader Fashion & Apparel Photography hub is a strong place to compare approaches.
Key Elements of Clothing Photography That Sells
Accurate lighting is the starting point. Apparel shoppers are sensitive to color mismatch, especially in categories like dresses, knitwear, activewear, and occasion wear. Soft, even light helps prevent harsh shadows while keeping garments true to life.
Consistent framing matters just as much. If one product is shot folded, another hanging, and another on-model from a different angle, collection pages can feel messy. A repeatable clothing photography setup makes your store easier to browse and often improves perceived brand quality.
Detail coverage is where many smaller brands fall short. One front image and one back image are rarely enough. Shoppers often want to inspect stitching, lining, closures, texture, and print quality. For higher-priced items, these close shots may have a meaningful impact on trust.
Background choice should support the product rather than distract from it. Clean white works well for marketplaces and standard PDPs. Styled scenes may work better for campaigns, lookbooks, and social creative. If background styling is part of your brand identity, this guide to choosing a fashion background can help you avoid visuals that compete with the garment.
Finally, your images need to match the job they are doing in the funnel. Main product images should reduce uncertainty. Lifestyle images should build desire. Ad creatives should stop the scroll. Those are related but different jobs, so your shot list should reflect that.
Ghost Mannequin vs Flat Lay vs On-Model: When Each One Wins
Here’s the thing: most format debates miss the real question. You are not choosing the “best” style. You are choosing the fastest way to answer buyer uncertainty for a specific garment.
From a practical standpoint, these three formats win in different scenarios, and the tradeoffs show up in production time, consistency across SKUs, and how clearly shoppers can judge fit and structure.
A simple decision framework (based on the garment and return risk)
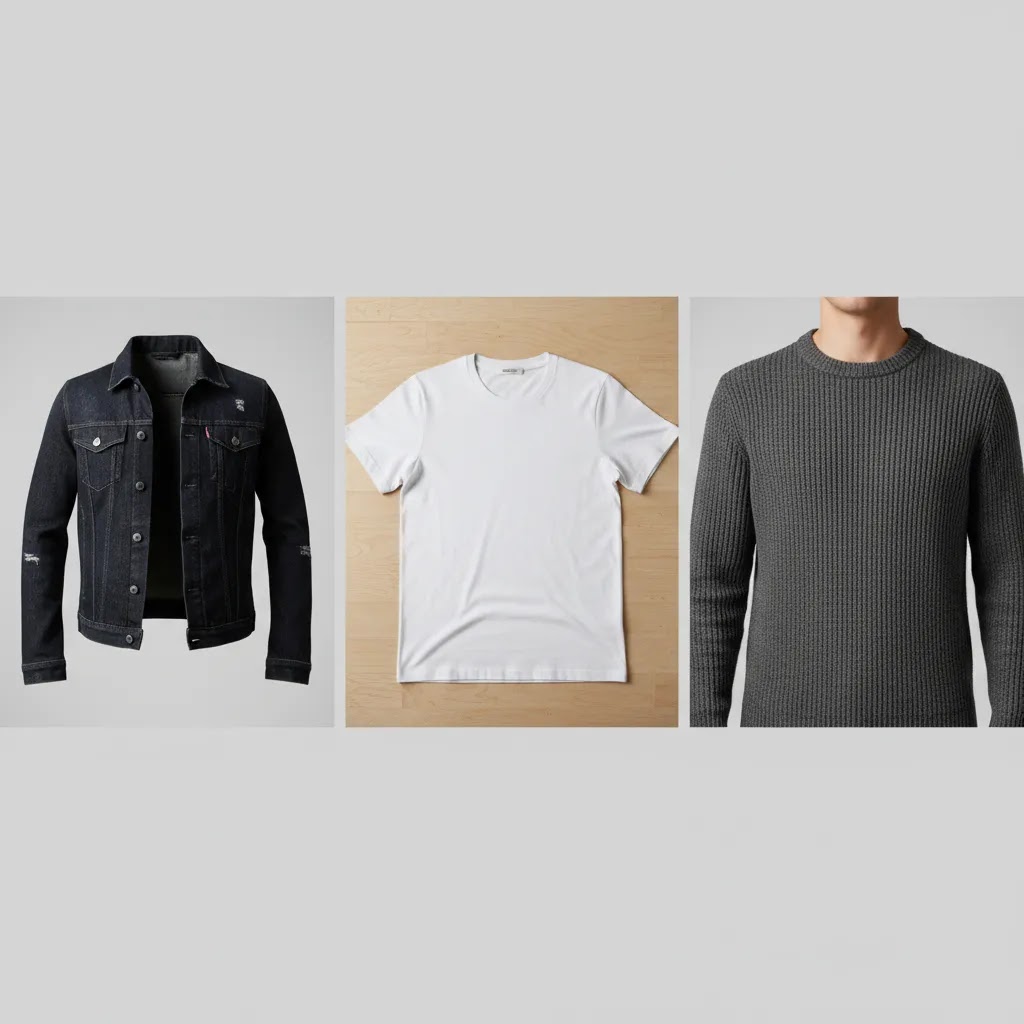
Flat lay tends to win for unstructured pieces where fit is not the main decision point. Think tees, sweatshirts, kidswear, simple shorts, and basics where shoppers mostly care about color, print, and fabric weight. It is also one of the easiest formats to keep consistent in-house.
Ghost mannequin usually wins for structured garments where shape drives the purchase, but you still want a clean, product-first catalog. Jackets, blazers, dresses with seaming, tailored pants, and premium knitwear often look more “true” on a form than on the floor. It can reduce ambiguity around silhouette without the complexity of a full model shoot.
On-model wins when fit, drape, movement, and styling are the product. Activewear, denim where rise matters, dresses where length matters, and anything where customers ask “How does this actually sit on a body?” often benefits from at least one strong model image. Premium pieces and high-return-risk categories typically need more fit context to avoid surprises.
The tradeoffs that matter on a Shopify product page
Production time: flat lay is usually fastest, ghost mannequin can be efficient once your process is dialed in, on-model is typically the slowest because you are coordinating talent, styling, and more variables.
Catalog consistency: flat lay and ghost mannequin are usually easier to keep consistent across hundreds of SKUs. On-model can be consistent too, but only if you standardize pose, framing, lighting, and styling rules.
Fit clarity: on-model usually gives the best “how it wears” signal. Ghost mannequin can be a strong middle ground for shape. Flat lay often needs extra support shots, like a close-up of stretch, a drape shot, or a measurement graphic, to reduce guesswork.
What many stores overlook: you can mix formats on one PDP
You do not have to pick one format and force it to do every job. Many Shopify apparel stores get better results when they lead with a consistent “catalog hero” image for clean collection pages, then use additional images to reduce uncertainty.
Think of it this way: keep the first image consistent across the category, then add one fit-context image (on-model or a strong drape shot), then add detail and construction shots. That mix often supports both browsing and decision-making without turning your whole catalog into a lifestyle shoot.
Best Image Formats for Apparel Stores
There is no single best format for every clothing brand. The right mix depends on your catalog, average order value, return sensitivity, and how shoppers make decisions in your category.
Flat-lay clothing photography works well for t-shirts, kidswear, denim, sleepwear, and basics. It is relatively efficient, works for clothing photography at home, and can create a neat catalog style if you keep spacing and camera height consistent.
Flat clothing photography is especially useful when you want speed and repeatability. It can also be paired with AI background tools to create alternate campaign versions without reshooting the garment.
Ghost mannequin photography is often the most practical middle ground for ecommerce clothing photography. It shows the structure of the garment better than a flat lay but keeps the focus on the product rather than the model. This is common for jackets, dresses, tailored pieces, and premium apparel.
Model photography becomes more important when fit, drape, movement, or brand identity drive the purchase. Fashion-led stores often need it, especially if they sell trend pieces or premium collections. If you are considering AI-generated visuals alongside live shoots, AcquireConvert’s article on ai fashion is worth reviewing before you build that workflow.
Detail shots and fabric close-ups should be standard for most stores. They are not glamorous, but they help answer questions that otherwise turn into support tickets or returns.
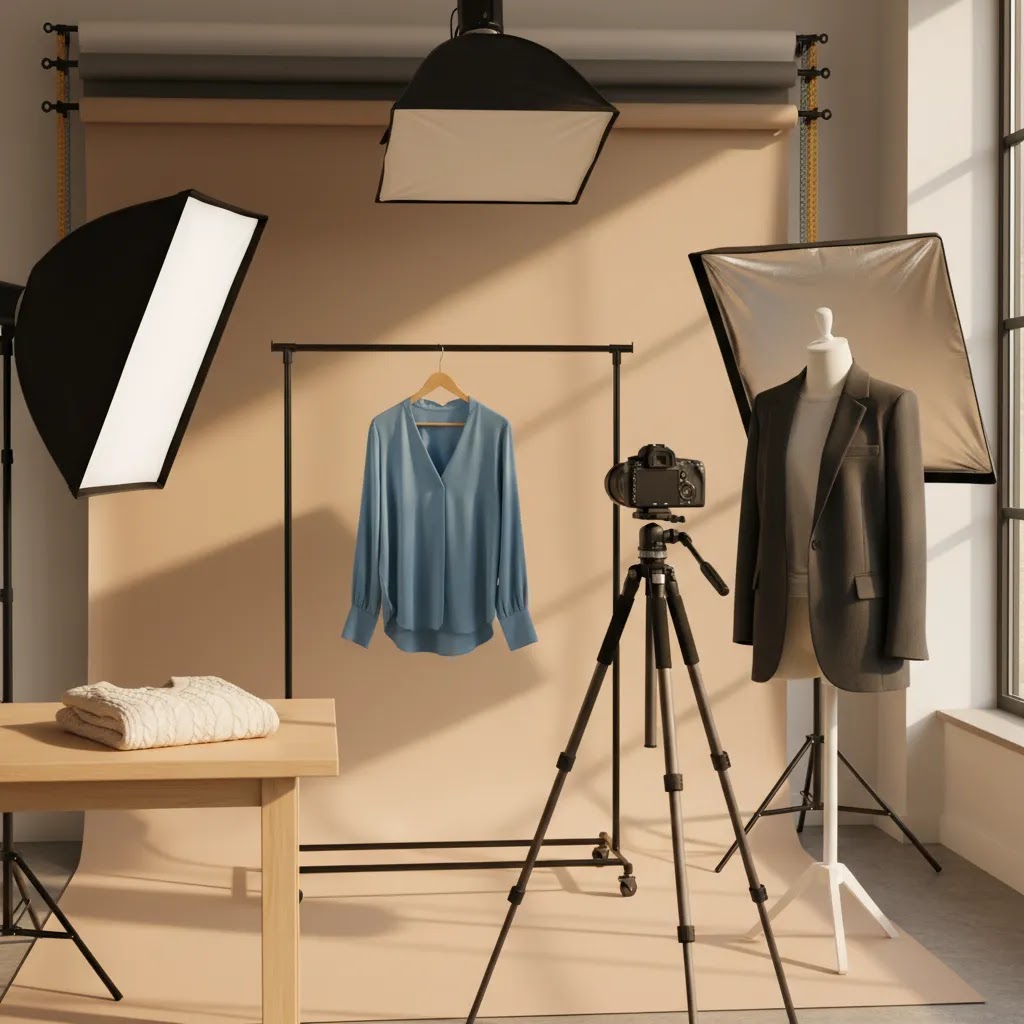
Clothing Photography Setup at Home (Flat Lay, Hanging, and Phone-Friendly)
If you are shooting in-house, the goal is not to build a perfect studio. It is to create a repeatable clothing photography setup you can run every week without reinventing it. Most Shopify stores struggle because every product gets shot slightly differently, and the inconsistency shows up on collection pages.
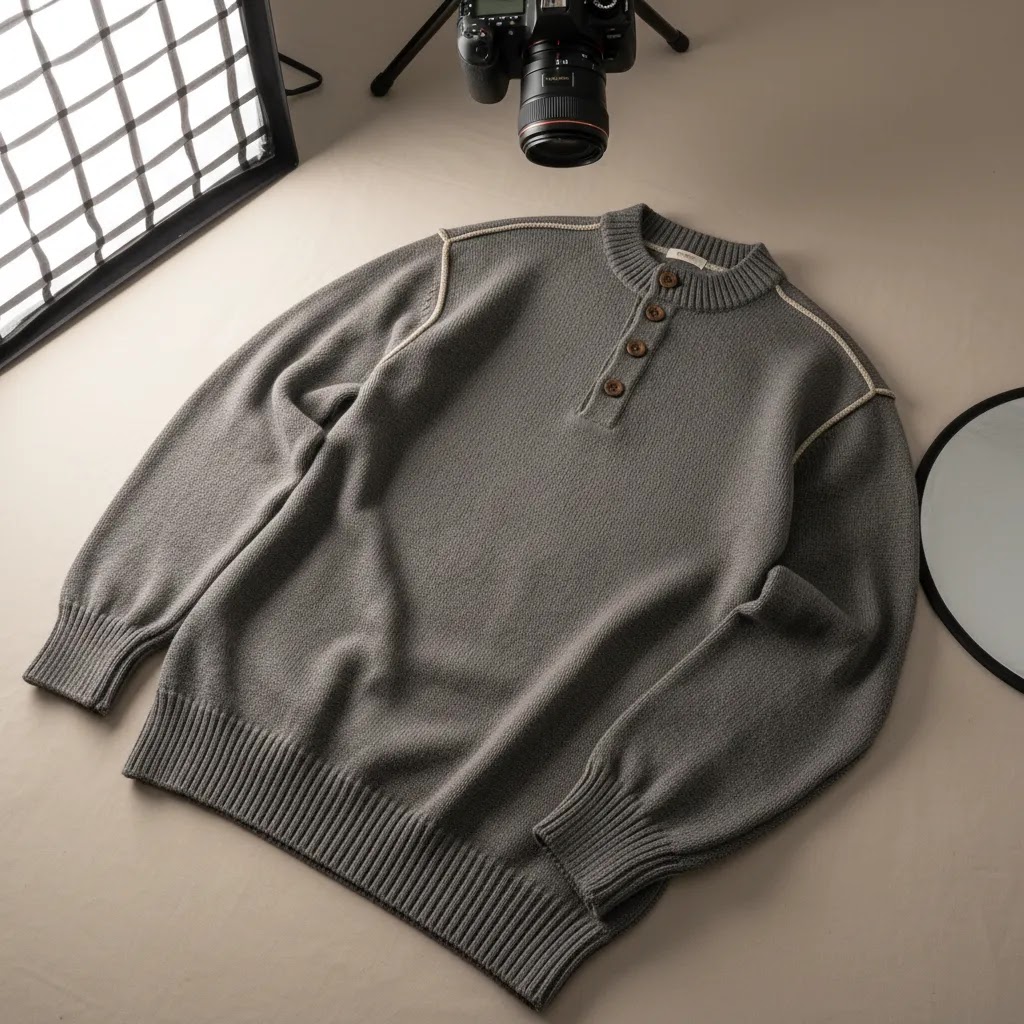
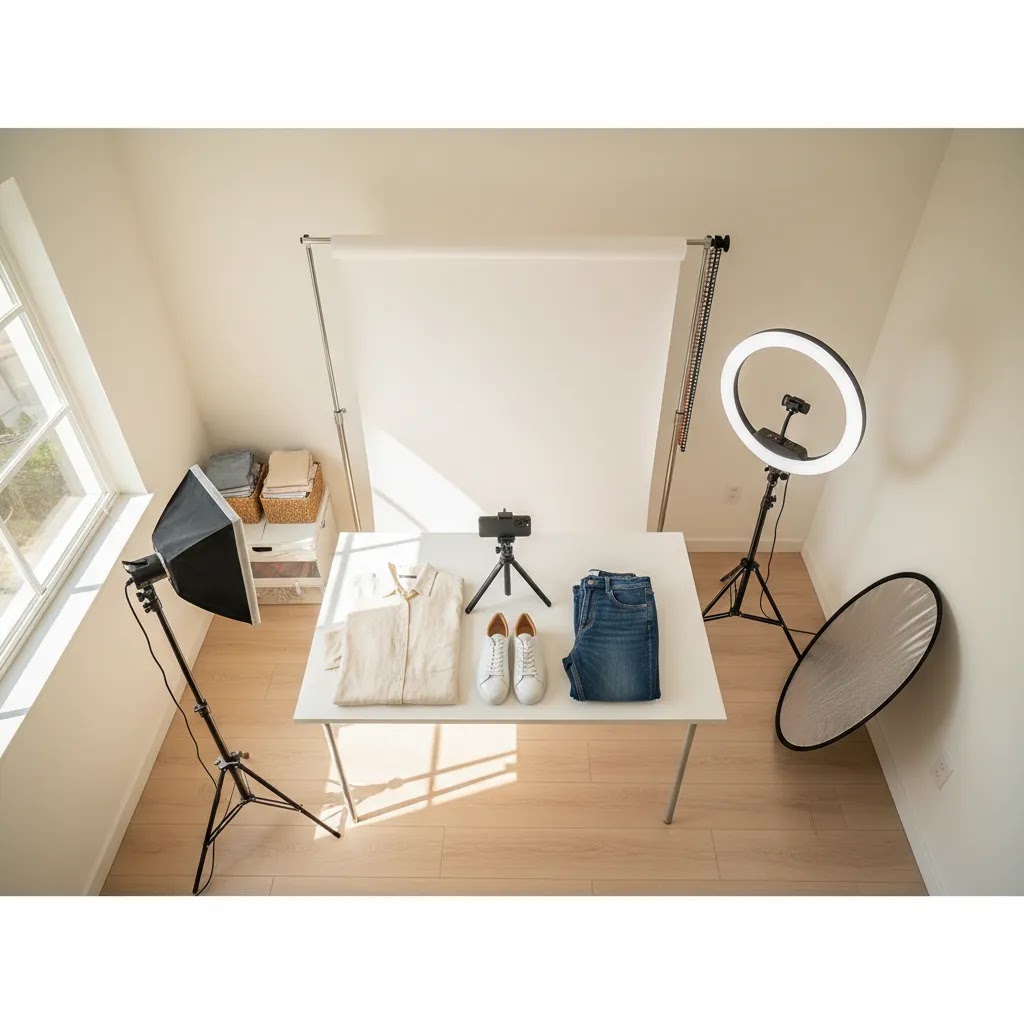
Flat lay setup you can repeat (table or floor)
For flat-lay clothing photography, a shooting table can be helpful, but a clean floor setup also works if you control light and framing. What matters most is that your camera position stays fixed and your garment styling is consistent.
Wrinkles are the silent killer of flat lays. Steam garments before shooting, then do quick micro-adjustments once the item is laid out. For knits, watch for stretched collars. For shirts, align plackets and hems so the shape looks intentional, not “dropped on the floor.”
To keep framing consistent, set a standard crop and stick to it. If you shoot with a phone, use a tripod and lock your framing so every top sits at the same scale. A simple tape outline on the floor or table for where the garment should sit can save hours over a season.
Hanging setup (rack plus backdrop)
Hanging shots can work well for pieces where drape matters, but they are also where lighting and distortion can get messy. A garment on a hanger will swing, twist, and cast shadows if your light is not even.
Use a sturdy rack, a consistent hanger style, and a clean backdrop. Keep space between the garment and the backdrop so shadows fall behind the subject rather than directly onto the background. If you are chasing a clean ecommerce look, a steamer is still non-negotiable. Hanging shots show wrinkles even more clearly than flat lays.
Simple on-model that is phone-friendly
You do not need a full fashion production to get useful fit context. A simple, repeatable on-model shot can be as basic as front, side, and back with consistent pose, consistent distance, and consistent light.
Use the same spot on the floor every time. Use the same focal length on your camera, or the same phone lens, and avoid shooting too close, since wide angles can distort proportions. Keep the styling rules consistent too, for example the same shoes or neutral base layers, so the garment stays the focus.
A basic gear checklist (priority order)
Most home setups get better results from consistency than from buying more gear. Start with what locks in repeatability, then add nice-to-haves as your volume increases.
Document your repeatability standards (your future self will thank you)
What many store owners overlook is that you are building a production system. Write it down, even if it is a simple note in your project tool.
At a minimum, document camera height, camera distance from the garment, light placement, backdrop distance, and a consistent shot order per product. For example, hero image, back, detail, label, fabric close-up, then one fit-context image. When you restock or reshoot, those notes help you match your existing catalog instead of creating a visible “batch shift” on Shopify collection pages.
Tools and Workflow Options
If you handle clothing photography internally, your workflow typically includes capture, cleanup, resizing, and channel-specific edits. That is where image tools can save time, particularly for teams that need to keep pace with seasonal drops.
From the current product data available, several tools are relevant to apparel image production:
These tools may be helpful when you need more content variation from a limited shoot, but they do not remove the need for strong source images. If your lighting, styling, or garment prep is weak, editing software will only fix part of the problem.
For stores moving between DIY and outsourced production, it can also help to think in terms of a repeatable product photography studio workflow, even if your “studio” is a spare room with controlled lighting and a seamless backdrop.
Working With a Clothing Photography Studio: Shot List, Deliverables, and How to Brief for Ecommerce
If you are searching for a “clothing photography studio” or a photographer near you, you are usually trying to solve one of two problems: consistency at scale, or getting a premium look you cannot reliably produce in-house. Outsourcing can work well, but only if you brief in ecommerce terms, not vague creative terms.
The reality is that many studios can shoot beautiful images that still create extra work on your side, for example inconsistent cropping, mismatched backgrounds, or file exports that are not ideal for Shopify.
Define deliverables that are actually usable for ecommerce
Before you book, specify what you need delivered, not just what you want shot. That usually includes consistent cropping, consistent background handling, and file types that match how you publish products.
For most Shopify stores, it helps to confirm:
If you also sell on marketplaces, confirm the studio can provide a compliant base layer. Then you can adapt for campaigns later. If you plan to use AI editing tools, clean and consistent source images make those workflows far more predictable.
A practical shot list structure for apparel
A good studio can help refine this, but you should still bring a clear default shot list. For most apparel categories, a dependable baseline looks like:
Then make a clear call on whether you want ghost mannequin, on-model, or both. For example, some stores use ghost mannequin for the consistent catalog hero and add one on-model image for fit context. That combination can be more efficient than trying to make on-model do every job.
Process expectations that protect quality across multiple shoots
Batch inconsistency is the biggest risk when you outsource. Your first shoot looks great, the second shoot looks slightly different, then your collection pages start to feel uneven.
Consider this as part of your brief:
If you are planning repeat shoots over a season, it is worth treating your photography like a production line. A good studio can plug into that, but only if you give them standards they can consistently follow.
Pros and Cons
Strengths
Considerations
Who This Approach Is For
This guidance is most useful for Shopify apparel brands, fashion startups, DTC clothing stores, and marketplace sellers that want product images to carry more of the conversion load. If you are selling basics, private-label garments, boutique fashion, or seasonal collections, you need a process that balances speed with consistency.
It is especially relevant if you are deciding between in-house clothing photography, a local professional setup, or an AI-assisted workflow. For brands exploring generated visuals for concept work or content expansion, this article on ai clothing generator options can help clarify where AI may fit and where it may fall short.
AcquireConvert Recommendation
For most ecommerce clothing brands, the smartest move is not chasing the most elaborate shoot. It is building a dependable visual system you can repeat across every launch. That means deciding which image types belong on every PDP, setting lighting standards, documenting garment prep, and using editing tools only where they genuinely save time.
AcquireConvert approaches this topic from a practical store-owner perspective. Giles Thomas is a Shopify Partner and Google Expert, so the guidance is grounded in how product visuals affect search visibility, ad performance, and on-site conversion behavior, not just aesthetics. If you are building a stronger apparel image workflow, start with the category-level resources on Product Photography Fundamentals and compare them with your own current process.
How to Choose the Right Setup
1. Start with your product mix. Flat lays work well for simple garments. Structured products usually benefit from ghost mannequin or model shots. If your catalog includes dresses, tailoring, or performancewear, shoppers often need more shape and fit context before purchasing.
2. Match the setup to your sales channels. If you sell through your own Shopify store, you have more flexibility in image sequencing and storytelling. If you also sell on marketplaces, you may need white background images as your base layer. That often means shooting for compliance first, then adapting images for campaigns and social.
3. Decide what must be photographed live. Fabric texture, trim detail, transparency, and fit are usually strongest when captured in-camera. Background swaps, cleanup, and alternate placements may be suitable for AI-assisted post-production, but core product truth should come from the original image.
4. Build for repeatability, not perfection. Many brands get stuck trying to create an ideal studio setup and delay launches. A simpler, repeatable system usually performs better over time than inconsistent “hero” shoots. If you are doing clothing photography at home, document your camera height, lens choice, lighting position, backdrop distance, and export specs.
5. Think about returns and support load. Apparel images are not only a marketing asset. They are also expectation-setting tools. If customers frequently ask about fit, color, or material, your photography is probably not answering enough pre-purchase questions. In many cases, better detail coverage and more consistent angles can help.
6. Separate catalog images from brand storytelling. Your main ecommerce photography should be clear and conversion-focused. Your lookbook, social, and campaign creative can be more expressive. That distinction helps stores maintain both efficiency and brand identity without forcing one image style to do every job.
Frequently Asked Questions
What is the best type of clothing photography for ecommerce?
The best type depends on what you sell. Flat lays work well for basics and fast catalog production. Ghost mannequin helps show garment shape. Model photography is often best when fit and movement influence the sale. Most ecommerce stores perform best with a mix rather than relying on a single format.
Can I do clothing photography at home for my Shopify store?
Yes, many smaller stores start that way. You need consistent lighting, a clean background, careful garment prep, and a documented shot list. A home setup can work well for flat-lay clothing photography and some hanging shots, especially if your catalog is narrow and you prioritize repeatability over complex styling.
How many photos should I use on a clothing product page?
There is no universal number, but most clothing PDPs benefit from several angles plus detail images. A front, back, side or shape shot, close-up texture shot, and one fit-context image is a practical starting point. Higher-priced products often need more visual evidence to support confident buying decisions.
Is ghost mannequin better than flat-lay clothing photography?
Not always. Ghost mannequin usually gives better structure and can make garments look more premium. Flat lay is faster and often easier to produce in-house. The better option depends on the garment category, your visual brand, and how much shape information shoppers need before they buy.
Does AI clothing photography replace a professional photographer?
Usually not completely. AI can help with background changes, resizing, cleanup, and creative variations. It may also support concept testing. But if your buyers need accurate fit, fabric, and construction cues, live photography remains important. AI works best as part of the workflow, not as a blanket replacement.
What background is best for clothing product photos?
White is the safest default for ecommerce and marketplace compatibility because it keeps attention on the garment. Styled backgrounds can work well for campaigns and brand storytelling. The key is making sure the background supports the image goal instead of distracting from the product itself.
How important is color accuracy in apparel photography?
It is extremely important. Apparel shoppers often rely heavily on images when deciding whether a product matches their needs. If your lighting or editing shifts color too far from reality, returns and dissatisfaction may increase. Consistent lighting and calibrated editing practices matter more than dramatic creative treatments.
Should I hire a studio or keep apparel photography in-house?
That depends on volume, complexity, and internal resources. In-house works well when you need speed, control, and a simple repeatable format. A studio may be better for premium collections, model shoots, or high-volume seasonal production. Many brands use a hybrid model to control costs while maintaining quality.
What is the best way to photograph clothing?
The best way is to pick a format that matches the garment and then make it repeatable. Prepare the garment with steaming and lint removal, use soft consistent light, lock your framing with a tripod, and follow the same shot order for every SKU. For most Shopify apparel stores, a consistent hero image plus back, detail shots, and at least one fit-context image is a strong baseline.
What is the 3-3-3 rule for clothing?
This rule is often used as a quick way to plan coverage, not as a strict photography standard. In many shoots it means aiming for three core angles, three detail shots, and three styling or fit-context shots. For ecommerce, it can be a useful reminder that one image rarely answers enough questions, especially for higher-priced garments.
What is the 20 60 20 rule in photography?
In ecommerce terms, you can treat it as a simple composition and intent guide: around 60% of your visual set should be consistent, conversion-first catalog images, while the remaining 40% can be split between detail-focused proof and more expressive lifestyle content. Different teams use this rule differently, but the underlying idea is separating “sell clearly” images from “tell a story” images, so your Shopify product pages stay practical while your marketing stays on-brand.
How much does a fashion photographer get paid?
It varies widely based on location, experience, usage rights, and whether you are paying for a photographer only or a full production that includes studio time, models, styling, and retouching. Some photographers charge hourly or day rates, others price per image or per product. If you are outsourcing, the most important step is to align on deliverables and licensing in writing, since that often drives total cost more than the shoot itself.
Key Takeaways
Conclusion
Clothing photography that sells online is usually clear, consistent, and built around real shopper questions. If your images show the garment honestly, highlight important details, and fit smoothly into your Shopify product page workflow, they can support stronger conversion confidence and a better customer experience. The right setup may be a home studio, a professional team, or a hybrid process with AI-assisted editing. What matters most is choosing a system you can repeat reliably. For more practical guidance, explore AcquireConvert’s apparel and photography resources, including content on model imagery, AI fashion workflows, and background selection, all shaped by Giles Thomas’s experience as a Shopify Partner and Google Expert.
This article is editorial content created for educational purposes and is not a paid endorsement unless explicitly stated otherwise. Pricing, features, and tool availability are subject to change, so verify current details directly with the provider before making a decision. Any performance outcomes discussed are illustrative only and not guaranteed.

Hi, I'm Giles Thomas.
Founder of AcquireConvert, the place where ecommerce entrepreneurs & marketers go to learn growth. I'm also the founder of Shopify agency Whole Design Studios.