Fashion Product Shoot: Concept to Delivery (2026)
A fashion product shoot is not just a creative exercise. It is a conversion asset that affects click-through rate, product page trust, and how premium your store feels at first glance. For most Shopify brands, the best approach is a structured workflow: define the concept, choose the right shot list, control styling and backgrounds, then decide whether to use a studio, a DIY setup, or AI-supported production. If you sell apparel, accessories, or lifestyle fashion products, the right process can help you publish cleaner listings faster and keep your catalog visually consistent. This guide walks through the full path from concept to final delivery, including planning, pricing, production choices, and where AI tools may fit for lean ecommerce teams.
Contents
What a fashion product shoot needs to achieve
A strong fashion product shoot should do three jobs at once. First, it needs to present the product clearly enough for shoppers to understand fit, texture, silhouette, and details. Second, it needs to support brand positioning, whether your store is minimalist, editorial, streetwear-focused, or premium. Third, it needs to be practical for ecommerce operations, meaning you can repeat the process across dozens or hundreds of SKUs.
That is where many brands get stuck. A shoot can look stylish but fail on consistency. Or it can be technically clean but feel generic. The goal is to balance brand expression with catalog efficiency. If you are also planning on-model imagery, it helps to review photography approach choices in this photography fashion model guide. For flat lays, ghost mannequin, and detail-focused apparel listings, this broader clothing photography resource is also useful.
From an ecommerce perspective, Giles Thomas approaches visual production as a growth lever, not just a branding task. As a Shopify Partner, he focuses on whether your images will actually support product page performance, collection page clarity, and paid traffic efficiency. That matters because a fashion shoot that looks good in isolation may still underperform if it is too inconsistent, too slow to produce, or too expensive to scale.
Shoot types by fashion category
Here is the thing: “fashion product shoot” means different execution standards depending on what you sell. Apparel shoppers need fit and drape cues. Footwear shoppers want shape, structure, and outsole traction. Jewelry shoppers need scale and micro detail. If you use the same shot list for everything, you usually end up with gaps that hurt conversion.
Apparel (tops, dresses, pants, outerwear)
Apparel usually benefits from a mix of structured catalog images and fit-oriented images. For many Shopify stores, the most practical core set is a clean hero image plus angles that answer, “How does it actually wear?”
Common apparel mistakes: changing camera height across SKUs, inconsistent sleeve positioning, and detail shots that are too far away to show fabric and stitching. Another issue is mixing flat lays, mannequin, and on-model randomly within one collection page, which can make your store feel less premium even if each photo is decent.
Accessories (bags, hats, belts, sunglasses)
Accessories tend to sell on construction and functional details. Shoppers want to see what opens, what adjusts, and how big it is in real life.
Common accessory mistakes: skipping scale, hiding interiors, and shooting glossy surfaces without controlling reflections. Sunglasses are a classic example, if reflections cover the lens and frame detail, it looks like low quality even when it is not.
Footwear (sneakers, boots, heels)
Footwear needs angle coverage. A single front shot rarely answers the questions shoppers have about shape, support, and materials.
Common footwear mistakes: no outsole image, inconsistent left vs right shoe orientation across SKUs, and cropping so tight that the toe or heel feels cut off. Another one is failing to show texture on suede or knits, which makes the product feel flatter than it is.
Jewelry (rings, necklaces, earrings, watches)
Jewelry is where precision matters most. Shoppers will zoom, and any softness, dust, or color shift will show up quickly on a Shopify product page.
Common jewelry mistakes: skipping scale, shooting too warm so metals look off, and relying on one macro angle that does not show craftsmanship. Another one is inconsistent metal color across products, which can increase returns even when the product is correct and the photography is not.
A minimum viable shot list you can reuse
If you need a baseline that works for most fashion categories, aim for: one hero image, one alternate angle, one back or secondary view, one to two detail images, and one fit or scale reference where relevant. Think of each image as answering a shopper question. “What is it?” “What does it look like from the other side?” “What is it made of?” “How big is it?” “How does it fit or wear?” If your current gallery does not answer those cleanly, more images will not fix it. Better images will.
Concept, planning, and production workflow
The best fashion product shoots start before the camera comes out. Begin with a clear concept document. This should include your audience, intended use cases, mood references, color direction, aspect ratios, and where each image will appear, such as product pages, collection grids, ads, email, or social.
Next, build a shot list. For most fashion brands, that means a mix of hero images, alternate angles, close details, fit shots, and contextual lifestyle frames. If you sell across multiple channels, add crops for mobile-first product pages and ad placements. A product photography studio workflow usually gives you the highest consistency for this stage, especially if your catalog is large.
Then choose the production model:
If you are assessing AI-supported workflows, AcquireConvert has covered the broader rise of ai fashion and more conversion-focused implementations such as an ai clothing generator. These tools may reduce production bottlenecks, but they work best when your product references are already clean and your brand standards are defined.
For background and image cleanup, the current tool dataset available to AcquireConvert includes image editing options such as AI Background Generator, Free White Background Generator, Increase Image Resolution, Remove Text From Images, Background Swap Editor, Place in Hands, Magic Photo Editor, and Creator Studio. The provided product data does not include pricing, feature specs, or ratings for these tools, so they should be treated as workflow options rather than fully reviewed recommendations here. In practical terms, they are most relevant during post-production, where teams often need faster background changes, white background outputs, or image refinement without booking another full reshoot.

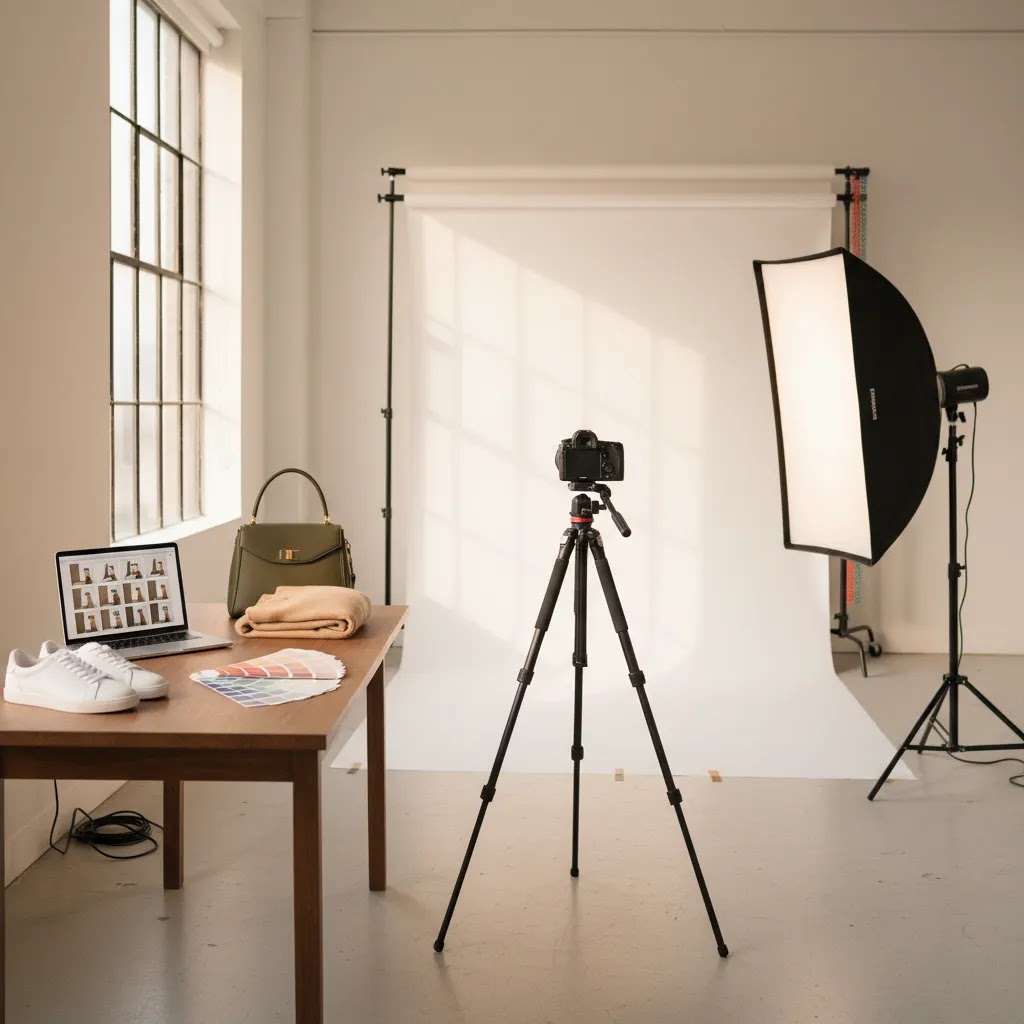
At-home clothing photography setup checklist
For most Shopify store owners, the hardest part of a DIY product shoot is not taking one good photo. It is taking 200 good photos that look like they belong together. Consistency comes from a repeatable setup you can rebuild, not from talent or a fancy camera.
Start by standardizing your physical environment. Pick one spot in your home where you can control light. The goal is not perfect, it is predictable.
Now, when it comes to styling and prep, small details do most of the work. A clean product with controlled shape can make a phone camera look surprisingly professional. A wrinkled product can make a full-frame camera look amateur.
Post-production is where DIY shoots usually win or lose on consistency. You do not need to over-edit. You need repeatable standards.
The way this works in practice is simple: document your setup with a few behind-the-scenes photos, write a one-page shot guide, and treat it like a mini studio. That is how small teams keep output consistent without turning every shoot day into a reinvention.
Pricing and production cost options
Product shoot pricing varies widely because fashion production has more moving parts than standard packshot photography. Costs typically depend on garment count, number of looks, model usage, stylist fees, studio rental, editing complexity, and how many final images you need per SKU.
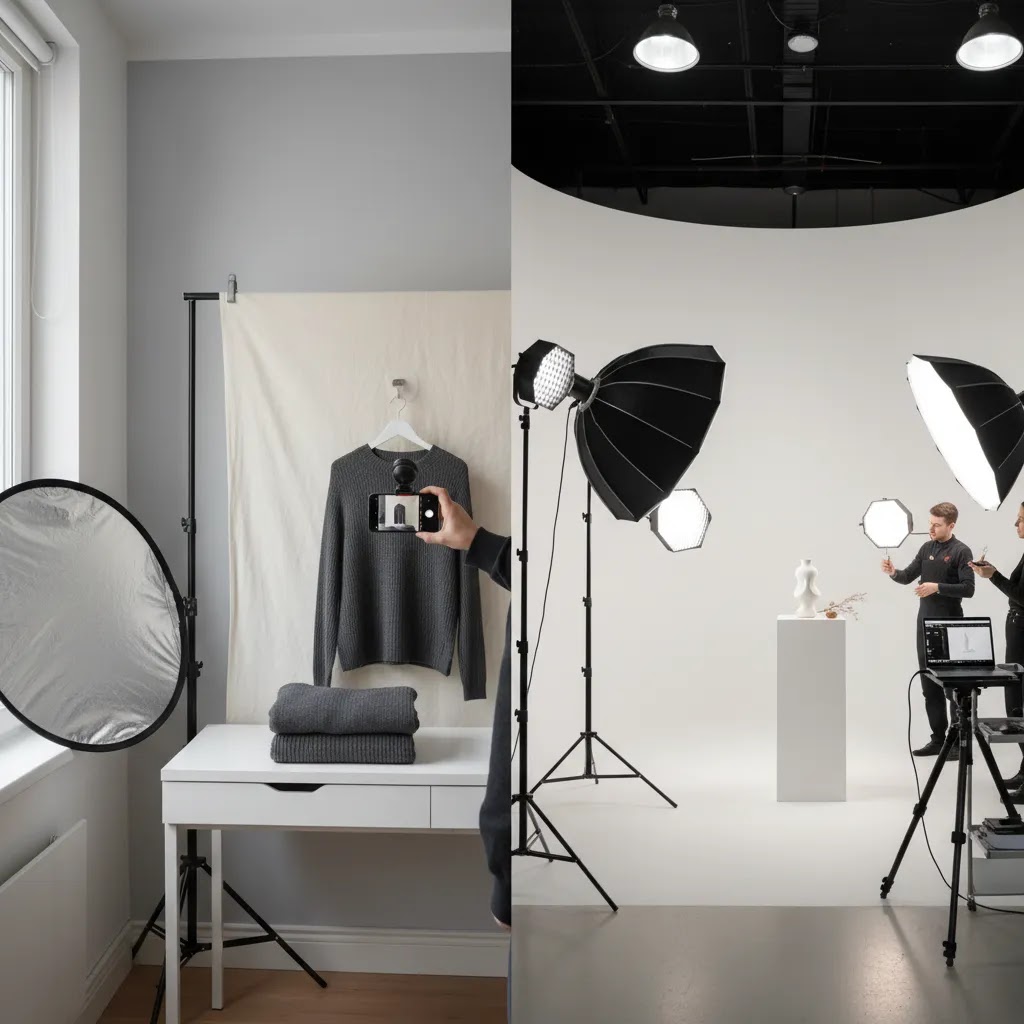
For a simple product shoot, your lowest-cost path is usually DIY production with a controlled setup, one background, and a limited shot list. This can work for early-stage Shopify stores, but the real cost is time. You may spend hours on lighting corrections, file management, and retouching.
A studio-based product photo shoot usually costs more upfront, but can lower your cost per usable image if your team needs consistent outputs across a large catalog. It is often the better fit once catalog growth and paid acquisition make image inconsistency more expensive than production itself.
AI product shoot workflows may reduce editing labor and concept mockup costs, especially for background variation or creative testing. Even so, they are not automatically the lowest-cost option. You still need source images, quality checks, and likely some manual revisions. Since the current Products data provided does not include verified pricing tiers for the listed AI image tools, no exact dollar comparisons should be made here. If cost control is your main concern, compare total workflow cost, including photography time, editing time, software spend, and revision cycles, not just the headline tool subscription.
AI fashion product photography workflows with models
AI can support fashion production in a few different ways, and model-related workflows are where expectations need to be realistic. AI can be useful for generating variations and creative testing, but it can also introduce accuracy issues that matter on a Shopify product page.
In practice, most AI model workflows start with clean source images. That could be a well-lit on-model photo you already own, or a flat lay or mannequin image that an AI tool uses as a base to create a more lifestyle-style output. The more controlled the original image is, the more predictable your results tend to be. If your source photo has mixed lighting, strong wrinkles, or unclear edges, AI edits usually amplify the mess.
What many store owners overlook is that fashion accuracy is not just “does it look good.” It is: does it look like the exact product in the listing. Fabric texture, stitch lines, logos, and patterns are where AI can drift. Fit cues can drift too, for example sleeve length, neckline depth, drape, and how a hem sits. That can become a trust issue, and it can increase returns if the image implies a different silhouette than the garment delivers.
Where AI tends to help most
Where traditional photography still tends to win
A QA checklist before you publish AI-assisted images on Shopify
If you use AI for model images or background generation, do not judge the output at full-screen only. Check it in the real buying context: collection page thumbnail size, product page zoom, and side-by-side next to other SKUs in the same drop.
From a practical standpoint, AI is usually safest as an assist layer. Use it to speed up parts of production and increase creative options, but keep at least one set of clean, true-to-life product photos as the foundation of your listing. That gives you a reliable baseline for customer trust, and it gives you better inputs for any AI variations you generate later.
Trust and credibility in delivery quality
For ecommerce brands, trust in a fashion product shoot comes down to accuracy and repeatability. Can shoppers see what they are buying clearly? Do colors look consistent across devices? Can you repeat the same look next month when a new collection drops?
This is where a disciplined process matters more than flashy creative language. A reliable workflow includes a fixed shot guide, standardized lighting, naming conventions, review rounds, and clear export specs. If your production partner or internal team cannot explain these basics, delivery quality will usually be inconsistent.
AcquireConvert evaluates visual workflows through practical ecommerce use, not just aesthetics. That perspective is shaped by Giles Thomas's experience as a Shopify Partner and Google Expert, where image quality affects both on-site conversion and paid channel performance. For merchants exploring category-level standards and inspiration, the Fashion & Apparel Photography and Catalog Photography sections on AcquireConvert are good next stops.
Pros and Cons
Strengths
Considerations
Who this process is best for
This workflow is best for apparel, accessories, footwear, and fashion-adjacent Shopify brands that need a repeatable way to create product imagery without sacrificing brand identity. It suits founders doing their first organized shoot, in-house ecommerce teams trying to standardize content, and scaling brands deciding whether to move from DIY to studio or AI-supported production.
If your catalog is still very small, a simple product shoot with tight standards may be enough. If you launch often, run paid traffic, or manage many variants, a more formal studio or hybrid workflow will usually make more sense. Stores with lean teams should prioritize consistency over ambitious concepts they cannot maintain.
How to get started
Start with one collection, not your full catalog. Pick 10 to 20 products and create a test workflow you can repeat. Define the visual goal, list the exact image types needed, and choose your setup: DIY, studio, or hybrid.
Next, prepare your products properly. Steam garments, organize size samples, confirm styling notes, and label every SKU before shoot day. Poor prep is one of the biggest causes of wasted time.
Run the shoot, then review images against a checklist: sharpness, color consistency, background cleanliness, crop uniformity, and file naming. If you are testing AI support, use it on post-production tasks first, not on your full brand aesthetic. That gives you a safer way to assess speed versus quality.
Finally, upload the finished assets to your Shopify store and watch practical metrics such as add-to-cart rate, bounce rate on product pages, and creative performance in ads. Results will vary by niche, traffic quality, and how strong your product pages are overall, but this is the right way to judge whether the shoot process is paying off.
Frequently Asked Questions
What is included in a fashion product shoot?
A fashion product shoot usually includes planning, styling, photography, image selection, retouching, and final exports for ecommerce use. The exact deliverables depend on your needs. Some brands only need white background product images, while others also need model shots, detail shots, and lifestyle content for ads and social channels.
Should I use a studio or do a DIY product shoot?
A DIY product shoot can work well for smaller catalogs or early-stage brands if you can control lighting and keep framing consistent. A studio is often the better choice once you need repeatability across many SKUs, seasonal launches, or multiple contributors. The decision usually comes down to scale, internal time, and quality expectations.
How much does a product photo shoot cost?
Costs vary based on product count, creative complexity, location, model usage, and editing requirements. A simple in-house setup may cost less in cash but more in team time. A professional studio usually costs more upfront, but may lower your cost per usable image if you need high-volume, repeatable production.
Can AI replace a traditional fashion product shoot?
In most cases, no. AI can help with background changes, concept exploration, cleanup, and some creative variations. It is less reliable when accuracy of garment detail, fit, and texture matters. For ecommerce, AI usually works best as support for production and post-processing rather than as a full replacement for source photography.
What backgrounds work best for fashion product photography?
White backgrounds are still the most practical choice for core ecommerce listings because they keep the focus on the product and look consistent across collections. Neutral lifestyle backgrounds can work well for campaign images and branded product pages. The best option depends on whether the image is meant to sell clarity, mood, or both.
How many photos should I take per product?
Most fashion products need at least a hero image, alternate angle, back view, and one or two detail shots. Apparel often benefits from fit imagery as well. The right number depends on complexity. The goal is not to upload more images for the sake of it, but to answer the shopper's main questions before they leave the page.
Is 3D product shoot content worth considering for fashion brands?
It can be, especially for accessories, footwear, or products where shape and structure drive the purchase decision. For standard apparel catalogs, 3D is often less essential than getting clean core photography right. If your team is still struggling with basic consistency, fix that first before investing in more advanced formats.
What is the best lighting setup for clothing photography at home?
For most at-home setups, the best approach is one you can repeat: two matching lights with diffusion, placed to the left and right of the product at roughly 45-degree angles, plus enough distance that the light wraps softly rather than creating harsh hotspots. If you use window light, keep the time of day consistent and control spill with curtains or a diffuser so color and shadow do not change across your catalog.
How do I photograph clothing for ecommerce without a model?
You typically have three reliable options: flat lay, mannequin, or ghost mannequin. Flat lays are the fastest to execute and work well for many categories if you keep folding and framing consistent. Mannequin images help show drape and length without the logistics of models. Ghost mannequin can look more premium, but it requires cleaner capture and more precise editing to avoid messy necklines and edges.
What camera settings should I use for fashion product photography?
Settings depend on your camera and lighting, but the usual goal is sharpness and consistent color. Use a low ISO to reduce noise, a mid-range aperture to keep the whole garment in focus, and a shutter speed that avoids blur, especially if you are hand-holding. If you can, shoot in a format that gives you more flexibility for white balance and exposure adjustments in editing. The most important part is consistency across SKUs, so whatever settings you choose, document them and keep them steady for the full shoot.
Can I use AI models for product images, and will customers notice?
You can use AI model images in some cases, especially for creative testing and ads, but you should quality check carefully before using them as core product page images. Customers may notice issues like warped logos, odd fabric texture, unnatural hands, or a fit that does not match the real garment. If you use AI, keep at least one set of accurate base product photos, then treat AI variations as supporting assets rather than the only source of truth.
Key Takeaways
Conclusion
A well-run fashion product shoot can strengthen your brand presentation and make your Shopify catalog easier to shop, trust, and scale. The right choice is rarely about picking the most creative route. It is about choosing a production model that fits your margins, team size, and publishing pace. For some stores, that means a simple in-house setup. For others, it means moving to a studio or adding AI tools selectively to speed up editing and asset production. AcquireConvert reviews these workflows through the lens of real ecommerce performance, drawing on Giles Thomas's Shopify Partner and Google Expert background. Your next step is simple: map one collection, define the required shot types, and test a repeatable workflow before expanding it across your catalog.
Disclosure: AcquireConvert may receive affiliate compensation from some third-party tool links where applicable. The product tool data available for this article included image-related tools, but did not include verified pricing, feature depth, or ratings for a full tool review. Any performance impact from a fashion product shoot, studio process, or AI-assisted workflow will vary based on your niche, traffic, product quality, merchandising, and implementation. No specific sales or conversion outcomes are guaranteed.

Hi, I'm Giles Thomas.
Founder of AcquireConvert, the place where ecommerce entrepreneurs & marketers go to learn growth. I'm also the founder of Shopify agency Whole Design Studios.