Photo Editing for Product Photography (2026)

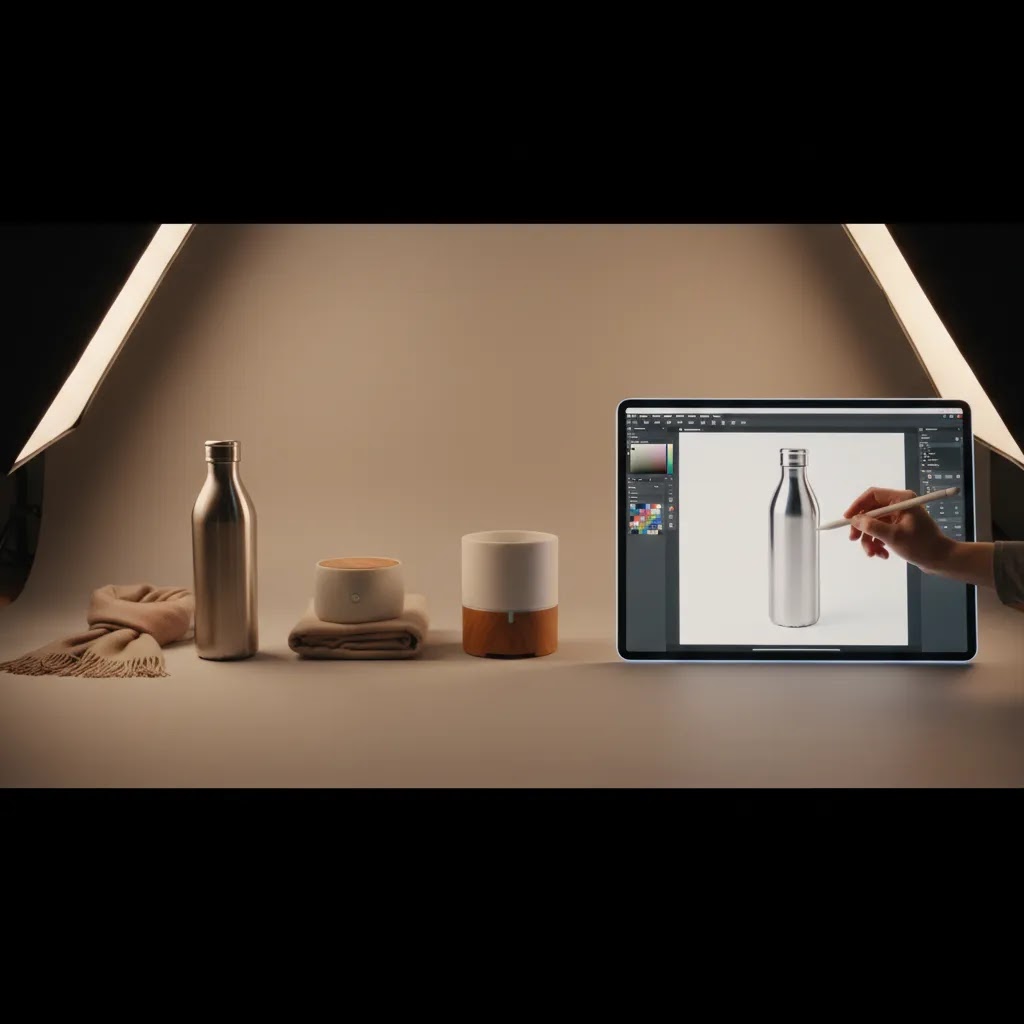
If you sell online, your product photos do more than make your store look polished. They shape trust, reduce hesitation, and help shoppers understand what they are buying before they ever reach checkout. That is why photo editing for product photography matters so much. Good editing is not about making products look fake. It is about making them clear, consistent, and conversion-friendly across product pages, collections, ads, and marketplaces. If you are still deciding which workflows and tools make sense, start with this guide and then explore AcquireConvert’s ai background generator resource for a closer look at one of the most common editing tasks store owners face.
Contents
Why Photo Editing Matters for Ecommerce
Most ecommerce stores do not lose sales because the product is bad. They lose them because the visuals leave too much uncertainty. Shoppers want to see clean edges, accurate color, texture detail, scale, and a consistent presentation across your catalog.
For Shopify merchants especially, edited product photos affect more than the product page. The same assets often flow into collection grids, email campaigns, social ads, Google Shopping creatives, and retargeting campaigns. That means one weak image can hurt both click-through rate and on-site conversion.
Strong photo editing for product photography usually focuses on five things: background control, color accuracy, detail enhancement, distraction removal, and size consistency. These are practical improvements that help shoppers compare products faster.
If you are building a repeatable workflow, the best place to start is the broader Background Removal & Editing topic hub. It helps frame editing as part of a bigger merchandising system, not just a one-off design task.
Essential Editing Techniques You Actually Need
You do not need every advanced retouching feature to improve ecommerce images. In most cases, you need a reliable process that keeps product photos clean and store-ready.
1. Background cleanup and replacement
Background editing is often the first priority. Clean white backgrounds are useful for marketplaces and many product grids, while styled backgrounds can help with ads and landing pages. The key is consistency. A messy mix of shadows, tones, and room clutter makes a catalog feel less trustworthy.
If background removal is your immediate need, AcquireConvert also covers the decision stage in its ai background remover guide.
2. Exposure and color correction
Product images should match the real item as closely as possible. Over-editing color may increase returns if customers receive something that looks different in person. Good correction means balancing brightness, contrast, white balance, and saturation without pushing the image too far.
3. Cropping and alignment
Your catalog should look visually ordered. Products should sit at a similar scale, with consistent spacing and framing. This matters on collection pages where shoppers compare multiple options quickly.
4. Sharpening and resolution improvement
Soft images can make products look lower quality than they really are. For zoomed product detail and retina displays, clarity matters. If you are fixing smaller or older files, an image upscaler may help recover usable detail for ecommerce layouts, though results vary depending on the original image quality.
5. Removing distractions
Dust, labels, accidental reflections, wrinkles, and background text can all pull attention away from the product. This is especially common when merchants repurpose supplier images or lifestyle shots from previous campaigns. If that is your situation, this guide on how to remove text from image assets is a useful next step.
6. Creating alternate versions for multiple channels
A single product may need a square social crop, a marketplace-compliant white background image, a hero image for your PDP, and a lifestyle version for email. Editing is not just cleanup. It is asset preparation for each stage of the customer journey.
File Specs and Export Settings for Ecommerce Channels (Shopify, Ads, Marketplaces)
What many store owners overlook is that editing is only half the job. The export is where good images get lost. Wrong file type, inconsistent aspect ratios, or sloppy naming can create the exact “multiple versions chaos” that slows down launches.
From a practical standpoint, build your workflow around two exports: a high-quality master you keep for reuse, and a channel-ready version you upload.
Formats: JPG vs PNG vs WebP
JPG is usually the default for product photography because it balances quality and file size well for photos. PNG is useful when you genuinely need transparency, for example for overlays or certain design uses, but it typically creates larger files for photo-like images. WebP can reduce file sizes significantly in many cases, but your workflow still needs to account for where the file will be used and whether your tools and channels support it reliably.
Now, when it comes to Shopify, the biggest win is usually keeping your images consistent and lightweight enough for fast mobile loading, while still sharp enough for zoom and product detail. That is why many stores keep a master file for future edits, then export web-ready versions sized for the storefront.
Aspect ratios and crops: make your collection grids look intentional
Consistency in aspect ratio matters because Shopify collection pages and featured product sections often display images in a grid. If one image is tall, another is wide, and a third is tightly cropped, the whole catalog can look messy even if each photo is “good” on its own.
Think of it this way: pick a standard for your main product images and stick to it. A square crop is common for catalog grids, while social and some ad placements often favor vertical crops like 4:5. If you need both, create both intentionally, rather than letting each channel auto-crop your hero image.
White background expectations and compliance
Many marketplaces prefer or require clean white backgrounds for primary product images, and ad platforms may also perform better with clear, uncluttered product presentation in certain placements. Requirements change, so it is smart to verify current channel guidelines before you standardize a template for every SKU.
The reality is that “pure white” is not the only goal. What matters is a clean background with believable contact shadows, consistent lighting, and accurate edges. A harsh cutout with floating products can look less trustworthy than a slightly off-white background that still feels real.
A simple file naming and versioning system that prevents chaos
You do not need a complicated DAM system to stay organized. You need a naming pattern you actually follow. One that works well for ecommerce teams is: sku-angle-channel-size.
Here is an example:
This makes it obvious what the file is, where it is used, and whether it is the right version to upload. It also helps when you revisit a product months later and want to refresh ad creative without rebuilding everything from scratch.
AI Product Photography Generators and AI Models: Where They Fit (and where they break)
AI is now doing more than removing backgrounds. There are tools that generate product scenes, create lifestyle variations, and even place products on AI models. That can be useful for Shopify stores that need more creative volume, but it also introduces a new risk: accuracy.
The way this works in practice is that you start with a product image, then use an AI tool to create new context. Sometimes it is a new background. Sometimes it is a “studio look.” Sometimes it is a full lifestyle scene or a model shot. Depending on the tool, you may also see high-resolution, “4K” style outputs advertised. Those outputs can look impressive, but you still need to judge them by ecommerce standards: would a customer feel misled if the product arrives?
Where AI product photo generators can help
For most Shopify store owners, AI generators are strongest in three areas.
Consider this: AI is often a speed tool, not a truth tool. It can help you produce options faster, but you still decide what is accurate enough to publish.
Where AI tends to break in ecommerce
Some categories have predictable failure points.
If you rely on AI heavily, keep a tight loop between your product team and whoever publishes images. One person’s “good enough” can become another person’s customer support headache.
A simple QA checklist before you publish AI-edited images
Before an image goes live on a PDP or into ads, run a quick check. You do not need to overthink it, but you do need consistency.
AI can be a strong part of your photo editing for product photography workflow, but it is still a workflow. Human review is the difference between faster creative and a catalog that quietly erodes trust.
Tools and Workflows to Consider
The right editing setup depends on your catalog size, image quality, and how often you launch new products. Some merchants need a lightweight AI-assisted workflow. Others need more manual control.
AI-assisted editing tools from current product data
Based on current AcquireConvert-connected product data, several tools are relevant for product photo editing tasks:
These tools are useful when speed matters and you need repeatable edits across many SKUs. They may be especially practical for merchants testing new product lines, refreshing older PDP assets, or preparing marketplace listings without booking a full reshoot.
That said, AI tools are not a perfect replacement for a strong original image. If your source photo has poor lighting, inaccurate angles, or major blur, editing can only go so far. In many cases, your outcome improves dramatically when the starting shot is solid. If you are evaluating setup improvements, this guide to a product photography studio is a smart complement to your editing workflow.
You can also browse broader visual workflow guidance in AcquireConvert’s E Commerce Product Photography category.

Best Photo Editing Apps and Software Pros Use (and when to use each)
If you talk to working product photographers, you will keep hearing the same baseline tools come up. Not because they are trendy, but because they solve the everyday problems ecommerce catalogs create: batch edits, accurate color, and controlled retouching.
Here is the thing: you do not need to use every app. You need a small stack that matches your volume and the kind of edits you actually do.
Lightroom: best for batch color and catalog consistency
Lightroom (and Lightroom Classic) is commonly used for organizing product shoots, applying consistent adjustments across many images, and exporting predictable file sets. If you shoot 30 SKUs in a day and need the same white balance, exposure, and crop feel across the set, batch editing is where Lightroom tends to pay off.
For Shopify store owners, Lightroom-style workflows are especially helpful when you are building a “house look.” Same background tone, same brightness, same contrast curve, and the catalog instantly feels more cohesive.
Photoshop: best for precision retouching and compositing
Photoshop is usually the tool for the hard stuff: detailed cleanup, advanced masking, fixing reflections, and compositing when you need complete control. If you sell products with complex edges, transparent packaging, or materials that show every flaw, Photoshop-level retouching can be the difference between “good enough” and genuinely premium presentation.
It is also where you can correct issues AI sometimes gets wrong, like halos around products, broken label edges, or unnatural shadows.
Mobile-first options: realistic for small catalogs and fast content
Not every store owner is sitting at a desktop doing long editing sessions. If you are creating fast content for Instagram, TikTok, or email, mobile editors can be a practical part of the workflow.
Lightroom Mobile is a common choice when you want consistent presets and solid control over exposure and color. Snapseed is often used for quick fixes, selective edits, and cleanup when you are working from a phone. These can be realistic if you have a small catalog, you are doing rapid social content, or you are making minor improvements to already-good images.
The limitation is control and consistency at scale. If you have hundreds of SKUs and frequent launches, mobile-only editing tends to become hard to standardize.
Pick one stack so you stop comparing tools and start shipping assets
Most stores get stuck because they compare dozens of apps instead of choosing a simple setup. A practical way to decide is to build a stack around your volume:
The goal is not to build the “perfect” workflow. It is to build a repeatable one that fits your Shopify release pace and keeps images consistent across PDPs, collection pages, ads, and marketplaces.
Pros and Cons
Strengths
Considerations
Who This Approach Is For
This approach fits ecommerce teams and independent store owners who want a cleaner, more scalable image workflow without turning every product launch into a custom design project. It is especially relevant if you run a Shopify store with frequent product updates, rely on supplier images that need cleanup, or manage multiple channels that each require different visual specs.
It is also a strong fit for growth-stage brands trying to improve merchandising quality before investing in a full studio process for every SKU. If you already have decent product shots, editing can help you get more value from them. If your photos are consistently weak from the start, studio improvements may deserve equal attention.

How to Choose the Right Editing Setup
Store owners usually get the best results when they choose an editing workflow based on business needs, not just feature lists. Here are the criteria that matter most.
1. Start with your source image quality
If your product photos are already well lit and clearly framed, AI tools can save a lot of time. If the originals are dark, noisy, or inconsistent, you may need to improve capture quality first. Editing works best as an enhancement layer, not a rescue plan for every image.
2. Match the tool to the job
Use a background-specific tool for background tasks, a resolution tool for clarity issues, and a broader editor for composite or contextual changes. A specialized workflow is usually more predictable than trying to use one tool for everything.
3. Think about channel requirements
Amazon-style white backgrounds, Shopify PDP heroes, Instagram crops, and ad creative often need different outputs. Before choosing software, map where each product image needs to appear. This helps you avoid duplicate work later.
4. Balance speed with control
AI can speed up repetitive editing, which is useful for larger catalogs. Manual editing gives you more precision, which matters for reflective surfaces, transparent packaging, jewelry, or complex edges. Many merchants end up with a hybrid process: AI first, manual cleanup second.
5. Keep the product truthful
The best ecommerce editing improves clarity without changing the product itself. If you alter shape, color, finish, or proportions too aggressively, you may create trust issues. For conversion-focused stores, realism usually beats dramatic styling on the primary product image.
AcquireConvert’s content is especially helpful here because it connects editing decisions back to actual merchandising use cases. Giles Thomas’s perspective as a Shopify Partner and Google Expert keeps the focus on assets that support search visibility, on-site clarity, and better buying confidence. If you are comparing techniques, tools, and setup choices, check the related guides above and work through your store’s highest-impact product pages first.
Frequently Asked Questions
What is photo editing for product photography?
Photo editing for product photography is the process of improving product images after the shoot so they are cleaner, clearer, and more consistent for ecommerce use. Common tasks include background removal, brightness correction, cropping, sharpening, and distraction cleanup. The goal is usually to present the product accurately while making it easier for shoppers to evaluate online.
Why does product photo editing matter for Shopify stores?
For Shopify stores, product photos appear across PDPs, collection pages, mobile layouts, and marketing channels. If images are inconsistent or unclear, shoppers may hesitate or abandon the page. Editing helps standardize presentation and can improve the overall shopping experience, especially when your catalog includes many variants or visually similar products.
Can AI handle product photo editing well enough for ecommerce?
In many cases, yes, especially for repetitive tasks like background changes, white background generation, or basic cleanup. Still, results depend heavily on the source image and the complexity of the product. Transparent items, reflective packaging, and soft edges may still need manual review before you publish the final asset.
What is the most important edit for product photos?
For most stores, background cleanup is the highest-impact edit because it immediately improves focus and consistency. After that, color correction and cropping usually matter most. The right priority can change by category, though. Fashion, cosmetics, home goods, and electronics each place emphasis on different visual details.
Should I use white backgrounds or lifestyle backgrounds?
Usually both, but for different jobs. White backgrounds are helpful for marketplaces, clean product grids, and primary product images where clarity matters most. Lifestyle backgrounds can help customers picture use and scale. A common ecommerce setup is a white-background hero image plus a few contextual secondary images.
Can editing improve low-resolution product photos?
Sometimes. Resolution tools may make smaller files more usable, especially for web display. But they cannot fully restore missing detail from a poor original. If your image is severely blurry or badly compressed, a reshoot may still be the better path. Enhancement tools work best when the source image is decent to begin with.
How much editing is too much?
If the product starts to look materially different from what the customer receives, you have gone too far. That includes major color shifts, unrealistic textures, altered proportions, or misleading shine and finish. Good product editing improves readability and presentation without creating a false impression of the item.
What should I edit first if I have a large catalog?
Start with your best-selling products, top collection pages, and any items used in paid traffic campaigns. Those images usually influence the largest share of clicks and conversions. Once the highest-impact assets are improved, create a repeatable workflow for the rest of the catalog so your visual standards stay consistent over time.
What is the best app to edit product photos?
The best app depends on your workflow and volume. If you need consistent batch edits across many SKUs, a catalog-style editor is often a better fit than a one-off photo app. If you mainly need quick edits for social content or a small product line, a mobile editor may be enough. Many Shopify store owners end up using a combination: one tool for color and crop consistency, and a separate tool for background cleanup or scene variations.
What do pro photographers use to edit photos?
Many professional product photographers rely on a batch editor for consistent color and exposure across a shoot, plus a precision retouching tool for detailed cleanup and complex masking. The split matters because ecommerce work usually involves both speed and accuracy: you want a consistent catalog, but you also need the hero images to hold up under zoom.
How to edit photos for product photography?
A practical approach is to standardize the basics first, then do detailed cleanup only where it matters. Start with exposure and white balance, then crop and align for consistent framing across your catalog. After that, clean the background, remove distractions, and export channel-ready versions with consistent naming. If you use AI tools for backgrounds or lifestyle variations, do a quick QA pass to confirm edges, shadows, and colors look believable before publishing.
What is the 20 60 20 rule in photography?
The 20 60 20 rule is a simple way some photographers think about what drives a final image: a smaller portion comes from the camera settings and gear, the largest portion comes from lighting and composition, and the final portion comes from editing. You will hear different versions depending on who is teaching it, but the takeaway for ecommerce is consistent: editing helps, but lighting and capture quality typically do most of the heavy lifting. If your product photos are poorly lit, editing becomes a rescue mission instead of a repeatable workflow.
Key Takeaways
Conclusion
Photo editing for product photography is not just a design task. It is a merchandising decision that affects how clearly shoppers understand your products and how professional your store feels. For most ecommerce brands, the biggest wins come from a disciplined workflow: clean backgrounds, accurate color, consistent cropping, and practical enhancement where needed. AI tools can help speed that process, but they work best when paired with solid source images and realistic expectations. If you want more practical guidance, explore AcquireConvert’s related editing and photography resources. Giles Thomas’s Shopify Partner and Google Expert perspective keeps the advice grounded in what actually helps store owners build stronger product presentation across channels.
This article is editorial content created for educational purposes and is not a paid endorsement unless explicitly stated otherwise. Tool capabilities and availability are based on current connected data and may change over time. Pricing details were not available in the provided product data and should be verified directly with each provider. Results from photo editing workflows and AI tools are not guaranteed and will vary based on image quality, product type, and implementation.

Hi, I'm Giles Thomas.
Founder of AcquireConvert, the place where ecommerce entrepreneurs & marketers go to learn growth. I'm also the founder of Shopify agency Whole Design Studios.