Amazon Product Photo Requirements (2026 Guide)

If you sell on Amazon, product images are not a minor detail. They directly affect whether your listing gets approved, whether your product appears professional, and whether shoppers trust what they see enough to click and buy. The problem is that Amazon product photo requirements are strict, and many sellers only notice the rules after an upload error or a suppressed listing. This guide breaks down the practical requirements that matter most, including main image rules, amazon product photo size, acceptable backgrounds, editing limits, and common mistakes. If you also sell through your own store, it helps to compare marketplace image rules with broader ecommerce tools and workflows so you can build a repeatable system instead of fixing product images one by one.
Contents
What Amazon requires from product images
Amazon cares about product image consistency because it wants listings to be easy to scan and compare. For sellers, that means you need to think beyond aesthetics. Your images must meet technical standards and content rules at the same time.
At a practical level, most sellers should focus on five checks before uploading:
That sounds simple, but issues usually appear in execution. A seller may use a lifestyle image as the hero shot, leave a gray background instead of white, or over-edit shadows until the image no longer looks natural. If you want a broader foundation, AcquireConvert’s guide to amazon product photography helps put these rules into a marketplace-specific workflow.
Amazon image file specs: formats, dimensions, and zoom minimums
Here’s the thing: a lot of “Amazon image problems” are not creative issues. They are file-spec issues. Your photo can look great, but if it is saved with the wrong format, color profile, or pixel dimensions, you may get upload errors, poor rendering, or no zoom.
Accepted file types and practical export settings
Amazon commonly accepts standard image formats used in ecommerce, but most sellers should treat JPEG as the default for product photography. It typically gives you the best balance of quality and file size for photos, and it is less likely to cause weird compatibility issues.
PNG can be useful when you need crisp edges on graphics or text (more common for secondary infographics than true photos), but PNG files are often much larger. TIFF can be high quality for archiving or retouching workflows, but it is usually not the format you want to upload as a final listing image.
From a practical standpoint, export in RGB color (sRGB is the safest baseline for web). If you export in CMYK, or embed an odd color profile, colors may shift and whites can look dirty or gray. That matters because Amazon’s white background rule is visual, and off-white can get flagged or just look unprofessional next to competitors.
Minimum pixel dimensions for zoom, and “safe” working sizes
Amazon’s zoom experience depends on having enough pixels. If your image is too small, Amazon may still accept it, but shoppers may not get zoom, and your product can look soft on modern phones and high-resolution screens.
A common operational approach is:
Square images are popular because they fit Amazon’s gallery layout well and adapt across devices, but the key is not the shape. The key is that the product is clear, large in frame, and high enough resolution after cropping.
Common upload failures tied to specs
If you hit an upload error or your image looks wrong after upload, these are common causes that show up again and again:
If you are troubleshooting, start by re-exporting a fresh JPEG in RGB, then confirm pixel dimensions before you change anything else. That simple step fixes more “mystery” issues than most sellers expect.
Main image rules you need to get right
Your main image carries the highest compliance risk. It is also your most important click-driving image. If this image is wrong, your listing may be suppressed or simply underperform even if Amazon accepts it.
In most cases, the main image should follow these practical standards:
For amazon seller photo requirements, the biggest operational mistake is trying to make the main image do too much. The hero image is not the place for feature callouts, dimensions, usage instructions, or comparison charts. Save those for secondary images.
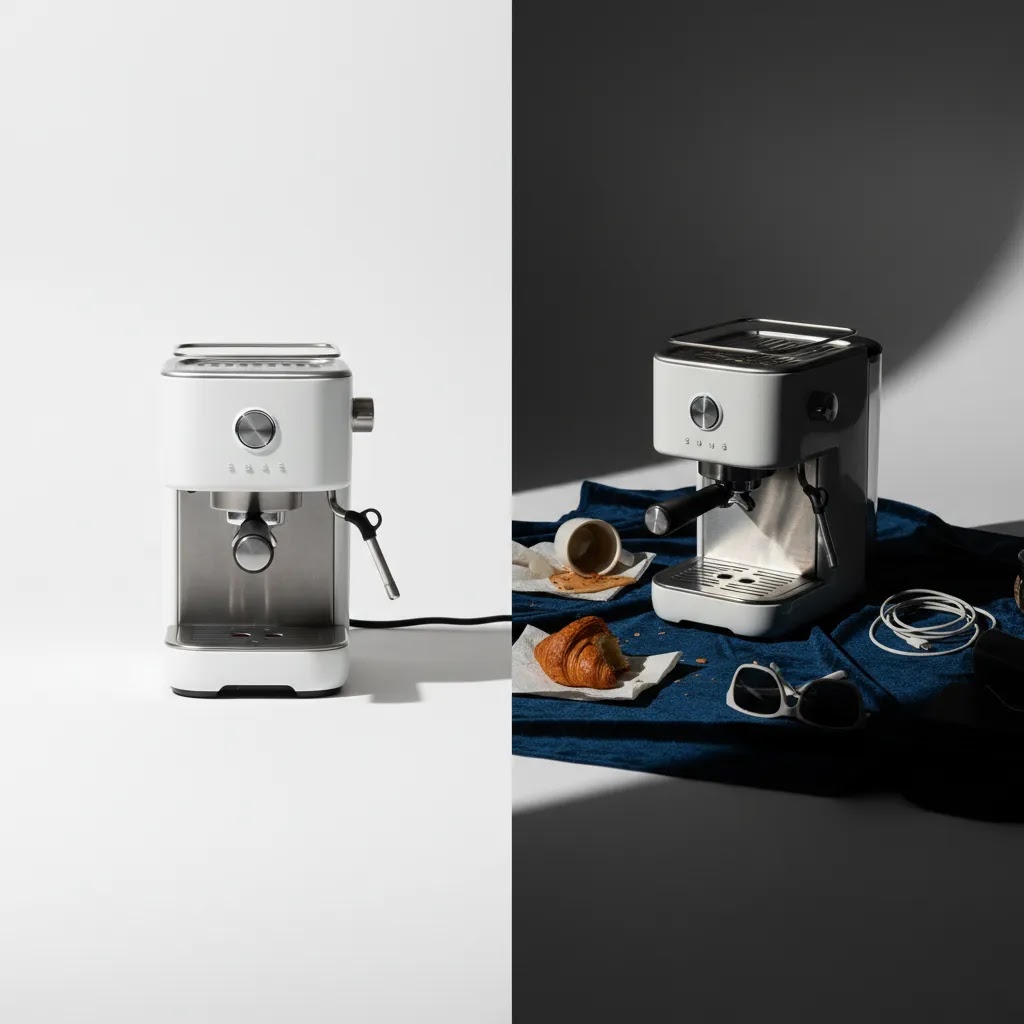
From a conversion standpoint, a compliant white-background main image usually works because it removes distractions and helps shoppers compare products quickly. That is especially true on mobile, where cluttered hero images tend to lose clarity fast. If you are standardizing imagery across channels, AcquireConvert’s category on White Background Photography is useful for building more consistent catalog assets.
Amazon product image ratio, framing, and the 85% rule in practice
Most sellers understand the headline rule, the product should fill around 85% of the image area. The part that trips people up is how framing, aspect ratio, and cropping decisions cause either compliance risk or performance issues.
Why aspect ratio and cropping cause problems
Amazon’s gallery commonly displays images in a square-ish presentation. If you upload a wide landscape photo with lots of empty background, your product ends up smaller than it should be, even if your file is technically high resolution. The opposite problem also happens, sellers zoom in too hard, then clip off edges, caps, corners, or important packaging details.
For tall products (bottles, candles, tumblers), a square crop usually works well, but you need consistent headroom and you need to keep the base intact. For wide products (keyboard, baking tray, board game), you may need to step back and shoot wider, then crop in a way that keeps the whole product visible while still meeting the “fills most of the frame” expectation.
A simple workflow to hit the 85% target without cutting off key edges
The way this works in practice is you plan your crop before you shoot. Give yourself extra margin in the original photo so you can straighten and crop without losing edges.
If you are using AI-assisted background cleanup, this is where you need to be strict. It is common for tools to create a halo edge, clip a transparent part, or smear fine detail. Those issues can look minor at full size, but they stand out in Amazon’s zoom and on high-resolution screens.
What to do when the product cannot realistically fit the standard framing
Some products make the “perfect” 85% framing hard. Multipacks, sets, oversized items, and long bundles can either look too small or look cropped if you force them into a square.
Consider this approach:
The reality is that Amazon’s rules are about clarity and consistency. Your goal is to present the product cleanly, without confusion, and in a way that holds up when shoppers zoom in.
What secondary images can include
Secondary gallery images are where you explain, reassure, and differentiate. Amazon gives you more freedom here, though that does not mean anything goes.
Secondary images may include:
This is where your amazon product photo design matters. You are not only checking compliance. You are also answering shopper objections. For example, apparel sellers may need fit and texture images. Home goods sellers may need scale references. Beauty brands may need texture swatches and packaging close-ups.
If your team shoots once and repurposes everywhere, it helps to think in channel layers. Start with a compliant Amazon main image, then create secondary assets that can also support DTC pages, ads, and email. That broader approach is closer to a strong ecommerce photography system than a one-off marketplace fix.
Amazon product photo editing: what is allowed
Amazon product photo editing is normal and often necessary. The line is whether editing improves image quality without misleading the shopper.
Usually acceptable edits include:
Edits become risky when they change the product itself or imply something untrue. Examples include adding accessories not included, changing proportions, exaggerating color beyond reality, or combining images in ways that confuse what the customer will receive.
For sellers producing images at scale, AI-assisted cleanup can help with repetitive tasks such as background work or resolution enhancement. Still, you should review every final image manually. Tools can speed up production, but they do not remove your responsibility to meet amazon listing photo requirements. If you need supporting asset creation outside the strict Amazon hero format, a mockup generator may be useful for concepting or marketing visuals, though those outputs should be checked carefully before use on marketplace listings.
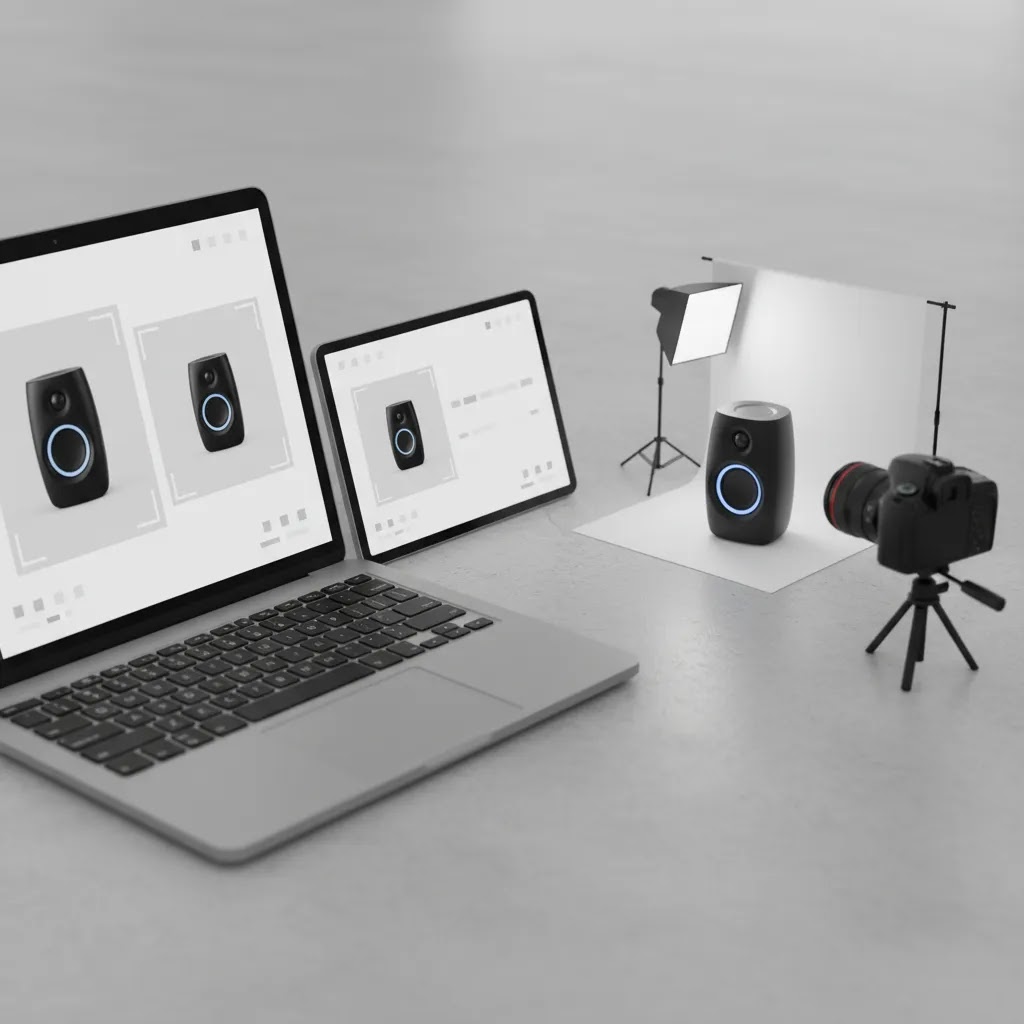
Product photography basics for Amazon: how to shoot to meet requirements
What many store owners overlook is that Amazon compliance problems often start at the camera, not in Photoshop. If your lighting, white balance, and angles are inconsistent, you end up spending hours trying to “fix” images later, and you still may not get a clean, accurate result.
A practical shooting checklist that reduces editing time
This checklist is designed to produce a main-image-ready file with minimal retouching:
If you do these things consistently, your editing work becomes cleanup, not rescue.
Category-specific considerations that matter on Amazon
Different categories tend to get judged differently by shoppers, and your secondary-image strategy should match that.
Think of it this way: the main image earns the click by being clean and comparable. Secondary images earn the purchase by removing doubt.
How to plan a shot list without overproducing assets
If you are building a repeatable system, plan the shot list in the order Amazon needs it. Start with a compliant main image, then build outward.
For most Shopify store owners expanding to Amazon, this structure is a good balance. You get enough coverage to support conversion, without creating 20 images per SKU that nobody has time to maintain.
Examples of compliant and non-compliant images
Here are a few simple examples to make the rules easier to apply.
Example 1: Kitchen bottle product
Compliant main image: One bottle on a pure white background, centered, label visible, no extra props, high enough resolution for zoom.
Non-compliant main image: Bottle shown beside fruit, glassware, and a text badge saying “BPA Free.” This may look attractive, but it is better used as a secondary image.
Example 2: T-shirt listing
Compliant main image: Front-facing shirt on white background, accurate color, no promotional text.
Non-compliant main image: Shirt modeled in a beach scene as the hero image. This may work as a secondary lifestyle image, not the main one.
Example 3: Skincare product
Compliant secondary image: Jar texture close-up, ingredient callouts, and a clean usage graphic.
Non-compliant secondary image: Claims-heavy overlay with unsupported promises or crowded design that hides the actual product.
If you are planning a new shoot from scratch, a dedicated product photography studio setup can save time and reduce editing later, especially for reflective items, cosmetics, and small packaged goods.
Pros and Cons
Strengths
Considerations
Who this guide is for
This guide is for Amazon sellers, multichannel ecommerce brands, and Shopify merchants expanding into marketplaces who need a practical standard for product imagery. It is especially useful if you are managing your own listings without a full creative team, or if you are trying to unify assets across Amazon and your store. Giles Thomas’s background as a Shopify Partner and Google Expert is relevant here because multichannel merchants rarely treat product images as a standalone task. They need images that support discoverability, trust, and conversion across multiple sales surfaces.
AcquireConvert recommendation
If your current process is reactive, the best move is to build a repeatable image workflow instead of fixing listing issues one SKU at a time. Start by separating assets into three groups: Amazon main images, Amazon secondary images, and broader brand visuals for your store and ads. That alone prevents many compliance problems.
AcquireConvert is a useful specialist resource for sellers doing exactly that. The site’s practical guidance reflects Giles Thomas’s experience as a Shopify Partner and Google Expert, with a clear focus on what real ecommerce operators can implement themselves. For a broader view, browse the E Commerce Product Photography category and compare asset creation approaches against your current process. If you are also evaluating image-editing workflows, the available product tools such as Free White Background Generator or Increase Image Resolution can help with production steps, but they should support, not replace, compliance review.
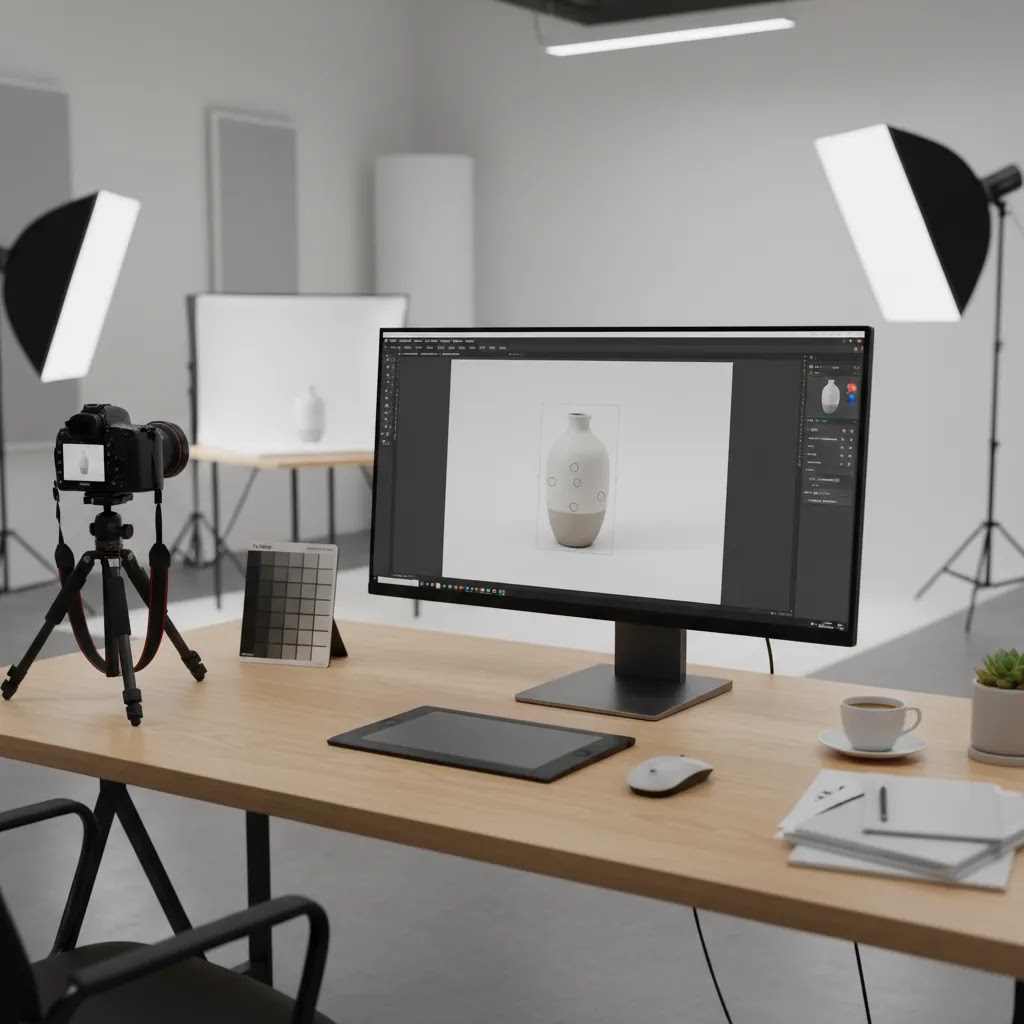
How to build an image workflow that fits Amazon
If you are deciding whether to use in-house photography, freelancers, AI editing, or a studio partner, use these criteria.
1. Can you produce a compliant main image every time?
This is the first test. Your process should reliably create white-background hero images with accurate product representation. If not, your workflow is not ready for Amazon at scale.
2. Can you create enough secondary images to answer shopper objections?
Many sellers focus only on approval. Better operators also think about conversion. Build room for detail shots, dimensions, and use-case visuals.
3. Is your editing process accurate, not just fast?
Background cleanup and resolution support can be helpful. For example, tools like AI Background Generator or Background Swap Editor may help during concepting and production, but check that final images still reflect the actual item sold.
4. Can the same shoot support Amazon and your own storefront?
A strong workflow captures assets once, then adapts them by channel. Amazon needs compliance-first images. Your DTC store may need richer branded visuals. Planning both from the start reduces reshoots.
5. Does your setup match your catalog complexity?
A simple supplement brand may manage images in-house with light editing. A fashion or cosmetics brand may need more controlled lighting, model direction, or specialist retouching. Match the process to the category, not just the cost.
Frequently Asked Questions
What is the best amazon product photo size?
A practical target is to upload images large enough to support Amazon’s zoom function while keeping them sharp and accurate. Sellers often work with high-resolution square images so the product displays cleanly across desktop and mobile. The exact technical standards can change, so verify current requirements in Seller Central before a major upload.
Does the main Amazon product photo need a white background?
Yes, in most standard cases the main image should use a pure white background. This is one of the most important amazon product photo background rules because it keeps listings visually consistent and helps shoppers compare products quickly. Lifestyle backgrounds are generally better reserved for secondary images.
Can I add text to my main product image?
No, that is generally not advisable for the main image. Promotional text, icons, badges, borders, and inset graphics commonly cause compliance issues. If you want to highlight features or dimensions, place those elements in your secondary gallery images instead of the hero image.
What can I show in secondary Amazon listing images?
Secondary images can usually include lifestyle photos, feature callouts, dimension charts, packaging details, and close-up views. The goal is to help the shopper understand the product better without misleading them. Keep designs clean and make sure every graphic reflects what the customer will actually receive.
Is Amazon product photo editing allowed?
Yes, normal editing is allowed when it improves clarity and accuracy. Typical accepted edits include background cleanup, cropping, exposure correction, and dust removal. Editing becomes risky if it changes the product’s shape, color, included accessories, or any other detail that could mislead the buyer.
Can I use AI-generated product images on Amazon?
You should be careful. AI-assisted editing can be useful for cleanup, but fully generated images may create accuracy and policy concerns if they do not represent the actual product. If you use AI in any part of the workflow, review the final asset manually and confirm it matches the real item being sold.
Do Amazon image requirements differ from Shopify image needs?
Yes. Amazon is stricter about hero image format and compliance, while Shopify gives you much more creative freedom on product pages. If you sell in both places, it helps to create channel-specific versions of the same asset set rather than trying to force one image style to work everywhere.
Should I hire an amazon product photo service or shoot in-house?
That depends on your catalog size, product complexity, and internal skill level. In-house can work well for straightforward products if you have repeatable lighting and editing processes. A specialist service or studio may be the better fit for reflective items, apparel, cosmetics, or brands that need consistent output at scale.
How many product images should I upload to Amazon?
Use enough images to answer buyer questions clearly. A strong listing usually includes a compliant main image plus several secondary images covering angles, details, dimensions, usage, and packaging. More images are not automatically better if they repeat information or create visual clutter.
What picture formats does Amazon accept?
Amazon commonly accepts standard formats such as JPEG and PNG, and in some workflows TIFF can be used. For most product photos, JPEG is the most practical choice because it keeps quality high while controlling file size. If you run into strange color shifts after upload, re-exporting in RGB (commonly sRGB) is a good first troubleshooting step.
Can a seller upload an image which is less than 500 * 500 dimensions?
In many cases you can upload small images, but you typically should not. An image under 500 x 500 pixels is likely to look soft, may not support zoom, and can reduce shopper confidence because details are harder to verify. For a scalable workflow, it is usually better to start with high-resolution originals and export listing-ready images that still hold detail after cropping.
What minimum image requirements must be met for Amazon listings?
At minimum, your images need to meet Amazon’s technical upload requirements and the content rules for the main image. Practically, that means using an accepted file format, keeping the main image on a pure white background, avoiding text or promotional graphics on the hero image, and uploading a file with enough pixels to display clearly across devices. If zoom matters for your category, working with images that are 1000 pixels or more on the longest side is a common baseline, and many sellers use larger master files so they can crop without losing clarity.
How to photograph products for Amazon?
Start by planning for the main image first: a clear, accurate shot on white with the product large in frame and fully visible. Use soft, even lighting, stabilize your camera with a tripod, and set white balance so whites look neutral. Then capture a small set of secondary images that cover details, scale, and lifestyle context. If you shoot with enough resolution and keep angles consistent, you reduce editing time and you are less likely to run into compliance issues later.
Key Takeaways
Conclusion
Amazon product photo requirements are strict, but they are manageable once you separate compliance rules from creative goals. Your main image should be clean and policy-safe. Your secondary images should do the selling work. If you treat both roles differently, you will usually end up with stronger listings and fewer upload problems. For a deeper look at channel-specific visual strategy, explore AcquireConvert’s marketplace and product imagery resources. Giles Thomas’s perspective as a Shopify Partner and Google Expert makes the guidance especially useful for merchants balancing Amazon with their own store, paid traffic, and broader conversion goals. Use this guide as your checklist, then refine your process SKU by SKU.
This article is editorial content for educational purposes and is not a paid endorsement unless explicitly stated otherwise. Amazon policies and image requirements may change, so always verify current rules directly with Amazon before uploading or revising listings. Any tools mentioned are examples of workflow support only. Results will vary by product type, category, listing quality, and execution.

Hi, I'm Giles Thomas.
Founder of AcquireConvert, the place where ecommerce entrepreneurs & marketers go to learn growth. I'm also the founder of Shopify agency Whole Design Studios.