Cheap Product Photography That Still Looks Great (2026)
Cheap product photography does not have to look cheap. For most ecommerce brands, especially newer Shopify stores, the real goal is not studio perfection. It is getting clear, consistent images that help shoppers trust the product and feel ready to buy. That usually means balancing cost, speed, and visual quality rather than paying for a full commercial shoot on day one. In practice, the strongest low-cost approach is often a mix of simple DIY setup, selective editing, and AI-assisted cleanup for routine catalog images. At AcquireConvert, Giles Thomas reviews ecommerce workflows through a conversion-focused lens as a Shopify Partner and Google Expert. If you need product photos that look credible without stretching margins, this is a practical place to start.
Contents
What Cheap Product Photography Really Means
Cheap product photography is best understood as a cost-controlled workflow, not just the lowest possible price. For ecommerce brands, that can mean using a smartphone, a simple cheap product photography setup, and AI tools to handle background cleanup, lighting correction, or image enhancement after the shoot.
If you are building a lean catalog for Shopify, your first benchmark should be consistency. Shoppers care more about seeing the product clearly than knowing whether you used a full-service studio in Toronto, Vancouver, Brisbane, Nottingham, or Edmonton. If every image has matching angles, clean backgrounds, and accurate color, your store will usually look more trustworthy than a brand with expensive but inconsistent photos.
For a broader view of category strategy and image quality standards, see our guides to ecommerce tools and ecommerce photography. If you also sell on marketplaces, image rules often get stricter, so our guide to amazon product photography is worth reviewing too.
The lowest-cost path usually works best for simple products such as home goods, cosmetics, packaged items, and small accessories. It gets harder with reflective, transparent, highly textured, or electronic products, where lighting and color accuracy matter more. That is where a selective use of editing tools can make a meaningful difference.
Low-Cost Ways to Improve Product Images
The most practical cheap product photography workflow usually combines basic capture with post-production. Based on current product data, ProductAI offers several tools that fit this model.
AI Background Generator can help create alternative settings for product images when you want more than a flat white background. This is more useful for lifestyle-style assets, social creatives, or secondary gallery images than for strict marketplace compliance.
Free White Background Generator is a stronger fit for core catalog needs. White background images remain standard for many ecommerce categories because they look clean, reduce distractions, and work well across collection pages. This can help merchants avoid manual cutout work for routine images.
Increase Image Resolution is relevant if your source photos are usable but slightly soft or too small for modern themes. It will not replace a truly sharp original, but it may help rescue images that are close enough for product page use.
Remove Text From Images is useful when supplier photos contain labels, watermarks, or promotional overlays that make a store look inconsistent. That said, you still need permission to use and edit source images.
Background Swap Editor, Place in Hands, Magic Photo Editor, and Creator Studio are more creative options. These could be useful if you need quick variations for ads, product photography video storyboards, or lightweight merchandising content without organizing a full reshoot.
For merchants comparing alternatives to a physical setup, a mockup generator may also help with certain product categories, especially when you need fast concept visuals rather than traditional photography. If you are deciding between DIY and outsourcing, our guide to a product photography studio can help frame that tradeoff.
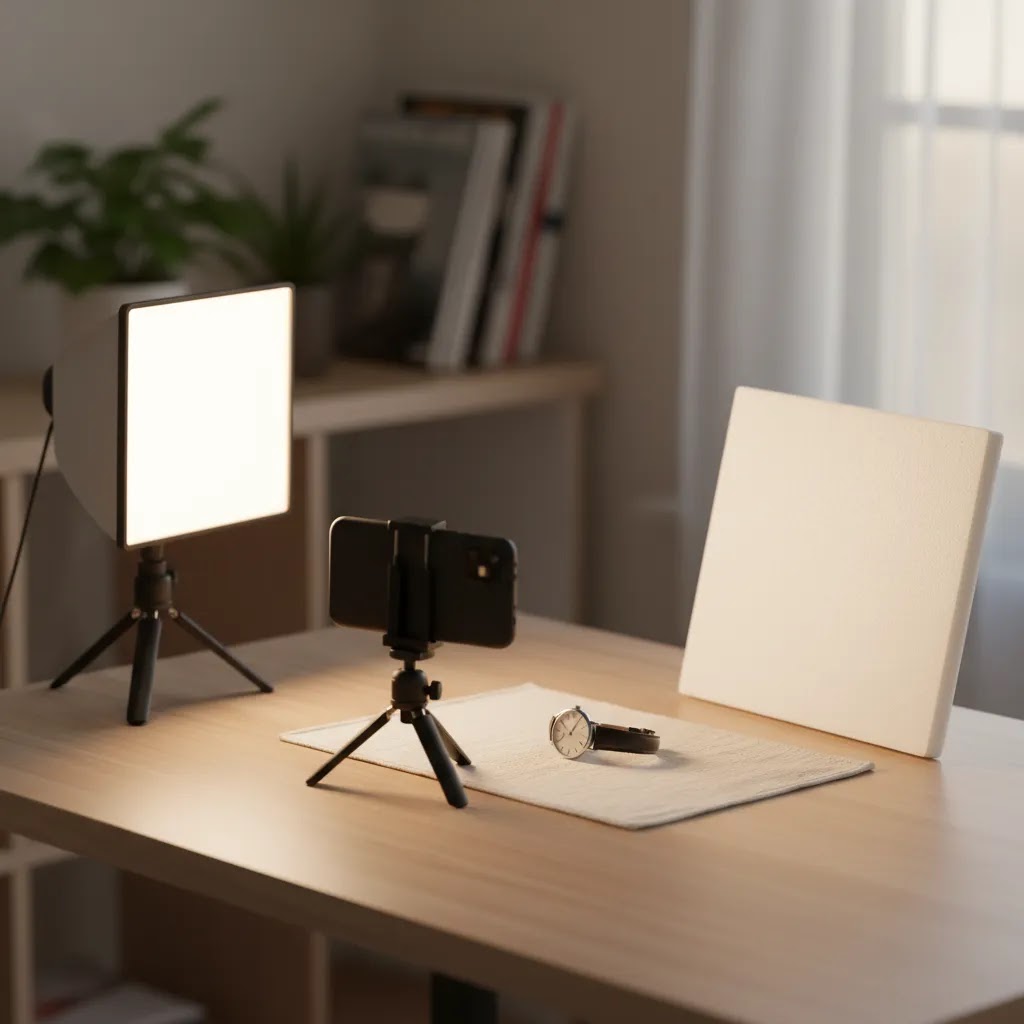
Cheap Product Photography Setup Checklist (What Actually Makes a Difference)
Here is the thing, most “cheap product photography” problems are not caused by your camera. They come from inconsistent lighting, a distracting background, and a wobbly shooting position. If you fix those three, your Shopify catalog will usually look dramatically more professional, even if you are shooting on a phone.
From a practical standpoint, a minimal starter kit looks like this:
Now, when it comes to the camera itself, consistency beats “fancy” for Shopify catalogs. A product photography tripod helps you lock in the same framing for every product, and it reduces blur that makes images look low quality. If you are using a phone, turn on gridlines, keep the lens at a consistent distance, and avoid shooting too close with an ultra wide lens. Wide lenses can distort products, especially on the edges of the frame. If your phone has a 2x option, that often creates a more natural look for many products because you can step back and keep proportions cleaner.
Lighting is where cheap product photography can either look great or fall apart. Window light is usually the best “starter” option, as long as it is soft and consistent. Place the setup next to a bright window and diffuse the light if it is harsh. A thin white curtain can work, and in a pinch a clean white shower curtain can soften shadows. The big mistake is mixing color temperatures. If you are using daylight from a window, turn off warm indoor bulbs nearby. Mixed lighting makes white backgrounds look yellow in some spots and blue in others, and it creates a lot of cleanup work later.
If you need more control than a window gives you, a basic two light setup with matching LED panels can be a reliable next step. Use the same type of light on both sides, diffuse them, and aim for even coverage. You are not trying to eliminate shadows completely. You are trying to make them soft and predictable so your product still has shape.
Pricing and Costs
Current product data provided here includes tool names and URLs, but it does not include confirmed pricing tiers or review ratings for these tools. Because AcquireConvert does not invent pricing, the safest conclusion is that you should treat costs as quote-based, usage-based, or to-be-confirmed directly on the provider site before committing.
That matters if you are trying to keep product image production lean. A low-cost workflow usually has four cost buckets:
For many smaller stores, the best financial move is to avoid overspending on the first shoot. Start with hero images for top sellers, then improve the rest of the catalog once you know which products attract traffic and convert. If you want a category-level view of what good images should include, review Product Photography Fundamentals and the main E Commerce Product Photography category.
If you use AI-assisted tools, remember that the subscription cost is only one part of the equation. You still need time for quality control, especially for color accuracy, edges, shadows, and texture. Results will vary based on your source images.
DIY Shooting Workflow, Step by Step (Prep to Export)
What many store owners overlook is that “cheap product photography” gets easier when you treat it like a repeatable production line. You want a process you can run the same way every time, even if you are shooting once a month as new inventory lands.
A simple workflow that works for most Shopify catalogs looks like this:
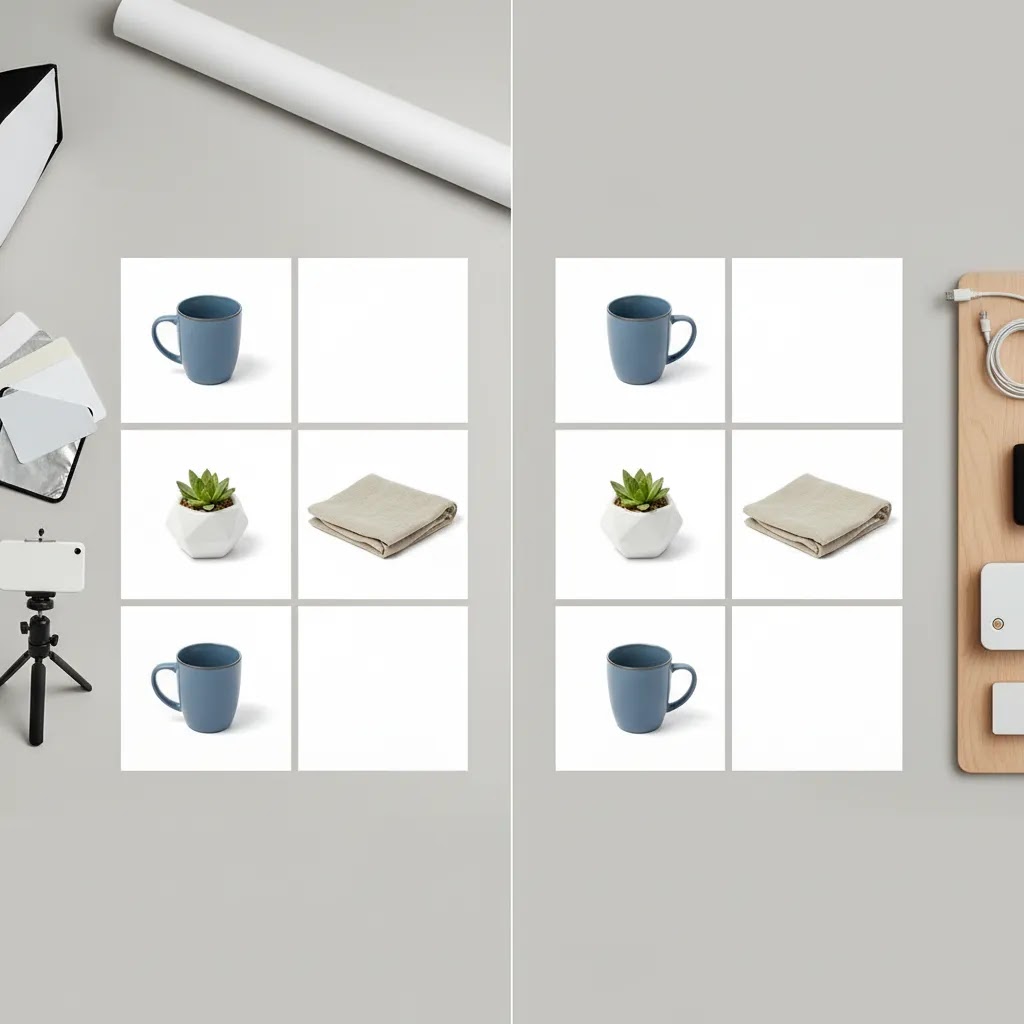
Composition does not need to be complicated, but it does need to be consistent. Keep your camera height consistent so products do not look like they were shot from random angles. Keep horizons straight. Leave a little space around the product so Shopify zoom can work without cutting off edges, and so you can crop consistently across variants. If your product has multiple colors or styles, shoot them with the same framing so your collection pages look tidy.
Once you get into editing and export, ecommerce file handling matters more than people expect. Shopify will accept different aspect ratios, but your theme and collection grids often look best when you commit to one format across your catalog. Many stores choose square for consistency, while some prefer 4:5 to fill more mobile screen space. Pick one, then stick to it.
For resolution, you typically want images that still look sharp on high density screens. The exact best size depends on your theme, but avoid uploading tiny files that look soft when shoppers zoom. Compress images so they load fast, but do not crush them so much that you get artifacts around edges and text. Name files in a way you can search later, for example product-name_color_front, product-name_color_detail-1, and keep variants organized so you do not accidentally upload the wrong colorway to the wrong product in Shopify.
Trust and Credibility
When you cut product photography costs, the biggest risk is not always visual quality. It is trust. If the image looks misleading, overedited, or inconsistent with the actual product, conversion rate and return rates may both suffer.
That is why the right cheap product photography service or workflow needs guardrails. Use AI editing for cleanup, not deception. Keep product shape, scale, and color realistic. If you sell apparel, beauty, or electronics, show enough angles and detail shots that customers can evaluate what they are buying.
AcquireConvert approaches this from a practical ecommerce perspective. Giles Thomas brings Shopify Partner and Google Expert experience, which matters because product images affect more than aesthetics. They shape click-through from search and shopping surfaces, product page trust, and ultimately whether your traffic turns into sales. The goal is not to create the fanciest image set. It is to create photos that support purchase decisions without draining time or margin.
When Cheap Stops Being Good Value (and When to Outsource)
The reality is that cheap product photography is not always the lowest cost option long term. If you are spending hours fighting inconsistent lighting, doing constant reshoots, or correcting color, you may be paying in time and opportunity cost.
DIY usually becomes a bottleneck when one of these shows up:
Consider this, outsourcing does not have to mean a huge expensive shoot. A cost controlled approach is to scope a small project with clear requirements. Provide a shot list, define your backgrounds, specify the required angles, and share basic style rules like framing, crop consistency, and how bright the background should be. If you are selling on Shopify and running paid ads, ask for consistency across the whole set, not “one amazing hero” and a bunch of uneven extras.
An approval process matters too. Ask for a small test set first, approve the look, then have the provider finish the rest. That simple step can prevent you from paying for a full batch that does not match your store.
To decide if paying for a shoot is justified, tie it back to acquisition and conversion realities. Product images affect click-through rates in shopping feeds and ads, time on page, add to cart behavior, and returns when customers feel surprised by what arrives. It depends on your category and traffic, but if you are already spending meaningful money on Google Ads or Meta, stronger images may make that spend work harder. On the flip side, if you have low traffic and you are still validating product market fit, DIY images that are clear and consistent are often good enough until you know what actually sells.
Pros and Cons
Strengths
Considerations

Who This Approach Is Best For
Cheap product photography is best for early-stage ecommerce brands, solo founders, and lean in-house teams that need speed and acceptable quality more than custom art direction. It is especially suited to stores launching a new catalog, testing demand, or refreshing product pages without committing to a high-end agency shoot.
It is a weaker fit for luxury brands, highly tactile products, premium beauty, and categories where precise finishes matter. In those cases, low-cost photography can still work for secondary assets, but hero imagery may need a more controlled setup or professional service.
How to Get Started
Start with one product, not your whole catalog. Set up near a window or use two matching lights, place the product on a clean white sweep, and stabilize your phone or camera with a tripod. Shoot a front view, side view, detail shot, and scale reference if needed.
Next, clean up the image. If the background is uneven, test a white background tool first. If the image is a bit soft, evaluate whether resolution enhancement improves it enough for product page use. Keep edits conservative.
Then upload the images to one Shopify product page and review them on desktop and mobile. Check whether the product feels clear, believable, and consistent with the rest of your store. If this improves the page without slowing your workflow, repeat the process for your next 10 best sellers.
If your catalog needs more variation for ads or merchandising, test creative tools like background swapping only after your core catalog shots are solid. Your first job is clarity. Style comes second.
Frequently Asked Questions
What is the cheapest way to do product photography for ecommerce?
The cheapest reliable option is usually a DIY setup with natural light or basic LEDs, a simple backdrop, and a tripod, followed by light editing. That keeps fixed costs low while still giving you control over consistency. For many stores, this is enough for initial product launches and catalog testing.
Can cheap product photography still help conversion rates?
Yes, if the images are clear, consistent, and accurate. Good low-cost photography can support trust and reduce hesitation on product pages. It does not need to look luxurious to be effective. What matters most is whether shoppers can understand the product quickly and confidently.
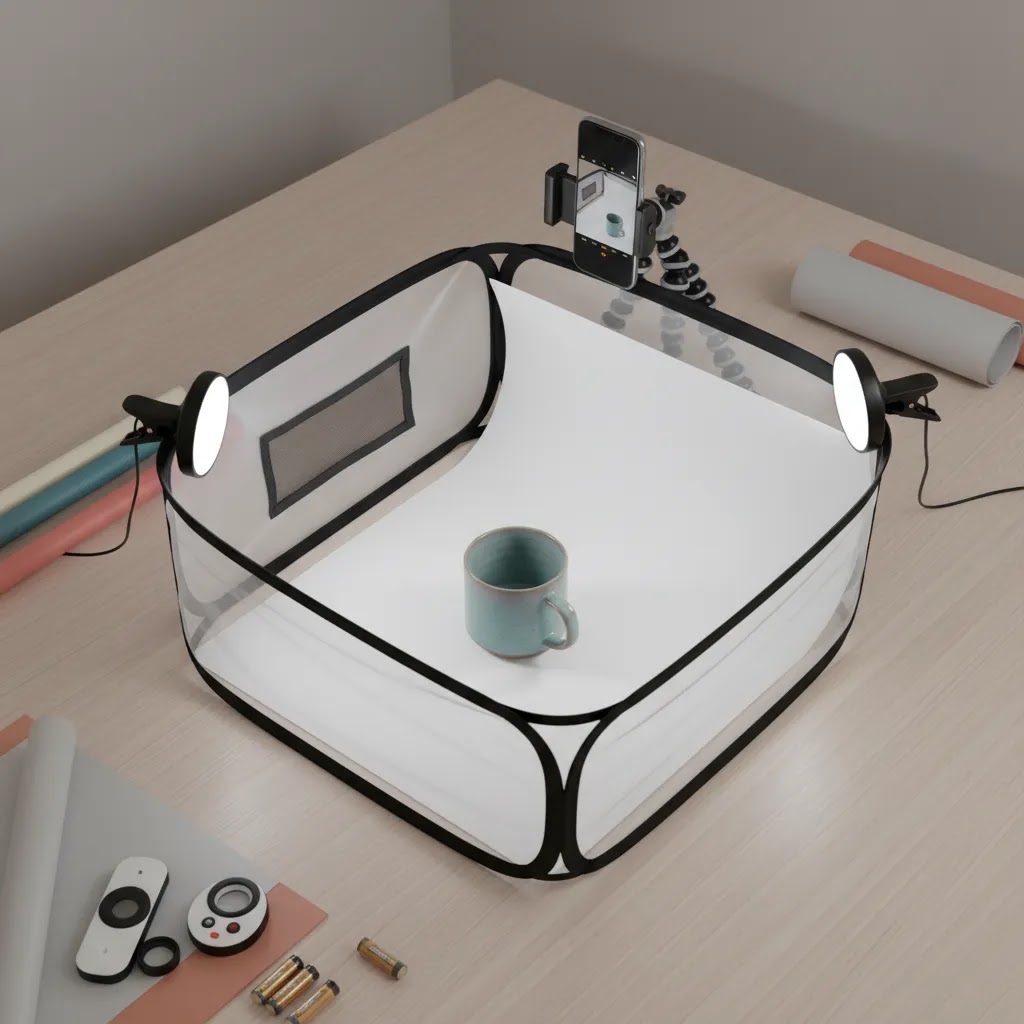
Should I use a product photography tent?
A product photography tent can help with small items, especially if you struggle with harsh shadows or inconsistent backgrounds. It is most useful for simple catalog shots. For larger products or lifestyle images, it becomes less practical and may make everything look flat if lighting is not balanced well.
Are AI product photo tools worth it for a small store?
They may be worth it if they save time on repetitive tasks like background cleanup or basic image enhancement. They are less valuable if your original photos are poorly lit or out of focus. AI tools usually work best as a finishing layer on decent source images, not a replacement for sound photography basics.
What about location-based services like product photography Toronto or product photography Vancouver?
Local providers can be useful if you want hands-on support, physical sample handling, or a quick turnaround. The main question is not the city. It is whether the provider understands ecommerce image requirements, consistency across SKUs, and the level of editing your store actually needs.
How do I photograph electronics on a low budget?
Electronic product photography is harder because reflective surfaces, screens, and dark finishes show flaws quickly. Use diffused light, keep the camera stable, and clean the product carefully before shooting. You may save money overall by using DIY for secondary angles and outsourcing only the main hero images.
Can I use mockups instead of real product photos?
Sometimes, especially for concept validation, pre-launch pages, or certain print-based products. But real photos are usually better for trust once you are actively selling. If you use mockups, make sure they reflect the actual product closely and do not create false expectations about texture, scale, or finish.
How much does a product photo shoot cost?
It depends on what you are shooting, how many products you need photographed, and how consistent you need the set to be. A small shoot with a simple background and a defined shot list is usually cheaper than lifestyle photography with props, models, and complex retouching. If you are comparing providers, ask how many final images you get per product, what level of retouching is included, and how revisions work.
How much does product photography cost?
Costs usually come down to a mix of time, complexity, and volume. Simple pack shots on white are typically cheaper than reflective items, apparel on model, or images that require precise color matching. If you want a cost controlled result, reduce variability: keep backgrounds consistent, limit the number of angles to what customers actually need, and standardize cropping.
How to take good product photos on a budget?
Focus on repeatability. Use one lighting approach you can control, keep the camera stable with a tripod, use a clean sweep background, and shoot every SKU with the same angles and framing. Then do minimal edits for brightness, color accuracy, and background cleanup. If you change lighting, framing, and editing style from product to product, the catalog will look messy even if individual photos are “good.”
What is the 20 60 20 rule in photography?
People use this as a simple way to think about where image quality comes from. In many ecommerce setups, you can treat it as: around 20 percent is your camera, around 60 percent is lighting and setup, and around 20 percent is editing. The exact numbers are not universal, but the lesson is practical. If you only spend on a better camera and ignore lighting, background, and stability, your images may not improve much.
Key Takeaways
Conclusion
Cheap product photography is a smart option for many ecommerce brands, as long as you stay disciplined about image quality. You do not need a premium studio from day one to create photos that support trust and sales. You do need a repeatable setup, realistic editing, and a clear standard for what belongs on your store. For most merchants, that means starting with clean catalog images, using AI tools carefully, and improving only where the return is likely to justify the effort. If your products are simple and your margins are tight, begin with a lean workflow this week. If your category is visually demanding, use low-cost methods for testing and reserve higher-end production for your most important listings.
Disclosure: AcquireConvert may receive affiliate compensation from some third-party links mentioned in its content. Product and pricing details should always be verified directly with the provider before purchase. Any performance impact from product photography or image tools may vary based on your store, niche, traffic, product category, and how well the images are implemented.

Hi, I'm Giles Thomas.
Founder of AcquireConvert, the place where ecommerce entrepreneurs & marketers go to learn growth. I'm also the founder of Shopify agency Whole Design Studios.