Cosmetic Product Photography (2026 Guide)
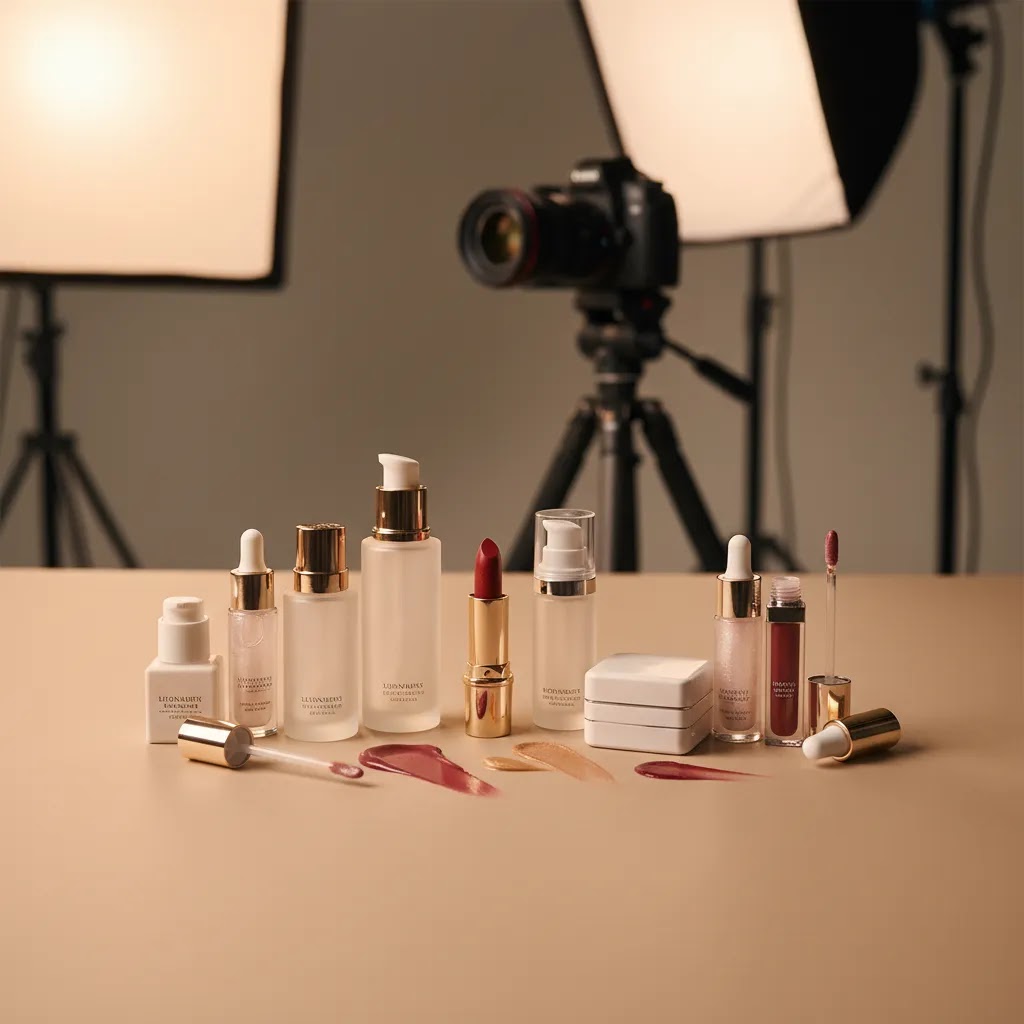
Cosmetic product photography has to do more than look attractive. It needs to show color, texture, finish, packaging detail, and shelf appeal in a way that helps shoppers trust what they are buying online. For beauty brands on Shopify, strong visuals can support product page clarity, paid ad creative, email campaigns, and social content at the same time. That is why cosmetic shoots need a different standard than general packshots. You are often selling tiny differences in shade, gloss, applicator shape, or premium feel. If you are building your visual workflow, it helps to understand how beauty imagery fits into wider ecommerce tools and conversion decisions. This guide covers what matters most, where brands get it wrong, and how to choose a setup that fits your store stage.
Contents
Why Cosmetic Product Photography Matters
Beauty shoppers are detail shoppers. They zoom in, compare shades, inspect labels, and judge whether a product feels clinical, premium, playful, or natural before they ever read the ingredients list. Good cosmetic product photography reduces uncertainty. It can also make product pages easier to scan and improve consistency across your catalog.
For ecommerce brands, beauty imagery usually needs to cover several jobs at once. You need clean white background shots for collection pages and marketplaces, close-ups for texture and applicators, styled images for brand storytelling, and cropped assets for ads or email. That mix is why cosmetic product photography works best when it is planned as a system, not as a one-off shoot.
Beauty founders often borrow ideas from amazon product photography because marketplace standards force clarity and consistency. That is useful, but direct-to-consumer brands usually need more storytelling than Amazon listings allow. A better model is to combine marketplace discipline with the brand feel of modern ecommerce photography. For a broader topic hub, you can also review AcquireConvert’s Cosmetics Photography and E Commerce Product Photography sections.
Key Elements of Beauty Product Images
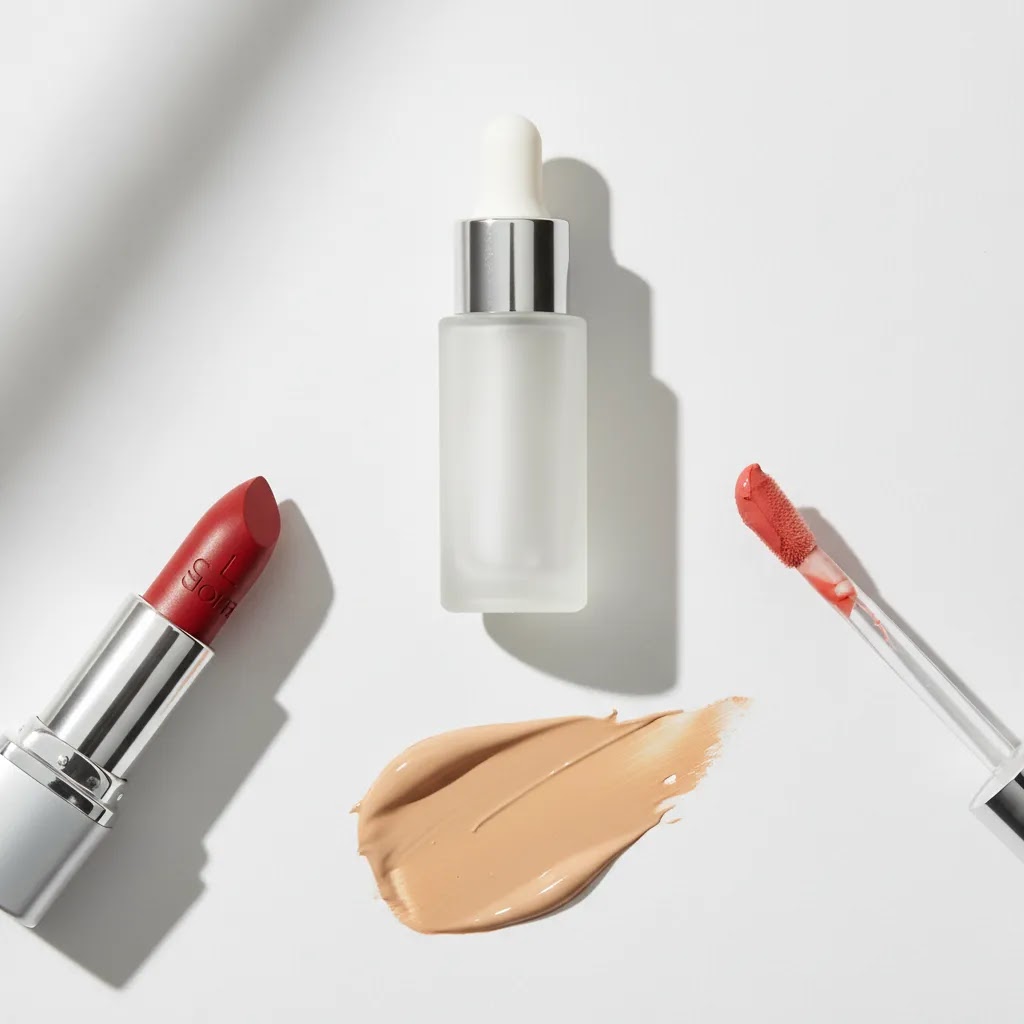
Packaging accuracy comes first. If your serum bottle has a frosted finish, metallic cap, embossed logo, or reflective pump, those details need to appear true to life. Beauty buyers notice packaging quality fast, and inaccurate lighting can make premium products look flat or low value.
Color fidelity is especially important for makeup. Lipstick, foundation, blush, and eyeshadow all create return risk if shades look off. Even skincare benefits from accurate color because consumers associate tone with ingredients, freshness, and texture. This is where controlled lighting, white balance, and consistent editing matter more than decorative props.
Texture storytelling helps convert interest into intent. Cream smears, serum droplets, powder spills, and swatch-style detail images can communicate finish far better than a plain front-facing packshot. Used well, these images answer common pre-purchase questions without adding more copy to the page.
Format variety is another practical requirement. Most beauty brands need at least:
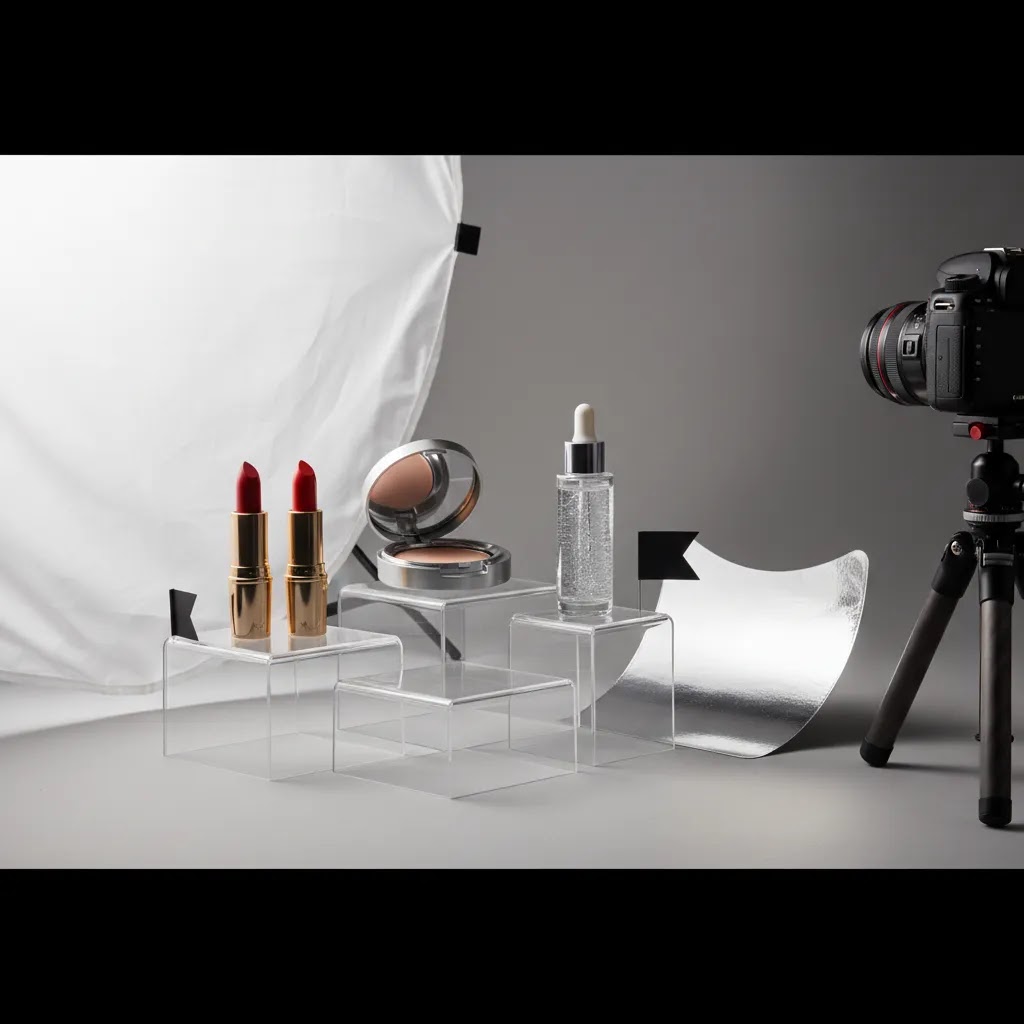
If you are producing assets in-house, a tripod and repeatable setup matter more than expensive gear. A stable camera position helps maintain scale and alignment between SKUs, especially if you are adding new variants over time. If you outgrow your home setup, working with a dedicated product photography studio may make sense, particularly for reflective packaging or large seasonal campaigns.
AI tools can also help with post-production and asset variation. Based on current AcquireConvert product data, useful options include AI Background Generator, Free White Background Generator, Increase Image Resolution, Background Swap Editor, and Magic Photo Editor. These can help with alternate backgrounds, cleaner marketplace-ready shots, or resizing workflows, but they still work best when your original photos are well lit and sharply composed.
Lighting and Reflections for Glossy, Metallic, and Transparent Packaging
Here is the thing, most cosmetic packaging is basically a mirror in disguise. Gloss tubes, metallic caps, foils, compacts, pumps, and even “matte” frosted bottles will pick up reflections from your room, your camera, and anything bright nearby. That is why two shots taken with the same camera can look completely different depending on how you shape the light.
From a practical standpoint, you are usually not trying to “remove” reflections. You are trying to control them so they describe the product in a clean, premium way. That means bigger, softer light sources, careful angles, and a few simple tools to block unwanted glare.
A practical lighting setup for cosmetics (diffusion first)
Small lights create hard highlights. Hard highlights are what make caps look blown out and labels look patchy. The fix is almost always diffusion. You want the product to “see” a large, soft white surface, not a bare bulb or tiny LED panel.
A simple setup many Shopify brands can build on a tabletop looks like this:
If you have a light tent, it can speed up consistency, especially for small SKUs. If you do not, a diffusion panel or even a large white curtain material clipped in front of your light can get you most of the way there. The key is that the diffusion surface should be close enough to the product to look “big” in the reflections.
Reflection control tactics that actually work
What many store owners overlook is that reflections follow angles. If the camera can see it, the product can reflect it. That is why you sometimes get a bright stripe across a cap, a window reflection in a compact, or a messy reflection that makes a bottle look scratched.
These tactics are simple but make a big difference:
For metallic caps and foils, you are usually aiming for smooth gradients, not bright hotspots. If you see a blown-out patch on a cap, your light is probably too small, too close without enough diffusion, or coming in at an angle that bounces straight into the lens.
Transparent and translucent packaging (serums, glosses, bottles)
Transparent packaging is where things get tricky because you are lighting both the surface and whatever is inside it. The goal is to keep the liquid looking clean, the label readable, and the bottle edges defined.
Consider this:
When you are shooting multiple variants, consistency is the real win. A reflection that is slightly imperfect but consistent across the range will typically feel more trustworthy on a Shopify collection page than images where each bottle has different glare and different contrast.
Pros and Cons
Strengths
Considerations
Who This Approach Is For
This approach fits beauty brands that want images to do more than fill a product page slot. It is especially relevant if you sell skincare, makeup, haircare, or wellness products where customers compare texture, finish, applicators, or premium packaging details before buying.
It is a good fit for Shopify merchants who are moving beyond simple supplier photos and want a more conversion-aware content system. It also suits growing brands preparing for retail outreach, marketplace expansion, or higher-volume paid media where consistent creative matters. If you only need a few temporary images for validation, a simpler setup may be enough. But if your catalog is expanding, a repeatable photography workflow becomes far more valuable.
AcquireConvert Recommendation
At AcquireConvert, the practical view is to treat cosmetic product photography as part of your conversion system, not a design-only task. Giles Thomas brings a Shopify Partner and Google Expert perspective to this because product visuals affect product page trust, Shopping click quality, creative testing, and how efficiently you can scale campaigns. For most beauty brands, the winning setup is a hybrid one: nail the core packshots first, add a few texture and lifestyle assets, then use tools selectively for faster variations.
If you want another practical next step, review our page on using a mockup generator for presentation workflows and campaign concepts. That can be useful when planning pre-launch pages, bundle visuals, or creative tests before a full shoot. The goal is not to chase visual trends. It is to build image sets that help real shoppers make confident buying decisions.
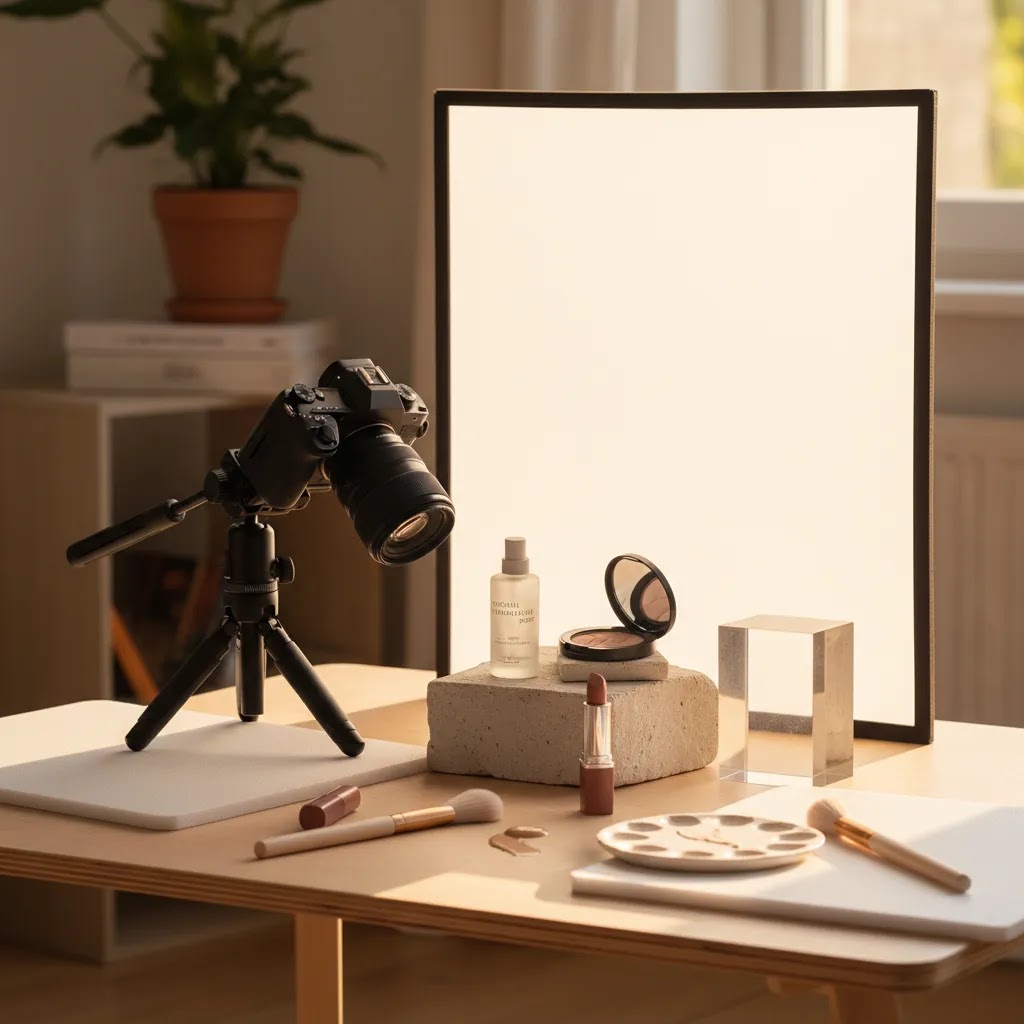
At-Home Cosmetic Product Photography Tutorial (Tabletop Workflow)
If you are shooting in-house, the way this works in practice is simple: you want a repeatable workflow that produces consistent files for Shopify, not just one good-looking image. Most of the “quality gap” in beauty photography comes from prep and consistency, not from buying a new camera.
Step 1: Prep the products like you are shooting macro
Cosmetics photography is unforgiving because packaging is small and shoppers zoom in. Before you set up the lights, do a quick prep pass:
This is the boring part, but it is usually what separates a clean “brand level” image from something that feels homemade.
Step 2: Lock your camera position for repeatability
Set your tripod up and treat it like a fixture. Mark your tripod feet position on the table with tape. If you are shooting multiple products at the same height, mark the product position too so every bottle sits in the same spot.
For Shopify catalogs, consistent angle and scale matter because customers compare products in collection grids and on variant switch. A small shift in camera height can make the same bottle look like a different size.
Step 3: Use simple settings that prioritize sharpness and color
Camera settings depend on your exact lighting and camera, but cosmetics generally benefit from the same priorities: sharp labels, clean edges, and controlled noise.
If you are using a phone, the same principles apply. Stabilize it, lock focus and exposure, and avoid mixed lighting that can shift color.
Step 4: Build a shot list that maps to your Shopify product page
Most Shopify stores get better results when they standardize image order across products. Use a shot list that matches how people browse:
If you sell shades, add a consistent shade lineup image. That can reduce friction because it gives shoppers one place to compare the range.
Step 5: Post-shoot workflow that keeps your catalog consistent
Editing is where catalogs drift. A quick workflow helps you keep consistency across launches:
Tools like background generators or background swap editors can help you version assets faster, but you still want a consistent base edit before you create variations. AI outputs should be reviewed before publishing, especially for labels and color critical products.
How to Choose Your Photography Approach
If you are deciding whether to shoot in-house, work with a studio, or mix both, focus on these criteria.
1. Product complexity
Simple matte bottles or cartons are much easier to shoot than mirrored compacts, translucent gloss tubes, or metallic pumps. The more reflective and detailed the packaging, the more likely you are to benefit from controlled studio lighting or outside support.
2. Catalog size and launch frequency
If you release products often, speed and repeatability matter. A documented in-house setup with fixed camera position, lighting marks, and editing presets may be enough. If launches involve multiple shades, gift sets, or retailer deadlines, outsourcing parts of production could save time.
3. Channel requirements
Shopify PDPs, Meta ads, Google Shopping, Amazon, and email headers all need different crops and image priorities. Choose a workflow that captures enough flexibility at the shoot stage. This is one reason beauty brands often regret planning only one hero image per SKU.
4. Post-production capacity
Editing is where many brands get bottlenecked. If your team is small, tools such as a white background generator, resolution enhancer, or background swap editor may help with production efficiency. They are most useful for versioning and cleanup, not for rescuing poorly shot originals.
5. Brand position and conversion goals
A clinical skincare brand may need crisp, minimal, trust-building imagery. A color cosmetics brand may need bolder styled setups and stronger texture storytelling. Your imagery should match the type of buying decision you are asking the customer to make. If the page needs to explain ingredients and efficacy, keep visuals clean and informative. If discovery and desire are the priority, use more creative compositions carefully.
A practical starting framework looks like this:
That gives you a balanced set for ecommerce without overproducing. If results are strong, expand into campaign-specific concepts later.
Styling and Composition Ideas for Cosmetic Product Photography
If you want creative cosmetic product photography that still works for ecommerce, you need repeatable setups. The goal is not one perfect campaign image. It is a system you can reuse across launches so your Shopify store looks consistent and your creative testing is faster.
Repeatable cosmetic product photography ideas you can reuse
These are practical setups that work across skincare, makeup, and haircare, and they are simple to scale across a product range:
Think of these as building blocks. You can rotate through them across campaigns so your content feels fresh without reinventing your whole process every time.
Composition techniques that make images more usable for ads and Shopify
Good styling is not just about props. It is about making the image flexible across crops and placements.
For most Shopify store owners, the biggest win is building a consistent “visual language” so your collection pages feel cohesive, even when products are shot at different times.
Prop selection rules for beauty (what helps, what hurts)
Cosmetic product photography props work best when they reinforce texture, finish, or usage. They hurt when they pull attention away from the SKU or create confusion about what is included.
Props that usually work well for beauty:
The reality is that restraint wins in ecommerce. If a prop could be mistaken for a product, or if it competes with the packaging color, it is probably too much. Keep the product label legible and the product shape clear, then let the styling add mood in the background.
Frequently Asked Questions
What is cosmetic product photography?
Cosmetic product photography is the practice of photographing beauty products such as skincare, makeup, haircare, and wellness items for ecommerce, ads, marketplaces, and brand campaigns. It usually combines clean packshots with detail, texture, and lifestyle images so customers can assess both the product and the brand presentation before buying.
Why is cosmetic photography harder than general product photography?
Beauty products often include reflective surfaces, small packaging details, transparent materials, and color-sensitive formulas. Those details make lighting, white balance, and retouching more demanding. A lipstick tube or serum bottle can look completely different depending on reflections, highlights, and background tone, so precision matters more than it might for basic household products.
What images should a beauty brand include on a product page?
Most beauty brands benefit from a white background hero image, an angled view, a close-up of packaging or applicator, and a texture or swatch image. A lifestyle image can help communicate brand positioning. If you sell on multiple channels, build your image set so it can also support ads, email, and marketplace requirements without needing a separate shoot.
Do I need a product photography tripod for cosmetics?
In many cases, yes. A tripod helps you keep framing, scale, and focus consistent across SKUs, which is especially useful for beauty collections with multiple variants. It also reduces blur in lower-light setups and makes repeat shoots easier. For growing catalogs, consistency usually matters more than buying extra camera gear too early.
Can I do cosmetic product photography at home?
Yes, many early-stage beauty brands start at home with a controlled tabletop setup, simple lighting, and a tripod. That can work well for white background images and basic detail shots. The challenge appears when you need strong consistency, reflective packaging control, or larger campaign volumes. At that point, hybrid or studio support may become the better option.
Are AI tools useful for cosmetic product photography?
They can be useful for background cleanup, white background conversion, resolution improvement, and versioning images for different channels. Based on current tool data, examples include AI Background Generator, Free White Background Generator, Increase Image Resolution, Background Swap Editor, and Magic Photo Editor. These tools are helpful, but they still depend on solid original photography for the best results.
What are good cosmetic product photography ideas?
Effective ideas usually tie back to the product itself. Think serum droplets for hydration messaging, powder spills for color cosmetics, ingredient-led props for natural skincare, or clean reflective surfaces for premium branding. The strongest concepts support product understanding first and style second. That balance usually works better for ecommerce than purely decorative scenes.
Should I use props in cosmetic product photography?
Props can work well when they clarify ingredients, mood, or usage context. They are most effective when they support the product rather than compete with it. For ecommerce pages, keep props restrained and make sure your clean packshots remain the priority. Decorative setups are useful, but they should not replace the clear informational images shoppers rely on to buy.
How many photos do I need per cosmetic product?
For most Shopify beauty stores, four to six images per SKU is a practical starting point. That is usually enough to cover front view, angle, detail, texture, and one branded context shot. Shade-heavy makeup lines may need more. The right number depends on complexity, but too few images often creates avoidable hesitation during the buying process.
How do you photograph makeup so the color is accurate?
Start with controlled, consistent lighting and avoid mixed light sources, for example daylight from a window plus warm indoor bulbs. Set a consistent white balance and keep it the same across the whole shoot. If you are shooting shades, photograph them as a set so your edits stay consistent between variants. Keep editing restrained, because heavy contrast or color grading can shift undertones and create mismatch with what customers receive. If you use AI tools for cleanup, review outputs carefully since subtle hue changes can happen and may not be obvious until you compare variants side by side.
What background is best for cosmetic product photography?
For ecommerce and marketplaces, a clean white background is the most versatile starting point because it supports consistency and makes products easy to scan on Shopify collection pages. For styled images, choose backgrounds that match your brand position, for example tile or stone for clinical skincare, soft fabric for gentle wellness, or glossy surfaces for premium. Whatever you choose, keep background texture and color subtle enough that labels remain readable and the packaging color stays accurate.
What camera settings are best for product photography (cosmetics specifically)?
Cosmetics usually benefit from settings that prioritize sharp labels and clean gradients. Use a tripod, keep ISO low when possible, and use an aperture that keeps the whole label in focus rather than just the front edge. Use a timer or remote to reduce shake, and keep your white balance consistent across the shoot so shade and packaging color do not drift from image to image. Exact values vary by camera and lighting, so test on one SKU, then lock the setup for the full range.
How do you photograph shiny products without glare?
Use a larger light source created through diffusion, then adjust angles so hotspots do not bounce straight into the lens. Control reflections with black and white cards to shape highlight lines and use flags to block messy room reflections. It often helps to keep lights in fixed positions and rotate the product slightly until the highlights look smooth and the label stays readable. If you still see blown-out patches, increase diffusion, move the light farther back, or change the angle of the product rather than trying to correct everything in editing.
Key Takeaways
Conclusion
Cosmetic product photography is one of the most practical investments a beauty brand can make because it shapes how shoppers judge quality, trust, and fit before they ever test the product. The best approach is usually not the fanciest one. It is the one that gives you consistent, accurate, reusable assets across Shopify, ads, email, and marketplaces. Start with a disciplined image set, build a repeatable process, and add creative complexity once the fundamentals are working. If you want more guidance from a Shopify-focused perspective, explore AcquireConvert’s photography resources and related ecommerce content. Giles Thomas’s experience as a Shopify Partner and Google Expert keeps the focus where store owners need it most: visuals that support clearer merchandising and better buying decisions.
This article is editorial content for educational purposes and is not a paid endorsement unless explicitly stated otherwise. Tool availability and features referenced are based on current AcquireConvert data and may change over time. Pricing was not available in the provided tool data, so no pricing comparisons are included. Results from photography changes, editing tools, or workflow updates may vary by product type, brand positioning, traffic source, and store execution.

Hi, I'm Giles Thomas.
Founder of AcquireConvert, the place where ecommerce entrepreneurs & marketers go to learn growth. I'm also the founder of Shopify agency Whole Design Studios.