Digital Product Photography for Ecommerce (2026)
Digital product photography is no longer just about getting a sharp image. For ecommerce store owners, it is about creating product visuals that load fast, look consistent across collections, and help shoppers feel confident enough to buy. That usually means a repeatable workflow, the right camera settings, and smart post-production choices. If you are building or refining your visual process, it also helps to understand where photography ends and design tools, AI editing, and mockups begin. This guide walks through the settings and workflow that matter most for online stores, with a practical focus on conversion-friendly images. If you are comparing the software and editing side of the process too, AcquireConvert’s guide to ecommerce tools is a useful next step.
Contents
What digital product photography means for ecommerce
For an online store, digital product photography covers the full image creation process: planning, shooting, editing, exporting, and publishing product visuals for product pages, collection pages, ads, marketplaces, and social channels.
That sounds broad, but the ecommerce goal is simple. You want accurate, persuasive images that match shopper expectations. If the product arrives looking different from the photos, returns may rise. If the image quality looks uneven across your catalog, trust can drop before a shopper even reads the description.
In practice, strong digital product photography usually combines three things:
This matters whether you sell apparel, cosmetics, electronics, home goods, or digital downloads shown through a digital product mockup. It also applies if you are creating marketplace images, where requirements for white backgrounds and image dimensions can be stricter. If that is part of your channel mix, it is worth reviewing platform-specific guidance like this article on amazon product photography.
If you need broader strategy around image types, file handling, and merchandising context, AcquireConvert’s ecommerce photography resources cover the wider picture.
Product photography ideas that convert (shot types by product category)
Most Shopify stores do not have a photography problem, they have a coverage problem. The images are often decent, but they do not answer the specific questions shoppers have for that product type. A strong shot list is not just “more angles.” It is the right angles, details, and context for the category.
Consider this: if a shopper cannot tell size, texture, finish, or how something is used, they hesitate. They may bounce, or they may buy and return. The shot types below are a practical menu you can use to build a more conversion-friendly image set.
Electronics and gadgets
Electronics shoppers look for proof. They want clarity on ports, controls, dimensions, and what is included in the box.
For electronic product photography, keep reflections controlled and avoid heavy contrast edits. Shoppers may interpret extreme edits as hiding wear, poor materials, or inaccurate color.
Cosmetics and skincare
Cosmetics are a mix of product and promise. You need to show texture, shade, and packaging quality without misleading on results.
If you use lifestyle images, keep them believable. Overly stylized lighting can shift perceived shade and finish.
Apparel and accessories
Apparel sells on fit and fabric. The most useful image sets reduce uncertainty about sizing, drape, and details.
Now, when it comes to variants, shoppers rely on side-by-side consistency. Try to keep framing, lighting, and background identical across colorways, then use one or two lifestyle images for variety.
Home goods and decor
Home goods need scale and context. A lamp is not just a lamp, shoppers want to know how it looks in a room and how big it really is.
What many store owners overlook is that lifestyle images should still be product-first. The room is a frame, not the subject.
Digital downloads and printable products
Digital products cannot be held, so your job is to make the value tangible. This is where a digital product mockup can be more persuasive than a plain screenshot.
The reality is that clarity prevents support tickets. If shoppers can see what they get, you spend less time answering questions after purchase.
Scale and context: when it matters most
There are a few patterns that show up across almost every category:
From a practical standpoint, keep context images honest and consistent. If you cannot control lighting or styling, use fewer lifestyle images and lean harder on clean catalog shots plus tight details. For some products, strictly catalog style is the better choice, especially when you need consistency across a large collection grid.
How to stay consistent while still adding variety
Consistency is what makes a Shopify collection page feel trustworthy. Variety is what keeps product pages from feeling sterile. You can have both if you set a few simple rules:
Think of it this way: your hero images sell the catalog. Your secondary images sell the product.

A practical settings and workflow framework
The best workflow is the one you can repeat across dozens or hundreds of SKUs. Most store owners do not need a studio-grade production setup on day one. They do need a method that keeps images clean, on-brand, and efficient to produce.
1. Start with the shot list
Before you pick up a camera, define what each SKU needs. A useful base shot list includes:
This prevents missing assets later and makes batch shooting much faster.
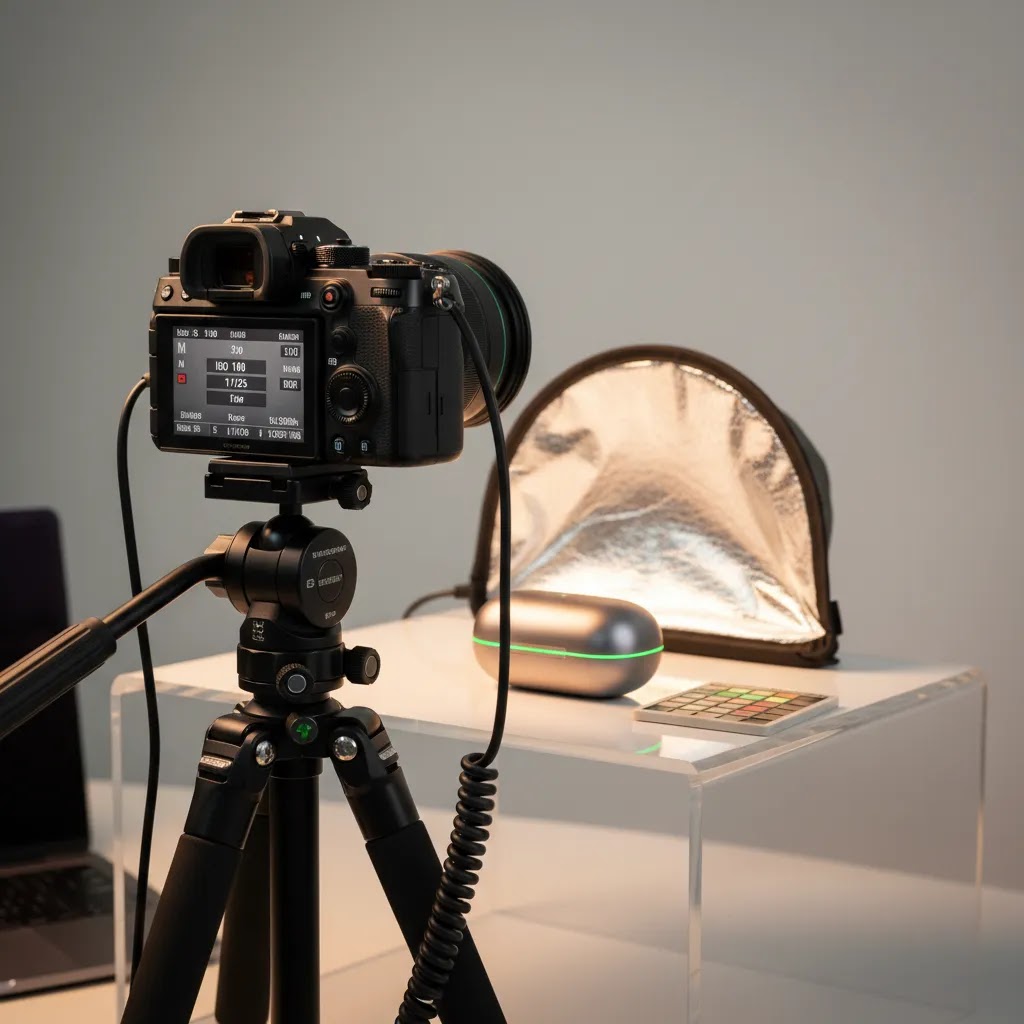
2. Use stable camera settings
For most ecommerce product photography, you want control and consistency over artistic variation. A practical starting point is:
A tripod is one of the most useful upgrades you can make because it helps preserve framing between shots and supports lower ISO settings. This is especially important for electronic product photography, where edges, ports, and reflective materials need clarity.
3. Control the lighting before editing
Good editing cannot fully rescue poor lighting. Soft, even light usually works best for catalog-style images. Use diffused light to avoid harsh shadows and hotspots, especially on glossy packaging, glass, and metal.
If you are shooting small batches in-house, a repeatable tabletop setup can be enough. If your catalog is growing quickly or product complexity is increasing, a dedicated product photography studio setup may save time and improve consistency.
4. Compose for the product page first
Your hero image should prioritize clarity over creativity. Leave enough space for cropping across Shopify themes, collection grids, and mobile layouts. A square or near-square crop often works well for consistency, though your theme and ad placements may call for additional aspect ratios.
Keep styling restrained on hero images. Lifestyle context works well in secondary images, but your main listing image should make the product unmistakable at a glance.
5. Edit in batches
Once the shoot is complete, edit for consistency across the full product set. Your product photography guidelines should cover:
For ecommerce, batch consistency often matters more than making one image look exceptional in isolation.
6. Export for speed and clarity
Large files may hurt load time. Tiny files may weaken perceived quality. Aim for a sensible middle ground based on your theme, zoom feature, and traffic sources. Compress images before upload, and check how they render on mobile, collection pages, and product detail pages.
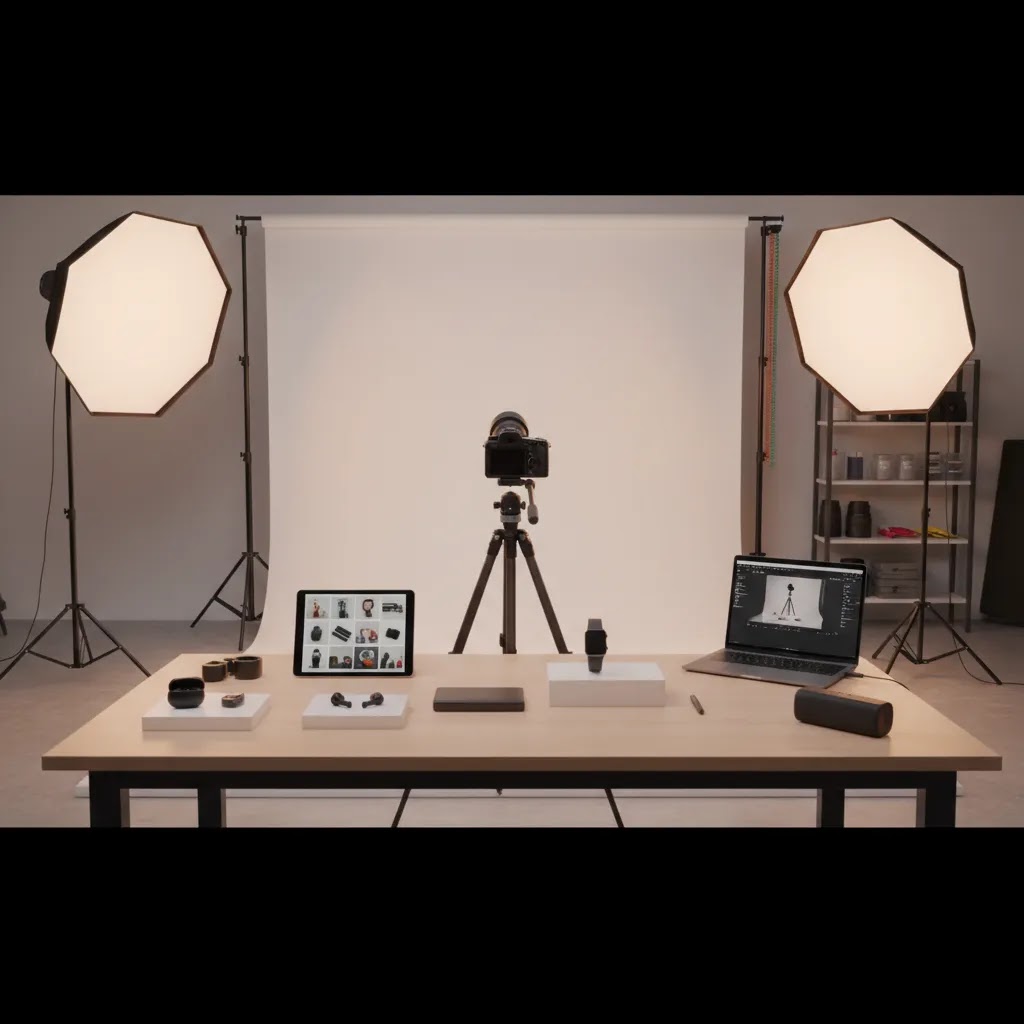
Beginner product photography setup (minimal gear that still looks professional)
If you are early in your workflow, the goal is not “cinematic.” It is clean, consistent, and accurate. For most Shopify store owners, you can get surprisingly far with a minimal setup if you prioritize stability and lighting over fancy camera bodies.
A simple starter kit that covers 90% of needs
Here is what typically matters most, in order:
What many store owners overlook is that consistency beats novelty. If your lighting and background change between SKUs, your collection pages look messy, even if each individual photo is technically sharp.
A basic tabletop lighting layout you can repeat
The way this works in practice is simple. Set your product on a sweep, lock your camera on a tripod, and build your light around the product.
If you batch shoot, mark your tripod position and product placement on the table with tape. That sounds basic, but it is one of the fastest ways to keep framing consistent across a growing catalog.
Fast fixes for the mistakes that make listings look cheap
Beginner product photos usually fail for a few predictable reasons. The good news is that these are easy to correct once you know what to look for.
From a conversion standpoint, clean and accurate beats dramatic. Shoppers tend to trust images that look realistic and consistent more than images that look “edited.”
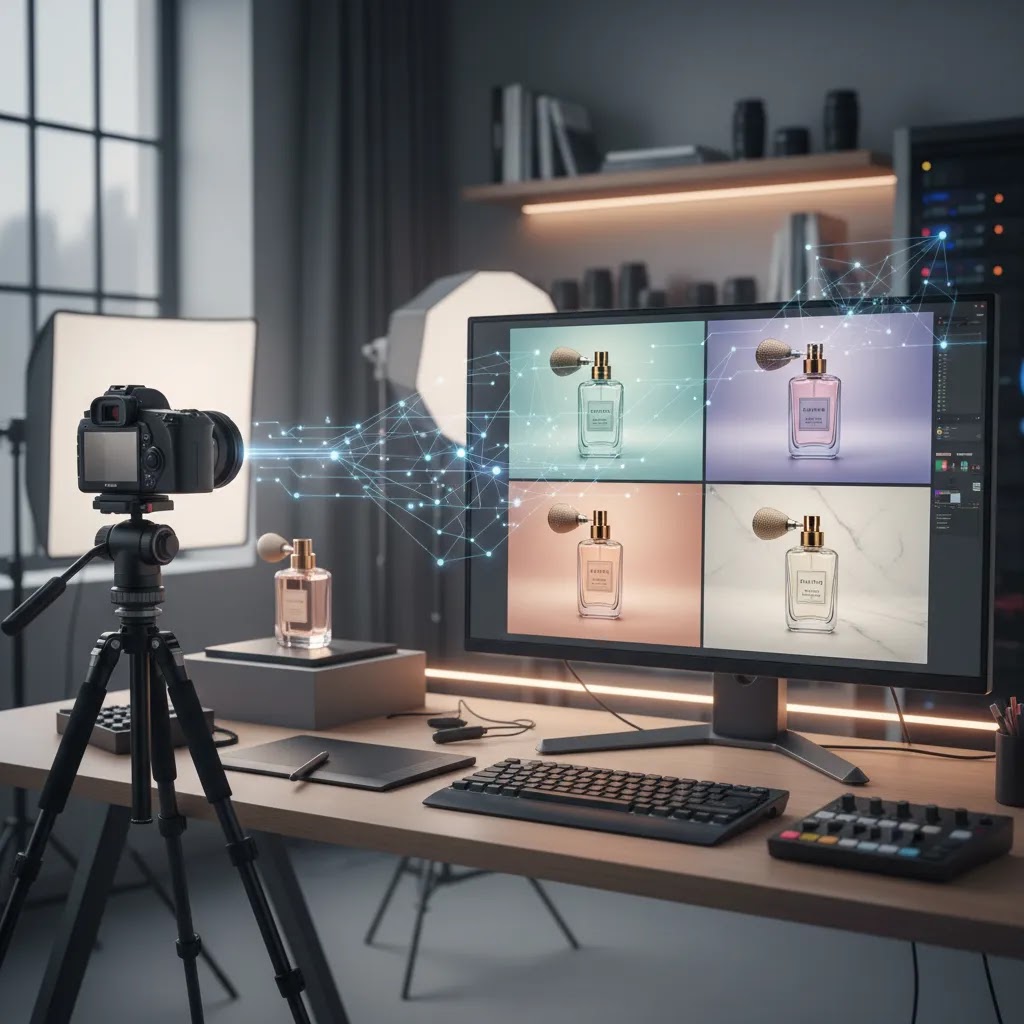
Where AI editing tools fit into the process
AI in digital photography can be genuinely useful for ecommerce, especially in post-production. It is most helpful when it saves repetitive editing time without changing the product itself.
Based on current AcquireConvert tool data, the most relevant options in this workflow are:
The trade-off is accuracy. AI tools can speed up background cleanup, alternate scenes, and mockup-style assets, but you should still keep a verified product-original image set for your PDP. For merchants selling digital downloads or printable goods, this is also where a mockup generator may fit alongside traditional photography rather than replacing it.
If background cleanup is a regular task in your workflow, AcquireConvert’s Background Removal & Editing category is worth bookmarking. You can also browse the broader E Commerce Product Photography category for related guidance.
AI product photography generators and apps: when they help, when they hurt
AI tools can be a real advantage for ecommerce teams, but only if you use them in the right part of the workflow. The safest mindset is “AI as post-production,” not “AI as product truth.” Your Shopify product page is ultimately a trust asset, so accuracy matters as much as aesthetics.
Where AI is usually reliable for ecommerce
AI tends to be most dependable when the edit is clear, bounded, and does not require the model to invent product details. In many cases, AI works well for:
If you treat these as production accelerators, you can often move faster without changing what the customer is actually buying.
Where AI can hurt conversion and create compliance risk
Here is the thing: the failure cases are predictable. AI struggles when it has to interpret materials, logos, and precise geometry. That can create images that look good at a glance but break trust on closer inspection.
Be cautious with AI when it may:
From a practical standpoint, if an AI edit changes anything a customer could reasonably interpret as “part of the product,” you should not use it as a primary product page image.
A practical “AI with guardrails” workflow
If you want to use AI editing without damaging trust, build your process around a verified base image.
This approach also protects you operationally. If you ever need to update listings, change themes, or upload to a marketplace with stricter rules, you still have a clean, trustworthy original set ready to go.
AI product images with models and hands
Model-based AI can be tempting because it creates “lifestyle” fast. It can also go wrong in ways shoppers notice instantly. Hands look unnatural, scale can be off, and the product may appear fused to skin or clothing.
If you use in-hand or on-body AI assets:
AI can still be useful here as a testing tool. You can trial multiple lifestyle contexts for ads, then invest in real shoots for the styles and angles that prove valuable.
Pros and Cons
Strengths
Considerations
Who this workflow is for
This workflow is a strong fit for Shopify merchants, marketplace sellers, and growth-stage ecommerce brands that need more consistency from product imagery but do not necessarily want a fully outsourced production model.
It is especially useful if you are managing frequent product launches, handling your own merchandising, or trying to standardize images across PDPs, collection pages, and ads. It also suits stores experimenting with digital product design assets, digital product mockups, or 3d digital photography concepts while still needing a trustworthy base image library.
If your team is small, the main benefit is operational clarity. Everyone follows the same settings, framing rules, and export standards. That usually leads to fewer reshoots and less time spent fixing inconsistent listings later.
How to choose the right workflow for your store
There is no single best setup for every merchant. The right digital product photography process depends on your catalog, margins, team size, and sales channels. Here are the criteria that matter most.
1. Product complexity
Simple products with matte finishes are easier to shoot in-house. Jewelry, electronics, cosmetics packaging, glass, and reflective materials usually need tighter lighting control and more careful retouching. If your products are technically difficult, it may be worth combining in-house basics with specialist help for hero shots.
2. Catalog volume
If you add a few products per month, a manual workflow is manageable. If you are launching dozens of SKUs or variants regularly, standardization matters more than perfection. Build templates for framing, file names, and export settings. AI-assisted background and resolution tools may help at this stage, but only if the output remains true to the product.
3. Channel requirements
Your Shopify store may allow more visual storytelling than a marketplace listing. Amazon and some ad formats often require stricter backgrounds or image treatments. Social content may need more lifestyle context. Plan your workflow around your highest-priority channel first, then create derivatives for the rest.
4. Internal skills and time
Many store owners can handle a controlled, repeatable setup without a photographer on staff. But photography, editing, and file management still take time. If your team already struggles to keep product pages updated, simplify. Choose one hero standard, one detail standard, and one lifestyle standard before adding more complexity.
5. Conversion impact versus production effort
Not every SKU needs an elaborate shoot. Focus the highest production effort on bestsellers, high-margin items, and products with fit, texture, or feature questions that strong visuals can answer. That is usually a better use of time than overproducing every product equally.
AcquireConvert takes this same practical view across its content. Giles Thomas’s work as a Shopify Partner and Google Expert is especially relevant here because store visuals affect more than aesthetics. They influence on-page conversion, ad performance, feed quality, and shopper trust. If you want the broader context around store imagery, merchandising, and optimization, explore AcquireConvert’s photography guides and supporting resources to see how other Shopify store owners approach image quality, layout, and workflow decisions.
Frequently Asked Questions
What are the best camera settings for digital product photography?
A reliable starting point is ISO 100 to 200, aperture around f/8 to f/11, and a shutter speed matched to your lighting setup. Use a tripod if possible, and keep white balance consistent. Exact settings vary by product and light, but consistency matters more than chasing dramatic creative effects for ecommerce.
Should I shoot in RAW or JPEG for ecommerce products?
RAW gives you more flexibility for correcting exposure and color, which is useful when product accuracy matters. JPEG can work if your lighting is already controlled and you need speed. For most merchants building a repeatable workflow, RAW capture with compressed web exports is the safer long-term setup.
How many images should each product page have?
Most stores benefit from at least five types of images: hero, alternate angle, back or side view, detail close-up, and context or scale shot. Apparel, electronics, and premium products may need more. The right number depends on how much visual information shoppers need before they feel ready to buy.
Can AI replace traditional product photography?
Usually not completely. AI tools can help with background cleanup, alternate scenes, and mockup-like assets, but they work best when built from a solid original product image. For ecommerce trust, you still want a core image set that accurately reflects the real product a customer will receive.
What is the difference between photography and a digital product mockup?
Photography captures the real item. A digital product mockup places artwork or product visuals into a designed presentation, often for downloadable products, packaging previews, or promotional assets. Both can be useful, but shoppers should still have access to accurate product visuals where real-world appearance matters.
Do I need a professional studio for electronic product photography?
Not always. Many smaller products can be photographed well with soft lighting, a stable tripod, and a controlled background. That said, reflective surfaces and precise detail requirements can make studio setups more effective. If your current results look inconsistent, lighting control is usually the first thing to improve.
How should I name and organize product image files?
Use a clear naming convention that includes SKU, angle, and variant where relevant. For example, productname-sku-front-black.jpg. This helps with asset management, marketplace uploads, and merchandising handoffs. Consistent file naming also reduces confusion when teams update product pages or ad creatives later.
What image edits are acceptable for ecommerce?
Color correction, cropping, dust cleanup, background removal, and exposure balancing are generally reasonable. The line to watch is misrepresentation. If editing changes the shape, finish, scale, or expected appearance of the product, it can damage trust and increase returns. Edit for clarity, not deception.
How often should I update product photos?
Update them when product packaging changes, when your brand standards improve, or when conversion issues suggest shoppers need better visual information. It is also worth refreshing older low-resolution images if your newer catalog looks noticeably stronger. Start with high-traffic and high-revenue SKUs first.
How much do product photos cost (and what drives the price)?
Costs vary widely depending on complexity and volume. The biggest drivers are usually the number of SKUs, the number of final images per SKU, and how demanding the product is to shoot. Reflective items, cosmetics texture shots, and apparel on models typically take more time than simple matte products on a sweep. Usage also matters. If you need multiple aspect ratios for ads, marketplaces, and Shopify, that increases production and editing time.
What is the 20/60/20 rule in photography?
The 20/60/20 rule is a simple way to think about where results come from in a photo workflow. Many photographers use it as a rough split between capture, lighting, and post-production effort. The exact breakdown is not a hard standard, but the principle is useful for ecommerce: get the lighting and setup right first, then use editing for cleanup and consistency, not for fixing fundamental problems like bad color or harsh reflections.
What is the best product photography app for beginners?
The best app is the one that helps you stay consistent. For beginners, look for an app that lets you control exposure and white balance, and that supports simple cropping and export sizes for ecommerce. If you are using AI tools for background cleanup or alternate scenes, keep your workflow anchored in a real hero image and review outputs before publishing to your Shopify product pages.
Are AI product photography generators safe to use for ecommerce listings?
They can be safe if you use them with guardrails. AI tools are usually fine for background changes, cleanup, and resizing, as long as the product remains accurate. Risk increases when AI changes materials, shape, label text, or reflections in a way that could mislead shoppers. A practical approach is to keep a verified baseline image set for your PDP and feeds, then use AI variations as secondary creative where appropriate, after a careful quality check.
Key Takeaways
Conclusion
Good digital product photography is really a systems problem. The stores that handle it well usually do not rely on guesswork from one shoot to the next. They use clear settings, repeatable lighting, editing standards, and publishing rules that keep product pages consistent as the catalog grows. That is where a practical workflow can do more for your store than chasing perfect gear or overly stylized images. If you want more ecommerce-specific guidance, AcquireConvert is a strong place to continue your research. Giles Thomas brings a useful practitioner perspective as a Shopify Partner and Google Expert, and the site’s photography and optimization resources can help you connect better visuals to stronger merchandising decisions across your store.
This article is editorial content for educational purposes and is not a paid endorsement unless explicitly stated otherwise. Tool availability and features are based on current data and may change over time, so verify details directly with the provider before making decisions. Any workflow or performance outcomes mentioned are not guaranteed and depend on your products, execution, store setup, and sales channels.

Hi, I'm Giles Thomas.
Founder of AcquireConvert, the place where ecommerce entrepreneurs & marketers go to learn growth. I'm also the founder of Shopify agency Whole Design Studios.