Fast Product Photography (2026 Guide)
Fast product photography is not about rushing and hoping for the best. It is about removing friction from your workflow so you can publish more SKUs, refresh creatives for ads, and keep your Shopify store looking consistent without burning a full day per product. The biggest wins usually come from standardizing your ecommerce tools stack, locking in a repeatable setup, and only escalating to pro studios when the product or channel demands it.
This guide breaks down the fastest approaches I see ecommerce teams use in real life: streamlined DIY setups, studio workflows, and AI-assisted editing. You will get a decision framework, practical setup checklists, and honest trade-offs so you can pick a workflow that fits your catalog, quality bar, and timeline.
Contents
What “fast” product photography really means for ecommerce
For most Shopify stores, “fast” is a combination of three things: speed per SKU, speed to publish, and speed to iterate. The bottleneck is rarely just the camera. It is usually the back-and-forth: finding props, resetting lighting, swapping backdrops, renaming files, removing backgrounds, exporting variants for ads, and uploading into product pages.
A fast workflow is one you can repeat with predictable output. That matters because different channels reward consistency. For example, marketplaces and strict requirements (see our guide on amazon product photography) push you toward standardized angles and backgrounds. Direct-to-consumer brands often need a mix: clean packshots for product pages, plus lifestyle images to build trust and improve conversion (more on this in our broader ecommerce photography hub).
Practical definition: a “fast” system is one where you can shoot and process a new product with minimal decision-making. You are not reinventing lighting, composition, and editing every time.
Types of product photography (and which ones are fastest to produce)
Here is the thing: most “fast product photography” advice sounds generic until you define what type of images you actually need. Different photo types have very different time and cost profiles, even if you are using the same camera and lighting.
For most Shopify stores, these are the core categories that matter from a speed standpoint.
Packshots on white (typically the fastest to standardize)
Clean, consistent product-on-white images are usually the fastest to produce at scale because the setup can be fixed and repeated. Once your lighting and backdrop are dialed in, you can batch products with minimal changeover. Post-production can also be templated, especially if you are using background tools to keep whites consistent.
Lifestyle or in-context (slower, but often worth it for trust and ads)
Lifestyle images take longer because you introduce variables: props, locations, models, styling, and brand “vibe.” They can be high-impact for conversion and ads, but they are rarely the best first step when speed-to-publish is the goal.
From a practical standpoint, many stores move faster by getting the core packshot set live first, then adding lifestyle images once the product is already selling or once you have a clear creative direction for ads.
Detail or macro (medium speed, depends on your product)
Detail shots are often quicker than full lifestyle shoots, but they can still slow you down if your product has reflective surfaces, fine textures, or tiny features that need precise focus and lighting. They matter most when details reduce hesitation, for example materials, ingredients, stitching, or closures.
360, video, and motion (slowest to produce, highest operational overhead)
360 spins and video tend to be the slowest because you are multiplying production steps: more frames, more editing, more exports, and more approvals. They can work well for certain categories, but if you are trying to move fast, treat motion as a second-phase project, not a requirement for every SKU.
What to prioritize first for Shopify product pages versus ads
If your goal is to launch products quickly on Shopify, prioritize a “buying clarity” set first: a strong main image, at least one angle that shows depth, one detail shot that supports the purchase decision, and a scale cue (in hand, on body, or next to something familiar). That gets you to publish-ready fastest.
For ads, speed is often about volume and iteration. You may get more value from a few reliable product-on-white variations and a small set of controlled lifestyle options than from a big lifestyle shoot that takes weeks to plan.
Build a tiered shot plan so you do not slow down your whole catalog
What many store owners overlook is that you do not need the same image set for every SKU on day one. A tiered plan keeps you fast without lowering your quality bar.
This approach also plays nicely with a hybrid workflow: you keep your baseline catalog moving, then invest deeper where the upside is most likely.
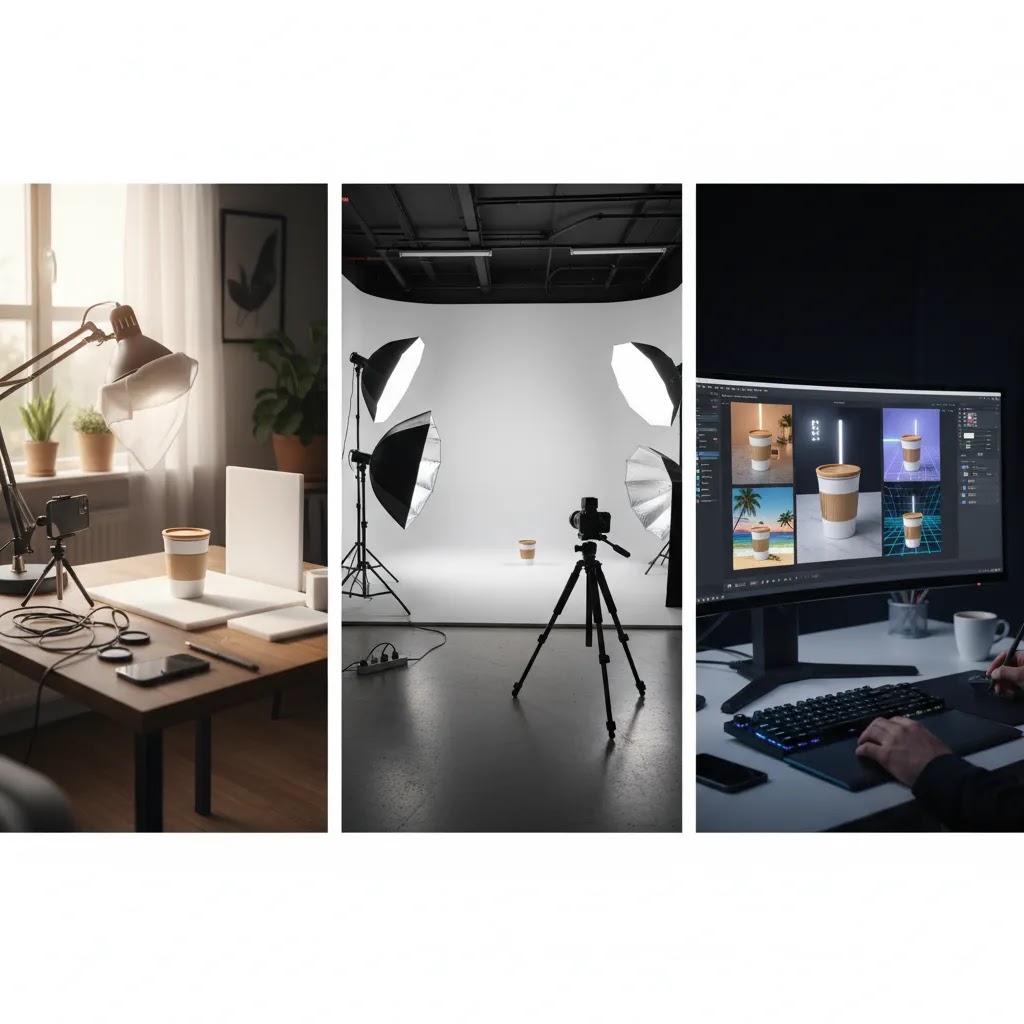
The fastest workflows (DIY, studio, AI, hybrid)
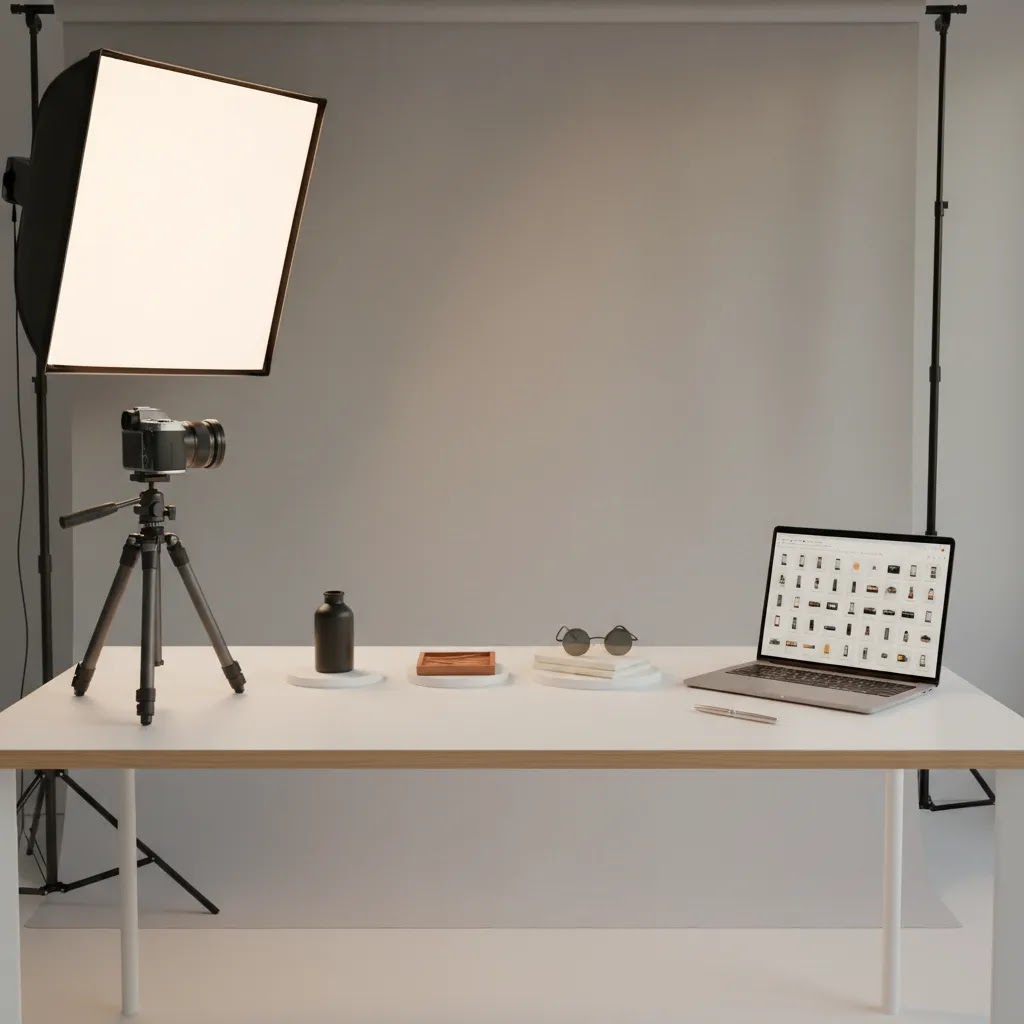
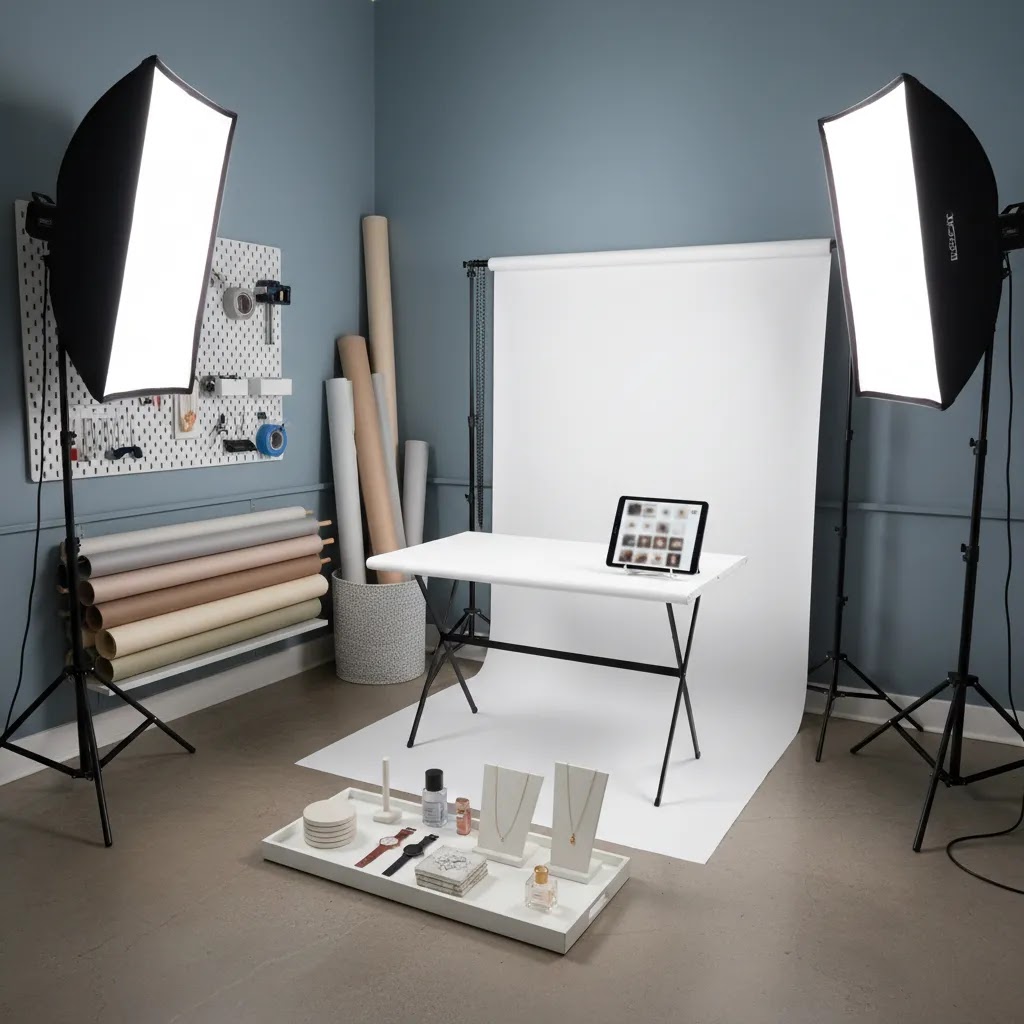
1) Fast DIY setup (best when you have many SKUs and a consistent style)
DIY can be the fastest option if you standardize it. The trick is treating your setup like a mini production line, not an art project. Pick a default angle set (for example: front, 45-degree, back, detail, scale shot) and lock it in.
2) Fast studio workflow (best when quality and consistency must be “agency-grade”)
If your product category is highly visual (beauty, jewelry, premium apparel) or your team is spending too many hours reshooting, a studio can be faster overall. “Fast” here means fewer internal hours and fewer rework cycles, not necessarily that the studio shoots instantly.
If you are evaluating a dedicated product photography studio, ask how they handle shot lists, revision rounds, color accuracy, file naming, and delivery formats for Shopify and ads. Those operational details are where time gets won or lost.
3) AI-assisted workflow (best when editing and background work is the bottleneck)
AI can compress the “post-production” part of product photography: background removal, background swaps, quick lifestyle variations, and resolution enhancements. For many stores, that is where speed gains show up first because it reduces manual editing time and lets you reuse the same base product shot across multiple placements.
This is not the same as replacing professional photography. It is a way to scale variations responsibly when you already have a decent base image.
4) Hybrid workflow (what most growth-stage stores end up using)
A practical hybrid approach is: shoot simple packshots in-house for speed, then use AI tools for background consistency and variants, and outsource hero campaigns or complex reflective products to professionals. This keeps your baseline catalog moving while protecting your “front page” images.
Fast product photography pricing and turnaround (what to expect)
If you are trying to move fast, pricing and turnaround are not just procurement details. They are workflow decisions. The way a photographer or studio charges you typically shapes how you plan your shot list, how many revisions you get, and how much time you will spend managing the process.
Common pricing models (and what they usually mean)
Product photography is often priced in one of these ways:
Now, when it comes to what is included, you want to be specific. Some packages include basic cleanup and background work, others treat retouching as a separate line item. Revisions are another common gap. Some studios include one revision round, others charge per round, and rush delivery may be extra.
What to confirm up front so “fast” stays fast
Speed usually gets lost in approvals and rework. These are the operational questions that tend to matter most:
If you do not lock these in, you may end up paying for speed and still waiting on the assets you actually need for product pages and ads.
Typical turnaround expectations for “fast” studios
Turnaround varies by season, shoot complexity, and how prepared you are. In many cases, studios can shoot quickly but still need time for editing and QA. The “fast” path often looks like: you provide a clear shot list and product prep notes, they shoot in a batch, then deliver proofs or selects, then final images after any included revisions.
Consider this: the fastest studios are often the most process-driven. That can feel rigid, but it is usually the reason they can deliver consistently.
When studio pricing can be faster overall than DIY
DIY feels cheaper because you see the gear costs and your time feels “free.” The reality is that internal time and reshoot risk are real costs, especially when you are trying to keep a Shopify store updated and run acquisition at the same time.
Here is a simple way to decide:
Think of it this way: the right studio is not just buying “nice photos.” You are buying fewer interruptions, fewer do-overs, and a more reliable production schedule. You still need to manage the process, but it can reduce the number of decisions your team has to make every week.
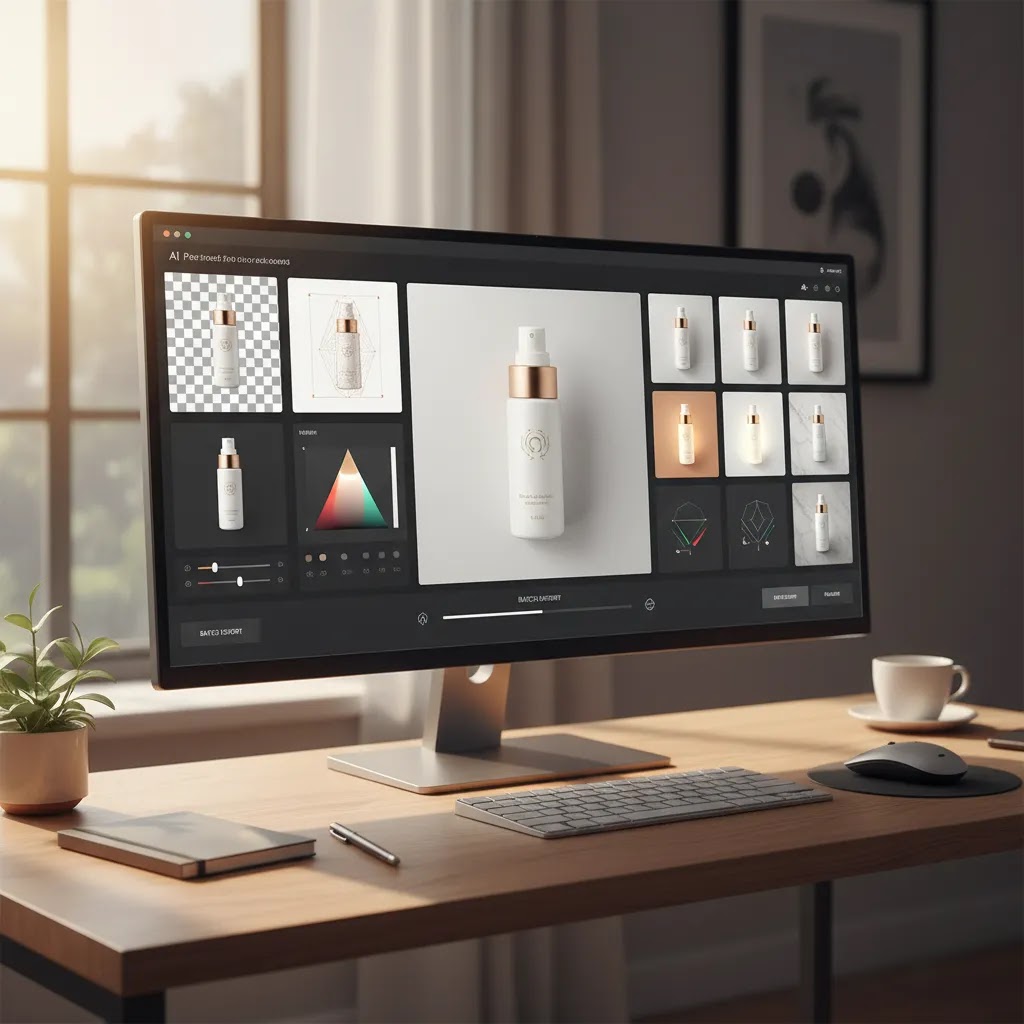
AI tools that can speed up product photography
If your current workflow is slow because you are stuck editing backgrounds, fixing small issues, or preparing images for multiple channels, these AI photo tools (from our current product dataset) are worth evaluating. They are especially useful when you need consistent output across a large catalog.
Creator Studio (workflow hub)
Creator Studio is the central workspace for generating and editing product visuals. In practice, a studio-style interface is helpful when you want to standardize processes across a team: one place to handle common transformations, export, and iterations.
Magic Photo Editor (general editing)
Magic Photo Editor is designed for broad product image edits. This category of tool can be a time-saver when you are constantly doing small fixes that otherwise require Photoshop time or agency revisions.
AI Background Generator (fast lifestyle and creative variants)
AI Background Generator can help you create quick scene variations that would normally require props, locations, and lighting changes. For ecommerce, the best use case is generating secondary images for ads or collections while keeping your primary product page images consistent and accurate.
Free White Background Generator (marketplace-friendly output)
Free White Background Generator is aimed at standard “clean background” requirements. This can be useful if you need to keep catalog images consistent, or you sell on channels that prefer or require white backgrounds.
Background Swap Editor (controlled background changes)
Background Swap Editor supports quick background changes in a more intentional way than generating random scenes. If you have brand guidelines for colors, shadows, and vibe, a swap workflow can help you stay consistent while still moving quickly.
Place in Hands (scale and “in use” context)
Place in Hands is a common ecommerce need because customers want scale. If you sell beauty, accessories, or small items, “in hand” images reduce uncertainty and can support conversion, especially on mobile.
Increase Image Resolution (fewer reshoots, better zoom)
Increase Image Resolution can help when you have older photos that are not sharp enough for zoom or modern themes. It is also useful when you need to repurpose images for higher-resolution placements, as long as the original image quality is not too poor.
Remove Text From Images (cleaning supplier photos)
Remove Text From Images helps clean up images that include watermarks, labels, or embedded text. That is a practical speed tool if you are auditing legacy assets or working with vendor-provided imagery (while still respecting licensing and channel rules).
If you need “instant” visuals for early-stage launches, consider pairing AI edits with a mockup generator workflow for placeholders and ad tests, then replace winners with real photography once you have demand signals.
How to choose the right fast workflow for your store
Your fastest option depends on what you sell, how many SKUs you have, and where the images will be used. Here are the criteria I recommend using when you are choosing between DIY, studio, AI, or hybrid.
1) Channel requirements (Shopify vs marketplaces vs ads)
If most sales come from your Shopify store, you usually have more flexibility. You can prioritize consistent lighting, attractive backdrops, and a mix of packshot and lifestyle. If you are also selling on marketplaces, you may need strict formats (white background, specific framing, specific file sizes). That is where standardization and background tools can be a real time saver.
2) Catalog size and “rate of change”
Fast product photography matters more when you have frequent drops, seasonal refreshes, or lots of variants. If you launch five new SKUs per month, a slower process might be fine. If you launch 50, delays directly impact revenue because products are not ready to sell.
3) Product complexity (reflective, translucent, textured, or small)
Shiny bottles, cosmetics packaging, glass, and reflective surfaces often take longer to shoot well. If you are in beauty or makeup, time often goes into controlling reflections and keeping color accurate. In those cases, a professional shoot may save time by avoiding rework, while AI can help speed background consistency and asset variations after you have a strong base image.
4) Team skills and “process maturity”
A fast workflow is usually a documented workflow. If you have a team member who can shoot, edit, and upload consistently, DIY can be extremely fast. If tasks are split across people with no templates, speed disappears. Create a shared shot list, a folder naming convention, and a simple checklist for exports.
5) Brand risk and accuracy requirements
Speed is valuable, but so is trust. Product images need to match what the customer receives. If AI is used to create scenes or swaps, keep it realistic and consistent with your product’s true color, materials, and scale. Use AI for variations and supporting images, not for misleading representation.
Pros and Cons
Strengths
Considerations
A 60-minute “speed setup” you can copy
If you want a simple, repeatable product photography setup you can implement quickly, this is a practical baseline that works for many Shopify stores.
Step 1: Lock your scene (10 minutes)
Step 2: Lock your lighting (15 minutes)
Step 3: Create your shot list (10 minutes)
Step 4: Batch your shoot (15 minutes)
Step 5: Batch your edits (10 minutes)
Basic product photography setup checklist (small business version)
If you want speed, you want a setup that is boring in the best way. Same place, same light, same framing, same exports. Here is a minimal checklist you can use to keep your setup quick and repeatable without turning your office into a full studio.
Minimal gear and space (focused on speed)
For most Shopify store owners, consistency beats gear. A fixed setup you can repeat will usually outperform a better camera used inconsistently.
Backdrop options and swap speed (and how to avoid wrinkles)
Backdrops are where fast setups often get slow. You want a system that is quick to reset and stays consistent over time.
If you are chasing “perfect white,” avoid relying on wrinkled fabric. Fabric can work for lifestyle, but for packshots it tends to introduce shadows and texture that slow your editing down.
Setup troubleshooting: the common slowdowns and quick fixes
When your process feels slow, it is usually because you are reshooting and re-editing. These are the issues I see most often in small ecommerce setups:
The way this works in practice is simple: if you can reduce retakes and reduce “special fixes” per product, your speed will jump without you feeling rushed.
AcquireConvert recommendation
If you are trying to move faster without sacrificing trust, focus on two layers: a stable base photo system and a controlled way to generate variations. Start with the simplest repeatable setup you can maintain, then use AI tools to remove the repetitive editing work that slows teams down.
AcquireConvert is built for store owners who want practical decisions, not theory. Giles Thomas is a Shopify Partner and Google Expert, and the same mindset applies here: systems beat one-off hacks. If you want to map your fastest path, browse the E Commerce Product Photography resources, then use the Background Removal & Editing category to identify tools that reduce your post-production time. For many catalogs, a hybrid workflow (DIY packshots plus AI variations, plus studio for hero shots) is the most sustainable way to increase output while keeping quality consistent.
Frequently Asked Questions
What is fast product photography?
Fast product photography is a workflow designed to produce consistent, publish-ready product images with minimal setup changes and minimal rework. It usually involves standard angles, fixed lighting, a repeatable backdrop system, and batch editing. For ecommerce, “fast” also includes file handling and exports, because speed to upload and iterate matters as much as speed to shoot.
Is fast product photography only for large catalogs?
No. Even small catalogs benefit because you spend less time per update, seasonal refresh, or new variant. The difference is what you optimize for. Large catalogs optimize for throughput and standardization. Small catalogs often optimize for quality plus speed, using a hybrid workflow so they can keep hero images premium while still producing supporting assets quickly.
What is the quickest product photography setup for a Shopify store?
The quickest reliable setup is usually a fixed shooting station: one backdrop (often a sweep), a tripod with marked placement, and one or two lights that never move. Pair that with a shot list and a file naming convention. Once you can repeat the same framing and lighting, editing becomes faster and your storefront looks more consistent.
When should I use a professional product photography studio instead of DIY?
Use a studio when the cost of rework is high: reflective products, premium beauty packaging, complex materials, or high-visibility campaigns where quality is part of the brand promise. Studios can also be faster overall when your internal team is overloaded. The key is to confirm their process for revisions, color accuracy, and Shopify deliverables up front.
Can AI replace professional product photography?
AI can speed up parts of the workflow, especially background work, cleanup, and creating controlled variations. It is not a guaranteed replacement for professional photography, particularly when you need precise color, accurate texture, or complex lighting. Many stores get the best outcome by using AI to scale variations from a strong base photo set.
How do I keep AI-assisted product images accurate?
Start with clean source images shot in consistent lighting. Keep AI changes focused on background and context, not on altering the product itself. Check edges, shadows, color shifts, and scale cues. If you are using “in hand” or lifestyle scenes, make sure the result still represents the real product honestly to avoid customer disappointment and returns.
What images should I prioritize if I need to launch products quickly?
Prioritize the images that reduce buying friction: a clear main image, one angle that shows depth, a detail shot for key features, and a scale shot. If you sell beauty or makeup, include a label/ingredients close-up when relevant. Add lifestyle or creative images later, or use controlled background variations once your core product page assets are live.
How does Amazon product photography change the speed requirements?
Amazon tends to push stricter standards and consistency, which can actually make your workflow faster once you commit to a template. The challenge is that you may need more compliance checks. If Amazon is a key channel, build a standardized set first, then create Shopify-specific lifestyle versions as a second layer, rather than mixing styles from the start.
Are mockups a good shortcut while I wait for photos?
Mockups can be useful for early testing, pre-launch pages, and ad creative exploration, especially if you are validating demand. Treat them as temporary and replace them with real photography as soon as possible for accuracy and trust. A mockup workflow is often best used alongside fast packshots, not as a long-term substitute for product images.
What is the biggest mistake that slows product photography down?
The biggest slowdown is changing too many variables: moving lights, switching backdrops, improvising angles, or editing every product differently. A documented shot list and a fixed setup eliminate most of that. The second biggest issue is poor prep, since dust, fingerprints, and misaligned labels create extra retouching time later.
What is the 20 60 20 rule in photography?
The “20 60 20” rule is a simple way some photographers think about where time and attention go in a shoot: roughly 20% planning, 60% execution, and 20% finishing. For ecommerce product photography, it is a useful reminder that your speed usually comes from planning and finishing, not just the moment you press the shutter. If you pre-build the shot list and lock your setup, the execution becomes repetitive, and batch editing stays predictable.
What is the 50 50 rule in photography?
The “50 50” rule is commonly used as shorthand for the idea that results are split between capture and post-production. In product photography terms, half the work is getting consistent lighting, framing, and prep in-camera, and the other half is background cleanup, color checks, cropping, and exports. If you want to go faster, you usually want to push more quality into the capture side so you are not spending hours fixing issues later.
How much should I pay a photographer for a product shoot?
It depends on the deliverables and the pricing model: per image, per SKU, hourly, or day rate. The number you should focus on is the effective cost per usable, publish-ready image set for Shopify, including any retouching, revisions, and exports you actually need. If your current DIY process is causing frequent reshoots or slow launches, paying more for a studio that delivers consistent, ready-to-upload files can be a reasonable trade-off for some stores.
What are the three types of product photography?
A simple way to group product photography into three types is: packshots (clean product-focused images, often on white), lifestyle (in-context images showing the product in use), and detail shots (close-ups that highlight features and materials). Many stores also add a fourth category, motion (360 or video), but those assets typically take longer to produce and are not always required for a fast launch.
Key Takeaways
Conclusion
Fast product photography is a competitive advantage when it helps you publish products sooner and iterate creative without sacrificing accuracy. The stores that move quickest usually are not the ones with the fanciest gear. They are the ones with a repeatable setup, a shot list, and a clear line between “core catalog images” and “marketing variations.”
If you want more practical guidance, explore AcquireConvert’s E Commerce Product Photography resources and the Background Removal & Editing category. Giles Thomas’s Shopify Partner and Google Expert perspective is built around systems that help you ship consistently, which is exactly what a fast photo workflow should do.
Disclaimer: This article is for educational purposes only and reflects an editorial evaluation. Pricing and feature availability for any tools referenced may change over time, so verify current details on the provider’s website before purchasing. Results are not guaranteed and will vary based on your products, creative execution, and operational workflow.

Hi, I'm Giles Thomas.
Founder of AcquireConvert, the place where ecommerce entrepreneurs & marketers go to learn growth. I'm also the founder of Shopify agency Whole Design Studios.