How to Photograph Jewelry (2026 Guide)
Jewelry photography is one of the hardest product image types to get right for ecommerce. Small surfaces reflect everything, metal picks up color casts fast, and gemstones can look flat if your lighting is off by even a little. If you sell rings, necklaces, earrings, bracelets, or even watches, your photos need to show detail, scale, finish, and sparkle without misleading the customer. That is what helps shoppers trust what they are buying.
This guide walks you through how to photograph jewelry in a practical way, whether you are shooting at home, building a simple setup, or improving existing listings. If you are comparing gear, editing workflows, and setup options across broader ecommerce tools, this article will help you make smarter decisions before you spend more on equipment.
Contents
What good jewelry photos need to do
Jewelry images do more than show the product. They reduce hesitation. A shopper wants to know how polished the metal looks, whether stones are clear or cloudy, how thick the chain is, and whether the finish feels premium enough for the price.
For ecommerce, your goal is consistency first and drama second. A clean catalog image on white usually does the heavy lifting on product pages, marketplaces, and ads. Then you can add close-ups and styled images to support conversion. This is the same principle used across strong ecommerce photography workflows: start with clarity, then add visual persuasion.
Jewelry also needs more careful control than many other products. If you know how to photograph products in general, that helps, but jewelry raises the bar on lighting, focus, and retouching. Dust that is invisible in real life will show up in a macro shot. Reflections from your shirt, window, or phone can appear in polished metal. Small shifts in camera angle can change how brilliant a gem looks.
That means the best workflow is usually structured and repeatable. Clean the product, control the light, stabilize the camera, shoot several angles, and edit for accuracy rather than over-processing. If you follow that sequence, your results will usually improve faster than if you keep changing cameras or buying more accessories.
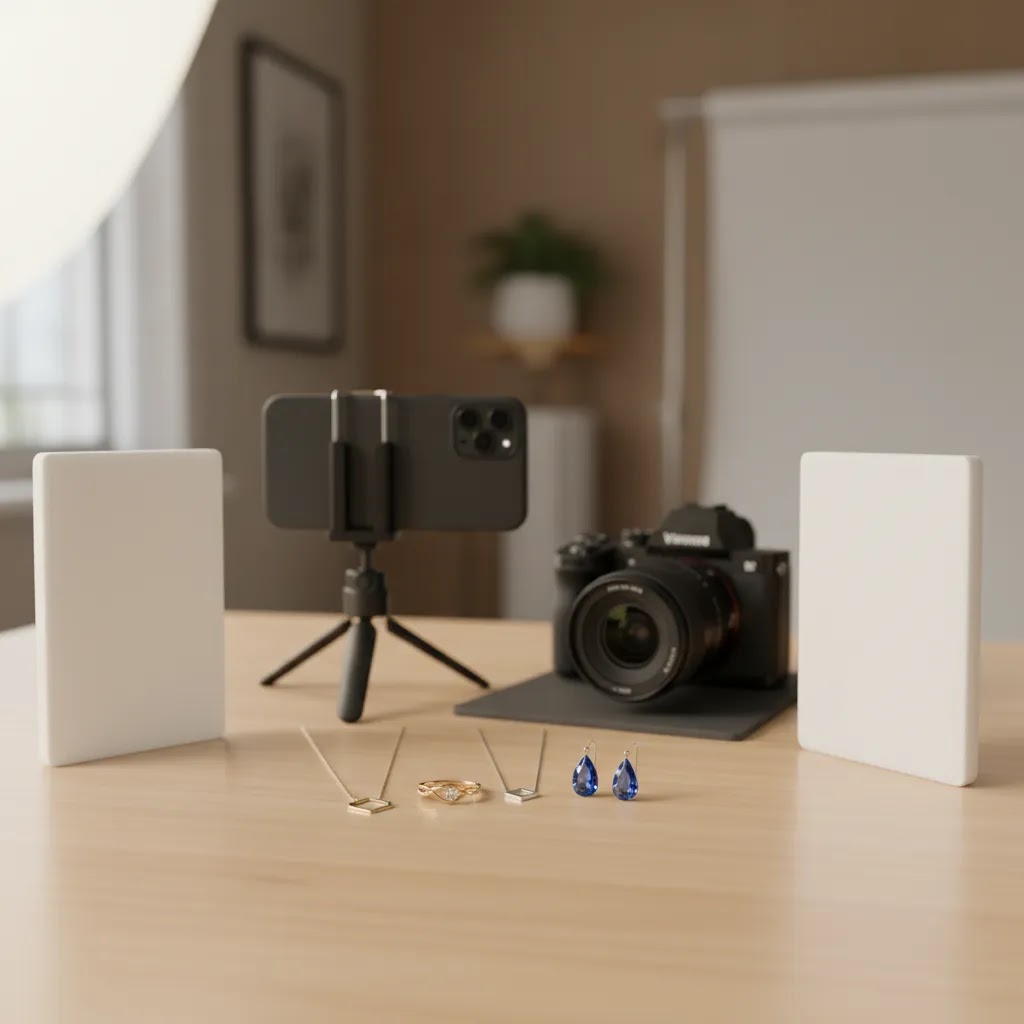
Set up your jewelry photography scene
You do not need a huge studio to photograph jewelry well, but you do need control. The simplest reliable setup is a table, a neutral backdrop, diffused light, and a tripod. If your images need to match across a full collection, consistency matters more than expensive gear.
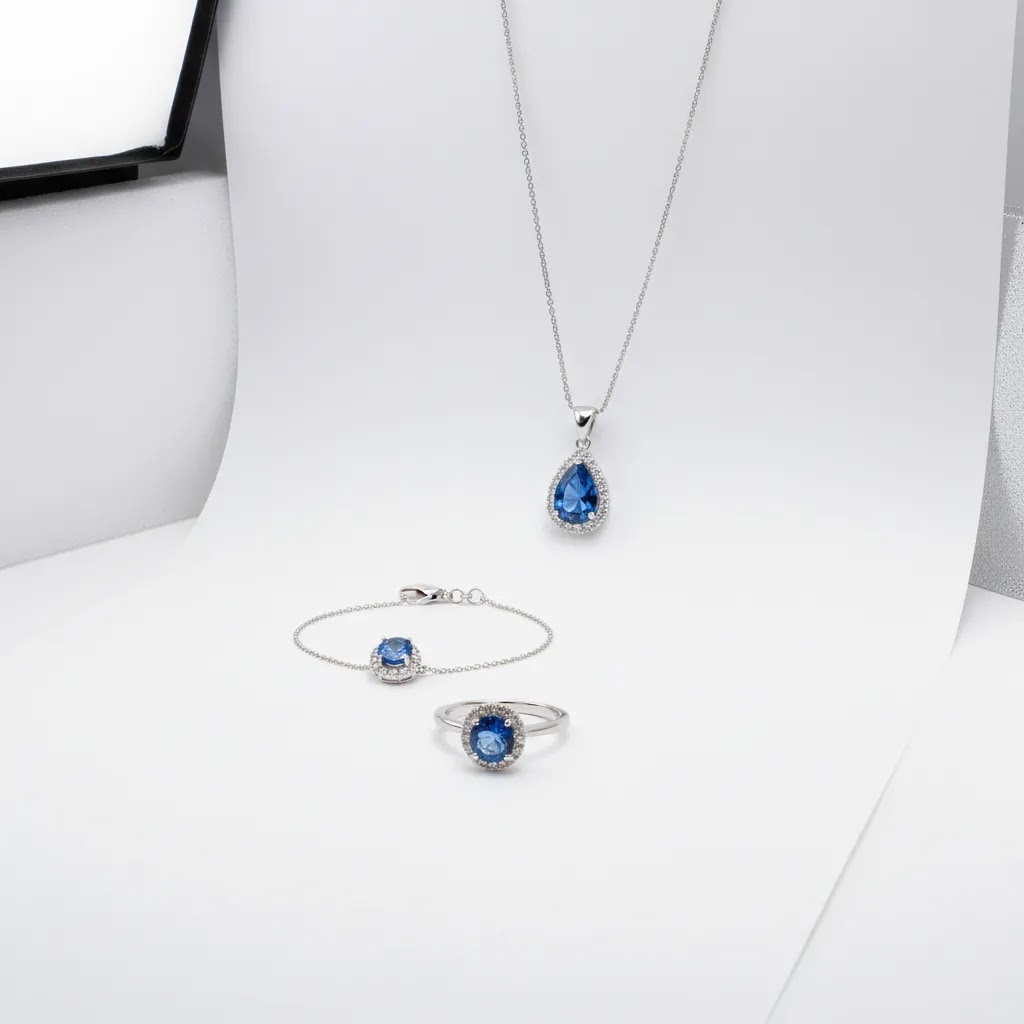
Start with a white, gray, or very light neutral background for your main product shots. White works especially well for catalog listings, but knowing white background photography basics matters because jewelry can disappear against bright surfaces if contrast is too low. Add a small riser, acrylic block, wax, or hidden support when you need a piece to stand upright.
Lighting is where most store owners either improve quickly or get stuck. Use soft, diffused light from two sides if possible. A light tent can help tame harsh reflections on polished metal. If you shoot near a window, avoid direct sunlight and use diffusion material like a sheer curtain or translucent fabric.
Your camera does not have to be top-tier. A mirrorless camera, DSLR, or even a modern phone can work if you can lock focus and exposure. The bigger issue is stability. Use a tripod or phone mount so your composition stays fixed while you refine the product position.
For merchants planning to scale image production, it is worth comparing whether a DIY setup or a small product photography studio setup makes more sense. If you shoot frequently, standardized lighting and surfaces usually save time.
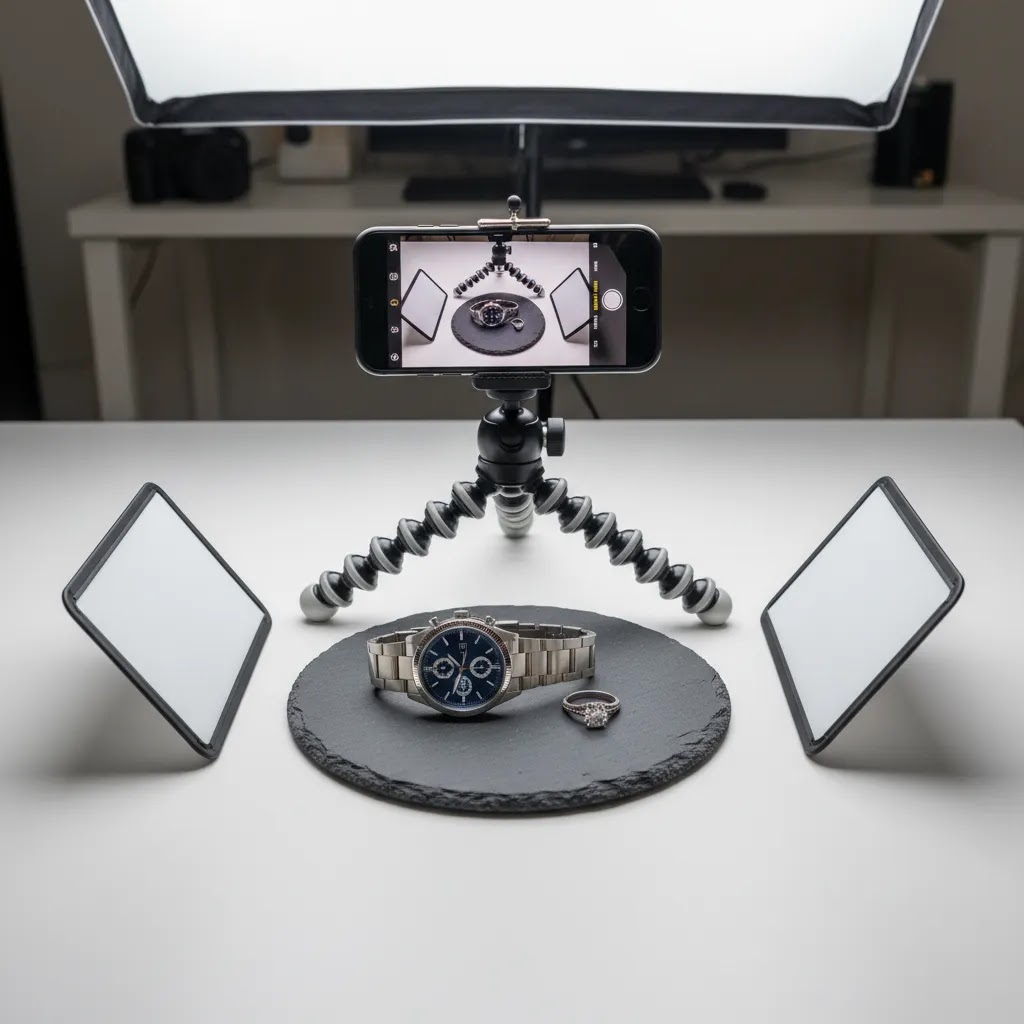
How to photograph jewelry with a phone (iPhone and Android)
Phones can absolutely produce saleable jewelry images, especially for simple pieces, collections with lower SKU complexity, or when you need to shoot frequently and stay consistent. The reality is that phones tend to struggle most when you push into extreme close-ups, shiny metal highlights, and gemstones where detail matters when shoppers zoom.
From a practical standpoint, your job is to stop the phone from making creative decisions for you. Most phone cameras aggressively boost HDR, sharpening, and noise reduction. That can make a ring look crunchy, make pavé stones look smeared, or turn polished metal into a weird blend of gray gradients.
Use the right lens and distance to avoid distortion
Wide lenses make products look warped at close distances. If your phone has a 2x or 3x lens, use it for jewelry. Step back a little, then crop if needed. You will typically get a more natural shape and cleaner edges, especially on watches and rings where circles need to look like circles.
If your phone does not have a telephoto lens, increase distance slightly and crop rather than pressing the phone too close. This is the quickest way to reduce the “macro mush” effect where fine details turn into soft blobs.
Lock focus and exposure before you shoot
Jewelry photos often fail because the phone keeps refocusing or re-metering when you move your hands. Tap and hold on the key detail you want sharp, usually the front edge of the ring, the main stone, or the brand stamp on a watch clasp, and lock focus and exposure if your camera app supports it. Then take the shot using a timer so you are not shaking the phone on the shutter press.
If your phone offers a Pro mode, you can often set a lower ISO and slightly underexpose to protect highlights. That is helpful for silver, gold, and polished steel where blown highlights remove the sense of finish.
Stabilize like you would with a real camera
Handheld phone jewelry photos look okay until you zoom in. Then softness shows up fast. Use a small tripod with a phone mount and a 2-second or 3-second timer. If you have to shoot handheld, brace your elbows on the table and take multiple frames, then pick the sharpest.
Get closer carefully, and know when an add-on macro lens helps
Clip-on macro lenses can help for extreme detail, but they also make focusing harder and can introduce softness around the edges. If you are mainly shooting ecommerce catalog images, you may get more consistent results by staying slightly farther back and cropping than by trying to go full macro on a phone.
Consider this: if your product page needs one or two true close-up detail shots, a macro lens can be worth testing. If you need every image in the set to be tack sharp for zoom, a dedicated camera or a very controlled phone setup will usually be less frustrating.
Avoid the most common phone-only problems
Mixed lighting is the biggest one. If you have window light plus a warm lamp, phones often create weird color shifts where the metal looks yellow on one side and blue on the other. Turn off room lights and commit to one light source, or make sure both lights match in color temperature.
Gemstones can also break phone processing. HDR can create halos, and over-sharpening can make facets look fake. If stones look “crunchy,” reduce HDR settings if possible, move the light to be softer, and back off any built-in filters. On white backgrounds, watch for the phone turning white into gray. That usually means the exposure is being pulled down to protect highlights. Lock exposure, and adjust lighting or angle until you get a clean background without wiping out metal detail.
How to shoot jewelry step by step
1. Clean the jewelry first. Fingerprints, dust, lint, and tiny scratches are much more obvious in close-up product photos. Use gloves, a microfiber cloth, and compressed air where needed. Clean before every angle, not just at the start.
2. Build the shot around the product shape. Rings, earrings, and pendants all need different support methods. A flat lay may work for bracelets, while earrings often need hidden supports or fishing line. The support should help the product look natural, not staged awkwardly.
3. Diffuse your light. Hard light creates blown highlights and ugly reflections. Soft light wraps around metal surfaces better and helps gemstones show more color and depth. If stones still look dull, adjust angle before increasing brightness.
4. Use a narrower aperture when possible. Jewelry has depth, especially rings and watches. If too much of the piece falls out of focus, the image feels less trustworthy. On dedicated cameras, a narrower aperture can help keep more of the product sharp. On phones, increase distance slightly and crop carefully if needed.
5. Shoot multiple angles with a purpose. Front, side, clasp, backing, scale-on-model, and detail macro shots are all useful, but each should answer a buyer question. This is especially important if you also sell on marketplaces and need a workflow similar to amazon product photography requirements, where clean, information-rich visuals matter.
6. Keep framing consistent across the collection. If one necklace is shot from overhead and another at a tilt, your category page can look messy. Consistency supports a more premium brand impression and may help shoppers compare products faster.
7. Capture both safe and styled images. Safe images are your high-clarity white-background shots. Styled images show texture, use, gift appeal, or how the piece sits on the body. If you do not have lifestyle photos yet, a mockup generator can help you test merchandising concepts, though it is still best to verify that the final visual accurately represents the real item.
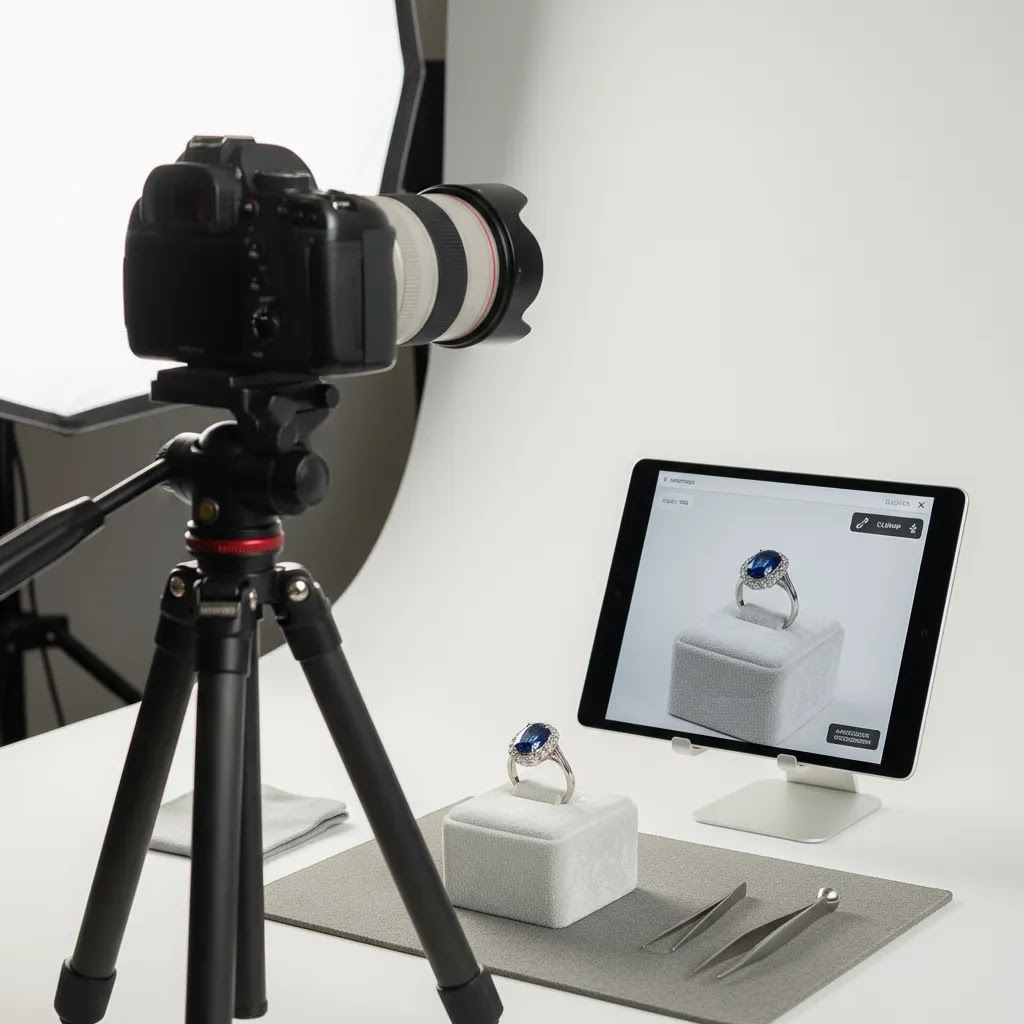
Camera settings that work for jewelry (macro, focus, exposure)
If you are using an interchangeable-lens camera, jewelry is one of those categories where basic camera settings matter more than people expect. The goal is simple: keep the important details sharp, control noise in smooth metal surfaces, and protect highlights so gold and silver still look premium.
Baseline settings for a controlled jewelry setup
For most Shopify store owners shooting on a tripod with continuous lighting, these baselines are a reliable starting point, then you adjust based on the piece.
If you are using flash, shutter speed interacts with flash sync limits, so check your camera specs. If you are using continuous lights, shutter speed mostly just controls exposure, which makes it easier to dial in a clean result on a tripod.
Focus strategy for small, reflective items
Autofocus can work well, but jewelry gives it fewer clean edges to lock onto, especially on polished surfaces. A practical approach is to use single-point autofocus and place the focus point on the most important detail, like the front edge of a ring, the center stone table, or the logo on a watch dial.
Manual focus is often more consistent for macro work. Use live view, zoom in on the screen, and focus carefully. If your camera supports focus peaking, it can help you see what is actually in focus, which is useful when depth of field is thin.
Focus stacking becomes worth considering when you have a piece that needs sharpness front-to-back and a single aperture is not enough. Rings with tall settings and watches shot at an angle are common examples. The trade-off is workflow complexity. You need multiple frames focused at different points, and you need software to merge them. For many ecommerce catalogs, focus stacking is best reserved for hero images or high-value products where the extra time per image is justified.
Exposure control, and why highlights matter for jewelry
Jewelry looks expensive when you can see controlled highlights and clean edges. It looks cheap when highlights are blown out and the metal turns into white patches with no detail.
Think of it this way: you want the brightest highlight to still have texture. Use your histogram and highlight warnings if your camera provides them. If you see clipping, reduce exposure slightly or use exposure compensation to pull it down. You can typically lift shadows later, but you cannot recover detail that never got recorded in the highlight areas.
What many store owners overlook is that making the whole image “brighter” often makes jewelry look worse. A brighter background is fine, but if you lift everything equally you will wipe out the finish of the metal and flatten gemstones. Instead, aim for controlled exposure, then use lighting position and reflectors to shape where the highlights fall.
Editing and post-production tools
Editing jewelry photos is not about making the product look unreal. It is about removing distractions and matching what a customer should expect when the order arrives. Most stores need a light but disciplined workflow: crop, straighten, clean the background, fix color cast, reduce dust, and sharpen detail carefully.
AcquireConvert’s product data includes several image editing tools that can support parts of this process:
These tools can be useful if you need to speed up editing, create cleaner backgrounds, or test alternate merchandising looks. The trade-off is that jewelry is highly detail-sensitive. You should always check prongs, edges, stone shape, chain links, and reflections after any AI-assisted edit. If visual accuracy matters for returns prevention, do not rely on automation without a final manual review.
For many store owners, the smartest workflow is to get the source photo right first, then use editing tools to standardize and polish. That usually produces more trustworthy product imagery than trying to repair a weak original shot later.
Common jewelry photography mistakes (and quick fixes)
If your photos still look “off” after following the basic setup steps, it is usually one of a few common problems. Jewelry is unforgiving because shoppers zoom in, and because small flaws can look like quality issues even when the actual product is fine.
Dust, fingerprints, and micro-scratches showing up everywhere
This is the #1 issue for ecommerce jewelry photos. The fix is less about editing and more about process. Clean between angles, not just once. If you touch the piece to reposition it, assume you need to wipe it again. If you are shooting a full collection, set up a simple cleaning workflow so you do the same steps every time.
Warped reflections that make the metal look messy
Polished metal reflects the world, and the world is not a clean studio. If you see ugly reflections, the quick fix is usually to control what the jewelry is reflecting.
Use white cards near the product to create clean bright reflections, and use black cards to add definition when the jewelry blends into a white background. Small card movements can completely change how premium the metal looks. This is also why light tents can help. They turn the environment into a large, neutral reflection source.
Yellow or green color casts that ruin gold and silver accuracy
Color casts usually come from mixed lighting or nearby colored objects reflecting into the metal. Turn off room lights if you are using window light, or avoid window light if you are using artificial lights. Also check the area around your setup. A bright colored wall, a green plant, or even your shirt can tint metal in a way you will not notice until you review the images.
Crooked horizons and inconsistent scale across a collection
When your category page is a grid of products, inconsistencies jump out. One ring looks bigger because it is framed tighter. One necklace is tilted left. The pieces start to feel less “catalog quality,” even if each image is decent on its own.
Use a repeatable cropping rule and stick to it. Keep camera height and distance fixed, and mark positions for your tripod and product placement. Straighten every image as part of your editing checklist. These are small steps, but they are the kind that make a Shopify collection page feel more premium.
Over-editing that makes the product look fake when shoppers zoom
Now, when it comes to editing, the goal is clarity and accuracy. A few specific things tend to go wrong:
If you need stronger impact, try to solve it in the shoot first by improving light direction and reflection control. Editing should refine what is already there, not invent detail that the camera did not capture.
Pros and Cons
Strengths
Considerations
Who this approach is for
This workflow fits ecommerce merchants who need trustworthy product images without building a large-scale commercial studio. It works well for Shopify store owners selling handmade jewelry, fashion accessories, watches, or gift products, especially if you need a repeatable process for launching new SKUs quickly.
It is also a good fit if you already know how to photograph merchandise in a general sense but need a more specialized approach for reflective, detail-heavy products. If your catalog is growing, these methods can help you standardize image quality before inconsistent visuals begin to hurt product page trust.
AcquireConvert recommendation
If you are building your jewelry photography workflow for ecommerce, focus first on image clarity, color accuracy, and consistency across your collection. Those are the foundations that typically matter most for product-page trust and conversion support. Giles Thomas brings a practitioner-led perspective here as a Shopify Partner and Google Expert, which is useful if your photos need to work not just on your store, but also in search, shopping feeds, and paid acquisition creative.
AcquireConvert is a strong specialist resource if you want to expand beyond this article. You can explore broader E Commerce Product Photography guidance or review adjacent setup considerations through the site’s photography content. If you are testing visual presentation methods, the practical goal should always be the same: produce images that help customers understand the product faster and buy with more confidence.
How to choose your setup
If you are deciding how to photograph jewelry for your store, choose your setup based on volume, product complexity, and where the images will be used.
1. Start with your sales channel requirements. If you sell on Shopify only, you have more flexibility in styling and layout. If you also sell on marketplaces, your main image often needs to meet stricter white-background expectations. Build your process around the strictest channel first, then create secondary assets for social and brand storytelling.
2. Match gear to product detail level. Simple fashion jewelry may photograph well with a modern phone and soft light. Fine jewelry, gemstones, and watches usually demand more precise focus and reflection control. If your average order value is higher, investing more time per image often makes sense.
3. Decide how much editing you can realistically handle. A heavily reflective ring may take more cleanup than a matte bracelet. If your catalog is large, prioritize a setup that reduces post-production time. That could mean better diffusion, a cleaner background, or a more standardized shooting surface. Editing tools can support output, but they should not become a crutch for poor source images.
4. Build for repeatability, not one perfect shoot. Many merchants can create one strong hero image. The real challenge is photographing 40, 100, or 500 products with similar quality. Document your camera position, light placement, backdrop, and editing settings so your next product launch is faster.
5. Keep buyer trust at the center. The strongest jewelry photos are not necessarily the most dramatic. They are the ones that help a shopper judge size, finish, craftsmanship, and color with confidence. If an edit makes the item look significantly different from reality, that may increase disappointment and returns.
This same decision framework can carry into related categories too, whether you are learning how to photograph watches, clothing, soap, or white-on-white products. The technical details change, but the ecommerce standard stays the same: clear, accurate, persuasive visuals that reduce buying friction.
Frequently Asked Questions
Can I photograph jewelry with an iPhone or Android phone?
Yes, in many cases you can. A modern phone can produce strong ecommerce images if you use good lighting, stabilize the device, and keep the product clean. The limitation is usually not the phone itself but macro detail, depth control, and reflection management. For very small or premium pieces, a dedicated camera may still give you more control.
What background is best for jewelry photography?
For primary ecommerce images, white or very light neutral backgrounds are usually the safest choice. They help products feel clean, consistent, and marketplace-ready. Styled backgrounds can work for social content or secondary gallery images, but your main product image should prioritize clarity and product visibility over visual drama.
Why does my jewelry look dull in photos?
This usually comes down to lighting angle, dirty surfaces, or a lack of separation from the background. Gems and polished metal respond strongly to small lighting changes. Try diffusing the light, adjusting the product angle, and cleaning the piece again. A brighter light source alone will not always solve the issue if the angle is wrong.
How do I avoid reflections on metal jewelry?
Use larger, softer light sources and diffuse them well. A light tent, translucent panels, or white cards can help reduce harsh reflections. Also check what the jewelry is reflecting from the room, including your clothing, phone, or nearby windows. Sometimes changing your own position matters as much as changing the light.
Should I use props in jewelry product photos?
Props can work in secondary images, but use them carefully. If the prop distracts from scale, detail, or style, it can weaken the product page. For main ecommerce images, keep the composition simple. Use props when they help communicate use case, gifting context, or brand positioning, not just decoration.
How many photos should I show per jewelry product?
Most stores benefit from at least five useful images: a front view, angled view, close-up detail, clasp or back view, and scale or on-body shot if relevant. The exact number depends on complexity. The key is that each image should answer a buyer question rather than repeat the same perspective.
Do I need professional retouching for jewelry?
Not always, but some level of cleanup is usually worth it. Dust removal, color correction, and background cleanup can make a meaningful difference. For higher-value items, detailed retouching may be justified. The main rule is accuracy. Retouch to present the product clearly, not to change what the customer will actually receive.
Can AI tools replace a jewelry photographer?
Usually not fully. AI tools can help with background cleanup, resizing, alternate scenes, and concept generation, but jewelry is detail-sensitive. Fine settings, reflections, gemstones, and metal textures still need careful review. For many merchants, AI works best as a support layer after a strong original photo has already been captured.
How is jewelry photography different from photographing watches?
The core challenges overlap, especially reflections and fine detail. Watches often add dial depth, crystal glare, and strap texture, while jewelry may require more attention to gemstones, chain shape, and delicate metalwork. Both categories benefit from controlled light, stable composition, and multiple close-up images that answer buyer questions.
What’s the best way to photograph jewelry?
The best approach for ecommerce is usually a repeatable setup: clean the piece, use soft diffused lighting, stabilize the camera, and shoot a consistent set of angles. Prioritize sharpness, accurate color, and controlled reflections. Then edit lightly to remove distractions like dust and minor color cast without changing what the product actually looks like.
What is the 3:1 rule in photography?
The 3:1 rule usually refers to lighting ratios, where the key light is three times brighter than the fill light. In practice, this creates shape and dimension while still keeping shadows controlled. For jewelry, you often want softer contrast than many portrait setups because harsh ratios can create ugly reflections or overly dark metal. Still, the idea is useful: use one light as the main source, then use a softer fill, reflectors, or diffusion to control contrast rather than blasting everything evenly.
What are the common mistakes in jewelry photos?
The most common issues are dust and fingerprints, blown highlights on metal, color casts from mixed lighting, soft focus from camera shake, and inconsistent framing across a collection. Quick fixes include cleaning between angles, diffusing lights more, locking focus and exposure, stabilizing the camera with a tripod and timer, and using a consistent cropping and alignment rule for your catalog images.
Key Takeaways
Conclusion
Learning how to photograph jewelry well is mostly about control, not complexity. If you clean the product carefully, soften the light, stabilize the camera, and keep your editing accurate, you can create product images that look more polished and sell the product more clearly. That matters whether you are listing a single handmade ring or managing a growing accessories catalog.
If you want more practical guidance from a specialist ecommerce perspective, explore AcquireConvert’s photography resources and related guides. Giles Thomas’s experience as a Shopify Partner and Google Expert helps connect image decisions to the bigger ecommerce picture, including product pages, shopping feeds, and conversion support. Use this article as your working checklist, then refine your setup one controlled improvement at a time.
This content is editorial and provided for educational purposes only. It is not a paid endorsement unless explicitly stated otherwise. Tool availability and product features may change over time, so verify current details directly with the provider before use. Any photography or ecommerce results will vary by store, product type, and implementation quality.

Hi, I'm Giles Thomas.
Founder of AcquireConvert, the place where ecommerce entrepreneurs & marketers go to learn growth. I'm also the founder of Shopify agency Whole Design Studios.