How to Take Photos for Etsy (2026 Guide)
If you want more Etsy shoppers to click your listing, your photos do a lot of the selling before anyone reads your title or description. Strong Etsy images help buyers understand scale, texture, color, and quality fast. Weak images make even a good product look uncertain. If you are learning how to take photos for Etsy, the goal is not just making your product look attractive. It is making it look clear, trustworthy, and easy to buy. That applies whether you sell handmade jewelry, apparel, candles, prints, or home goods. This guide walks you through the practical setup, shot list, and editing decisions that help your listings stand out in search. If you also sell beyond Etsy, our guide to ecommerce tools can help you build a more consistent product content workflow across channels.
Contents
What Etsy photos need to do
Etsy search is competitive, and most buyers scan thumbnails quickly. Your main image needs to stop the scroll, but your full image set needs to answer buying questions. That means your product photography should do four jobs at once.
The biggest mistake sellers make is focusing only on style. A dramatic photo may look nice on Instagram, but Etsy shoppers often need cleaner product communication first. A thumbnail has to be readable at small sizes. Your supporting images should then provide close-ups, scale references, packaging details, and context shots.
This is also where Etsy overlaps with broader ecommerce photography principles. Clear visual hierarchy, consistent lighting, and honest color presentation matter on any sales channel. Etsy just rewards a slightly more handcrafted, detail-rich presentation than many mass retail platforms.
If you sell on multiple marketplaces, keep in mind that Etsy image priorities can differ from amazon product photography, where stricter main-image rules and a more catalog-style look often matter more.
How to set up your Etsy photo shoot
You do not need an expensive studio to take good Etsy photos. You do need consistency. For most sellers, that comes from controlling three things: light, background, and camera stability.
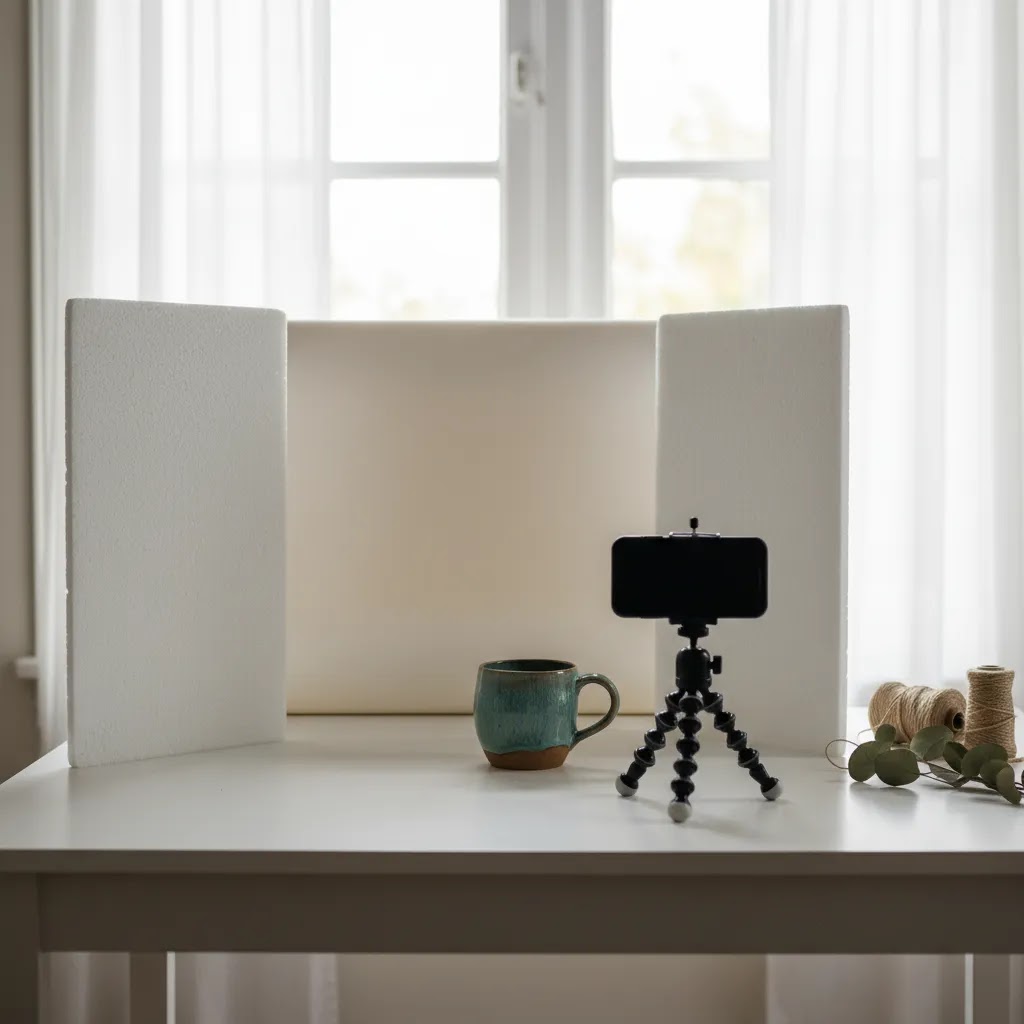
1. Start with soft, even lighting
Natural window light works well if it is indirect and consistent. Place your setup near a bright window and use white foam board opposite the light source to bounce light back onto the product. If natural light changes too much during the day, a simple continuous lighting setup may be more reliable.
For clean listing images, review examples and setup ideas in AcquireConvert’s White Background Photography category. It is especially useful if you want brighter, marketplace-friendly photos without harsh shadows.
2. Choose a background based on the product
A plain white or neutral background usually works best for the main Etsy image because it keeps the product easy to read in search results. Lifestyle backgrounds work better in secondary photos where you want to show use, mood, or scale.
If you need inspiration for context shots, the Lifestyle Product Photography category is a helpful place to compare different visual approaches.
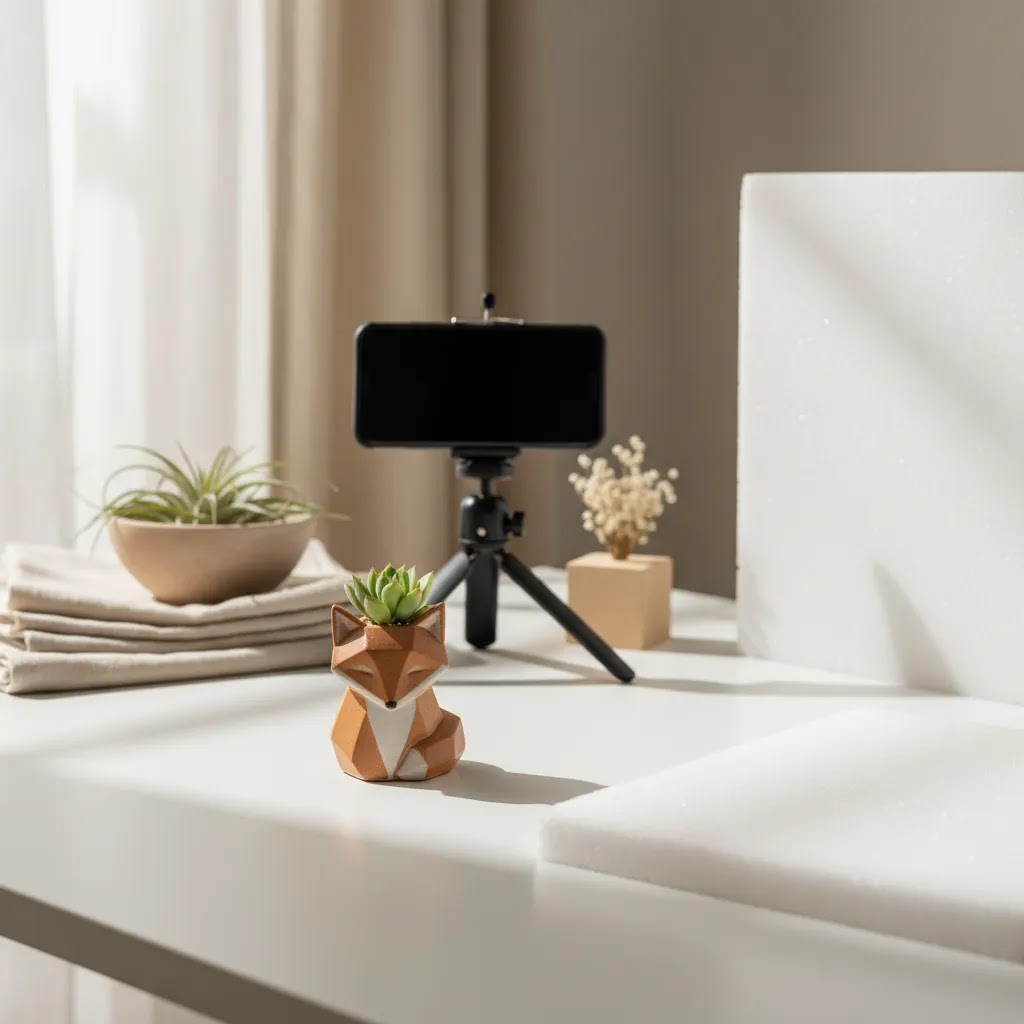
3. Stabilize your camera or phone
If you are figuring out how to take good photos for Etsy with iPhone, stabilization matters more than brand of device. Use a tripod, phone stand, or stable surface. That lets you keep framing consistent across product variants and reduces blur in lower light.
4. Keep your frame consistent
Pick a repeatable angle, distance, and crop style for similar products. This gives your shop a more professional look and makes it easier for buyers to compare listings.
Etsy photo specs that prevent cropping and quality issues
Here is the thing. You can take a strong photo and still lose clicks if Etsy crops your thumbnail awkwardly or your upload gets compressed into something soft and noisy. A few technical choices upfront can save you from that.
Use an aspect ratio that plays nicely with Etsy thumbnails
Etsy displays your main photo in different shapes depending on where it shows up, including search results, shop grids, and mobile views. That is why square-friendly composition matters even if you do not shoot a perfect square file.
From a practical standpoint, aim for a horizontal photo that is close to a 4:3 shape, or a square crop. More important than the exact number is composing so the product still reads clearly when it is cropped tighter.
Consider this approach for your main image:
Choose the right file format: JPEG vs PNG
Most Etsy sellers should default to JPEG for physical products. It is typically the best balance of file size and visual quality for photos with real-world lighting and texture, like jewelry, candles, apparel, ceramics, and home goods.
PNG is usually better when your image has large areas of flat color, clean graphic edges, or you are uploading artwork where crisp lines matter more than photographic texture. For example, art prints, sticker designs, and digital illustrations may hold up better as PNG files, depending on how the image was created and exported.
Think of it this way. Photos of real objects usually compress better as JPEG. Graphic art and flat designs often look cleaner as PNG. If you are not sure, export both and compare them on mobile, because that is where compression artifacts are most obvious.
A simple export checklist that keeps your images looking true-to-life
If you are editing on desktop or phone, your export settings can change how color and sharpness look once the image is uploaded. This checklist is a good baseline for Etsy listings:
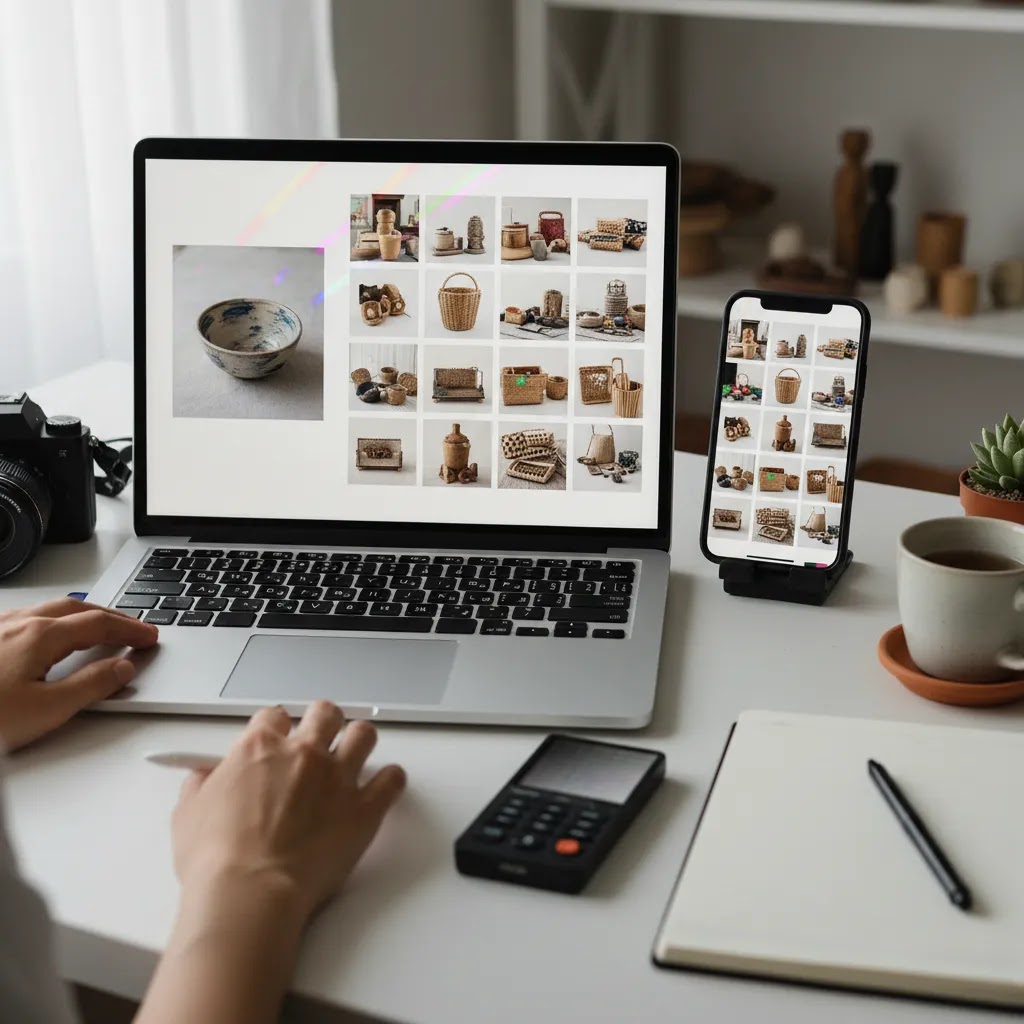
Upload QA: quick checks that prevent avoidable returns and complaints
Once you upload your photos, do a fast quality check inside Etsy before you publish or renew a listing. What many store owners overlook is that Etsy previews and real buyer views are not always the same as your camera roll.
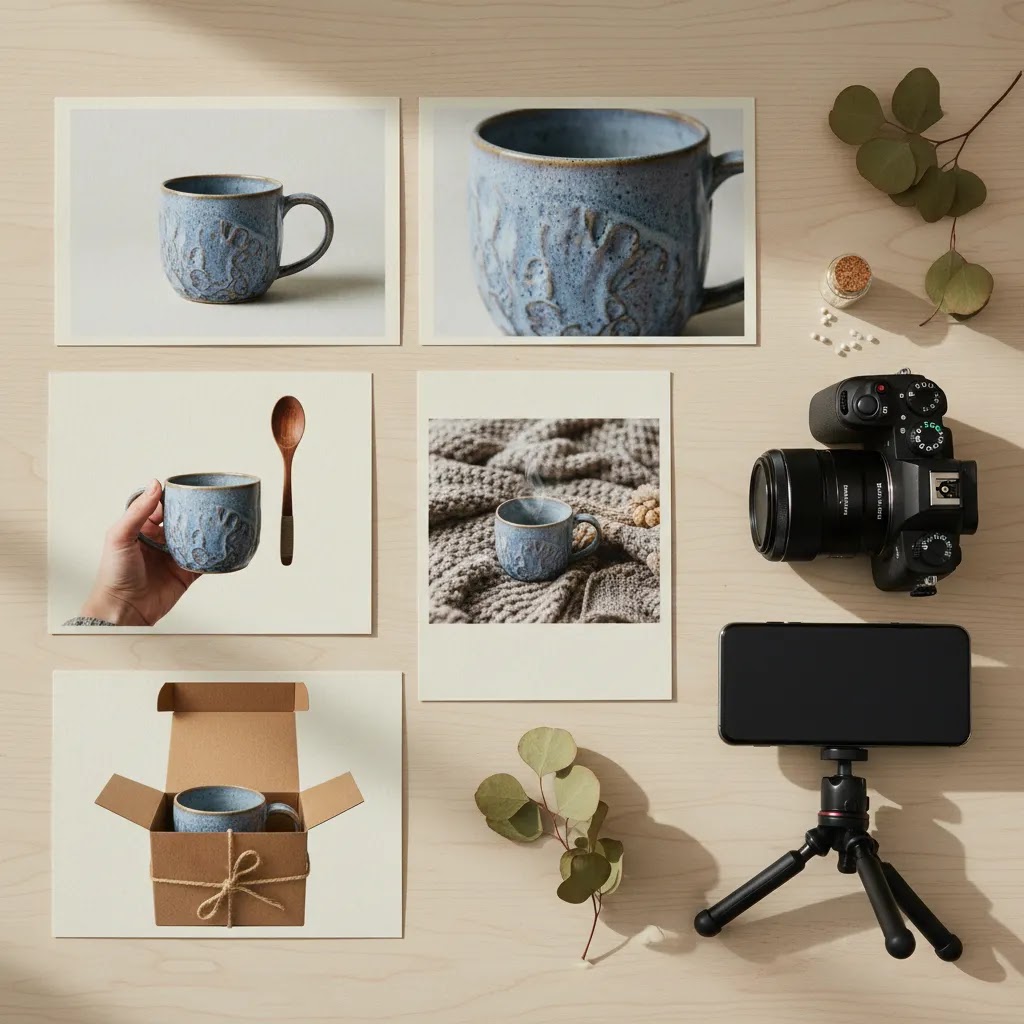
The Etsy shot list that usually works best
When store owners ask how to take product photos for Etsy, I usually recommend building every listing around a repeatable shot list. That keeps your workflow fast and helps you avoid missing key buyer questions.
This shot structure works well for many Etsy categories because it balances search visibility with buyer confidence. If you sell clothing, jewelry, or giftable items, lifestyle images often influence conversion more than sellers expect. If you sell practical goods, clarity and scale tend to matter most.
For sellers who want polished scene-based visuals without reshooting every listing, a mockup generator can be useful for certain categories like prints, apparel graphics, stationery, or wall art. Just be careful not to rely on mockups alone if your buyers need to inspect craftsmanship or true material quality.
Category-specific shot advice for common Etsy products
The shot list above is the baseline. Now, when it comes to Etsy, buyers also have category-specific expectations. If you match those expectations, your photos can feel instantly more trustworthy without needing a more expensive camera.
Jewelry: prove scale, finish, and comfort
Jewelry photos fail most often on scale and reflections. A buyer wants to know if an item is delicate or chunky, shiny or matte, and how it sits when worn.
Apparel: show fit, fabric, and details that affect sizing decisions
For apparel, your photos are often doing the job of a fitting room. Flat lays can look clean, but they do not always answer fit questions.
Prints, art, and stationery: clarity and color accuracy win
For prints, the buyer is judging your quality and your color choices. Crispness matters, but so does setting realistic expectations.
Candles, ceramics, and home goods: show finish and what it looks like in a room
These products sell on texture and vibe, but buyers still need practical info like size and finish.
How to handle reflective, transparent, glossy, and highly textured products
Some products are just harder to photograph. The reality is you often need to control reflections more than you need more light.
Props and styling boundaries: keep lifestyle shots helpful, not confusing
Props can help your listing feel premium and give buyers context, but they also create misunderstandings. Keep lifestyle shots honest and specific.
Editing tools and workflow options
Editing should improve clarity, not distort the product. For Etsy, the safest workflow is usually basic cleanup: exposure correction, white balance adjustment, background refinement, cropping, and light sharpening.
AcquireConvert’s product data shows several photo tools that may help sellers streamline prep work:
These can save time, especially if you are managing lots of SKUs or testing different listing styles. Still, they work best when your original photo is already well lit and sharply framed. AI editing can help with polish, but it usually cannot fully rescue a poorly shot product image.
If you are consistently struggling with image quality, angle repeatability, or lighting control, it may be time to compare your current setup with a more formal product photography studio workflow.
How to take Etsy photos with an iPhone (repeatable workflow)
If you are shooting phone-first, the goal is consistency. An iPhone can produce excellent Etsy listing photos, but only if you control the things that usually make phone images look amateur: shaky framing, mixed lighting, and accidental exposure changes from shot to shot.
iPhone camera settings and habits that matter for product photos
For most Shopify store owners and Etsy sellers, the biggest improvements come from how you shoot, not from buying another app.
What many store owners overlook is mixed lighting. If you have window light plus warm indoor bulbs, your colors can shift between shots. Turn off overhead lights when possible and stick to one light source type for the whole batch.
What to look for in an editing app (without chasing one perfect tool)
There is no single best app for Etsy photos for every seller. What matters is whether the app helps you do the same core adjustments quickly and repeatably.
If you use AI-based background tools, treat them like an assistant, not an autopilot. Always review edges, shadows, and color. It is easy to end up with a cutout look if you publish without checking.
A repeatable iPhone batch workflow that speeds up listing creation
The way this works in practice is to shoot in batches, not one listing at a time. You want the same distance, angle, and light for all similar products, then you edit with the same baseline adjustments.
If you sell multiple variants, take one reference shot that includes a small card with the variant name next to the item. You can delete it later, but it can make sorting much faster when you are tired and exporting a big batch.
Pros and Cons
Strengths
Considerations
Who this approach is for
This approach fits Etsy sellers who want stronger listing photos without turning product photography into a full-time production project. It is especially useful for solo founders, handmade sellers, print-on-demand brands, and small ecommerce teams that need a practical process they can repeat across products.
If you also sell on Shopify, your photo system matters even more because image consistency affects brand trust across collections, product pages, emails, and paid traffic landing pages. Giles Thomas’s work as a Shopify Partner and Google Expert gives AcquireConvert a useful perspective here. The goal is not just better-looking photos. It is better product communication that supports search visibility and conversion across channels.
AcquireConvert recommendation
If you are evaluating how to take good product photos for Etsy, start simple before you spend heavily on gear. Most sellers get the biggest improvement from better lighting, steadier framing, cleaner backgrounds, and a more disciplined shot list. That is true whether you shoot on an iPhone or a dedicated camera.
AcquireConvert is a useful specialist resource if you want photography advice that stays tied to ecommerce performance, not just visual style. Giles Thomas brings a practical operator’s lens as a Shopify Partner and Google Expert, which is helpful if your Etsy photos also need to work for your own store, Google Shopping assets, and social channels.
A smart next step is to compare this guide with AcquireConvert’s resources on ecommerce photography, review visual presentation options like a mockup generator, and use the broader photography categories to refine your setup based on the kind of products you sell.
How to choose the right photo workflow
If you are trying to decide how to take etsy photos in a way that is sustainable, choose your workflow based on product type, volume, and sales channel mix.
1. Match the workflow to the product
Flat products like prints, stickers, and cards can often be photographed and edited quickly. Reflective or dimensional items like jewelry, glass, and candles usually need more control over light and angle. Apparel often needs both flat lays and model or mannequin images.
2. Decide whether your main problem is capture or editing
If your images are blurry, dark, or inconsistent, fix your shooting setup first. If your photos are decent but time-consuming to clean up, editing tools may help more. Sellers often waste time buying software when the real issue is poor source imagery.
3. Consider your channel mix
If the same product photos need to work on Etsy, your own store, Instagram, and possibly marketplaces, prioritize flexible compositions. Etsy may reward handmade warmth, while your website may need a cleaner catalog look. That is why it helps to understand both marketplace standards and broader ecommerce requirements.
4. Think in systems, not one-off listings
The best photo workflow is the one you can repeat every week. Create a checklist for setup, angles, props, exports, and naming. That reduces friction as your catalog grows.
5. Know when to upgrade
If you are getting sales and adding products regularly, upgrading to a more structured lighting setup or outsourced studio support may be worth it. You do not need to start there, but growth-stage stores usually benefit from more consistency once listing volume increases.
Frequently Asked Questions
Can I take Etsy product photos with an iPhone?
Yes. Many Etsy sellers use an iPhone successfully. The key is stable framing, soft light, and careful exposure. A phone can produce strong listing images if the product is well lit and you avoid digital zoom, harsh shadows, and cluttered backgrounds.
What is the best background for Etsy photos?
For most main listing images, a plain white or light neutral background works best because it makes the product easier to read in search results. Secondary images can be more styled if they help buyers understand use, size, or brand feel.
How many photos should I use in an Etsy listing?
Use enough images to answer buyer questions clearly. In most cases, that means a main image, alternate angle, detail close-up, scale image, and at least one context or use-case photo. More images are useful if variants or customization options need explanation.
How do I take good photos for Etsy jewelry listings?
Jewelry usually needs soft, controlled lighting and very steady framing. Show one clean hero shot, one close-up for detail, and one image for scale, such as worn on a model or placed next to a familiar object. Avoid overediting metallic tones.
Should Etsy photos be square?
Square-friendly compositions are often practical because they crop predictably in galleries and thumbnails. Even if your original file is not perfectly square, compose with enough breathing room so the product still reads clearly in tighter crops.
Can I use mockups for Etsy listings?
You can for some categories, especially art prints, digital products, and certain apparel designs. Still, real product photos are usually better when texture, craftsmanship, or material quality influences the buying decision. Mockups should support, not replace, honest product presentation.
How edited should Etsy photos be?
Keep editing focused on accuracy and clarity. Adjust brightness, color balance, crop, and background cleanliness as needed. Avoid edits that misrepresent texture, size, finish, or included items. Buyers should receive something that matches what the photos suggest.
What is the biggest mistake Etsy sellers make with photos?
The most common issue is making images look pretty without making them informative. If shoppers cannot quickly tell what the item is, how big it is, or what it is made from, your listing may lose clicks or conversion opportunities.
What is the best photo format for Etsy?
In many cases, JPEG is the best format for Etsy product photos because it balances quality and file size for real-world photos. PNG can be a good fit for artwork, graphics, or designs with crisp edges and flat color. Whichever you use, export in sRGB when possible and check your listing on mobile after upload to make sure color and sharpness hold up.
What is the 20-60-20 rule in photography?
The 20-60-20 rule is a simple composition idea some photographers use for product and lifestyle images. Roughly speaking, the product takes up about 60% of the frame, while the remaining 40% is split between space above and below, or between supporting context and negative space. The point is not the exact numbers. It is keeping the product dominant, leaving enough breathing room for cropping, and avoiding a cluttered frame that confuses what is being sold.
Is it worth selling photos on Etsy?
It can be, depending on what you mean by photos and how you plan to sell them. Printable photography, digital downloads, and wall art can work if you have a clear style, a defined customer, and listings that make licensing and usage clear. Competition is high, so your results will depend on niche selection, keyword targeting, and how well your previews show the final product. If you sell physical products already, strong original photography can also become an asset for your brand across Etsy, Shopify, and marketing channels.
Key Takeaways
Conclusion
Learning how to take photos for Etsy is really about learning how buyers shop. They want confidence fast. Your images need to show the product clearly, prove quality, and remove uncertainty about size, use, and finish. For most sellers, the winning formula is simple: clean light, a consistent setup, a practical shot list, and restrained editing. You do not need a complicated studio on day one, but you do need a process you can repeat. If you want more photography guidance grounded in ecommerce performance, explore AcquireConvert’s specialist resources across product imagery, marketplace presentation, and visual optimization. Giles Thomas’s Shopify Partner and Google Expert perspective makes those guides especially useful if your product photos need to support both Etsy sales and broader online growth.
This article is editorial content created for educational purposes and is not a paid endorsement unless explicitly stated otherwise. Tool availability and features are based on current source data and may change. Pricing was not available in the provided product data and should be verified directly with each provider. Any performance outcomes from improving product photography will vary by product type, competition, listing quality, and market demand.

Hi, I'm Giles Thomas.
Founder of AcquireConvert, the place where ecommerce entrepreneurs & marketers go to learn growth. I'm also the founder of Shopify agency Whole Design Studios.