Jewelry Photography for Ecommerce (2026 Guide)
Jewelry photography can make or break a product page. Rings, necklaces, and earrings are small, reflective, and detail-heavy, so weak lighting or soft focus can hide the very qualities shoppers care about most. If you run an online store, your goal is not just to create beautiful images. It is to create images that help buyers judge quality, size, finish, and wearability before they add to cart. This guide walks you through the practical choices that matter, from white background jewelry photography to flat lay setups and AI editing workflows. If you are comparing your broader setup, AcquireConvert also has useful resources on ecommerce tools that support photography, merchandising, and conversion work across your store.
Contents
What good jewelry photography needs to do
Strong jewelry photography helps shoppers answer a few critical questions fast. Is the item finely made? What does the metal tone actually look like? How large is it on the body or against other objects? Is the stone bright, clear, and well cut? Your image set should reduce uncertainty, because uncertainty is what slows conversion on detail-oriented products.
For most ecommerce stores, that means combining a few image styles instead of relying on one. White background jewelry photography works well for collection pages, paid ads, marketplaces, and clean product page galleries. Lifestyle or model shots help with scale and styling. Flat lay jewelry photography can work for bundles, gifting edits, or editorial landing pages, but it usually should not replace clean front-facing product images.
If you also sell on marketplaces, your image standards may need to match stricter formatting rules. That is why it helps to understand adjacent requirements like amazon product photography, where white backgrounds and image clarity are often non-negotiable.
For Shopify merchants, the practical goal is simple: create a repeatable system that produces consistent, zoom-friendly images without turning every product launch into a week-long production job.
Key approaches, setups, and AI tools
Jewelry is one of the hardest categories to photograph well because polished metals and gemstones reflect everything around them. That includes your lights, camera, room, and hands. A workable setup usually depends on controlled lighting, a stable camera position, and enough editing discipline to improve clarity without making the product look misleading.
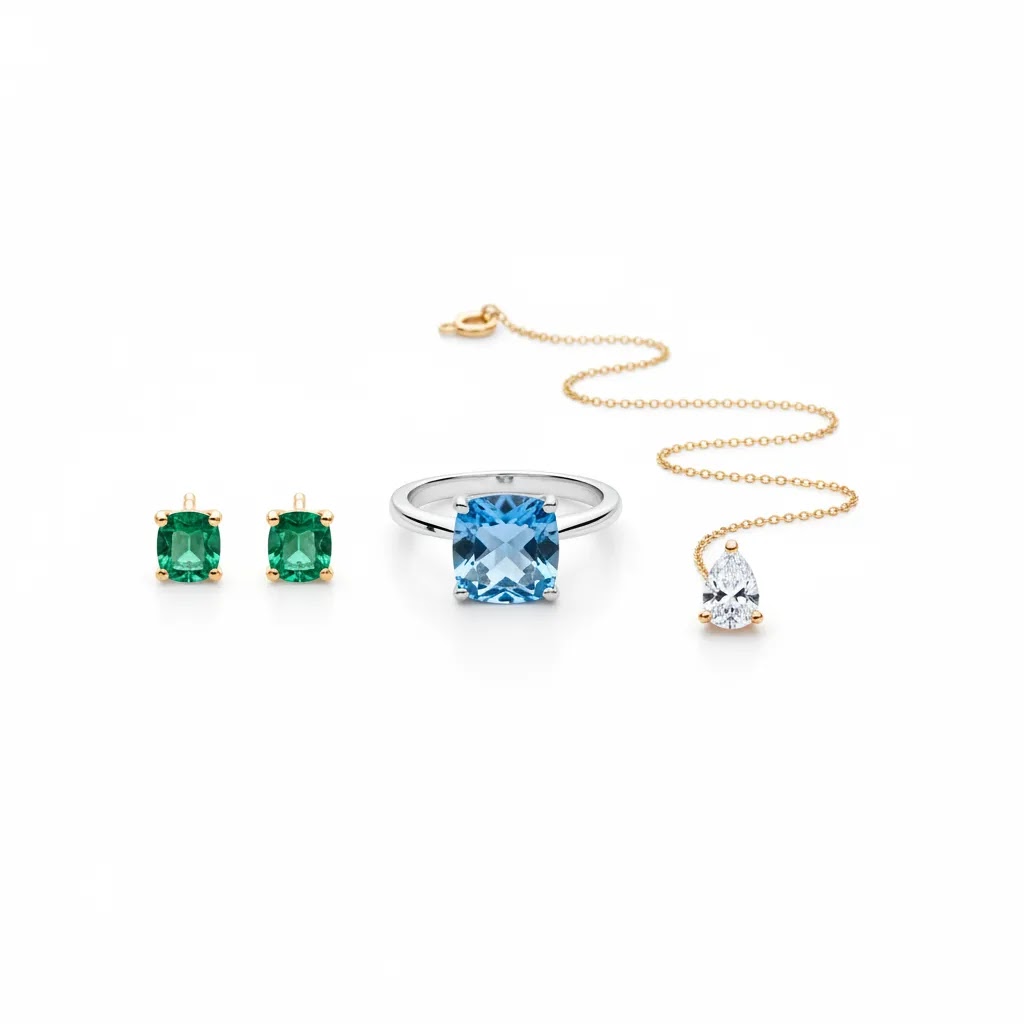
1. Start with white background product shots
Jewelry photography with white background is often the foundation of a commercial image set. It keeps attention on the piece itself and gives your catalog a cleaner, more consistent look. This is especially useful for rings, stud earrings, charms, and small pendants where shoppers need to inspect shape and finish closely. AcquireConvert’s White Background Photography category is useful if this is the style you want to standardize across your store.
2. Use lighting that softens reflections, not just brightens the product
With jewelry, more light is not always better. Hard light can create blown highlights on metals and make stones look flat. Diffused lighting, light tents, reflectors, and careful angle adjustments usually do more for image quality than simply adding brighter bulbs. If you are shooting in-house, test a few lighting distances and modifier types before you photograph your full collection.
3. Add scale and styling images where they influence conversion
Catalog images should handle clarity. Secondary images should handle context. A pendant on a model, stacked rings on a hand, or earrings shown from front and side angles can help shoppers understand proportion. If your store depends on styling inspiration, your broader ecommerce photography strategy should include both merchandising and conversion goals, not just aesthetics.
4. Use AI editing to speed repetitive production tasks
AI can be genuinely useful for jewelry teams when it handles narrow tasks well. Based on the current tool data available, ProductAI offers several relevant options:
These tools may save time on background cleanup, simple merchandising variants, or repurposing older creative. They are less reliable if you need highly accurate gemstone color, flawless edge handling on intricate prongs, or luxury-grade campaign imagery without manual review.
5. Know when AI mockups help and when they do not
AI-generated scenes and mockups can support ads, social posts, and merchandising concepts, especially when you need more volume than your studio can produce quickly. They can also help with concept testing before a larger shoot. But for hero product images on high-consideration items, you still need careful quality control. If you are evaluating that option, AcquireConvert’s guide to using a mockup generator can help you think through where generated imagery belongs in your workflow.
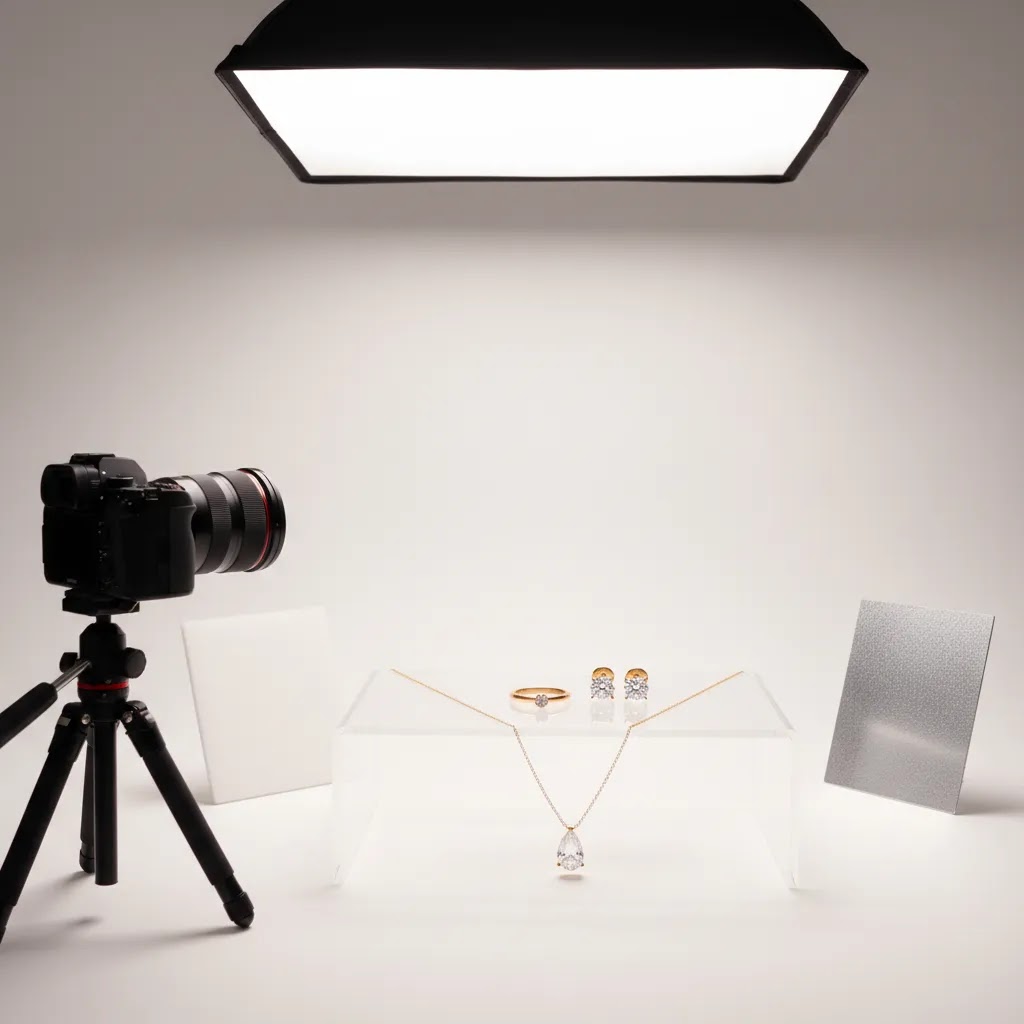
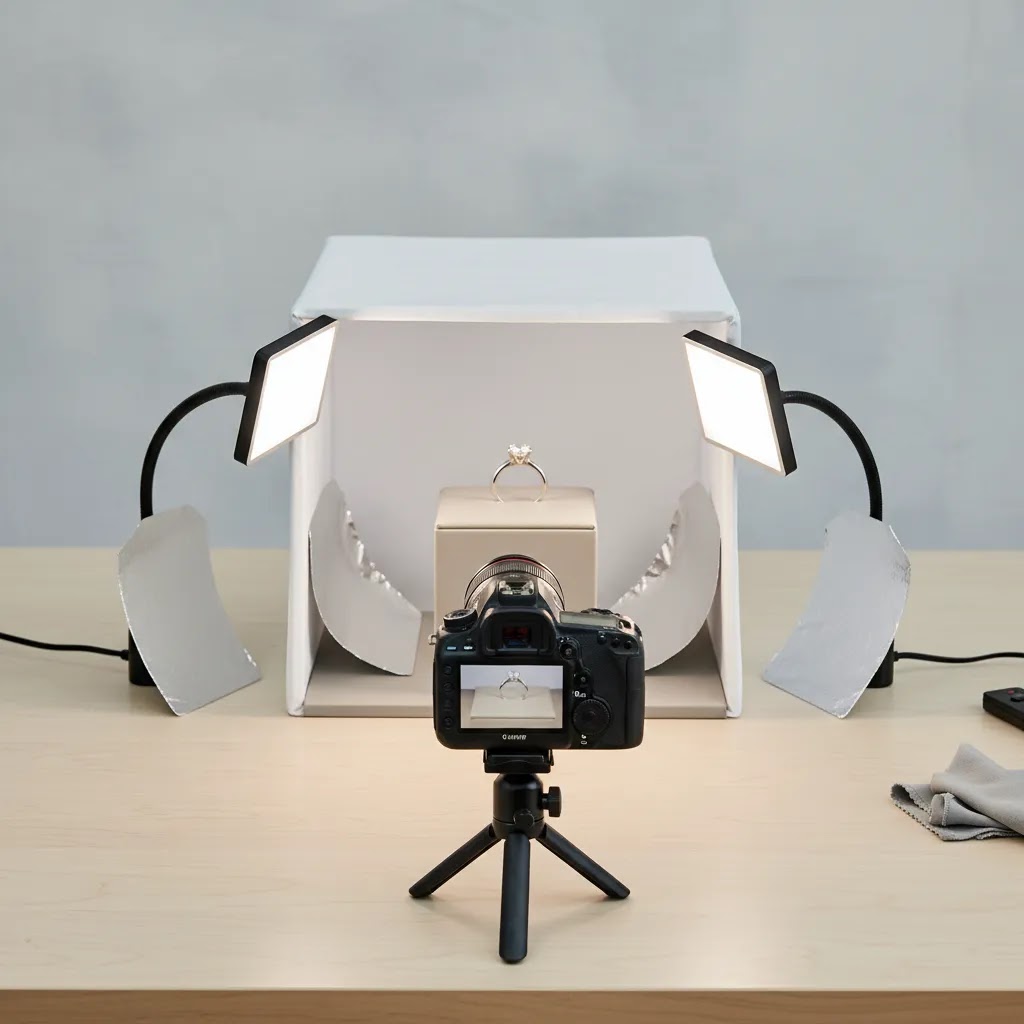
Jewelry photography setup: a practical home studio checklist
Here’s the thing: you do not need a full commercial studio to get clean, consistent jewelry photos. You do need a controlled setup that reduces reflections, keeps the camera stable, and gives you repeatable angles. For most Shopify store owners, the best target is a “minimum viable” setup you can recreate every time you add new products.
A minimum viable in-house setup that covers most catalog needs
A light tent or strong diffusion is the centerpiece. Jewelry reflects whatever it “sees,” so your job is to make it see clean, soft, neutral surfaces. Pair that with two lights placed at roughly 45-degree angles to the product, aimed into the diffusion rather than directly at the jewelry.
From a practical standpoint, the other items that matter more than people expect are the unglamorous ones: a tripod so your images stay sharp, microfiber gloves so you are not fighting fingerprints, a small amount of wax or museum putty to hold pieces at a consistent angle, and a simple dust routine. Jewelry shows dust fast, especially on macro close-ups and white backgrounds. If you can keep a blower, microfiber cloth, and a soft brush next to your shooting area, you will save a lot of retouch time.
Camera and phone settings that help with small, reflective products
If you are shooting with a camera, use a tripod and treat consistency as the goal. A smaller aperture (often around f/8 to f/16 on many lenses) can help keep more of the ring face or pendant detail in focus. The tradeoff is you need more light, a slower shutter speed, or a higher ISO. Since jewelry is not moving, a slower shutter speed is typically fine as long as the camera is locked off on a tripod and you use a timer or remote so you are not adding vibration when you press the shutter.
If you are shooting with a phone, macro mode can help, but it also has limits. Many phones shift focus unexpectedly at very close distances, and tiny hand movements can cause blur. The way this works in practice is simple: back up slightly, use 2x or 3x optical zoom if your phone has it, and keep the phone stable on a small tripod. If your phone app allows it, lower ISO to reduce grain and use exposure control so metal highlights do not blow out. You can brighten the image later more safely than you can recover blown highlights on polished metal.
Positioning tricks so tiny pieces read clearly
What many store owners overlook is that “sharp” is not only a camera setting. It is also staging. Rings often look sloppy if they are not perfectly level, especially on a white background where the symmetry is obvious. A tiny wedge of putty behind the band can fix the angle without being visible. Chains photograph better when they are gently tensioned and untangled, then arranged into a consistent curve you can repeat across variants. Earrings look cleaner when prongs and posts are aligned, because misalignment creates odd reflections and makes the piece feel lower quality even if it is not.
Reflection control starts here too. Keep a couple of small white and black cards next to your tent. You can place them just outside the frame to clean up what the jewelry reflects, add definition to metal edges, and avoid the “gray blob” look that happens when everything is evenly lit with no shape.
How to photograph reflective jewelry without harsh glare
Diffusion is the starting point, but it is not the whole strategy. Reflective jewelry is basically a mirror. If your piece is reflecting your room, your camera, or a bright bulb, you will see it. The goal is to make the jewelry reflect controlled, clean surfaces and to shape those reflections so metal still has definition.
Build a larger soft source, not just a brighter one
Consider this: the size of your light source relative to the product affects how harsh the reflection looks. A small light creates a small, harsh highlight. A larger diffused surface creates a broader, softer highlight that reads as “polished” instead of “blown out.” Light tents do this naturally. If you are not using a tent, a scrim effect is the next best thing. That can be as simple as shining your lights through diffusion material so the jewelry sees a larger white surface.
Distance matters too. Moving lights farther back and increasing diffusion area often smooths metal reflections and reduces the hard hotspots that make jewelry look cheap or overexposed.
Use black flags and white reflectors to shape metal edges and stone sparkle
Even soft light can make jewelry look flat if everything is evenly bright. This is where “flags” come in. A black card placed near the jewelry, outside the frame, can create a clean dark line reflection that defines edges and gives metal more shape. A white card can fill shadows and brighten specific areas without adding another direct light that causes glare.
Gemstones can be tricky. If a stone looks dead, it is often because it is only reflecting a big uniform white surface. Sometimes you need a controlled darker reflection (a black card) or a slightly different angle so facets pick up contrast. You can also try raising the light slightly or shifting the piece so the stone catches a more interesting reflection pattern, while still staying honest to how it looks in real life.
A quick troubleshooting flow that fixes most problems fast
If you are stuck, change one thing at a time and re-shoot. These are the most common issues and what to adjust first:
The reality is you are not “lighting” the jewelry as much as you are lighting what the jewelry reflects. Once you think of it that way, the fixes become more predictable.
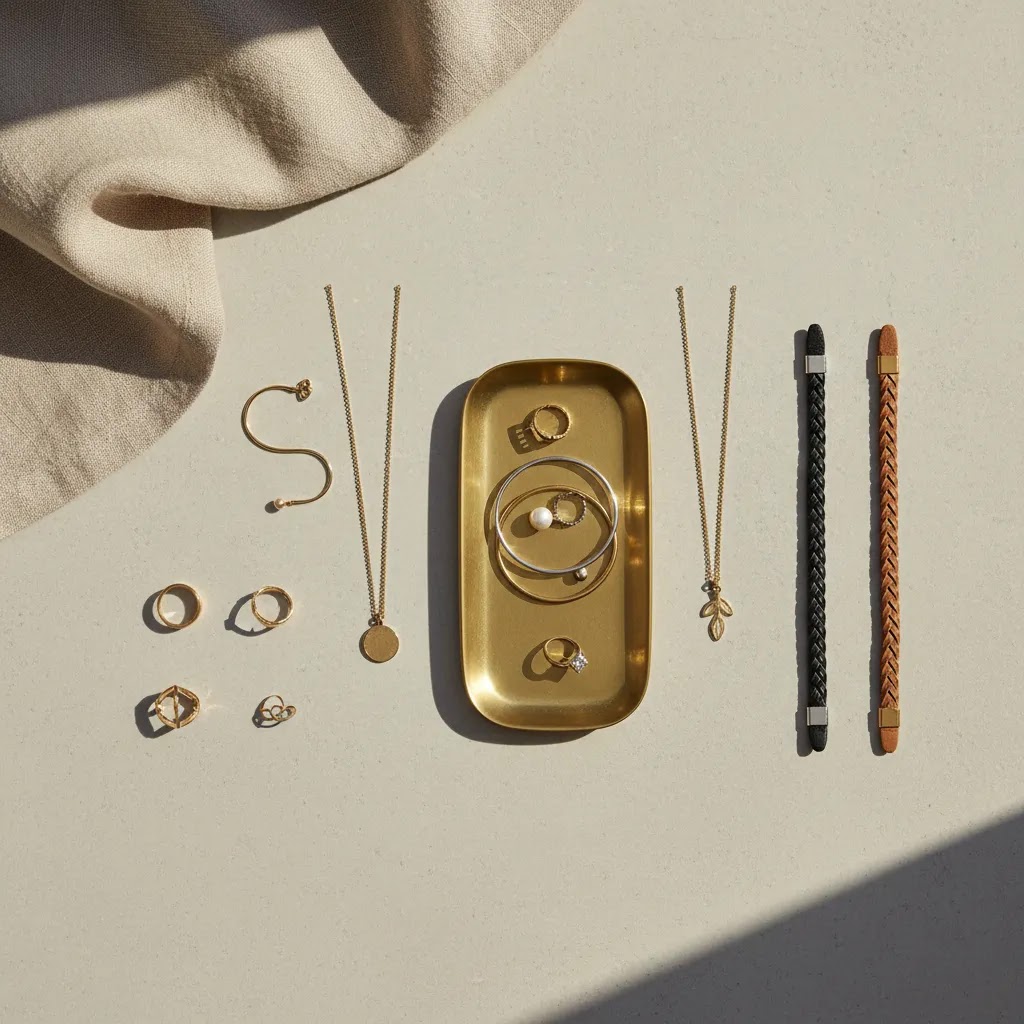
Props, flat lay styling, and brand consistency
Scale and styling shots can help conversion, but they also introduce a new risk: inconsistency. If every drop has a different surface, shadow direction, and crop style, your Shopify collections can start to look messy fast. The best approach is usually to choose a small set of props and surfaces you can repeat, then treat them as templates.
Props that support jewelry photography, and when they distract
Subtle textures tend to work best for ecommerce because they add a premium feel without pulling attention away from the piece. Stone, linen, matte acrylic, and clean wood tones are common choices because they photograph predictably and do not create weird color casts. For certain categories, ring cones, busts, and stands can be useful if they help shoppers understand size and drape, especially for necklaces and longer earrings.
Now, when it comes to props, the main rule is that the product still needs to be the hero. If a prop is brighter than the jewelry, has a strong pattern, or creates reflections you cannot control, it may reduce clarity and hurt conversion. The same is true for highly trendy editorial styling that looks great on social but makes it harder to judge the actual product.
Flat lay composition rules for ecommerce, not just editorial
Flat lay jewelry photography can work well, but it needs to be designed for how it will be cropped and used across your store. Leave space so you can crop for square thumbnails, vertical social placements, and product page galleries without cutting off key detail. Keep your angles consistent, too. A slight change in camera height or rotation can make a set feel mismatched when shoppers flip through product pages quickly.
Shadow style consistency matters more than most people expect. If one flat lay has crisp shadows and the next has none, the collection page can look like it was stitched together from different brands. Decide whether your brand look is “bright and airy” or “moody with defined shadows,” then keep lighting position and diffusion consistent so every launch fits the same visual system.
Plan your shots for Shopify outputs so you do not reshoot everything
For most Shopify store owners, you want each shoot to produce multiple usable crops. Think of it this way: one “session” should give you a clean hero for the product page, a consistent crop for collection grids, and a couple of variants you can use in ads or gift edits. That usually means shooting a little wider than you think you need, keeping the product centered when it matters, and capturing a few predictable angles you can repeat across the catalog.
If you are using flat lays as a supporting format, build a repeatable template for launches. Use the same surface, keep the same spacing rules, and lock in camera height with tripod marks. You will spend less time reinventing the look each time, and your store will look more consistent, which is often a quiet conversion win.
Pros and Cons
Strengths
Considerations
Who this approach is for
This approach fits ecommerce brands that sell jewelry directly online and need a practical image workflow rather than a one-off creative shoot. It works especially well for Shopify merchants managing frequent product drops, made-to-order collections, or broad catalogs where consistent product presentation matters. If you are deciding between in-house production and outsourcing, a dedicated product photography studio may make sense for premium launches, while AI-assisted editing can support routine catalog updates. The best setup depends on your volume, quality bar, and how much visual storytelling your brand requires to convert first-time shoppers.
AcquireConvert recommendation
If you are building or refining your jewelry photography workflow, the most sensible path is usually a hybrid one. Start with a repeatable base process for clean product images, then add selective lifestyle photography and AI-assisted editing where it actually saves time. That approach is more realistic for growing ecommerce teams than trying to perfect every image manually from day one.
AcquireConvert is a useful specialist resource for this kind of decision because the content is framed around what store owners can implement in real operations, not just what looks impressive in a portfolio. Giles Thomas brings the perspective of a Shopify Partner and Google Expert, which matters when your product images need to work not only on your storefront but also in merchandising, search visibility, and paid acquisition. For adjacent guidance, explore the E Commerce Product Photography category to compare practical image strategies across different product types and selling channels.
How to choose the right jewelry photography workflow
There is no single best setup for every jewelry brand. The right choice depends on your catalog size, price point, visual standards, and publishing frequency. Here are the criteria worth using if you want a process that supports ecommerce performance rather than just attractive images.
1. Match image type to buying intent
If shoppers mainly need clarity and comparison, prioritize white background jewelry photography first. If your average order value depends on styling, gifting, or layering, invest more in model and editorial shots. For many stores, the best mix is 60 to 80 percent clean product photography and the rest contextual imagery.
2. Decide what should be shot and what can be edited
Core product detail usually deserves a real photo. Simple cleanup, background standardization, and resizing can often be handled with AI tools or editing software. This split tends to keep quality high while reducing production bottlenecks. Be careful with gemstone color, metal tone, and reflective surfaces though. Those areas often reveal over-editing fastest.
3. Consider your catalog velocity
A handmade jeweler releasing a few pieces a month can justify a slower, more handcrafted image process. A fast-moving catalog with many variants needs speed and consistency. In that case, templates, standardized camera angles, fixed lighting marks, and AI-assisted cleanup become more valuable.
4. Use channel requirements to guide your standards
Your own site may support richer visual storytelling than marketplaces or ad platforms. Still, your base image set should satisfy the most restrictive major channel you use. That reduces duplicate work later. If you list across Shopify, marketplaces, and social commerce placements, consistency becomes more important than creative variety alone.
5. Build for trust, not just style
Best ai for jewelry photography is usually the tool or workflow that helps you present products accurately and consistently, not the one that generates the most dramatic visuals. Shoppers buying jewelry online are often sensitive to finish, scale, and authenticity. Anything that makes the item look misleading may increase returns or support questions. A trustworthy image set usually includes front, angled, close-up, and scale-related views with editing that stays true to the real product.
Frequently Asked Questions
What is the best background for jewelry photography?
For ecommerce, a white background is usually the safest starting point. It keeps the product consistent across collection pages, ads, and marketplace listings. It also makes editing and catalog management easier. You can then add lifestyle or editorial images as secondary assets where shoppers need styling inspiration or scale context.
Is AI jewelry photography good enough for product pages?
AI can be useful for editing support, especially background cleanup, resolution enhancement, and alternate scene creation. It may be good enough for some secondary visuals or fast catalog work. But for premium jewelry, hero images still need careful review to make sure color, texture, prongs, and reflections look accurate and believable.
How many images should a jewelry product page have?
Many stores do well with at least four to six images per product. A typical mix includes a front hero image, angled view, close-up detail, scale reference, and one contextual or on-body shot. More may be helpful for higher-priced pieces, customizable products, or items where clasp design and side detail affect the purchase decision.
Does flat lay jewelry photography work for Shopify stores?
Yes, but it works best as a supporting format rather than the only format. Flat lays can tell a styling story and work well for bundles, gift guides, and social content. They are less effective when a shopper needs to inspect fine craftsmanship or understand exact size, depth, and fit from the product page gallery.
Should I hire a local photographer or shoot jewelry in-house?
That depends on volume, quality requirements, and available time. In-house setups can work well if you need frequent new product uploads and can standardize the process. A local or specialist studio may be better for premium campaigns or complex reflective items. Many brands use both: in-house for routine catalog updates and studio support for launch assets.
Can AI remove backgrounds from jewelry photos accurately?
It can often do a solid job on simpler shapes and clean source images. Accuracy becomes more variable with chains, intricate settings, transparent stones, and reflective edges. Always review the cutout closely before publishing. Small masking errors can be obvious on zoom and may make product pages look less polished than intended.
What lighting works best for white background jewelry photography?
Diffused lighting is usually the best place to start. Softboxes, light tents, and reflected light help control glare better than direct harsh lighting. The main goal is not only brightness. It is also reflection control and surface definition. Test multiple angles so metals retain shape and stones still show sparkle without blowing out highlights.
Do I need lifestyle images if I already have white background shots?
Not always, but they often help with conversion on fashion-led or gift-oriented collections. White background shots handle clarity well. Lifestyle images handle emotion, scale, and styling ideas. If your pieces are stackable, layered, or occasion-based, adding even one or two contextual images can make the product feel easier to imagine wearing.
What should I edit carefully in jewelry images?
Pay closest attention to color accuracy, reflections, edge cleanup, dust removal, and sharpening. Jewelry can shift from polished to unrealistic very quickly if edits are too aggressive. Keep the final result true to the product the buyer will receive. That is especially important for metal finish, gemstone hue, and intricate construction details.
Which app is best for jewellery photography?
It depends on what you mean by “app,” and what part of the workflow you want to improve. If you are trying to standardize backgrounds and speed up catalog prep, an AI editing tool like the ProductAI options listed earlier in this guide may help. If you are trying to improve capture on a phone, look for a camera app that gives you manual control over focus and exposure so you can protect highlights on metal and avoid soft focus on small details. Whatever you use, plan to review images on a larger screen before publishing, because jewelry flaws and masking errors are easy to miss on a phone.
How much to charge for jewelry photography?
If you are a store owner pricing photography as a service, rates vary widely based on complexity, volume, retouching level, and usage rights. A simple white background catalog set for a high volume of similar items is typically priced very differently from a small batch of highly retouched hero images for premium pieces. Think in terms of inputs you can control: time per item (shooting plus retouching), equipment and studio overhead, and the client’s expectations for output (angles, close-ups, on-model, video). If you are outsourcing for your own Shopify store, ask for a per-SKU quote that clearly lists how many final images you get per product and what level of retouching is included, so you can compare options fairly.
What is the 20 60 20 rule in photography?
The “20 60 20” rule is usually mentioned as a guideline for visual balance in an image: about 60% of the frame is the main subject area, with 20% supporting elements and 20% negative space. You will see it referenced in styling and composition contexts more than as a strict technical rule. For ecommerce jewelry photography, the practical takeaway is to keep the product dominant in the frame, leave enough clean space for consistent cropping across Shopify thumbnails, and avoid clutter that competes with the item’s details.
Key Takeaways
Conclusion
Jewelry photography is one of those areas where small execution choices have an outsized effect on perceived quality. Shoppers cannot touch the product, so your images need to carry the work of clarity, trust, and desire at the same time. For most ecommerce brands, that means combining disciplined white background shots with selective lifestyle imagery and carefully reviewed AI editing support. If you want more practical guidance, AcquireConvert is a strong place to keep researching. Giles Thomas’s perspective as a Shopify Partner and Google Expert helps connect product imagery decisions to real ecommerce outcomes, from merchandising to acquisition. Use this guide as your framework, then compare related photography resources on AcquireConvert to refine the workflow that fits your store.
This content is editorial and provided for informational purposes only. It is not a paid endorsement unless explicitly stated otherwise. Tool availability and features are subject to change, so verify current details directly with the provider before use. Any performance impact from photography or AI tools will vary by store, product type, traffic quality, and implementation.

Hi, I'm Giles Thomas.
Founder of AcquireConvert, the place where ecommerce entrepreneurs & marketers go to learn growth. I'm also the founder of Shopify agency Whole Design Studios.