Large Product Photography Guide for Ecommerce (2026)
Large product photography is less about camera tricks and more about control. Once you start shooting furniture, fitness equipment, large decor, mattresses, strollers, or bulky multi-box products, the usual tabletop setup stops working. You need more space, more intentional lighting, and a workflow that keeps images consistent across your storefront, marketplaces, and ads. For Shopify merchants, the goal is simple: create accurate, attractive images that help customers understand scale and quality before they buy. This guide explains how to shoot oversized items, when to use a real set versus AI-assisted editing, and where tools like ProductAI photo editors can speed up background cleanup, scene creation, and post-production. If your catalog includes large items with higher return risk, getting photography right may have a direct impact on conversion quality.
Contents
Overview
Large product photography sits in a different category from standard packshot work. Bigger items create practical problems, such as limited studio space, uneven lighting, lens distortion, complicated styling, and transportation costs. If you sell oversized goods on Shopify, your images need to do two jobs at once: present the product cleanly for product pages and communicate context for shoppers who cannot judge dimensions in person.
That is why most ecommerce teams use a mixed workflow. They combine core photography fundamentals with editing tools that reduce production friction later. AcquireConvert reviews visual commerce workflows through the lens of real store performance, drawing on Giles Thomas's experience as a Shopify Partner and Google Expert to keep recommendations practical for lean ecommerce teams.
For foundational strategy, it helps to understand where oversized item shoots fit into the wider ecommerce photography workflow and how they connect with the broader set of ecommerce tools many merchants use to prepare store assets faster.
From the current product data available, relevant tools include ProductAI options such as AI Background Generator, Free White Background Generator, Increase Image Resolution, Remove Text From Images, Background Swap Editor, Place in Hands, Magic Photo Editor, and Creator Studio. The live tool data provided does not include pricing or platform ratings for these resources, so any decision to use them should be based on workflow fit rather than assumed cost savings.
Preparing the studio for large product shoots
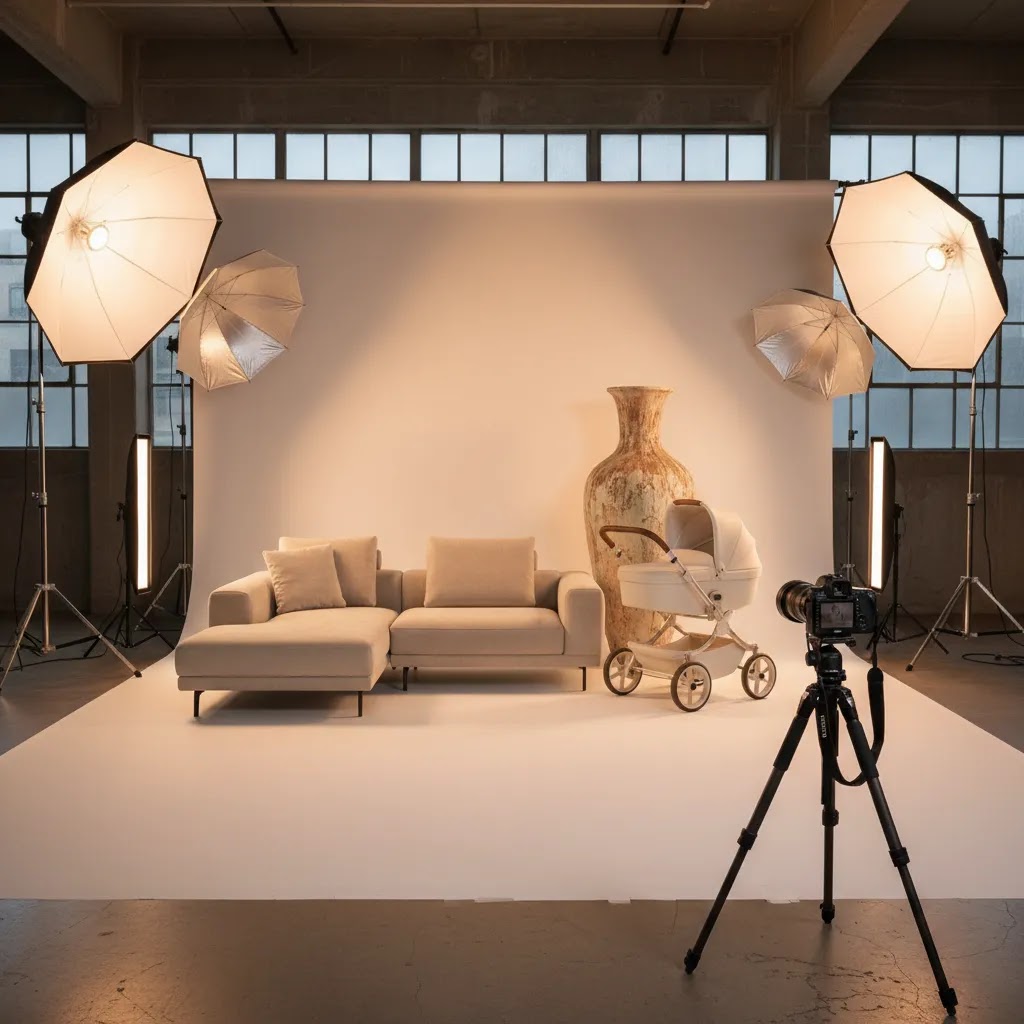
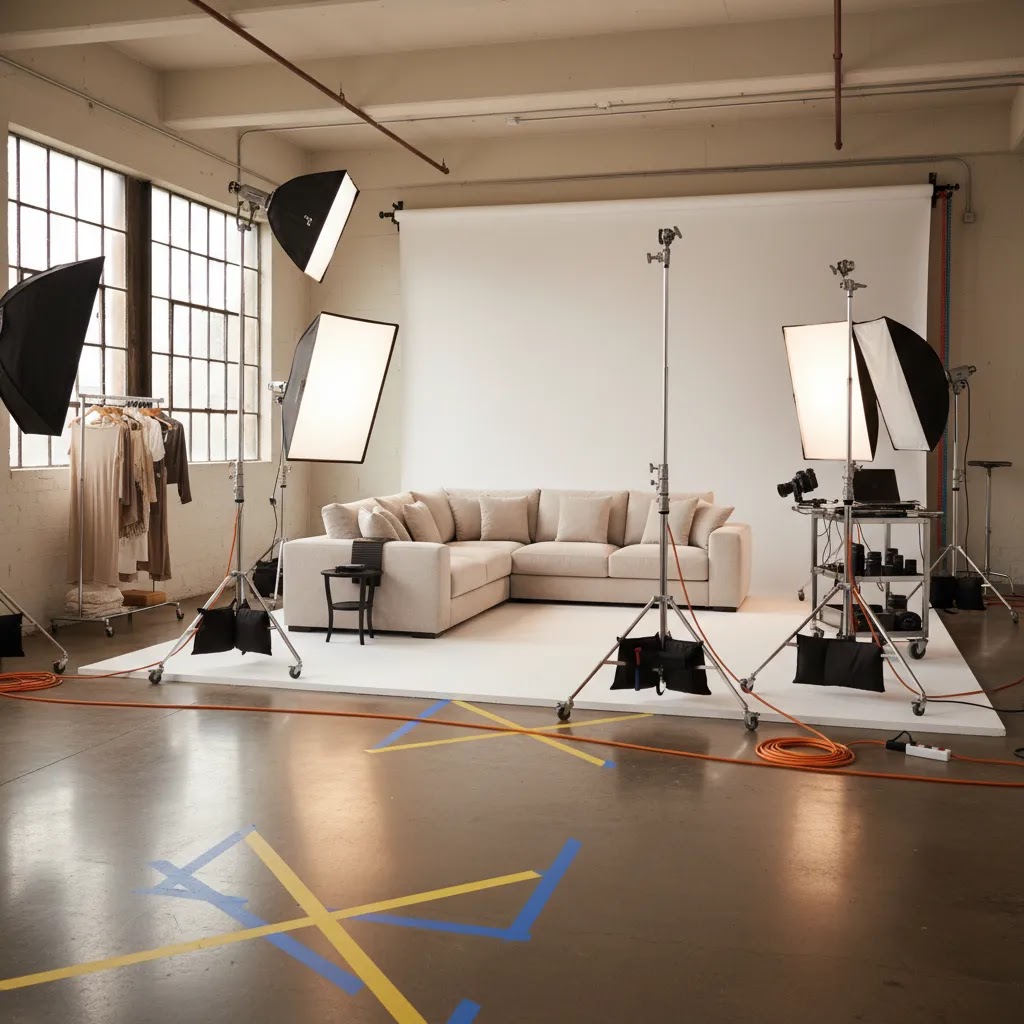
Here is the thing: most large product shoots go off the rails because of logistics, not because your camera is not “good enough.” When the item is big, you are managing space, movement, and safety at the same time as lighting and styling.
Start by creating a functional shooting zone with clear space on all sides. You want room to walk lights around the product, adjust modifiers, and step back with a longer focal length. In many cases, you will also want to keep the product a few feet away from the background so you can control shadows and reduce background wrinkles or seams showing up behind the item.
Your backdrop needs to be sized for the product, not for your camera. For large items, backdrop width and height matter because you may need to shoot higher angles or wider compositions for Shopify hero images, and you do not want to crop too tight and accidentally cut off edges. If you are using a sweep, plan for enough floor length so the curve stays smooth and does not crease under the product weight.
From a practical standpoint, moving bulky inventory is often the slowest part of the day. Protect floors and walls, especially if you are shooting in a rented space or a corner of your warehouse. Furniture feet, metal frames, and boxed goods can scuff surfaces quickly while you are repositioning for different angles. Sliders, moving blankets, and basic floor protection can reduce damage and save you time retouching later.
Safety is not optional. Large lights and stands can tip if they are bumped while you are circling a big product. Use sandbags, keep cables taped down, and avoid stacking unstable props. If the product needs assembly, confirm it is stable before anyone starts working around it, especially with tall items like shelving, lamps, or gym equipment.
Consider this a simple pre-shoot checklist mindset. Before shoot day, confirm the product is clean, assembled, and defect-free. Have tools on hand for quick fixes, such as an Allen key set, microfiber cloths, and a lint roller. Build a shot list for each SKU so you do not improvise all day, and capture measurements you will want later for scale communication and consistent framing across your catalog.
What Matters Most When Shooting Oversized Products
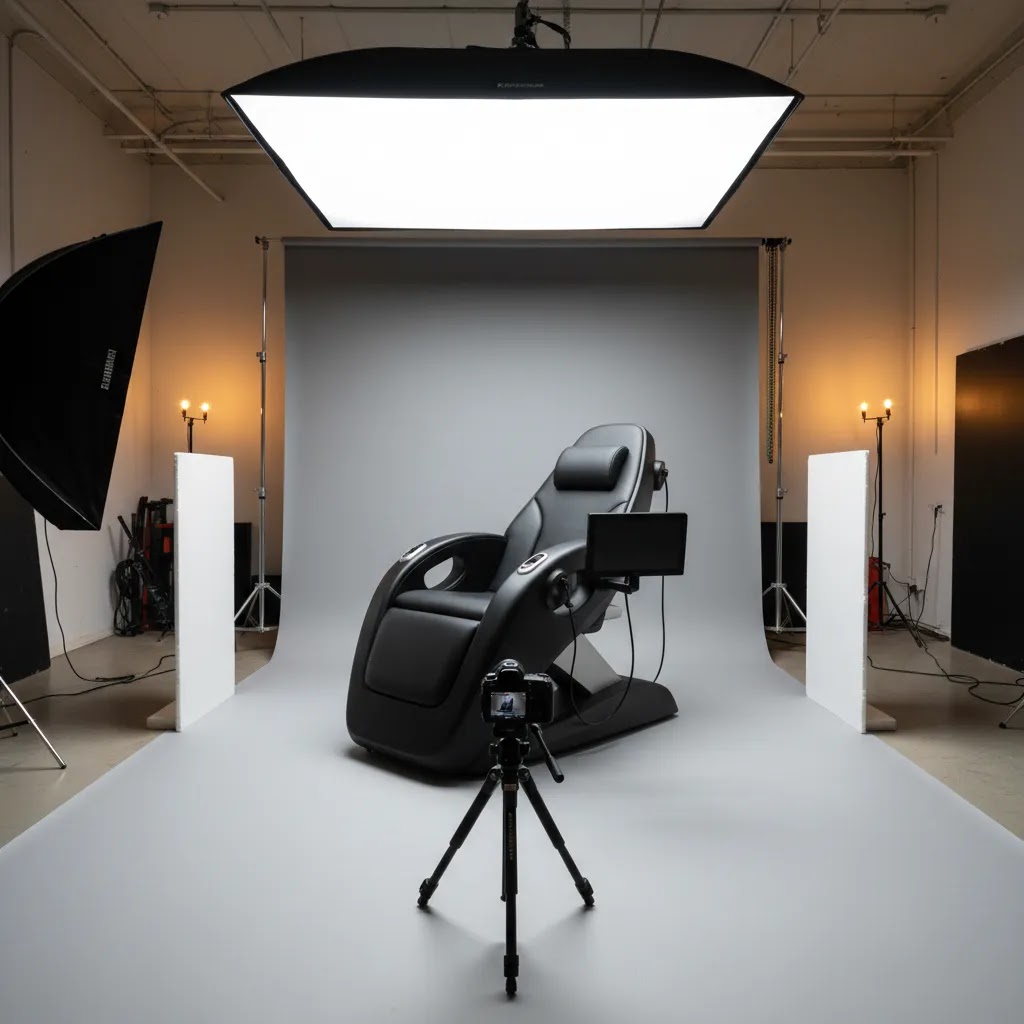
Space planning comes first. Large product photography often fails before the shutter clicks because the set is too cramped. You need enough distance between the camera, product, and backdrop to avoid harsh shadows and warped edges. If you are shooting a sofa, dining table, or exercise machine, even a technically sharp image can still look wrong if the perspective compresses or stretches the shape unnaturally.
Lighting control is the second major factor. Large items need broader, more even light coverage than smaller catalog products. Multiple light sources, larger modifiers, and careful spill control are usually necessary. If you need help refining your product photo lighting setup, that category is worth reviewing before investing in more gear.
Context shots matter more with oversized products than with small accessories. A chair, treadmill, patio heater, or floor lamp often benefits from one clean white-background hero image plus a few in-room lifestyle angles. Those supporting images reduce uncertainty around size, finish, and everyday use. This is where tools like the AI Background Generator or Background Swap Editor may help with post-production concepts, especially if reshooting every lifestyle variation is not realistic.
Scale communication is another priority. Add a human reference, room context, or dimension graphic where appropriate. The ProductAI AI Background Generator can help create alternate settings for marketing assets, while the Place in Hands tool is more useful for smaller products than truly oversized ones. For large items, real environment photography is usually still the more credible option.
Post-production should focus on correction, not deception. Use editing to clean backgrounds, straighten perspective, improve brightness consistency, and remove distracting text or marks. The current product data includes Remove Text From Images, Increase Image Resolution, and Magic Photo Editor, which may help teams polish large product images for ecommerce use.
If your oversized catalog also sells on marketplaces, your image standards may differ by channel. For example, the clean hero image approach used in amazon product photography is often stricter than what you would use on branded Shopify landing pages or paid social creatives.
For staging decisions, a dedicated product photography studio setup usually becomes worthwhile once you have a repeatable large-item catalog workflow, frequent launches, or regular reshoots caused by supplier changes.
Camera settings and lens choices for large products
Large products expose camera and lens mistakes faster than small products. The goal is not “cinematic,” it is repeatable and accurate, especially if you want a consistent look across Shopify collection pages and product detail pages.
A practical baseline is to prioritize depth of field and consistency. For long items like sofas, tables, or bed frames, you often need a smaller aperture than you would for a small packshot so the near and far edges do not fall out of focus. If you are using strobes, you can typically keep ISO low and adjust exposure with strobe power and aperture, then set shutter speed within your flash sync limits. If you are using continuous lights, you may need a slower shutter speed or higher ISO, which makes a tripod and a stable setup much more important.
White balance is where ecommerce teams lose time later. Auto white balance can drift shot-to-shot, especially when you are repositioning lights around a big subject. Lock your white balance once you have your lights dialed in, and keep it consistent across a batch. That simple step can reduce color correction work when you are editing multiple SKUs or finishes.
Now, when it comes to lens choice, distortion control matters more than “fitting it all in.” Ultra-wide lenses can stretch corners and make furniture legs, edges, and frames look wrong. In many cases, you are better off stepping back and using a standard or short telephoto focal length so lines look natural. If your space is tight and you feel forced into a wide lens, that is usually a signal to revisit the shooting area, not a reason to accept distortion.
Camera height and leveling are also big. Furniture and large home goods have lots of straight lines, and shoppers notice when horizons are off or verticals lean. Keep your camera level, use a tripod, and pay attention to your sensor plane relative to the product. If you tilt the camera up or down to “make it fit,” you are creating perspective problems that you will have to fix later.
For catalog consistency, tethered shooting can help if your setup supports it. Seeing images on a larger screen makes it easier to spot crooked lines, reflections, and asymmetry before you move on. Once you have a look you like, lock exposure and keep your framing as consistent as possible. Think of it this way: every time you change exposure, focal length, or camera height mid-batch, you are creating extra work for editing and making your Shopify grid feel less cohesive.
Pricing and Costs
The cost of large product photography is usually higher than standard ecommerce image production. The extra expense comes from studio size, freight handling, set building, lighting equipment, assistants, and longer retouching time. Even if you shoot in-house, the labor cost per finished image is often higher because setup and repositioning take longer.
For AI-assisted tools in the current dataset, live URLs are available but no verified pricing details were returned by the product source. That means it would be irresponsible to quote plan costs for AI Background Generator, Free White Background Generator, Increase Image Resolution, Remove Text From Images, Background Swap Editor, Place in Hands, Magic Photo Editor, or Creator Studio. If you are evaluating these tools, check each product page directly before building them into your content budget.
From a practical ecommerce standpoint, it helps to split your costs into three buckets: capture, editing, and usage. Capture covers the actual shoot day. Editing covers background cleanup, resizing, retouching, and alternate aspect ratios for Shopify, marketplace feeds, and ads. Usage covers how many channels and campaigns each image set needs to support.
If you sell fewer oversized products with strong margins, paying more per image can still make sense because visual accuracy may reduce costly returns. If your catalog is broad and refreshed frequently, a hybrid model often works better: shoot core angles professionally, then use tools such as a mockup generator or AI editing software for secondary creative variations.
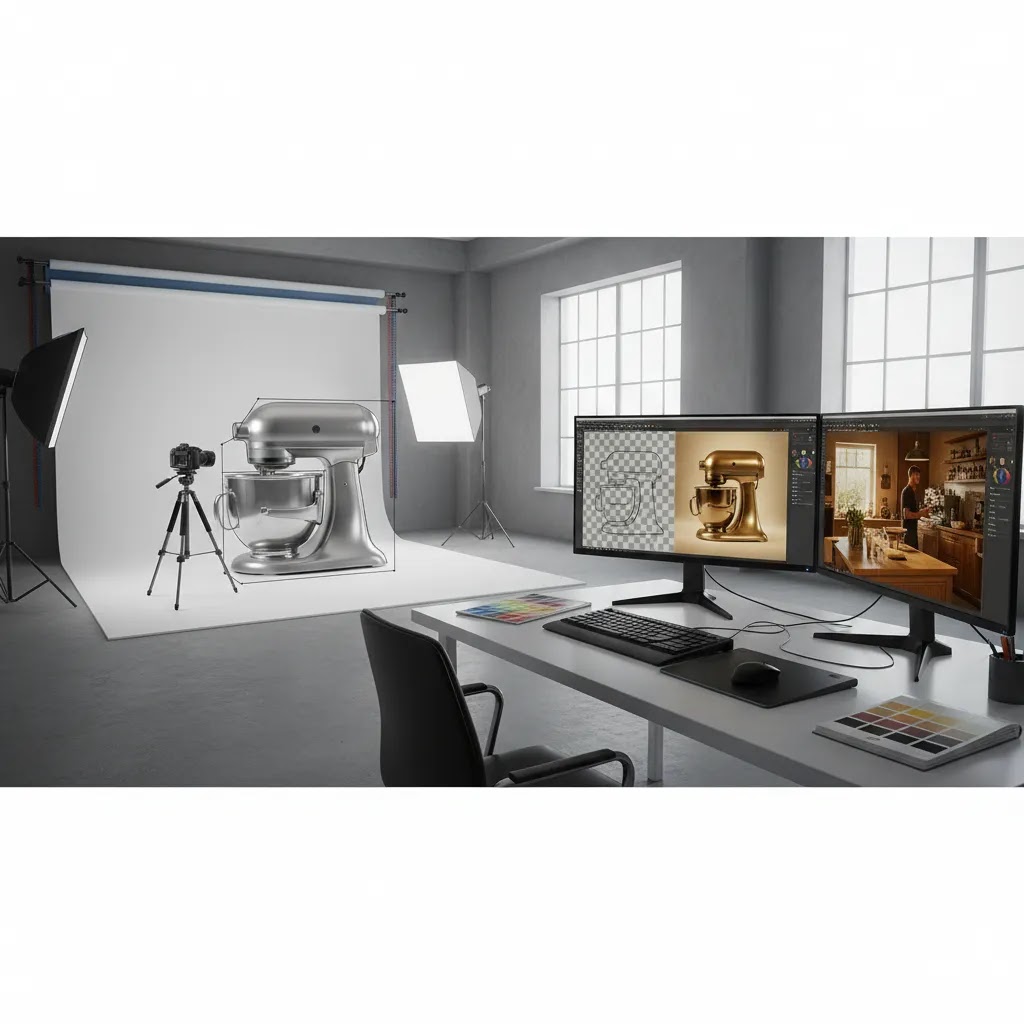
Editing and post-production workflow for large product photography
With oversized products, editing is where you protect accuracy. Your goal is to make the product look clean and consistent, while keeping scale cues believable and the finish true to what ships to the customer.
A concrete retouching flow usually starts with straightening and perspective correction. Large items tend to show floor lines, wall lines, and seams that make an image feel “off” even if it is sharp. Correct verticals and horizontals so furniture lines look square, then handle distractions like backdrop wrinkles, floor seams, and scuffs that happened during moving and repositioning. If you are shooting on a sweep, cleaning the transition area is often the difference between an image that feels premium and one that feels like a warehouse photo.
Color matching matters more than one perfect hero shot. If you are selling multiple finishes, fabrics, or colorways, you need the entire set to match the real product and match each other. Use a consistent editing approach across angles so the chair does not look warm in one image and cool in another. This is also where it helps to work from a calibrated monitor, and to sanity-check edits against the real product under neutral light when you can.
Shadow control is another common pain point. Oversized products can look like they are floating if you remove too much shadow, or they can look dirty if you leave uneven shadows and blotches. Aim for a natural grounding shadow that is consistent with the direction and softness of your lighting. If you use AI-assisted cleanup, treat it as a first pass, then review edges and transitions carefully because large, clean surfaces make mistakes obvious.
For ecommerce usage, plan your deliverables instead of exporting one file and hoping it works everywhere. Shopify product pages, collection tiles, and paid ads often need different crops and aspect ratios. You may want a clean hero crop for thumbnails, a wider crop that shows the full silhouette, and close-ups that support zoom. A simple file naming convention, such as sku-angle-color, can also reduce team confusion when you are uploading to Shopify, sharing with marketplaces, or handing off to an ad team.
What many store owners overlook is QA before upload. Check for halos around edges, warped lines from heavy perspective correction, and color shifts introduced during background cleanup. Make sure scale cues, like floor contact points or recognizable hardware details, still look realistic after edits. Post-production should help a shopper feel confident, not create a mismatch between expectation and what arrives at their door.
Pros and Cons
Strengths
Considerations
Frequently Asked Questions
What is the best background for large product photography?
A white background is still the safest option for hero shots because it keeps the product page clean and works well across Shopify themes, marketplace listings, and paid creatives. For large items, though, a secondary lifestyle background is often just as important. It helps customers understand size and real-world use. The best approach is usually one clean isolated image plus a few contextual shots.
Do I need a warehouse-sized studio to photograph oversized products?
Not always, but you do need enough room to separate the product from the backdrop and lights. Tight spaces create harsh shadows and awkward angles. If your in-house setup is limited, start with smaller oversized items and outsource the largest pieces. Renting a larger location for batch shoots can be more practical than trying to force every item into a small room.
How do you photograph large products in small spaces?
Prioritize distortion control and shadow control. If you cannot step back far, avoid ultra-wide lenses that stretch edges and make furniture lines look wrong. Keep the product off the background if possible so you have room to light it cleanly, even if that means using a narrower composition and capturing extra angles for context. A tripod, consistent camera height, and a simple shot list also help you work faster in tight quarters because you are not constantly improvising.
Can AI replace a real shoot for large ecommerce products?
Usually not for the main product images. AI tools can help with editing, alternate backgrounds, and creative concepts, but oversized items still benefit from real photography for accuracy. This matters even more when products are expensive, bulky, or return-sensitive. AI may support your workflow, but it should not be treated as a substitute for a credible source image.
How many images should I use for a large product on Shopify?
Most stores should aim for a mix of clean product views, close-up detail shots, and at least one scale or room-context image. The exact number depends on complexity. Furniture or fitness gear may need more visual explanation than a basic storage bin. Focus on answering buyer questions visually rather than hitting an arbitrary image count.
What camera settings are best for product photography (especially for large items like furniture)?
Use settings you can keep consistent across the whole batch. In many cases that means a tripod, a smaller aperture for depth of field on long products, and a locked white balance so color does not drift shot-to-shot. With strobes, you can typically keep ISO low and adjust exposure with strobe power and aperture, then choose a shutter speed within your camera’s flash sync limits. With continuous lighting, you may need a slower shutter speed or higher ISO, so stability becomes even more important.
What lens works best for large product photography lighting and composition?
A moderate focal length often works better than going too wide. Wide lenses can distort corners and make large items look unnatural. In many cases, stepping back and shooting with a standard or short telephoto lens gives a more accurate result. Your lighting setup also matters because poor light can exaggerate shape issues even if the lens choice is solid.
How do you edit large product photos for ecommerce (perspective correction, background cleanup, color matching)?
Start with straightening and perspective correction so long lines and vertical edges look natural, especially for furniture. Then clean the background, remove seams and scuffs, and balance shadows so the product feels grounded rather than floating. After that, focus on color consistency across all angles and all SKUs, since shoppers notice when a finish looks different from image to image. If you use AI tools for cleanup, review edges closely to avoid halos and artifacts before uploading to Shopify or a marketplace feed.
What equipment do I need for large product photography (backdrop, lights, modifiers, tripod)?
You typically need more support gear than you expect. A stable tripod helps keep framing consistent and reduces the temptation to “fix it in post.” A backdrop that is wide and tall enough for the product, plus enough floor length for a smooth sweep, can prevent unnecessary retouching. Large modifiers help you create even light across bulky items, and basic safety gear, such as sandbags and floor protection, matters because stands and heavy products are harder to manage in tight spaces.
Should I edit large product photos with AI tools or Photoshop?
That depends on the task. Photoshop is still strong for precise retouching, perspective corrections, and detailed masking. AI tools are useful for speeding up repetitive edits, creating alternate scenes, or testing concepts. Many ecommerce teams use both. The right choice is not either-or, it is deciding which tool is more efficient for each part of the workflow.
How can I keep oversized product images consistent across my catalog?
Create a repeatable shot list, lighting diagram, crop standard, and color workflow before your next batch shoot. Consistency matters more than artistic variation on collection pages. Standardized framing helps your store feel more professional and makes comparison easier for shoppers. It also reduces rework when you upload new images to Shopify or external sales channels.
Key Takeaways
Conclusion
Large product photography is worth treating as a separate ecommerce discipline, not just a larger version of small-item shooting. Oversized products create more friction for shoppers because size, use case, and finish are harder to judge online. Better images can help reduce that uncertainty. For most Shopify merchants, the strongest approach is a hybrid one: invest in accurate source photography, then use editing and AI-assisted tools selectively for cleanup, alternate scenes, and channel-specific assets. If you are building out your visual workflow, start by tightening your lighting setup, standardizing your shot list, and deciding which images truly need a studio environment. Then test AI editing support where it saves time without compromising trust.
Disclosure: AcquireConvert may receive affiliate compensation from some third-party links mentioned in this content. We aim to evaluate tools and workflows honestly based on ecommerce usefulness. Any results from photography improvements or AI-assisted editing will vary depending on your store, product type, traffic, creative quality, and implementation.

Hi, I'm Giles Thomas.
Founder of AcquireConvert, the place where ecommerce entrepreneurs & marketers go to learn growth. I'm also the founder of Shopify agency Whole Design Studios.