Outdoor Product Photography (2026 Guide)
Outdoor product photography can give your store images a more natural, editorial feel than a plain studio setup. It can also be a smart option if you want lifestyle shots without booking a full product photography studio. The trade-off is control. Natural light changes fast, backgrounds get busy, and products that look great indoors may be harder to photograph outside. For Shopify and ecommerce store owners, the goal is not just attractive imagery. It is product photos that help shoppers judge color, scale, texture, and fit well enough to buy. This guide covers how to plan, shoot, and refine outdoor product photography so your images stay conversion-focused. If you are comparing broader visual workflows, AcquireConvert also has related guidance on ecommerce tools for store operators building a practical image stack.
Contents
Why outdoor product photography works for ecommerce
Outdoor product photography works best when the setting supports the product story. A hiking bottle on a trail, skincare near soft morning light, or apparel photographed in a real urban setting can feel more believable than a generic backdrop. That context often helps shoppers picture the product in use.
For ecommerce, though, lifestyle appeal should not replace product clarity. Your main image set still needs to show shape, finish, materials, and important details. That is why many merchants use outdoor photos as secondary gallery images while keeping cleaner front-on shots for product pages, marketplaces, and ads.
This is especially important if you sell across channels. Requirements for amazon product photography are usually stricter than what works on your own Shopify storefront. A strong image workflow often combines compliant listing photos, clean white background images, and more atmospheric outdoor photography for storytelling.
If you are building a full visual strategy, it helps to think in layers: marketplace compliance, product detail clarity, and lifestyle persuasion. Outdoor photography usually performs best in that third layer.
Outdoor composition rules that keep product photos conversion-focused
Here is the thing about outdoor product photography, you can get a beautiful image that still does a poor job selling the product. Ecommerce photos have to work at thumbnail size, inside a product gallery, and next to other items in your collection. Composition is what keeps the product readable.
Use a “primary, supporting, background” structure
Think of every frame as three layers:
From a practical standpoint, if the viewer notices the bench texture, bright leaves, or skyline before they notice the product, the shot is probably better as a brand image than a PDP image.
What the 20/60/20 rule looks like for product-in-scene shots
A simple framework that helps store owners is the 20/60/20 rule. In many product lifestyle compositions:
This is not a strict measurement. It is a reminder that most ecommerce lifestyle shots need more breathing room than you think, otherwise they look messy in a product grid or on mobile.
What the 50/50 rule looks like for outdoor lifestyle images
You will also hear the 50/50 rule in photography. For ecommerce outdoor shots, a useful interpretation is this: aim for roughly half the frame to communicate product and half to communicate context. That balance can make the image feel real without hiding what you are selling.
Consider this when you are shooting things like candles, skincare, drinkware, or accessories. If you go too wide, the product becomes a small detail. If you go too tight, you lose the benefit of being outside.
Shoot tighter for PDP clarity, wider for ads, and plan crops before you shoot
What many store owners overlook is that composition is not just about the current photo, it is about future crops. A simple way to reduce reshoots is to capture two versions of each setup:
If you are shooting with a smartphone, step back and shoot a little wider than you need, then take an extra frame closer. That gives you options. If you are shooting on a camera, avoid cropping too aggressively in-camera unless you are also capturing a wider safety shot.
How to plan the shoot before you go outside
The biggest mistake store owners make is treating outdoor photography as spontaneous. In practice, the better your planning, the more usable images you will bring back.
Start with the product itself. Ask what shoppers need to understand before buying. Is it texture, reflective finish, size, ingredients, stitching, or packaging quality? Your shot list should answer buying questions, not just create pretty scenes.
Then choose a location that supports the product without overpowering it. Neutral stone, wood, pavement, grass, sand, and muted architectural backgrounds usually work better than cluttered public spaces. Busy colors, harsh signage, and random foot traffic can make your product look less premium.
Time of day matters just as much. Early morning and late afternoon often give you softer light and more control. Midday sun can create blown highlights, hard shadows, and color shifts that make accurate product presentation difficult. If you sell beauty, fragrance, or apparel, those softer lighting windows are usually more forgiving.
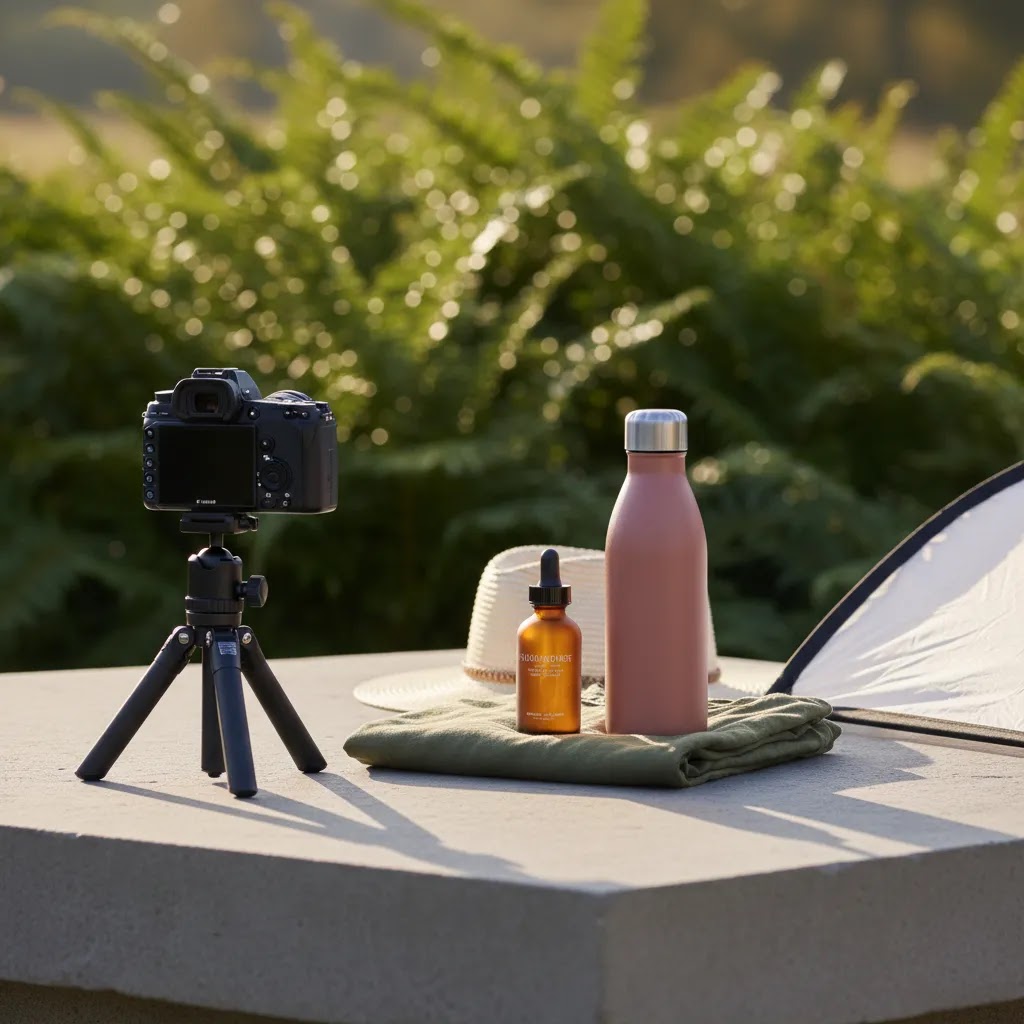
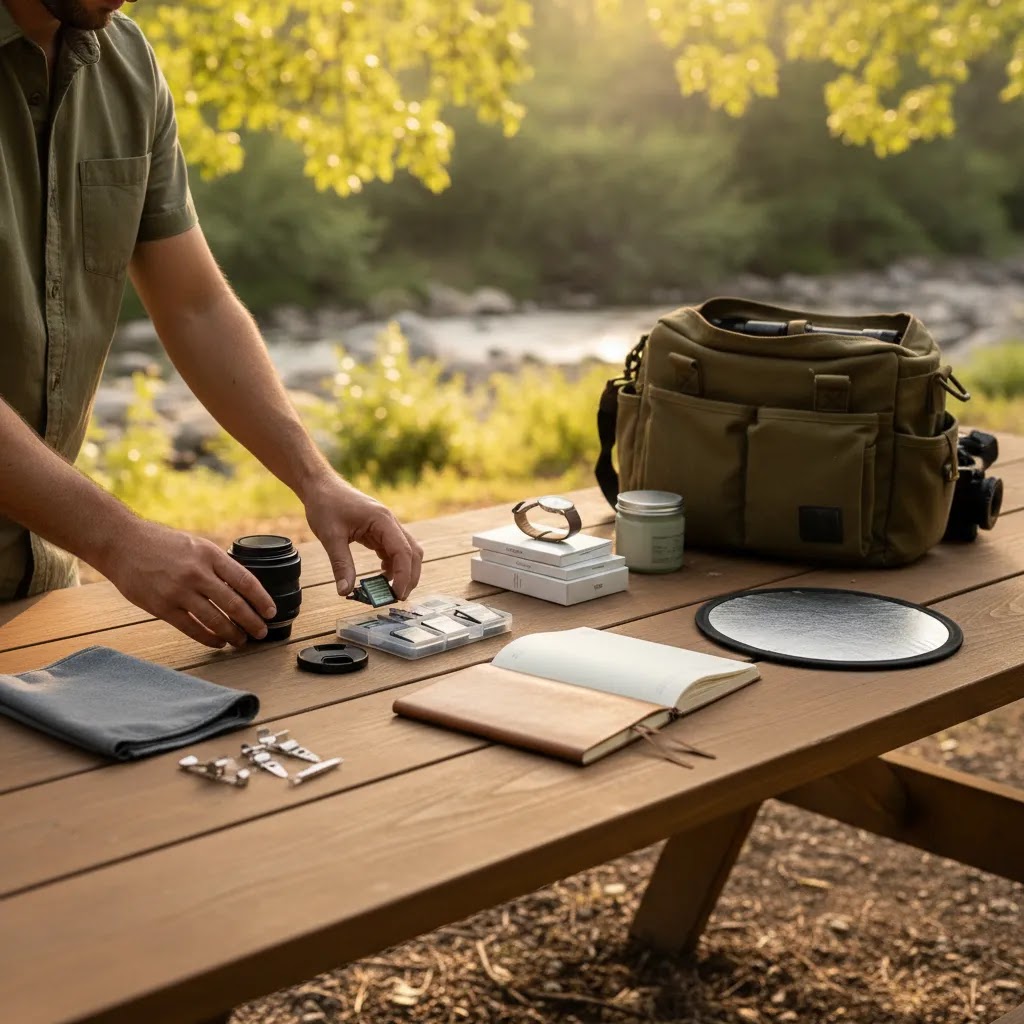
Bring a small kit even if you are keeping things lean:
If your broader content plan includes both editorial and catalog imagery, review your full ecommerce photography mix first so outdoor images support the rest of your product page rather than feeling disconnected.
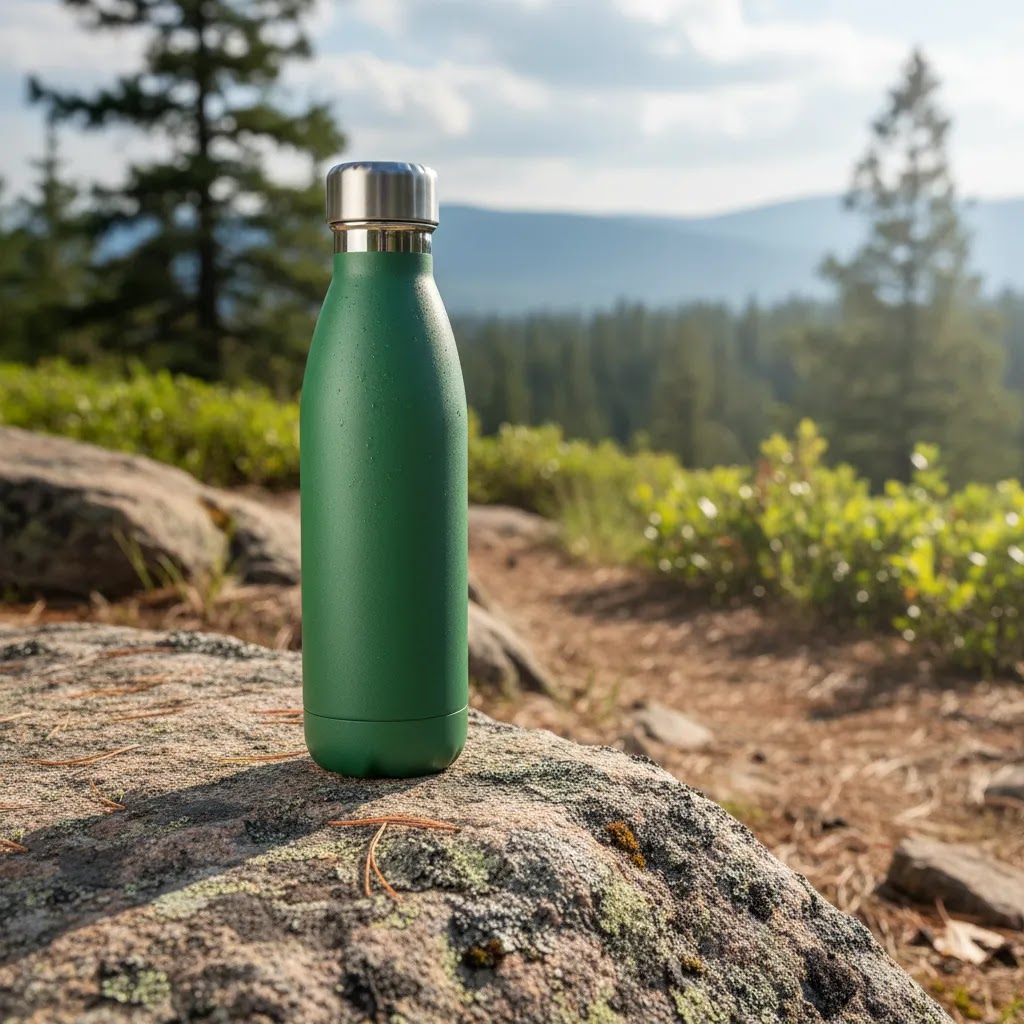
Outdoor lifestyle product photography: choosing environments that fit the product
Now, when it comes to outdoor lifestyle product photography, the location is not just a background. It is part of the message. The goal is to choose an environment that supports the product story, without introducing confusion or visual clutter that lowers trust.
Match the environment to the product category, and know when context helps
Some products get a direct conversion lift from real-world context because shoppers need help imagining use and scale. Outdoor gear, drinkware, travel accessories, pet items, and casual apparel are obvious examples. A trail, a park, a sidewalk cafe, or a car trunk packing scene can answer real buying questions quickly.
Other categories need more restraint. Skincare and beauty often benefit from outdoor light, but the environment should stay clean and controlled, think stone surfaces, minimal greenery, and soft shade. Electronics, technical products, and anything with fine text or ports often suffers if you shoot too wide or too busy. In those cases, outdoor can still work, but it should feel like a controlled outdoor set, not a chaotic scene.
The reality is that “real world” can also distract. If the setting introduces unrelated signals, like crowded streets, branded signage, trash, or messy textures, shoppers may focus on the wrong thing. For ecommerce, your location should support the product, not compete with it.
A quick location scouting checklist (so you do not waste a shoot day)
Before you pack your products and head out, do a fast scout with your phone camera. Look for:
For most Shopify store owners, the simplest win is finding two or three reliable locations you can reuse. A consistent set of outdoor surfaces and backdrops helps your product pages look more cohesive even if shoots happen months apart.
Simple prop and styling rules, so the product stays the hero
Props are where lifestyle shoots often go wrong. A good rule is that props should explain use or scale, not decorate. If the prop does not make the product clearer, it is probably optional.
Keep your palette tight. Pick one main surface and one accent texture, like stone plus a neutral fabric, or wood plus muted greenery. If your packaging is colorful, go even more neutral on surfaces so the product reads cleanly.
Pay attention to scale cues. A hand, a bag pocket, a cup holder, or a bathroom ledge can help shoppers understand size quickly. Just make sure the product is still the sharpest, most intentional element in the frame.
How to capture cleaner product images in natural light
Once you are on location, consistency becomes the priority. Outdoor light changes by the minute, so work through your shot list in order of importance. Capture the must-have angles first.
Keep the product as the visual anchor. Use negative space and simple compositions so shoppers know exactly what they should focus on. If a leaf, branch, bench, or textured wall becomes more prominent than the item, the shot may be better for social content than for a product page.
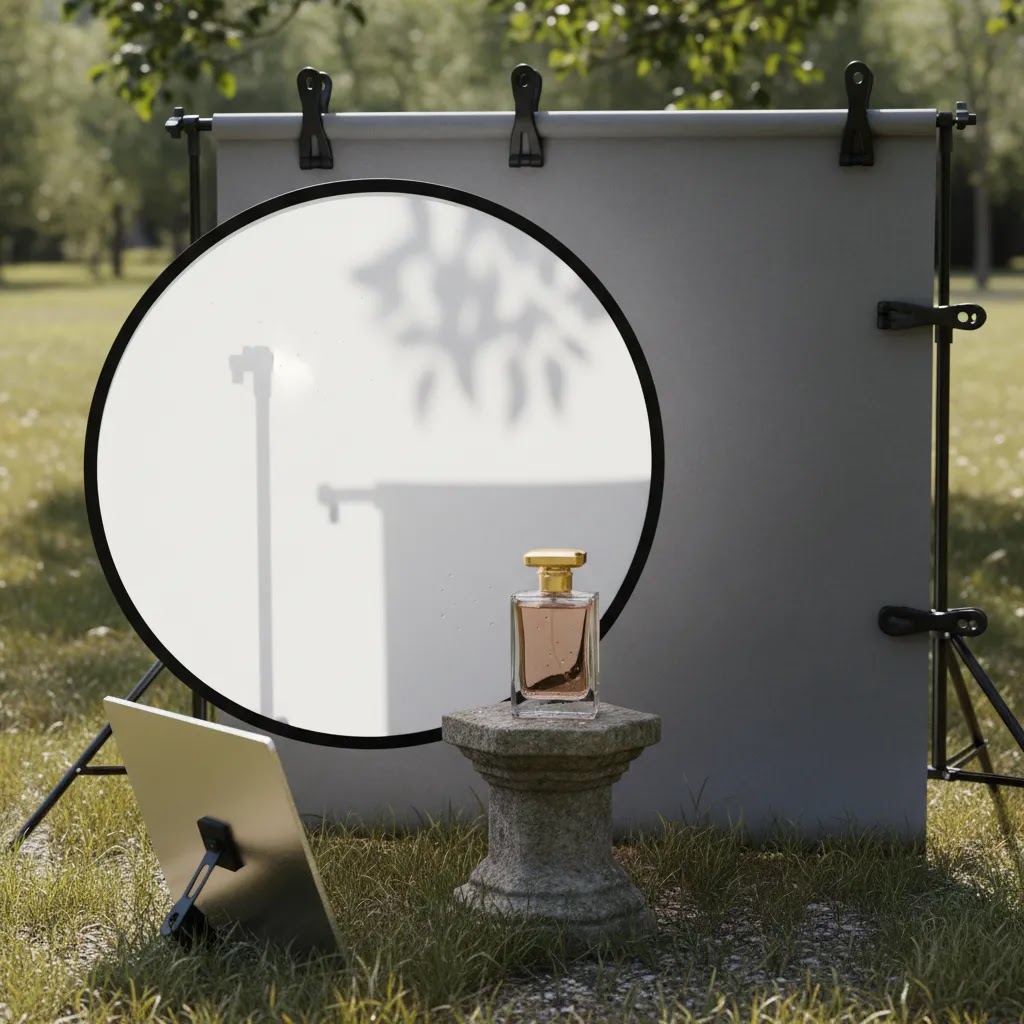
Watch shadows closely. Soft directional light can add depth, but harsh shadows across labels or product surfaces can obscure details. A reflector, diffuser, or a small move into open shade often solves this faster than editing later.
Shoot more variation than you think you need. For each setup, capture:
This matters because different channels need different framing. Your PDP gallery, paid social creatives, and collection page thumbnails all benefit from slightly different compositions.
If you are photographing reflective products like bottles, beauty packaging, sunglasses, or metal accessories, move slowly around the item and watch where sky reflections, trees, or bright patches land. A few degrees of angle adjustment can make a major difference.
For apparel or shirt product photography outdoors, keep wrinkles, fit, and fabric drape front of mind. Real settings help show scale and wearability, but they can also hide construction details if the pose or crop is too loose. For products like makeup, perfume, or CBD packaging, clear label readability still matters even in lifestyle scenes.
Handling common outdoor shoot problems (wind, glare, mixed light, and weather)
Outdoor shoots do not usually fail because of camera settings. They fail because something in the environment changes faster than you can react. If you plan for the common problems, you will bring home more usable images and spend less time trying to rescue shots in editing.
Wind: keep products stable and remove movement from the frame
Wind is a bigger issue than most people expect, especially for lightweight packaging, fabric, labels, and hair in apparel shots. A few fast fixes that help in practice:
If something is constantly moving, simplify the scene. A calm product photo usually converts better than a chaotic “authentic” one.
Glare and reflections: fix it with angle and shade before you try to edit
Glossy packaging, bottles, and metallic products can pick up the sky, trees, or bright buildings as reflections. The easiest fix is almost always angle choice. Rotate the product slightly and move yourself around it until the reflection becomes less distracting.
Open shade is your friend here. Shooting just inside shade, like under an awning or next to a building, can keep light soft while still looking outdoors. If the label is washing out, prioritize label readability and accurate color over dramatic highlights. Those details are what shoppers rely on to decide.
Mixed light and color casts: pick one light source and protect product accuracy
Mixed lighting is common outdoors, sun hitting part of the scene while the rest sits in shade, or green tree canopy tinting everything. From a practical standpoint, you want the product in one consistent light source, even if the background varies a little.
If the product is half sun and half shade, move it. If tree canopy makes whites look green, step into open shade near a neutral wall or surface. For ecommerce, accurate product color and materials matter more than matching the vibe of the location.
Weather contingencies: protect product quality and know when to reschedule
Weather is not just about rain. Heat can soften packaging, cold can create condensation, and humidity can attract dust and lint. Bring simple protection, like a clean tote, paper towels, and a microfiber cloth, and keep products sealed until you are ready to shoot.
If conditions are changing quickly, prioritize the highest-value shots first, usually hero images and a couple of tight detail shots. If the light is harsh, the wind is constant, and you cannot keep surfaces clean, rescheduling is often the cheaper option. A rushed outdoor shoot can create images that look fine on Instagram but cause product page inconsistency and extra editing workload later.
Where AI editing can help after the shoot
Outdoor shoots often need cleanup before images are ready for a live store. A branch in the frame, uneven sky tone, distracting ground texture, or poor background match can make a good shot feel inconsistent next to the rest of your catalog.
This is where selective AI-assisted editing can save time. The key is to use it for polish and workflow efficiency, not to create misleading product representation.
From the current product data available, useful options include:
These tools can be useful if you are testing creative directions, building seasonal campaigns, or handling remote product photography workflows where reshooting is slow. If you need styled scenes at scale, a mockup generator may also help fill content gaps between major shoot days.
Still, be careful. If AI editing changes color accuracy, gloss, texture, fill level, or packaging details, you risk creating returns and disappointing customers. For ecommerce, believable and consistent beats dramatic every time.
Pros and Cons
Strengths
Considerations
Who outdoor product photography is best for
Outdoor product photography is usually a strong fit for brands that benefit from context and mood. Think apparel, skincare, fragrance, food and beverage, fitness accessories, pet products, outdoor gear, and home goods. It can also work well for founders who need versatile lifestyle content but are not ready for frequent studio bookings.
It is less suitable as your only image style if you sell on strict marketplaces, need exact color representation, or rely heavily on technical detail shots. In those cases, outdoor imagery should support, not replace, your core product image set.
If your store is still building visual consistency, start with a hybrid approach. Keep your essential catalog shots clean and standardized, then use outdoor images for persuasion deeper in the gallery, in ads, and on collection banners.
AcquireConvert recommendation
For most ecommerce brands, the right question is not whether outdoor product photography is better than studio photography. It is where it belongs in your image mix. That practical framing is where AcquireConvert is useful. The site focuses on real store-owner decisions, with guidance shaped by Giles Thomas's experience as a Shopify Partner and Google Expert.
If you are refining your product image workflow, start with AcquireConvert's category resources on E Commerce Product Photography and Lifestyle Product Photography. Those are especially useful if you are balancing compliant product imagery, conversion-focused product pages, and stronger creative assets for traffic channels.
The most effective approach for many Shopify merchants is simple: use clean main images for clarity, lifestyle images for persuasion, and AI-assisted cleanup only where it preserves trust. That balance usually supports better merchandising decisions than relying on one style alone.
How to decide if outdoor photography is right for your store
You do not need a complicated framework to decide this. You just need to evaluate outdoor photography against how customers actually shop your products.
1. Product detail needs
If buyers need to inspect stitching, ingredients, finish, texture, or construction, your image set still needs highly controlled shots. Outdoor photography can complement those details, but it rarely replaces them completely. This is especially true for cosmetics, supplements, jewelry, and products with reflective packaging.
2. Channel requirements
Your own Shopify store gives you more flexibility than marketplaces and ad networks. Still, collection pages, thumbnails, and shopping feeds often work better with simpler, more standardized imagery. If your product images need to serve many channels, build your workflow around the strictest use case first.
3. Brand positioning
Some brands benefit from outdoors immediately. Sustainable products, athletic goods, travel accessories, and casual apparel often feel more credible in real settings. Others, like luxury beauty or technical electronics, may need a more controlled aesthetic. Match the location style to the brand, not just to what is convenient.
4. Production capacity
Outdoor photography sounds lightweight, but it can still be operationally messy. Weather delays, travel, setup time, and retouching all add hidden effort. If you are a lean team, it may be smarter to schedule fewer, more intentional outdoor shoots and supplement gaps with edited variations.
5. Post-production workflow
Ask yourself how much editing you can realistically handle. If your team can crop, color-correct, and standardize images efficiently, outdoor photography becomes more practical. If editing bottlenecks already slow product launches, uncontrolled shoots may create more problems than they solve.
A useful test is to run one small batch through the full process: planning, shooting, editing, uploading, and measuring engagement on your PDPs or ad creatives. That gives you a more realistic answer than debating it in theory.
Frequently Asked Questions
Is outdoor product photography good for Shopify stores?
Yes, it can work very well for Shopify stores, especially as part of a mixed image strategy. Outdoor photos often add context and lifestyle appeal that helps shoppers imagine the product in use. Still, your core gallery should usually include clean, detail-focused images so buyers can assess the product accurately before purchasing.
What time of day is best for outdoor product photography?
Early morning and late afternoon are usually the best times because the light is softer and easier to control. Midday sun can create harsh shadows, bright reflections, and inconsistent color. If you must shoot in stronger sun, look for open shade and use a reflector or diffuser to reduce contrast.
Can I use a smartphone for outdoor product photography?
Yes, many store owners get usable results with a recent smartphone, especially if they control composition and light carefully. A tripod, clean background, and simple reflector often matter more than expensive gear. The limit usually appears when you need very precise detail, high-end retouching flexibility, or larger crop variations.
Which products work best in outdoor settings?
Products that benefit from context usually perform best outdoors. That includes apparel, skincare, fragrance, outdoor gear, drinkware, pet accessories, and lifestyle home goods. Products that rely on technical detail, exact color matching, or highly controlled reflections may need studio-style shots first, with outdoor imagery used as support.
Should outdoor images replace white background product photos?
No, usually not. White background images still serve an important role for product clarity, collection page consistency, marketplace compliance, and ad feeds. Outdoor photos are often most effective as secondary images that add emotion and context after shoppers have already seen the product clearly.
How many outdoor shots should I add to a product page?
For many stores, two to four outdoor or lifestyle images per product is a sensible starting point. That is often enough to show context, scale, and in-use scenarios without crowding out essential detail shots. The ideal number depends on your category, your page layout, and how much visual explanation the product needs.
Can AI improve outdoor product photos after the shoot?
Yes, AI tools may help with cleanup, resolution, or background adjustments after shooting. They can be useful for removing distractions or creating alternate visual versions. The main caution is accuracy. If editing changes the real look of the item, it may reduce trust and lead to higher return risk.
Do I need a professional photographer for outdoor product images?
Not always. Many founder-led brands can produce solid outdoor imagery in-house with planning and repetition. A professional often becomes more valuable when your catalog is large, your brand standards are high, or your team lacks time for location scouting, lighting control, and post-production. The right choice depends on complexity and volume.
What is the 20/60/20 rule in photography?
In practical terms, the 20/60/20 rule is a composition guideline where around 20% of the frame is the main subject, around 60% is simpler negative space, and around 20% is supporting context. For ecommerce outdoor lifestyle shots, it can help you avoid crowded scenes so the product stays readable in thumbnails and on mobile product pages.
What is the 50/50 rule in photography?
The 50/50 rule is often used as a reminder to balance two competing priorities in a frame. For outdoor product photography, a useful approach is to keep roughly half the image focused on the product and half communicating the environment or in-use context. It is not a strict requirement, but it can help you create lifestyle images that still feel clear and sales-ready.
How much should I pay a photographer for a product shoot?
Pricing varies widely based on your location, the photographer's experience, the number of products, and whether you need styled lifestyle scenes, models, retouching, and usage rights for ads. Some shoots are priced per image, some per half-day or day rate, and many include separate retouching fees. If you are hiring for outdoor lifestyle product photography, ask what is included around location scouting, weather contingencies, and how many final edited images you should typically expect from the session.
How do I keep outdoor product photos consistent across my store?
Use a repeatable shot list, similar lighting windows, a limited color palette, and consistent editing settings. Consistency usually comes more from process than from gear. If your product pages mix too many styles, shoppers may read the catalog as less polished, which can weaken the perceived quality of the brand.
Key Takeaways
Conclusion
Outdoor product photography can be a strong ecommerce asset if you use it with the right expectations. It is excellent for storytelling, lifestyle context, and creative variety. It is less reliable as the only image type in a product catalog where accuracy and consistency drive purchase confidence. For most store owners, the best setup is a blend of clean product imagery and carefully planned outdoor shots that support the buying journey. If you want a practical next step, explore AcquireConvert's related photography resources and category guides to compare approaches, tighten your workflow, and build a stronger visual merchandising system for your store. That is where expert, store-owner-focused guidance from Giles Thomas and AcquireConvert can help you make better decisions with less guesswork.
This content is editorial and for educational purposes only. It is not a paid endorsement unless explicitly stated otherwise. Pricing, features, and tool availability are subject to change, so verify current details directly with the provider. Any performance outcomes from photography or AI-assisted editing will vary by product, market, traffic quality, and execution, and are not guaranteed.

Hi, I'm Giles Thomas.
Founder of AcquireConvert, the place where ecommerce entrepreneurs & marketers go to learn growth. I'm also the founder of Shopify agency Whole Design Studios.