Shopify Image Sizes Guide for Speed & Quality (2026)
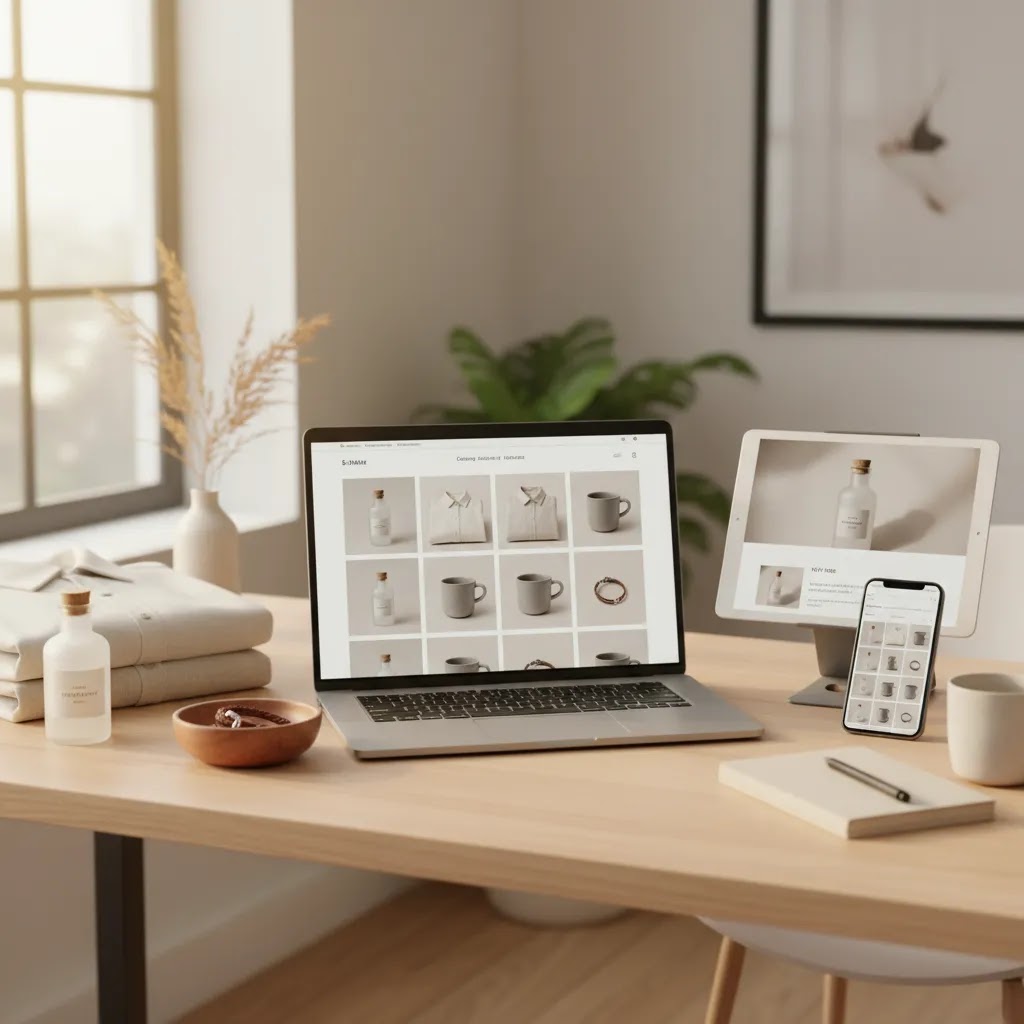
If your product photos look soft, crop awkwardly, or slow down your store, image optimization is usually the issue rather than the camera. For Shopify merchants, the right image size affects page speed, mobile usability, zoom quality, and how polished your catalog feels. It also influences practical tasks like setting a clean Shopify hero image size, managing a product gallery, and keeping collection pages fast enough to support conversions. This guide walks you through how to choose Shopify image sizes that fit your theme, your products, and your storefront goals. If you are still building the wider visual stack around your store, it also helps to review other ecommerce tools that support resizing, cleanup, and merchandising workflows.
Contents
Why Shopify image sizes matter
Shopify can display large, high-quality images well, but that does not mean every image should be uploaded at the largest possible size. Oversized files can slow collection pages, increase mobile load time, and make your image library harder to manage. On the other hand, files that are too small may look blurry in zoom views, hero banners, and retina displays.
The practical goal is simple: upload images large enough for your theme’s display areas and product zoom, but compressed enough to avoid dragging down performance. For most stores, that means creating a repeatable image policy across product pages, collection thumbnails, hero banners, and lifestyle assets.
This is especially important if you sell highly visual products such as apparel, beauty, home goods, or accessories. Your sizing decisions affect everything from cropping consistency to perceived quality. If you also sell on marketplaces, your Shopify setup may differ from your amazon product photography requirements, so it is worth optimizing each channel on its own terms.
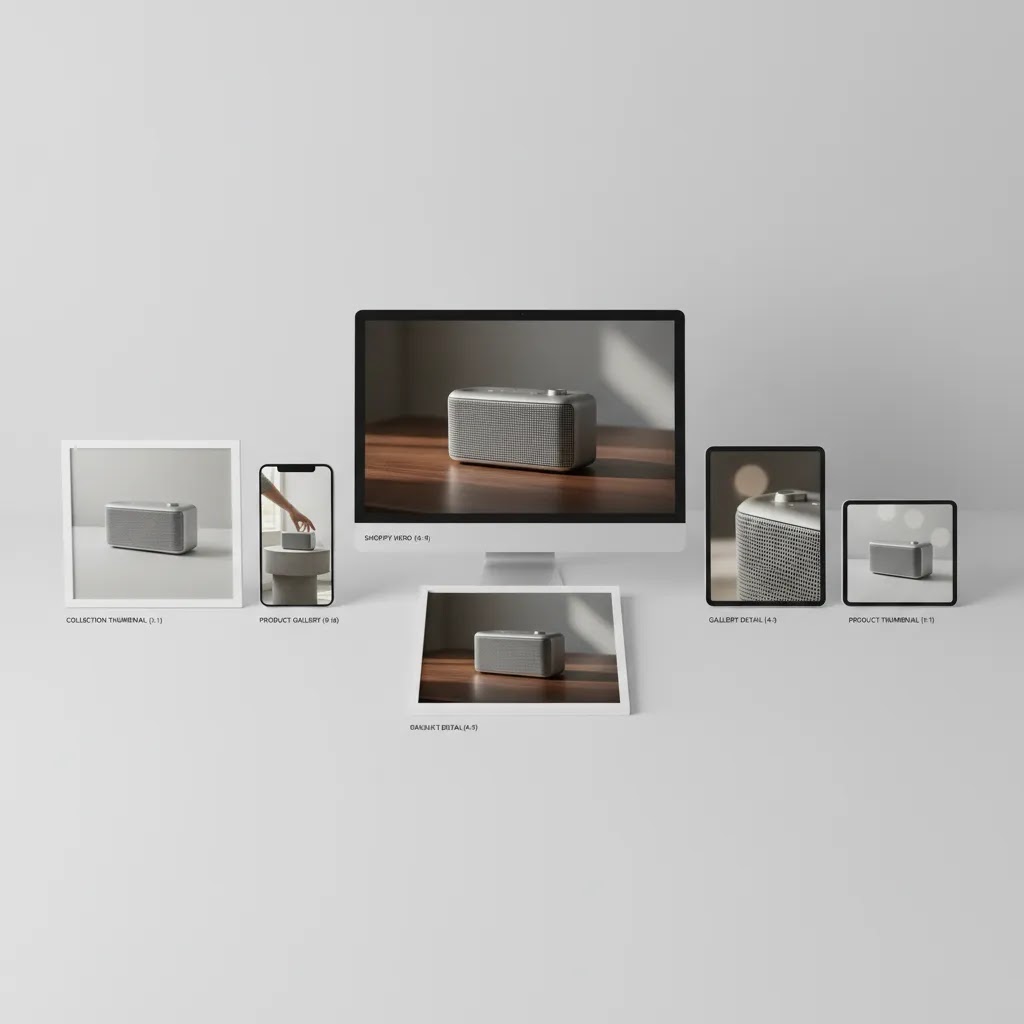
Best Shopify image sizes by use case
There is no single universal image size for every Shopify store because themes handle image ratios differently. Still, there are practical ranges that work well for most merchants.
Consistency matters as much as pixel dimensions. If your product gallery mixes portrait, square, and landscape images, your layout may jump around and look less professional. For many Shopify stores, choosing one main ratio per product category improves the browsing experience immediately.
If you are refining visual standards across the whole store, our broader guide to ecommerce photography is a useful next step.
Shopify image aspect ratios and theme cropping
Pixel dimensions are only half the story. The part that creates most “why does Shopify crop my photos?” headaches is aspect ratio, meaning the shape of the image. Common ratios you will see in ecommerce are 1:1 (square), 4:5 or 3:4 (portrait), and 16:9 (landscape).
Here’s the thing: many Shopify themes display product cards and collection grids inside fixed “image containers.” If your source image ratio does not match that container, the theme typically has to choose between adding empty space or cropping. Cropping is what causes cut-off heads in apparel, chopped packaging tops, and inconsistent thumbnail heights that make grids feel jumpy as you scroll.
Pick a default ratio that matches how customers shop your catalog
For most Shopify store owners, choosing one default ratio per product type is the fastest way to make the storefront look more premium.
Consider this: once you choose a default ratio, keep it consistent for the first image in every product (your “primary” image). You can still use mixed ratios inside the product gallery if you want to include size charts, infographics, or bundles, but plan for how those will look as thumbnails.
When it makes sense to break your ratio rule
Even well-run catalogs break the ratio standard sometimes. Common examples are bundles that need a wider composition, size charts that are easier to read in landscape, and comparison infographics that need extra horizontal space. The key is to break the rule intentionally, and to check how those images render as thumbnails and in quick view modules.
A quick theme check to spot cropping issues before you upload 200 images
From a practical standpoint, you want to preview your images in the places where Shopify shoppers actually see them. Before you standardize a whole catalog, test a small batch and check:
If images are getting clipped, first look for theme settings that control “image ratio” or “image shape” for product cards and collection grids. Many themes let you choose square, portrait, or “adapt to image.” If your theme supports “adapt,” it may reduce cropping but can also create uneven grid rows, which some stores do not want. If settings cannot solve it, you typically need to standardize your source ratio through cropping before upload.
How to balance format, quality, and speed
Image optimization is not only about dimensions. File format and compression settings often make the bigger difference to speed.
JPEG is still a practical choice for most product and lifestyle photography because it keeps file sizes relatively low while preserving acceptable detail. PNG is better when you need transparency, but the files are often heavier. That makes PNG a poor default for standard product photos unless transparency is genuinely needed.
For stores using background removal or AI editing workflows, file size control becomes even more important. Re-exported images can become unexpectedly large if layers, transparency, or sharpness settings are pushed too far. This is where merchants often run into issues with Shopify cover image uploads or hero banners that look fine visually but hurt load time.
A good working process looks like this:
If you are working with transparent PNGs, edited cutouts, or replacement backgrounds, the resources in Background Removal & Editing can help you standardize your workflow.
Shopify image formats in 2026: WebP, AVIF, JPEG, and PNG
Most store owners ask “what image format is best for Shopify?” because they want speed without sacrificing detail. In 2026, that question also includes modern formats like WebP and AVIF, since many browsers support them and they can be more efficient than older formats.
The reality is: Shopify will often serve optimized variants of your images through its CDN, even if you upload standard JPEG or PNG files. That means your upload format is still important for quality and workflow, but Shopify may handle a lot of the delivery-side optimization behind the scenes depending on the context and the shopper’s device.
What to upload versus what Shopify may serve
For most Shopify catalogs, you can keep uploads simple and still get modern delivery benefits:
What many store owners overlook is that PNG can become a silent performance killer when used for photography. A common mistake is exporting a product photo as PNG with an unnecessary alpha channel (transparency), which can inflate file size without improving on-screen quality.
Practical export settings that prevent weird color and quality issues
If you want fewer surprises after uploading to Shopify, use a few simple standards:
Now, when it comes to banners and hero sections, think in terms of “desktop width” and “mobile crop-safe area.” You can upload a wide banner that looks great on desktop, but still lose key text or faces on mobile if the focal point is too close to the edges. Keep the most important content centered, and preview mobile before you publish.
Helpful tools and workflow options
Most Shopify merchants do not need a complex design stack. What they need is a repeatable process for resizing, cleaning, and exporting images at the right quality level. A few lightweight tools can help with that.
These tools can save time, but they are not a substitute for good source photography. If your images are poorly lit or inconsistently framed, editing alone will not solve the underlying presentation problem. In those cases, improving your shoot setup or using a product photography studio process may have a bigger impact than resizing alone.
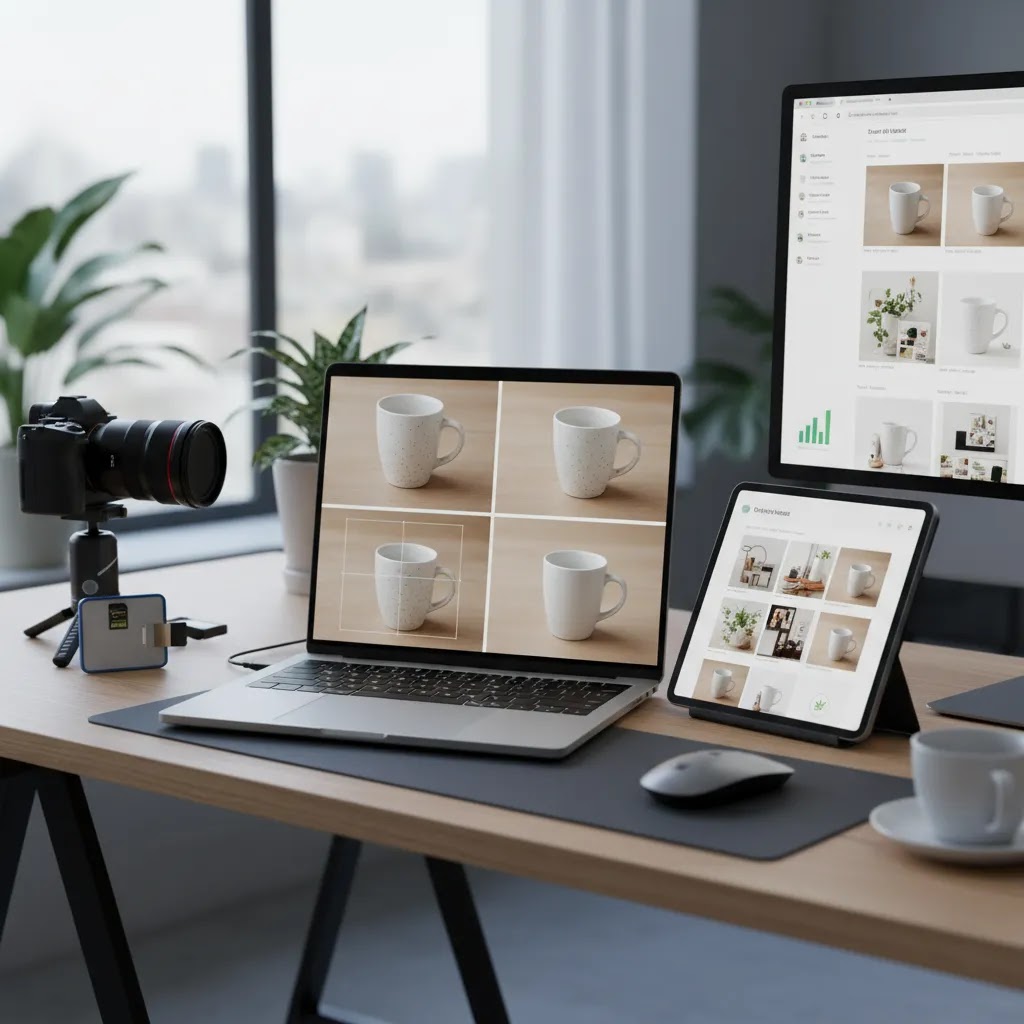
How to resize images for Shopify (without creating new problems)
If you want a practical answer to “how to resize images for Shopify,” the goal is not just smaller files. The goal is consistent masters, consistent exports, and predictable results across product pages, collection grids, and mobile.
A simple resizing workflow most Shopify teams can follow
What “too big” looks like in practice
Oversized images do not just waste storage. They can create real storefront issues:
If you are relying on Shopify admin to handle everything, keep expectations realistic. Shopify can host and deliver images efficiently, but it cannot make inconsistent source files consistent. When your catalog is growing, a repeatable resizing and cropping process is usually what keeps the store looking clean month after month.
Pros and Cons
Strengths
Considerations
Who this guidance is for
This guide is for Shopify store owners who want sharper product presentation without sacrificing speed. It is especially useful if you are dealing with blurred thumbnails, oversized homepage banners, inconsistent image gallery layouts, or a growing catalog that has become messy to maintain.
It is also relevant if you are experimenting with AI image editing, background removal, or mockups and want to keep exports efficient before uploading to Shopify. If you are preparing visuals for launches, seasonal campaigns, or merchandising tests, a reliable sizing standard will save time and reduce avoidable theme issues.
AcquireConvert recommendation
For most merchants, the smartest move is to treat image optimization as part of conversion work rather than a standalone design task. Giles Thomas’s perspective as a Shopify Partner and Google Expert is especially useful here because image decisions affect both on-site experience and acquisition performance. Faster pages, cleaner category grids, and more consistent product visuals can support better shopping journeys, even if results vary by theme, niche, and traffic mix.
If you are comparing creative workflows, AcquireConvert is a strong specialist resource to keep nearby. You can explore the wider E Commerce Product Photography category for practical guidance, and if you are deciding between styled assets and on-brand visual placeholders for launches or ads, this mockup generator resource is a useful next read.
How to choose the right image setup
If you want a repeatable image policy for Shopify, focus on five decisions.
1. Match sizes to your theme, not generic advice
Your theme determines how product cards, hero banners, featured collections, and gallery modules behave. Start by identifying the largest display area for each image type. Then size files to fit that area with some headroom for high-density screens, rather than uploading far beyond what the theme can show.
2. Pick one primary aspect ratio per product type
Apparel may work better in portrait, while beauty and packaged goods often look cleaner in square. The important thing is consistency. A uniform image gallery shopify layout usually looks more trustworthy and is easier to scan.
3. Use transparent files selectively
Transparent PNGs are useful for layered design work, badges, and certain merchandising effects. But for standard product photos, JPEG is usually more efficient. If you rely on AI image editing background removal, export only what your storefront actually needs.
4. Keep the workflow simple enough to repeat
The best process is one your team can follow every week. That may mean defining file names, export presets, and a standard folder structure. It may also mean separating product page masters from homepage campaign assets. If you are building banners from edited cutouts, review a few White Background Photography principles so your base assets stay flexible.
5. Test on real pages before rolling out sitewide
Do not judge image quality from the file alone. Check collection pages, product detail views, mobile screens, and homepage sections. Look for soft edges, strange crops, slow loading, and jumpy layouts. If you sell visual products across multiple channels, you may also need separate exports for Shopify and marketplace use.
Frequently Asked Questions
What is the best Shopify product image size?
For many stores, 2048 x 2048 px is a practical benchmark for product images, especially if your theme supports zoom. That said, the best size depends on your theme layout, product type, and how much image detail customers need. Test a few products live before standardizing your whole catalog.
What is a good Shopify hero image size?
A hero image often works well between 1800 and 2400 px wide, but there is no single rule for every theme. The right Shopify hero image size depends on whether your banner is full width, split layout, or mobile-cropped. Always preview desktop and mobile versions before final export.
Should I use JPEG or PNG for Shopify images?
JPEG is usually the better choice for most product and lifestyle photos because it keeps file size lower. PNG is more suitable when you need transparency, logos, or certain edited assets. If speed is a concern, avoid using PNG as your default for standard product photography.
How can I reduce file sizes in AI image editing workflows?
Start by exporting only the dimensions you actually need for Shopify. Flatten unnecessary layers, avoid oversized transparent canvases, and choose JPEG where transparency is not required. If you are using AI background tools, check export settings carefully because they can produce larger files than expected.
Can a Shopify image resizer improve store speed?
A Shopify image resizer can help if your current images are much larger than your theme requires. Resizing alone will not solve every speed issue, but it often reduces page weight and makes galleries more efficient. The biggest gains usually come from combining proper dimensions with smart compression.
Do all Shopify themes handle image galleries the same way?
No. Themes vary in how they crop cards, display zoom, load thumbnails, and handle portrait versus square images. That is why theme-specific testing matters. A size that looks perfect in one Shopify image gallery may crop poorly or feel oversized in another theme.
Can AI image generators that integrate with Shopify replace product photography?
They can support certain workflows, especially for concept visuals, backgrounds, mockups, or campaign assets. But they are not always the best substitute for accurate catalog photography. For products where texture, color accuracy, or compliance matters, original photography is still usually the safer foundation.
How should I organize a Shopify image library as my catalog grows?
Use consistent naming conventions, separate originals from web exports, and define standard sizes for each asset type. That makes updates faster and reduces duplicate uploads. A clean library also helps teams work more efficiently when launching new products or refreshing merchandising images.
What if my images look sharp on desktop but soft on mobile?
This can happen when mobile crops scale differently or when compression is too aggressive for smaller screens. Check how your theme serves images to mobile devices and compare a few export settings. Sometimes a modest size increase with better compression balance solves the issue.
How big is 2048x2048?
2048 x 2048 pixels is a square image that is typically large enough for most Shopify product galleries, including zoom in many themes. In practical terms, it gives you solid detail for shoppers without being as heavy as full camera-resolution uploads. File size still depends on format and compression, so a 2048 x 2048 JPEG is usually much lighter than a 2048 x 2048 PNG.
How to resize images for Shopify?
Start by choosing one aspect ratio and a master export size for your product type, then create an export preset so every image is resized and compressed consistently. Batch export a small set, upload to a few products, and check collection grids, product galleries, and mobile cropping before you resize the rest of your catalog. This approach helps you avoid inconsistent thumbnails and unnecessary rework later.
What image format is best for Shopify?
For most stores, JPEG is the best default for product and lifestyle photography because it balances detail and speed. Use PNG when you need transparency, such as logos or certain overlays. Shopify may serve optimized versions through its CDN, but you still want clean exports, sRGB color, and sensible compression so quality stays consistent.
What are standard sizes for pictures?
There is no single standard that fits every Shopify theme, but common practical ranges are 2048 x 2048 px for product images, 1024 x 1024 px to 1600 x 1600 px for collection images, and 1800 px to 2400 px wide for hero banners. What matters most is matching the size and aspect ratio to your theme’s image containers, then testing on desktop and mobile.
Key Takeaways
Conclusion
Getting Shopify image sizes right is less about chasing one perfect number and more about building a reliable system. When your product photos are sized for the theme, compressed sensibly, and consistent across the catalog, your store usually feels faster, cleaner, and more credible to shoppers. That matters on product pages, collection grids, homepage banners, and every part of the buying journey in between.
If you want more practical guidance from a Shopify-focused specialist resource, explore AcquireConvert’s photography and merchandising content. Giles Thomas’s experience as a Shopify Partner and Google Expert makes the advice especially useful for merchants who want improvements they can actually implement. Start with one product category, standardize the workflow, and expand from there.
This article is editorial content created for educational purposes and is not a paid endorsement unless explicitly stated otherwise. Pricing, features, and tool availability are subject to change, so verify current details directly with each provider. Any performance or conversion impact from image optimization will vary by store, theme, traffic mix, and implementation quality.

Hi, I'm Giles Thomas.
Founder of AcquireConvert, the place where ecommerce entrepreneurs & marketers go to learn growth. I'm also the founder of Shopify agency Whole Design Studios.