How to Take Product Photos With iPhone (2026)
If you run an ecommerce store, you do not need a full camera kit to start improving your product imagery. An iPhone can produce clean, sharp, conversion-friendly photos if you control the setup, understand a few camera settings, and keep your editing consistent. This matters whether you sell on Shopify, Etsy, Amazon, or your own storefront, because product images shape click-through rate, trust, and purchase intent before your copy gets a chance. In this guide, you will learn how to take product photos with iphone using practical lighting, framing, background, and editing techniques you can apply at home. If you want broader inspiration on composition and real-world use, start with this guide to lifestyle photography and then use the steps below to tighten up your product shots.
Contents
What good iPhone product photography actually requires
The biggest mistake store owners make is assuming the phone camera is the deciding factor. It is not. In most ecommerce setups, lighting, stabilization, distance, and background control matter more than whether you are using the newest iPhone.
If your goal is to create product photos that look professional on product pages, collection pages, marketplaces, and ads, focus on four basics first:
That applies whether you are shooting jewelry, cosmetics, apparel, home goods, or handmade products. If you sell visual or brand-led products, your supporting images may also benefit from stronger storytelling. That is where concepts from branding photography can help, especially for homepage banners, social creatives, and collection imagery.
For core product page images, though, your first priority is clarity. Shoppers need to see shape, texture, color, scale, and details quickly. Strong iPhone product photography can absolutely do that if your process is repeatable.
Best iPhone settings and shooting technique
If you want to know how to take good product photos with iphone, work through these in order. This is the same practical sequence many store owners use when building a simple in-house content workflow.
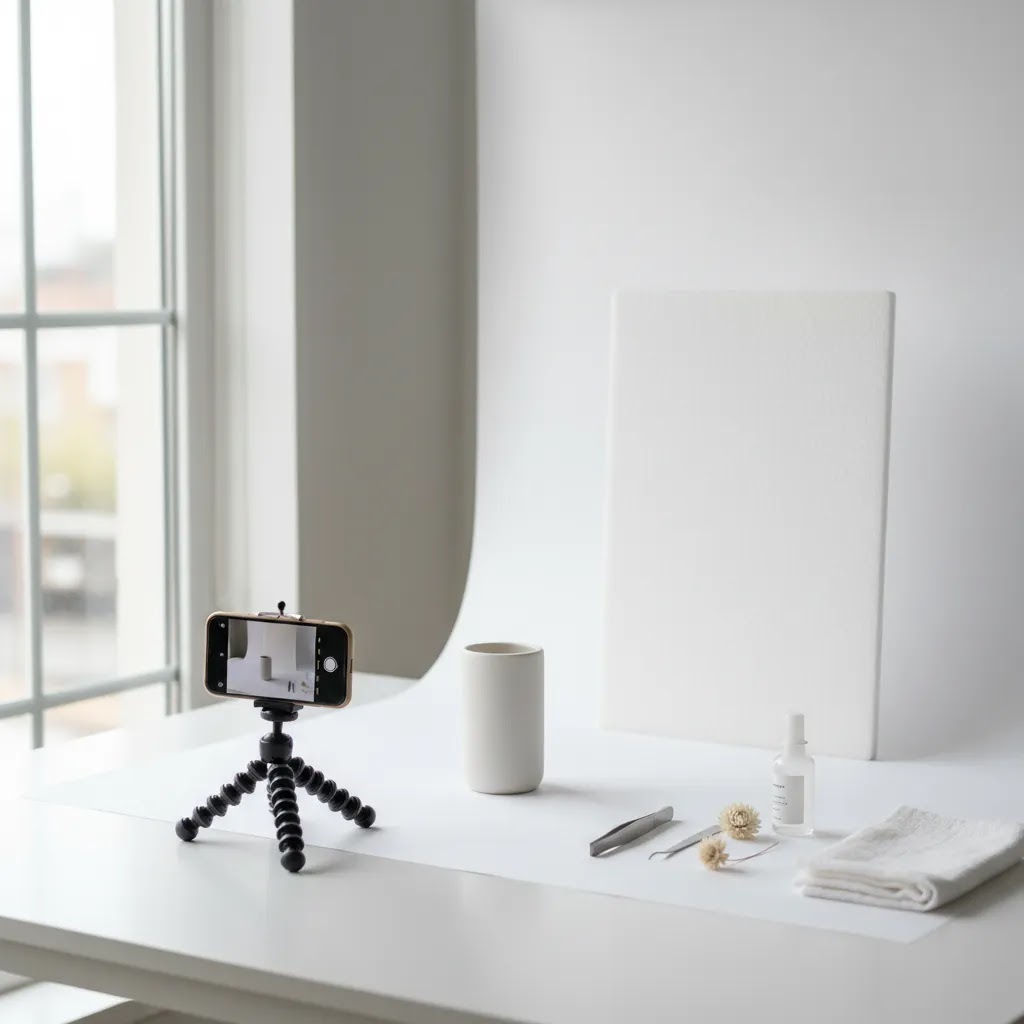
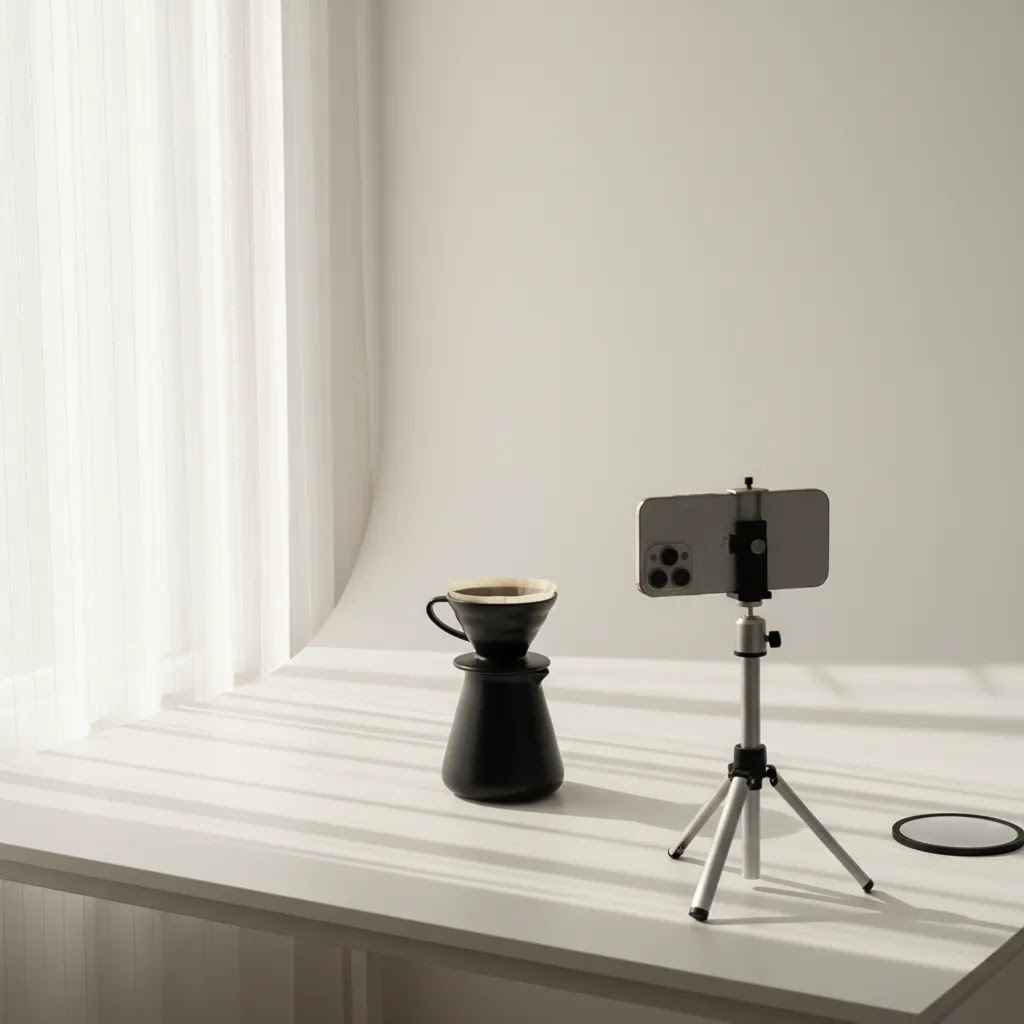
1. Use window light or one consistent artificial light source
Place your product near a large window with indirect light. Avoid direct sunlight unless you want strong shadows for a styled image. For cleaner catalog-style shots, use soft light from the side or front-side angle. If you need more control, a basic tabletop setup can help. This is one reason many merchants eventually explore a dedicated product photography studio setup for repeatable results.
2. Turn on grid and lock focus
Open the iPhone camera settings and enable the grid. This helps you keep products centered, vertical lines straight, and framing consistent across a collection. Tap the product on screen to focus, then hold to activate AE/AF Lock. That prevents the camera from constantly shifting exposure or focus between shots.
3. Adjust exposure manually
After locking focus, slide your finger up or down to brighten or darken the image. Slightly lowering exposure often preserves detail in highlights and gives you more flexibility when editing later. This is especially useful for white packaging, reflective materials, and glossy labels.
4. Use the main lens, not digital zoom
Digital zoom usually reduces image quality. If you need a tighter crop, move the phone physically closer or crop later in editing. For many products, the main lens produces the most reliable results. Keep enough distance to avoid perspective distortion, especially with bottles, boxes, and apparel laid flat.
5. Stabilize the phone
A small tripod makes a noticeable difference. It keeps your framing consistent across angles and reduces blur in lower light. If you shoot multiple SKUs or variants, this consistency saves time during editing and keeps your store looking more professional.
6. Shoot multiple angles with a purpose
Take a front shot, side angle, close-up detail, packaging shot, and scale image. For ecommerce, every image should answer a buyer question. Styled images can help too, especially when you use the right scene background to show context without overpowering the product.
7. Capture the highest quality file your workflow can handle
If your iPhone model supports higher-resolution capture options, use them when storage and editing speed allow. If you are wondering how to take high resolution photos with iphone, the practical answer is to avoid screenshots, compressed messaging apps, and heavy in-camera filters. Start with the cleanest original file possible, then resize for web after editing.
The goal is not the largest file. The goal is a sharp master image you can optimize later for Shopify, Etsy, and ad placements.
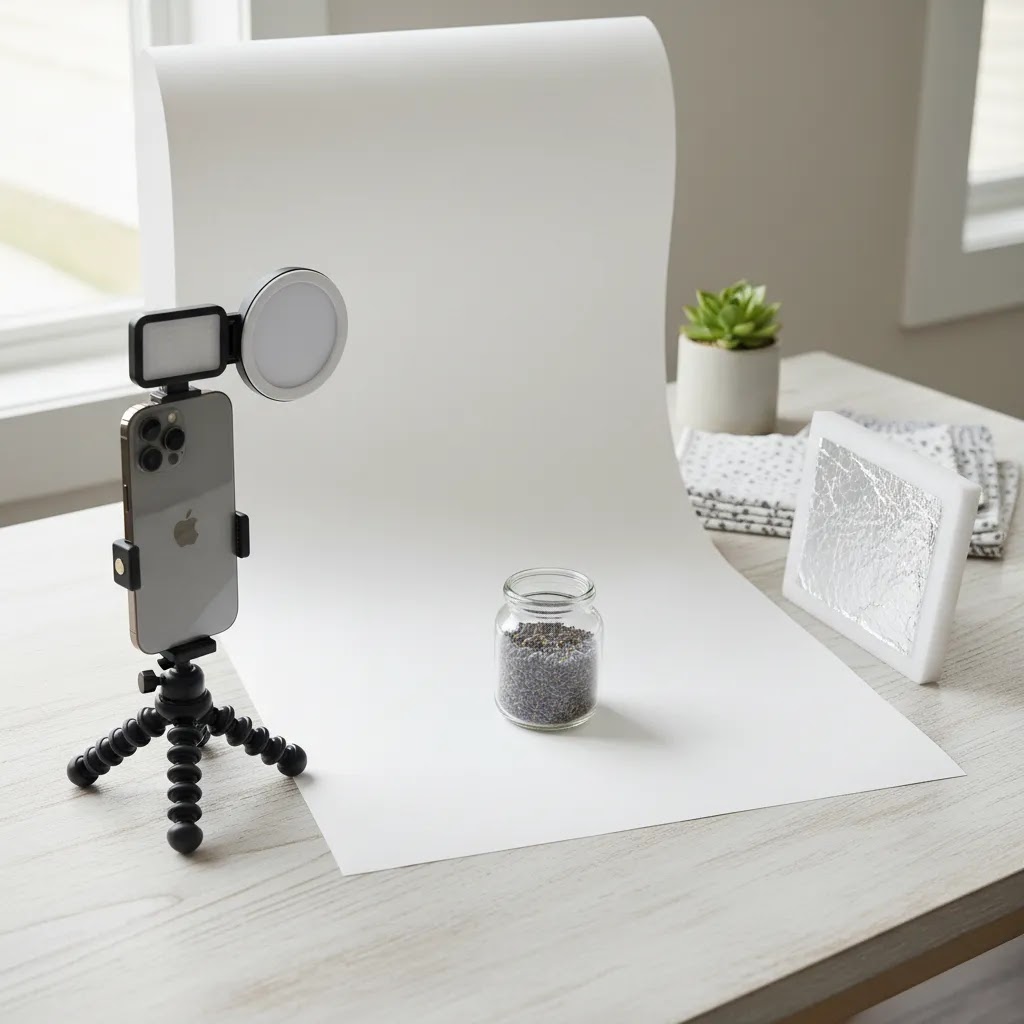
Basic iPhone product photography kit (what you actually need)
Here is the thing, most iPhone product photo problems are not solved in editing. They are caused by a shaky camera, uncontrolled light, and a background that is doing too much. A basic kit fixes those issues and makes your results repeatable across SKUs.
If you want a minimum viable setup, start with four items:
From a practical standpoint, you can shoot an entire catalog with that kit if your lighting is stable. The goal is not a perfect studio build, it is a setup you can rebuild quickly, week after week, without guessing.
Consider this based on product size:
What many store owners overlook is that repeatability is a conversion asset. When your images look consistent, your product grids look more premium and shoppers can compare items faster.
If you are deciding what to buy next, follow the bottleneck:
You can absolutely add continuous lights later, but most stores get a bigger quality jump from controlling the basics first.
Pros and Cons
Strengths
Considerations
Who this approach is for
This approach fits early-stage and growth-stage ecommerce brands that need better product imagery without handing the whole process to an agency. It is especially useful if you manage your own Shopify store, update products often, test creatives for paid social, or sell on Etsy and need fresh listing images regularly.
It is a strong fit for handmade products, beauty items, accessories, packaged goods, and smaller home products. It may be less ideal for highly reflective items, complex apparel ghost mannequin work, or luxury products where advanced lighting control matters more. In those cases, you can still use an iPhone for secondary content while keeping hero images professionally produced.
Product-specific shooting setups (clothing, flat lay, and tricky materials)
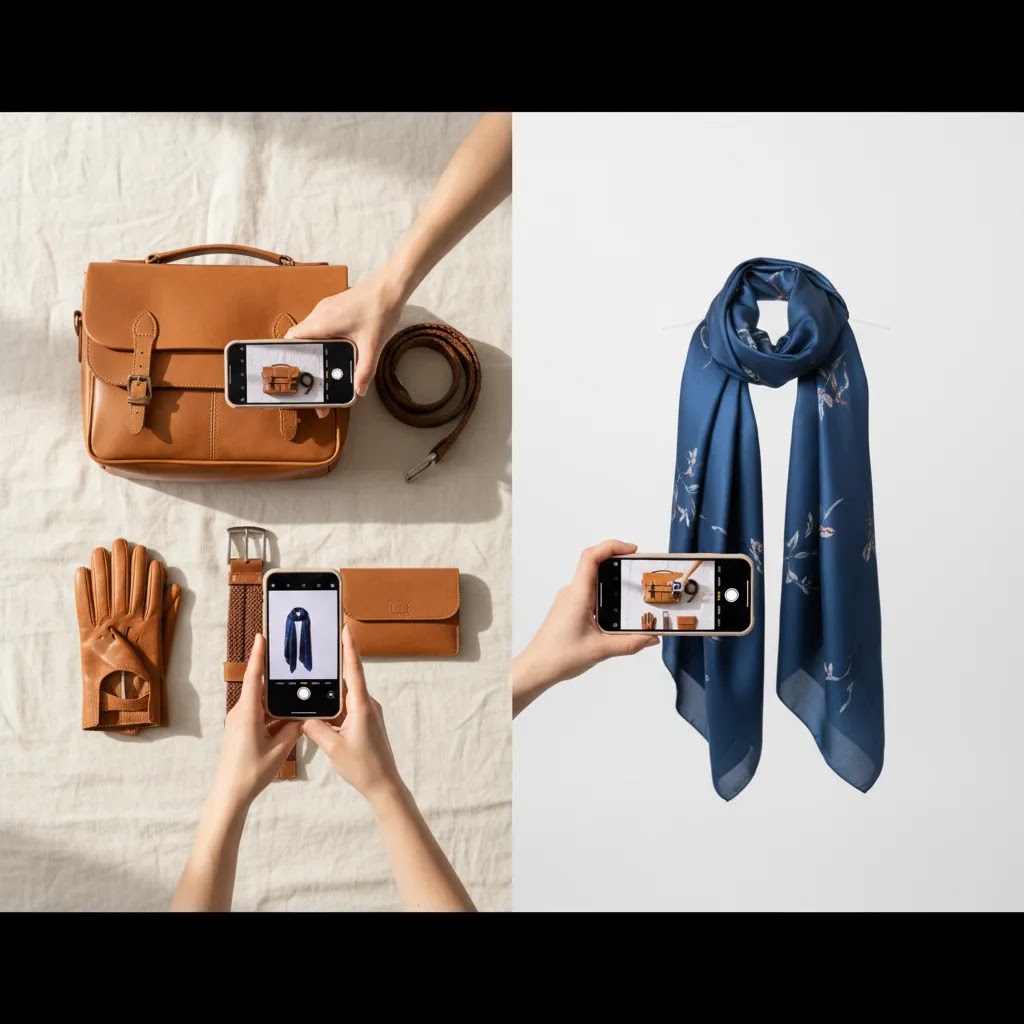
Once you have a stable, repeatable setup, the next jump in quality comes from shooting the product the way shoppers expect to evaluate it. Apparel is the most common example. Shoppers want fit cues, texture, and construction details. Your iPhone can capture all of that, but you need to be more intentional than a single flat lay.
How to take clothing product photos with iPhone: flat lay vs. hanging
Flat lay is usually the fastest option for solo store owners. It is also easier to keep consistent across a big range of sizes and colors. Hanging can show drape better, but it is harder to keep symmetrical and wrinkle-free without a more controlled setup.
For flat lay apparel photos:
For hanging apparel photos:
A simple apparel shot list that maps to buyer questions
If you want a practical shot list that works for most clothing items, aim for:
Think of it this way, every shot should reduce uncertainty. The fewer unanswered questions, the fewer hesitation clicks and the more confident the add-to-cart decision typically becomes.
How to shoot reflective or glossy products with an iPhone
Reflective products are where many phone shoots fall apart. Bottles, glossy packaging, chrome parts, and shiny plastics tend to show your window, your phone, and your entire room. The way this works in practice is you control what the product is reflecting.
Start with these fixes:
If you still cannot get clean label readability, that is a sign to adjust the lighting direction or add more diffusion. Editing can help, but reflective product photography is usually won during the shoot.
Editing and background workflow
Good shooting reduces editing time, but a simple post-production workflow still matters. For ecommerce, keep your edits consistent across the full catalog. That means similar brightness, white balance, crop ratio, and background treatment.
If you need cleaner backgrounds, there are a few useful options in the current tool data. For simple cleanup, Free White Background Generator can help when you need a cleaner plain-background output. If your shot works but the setting does not, AI Background Generator may be useful for creating alternate styled contexts.
For merchants building more creative assets for ads or social, a tool like Background Swap Editor can speed up experimentation. That said, use AI edits carefully. They can save time for campaign creatives, but your main product page images should still represent the item accurately.
If styled scenes are part of your brand, you may also want to review AcquireConvert's take on an ai scene generator so you can judge where AI-enhanced visuals fit and where standard product photos should stay straightforward.
For more foundational background treatment ideas, see the AcquireConvert category on White Background Photography. If your catalog relies more on contextual storytelling, the Lifestyle Product Photography category is a useful next stop.
Best app for product photos on iPhone (and when to use the default Camera app)
The default iPhone Camera app is enough for most catalog-style product photos if your lighting is controlled, your phone is stable, and you are using focus lock and manual exposure adjustment. For many Shopify stores, the biggest wins come from the setup, not from switching apps.
Now, when it comes to the “best app” question, a dedicated photo app can help when you need more control and consistency than the standard Camera app gives you. This tends to matter when you are shooting lots of SKUs, trying to match color across multiple sessions, or doing more advanced cleanup.
What to look for in an app if ecommerce consistency is the priority:
For most Shopify store owners, color accuracy is the difference between a catalog that feels trustworthy and one that feels slightly off. A simple approach is to pick one lighting setup, keep it consistent, and avoid mixing different bulb types. If you shoot near a window one day and under warm indoor lights the next, you will fight color casts forever.
After shooting, keep your edits consistent too. Use the same white balance approach each time, do not over-brighten whites until labels lose detail, and always review images on a second screen when possible before uploading. iPhone screens can make some edits look better than they will on a typical laptop or desktop monitor.
How to choose the right setup for your store
If you are deciding how to take professional product photos with iphone at home, do not overcomplicate the setup. Choose based on your product type, publishing volume, and where the images will be used.
1. Match the setup to the role of the image
Use plain, clean shots for product pages and marketplaces. Use styled scenes for ads, email campaigns, and social posts. Many stores need both, but they should serve different jobs. Hero images should prioritize accuracy. Lifestyle images should prioritize context.
2. Decide whether white background or lifestyle comes first
If you sell on marketplaces or use dense collection grids, a white or neutral background often gives you the clearest merchandising result. If your brand is premium, gift-focused, or visually distinctive, lifestyle images may matter more for conversion support. Most stores benefit from a mix.
3. Build for repeatability, not one perfect shoot
The right process is the one you can repeat every time a new SKU arrives. Mark your shooting spot. Keep a reflector nearby. Save the same crop ratios. Use the same light direction. This is what helps your store look coherent as the catalog grows.
4. Know when to add editing tools
AI editing can help after the shot, not instead of the shot. If your source image is blurry, badly lit, or distorted, background tools will not fully solve the problem. Use them to clean up edges, remove distractions, or test creative directions faster.
5. Upgrade only where the bottleneck is real
If your issue is shaky framing, buy a tripod first. If your issue is harsh shadows, improve lighting first. If your issue is slow editing, add a cleanup tool or a more standardized workflow. Experienced store owners usually improve one bottleneck at a time instead of replacing everything at once.
That practical approach fits how AcquireConvert covers ecommerce operations. Giles Thomas's perspective as a Shopify Partner and Google Expert is useful here because image quality is not just a design issue. It affects product page clarity, shopping feed appeal, and the quality of creative assets you use across acquisition channels. If you want more visual direction around styling and composition, explore AcquireConvert's related photography resources linked throughout this guide.
Frequently Asked Questions
Can I take professional product photos with an iPhone?
Yes, in many cases you can. The result depends more on lighting, stabilization, framing, and editing consistency than on the phone alone. For many small ecommerce brands, an iPhone is fully capable of producing solid product page and social images, especially for smaller products and controlled tabletop setups.
How do I take product photos with iPhone at home?
Set up near indirect window light, use a plain backdrop, stabilize the phone with a tripod, lock focus and exposure, and shoot several useful angles. Start simple. A consistent home setup often performs better than changing rooms, backgrounds, and lighting conditions each time you photograph a new product.
What is the best background for iPhone product photography?
A white or light neutral background is usually best for core ecommerce images because it keeps attention on the item and makes catalogs look consistent. Styled backgrounds can work well for ads and social. Choose based on the job of the image, not just what looks most creative in isolation.
How do I take product photos with white background on iPhone?
Use a white sweep, poster board, or foam board, place it in soft even light, and avoid strong shadows. Slightly lower exposure if highlights are blowing out. After shooting, you may still need some cleanup for edge accuracy and background uniformity, especially with reflective or textured products.
Should I use Portrait mode for product photos?
Usually not for your main ecommerce images. Portrait mode can create edge errors around products, packaging, or fine details. For catalog and product page photography, standard photo mode is generally more reliable. Portrait mode can still be useful for some styled shots if the edge separation looks natural.
How can I take high resolution photos with iPhone for my store?
Start with the original camera file, avoid digital zoom, use good light, and keep the phone stable. Do not send images through apps that compress them before editing. If your iPhone supports higher-resolution capture, use that setting when practical, then export web-optimized versions for your store afterward.
Is an iPhone good enough for Etsy product photos?
Yes, often it is. If you are wondering how to take etsy photos with iphone, focus on clean backgrounds, accurate color, and a mix of overview and detail shots. Etsy buyers usually want to understand craftsmanship, scale, and texture quickly, so clarity and consistency matter more than flashy effects.
Do I need editing software after taking the photos?
Usually yes, at least for light cleanup. Even strong source images often need minor exposure, white balance, cropping, and background adjustments. Keep edits realistic and consistent. Overediting can create a mismatch between what customers expect and what arrives, which may affect trust and return rates.
When should I stop doing product photos myself?
If your image quality is limiting conversion, your team is spending too much time shooting, or your products need advanced lighting and styling, it may be time to outsource hero images or invest in a more controlled setup. Many brands keep DIY content for regular updates and outsource only the most important shots.
How to take a picture of a product on iPhone?
Put the product in soft, consistent light, set it on a clean backdrop, and stabilize your iPhone so the framing does not shift. Tap to focus, hold to lock focus and exposure, then adjust exposure slightly so highlights are not blown out. Shoot a few angles that answer buyer questions, then pick the sharpest frames for editing.
How to take clothing product photos with iPhone?
Use either a flat lay shot from directly overhead or a hanging setup that keeps the garment level and centered. Steam or iron first, keep folds consistent across colors and sizes, and shoot a simple set: front, back, detail close-up, and label or care tag where relevant. Use the grid to keep lines straight and avoid shooting at an angle that makes the clothing look skewed.
What basic equipment do I need to take product photos with my iPhone?
A small tripod, a simple sweep or backdrop, a reflector or white foam board, and a few clamps or tape are enough for many ecommerce shoots. The tripod fixes blur and inconsistent framing, the sweep fixes messy backgrounds, the reflector fixes harsh shadows, and clamps keep the setup repeatable across multiple SKUs.
What is the best app for product photos?
For many stores, the built-in iPhone Camera app is enough if your setup is controlled and you lock focus and exposure. If you need more consistency across shoots, look for an app that offers manual exposure and white balance control, consistent crop ratios, and batch export. Whichever app you use, avoid heavy filters that shift color, and always review images before publishing so the product is represented accurately.
Key Takeaways
Conclusion
An iPhone can be a very practical product photography tool for ecommerce if you use it with intention. You do not need a studio-level setup to create images that look cleaner, feel more trustworthy, and support better merchandising. Start with a controlled light source, a stable shooting position, and a simple editing routine you can repeat across every SKU. That will usually do more for your store than chasing fancy effects. If you want the next layer of guidance, AcquireConvert is a strong specialist resource for merchants refining their visual content workflow. Explore the related photography guides above to compare approaches, evaluate AI-assisted image tools, and see how experienced Shopify-focused operators structure product imagery for growth.
This article is editorial content created for educational purposes and is not a paid endorsement unless otherwise stated. Tool availability and features are based on current provided data and may change over time. Pricing was not available in the tool data for the products referenced, so verify current details directly with the provider before use. Any performance outcomes from improved product photography may vary by store, product type, traffic quality, and site experience.

Hi, I'm Giles Thomas.
Founder of AcquireConvert, the place where ecommerce entrepreneurs & marketers go to learn growth. I'm also the founder of Shopify agency Whole Design Studios.