Retail Store Photography for Ecommerce (2026)

Retail store photography can work well for ecommerce if you want your products to feel real, tactile, and context-rich rather than isolated on a plain backdrop. For Shopify merchants especially, in-store images often sit somewhere between catalog shots and editorial lifestyle content. They can help shoppers understand scale, merchandising style, and brand personality. The trade-off is that in-store photography is harder to control than a studio setup, so your results depend on lighting, composition, and how clearly the product remains the hero. If you are deciding whether to shoot products in your retail space, this guide will help you evaluate where it fits, what to watch for, and how to make it commercially useful. For broader visual strategy, start with AcquireConvert’s guide to lifestyle photography.
Contents
What retail store photography is really good at
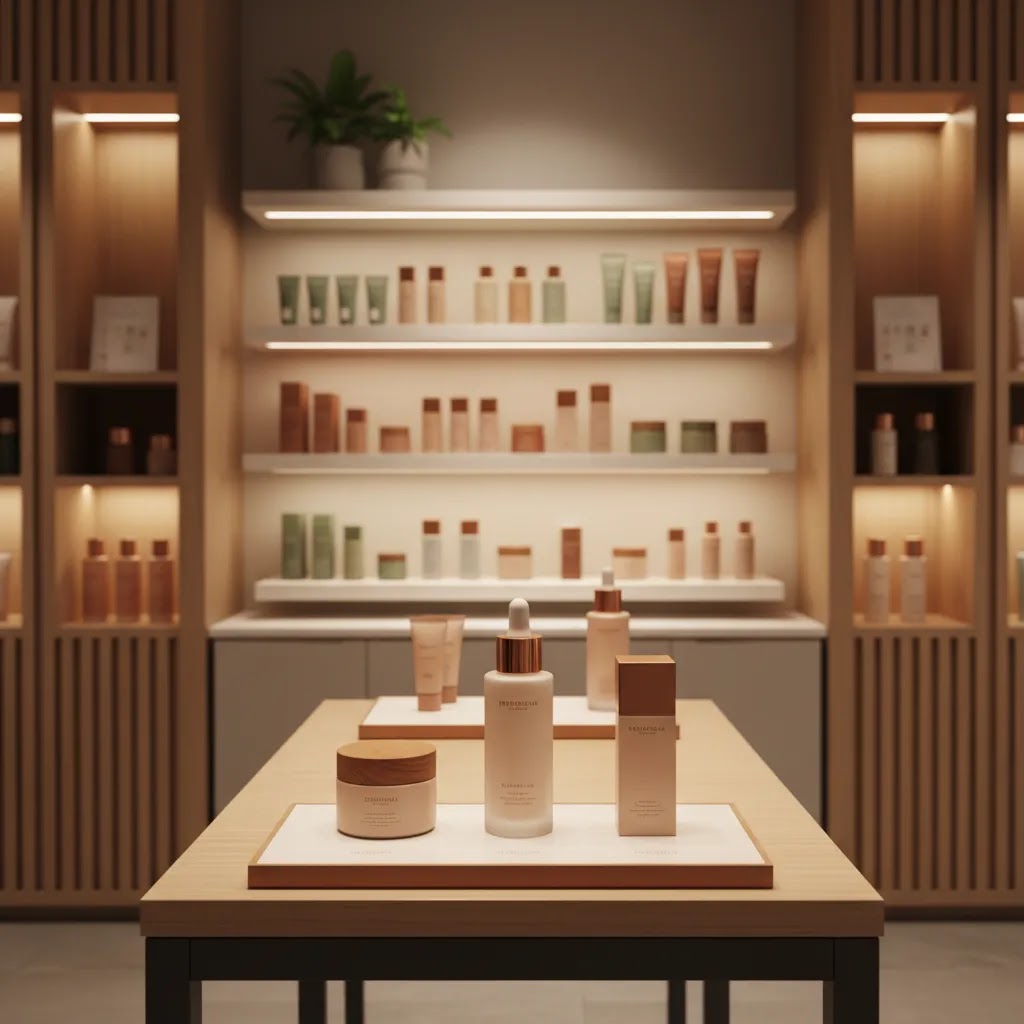
Retail store photography means photographing products inside a real shop environment instead of a controlled studio alone. For ecommerce, that can include shelves, fixtures, checkout displays, fitting areas, product tables, or styled brand corners. The goal is usually not just documentation. It is to show the product in a believable retail setting that supports purchase intent.
This style is especially useful when your store environment is part of your brand. A carefully merchandised boutique, beauty counter, concept store, or showroom can add trust in a way a plain product cutout cannot. Shoppers may feel they are seeing the product “in the wild,” which often helps with premium positioning and storytelling.
That said, retail store photography should support ecommerce performance, not distract from it. Your main product pages still need clear, conversion-focused visuals. In many cases, the strongest setup is a mix: clean primary images, then in-store photography as supporting media lower on the page, in gallery slots, or in collection banners. If your retail space doubles as a brand asset, it can complement branding photography and help tie your physical and online channels together.
For merchants building stronger visual consistency across channels, it also helps to review broader guidance in AcquireConvert’s Lifestyle Product Photography section.
Key features of effective in-store product photography
The best retail store photography is commercially useful first and visually appealing second. That means every image should answer a store-owner question: does this help a shopper understand the product better and move closer to purchase?
Clear product hierarchy matters most. Even inside a busy retail setting, the eye should go to the featured item first. Use depth of field, framing, spacing, and contrast so props, shelving, signage, or neighboring products do not compete with the item you are selling.
Controlled backgrounds make a major difference. Store interiors can get cluttered fast. Before shooting, simplify price labels, excess packaging, tangled cords, or visual noise. If your environment still feels too busy, plan a more intentional scene background within the shop instead of photographing the entire area.
Useful variation is another sign of strong execution. A good set usually includes:
Lighting consistency is where many in-store shoots fall apart. Mixed light from windows, overhead retail fixtures, and decorative bulbs can create odd color casts. If color accuracy affects conversion, as it often does in apparel, beauty, home goods, or electronics, use correction tools and test your images on desktop and mobile before publishing.
Post-production flexibility also matters. Some merchants use AI-assisted editing tools to refine a shot rather than reshoot everything. For example, ProductAI offers tools such as AI Background Generator, Free White Background Generator, Increase Image Resolution, and Background Swap Editor. These can be useful if you want to repurpose an in-store image into a cleaner ecommerce asset, though they are not a substitute for getting the original composition right.
If your in-store setup is becoming too complicated, it may be a sign that the product should be shot in a dedicated product photography studio first, then supported with retail-context imagery afterward.
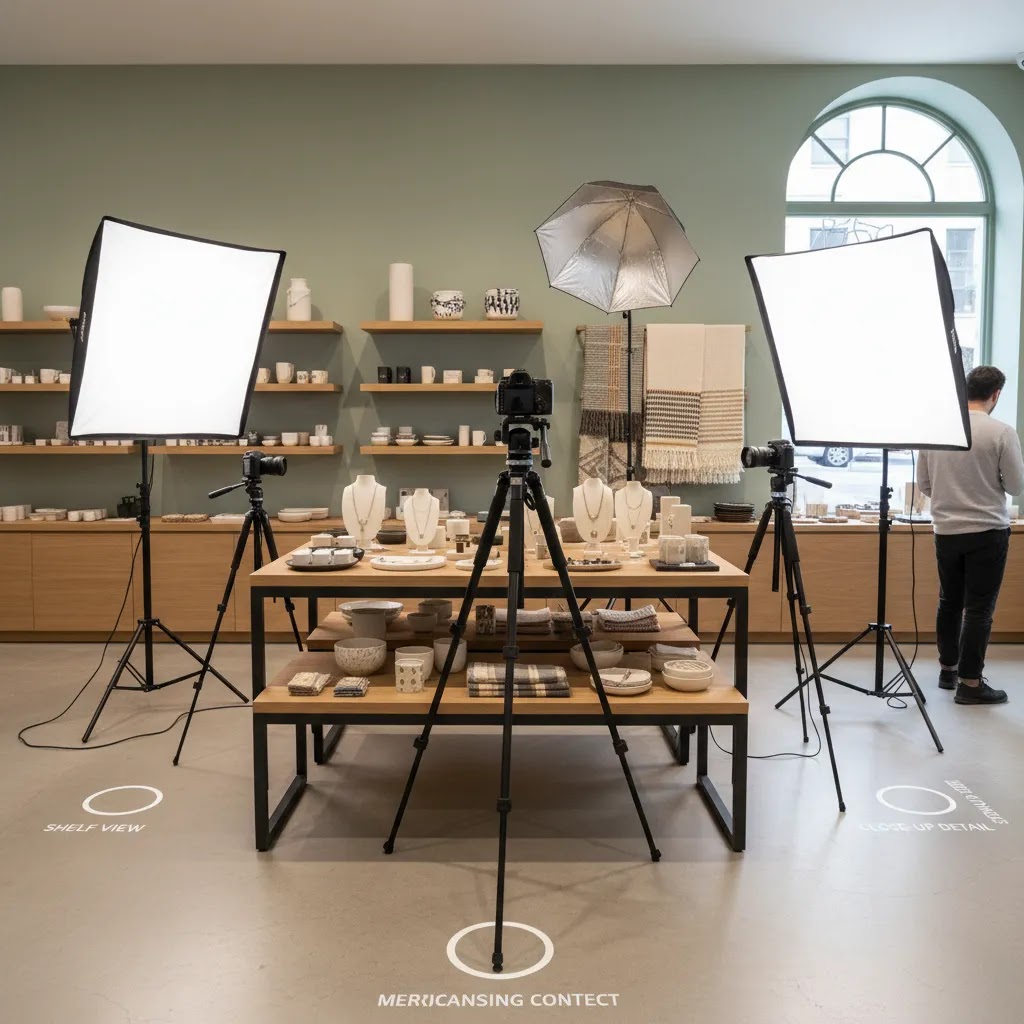
Retail store photography shot list (what to capture in-store)
What many store owners overlook is that “in-store photography” is not one kind of image. You usually need a small set of repeatable shots that map to specific placements in Shopify, email, and ads. If you walk into your store without a capture plan, you often end up with pretty images you cannot use where it matters.
From a practical standpoint, here is a must-capture shot list that covers most Shopify catalogs. You will not need every shot for every SKU, but this list keeps you from missing the images that tend to do the heavy lifting.
Now, when it comes to planning intent, decide where each image is meant to live before you shoot. A simple way to think about it is:
Consider this if you sell multiple SKUs that sit together in a collection: consistency is not just an aesthetic preference, it helps your store feel trustworthy. Pick a repeatable approach across products, such as the same camera height, the same distance from the product, and the same “background zone” in the shop. When every item is photographed from a completely different angle in a completely different part of the store, the catalog can feel improvised, even if each photo is nice on its own.
Pros and Cons
Strengths
Considerations
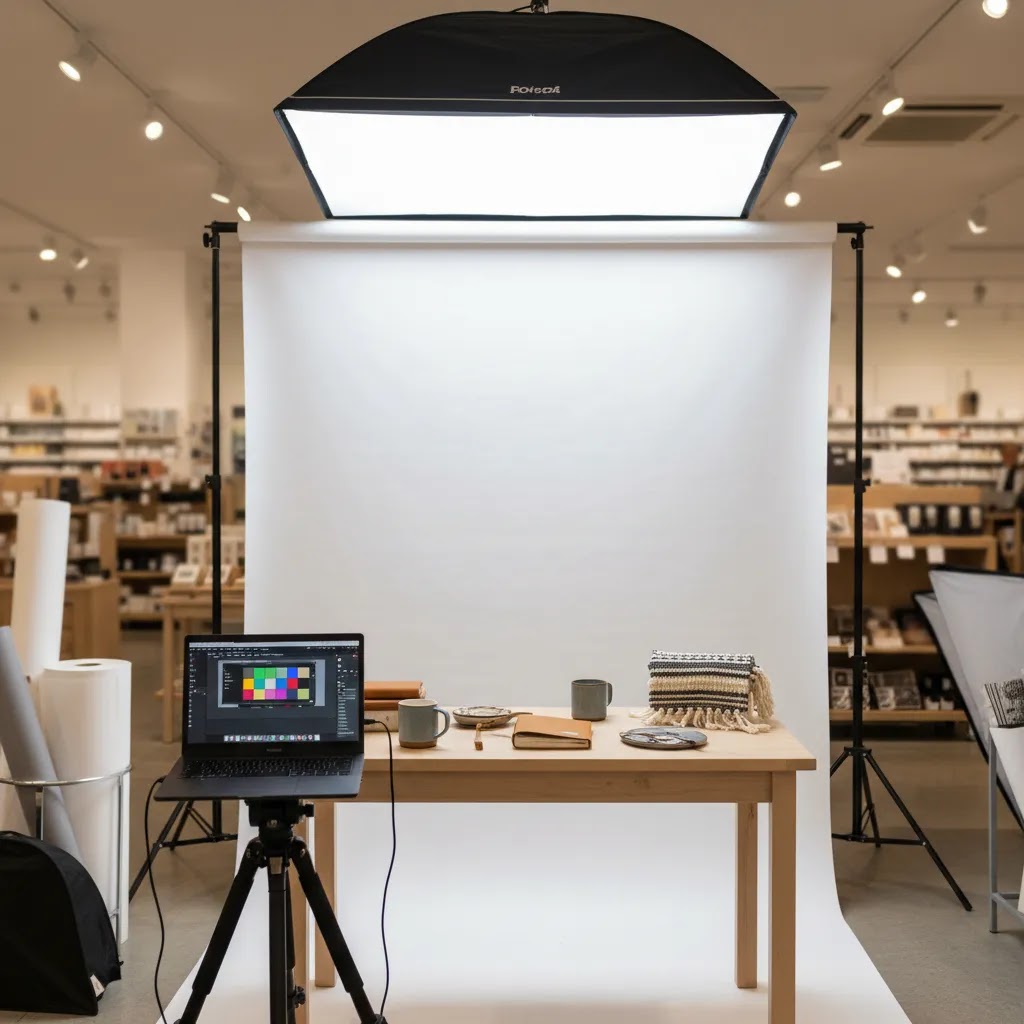
In-store lighting and camera settings that keep product color accurate
Here’s the thing, most retail stores have mixed lighting. You might have daylight from the front windows, overhead LED panels, and warm accent bulbs designed to make the space feel cozy. That is great for shoppers in person, but it can create color casts and inconsistent product tone in photos.
A practical approach is to simplify the light sources as much as you can:
If you are shooting with a phone, focus on control over consistency. Many phones allow you to lock exposure and focus. If your subject is glossy packaging, glass, or anything reflective, watch for blown highlights, because once a highlight clips to pure white you cannot recover the label detail.
If you are using a camera, the basic tradeoff is shutter speed versus ISO. In-store shooting often tempts you to push ISO high, which can introduce noise and reduce fine detail. Instead, a tripod can be the simplest upgrade, because it lets you use a slower shutter speed without introducing motion blur. This is especially helpful for packaging close-ups where you want text to remain sharp.
Think of it this way: if the product is moving, such as a model holding it, you usually need a faster shutter speed. If the product is static on a shelf or table, a tripod buys you more options. Either way, avoid underexposing and “fixing it later,” because lifting dark shadows tends to exaggerate noise and odd color shifts.
For ecommerce, it is worth doing a quick color accuracy check before you upload anything to Shopify:
In many cases, getting color closer to reality is less about “perfect photography” and more about removing variability. One consistent lighting choice, one consistent white balance approach, and one consistent edit style usually beats a collection of one-off fixes.
Who retail store photography is for
Retail store photography is a strong fit for merchants whose physical space is part of the buying experience. That includes boutiques, beauty brands with in-store displays, home decor stores, gift shops, fashion retailers, and curated concept stores. If you sell products where atmosphere supports perceived value, this approach can add meaning that plain white-background shots cannot.
It is less ideal as your only image style if shoppers need precise product detail, technical specs, or color accuracy before buying. Electronics, small accessories, and comparison-heavy products typically still need clean catalog imagery first. For most Shopify stores, the practical setup is mixed media: studio or white-background primary shots, then in-store photography for support, merchandising context, and storytelling.
AcquireConvert recommendation
For most ecommerce brands, the right question is not whether retail store photography is good or bad. It is where it belongs in your conversion flow. Giles Thomas’s work as a Shopify Partner and Google Expert consistently points toward practical execution over visual trend-chasing. In plain terms, use in-store photography where it helps shoppers feel more confident, not where it makes buying harder.
A sensible rollout is to keep your first product image clean and highly legible, then add in-store shots later in the gallery, on collection headers, or in merchandising sections. If you want to build more immersive product scenes without staging every detail physically, AcquireConvert’s guide to an ai scene generator is a helpful next step. If you are refining the broader visual style of your catalog, review the category pages for E Commerce Product Photography and Lifestyle Product Photography for more implementation ideas.
How to decide if in-store photography is the right fit
If you are evaluating retail store photography for your online store, use these five criteria before committing time and budget.
1. Is your store environment actually part of the product story?
If customers buy because of curation, atmosphere, or premium presentation, in-store visuals can strengthen perception. If your store is functional but not visually distinctive, a controlled set may serve you better.
2. What role will these images play on the page?
Decide whether the shots are for hero placement, supporting gallery slots, collection banners, ads, or social. For most Shopify product pages, your first image should remain clear and product-led. Supporting images can be more atmospheric.
3. Can you keep the product visually dominant?
Look at shelves, signage, neighboring items, reflections, and shadows. If the eye keeps drifting away from the featured product, the image is not doing its ecommerce job. This is especially important for mobile, where visual clutter becomes more obvious.
4. Do you have a repeatable process?
Strong ecommerce photography needs consistency. Choose a few repeatable store zones, standard camera heights, and lighting adjustments. Without a repeatable setup, your catalog may start to feel uneven from one product page to the next.
5. Would a hybrid workflow perform better?
For many brands, the answer is yes. Start with clean product shots on white or neutral backgrounds. Add in-store photography for context. If needed, use editing support to create alternate assets such as a white backdrop for marketplaces or cleaner image crops for ads. This hybrid approach usually gives you more flexibility than relying on one style alone.
If you are also planning immersive store views or retail shop 360 photography, remember that those assets solve a different problem. They are better for store exploration and space presentation than direct product conversion. Treat them as complementary, not interchangeable, with your product media.
Pricing, rights, and business basics (if hiring a photographer)
If you are considering hiring a photographer for retail store photography, the reality is that cost is rarely just “time with a camera.” What you are usually paying for is a combination of planning, on-site execution, and post-production, plus the rights to use the images commercially.
What typically affects cost for retail shoots includes:
Before you book anyone, clarify these basics in writing so you do not get surprised later:
When you brief a photographer, treat it like an ecommerce production brief, not a general “take nice pictures of the shop” request. Tie the shot list to specific product pages and collections, explain which images need to look consistent across SKUs, and reinforce a simple rule: the product is the hero. You can still get lifestyle feel and atmosphere, but the image has to do a commercial job on Shopify, especially on mobile.
If you are unsure what to ask for, bring examples from your own store. Show your current product page gallery and identify what is missing, such as scale, texture, packaging detail, or in-shelf context. That usually leads to a clearer quote and a better final set.
Frequently Asked Questions
Is retail store photography good for Shopify product pages?
Yes, but usually as supporting imagery rather than the primary product photo. Shopify merchants often get better results by leading with a clean, product-first image and then using in-store shots to show context, merchandising, or brand feel. That balance can help maintain clarity while still adding personality to the page.
Can I use in-store photography instead of white background product photos?
Sometimes, but not in every category. If the product requires clear detail, accurate color, or straightforward comparison, white-background or studio images are still important. In-store photography is best treated as a complement. It can improve storytelling, but it may not provide the clean consistency marketplaces and some shoppers expect.
What products work best for retail store photography?
Products that benefit from atmosphere and presentation usually perform best. Apparel, beauty, home decor, gifts, accessories, and boutique items are common examples. These categories often gain from context because styling influences perceived value. Technical items, small components, or comparison-driven products may need more controlled photography first.
How do I keep store photography from looking cluttered?
Start by simplifying the scene before you shoot. Remove distracting labels, signage, cords, and unrelated products. Use tighter framing and shallow depth of field where appropriate. You do not need to show the whole shop. A smaller, cleaner section of the space often communicates the brand more effectively than a wide, busy view.
Does retail shop 360 photography help ecommerce sales?
It can help with brand engagement and store exploration, especially if your physical environment is a selling point. Still, it solves a different user need than product photography. A 360 store view may build trust or interest, but shoppers usually still rely on standard product images to evaluate the actual item before purchasing.
Can I do DIY product photography for an online store inside my shop?
Yes, especially if you have good natural light, a clean merchandising area, and a consistent shot plan. DIY setups can work well for social content, secondary product images, and seasonal updates. The key is to stay disciplined about composition and consistency, otherwise the images may look improvised rather than intentionally branded.
Should I use AI tools to improve in-store product photos?
They can be useful for cleanup, alternate crops, or creating additional versions of an asset. Tools like background generators or resolution enhancement may save time in some workflows. Still, they work best as support. You should not rely on editing alone to fix poor lighting, weak composition, or unclear product focus.
What is the main mistake merchants make with store photography?
The most common mistake is forgetting that ecommerce images must still sell the product. Merchants sometimes prioritize atmosphere so heavily that the item becomes secondary. If the shopper cannot quickly identify what is being sold, see its shape, or understand its finish, the image may look nice but still underperform commercially.
How many in-store images should I add to a product page?
There is no fixed number, but one to three supporting in-store images is often enough for a standard product page. Use them where they add something new, such as scale, styling context, or placement ideas. If every image says the same thing, you are adding visual weight without helping the shopper decide.
What is the 20 60 20 rule in photography?
The 20 60 20 rule is a simple composition guideline some photographers use to keep images balanced. The idea is that roughly 60% of the frame is your main subject area, with the remaining 40% split across supporting context. In a retail store photography context, this often means the product stays dominant in the frame, while the surrounding shelving, props, and shop environment play a supporting role rather than becoming the subject.
What is the 400 rule in photography?
The “400 rule” usually refers to a rule of thumb for avoiding camera shake when shooting handheld, particularly on a camera with a longer focal length. A common version is to keep your shutter speed at least around 1/400s in situations where you are zoomed in or working with a longer lens and want to reduce blur from hand movement. In-store, this matters because lighting can be dim and it is easy to accidentally use a shutter speed that is too slow. If your product is static and you can use a tripod, you can often shoot slower than that and keep ISO lower.
How to get into retail photography?
Start by building a small portfolio that proves you can make products look commercially useful inside a real shop environment. In practice, that means consistent lighting, clean compositions, and a clear product hierarchy, not just atmospheric store shots. If you want to work with ecommerce brands, it also helps to show that you understand where images get used, such as product page galleries, collection banners, and paid social formats. Offering a test shoot for a local retailer, then delivering a tight set of wide, mid, and detail images can be a realistic first step.
How much should a photographer charge for 1 hour?
It depends on what that hour includes and what rights you need. An “hour” can mean only time on-site, or it can also include planning, styling, and post-production afterward. Usage rights matter too, especially if the images will be used in paid ads. Pricing varies widely by region and experience, so the most reliable way to judge a quote is to confirm deliverables, editing level, turnaround, and usage rights, then compare like for like.
Key Takeaways
Conclusion
Retail store photography can be a smart choice if your shop environment adds meaningful context to the way customers buy. It tends to work best when used strategically, alongside clean product imagery that keeps your ecommerce experience clear and conversion-focused. For most merchants, this is not an either-or decision. It is about choosing the right image style for the right moment in the customer journey.
If you are refining your visual content strategy, AcquireConvert is a strong place to continue. Giles Thomas brings a practical Shopify and Google perspective to ecommerce imagery, merchandising, and conversion decisions. Explore related guides on lifestyle scenes, branding visuals, and product photography workflows to decide what fits your store best.
This article is editorial content created for educational purposes and is not a paid endorsement unless explicitly stated otherwise. Pricing, product availability, and tool features are subject to change, so verify current details directly with the provider. Any performance or conversion impact discussed is not guaranteed and will vary by product type, store setup, traffic quality, and implementation.

Hi, I'm Giles Thomas.
Founder of AcquireConvert, the place where ecommerce entrepreneurs & marketers go to learn growth. I'm also the founder of Shopify agency Whole Design Studios.