Best Light for Product Photography (2026 Guide)
If you sell online, lighting usually matters more than the camera body sitting on your desk. The right light helps you show texture, color accuracy, and shape clearly, which may improve buyer confidence on product pages, marketplaces, and ads. The wrong setup can create muddy shadows, blown highlights, and inconsistent images that make your catalog feel less trustworthy. If you are comparing continuous LEDs, softboxes, ring lights, and light boxes, this guide will help you make a practical choice based on what you actually sell. For a broader foundation on angles and setups, see our guide to loop lighting photography. Here, the focus is simpler: what light works best for ecommerce product photography, where it works well, and what trade-offs you should expect before you buy.
Contents
What Makes a Light Good for Product Photography
The best light for product photography is usually the one that gives you consistent, repeatable results. For ecommerce, that matters more than a dramatic look. Your product page images need to match from one SKU to the next, especially if you sell apparel, cosmetics, homeware, or accessories. Buyers notice when white backgrounds shift gray, colors look warmer in one shot than another, or shadows change from image to image.
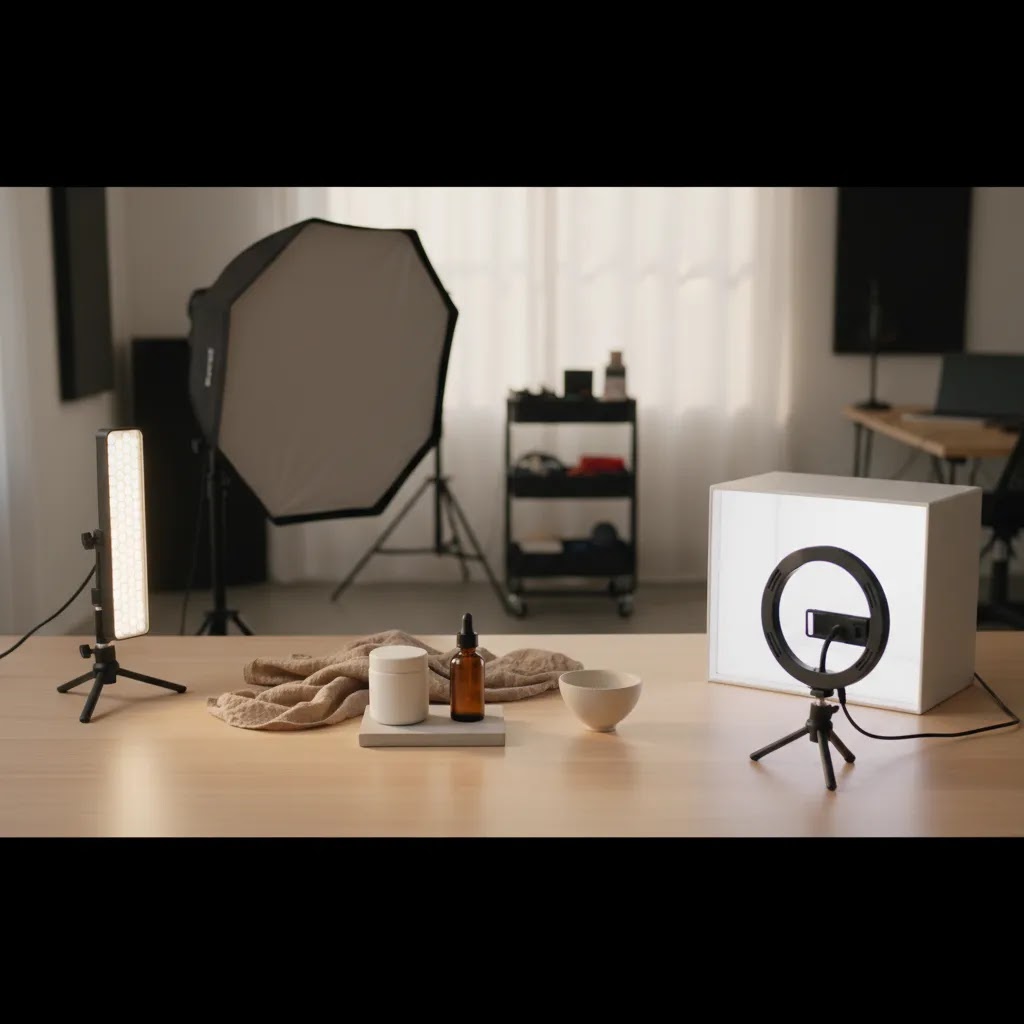
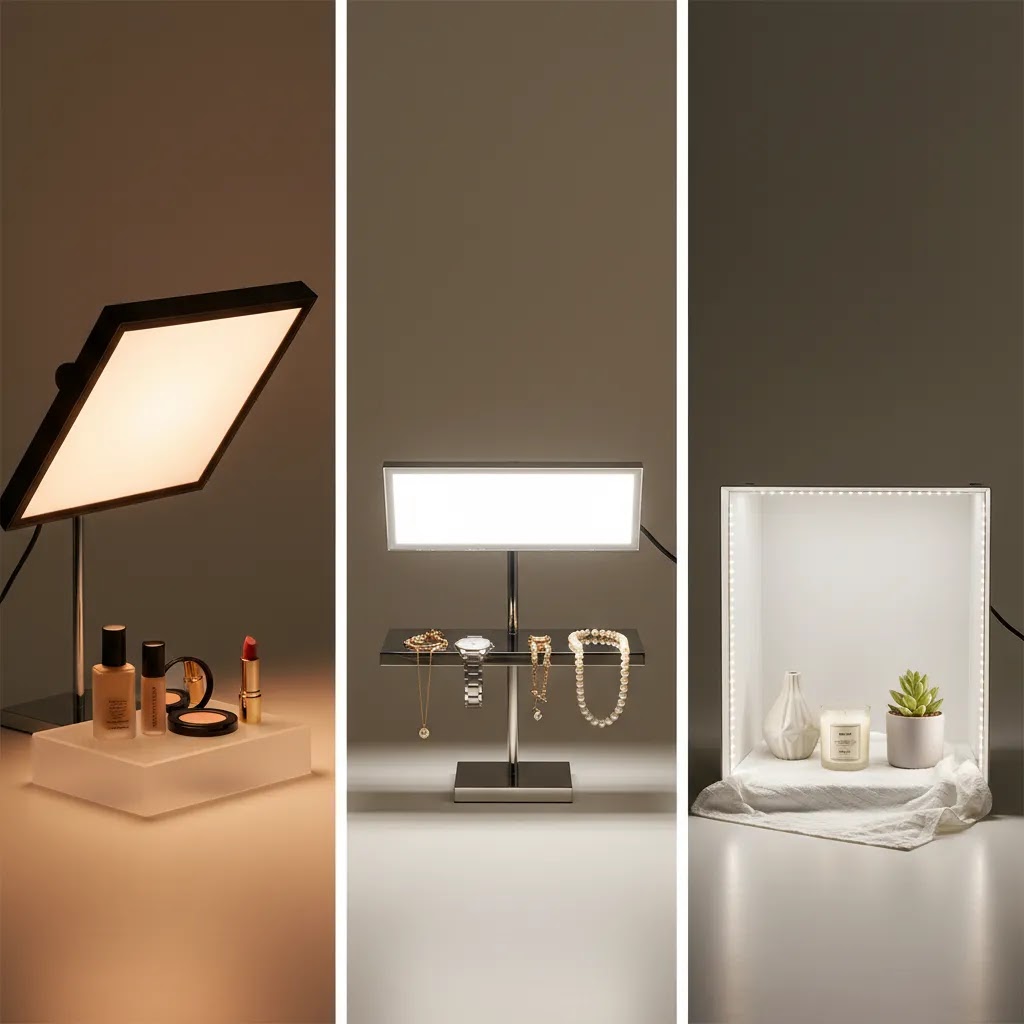
For most store owners, continuous LED lighting is the most practical starting point. You can see the effect in real time, adjust angle and distance quickly, and shoot without deep photography experience. A softbox or diffuser paired with LED panels often produces cleaner shadows and more even highlights than a bare bulb. If you need highly standardized packshot images, a light box can work well for smaller products like jewelry, skincare, gadgets, and handmade goods.
The right answer also depends on the product surface. Reflective items such as glass, metal, and glossy packaging are less forgiving. They usually need larger, softer light sources and more careful positioning. If you are still comparing options, our broader guide to best lighting for photography gives helpful context before you commit to a setup.
Common Lighting Rules, and When to Ignore Them
If you have been researching the best light for product photography, you have probably come across a few “rules” that sound scientific. They can be helpful, but only if you treat them as starting points, not standards you must follow.
The 20/60/20 rule: a practical way to interpret it for ecommerce
The 20/60/20 rule is often described as a lighting ratio guideline. In many explanations, it means something like: 60% of your exposure comes from the main light on the product, 20% supports the shadows (fill), and 20% creates background brightness or separation.
Here’s the thing: in catalog photography, you usually do not need to measure percentages. A more ecommerce-friendly way to apply the idea is to set your key light first, then add only enough fill to control how “heavy” the shadows look on your product page. After that, adjust your background brightness separately so it looks clean without washing out the product edges.
If you shoot on a white sweep, the background is often what causes problems. If you push background brightness too hard, you can lose product outline, flatten texture, or create a halo effect. In practice, many Shopify catalogs look best when the product exposure is correct first, then the background is brought up carefully.
What people mean by the “3 lighting rule”, and why you may not need it
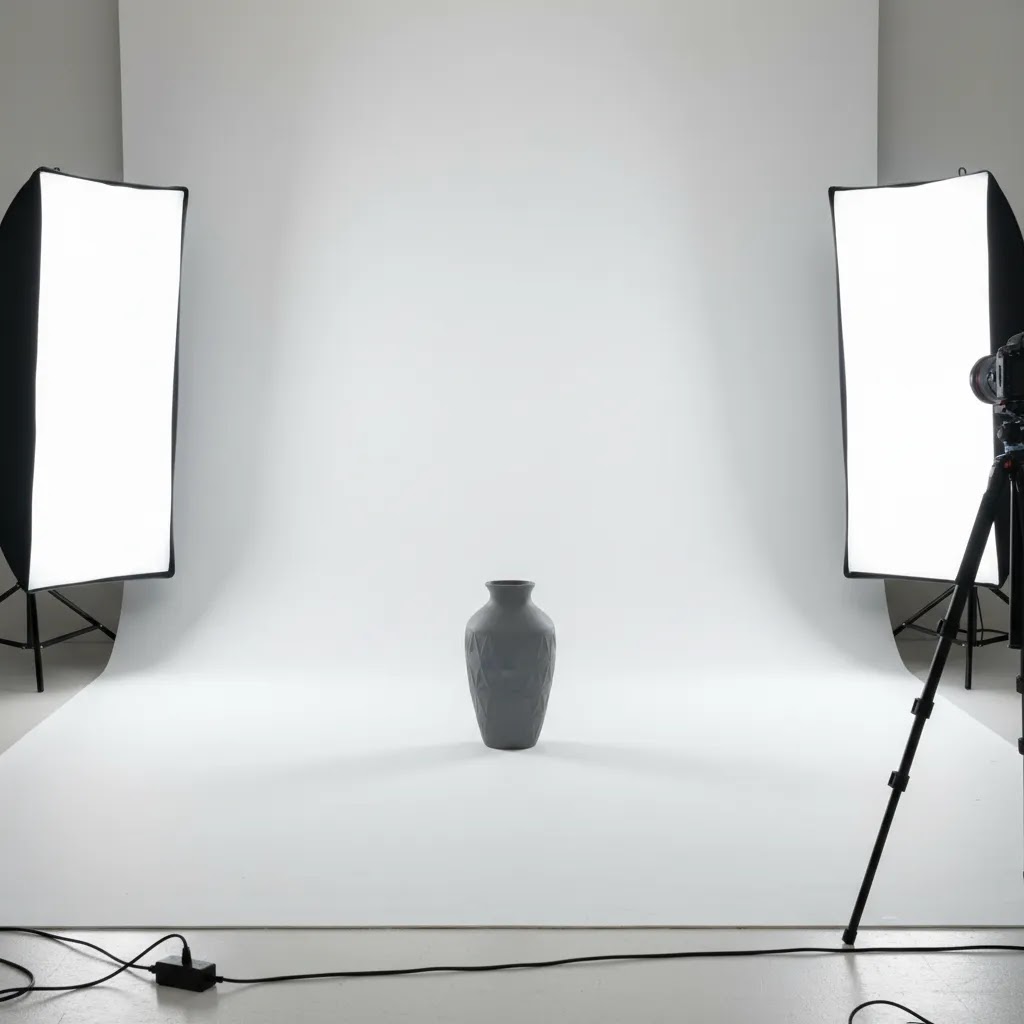
The “3 lighting rule” usually refers to a three-light approach: a key light, a fill light, and a back light (sometimes called a rim light or hair light). It is a classic setup because it gives shape, controls shadows, and helps separate the subject from the background.
For most Shopify store owners shooting small to medium products, you can still get professional-looking results with one good light and a reflector. A large diffused key light creates the look, and a simple white foam board or reflector lifts the shadow side. A third light can help, but it is not mandatory for clean packshots. It becomes more valuable when you are shooting dark products on dark backgrounds, glossy packaging, or you want a crisp edge highlight that makes the product pop in thumbnails.
When to ignore the rules entirely
Rules break down fastest with difficult surfaces and materials. If you sell reflective products, transparent items, or anything with a mirror finish, ratios matter less than controlling what your product is reflecting. The “right” setup may be a bigger diffusion panel placed closer, not more lights.
White-background packshots are another case where rules can distract you. Many stores get better results by focusing on background control and edge definition rather than trying to hit a specific lighting formula. If the product looks accurate and consistent across SKUs, you are doing the job.
Key Features to Look For
If you are choosing lights for a Shopify store, Amazon listings, or marketplace photography, focus on features that support speed and consistency rather than flashy specs.
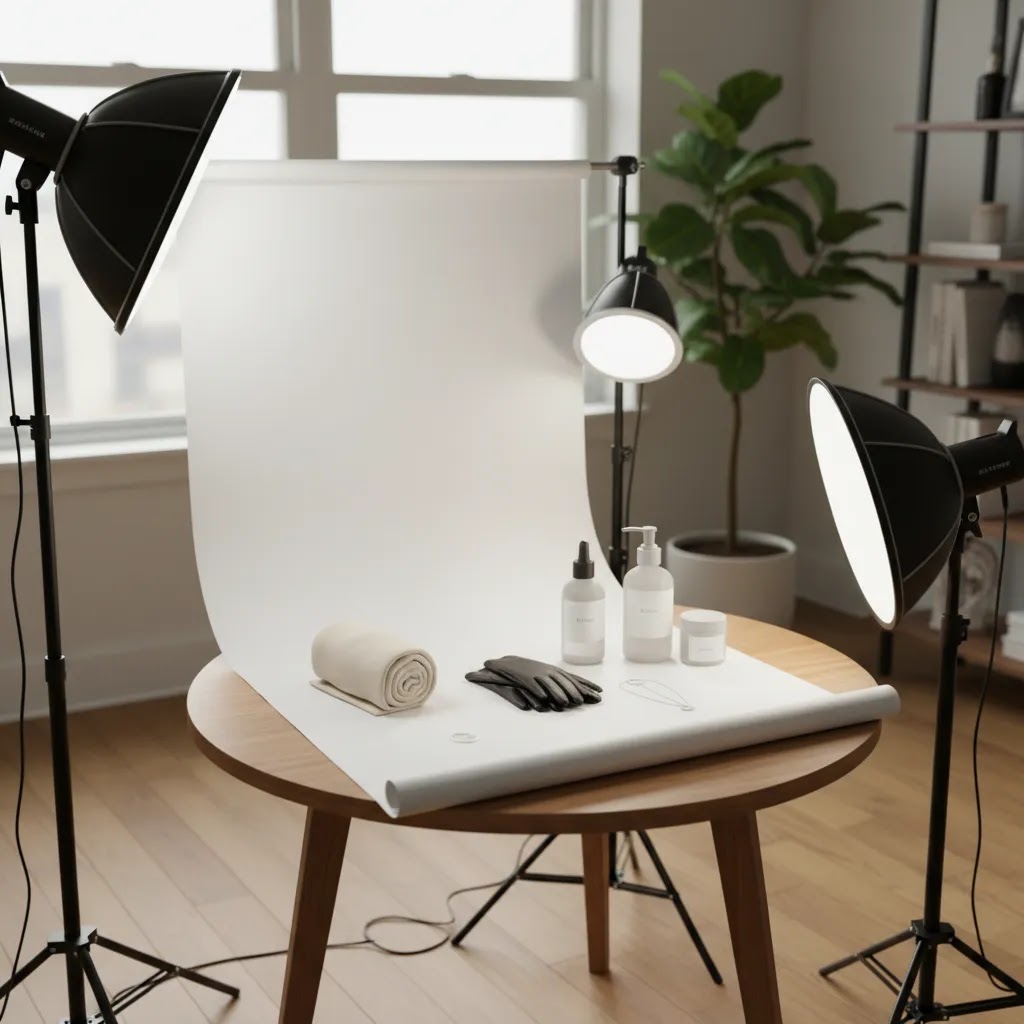
For many ecommerce teams, the most effective setup is not one perfect lamp but a simple system: key light, fill light or reflector, white sweep background, and a tripod. If you want examples of lighting placement that shape products more intentionally, our article on top lighting photography is a useful next read.
Lighting is only one part of the production workflow. After capture, some merchants also use editing tools to clean backgrounds, improve consistency, or create alternate scenes for ads and social content. AcquireConvert tracks tools like AI Background Generator, Free White Background Generator, and Increase Image Resolution for stores that want to streamline post-production.
Product Photography Lighting Positions: Key, Fill, and Back Light
If you want more consistent product photos, think in terms of jobs, not gear. Most ecommerce setups are some version of a “three light” approach: a key light that creates the main look, a fill (or reflector) that controls shadows, and an optional back or rim light that adds separation. You can do all of this with one light and a reflector, then add the third element only when it solves a real problem.
Key light: your main source
The key light defines the shape of the product. For classic catalog results, a good starting point is placing the key light about 45 degrees to the side of the product and slightly above it, angled down. That angle tends to reveal texture and form without creating extreme shadows.
Distance matters as much as power. As a rule of thumb, moving a diffused light closer makes it “bigger” relative to the product, which softens shadows and smooths highlights. Moving it farther away makes the light effectively smaller, which can increase contrast and make reflections harsher on glossy packaging.
If you are shooting on a white background, watch the shadow edge. If the shadow looks hard and distracting, the light is usually too direct, too small, or too far away. Bigger diffusion and closer placement typically helps.
Fill light or reflector: shadow control without flattening the product
Fill is about deciding how much shadow you want on the non-key side. Many store owners accidentally remove all shadow, then wonder why the product looks flat. Some shadow is useful because it shows depth and makes the product feel real.
In practice, a reflector often beats a second light for small studios. Place a white foam board, reflector, or even a white poster board on the shadow side, just out of frame, and move it closer until the shadow lifts to a level you like. If you use a second light as fill, keep it softer and lower power than the key so it supports the shape rather than replacing it.
Back light (rim light): separation and edge definition
A back light is optional, but it is helpful when your product blends into the background, especially with dark objects on a dark sweep, clear bottles, or shiny items that need a clean edge highlight. Position it behind the product, aimed toward the back edge, often higher than the product and angled down slightly.
Be careful with back lights on white backgrounds. Too much can create a glow around the product edge and make cutouts or background cleanup harder. The goal is a subtle rim, not a second key light fighting your main source.
Quick troubleshooting based on what you see
If you see deep shadows, your key is probably too far to the side, too high, or too undiffused. Try moving it closer, making the diffusion larger, or adding a reflector on the shadow side.
If the lighting looks flat, your fill is usually too strong or too close. Pull the reflector back, lower the fill intensity, or move the key slightly more to the side to bring back shape.
If highlights are blown or detail disappears on glossy packaging, the light source is typically too small or too direct. Make the light larger with diffusion, change the angle so reflections move away from the camera, or increase the distance between product and background so you have more control.
If you are getting unwanted reflections, especially on metal and glass, remember the product reflects the room. Clean up what is around the product, use larger diffusion, and adjust camera and light angles until the reflection becomes a smooth gradient instead of a bright hotspot.
Pros and Cons
Strengths
Considerations
Who This Buying Approach Is For
This guide is for ecommerce operators who need dependable product images without turning their workflow into a full production studio. If you run a Shopify store, manage your own catalog updates, or create product content for marketplaces and ads, a practical lighting setup often gives you the fastest quality improvement. It is especially relevant if you photograph products in-house and want fewer reshoots, better consistency across SKUs, and cleaner source images for editing.
If you are building a dedicated shooting area, our guide to setting up a product photography studio will help you think beyond just the lights themselves.
AcquireConvert Recommendation
For most ecommerce brands, the smartest purchase is a daylight-balanced continuous LED setup with soft diffusion, not the most expensive light on the market. In practice, store owners usually need reliability, manageable heat, compact storage, and enough flexibility to shoot hero images, detail shots, and occasional lifestyle content. That makes LEDs with softboxes or diffused panels a strong fit for many catalogs. A light box can be the better choice if you mainly shoot small products and need clean, repeatable white-background output.
At AcquireConvert, we look at these decisions through a merchant lens: how quickly you can get consistent images live on your store, how much editing time the setup may save, and how well the workflow fits a small team. That approach reflects Giles Thomas’s experience as a Shopify Partner and Google Expert, where visuals are not just creative assets but conversion assets too. If you want to compare more setup options side by side, explore our Product Photo Lighting resources and related photography guides before you buy.
How to Choose the Best Light Setup
Here are the five criteria that matter most if you want a setup that works for ecommerce rather than occasional hobby use.
1. Start with your product size and surface
Small matte products are the easiest to light. A compact LED kit or light box may be enough. Larger items, reflective packaging, glass, and metallic surfaces usually need bigger diffused light sources. If highlights are appearing as bright streaks or mirror-like reflections, the light is probably too small or too direct.
2. Match the setup to your output requirements
If your main goal is white background catalog photography, prioritize even coverage and shadow control. If you also create social ads, collection banners, or lifestyle content, choose a more flexible setup with adjustable angle and intensity. The best light for photography is not always the best light for standardized product pages, so be clear about your primary output first.
3. Think about speed, not just image quality
Store owners often underestimate workflow friction. If a setup takes 20 minutes to assemble every time, it tends to get used less often. Compact LEDs, marked floor positions, and a fixed background area can help you create a repeatable system for launches, restocks, and seasonal campaigns.
4. Plan for editing and background work
Even with a good setup, you may still need cleanup. That is normal. Some merchants use tools like Background Swap Editor or Magic Photo Editor to create alternate scenes for ads and social content after the base product shot is captured. The key is to get the source image right first, because editing tends to work better when lighting is already controlled.
5. Avoid mixing too many light sources
One of the most common problems in DIY product photography is mixed lighting. Window light plus warm ceiling bulbs plus an LED panel can lead to inconsistent color and longer editing sessions. A controlled single system is usually better than several mismatched lights. If you are testing backgrounds at the same time, keep them neutral and review how lighting falls across edges, shadows, and product contours.
If your current images still look inconsistent, audit the whole scene: light angle, background material, camera position, and post-production process. A stronger setup often comes from refining the workflow rather than replacing every piece of equipment at once.
Lighting Equipment Checklist for Ecommerce Product Photography (Home Setup)
If you are building a home product photography setup, it helps to think in terms of a complete system. A lot of “lighting problems” are really missing-modifier problems, unstable-stand problems, or background problems.
Here is a practical checklist that covers what most Shopify store owners actually use.
Small-space variants: tabletop kit vs full-height kit
If you shoot mostly small items, a tabletop setup is usually the most efficient. One LED with a softbox or scrim, a reflector opposite, and a small sweep on a table can produce clean catalog images without taking over your room.
If you shoot apparel on mannequins, larger home goods, or anything tall, you will usually want full-height stands and a larger sweep. The bigger the product, the bigger your diffusion typically needs to be to keep shadows and reflections looking controlled.
When a light box is more efficient than softboxes
A light box can be the faster option when you shoot small products repeatedly and want standardized output. It wraps diffused light around the product and minimizes shadow drama. That can be ideal for marketplaces and tight Shopify catalog consistency. The trade-off is flexibility. Light boxes can feel restrictive for larger items or creative lifestyle shots.
What to prioritize first, and what can wait
If you are buying in stages, prioritize color consistency, diffusion size, and stand stability first. Those three elements do the most to improve repeatability across your catalog. Extra modifiers and accent lights can wait until you have a baseline setup that produces consistent, editable source images.
Frequently Asked Questions
What is the best light for product photography?
For most ecommerce use cases, continuous daylight-balanced LED lights with soft diffusion are the most practical choice. They are easier to control than harsher direct sources and let you preview the result in real time. A light box can also work well for smaller products that need clean, consistent white-background images.
Which light is best for product photography if I sell on Shopify?
If you manage your own Shopify catalog, choose a setup that prioritizes repeatability over drama. A simple two-light LED system with softboxes or diffused panels is usually a strong option. It may help you keep images consistent across collection pages, product pages, and ad creatives without creating a complicated studio workflow.
Are LED lights good for product photography?
Yes, in many cases they are the most practical option for store owners. LEDs are commonly used because they run cooler, are easier to position, and allow you to see lighting changes immediately. The quality still depends on diffusion, placement, and color consistency, so the full setup matters more than the light type alone.
Do I need a light box for product photography?
Not always. A light box is helpful for small items like cosmetics, jewelry, tech accessories, and handmade products where you want a fast white-background workflow. For larger items or more varied creative needs, a flexible LED and softbox setup often gives you better control over shadows, shape, and styling.
What is the best background for product photography?
White is still the safest choice for many ecommerce catalogs because it looks clean and works across marketplaces and product pages. That said, the best background depends on your brand and channel. Neutral sweeps, textured surfaces, or staged settings can work for campaign content, but catalog consistency should usually come first.
Can I use natural light for product photography?
You can, especially when starting out, but it often creates consistency problems. Natural light changes with time of day, weather, and season. If you need repeatable results for ongoing catalog updates, artificial lighting usually gives you more control and may reduce editing time.
What light setup for product photography works in a small space?
A compact tabletop setup with one key LED light, one reflector, a white sweep, and a tripod can work very well in a small room. If you sell smaller products, a collapsible light box is also worth considering. The main goal is controlling reflections, shadows, and color without overcrowding your workspace.
Do better lights improve ecommerce conversions?
Better product images may improve shopper trust and reduce uncertainty, which can support conversion performance, but results vary by niche, price point, traffic quality, and product-market fit. Lighting is one important part of the product page experience, not a guaranteed fix on its own.
Are AI tools useful for product photography workflows?
They can be useful for editing support, alternate backgrounds, resolution enhancement, and creative variations, especially when you already have a clean source image. They are usually best treated as workflow tools rather than substitutes for a sound lighting setup. Strong source photos still give you more reliable results.
What is the 20 60 20 rule in photography?
The 20/60/20 rule is a common guideline for balancing light contribution, usually referring to how much of the final exposure comes from the main light (often treated as the majority), with smaller amounts used to control shadows and create background brightness or separation. For ecommerce product photography, it is usually more practical to set your key light first, then add only enough fill to control shadow depth, and adjust background brightness separately so you keep clean edges and accurate product texture.
What is the 3 lighting rule?
The “3 lighting rule” typically refers to a three-light setup: key light, fill light, and back (rim) light. It is a reliable approach for shaping products and separating them from the background. Many Shopify catalogs can still look great with one strong diffused key light plus a reflector, adding a back light only when you need extra edge definition or separation.
What is the best lighting position for product photography?
A common starting position is a diffused key light placed about 45 degrees to the side of the product and slightly above it, angled down. Then place a reflector on the opposite side to lift shadows. If you need more separation from the background, add a back or rim light behind the product, aimed toward the product’s edge, and keep it subtle so it does not create a halo.
What lighting equipment do I need for product photography?
At a minimum, most ecommerce setups need one continuous LED light, a diffusion modifier (like a softbox or scrim), a stable light stand, a reflector or white foam board, a background sweep, and a tripod. Depending on your space and product type, you may also add clamps for backdrops, a second light for fill, and an optional back light for separation.
Key Takeaways
Conclusion
The best light for product photography is usually the setup that helps you produce clean, consistent images week after week, not the one with the longest spec sheet. For many online stores, that means diffused LED lighting paired with a controlled background and a repeatable shooting process. If you mainly shoot small products, a light box may be the more efficient choice. If you need flexibility for catalog and campaign work, modular LED lights are often a better long-term fit.
AcquireConvert focuses on these decisions from a merchant’s point of view, with practical guidance shaped by Giles Thomas’s work as a Shopify Partner and Google Expert. If you want the next step, compare related lighting articles on AcquireConvert, review your current setup against this checklist, and use the findings to build a product photography workflow that supports a stronger store experience.
This article is editorial content and not a paid endorsement unless explicitly stated otherwise. Pricing, product availability, and tool features are subject to change, so verify current details directly with the provider before purchasing. Any performance outcomes discussed are illustrative only and may vary by store, product type, and implementation quality.

Hi, I'm Giles Thomas.
Founder of AcquireConvert, the place where ecommerce entrepreneurs & marketers go to learn growth. I'm also the founder of Shopify agency Whole Design Studios.