Loop Lighting Photography for Ecommerce (2026)

Loop lighting photography is one of the most useful lighting patterns to learn if you sell products online and also create people-focused brand imagery. It gives you a polished, dimensional look without the heavy contrast of more dramatic setups, which makes it a smart fit for beauty, apparel, founder portraits, and close-up lifestyle content. If you are building better visuals for a Shopify store, learning this pattern can help you create images that feel more professional while still being repeatable in a small studio or home setup. If you need a broader foundation first, start with this guide to lighting for pictures. From there, loop lighting becomes much easier to understand and apply consistently.
Contents
What loop lighting is
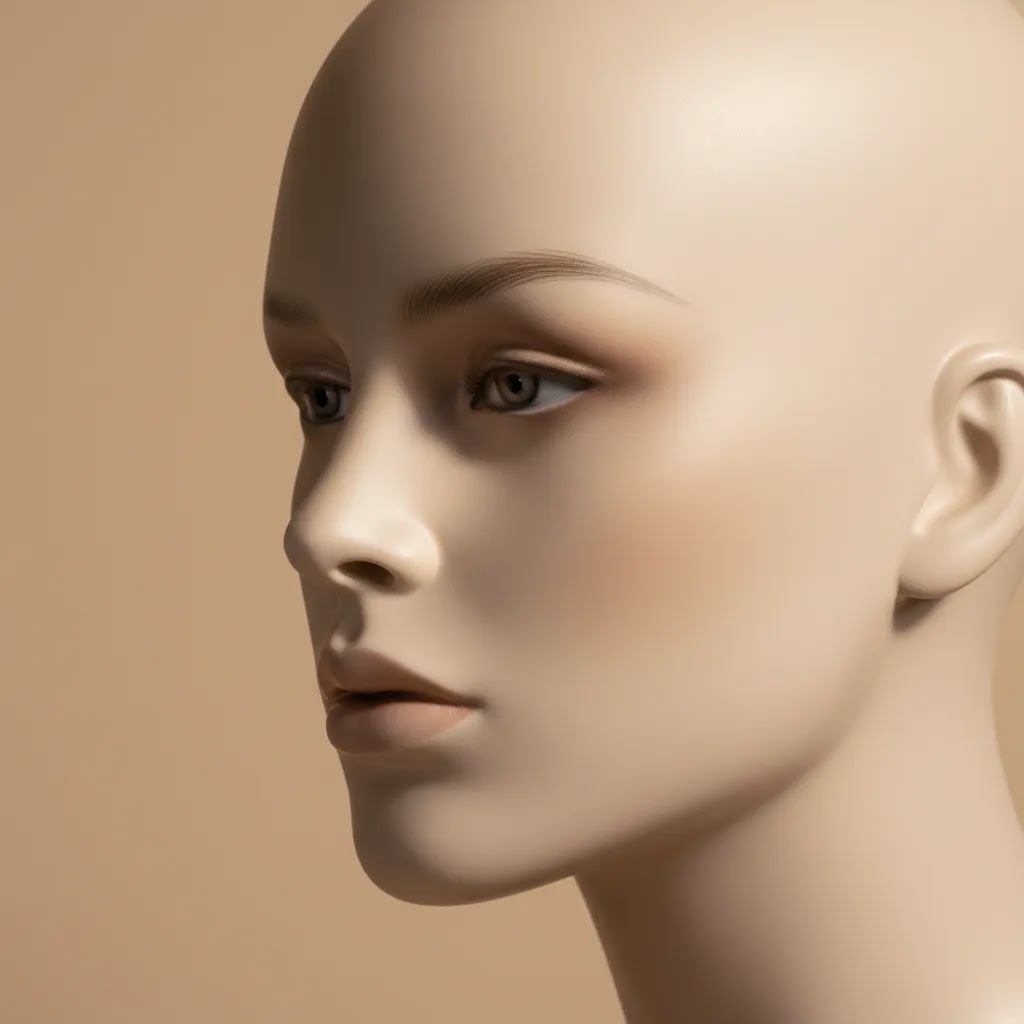
Loop lighting is a portrait lighting pattern where the main light sits slightly above eye level and around 25 to 45 degrees to one side of the subject. This creates a small shadow from the nose that falls downward and slightly to the side, forming a loop shape on the cheek. The goal is to keep that nose shadow short and separate from the shadow on the far cheek.
For ecommerce, this matters because loop lighting adds shape without making the image feel too theatrical. It can work especially well for beauty product campaigns, model shots for fashion brands, founder headshots, and social content where you want the subject to look polished but approachable.
It is not usually the default choice for standard white-background packshots. For those, flat and controlled product photography lighting is often the better fit. But if your store uses lifestyle visuals, creator-style imagery, or close-up product-in-use scenes, loop lighting can give you a more refined result than basic front lighting.
You can also think of it as a practical middle ground between broad, forgiving illumination and more shadow-heavy setups often used in dramatic lighting photography.
Loop lighting vs other portrait lighting patterns
Here is the thing, loop lighting is often described as a “safe” portrait pattern, but it is only safe when you understand what you are choosing it over. If you are building ecommerce brand imagery, especially for Shopify product pages and ad creative, you want a lighting pattern that flatters the face while still supporting the product in the frame.
These comparisons help you choose faster.
Loop lighting vs butterfly lighting
Butterfly lighting puts the key light centered above the camera, creating a shadow under the nose that looks like a small butterfly. It can look clean and “beauty editorial” when executed well.
For ecommerce, butterfly lighting can be flattering for certain beauty founder portraits and skincare campaigns because it keeps both sides of the face relatively symmetrical. The risk is that if the light is too high or too small, you can get heavier eye socket shadows. That can make eyes look tired, which is usually not what you want for product pages or ads.
Choose butterfly lighting if your goal is symmetry and a slightly more glamorous look, and you can control the height to avoid under-eye darkness. Choose loop lighting if you want similar polish with a bit more face shape and fewer “raccoon eye” issues.
Loop lighting vs split lighting
Split lighting places the key light far to one side so half the face is lit and half is in shadow. It is dramatic and stylized.
For most Shopify stores, split lighting tends to be a poor fit for core commerce assets because it can hide skin detail, obscure makeup, and reduce trust when the face is not clearly visible. It may work for certain brand campaigns, especially if your product is edgy or the image is meant to be more editorial than product-driven, but it is rarely the first choice for conversion-focused images.
Choose split lighting when mood is the point. Choose loop lighting when clarity and product support matter.
Loop lighting vs broad lighting
Broad lighting is not a separate shadow pattern in the same way, it is a face orientation choice. It happens when the side of the face turned toward the camera is the brighter side. This typically makes the face look wider and reduces shadow definition.
For ecommerce, broad lighting can be useful if your brand wants bright, open, minimal-shadow visuals. The downside is that it can look flatter, and in close-up “product-in-hand” shots it may not separate the subject from the background as well.
Choose broad lighting if you want a lighter, airier look and you are okay with less face shape. Choose loop lighting if you want a more dimensional result that still stays commercial.
Quick “choose this if…” guidance for ecommerce shoots
If you want a simple decision rule, use this:
A simple checklist to keep loop lighting “loop”
What many store owners overlook is that loop lighting is defined by a few small, visible cues. Use this mental checklist during test shots:
How to set up loop lighting
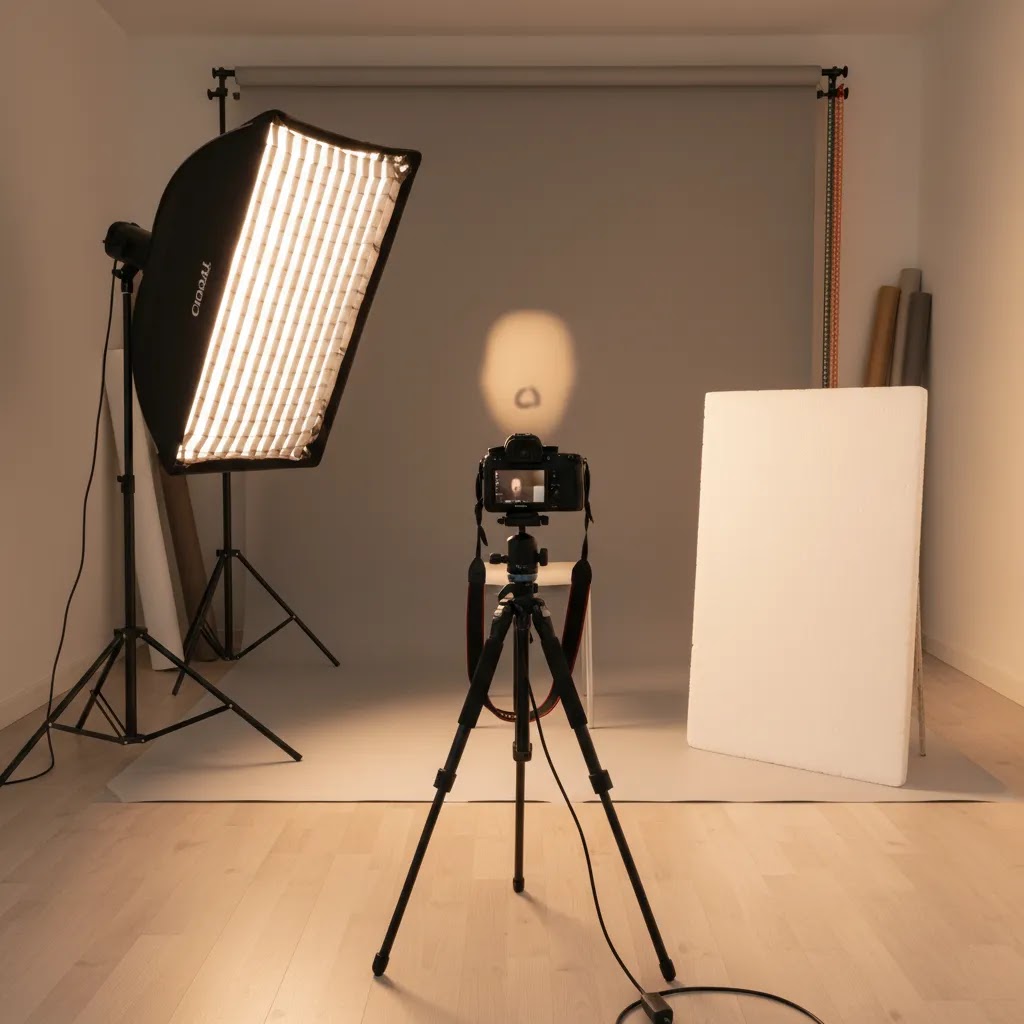
The classic setup is simple, which is why many ecommerce teams and solo founders can use it without a full studio crew. Start with one key light, one reflector or fill source, and a subject facing slightly away from the light.
Here is the practical setup:
If you are shooting products with a model, check both the face and the merchandise. A beauty brand may prioritize skin texture, makeup detail, and product visibility in hand. An apparel brand may care more about facial definition while still showing fabric texture and garment color accurately.
Loop lighting is sensitive to small adjustments. Move the key light too far sideways and you drift into Rembrandt territory. Raise it too high and eye sockets can darken. Bring it too close to camera center and the look becomes flatter. That is why test shots matter.
If your store is setting up an in-house content area, this is easiest to repeat in a controlled product photography studio where distance, backdrop, and light positions can stay consistent between shoots.
Loop lighting diagram and starting positions
If you do not have a studio diagram in front of you, a clock-face reference is a practical way to get to a reliable starting point. The way this works in practice is that you set one repeatable “default” position, then you tweak based on the nose shadow and the eyes.
A diagram in words (clock-face positioning)
Assume the subject is standing at the center of a clock and looking toward the camera.
As a starting distance guideline, place the key light far enough back that the modifier still looks large relative to the face, but not so close that tiny head movements change the lighting dramatically. In many small ecommerce setups, that ends up being a few feet away with a medium-to-large softbox. Once you find a distance that works, measure or mark it so you can recreate it later.
Common setup mistakes that break the pattern
Loop lighting usually fails in predictable ways:
Quick troubleshooting: what to change first
From a practical standpoint, you want a consistent order of operations so you do not chase the pattern for 20 minutes.
Consider this, in most ecommerce shoots you are trying to create repeatable, sale-supporting images. You do not need to chase a perfect “textbook” loop, you need a clean loop that keeps the eyes and product readable, shot after shot.
Where loop lighting works best for ecommerce
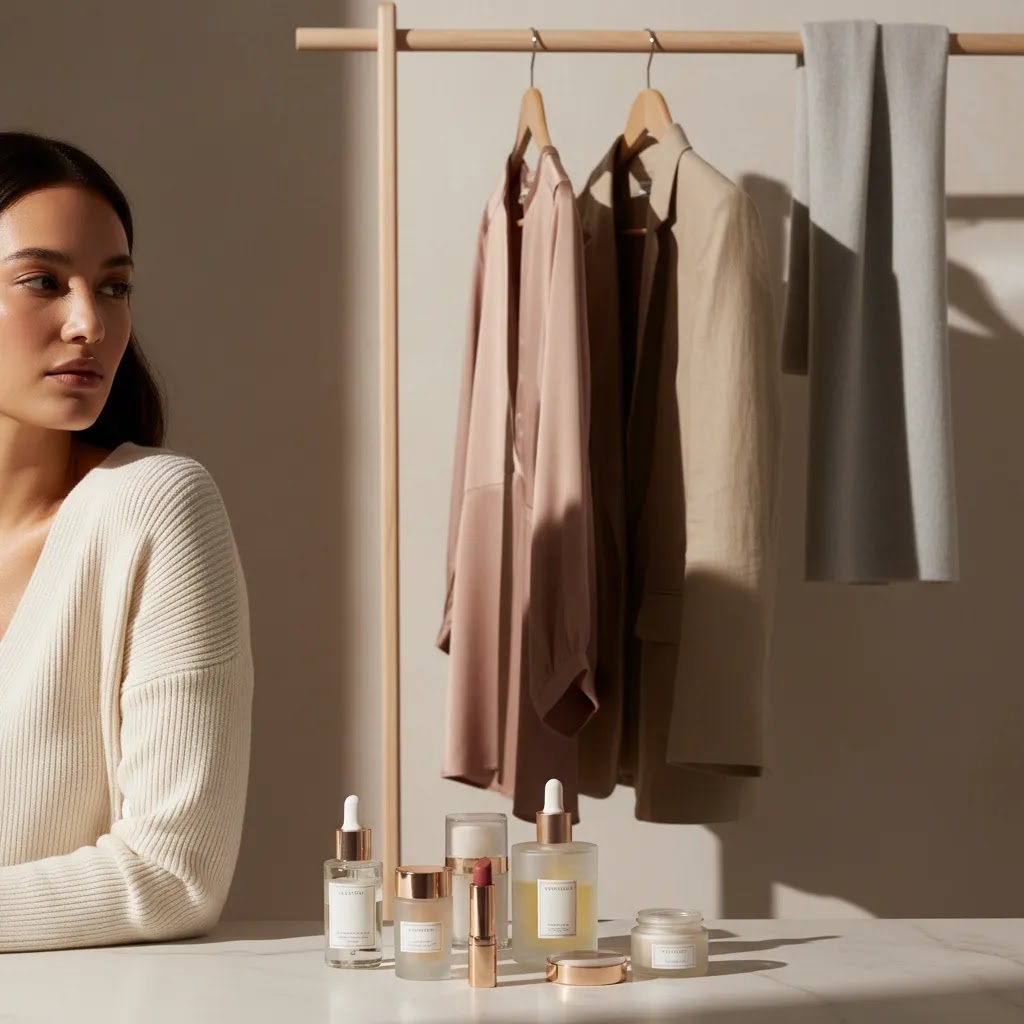
Loop lighting is strongest when a human subject helps sell the product. That includes cosmetics, skincare, fashion accessories, wellness brands, and any store using founder-led marketing. It gives more structure than flat lighting, which can make skin, contours, and product placement look more intentional.
Some common ecommerce use cases include:
It can also complement AI-assisted creative workflows. For example, some brands shoot source portraits with proper lighting first, then test variations or concept visuals later. If you work in beauty, related tools such as an ai makeup generator may help with ideation or mockups, but clean original lighting still gives you a stronger starting image.
Where loop lighting is less useful is highly standardized catalog photography. If your main need is simple consistency across dozens or hundreds of SKUs, more neutral setups may be better. Loop lighting is a style choice, so use it where dimension helps sell.
Loop lighting examples for ecommerce shots
Once you have the setup in place, your job is not just to get a loop shadow. Your job is to get an image that works in a Shopify storefront, in an ad crop, and in a thumbnail. That means you need a few checkpoints that go beyond “looks nice.”
Beauty and skincare: what “good loop lighting” looks like
For beauty, loop lighting is doing two jobs at once: flattering the face, and showing enough detail to sell the product. In a good result, skin looks dimensional without looking overly textured, and makeup placement is clear. Pay special attention to under-eye shadows and nose shadow length, because those are the two things that can make a beauty image feel harsher than you intended.
If the product is held near the face, check that the product label is readable and not falling into the shadow side. In many cases, a reflector placed slightly forward on the fill side helps keep the product-in-hand moment commercial without flattening the face.
Apparel lifestyle: face plus fabric color accuracy
For apparel, you usually want the face to look alive, but the garment still needs to read as the hero. A good loop lighting result keeps facial definition while still showing fabric texture and accurate color.
Watch for color shifts caused by mixed lighting. If you are using window light plus indoor bulbs, fabric can pick up odd casts that are painful to correct across a full collection. Consistent light sources matter more in apparel than many founders expect, because you often need a series of images to match across PDPs and collection pages.
Jewelry and accessories: controlled highlights, not blown speculars
Jewelry is where loop lighting can get tricky. The face may look great, but the product can blow out with harsh specular highlights if the light source is too small or too direct. A larger modifier typically helps by creating smoother, more controlled reflections.
Check the final image at the size it will be used. Highlights that look fine on a full-size file can become distracting when compressed into a small Shopify product page image or an ad thumbnail.
How to evaluate the result for ecommerce use
Think of it this way, you are not lighting for a portfolio. You are lighting for clarity.
Keeping results consistent across a batch shoot
For most Shopify store owners, the real win is not one perfect image. It is consistency across a day of shooting.
If you are building a content library, those small controls can make your catalog-style lifestyle images look like a deliberate system, not a set of random one-offs.
Gear and helpful tools
You do not need an elaborate studio to create loop lighting, but you do need control. A softbox or umbrella works well for most store owners because the larger light source keeps skin and shadows flattering. A reflector is often enough as fill, especially if you are shooting in a small space.
Useful core gear includes:
If you are still choosing gear, this overview of photography lighting equipment is a useful next step.
After the shoot, editing tools can help clean up and repurpose images for different channels. From the current product data available, useful options include:
These tools are most useful after you have captured a well-lit original image. Good source lighting still does most of the quality work.
Pros and Cons
Strengths
Considerations
Who loop lighting is for
Loop lighting is a strong fit for Shopify merchants and ecommerce teams that need people-centered imagery, not just standalone product shots. If you run a beauty, skincare, fashion, wellness, or personal brand store, this pattern can help you produce better campaign images, social ads, and close-up product-in-use photos without requiring a large production team.
It is especially useful if you are past the earliest store stage and now want your visuals to look more intentional. For merchants still focused on basic packshots, a simpler lighting setup may be the better first investment.
AcquireConvert recommendation
Loop lighting is worth learning if your store sells through personality, trust, and visual detail. That is often true for beauty, fashion, and founder-led brands where the face, expression, or product-in-use moment carries real conversion weight. At AcquireConvert, the focus is always on practical implementation for ecommerce operators, not photography theory for its own sake.
Giles Thomas brings the perspective of a Shopify Partner and Google Expert, which matters because store imagery is not just an aesthetic choice. It affects product page clarity, ad creative performance, and how your brand is perceived across search, social, and Shopify storefront experiences. If you want to build a stronger foundation, explore the broader Product Photo Lighting hub and the related guides on controlled setups, gear, and style choices. If you work in beauty specifically, the Cosmetics Photography category is a useful next stop.
How to choose the right loop lighting setup
Not every version of loop lighting is right for every store. The best setup depends on your products, shooting environment, and where the images will be used.
1. Match the lighting style to the sales context
If the image is for a homepage banner, ad creative, or social campaign, you usually have more freedom to use dimension and mood. Loop lighting works well there. If the image is for a strict product grid or marketplace listing, flatter lighting may convert better because it shows the item more clearly and consistently.
2. Choose modifier size based on the subject and brand feel
A larger softbox creates softer transitions and is often better for skincare, cosmetics, and premium lifestyle brands. Smaller modifiers create more contrast and definition, which can work for edgier campaigns. If you are unsure, start soft. Most ecommerce stores benefit from flattering, forgiving light.
3. Decide how much fill you need
Low fill creates more shape and drama. Higher fill gives a cleaner, brighter result that may be better for product pages. A white reflector is often enough to start. If your brand uses bright, airy visuals, bring the shadow side up so the final image still feels open and commercial.
4. Think about repeatability, not just one good shot
Many store owners can create a strong image once, then struggle to reproduce it next month. Mark the floor, note the light height, camera distance, and reflector placement. Repeatability matters more than chasing a perfect artistic setup you cannot rebuild later.
5. Build post-production into the workflow
Loop lighting should get you 80 to 90 percent of the way there in camera. Editing should then be used for cleanup, resizing, cropping, and channel-specific background changes. If your workflow often includes alternate formats for ads, collection pages, and marketplaces, planning for post-production from the start saves time.
If you are still comparing approaches, it helps to review your light style alongside your overall shooting environment, support gear, and how the images fit into your broader product page strategy.
Frequently Asked Questions
Is loop lighting good for ecommerce photography?
Yes, in the right context. Loop lighting is especially useful for ecommerce images featuring models, founders, or product-in-use scenes. It adds shape and polish without looking overly stylized. For plain white-background packshots, though, a flatter setup is often more practical and consistent.
What is the main difference between loop lighting and Rembrandt lighting?
Loop lighting creates a small nose shadow that does not connect with the cheek shadow. Rembrandt lighting pushes the key light farther to the side, creating a triangle of light on the shadow-side cheek. For many ecommerce brands, loop lighting feels softer and more commercially versatile.
Can I use loop lighting with natural light?
Yes. A window can work as your key light if you position the subject correctly and control spill with curtains, reflectors, or flags. The challenge is consistency. For ongoing ecommerce production, artificial light is usually easier to repeat across multiple sessions and products.
Is loop lighting suitable for beauty photography lighting?
Often, yes. It is a popular choice for beauty because it shapes the face while still showing skin, makeup, and product placement clearly. The key is keeping the modifier soft enough and using fill when needed so texture does not become harsher than your brand wants.
How high should the light be for loop lighting photography?
The light should usually sit slightly above eye level and angle downward. Exact height depends on the subject’s face and the modifier size. If it is too high, you may get heavy shadows under the eyes or nose. Small adjustments make a noticeable difference.
Does loop lighting work for product photography without people?
Sometimes, but it is more commonly a portrait pattern than a pure product setup. On objects, the concept becomes more about shaping form with angled light. For many SKUs, especially catalog items, dedicated object lighting setups will be more effective and easier to standardize.
What background works best with loop lighting?
Neutral gray, white, beige, and muted brand colors all work well, depending on your store aesthetic. The right background depends on whether the image is for a product page, social ad, or campaign asset. Make sure the background supports the product without competing with it.
How do I know if my nose shadow is correct?
The nose shadow should create a small loop on the cheek and stay separate from the cheek’s main shadow. If the shadows connect, the light has likely moved too far to the side. If there is barely any shadow, the key light may be too close to the camera axis.
Do I need expensive gear to create professional lighting photography?
No. You need control more than expensive equipment. One reliable light, a soft modifier, and a reflector can produce strong results. Good positioning, consistent shooting distance, and a repeatable workflow often matter more than buying the most advanced gear available.
What is a loop lighting in photography?
Loop lighting is a portrait lighting pattern where the key light is placed slightly above eye level and 25 to 45 degrees to one side of the subject. It creates a small nose shadow that falls onto the cheek in a loop shape, and it should not connect with the shadow on the far cheek.
How do you set up loop lighting in photography?
Start with your camera in front of the subject, then place the key light slightly above the subject’s eye line and a bit off to one side. Take a test shot and adjust until the nose shadow forms a short loop on the cheek without connecting to the cheek shadow. Add a reflector or fill on the opposite side if you need a brighter, more commercial look for ecommerce.
What is the 20 60 20 rule in photography?
The “20 60 20” rule is often used as a simple way to think about how an image is built, where something like 20 percent is gear, 60 percent is lighting and technique, and 20 percent is editing. The exact meaning can vary by who is using it, but the practical takeaway for ecommerce is consistent: if you get your lighting pattern and exposure right in camera, your product and portrait images typically need less heavy editing to look professional.
What is the difference between Rembrandt and loop lighting?
Loop lighting creates a short nose shadow that stays separate from the cheek shadow. Rembrandt lighting pushes the key light farther to the side, so the nose shadow connects and creates a triangle of light on the shadow-side cheek. Rembrandt can look great, but loop is usually more flexible for ecommerce because it keeps the face clearer and less dramatic.
Key Takeaways
Conclusion
Loop lighting is a classic for a reason. It is flattering, practical, and flexible enough for many ecommerce brands that rely on people-centered visuals to sell. If your store creates beauty shots, founder portraits, or product-in-use content, this pattern can give your images more shape without pushing them too far into a dramatic editorial style. The real advantage is that once you understand the light position and how to control fill, you can repeat it reliably across campaigns. For more practitioner-led guidance, explore AcquireConvert’s lighting resources and related photography categories. Giles Thomas’s perspective as a Shopify Partner and Google Expert keeps the focus where it should be: visuals that support better store presentation, clearer brand communication, and smarter ecommerce decisions.
This article is editorial content for educational purposes and is not a paid endorsement unless explicitly stated otherwise. Any tool availability or product details referenced are subject to change. Always verify current features, pricing, and suitability directly with the provider. Photography and ecommerce results vary by store, product type, implementation quality, and channel, so no specific outcomes are guaranteed.

Hi, I'm Giles Thomas.
Founder of AcquireConvert, the place where ecommerce entrepreneurs & marketers go to learn growth. I'm also the founder of Shopify agency Whole Design Studios.