Photography Lighting Equipment (2026 Guide)
If you run an ecommerce store, your lighting setup has a direct effect on how professional your products look and how consistent your catalog feels. Good photography lighting equipment helps you control shadows, texture, color, and reflections, whether you are shooting clean packshots, apparel, cosmetics, or lifestyle scenes. The tricky part is not just choosing between strobes and LEDs. You also need to think about modifiers, background lighting, space, workflow speed, and how often you reshoot products. If you are still learning the basics, our guide to loop lighting photography is a helpful starting point for understanding shape and shadow. In this guide, I’ll break down the main lighting equipment categories, where each one fits, and how to choose a setup that actually suits your store’s content needs.
Contents
What photography lighting equipment actually includes
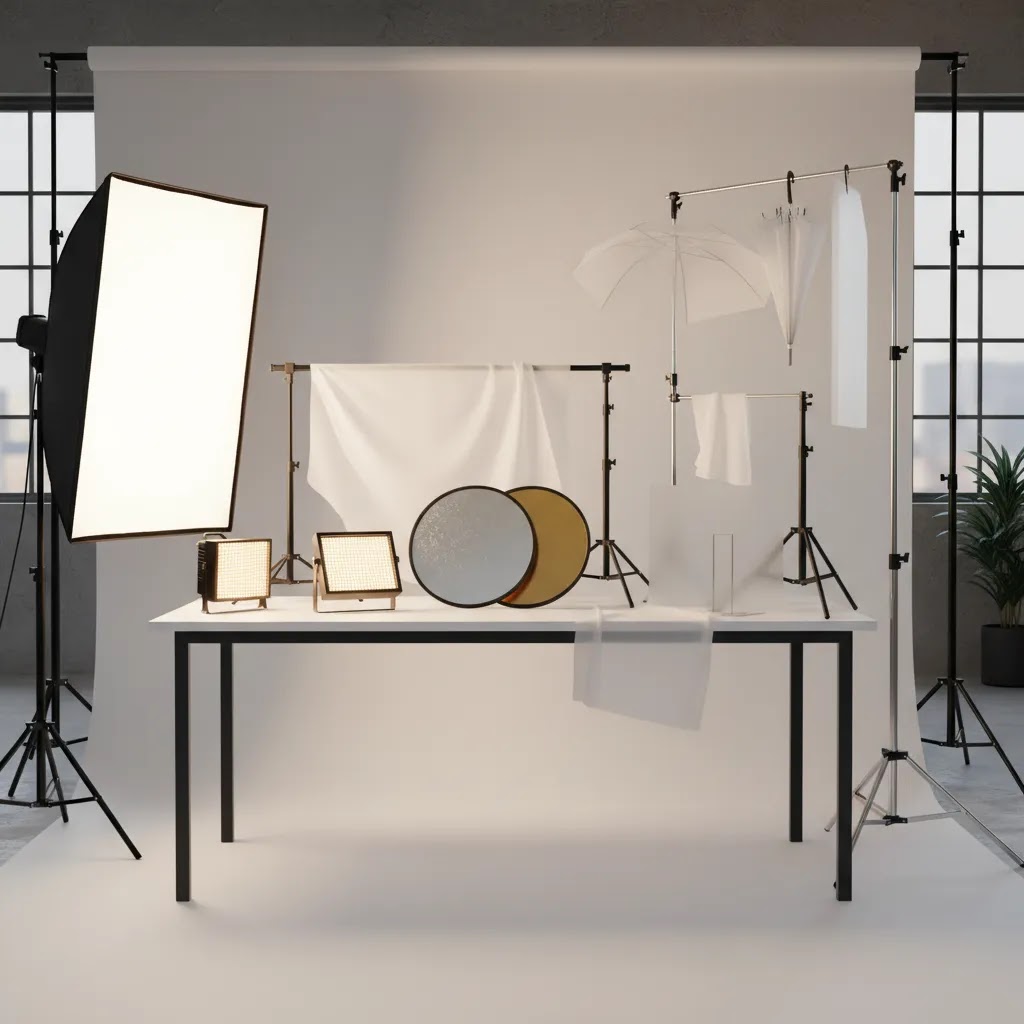
When store owners search for photography lighting equipment, they often focus on the light itself. In practice, the light is only one part of the system. A workable setup usually includes the light source, stands, modifiers, triggers or power controls, reflectors, and some way to manage the background.
For ecommerce, the goal is usually consistency more than drama. You want product images that look clean across collection pages, product pages, ads, and marketplaces. That is why many merchants start with a simple key light, fill control, and a white or neutral background, then add complexity only when needed. If you want a broader framework for this, see our guide to product photography lighting.
The core equipment categories are:
If you sell a wide range of products, your best investment is usually not the most expensive light. It is the setup that gives you repeatable results with the least friction.
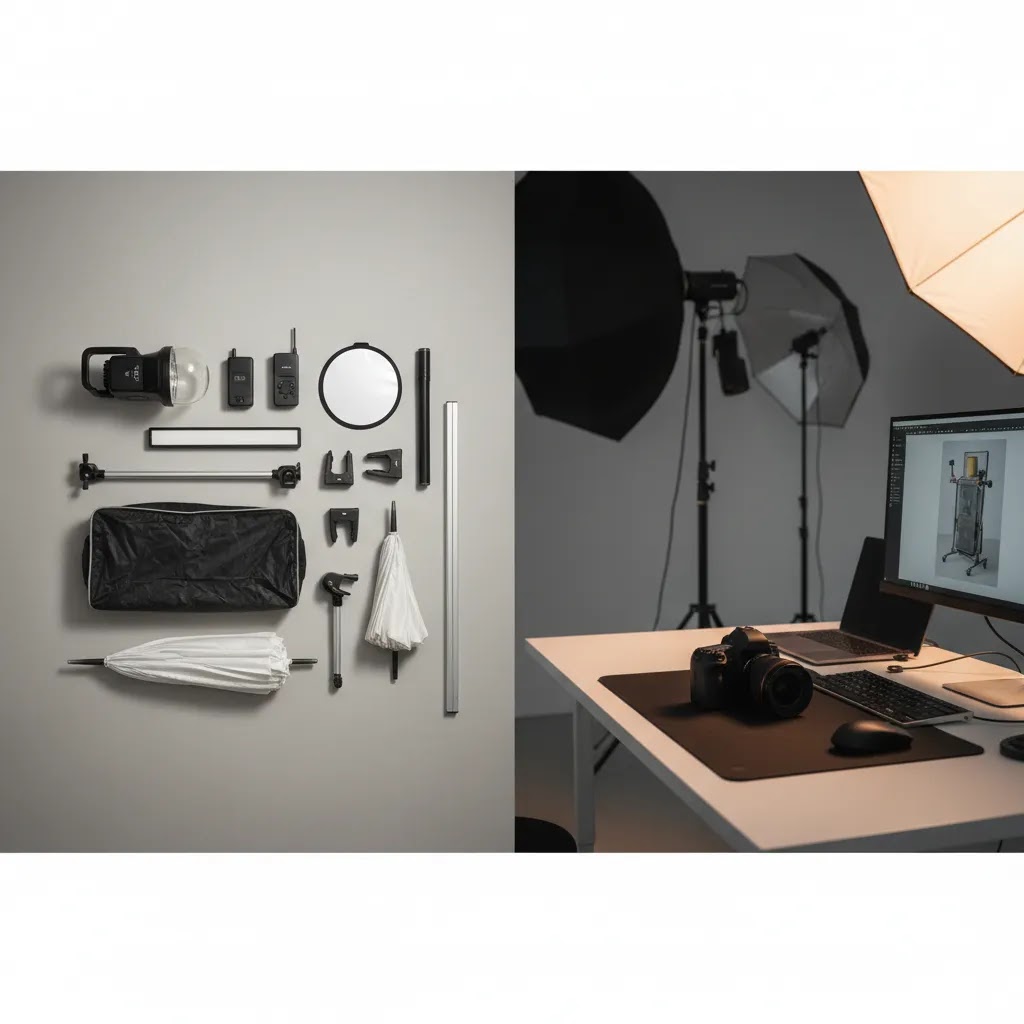
Common kit components that affect results (and durability)
Here’s the thing. Most “lighting kit” listings make the light head sound like the whole story, but in day-to-day ecommerce work, the supporting pieces are what keep your setup stable, repeatable, and fast to use.
Stands: stability is usually the first failure point
If you have ever had a softbox slowly tilt down mid-shoot, you already understand why stand quality matters. Bigger modifiers catch air, and taller stand height increases leverage, so a flimsy stand becomes a real risk once you move beyond tiny umbrellas.
From a practical standpoint, pay attention to stand height, footprint, and how the legs lock. A wider footprint is usually more stable, but it takes up more floor space. If you need to place a light over a table setup, a boom arm can help you position the light without putting a tripod leg where you need to stand. Sandbags are not glamorous, but they are one of the cheapest ways to prevent expensive accidents, especially if you shoot in a home office or shared workspace.
Mounting and compatibility: what fits what
Many modifiers are not universal, so compatibility matters if you want to upgrade over time. One common standard in ecommerce-oriented kits is the Bowens mount, which is a widely supported modifier mount for many strobe heads and many COB LED fixtures. If your light uses a less common mount, your modifier choices can narrow quickly, or you end up buying adapters that add wobble and frustration.
Umbrellas are their own category. Even when a softbox mount is proprietary, many lights still support an umbrella shaft slot, which lets you use a basic umbrella quickly. It is worth checking that the light actually has this, and that the included bracket is sturdy enough to hold position under weight.
You will also see “open-face” lights and “COB LED” lights. Open-face often means the light output is exposed and you shape it with barn doors, reflectors, or separate diffusion. COB LED typically describes a single, high-output LED source that behaves more like a strobe head in terms of modifier use, which is why mount compatibility becomes so important.
Power and control: repeatability is what ecommerce needs
For most Shopify store owners, repeatability matters more than maximum brightness. If you shoot new SKUs every week, you want to be able to set your key light to the same output and color every time, so your catalog does not look like five different photographers shot it.
Think about whether you need AC power only, battery power, or both. AC is fine for a fixed corner setup. Battery can be useful if you shoot on location, move between rooms, or want a clean floor with fewer cables. Control matters too. Some lights offer app control, others use manual dials. App control can be convenient if the interface is reliable, but manual dials are often faster when you are making constant small adjustments. Either way, what you want is consistent increments and settings that are easy to repeat when you reshoot a top seller months later.
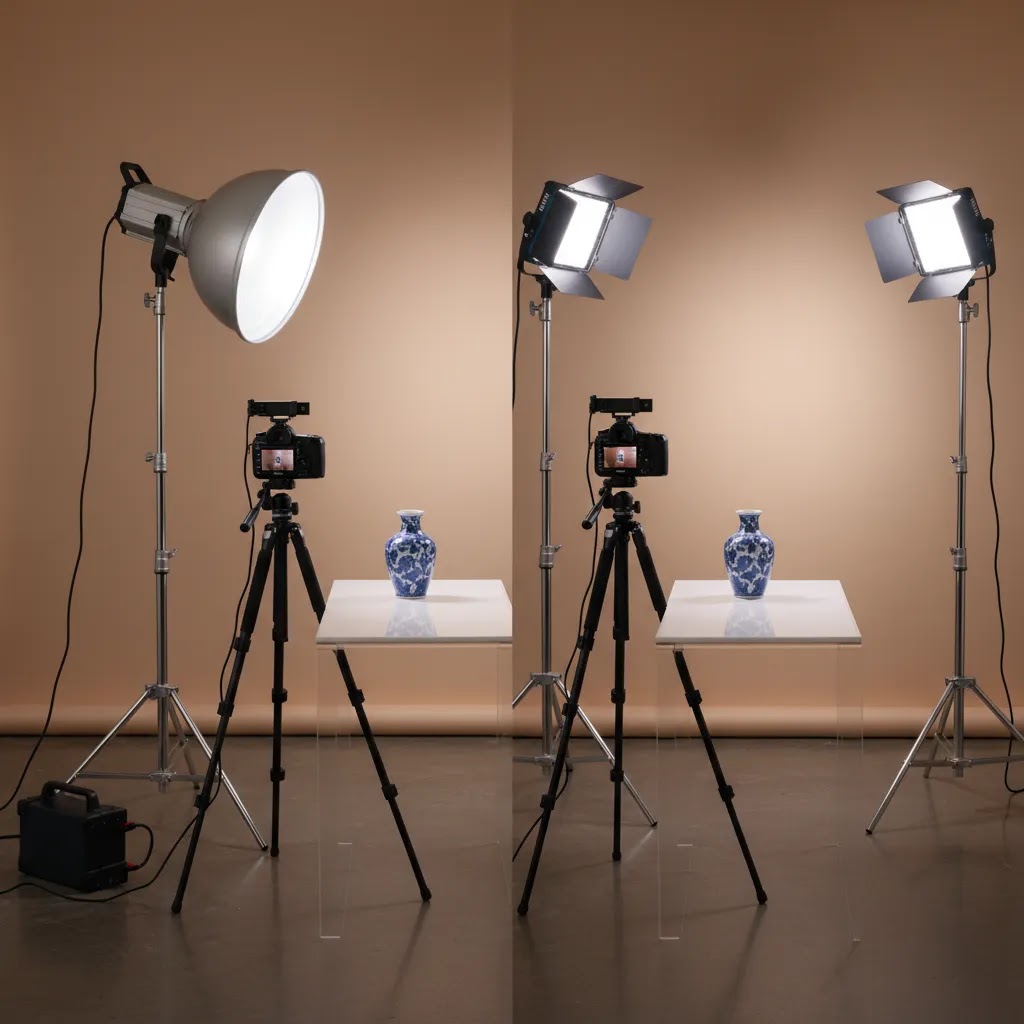
Strobes vs LEDs for ecommerce work
The most important decision is whether you need strobes, LEDs, or a hybrid setup. Each has a legitimate place in ecommerce photography.
Strobes
Strobes are flash units that produce a brief, powerful burst of light. They are a strong fit for still product photography, especially when you want sharp detail, lower ISO, and control over reflections on glossy packaging, glass, or metal. They are often the better choice for packshot photography equipment and white background catalog work.
Strobes also help when you need to stop motion, such as fabric movement or handheld beauty shots. The trade-off is that they are less intuitive for beginners because you cannot always see the final effect until you fire the shot.
LEDs
LED continuous lights are easier to learn because what you see is close to what the camera records. That makes them practical for solo operators, small in-house teams, and stores shooting both stills and video. If you create product demos, social clips, or behind-the-scenes content, LEDs may give you more flexibility per dollar spent.
They are especially useful for fashion photography equipment setups where you want to shoot lookbook stills and video in the same session. The limitation is output. Some lower-cost LEDs may struggle if you need to overpower ambient light or work at smaller apertures.
Hybrid setups
Many growth-stage brands end up with a hybrid approach: strobes for clean ecommerce stills, LEDs for content production and experimentation. That is often the most practical route if your store relies on both conversion-focused product pages and social-first creative assets. If you want a style reference for moodier creative execution, our article on dramatic lighting photography shows how lighting choices change the feel of a shot.
LED color accuracy and flicker: what to check before you buy
If you are leaning toward LEDs, there are two specs and one real-world issue that matter a lot for ecommerce results: color accuracy, flicker, and consistency in mixed lighting. Many store owners overlook these because kit listings focus on brightness and features.
CRI and TLCI: what they mean for product color
CRI is a rating that describes how accurately a light source shows colors compared to a reference light. TLCI is a similar concept aimed at video, and it can be useful if you shoot a lot of reels, product demos, or UGC-style clips in-house.
Think of it this way. If your lighting shifts reds or dulls blues, your product photos may not match what customers see in real life. That can create friction, especially for cosmetics, apparel, and anything where shade and tone are a selling point. It can also make color matching across your catalog harder, so your collection pages look inconsistent.
In many cases, you will want LEDs that are rated high for color accuracy, and you should still test them with your actual products. Spec sheets can be optimistic, and two lights with similar ratings can still render certain colors differently. If you are shooting skin tones for apparel, accessories, or beauty, this matters even more, because customers are good at noticing when images feel “off.”
Flicker: why it happens and when it shows up
LED flicker is one of those problems you do not notice until you do, then it becomes impossible to ignore. Some LEDs pulse rapidly due to the way they are powered or dimmed. Your eyes may not see it, but your camera can, especially in video or when using certain shutter speeds.
For video, flicker can show up as rolling bands, pulsing brightness, or weird exposure shifts. For stills, it can show up as subtle frame-to-frame exposure changes, which becomes a real issue in 360 workflows or if you shoot bursts.
The way this works in practice is simple to test before you commit to a full catalog shoot. Record a short video clip of a plain surface, like a white card, while dimming the light through its range. Then review the footage on a larger screen. If you see bands or pulsing, that is a warning sign. If your phone can shoot slow-motion video, that can make flicker easier to spot, even in a quick test.
If you run into flicker, you may be able to reduce it by avoiding very low dimming levels, adjusting shutter speed, or matching your video frame rate and shutter settings to your local power frequency. Results vary by light, and policies and capabilities change across cameras, so test your setup before you schedule a big shoot day.
“Daylight-balanced” vs real rooms: control your environment
Many LED kits are marketed as daylight-balanced, which usually means the color temperature is in the neighborhood of daylight. The reality is that mixed lighting is what causes most color headaches. Window light shifts throughout the day. Overhead room lights vary widely. Even monitor glow can contaminate a small set.
For most Shopify store owners shooting in a home or office, the cleanest path is consistency. If you are lighting with LEDs, consider turning off ambient room lights and blocking or minimizing window light during product shoots. That way your product color and white background remain consistent across sessions. If you need to use window light, try to keep the timing and conditions similar, and lock your camera white balance so your images do not drift from one SKU to the next.
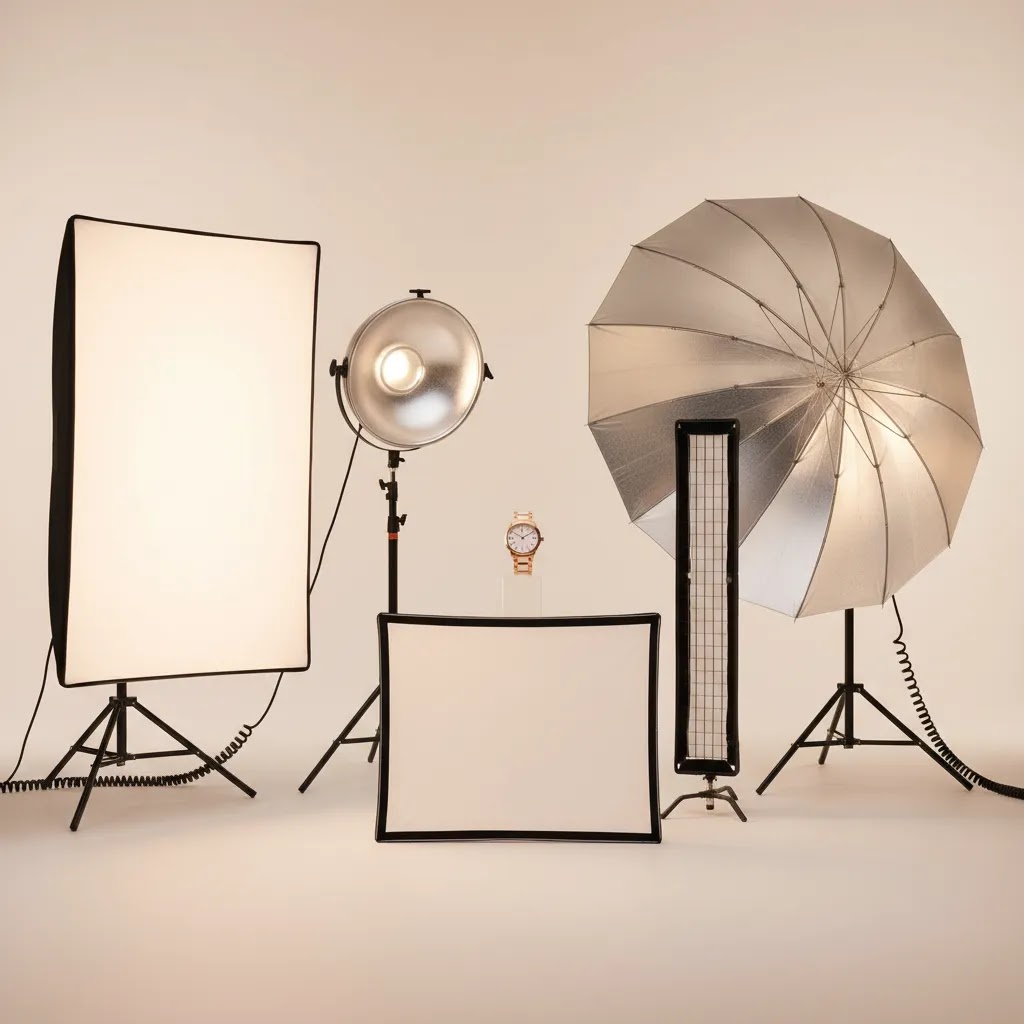
The modifiers that matter most
Modifiers often matter more than the light head itself. A basic light with the right modifier can outperform a stronger light used poorly.
Softboxes
For most ecommerce photography lighting, softboxes are the safest starting point. They create broad, even illumination and cleaner reflections than a bare bulb. Rectangular softboxes are especially useful for bottles, skincare, boxed products, and electronics.
Umbrellas
Umbrellas are quick to set up and often cheaper than softboxes. They are fine for basic catalog work, but they spill light more widely, which can reduce contrast and make small studios harder to control.
Strip boxes
Strip softboxes are a smart choice for apparel, footwear, glassware, and reflective products. Their narrow shape makes it easier to create controlled edge highlights without flooding the entire set.
Grids and flags
These are useful once you need precision. Grids narrow the spread of light. Flags block unwanted spill. If you are struggling with photography background lighting, these tools can help separate product and backdrop so your white background looks intentional rather than washed out.
Reflectors and diffusion
Do not overlook simple accessories. A reflector can lift shadows without requiring a second light. Diffusion material can soften a source that feels too harsh. For many Shopify merchants shooting at home or in a small office, these low-cost additions improve image quality more than adding another light.
Recommended setups by store type
You do not need the same photography lighting equipment for every category. The best choice depends on what you sell, how often you shoot, and where the images will be used.
Small catalog-focused store
If you mainly need clean product page images, start with two lights, one medium softbox, one reflector, a white sweep, and stable stands. This works well for accessories, home goods, packaged foods, and beauty products.
Apparel or fashion brand
You will usually need more flexibility. A three-light setup with one key, one fill or reflector, and one background or rim light is often more useful. Continuous LEDs can make sense if your team also produces reels, lookbooks, and ad creatives.
Glossy, reflective, or premium packaging
Control matters more than raw power. Favor larger diffusion, strip boxes, flags, and careful background separation. This is where better modifiers typically matter more than buying another inexpensive light.
360 and 3D workflows
If you are building 360 photography equipment or 3d photography equipment workflows, consistency becomes critical. Products need even lighting across every angle, or the final spin can flicker visually. A controlled product photography studio with fixed light positions and marked camera placement is the best long-term solution.
If you are earlier in the decision process and want a broader shortlist of options, our guide to best lighting for photography can help you compare common setup paths.
Starter kit examples by space and workflow
Consider this. Most ecommerce teams are not choosing lighting in a vacuum. You are choosing it based on your space, your time, and how often you need to reproduce the same look for new products.
These starter builds are meant to map to common constraints, not win a spec sheet contest. You can mix and match based on what you sell.
1) Home table setup (tiny space, fast packshots)
If you shoot on a dining table or a small desk, prioritize control and consistency over power. A single continuous LED with a softbox, plus a reflector, can get you a clean look quickly. Use a simple white sweep for the background and keep your shooting area away from windows if the light changes throughout the day.
What to buy first is the light and a solid modifier. What to upgrade later is usually the stand and the background solution, because a more stable stand and cleaner sweep setup saves time every single shoot.
Reality check: this kind of setup is great for small to medium products. It may struggle with large items or highly reflective products where you need bigger diffusion and tighter flag control.
2) Small room studio (shared office, mixed stills and video)
If you have a spare room or a shared office corner, a two-light LED setup is often a practical middle ground. Use one key light in a softbox and a second light either as fill through diffusion or as a controlled background light. This gives you flexibility to shoot product page images, quick video clips, and lifestyle-in-a-box scenes without resetting everything from scratch.
Upgrade priorities here tend to be modifier quality and background separation. Better diffusion and better spill control often make more difference than jumping to a third light. If you are seeing messy shadows on your sweep, adding a dedicated background light and flags can help you keep the product and background as separate problems.
Reality check: if you want pure white backgrounds that look consistent across a large catalog, you will still need to standardize distances and settings. Mark your light stand positions on the floor so you can reset quickly.
3) Growth-stage in-house corner (repeatable catalog process)
If you are shooting a lot of SKUs and you want the catalog to look uniform month after month, a strobe-based setup can be a strong move for stills, with LEDs reserved for video. A practical build is two strobes with a medium softbox as the key and a strip box for controlled fill or edge highlights, plus a separate background light if you shoot on a sweep. The goal is repeatable placement, repeatable power levels, and a workflow that a team member can follow without guessing.
What many store owners overlook is that scaling your setup is not only about adding more lights. It is about reducing variability. Better stands, marked floor positions, consistent camera settings, and controlled ambient light can matter as much as the strobes themselves.
Reality check: for large furniture, wide scenes, or mirror-like products, you may hit limits quickly. Those categories often need larger modifiers, more space, and more advanced flagging. In those cases, building a dedicated studio area or bringing in a specialist for hero shots can be more efficient than endlessly expanding a small kit.
Pros and Cons
Strengths
Considerations
How to choose the right lighting kit
If you are comparing options, use these five criteria before spending money.
1. Start with your product type
Shoes, apparel, glass, cosmetics, jewelry, and furniture all respond differently to light. Reflective products usually need more control and diffusion. Textured items benefit from directional shaping. Flat, consistent catalog shots need repeatability over creativity.
2. Match the setup to your content mix
If you only shoot still images for product pages, strobes may be the better fit. If you also produce TikTok, Instagram Reels, or product explainer clips, LEDs may be more practical. For many merchants, the right answer is based on workflow, not image theory.
3. Check the real cost of the system
The light head is only part of the spend. Include modifiers, stands, triggers, spare bulbs or batteries, sandbags, and background support. Store owners who search for cheap photography lighting equipment or budget photography equipment often underestimate these extras.
4. Think about space and repeatability
A small home office setup benefits from compact stands, foldable modifiers, and fewer moving parts. A dedicated shooting area benefits from fixed marks and standardized placement. That repeatability matters if multiple people on your team will shoot products.
5. Buy for your next 12 months, not your next 2 weeks
If your catalog is growing, buy equipment that can scale with a slightly more demanding workflow. You do not need a huge studio. You do need gear that will not force a replacement after your first few serious shoots. For a stronger foundation, it is worth reviewing the broader principles in our Product Photography Fundamentals section and the rest of the Product Photo Lighting hub.
AcquireConvert recommendation
If you run a Shopify store and want better product images without overbuying gear, the smartest move is to build your lighting setup around your actual ecommerce workflow. That means thinking about SKU volume, how often you shoot, whether you also need video, and how polished your PDP imagery needs to be.
At AcquireConvert, the guidance is shaped by real ecommerce use cases, not generic studio advice. Giles Thomas brings the perspective of a Shopify Partner and Google Expert, which matters because product imagery affects more than aesthetics. It influences click-through rate, perceived trust, landing page clarity, and how consistently your brand shows up across channels.
If you are comparing setup options, start with the articles linked above, then move into practical testing with one hero product from your catalog. That will tell you far more than spec sheets alone. The goal is not the biggest kit. It is the setup that helps you publish stronger images, faster, with less friction.
Frequently Asked Questions
What is the best photography lighting equipment for ecommerce beginners?
For most beginners, a simple two-light setup with softboxes or one light plus a reflector is enough to start. The best choice depends on your product type and whether you shoot only stills or both stills and video. Many smaller stores do better with fewer lights and better modifiers rather than buying a large kit too early.
Are strobes better than LEDs for product photography?
Strobes are often better for still product shots where you want sharp detail, lower ISO, and strong output. LEDs are often better if you want to see the lighting effect live or create video content in the same setup. The better option depends on your workflow, not just technical performance.
How many lights do I need for product photography?
Many ecommerce stores can produce strong results with one or two lights, especially when reflectors and diffusion are used well. A third light becomes helpful when you need background separation, rim lighting, or more control over reflective products. More lights do not automatically mean better results.
What modifiers should I buy first?
A medium softbox, reflector, and some diffusion material are strong first purchases for most store owners. These tools help create even, flattering light and are useful across many product categories. If you shoot reflective items, strip boxes and flags often become valuable next additions.
Can I use photography lighting equipment for both photos and video?
Yes, but continuous LED lighting is usually the more practical choice for mixed photo and video production. Strobes are designed mainly for still photography. If your content calendar includes social clips, tutorials, or UGC-style assets alongside product pages, LEDs may offer more flexibility.
Is cheap lighting photography equipment worth buying?
It can be, if your expectations are realistic and your shooting needs are simple. Entry-level kits may work for learning and low-volume catalog photography. The compromises often show up in stand stability, output consistency, modifier quality, and durability. It is usually better to buy a smaller setup that you can trust than a bigger one that creates problems.
What is the difference between background lighting and product lighting?
Product lighting shapes the item itself, controlling detail, texture, and reflections. Background lighting controls how the backdrop appears, whether that is pure white, gray, colored, or intentionally shadowed. Separating these functions gives you more control and typically leads to cleaner ecommerce images.
Do I need special equipment for 360 or 3D product photography?
Usually, yes. In addition to lights and modifiers, 360 photography equipment often includes a turntable and a repeatable camera setup. For 3d product photography equipment workflows, consistency is crucial so each frame matches. Uneven lighting can make spins or composites look unstable.
What lighting works best for fashion photography equipment setups?
Fashion setups usually need flexibility because you may shoot full-length looks, detail shots, flat lays, and video in one session. A three-light configuration often works well, especially with larger modifiers. Continuous LEDs are useful for brands that create both ecommerce imagery and social content during the same shoot day.
What is CRI and what CRI rating is good for product photography lights?
CRI is a color accuracy rating that describes how closely a light source renders colors compared to a reference light. For product photography, higher CRI is generally better because it helps colors look more natural and consistent across your catalog. That said, ratings do not tell the full story, so it is smart to test your lighting with real products, especially for apparel, cosmetics, or anything where color matching affects purchase decisions.
Why do my LED lights flicker on camera, and how do I fix it?
LED flicker typically comes from the way the light is powered or dimmed, and cameras can capture that pulsing even when your eyes do not see it. It shows up most often in video as bands or pulsing brightness, and it can also affect stills in bursts or 360 workflows. Fixes may include adjusting shutter speed, matching your frame rate and shutter settings to your local power frequency, avoiding very low dimming levels, or using a different light designed to be flicker-free. The most reliable approach is to test your exact camera and light combination before a full shoot.
What is a COB LED light, and is it better than a panel light for product photography?
A COB LED is a single, concentrated LED light source that often behaves more like a strobe head in terms of how you modify it. Many COB LEDs support common modifier mounts, which can make them more flexible for softboxes, strip boxes, and grids. Panel lights are typically broader, which can be convenient for simple setups and video, but they can be harder to control precisely in tight spaces. Which is better depends on your products, your room size, and whether you need a system that can grow with more modifiers over time.
Do I need a light tent, and when does a light box work better than softboxes?
A light tent or light box can work well for small products when you want soft, wraparound lighting with minimal setup and fewer reflections. They are often useful for jewelry, small cosmetics, and accessories. Softboxes tend to be more flexible as your catalog grows because you can control light direction, add flags, and create separation from the background more easily. If you only shoot small items, a light box may be enough. If you expect to shoot larger products or want more control over contrast and reflection shaping, softboxes usually scale better.
Key Takeaways
Conclusion
The right photography lighting equipment is the setup that helps you produce cleaner, more consistent product images without slowing your workflow down. For some stores, that means a compact LED kit. For others, it means strobes with better modifiers and tighter background control. The key is to buy around your catalog, your space, and your publishing needs. If you want more practical guidance, explore AcquireConvert’s related lighting and studio setup resources. Giles Thomas brings a Shopify Partner and Google Expert perspective to these decisions, which helps keep the advice grounded in what actually supports ecommerce growth. Start with one repeatable setup, test it on your hero products, and expand only when the workflow truly demands it.
This content is editorial and provided for educational purposes only. It is not a paid endorsement unless explicitly stated otherwise. Pricing, product availability, and equipment specifications are subject to change and should be verified directly with the provider or manufacturer. Any performance outcomes discussed are not guaranteed and will vary based on product type, workflow, skill level, and shooting conditions.

Hi, I'm Giles Thomas.
Founder of AcquireConvert, the place where ecommerce entrepreneurs & marketers go to learn growth. I'm also the founder of Shopify agency Whole Design Studios.