Best Lighting for Photography (2026 Guide)
If you run an ecommerce store, lighting is one of the fastest ways to improve product photos without replacing your camera. The best lighting for photography depends on what you sell, how much space you have, and whether you need marketplace-ready white background shots, styled lifestyle images, or flat lays for social and email campaigns. For most store owners, the real decision is not just “what light is brightest?” It is “what setup will help me create consistent, conversion-friendly images week after week?” This guide breaks down the lighting types, modifiers, and practical setups worth considering for products, apparel, jewelry, and flat lays. If you are comparing styles first, our guide to loop lighting photography can help you understand how light direction changes the final image.
Contents
What counts as the best lighting for photography?
The best lighting for photography is the setup that gives you repeatable results for your catalog, ads, and product pages. That usually means controlled light, consistent color, and enough flexibility to shoot different product sizes without rebuilding the whole set every time.
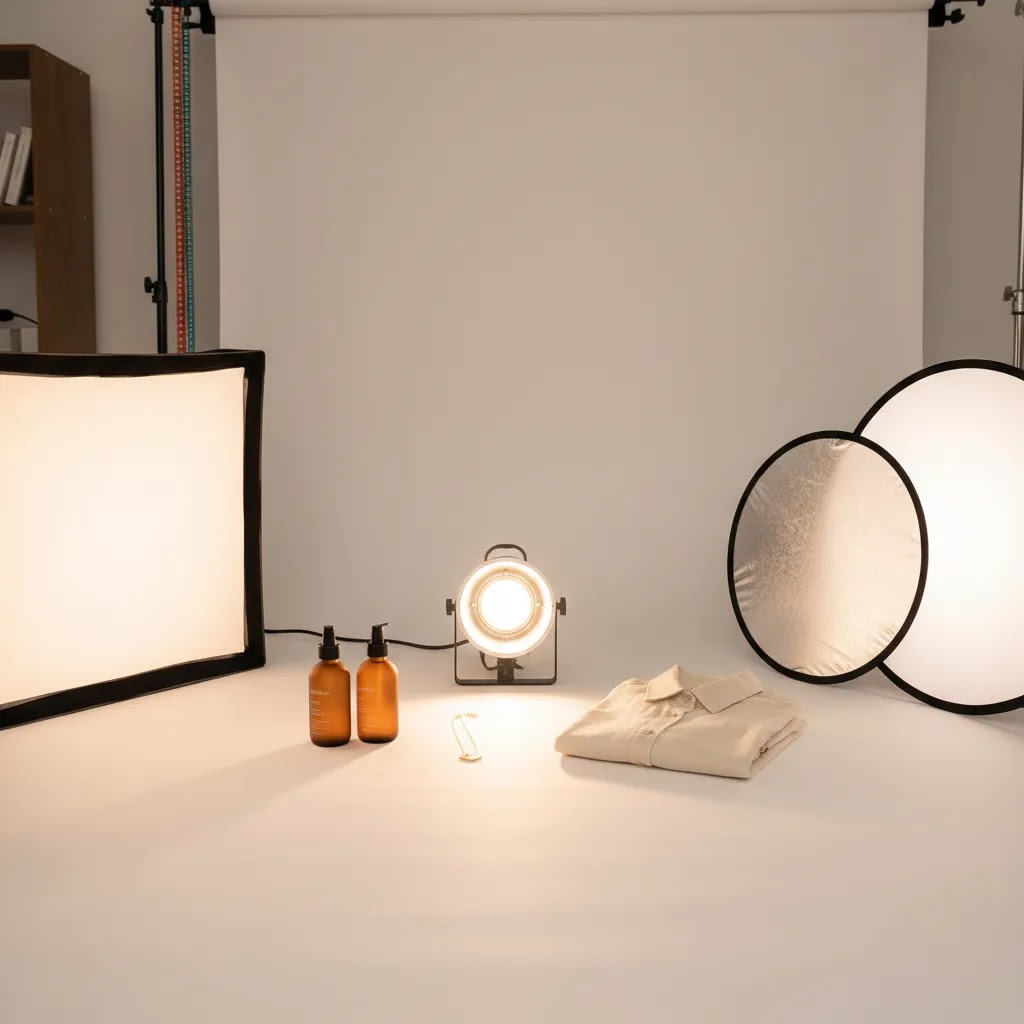
For ecommerce, continuous LED lights are often the most practical starting point. You can see the shadows and highlights in real time, which is useful if you are photographing products yourself without a crew. Flash or strobe lighting can deliver more power and sharper images, but it adds complexity and is usually better suited to larger studios or advanced workflows.
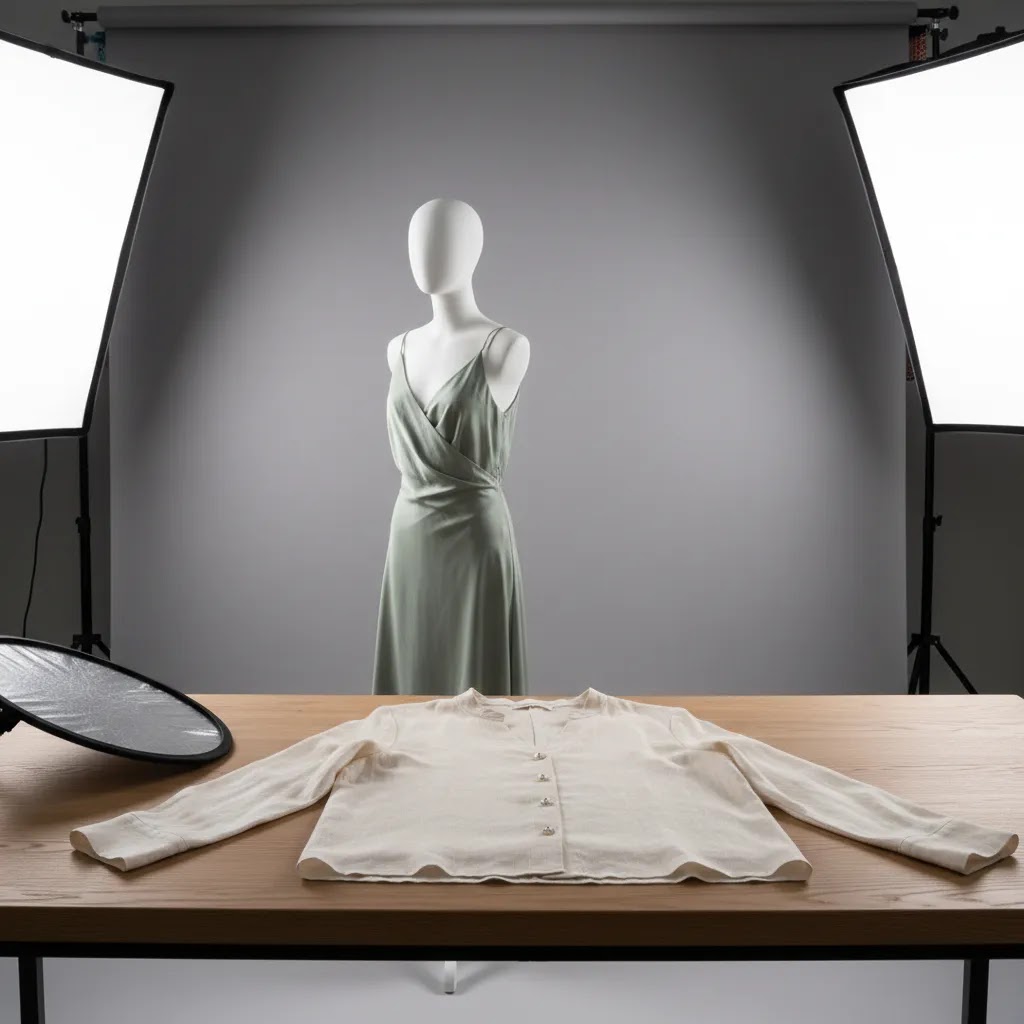
Your “best” option also depends on the shot type. Apparel flat lays often benefit from overhead or directional top lighting. Packshots on a clean white backdrop need even, soft light with minimal harsh shadows. Lifestyle photography may need more shape and contrast so products do not look flat. If overhead shooting is part of your workflow, it is worth reading our guide to top lighting photography to see where that setup works best.
Store owners should think beyond aesthetics. Lighting affects image consistency across collection pages, how professional your brand looks, and how efficiently you can publish new products. Strong lighting decisions can also reduce retouching time and make AI background editing easier later in the process.
LED vs flash for product photography: when each makes sense in ecommerce
Here’s the thing: “LED is easier, flash is better” is too simple to be useful. For ecommerce, the right choice depends on how fast you need to shoot, who is doing the shooting, and how consistent you need your catalog images to be across hundreds of SKUs.
When flash (strobe) typically makes more sense
Flash tends to win when you need maximum output and control. In practice, that often shows up in three ways: you can shoot at a lower ISO for cleaner images, you can freeze motion more easily (useful for products that move, liquids, hair, or models), and you can overpower ambient light in a bright space for more consistent results.
For busy catalog workflows, flash can also be efficient once set up. If you have a fixed shooting bay and you want the same look every time, strobes can be extremely repeatable. The tradeoff is that getting to that repeatability takes more knowledge, especially around power settings, sync, and modifier placement.
When continuous LED typically makes more sense
Continuous LED wins for “what you see is what you get.” If you are a Shopify store owner shooting products yourself, or training a team member to shoot new arrivals each week, being able to see shadows and reflections in real time is a big deal. It usually shortens the learning curve, reduces reshoots, and makes it easier to keep your lighting consistent when you are switching between product sizes.
LED is also the obvious choice if your workflow includes video, UGC-style content, or short-form social clips, because you need continuous light anyway.
Workflow implications most merchants notice
Lighting choice affects more than the shoot. It affects how much editing you need, and how reliable your post-production tools are. For example, background removal and AI background tools typically work best when the product edges are clean and the background exposure is consistent. If your lighting creates uneven gray falloff on a “white” sweep, you may spend more time correcting backgrounds and color from SKU to SKU.
From a practical standpoint, LED setups often make it easier to maintain that even background exposure because you can dial in placement and brightness while looking at the scene. Flash setups can still be very consistent, but you usually rely more on test shots and a repeatable set of distances and power settings.
Common gotchas to watch for
Some LED lights can flicker, especially at certain brightness levels, and that can show up as banding or exposure variation. It is more common when mixing LEDs with fast shutter speeds, or when shooting video at certain frame rates. Many modern photo LEDs handle this well, but it is something to test early.
With flash, the common issues are different. You may need to manage recycle time (how quickly the strobe is ready to fire again) and battery capacity if you are not plugged into wall power. Flash also pushes you into a more “technical” workflow with triggers, sync, and consistent camera settings.
Reflections are the shared challenge. Whether you use LED or flash, glossy packaging, bottles, and jewelry will reflect your modifiers, your room, and you. The fix is usually the same: increase diffusion, adjust angles, and use flags or bounce cards to shape what the product reflects.
Key features to look for
If you are evaluating the best lights for photography, focus on utility over spec-sheet noise. Here are the features that matter most for ecommerce work.
For Shopify store owners, the best setup is usually the one that improves throughput. If you can shoot ten products in one consistent lighting environment, your collection pages will look stronger and your merchandising will feel more professional. If you are still comparing equipment types, our guide to best light for product photography gets more specific on the fixtures themselves.
Best lighting setups by shooting scenario (indoors, outdoors, on-location)
What many store owners overlook is that the “best” lighting setup changes depending on where you shoot. The goal stays the same, consistent color and repeatable shadows, but the constraints are very different in a spare room versus outside versus a warehouse or supplier location.
Best lighting for photography inside (home studio or small office)
Indoors, the biggest risk is mixed light. If you are using LED lights but also have daylight coming through a window, plus warm overhead room lights, you can end up with color shifts that make products look inconsistent across a collection page. For ecommerce, that can create returns and customer complaints, especially with apparel and home goods.
A practical approach is to pick one “dominant” light source and control everything else. Many merchants do best by turning off overhead room lights and blocking window light (or shooting when window light is not changing), then letting their photo lights do all the work. If you cannot block a window, try to keep the setup consistent: shoot at the same time of day, keep the same curtain position, and do not move the table relative to the window.
Small spaces also make placement harder. If your light is too close, you can get hot spots and harsh falloff. If it is too far, you lose output. In many cases, a larger diffuser or softbox placed close, then controlled with bounce cards, gives you softer light without needing a bigger room.
To keep color consistent, set your camera white balance intentionally. Auto white balance can drift from shot to shot as the product changes, which is a problem when you need a catalog to match. Even if you plan to edit, starting with stable white balance usually reduces correction time later.
Best lighting for photography outside (using natural light without guessing)
Outside, natural light can be “good enough” when it is soft and predictable. Bright overcast conditions are often useful because the sky becomes a giant diffuser. Open shade is another reliable option, for example, placing the product just inside the shade of a building so it sees a bright sky but not direct sun.
Direct midday sunlight is where product photos fall apart fast: harsh shadows, blown highlights, and specular reflections on packaging. If you need to shoot outside in sun, diffusion is your friend. A diffusion panel can soften the light, and a simple reflector or white foam board can fill shadows so the product does not look contrasty and unpolished.
Outdoor shoots also change quickly. Clouds move, sun angle changes, and your “white” background may not stay white. If you are shooting for Shopify product pages, it is usually smarter to keep outdoor light for lifestyle images and keep your catalog shots inside with controlled lighting.
Portable on-location kit (pop-ups, warehouses, and supplier visits)
On-location setups are about speed and stability. You might be at a pop-up and need consistent shots for a new launch, or you might be in a warehouse shooting large items where you cannot build a full studio. Prioritize gear that sets up fast and does not tip over.
In practice, that means compact stands, reliable mounting, and a way to stabilize everything. Sandbags are not glamorous, but they prevent expensive accidents. If you are shooting away from outlets, battery power matters, and you will want a plan for how many products you can shoot per charge before your light output or recycle time becomes a bottleneck.
Consider this: on-location, your biggest enemy is inconsistency. Build a simple workflow you can repeat, set your camera settings once, keep your subject distance consistent, and use the same modifier and angle every time. That repeatability is what keeps your Shopify collection pages looking like one brand, even if images were shot in different places.
Pros and Cons
Strengths
Considerations

Who this guide is for
This guide is for ecommerce operators who want a clear decision framework before buying or upgrading photography lighting. That includes Shopify merchants handling photography in-house, small teams building out content pipelines, and brands trying to improve PDP images without hiring a full studio for every shoot.
It is especially relevant if you sell physical products and need a mix of catalog photos, promotional images, and social-first content. If your current photos vary too much from product to product, or you are struggling to shoot reflective, textured, or color-sensitive items, your lighting setup is likely the first place to look.
AcquireConvert recommendation
At AcquireConvert, we look at photography decisions through the lens of ecommerce performance, not photography gear for its own sake. Giles Thomas brings that perspective as a Shopify Partner and Google Expert, which matters if you are creating images for product pages, shopping feeds, and conversion-focused campaigns rather than a general photography portfolio.
For most store owners, the best route is to build a simple, repeatable setup first: two controllable lights, soft diffusion, a clean background option, and a shooting area that supports your most common product size. Then improve workflow with editing and AI tools where they actually save time. If you are refining your setup, explore our Product Photo Lighting resources and our guide to White Background Photography for cleaner catalog imagery.
If your bottleneck is post-production rather than capture, tools like Increase Image Resolution, Remove Text From Images, and Background Swap Editor may help streamline parts of your workflow. Compare options side by side on AcquireConvert and use our specialist guides to choose what fits your store, product mix, and content volume.
How to choose the right setup
If you are trying to choose the best lighting equipment for photography, start with your most frequent shot type, not your aspirational one. Many merchants buy for occasional lifestyle shoots and then struggle to produce day-to-day catalog images efficiently.
1. Match lighting to product type
Soft, even light is usually safest for beauty, packaged goods, and most white background product photos. Apparel often needs enough shadow and direction to show folds, texture, and fit. Jewelry needs careful diffusion and precise reflection control. If you sell clothing, test a setup on dark fabric and textured fabric before committing.
2. Plan for your shooting space
A small room may favor compact LEDs, wall-adjacent setups, and foldable modifiers. A larger dedicated shooting area gives you more flexibility with stands, backdrops, and boom arms. If your space is cramped, a simpler setup you can leave assembled will usually outperform a bigger kit you keep avoiding.
3. Think in systems, not single lights
The best light for photography is rarely just one fixture. You also need diffusion, reflectors, background material, and enough stand stability to keep your scene consistent. This is why merchants searching for the best backdrop for photography often discover that backdrop choice and lighting choice are linked. A matte white sweep behaves very differently under light than glossy vinyl or textured paper.
4. Consider editing and AI after capture
AI can speed up background cleanup and creative variations, but it works best when the original image is clean. If you regularly need alternate scenes for ads or marketplaces, tools like Magic Photo Editor or Creator Studio can be useful additions after you have your base lighting sorted.
5. Buy for consistency, not maximum power
More light is not always better. The real goal is predictable exposure, true product color, and manageable shadows. For many ecommerce brands, a modest but reliable setup creates a better operational workflow than a more advanced setup that requires constant adjustment.
How to choose a photography lighting kit (what to buy first, what to skip)
If you are buying your first kit, you are not really buying “a light.” You are buying a repeatable system that needs to work for your most common products, in your actual space, with your current camera and editing workflow.
A buyer checklist for what actually matters
Start with light quality and consistency, then work outward to modifiers and mounting. For ecommerce, the most useful checkpoints are color accuracy, enough output for your shooting distance, and an ecosystem of modifiers you can keep using as your needs grow.
Look for published color accuracy metrics such as CRI and TLCI when available, and treat them as a starting signal, not a guarantee. Real-world consistency still comes down to how stable the light is shot to shot, and whether it shifts color when you dim it.
Next is output. Output is not about bragging rights. It is about whether you can shoot at settings that keep your images clean and sharp for product pages. If your setup forces you into very high ISO because the light is weak, your images may look softer and noisier, and that can make retouching and background cleanup harder.
Modifier compatibility is another practical factor. A kit with limited modifier options can box you into one look. A kit that supports common mounts and a range of softboxes, diffusers, grids, and reflectors is usually easier to adapt as your catalog grows.
Power options matter too. If you may shoot on-location, battery support is not a nice-to-have. Mounting matters in small rooms as well. A great light on a flimsy stand is a real problem if you need overhead angles or you are working in a tight space.
What to skip: features that do not improve your images or workflow. Overly complicated controls, app features you will not use, and marketing claims that do not translate to more consistent product photos can distract you from what matters. If a kit makes setup slower or harder to repeat, it is probably not a good fit for an ecommerce workflow.
“Good, better, best” tiers for typical ecommerce needs
Most Shopify stores fit into one of these patterns. The goal is consistency and throughput, not owning the most advanced gear.
A good starter continuous kit is usually two continuous lights with diffusion (softboxes or a light tent), plus bounce cards and a stable way to position the lights. This is often enough to produce clean catalog images, and it is relatively simple to teach to someone else on your team.
A better continuous kit typically adds stronger output, larger modifiers for softer wrapping light, and more control options for spill and reflections. This tier is where stores often see the biggest workflow benefits, because you can shoot a wider range of products without rebuilding the setup.
A best-in-class strobe kit is for stores that want maximum control and speed in a dedicated shooting bay, or that regularly shoot people, motion, or higher-volume catalog days. This can be a strong option, but it usually requires more setup discipline and a consistent space, otherwise you lose the advantage.
How to evaluate a kit when it arrives
The reality is that you only learn if a kit fits your store once you run a quick test on your real products. Before you commit to a full reshoot, do a short test that matches your day-to-day workflow.
Take a few shots of a white or neutral object, then a product with a tricky surface (glossy packaging or metal), then your most common product size. Check for color consistency across images, not just “does it look bright.” Look at shadows under the product, and whether they feel controlled rather than random. If you shoot on a white sweep, check how evenly the background lights, and whether it stays consistent when you move from one SKU to the next.
If you use AI background tools, run one or two test images through your usual background removal or background swap step. Clean lighting tends to produce cleaner edges and more believable results. If the cutout looks messy, it is often a lighting or exposure consistency issue, not an AI issue.
Frequently Asked Questions
What is the best lighting for product photography?
For most ecommerce product photography, soft and controllable light is the best starting point. Continuous LED lights with diffusion are often practical because you can see changes in real time. The ideal setup depends on the product category, though. Reflective items, apparel, and flat lays each need slightly different placement and modifiers.
Are LED lights better than flash for ecommerce photography?
LED lights are often better for merchants shooting in-house because they are easier to learn and easier to preview. Flash can produce excellent results too, especially in larger studio settings, but it adds more setup complexity. If speed and consistency matter more than advanced studio control, LEDs are usually the easier place to start.
How many lights do I need for product photography?
Two lights are enough for many ecommerce use cases. A common setup is one key light and one fill or background light, paired with reflectors or diffusion. Some products can be shot with one light and bounce cards, while more demanding subjects like jewelry or glass may need extra control from additional modifiers or accent lighting.
What is the best lighting for clothing photography?
The best lighting for clothing photography usually balances softness with enough direction to show shape and fabric texture. Flat, overly even light can make garments look dull. For ghost mannequin, flat lay, or model shots, test the setup on black, white, and textured fabrics to make sure the light reveals detail without distorting color.
What is the best lighting for flat lay photography?
Flat lay photography often works best with top or near-top lighting, softened through diffusion to avoid harsh shadows. That is especially useful for accessories, stationery, beauty products, and apparel layouts. The main goal is even coverage across the frame, with just enough shadow to keep the arrangement from looking flat and lifeless.
Does background choice affect lighting quality?
Yes. The background changes how light reflects, how shadows appear, and how easy editing becomes. Matte white paper is often easier to light cleanly than glossy surfaces. If you are shooting for marketplaces or Shopify collection pages, a simple white sweep is often the most practical choice because it supports both consistency and easier cleanup.
Can AI replace a good lighting setup?
No, not fully. AI tools can help with background replacement, cleanup, upscaling, and creative scene generation, but they work better when the source image is well lit. If your original photo has poor exposure, color problems, or heavy reflections, editing can only fix so much before results start looking unnatural or inconsistent.
What is the best AI for photography workflows?
The best AI for photography depends on the task. For background work, tools such as AI Background Generator or Free White Background Generator can help. For cleanup and image enhancement, Increase Image Resolution or Remove Text From Images may be useful. These are workflow helpers, not substitutes for sound photography basics.
Should I upgrade my lights or my camera first?
For many ecommerce stores, upgrading lighting makes a bigger difference than upgrading the camera. Better lighting improves consistency, reduces editing time, and helps products look more accurate. If your current camera is reasonably modern, you will often get more noticeable improvements from controlling light than from buying a new body first.
What are the three rules of lighting for photography?
A practical set of three rules for ecommerce lighting is: control your light (limit mixed sources), diffuse it (soften shadows and reflections), and keep it consistent (same placement, same settings, same white balance). If you do those three things, your product photos typically become easier to shoot, easier to edit, and more consistent across your Shopify catalog.
What’s the best lighting for taking photos?
The best lighting is the lighting you can control and repeat. For many store owners, that means two continuous LED lights with diffusion in a dedicated spot, with your camera settings and white balance locked in. Natural light can work too, but only if you can keep it consistent from shot to shot.
What is the 20 60 20 rule in photography?
The 20 60 20 rule is often used as a simple way to think about what drives a strong image: roughly 20% is gear, 60% is lighting and composition, and 20% is editing. For ecommerce, the point is that lighting and setup usually matter more than upgrading your camera body. If your light is inconsistent, editing becomes slower and your catalog looks less cohesive.
What are the 7 C’s of photography?
Different photographers define the 7 C’s slightly differently, but they usually center on fundamentals like composition, contrast, color, clarity, content, cropping, and consistency. For Shopify product photos, consistency is the one that drives the biggest business impact: consistent lighting, angles, and color help collection pages look professional and help shoppers compare products confidently.
Key Takeaways
Conclusion
The best lighting for photography is the setup that helps you produce clean, accurate, repeatable images for your store without turning every shoot into a technical project. For most ecommerce brands, that means controlled soft light, reliable modifiers, and a setup built around the products you sell most often. Start with consistency, then layer in workflow improvements like better backdrops, overhead support, or AI-assisted editing where they genuinely save time.
If you want a clearer path to the right setup, explore AcquireConvert’s specialist guides for Shopify and ecommerce operators. Giles Thomas’s experience as a Shopify Partner and Google Expert gives these recommendations a practical commercial lens, not just a photography one. Read the full breakdowns, compare options side by side, and use AcquireConvert to build a lighting workflow that fits your store.
This article is editorial content created for AcquireConvert. It is not a paid endorsement unless explicitly stated otherwise. Tool availability and features may change over time, so verify current details directly with the provider before making a purchase decision. Any performance improvements discussed are not guaranteed and depend on your products, workflow, photography skill, store setup, and editing process.

Hi, I'm Giles Thomas.
Founder of AcquireConvert, the place where ecommerce entrepreneurs & marketers go to learn growth. I'm also the founder of Shopify agency Whole Design Studios.