Top Lighting Photography for Ecommerce (2026)
Top lighting photography is one of the most practical setups for ecommerce brands that want cleaner product shots, better texture control, and more consistent image production without building an overly complex studio. For Shopify merchants, the real question is not whether overhead lighting looks professional, but whether it fits your product type, workflow, and margin structure. In most cases, top lighting works especially well for cosmetics, flat lays, accessories, packaged goods, and controlled catalog photography. It is less forgiving for highly reflective or tall products unless you add fill and diffusion. At AcquireConvert, we evaluate visual commerce workflows through the lens of conversion rate optimization and day-to-day store operations. If you want a setup that can improve image consistency across PDPs, collections, and ads, top lighting is usually worth serious consideration alongside loop lighting photography and other product-focused arrangements.
Contents
Overview
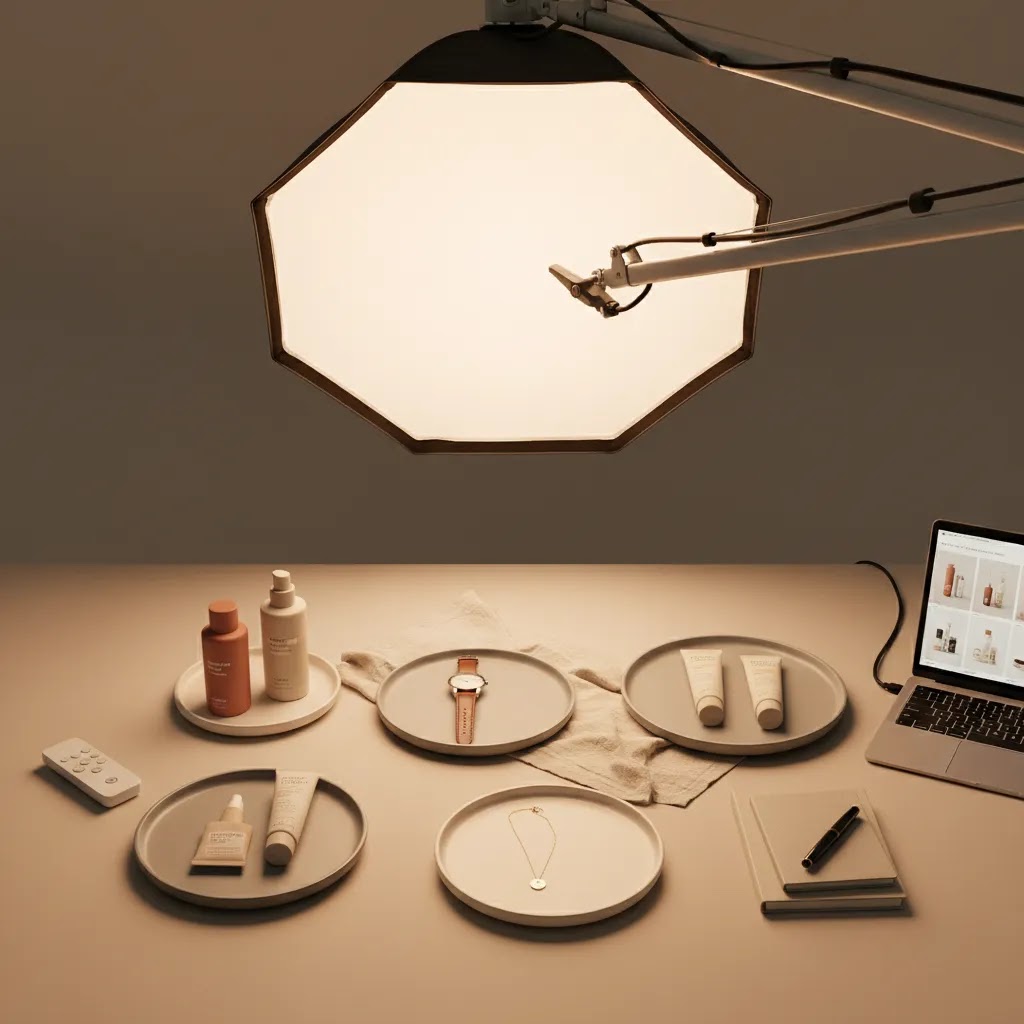
Top lighting photography means placing the main light source above the product, usually centered or slightly angled, to create even illumination across the subject. In ecommerce, this approach is widely used for flat lays, table top photography lighting, and catalog workflows where consistency matters more than dramatic mood.
For store owners, the appeal is simple. A good overhead setup can reduce distracting shadows, keep backgrounds cleaner, and make batch photography easier to repeat. That is useful if you are shooting dozens of SKUs for collections, seasonal launches, or paid social creatives. If your brand relies on clear product detail and minimal editing, top lighting can be a strong fit.
That said, it is not a universal answer. Watches, glass, metallic finishes, and glossy packaging often need more than a single overhead light. You may need side fill, negative fill, bounce cards, or a light tent depending on the material. If you are still comparing setups, it helps to review broader guidance on best lighting for photography and product-specific recommendations on best light for product photography.
For lean Shopify teams, the main benefit is operational. A repeatable lighting system speeds up content production for product pages, email campaigns, and marketplace feeds. That can matter just as much as image quality.
Top Lighting vs Flash vs LED (What to Choose for Ecommerce)
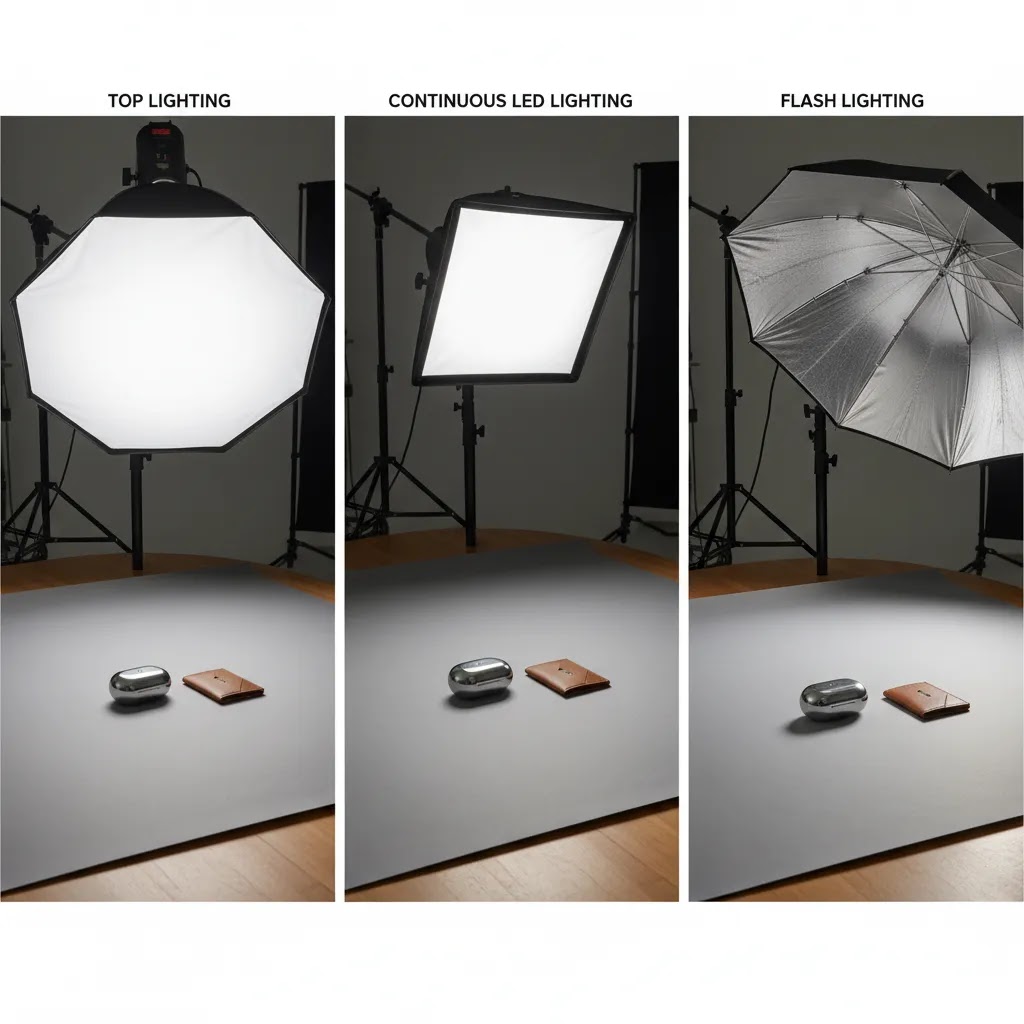
Here is the thing, “top lighting” describes the direction of the light, not the type of light. For ecommerce, your biggest equipment decision is usually whether your overhead source is continuous (typically LED) or flash (strobe). Both can produce clean catalog images. The better choice depends on your workflow, your team’s shooting experience, and how fast you need to produce consistent results.
If you are a lean Shopify team and you want the most straightforward learning curve, continuous LED is usually the easiest starting point. What you see is what you get, so you can judge shadows, glare, and highlight placement in real time without guessing. That tends to reduce setup friction and makes it simpler to train a teammate to shoot “good enough” product images on a repeatable system.
Flash can be worth it when you need more power headroom, cleaner light at lower ISO, or you want to freeze motion. That might matter if you are shooting splashes, powders, pouring liquids, or any product where tiny movement makes the image look soft. Flash can also help when you are trying to get a bright white background while keeping the product exposure clean, but it typically adds more complexity at the start.
From a practical standpoint, think about the downstream workflow implications:
For most stores, the tipping point is volume and standards. If you are shooting a handful of products each month, LED overhead lighting with good diffusion is often enough. If you are shooting big launches, need very clean files for marketplaces, or you are scaling a catalog workflow where reshoots are expensive, flash can become a smarter long-term investment.
Trust and Credibility
Lighting advice is only useful if it reflects real ecommerce constraints: limited space, tight production timelines, and the need for images that hold up on collection pages as well as zoomed PDP views. AcquireConvert approaches this topic from that practical angle. Giles Thomas, who leads the site, is a Shopify Partner and Google Expert, so recommendations are framed around how product imagery supports store performance, paid acquisition, and conversion rate optimization.
That matters because photography decisions are rarely just creative choices for ecommerce brands. Lighting affects click-through rate from ads, perceived product quality, and how trustworthy your store feels. A clean overhead setup can help standardize your image library, but the setup still needs to match your category, margins, and production volume.
If you are building an in-house content workflow, it is also worth looking at the wider product photography studio process and browsing AcquireConvert's Product Photo Lighting resources for related setups and modifiers.
Key Features
1. Better consistency across SKUsTop lighting is one of the easiest ways to keep product images visually aligned across a catalog. If you shoot from the same overhead position each time, your shadows, highlights, and background exposure stay more predictable. That is especially helpful for catalog photography lighting where your priority is a uniform storefront rather than artistic variation.
2. Strong fit for flat lays and small productsThis setup works well for cosmetics, makeup, supplements, stationery, packaged goods, and apparel accessories. It is also useful for top down photography where the camera and light are both positioned above the product. For brands selling gift boxes, skincare sets, or curated bundles, overhead light often creates a cleaner merchandising look.
3. Cleaner background separationWith proper diffusion, top lighting can make white or neutral backgrounds easier to manage. You still need reflectors or fill if the subject casts hard edges, but many merchants find that overhead placement simplifies photography background lighting compared with more dramatic side-lit scenes.
4. Good starting point for compact home studiosIf you are running a small Shopify store from a spare room or office corner, a top-mounted softbox or LED panel can be easier to manage than a three-light setup. It can also pair well with a modest table top photography lighting arrangement, giving you a practical base before adding accent lights later.
5. Useful with AI editing workflowsConsistent lighting tends to make downstream editing cleaner, whether you are cropping for marketplace feeds or using tools like Catalog Photography resources to improve image workflows. Even when you use AI-assisted background cleanup or retouching, starting with stable lighting usually reduces corrections.
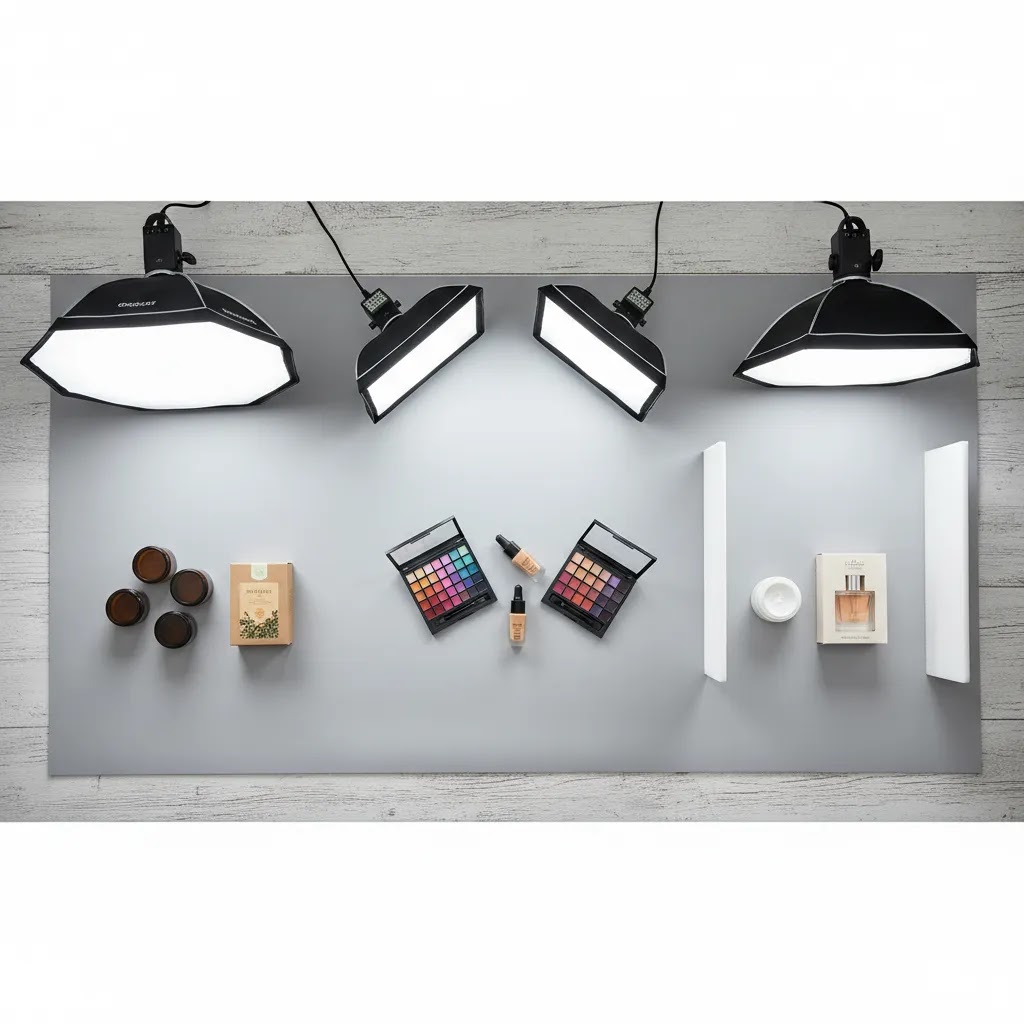
Common Top Lighting Setups (1-Light, 2-Light, and “Add Fill” Variations)
What many store owners overlook is that “top light” is rarely one exact setup. It is a family of setups that all share one idea: the main source is above the product. Your results depend on source size, diffusion, and what you add around the product to control shadows and reflections.
1-light overhead soft source (the catalog baseline)
This is the simplest overhead product photography lighting setup and often the best starting point for Shopify merchants. Use one broad, diffused light above the table, centered for flat lays or slightly forward for taller items. A larger modifier (softbox or a diffused panel) usually creates smoother transitions and fewer harsh edges than a small panel placed close to the subject.
Where it tends to work best: flat lays, cosmetics, packaged goods, and products where the top surface is the primary selling view.
If you see harsh downward shadows under the product, your quickest fixes are usually to increase diffusion (more layers, or a larger diffusing surface), raise the light a bit to spread it, or add bounce fill near the shadow side.
Overhead key plus side fill (the “make it look more expensive” variation)
If your products are slightly dimensional, for example bottles, jars, shoes, or boxed sets, overhead alone can make side surfaces look too dark. Add a simple fill source or reflector to one side. For many ecommerce shoots, fill does not need to be a second powered light. A white foam board placed close to the product can lift shadow detail without changing your overall look.
The way this works in practice is that you keep the overhead light doing most of the work, then use side fill to control how “deep” the shadows feel. If you overfill, everything starts looking flat and you lose shape definition. If you underfill, the edges look heavy and can read as low quality on a Shopify collection grid.
Overhead key plus negative fill (for glossy products and reflection control)
For glossy packaging, polished metals, or glass, your problem is often not darkness. It is uncontrolled reflections that make the product look messy. Negative fill is simply using a black card (or black foam board) near the product to absorb stray light and create clean edge definition.
Consider this if your highlights look blown out, your labels look washed, or the product has “random bright streaks.” Instead of adding more light, you often get a cleaner result by subtracting light in the right place.
When a light tent becomes the smarter choice
If you sell very reflective items and you want fast repeatability, a light tent can be a practical shortcut. It wraps the product in diffusion, which can help turn chaotic reflections into smooth gradients. The tradeoff is that light tents can make products look a bit generic if you do not add controlled direction, and large products can be awkward to fit.
Think of a light tent as a “consistency tool.” If your priority is marketplace-style images and you need to move quickly through SKUs, it can be worth testing. If your brand is built on high-end creative, you may prefer flags, diffusion panels, and more deliberate shaping.
Quick troubleshooting for common top lighting problems
Pricing and Costs
There is no single product price for top lighting photography because this article is evaluating a setup choice rather than a specific Shopify app. Based on the live product data available, no dedicated lighting kit, subscription plan, or photography hardware pricing was returned from the Products data source for this topic. That means it would be misleading to assign exact costs here.
For most ecommerce teams, your actual spend will depend on whether you are building an in-house setup or outsourcing content production. In-house costs typically include the light source, diffusion, modifiers, stands or overhead rigging, a shooting table, and editing time. If you want a lower-commitment workflow, you may also rely on image tools after the shoot. The available product data includes visual editing options such as AI Background Generator, Free White Background Generator, Increase Image Resolution, Remove Text From Images, Background Swap Editor, Place in Hands, Magic Photo Editor, and Creator Studio, but no live pricing details were returned for those tools in the provided dataset.
For store owners, the practical takeaway is this: judge cost against output volume. If you launch products often, run frequent campaigns, or need catalog consistency, an overhead setup may pay for itself in production efficiency. If you only shoot a few products each quarter, outsourcing may be the better financial decision.
Pros and Cons
Strengths
Considerations
Who It's Best For
Top lighting photography is best for Shopify merchants who sell visually tidy, relatively compact products and need a scalable way to produce clean images. Think beauty brands, cosmetics sellers, stationery shops, packaged food, wellness products, and accessories with consistent dimensions.
It also suits founders handling content themselves, because the workflow is learnable without a full production crew. If your store is in an early to mid-growth stage and you need better images without building a complex studio, this is often a sensible next step.
If you sell jewelry, watches, glassware, or polished metal, treat top lighting as one component rather than the full answer. Those categories often require more advanced control than a simple overhead setup can provide on its own.
How to Get Started
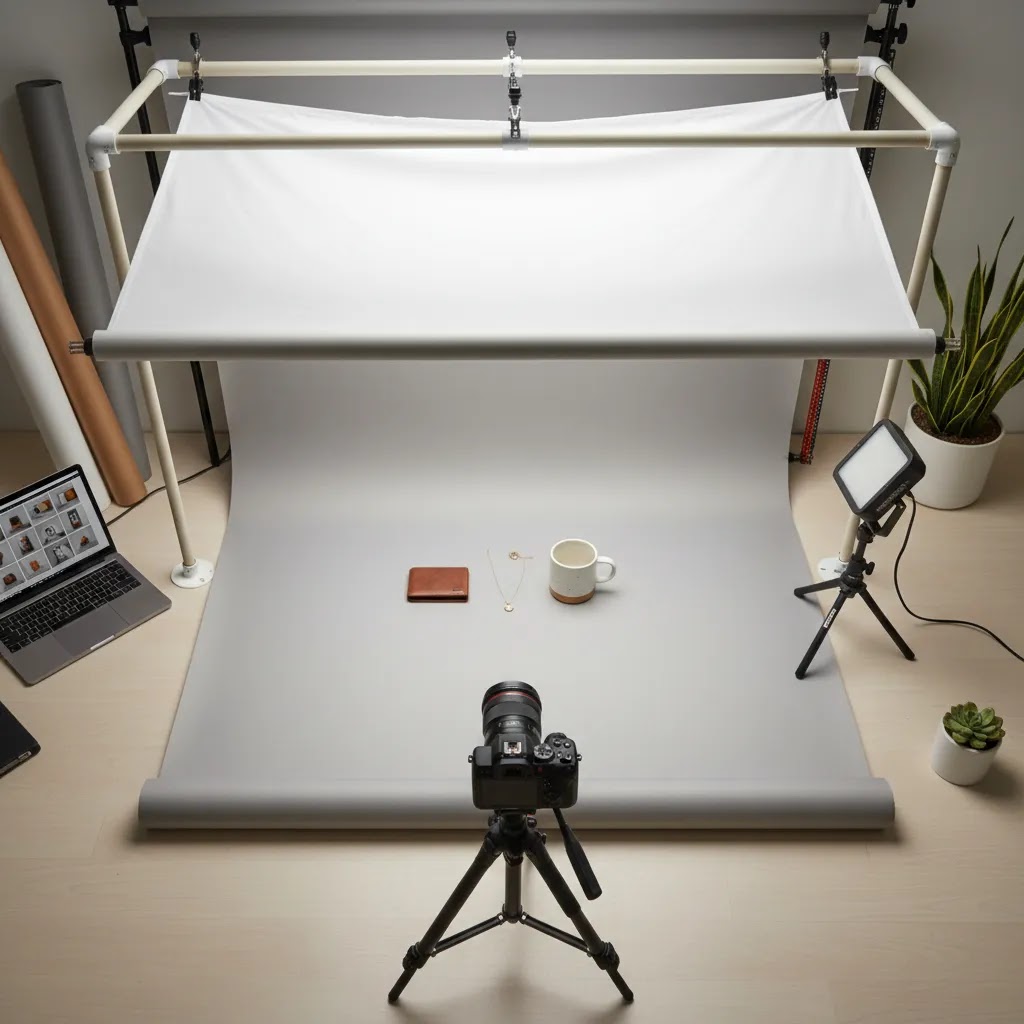
Start with one diffused overhead light placed above your shooting surface. Keep the light broad and soft rather than small and direct. A larger modifier generally gives smoother shadows and a more forgiving result.
Next, set up a stable table and choose a background that matches your brand's needs, usually white, off-white, or light gray for catalog use. Place foam boards or reflectors on the sides if the product looks too dark around the edges.
Take test shots of three product types, ideally one matte item, one glossy item, and one dimensional item. This quickly tells you whether your lighting for product photography can handle your catalog range. Review shadows, reflections, and edge definition on desktop as well as mobile.
Then standardize the setup. Mark light position, table position, and camera height so you can repeat the process during future shoots. If you need a wider framework for building your setup, compare this approach with a fuller best light for product photography guide and studio planning advice inside the Catalog Photography category.
Top Lighting “Rules” Explained for Product Photography (So You Can Direct Your Shoot)
If you have searched for lighting help before, you have probably seen a few “rules” repeated. The reality is that rules are only useful if they help you make repeatable decisions for product photos. For most Shopify store owners, the goal is not to memorize theory. It is to set up a simple system that produces consistent results across SKUs.
What the “3 lighting rule” usually means in product work
In plain English, the “3 lighting rule” is usually pointing to a three-part priority: key light, fill, and separation (or accent). You do not need three expensive lights to apply it. You need three functions covered.
For a tabletop catalog workflow, key and fill are usually the main levers. Separation becomes more important when products are tall, dark, glossy, or similar in tone to the background.
What the “20/60/20 rule” can mean for lighting ratios
You will see “20/60/20” used in a few ways online, but in practice it is often describing a simple ratio: most of your light is doing the main job, and smaller parts are supporting it. For ecommerce, that is a helpful mindset.
Think of it this way: keep the overhead key light doing about 60% of the visual work, then use fill and accent at roughly 20% each to refine the result. That could mean your fill is subtle, not equal to the key. It could also mean your separation is just enough to define the product edge, not enough to create a second obvious shadow pattern.
If you are getting inconsistent results between SKUs, it is often because the fill is too strong on one product and too weak on another. A simple ratio mindset helps you keep the “look” stable, which matters on Shopify collection pages where images sit side by side.
What the “3/4 rule” means for product angle and reflections
The “3/4 rule” is commonly discussed as a camera angle, a three-quarter view that shows both the front and side of a subject. For ecommerce products, it is a reminder to choose an angle that helps shoppers understand shape, not just surface design.
For top lighting specifically, a three-quarter product angle often improves reflections and dimensionality because the overhead light is not hitting every surface straight on. It can reduce flatness for bottles and jars, and it can make highlights look more natural. If you are shooting only straight-on images with a strict overhead light, you may find your products look clean but lifeless. Testing a slight three-quarter camera angle can be a practical fix without changing your whole lighting setup.
What to ignore if you are a lean Shopify team
It is easy to overcomplicate lighting rules and end up changing too many variables at once. For most Shopify store owners, the fastest path to better images is consistency and controllable reflections first. Lock your overhead light position and diffusion. Control ambient light. Add fill or negative fill as needed. Once you have a stable baseline, then you can introduce more advanced accent lighting if your category demands it.
Frequently Asked Questions
Is top lighting photography good for Shopify product pages?
Yes, in many cases it is. It works particularly well for stores that need clean, repeatable images across multiple SKUs. The biggest advantage is consistency. If your products are small, flat, or packaged neatly, overhead lighting can help create a more professional storefront. Results vary with reflective or highly textured items, which often need extra fill or diffusion.
What products work best with top down photography?
Flat lays and top down photography usually suit cosmetics, apparel accessories, stationery, meal kits, skincare, supplements, and boxed sets. These categories tend to photograph well from above because shape and packaging are easy to read in a single frame. Products that rely on side profile detail may need a different angle or an added secondary light.
Can I use a simple product photography lighting kit for this setup?
Often, yes. A basic kit can be enough if it includes a soft, diffused main light and gives you stable positioning above the table. The limitation is control. Smaller kits may struggle with larger products, shiny surfaces, or more premium creative styles. If your catalog expands, you may outgrow a starter setup fairly quickly.
Does top lighting help conversion rate optimization?
It can support conversion rate optimization by making product images clearer and more consistent, which may improve shopper confidence. That said, no lighting style guarantees better conversion. Outcomes depend on product type, page design, traffic quality, pricing, and how well your images communicate product value. Good lighting is one part of a wider conversion system.
Is this a good choice for makeup photography lighting?
Yes, especially for flat lays, ingredient-focused shots, boxed sets, and catalog images of makeup or skincare packaging. For swatches, textures, or reflective compacts, you will usually want side fill to show detail more naturally. Beauty brands often do well with overhead lighting for consistency, then add a second setup for richer campaign imagery.
What is the biggest mistake with ecommerce photography lighting?
The most common problem is using an overhead light that is too harsh and too small. That creates strong downward shadows and makes products look flat or low quality. Another issue is inconsistency between shoots. If your light and camera positions change every session, your collection pages can start to look uneven and less trustworthy.
Should I build a studio or outsource product shots?
If you launch often and need ongoing image updates, building an internal workflow usually makes sense over time. If you only shoot a limited number of products, outsourcing may be more efficient. The right answer depends on product volume, team capacity, and quality requirements. Reviewing your long-term product photography studio needs can help clarify the decision.
What is top lighting in photography?
Top lighting is when the main light source is placed above the subject, either directly overhead or slightly angled. In product photography, it is often used to create clean, even illumination for catalog shots, flat lays, and table top photography lighting setups where consistency is more important than dramatic shadows.
What is the 3 lighting rule?
The “3 lighting rule” is usually shorthand for covering three roles: a key light (your main overhead light), fill (to control shadow depth), and separation or accent (to keep the product distinct from the background or to shape reflections). For ecommerce, you can often cover fill and separation with reflectors or flags rather than buying three separate lights.
What is the 20 60 20 rule in photography?
The “20/60/20” idea is often used as a simple guideline for balance. In product photography lighting, it can be applied as: the key light does most of the work (around 60%), while fill and accent are supporting elements (around 20% each). It is not a strict measurement. It is a way to avoid overpowering your main light and ending up with flat, inconsistent product images.
What is the 3/4 rule in photography?
The “3/4 rule” commonly refers to shooting from a three-quarter angle where you can see the front and one side of the product. For ecommerce, this view can help shoppers understand shape and size better than a perfectly straight-on shot. With top lighting, a slight three-quarter angle can also make highlights and reflections look more natural on dimensional products.
Key Takeaways
Conclusion
Top lighting photography is worth considering if your store needs cleaner, more consistent product images without the complexity of a full commercial studio. It is especially useful for brands shooting cosmetics, accessories, packaged products, and flat lays at scale. If that sounds like your catalog, this setup could be a practical upgrade that improves production efficiency and visual consistency across your store.
If your products are reflective, tall, or highly detailed from multiple angles, do not expect overhead lighting alone to solve everything. In those cases, use it as a foundation rather than a finished system. A sensible next step is to test one overhead setup on a small batch of products, compare the results against your current imagery, and then refine from there with support from AcquireConvert's broader lighting guidance.
Disclosure: AcquireConvert may receive affiliate compensation from some third-party tool links where applicable. This article is for educational purposes and reflects practical ecommerce evaluation, not guaranteed performance advice. Results from any photography setup, editing workflow, or visual optimization approach will vary based on your product type, niche, traffic, creative execution, and implementation quality.

Hi, I'm Giles Thomas.
Founder of AcquireConvert, the place where ecommerce entrepreneurs & marketers go to learn growth. I'm also the founder of Shopify agency Whole Design Studios.