Tabletop Photography Lighting (2026 Guide)
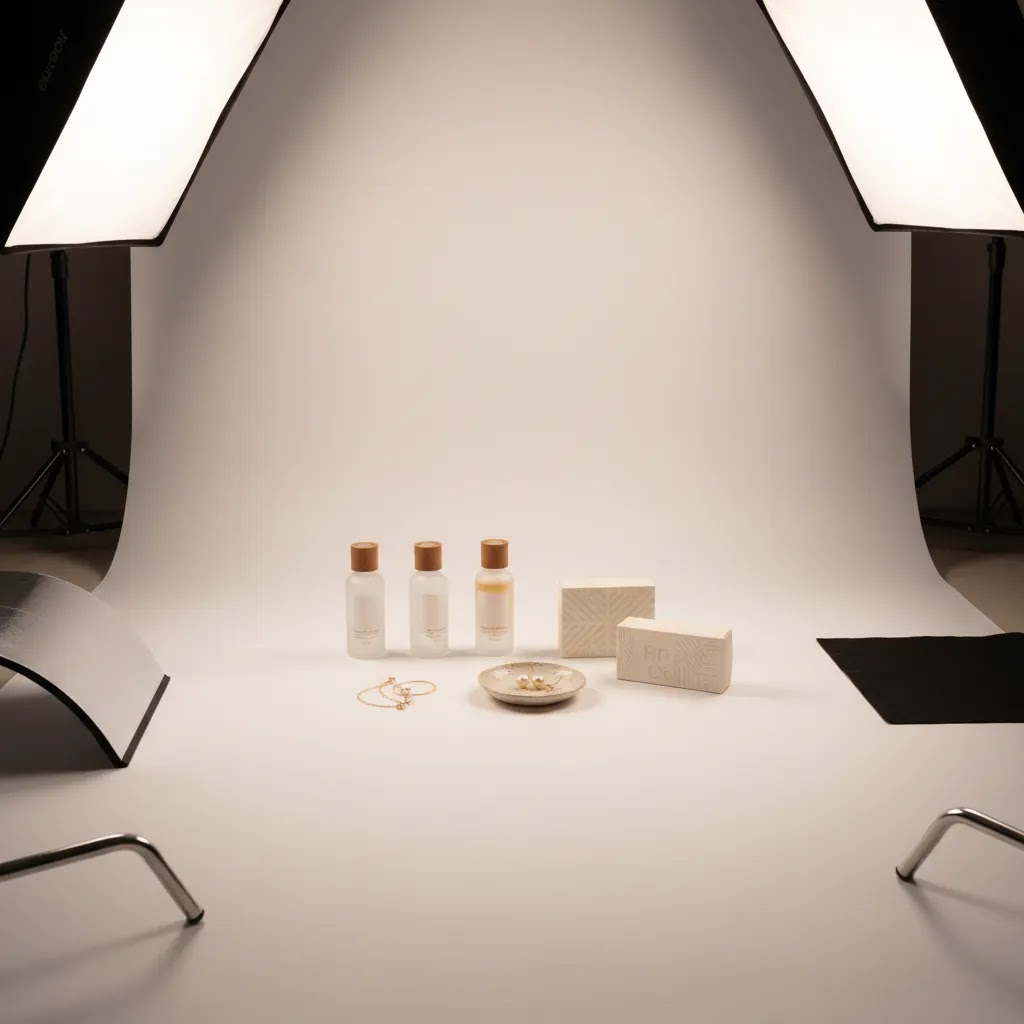
If you sell smaller products online, tabletop photography lighting can have a direct effect on how professional your store looks. It shapes shadows, controls reflections, and helps customers see color, texture, and product details clearly. For Shopify merchants, that matters because product photos often do a big share of the selling. The right setup is not always the most expensive one, though. It is the one that fits your product type, available space, and content workflow. If you are comparing lighting options for jewelry, cosmetics, accessories, packaged goods, or other small items, this guide will help you make a practical decision. If you also want a broader foundation before choosing a setup, start with our guide to loop lighting photography to understand how light direction changes the final image.
Contents
What tabletop photography lighting actually needs to do
Tabletop lighting is different from general portrait or room lighting. Your goal is not simply to make the product brighter. Your goal is to control shape, surface, and consistency. For ecommerce, that usually means creating repeatable product photos that look clean across collection pages, product pages, marketplaces, and ads.
A good tabletop setup should help you do five things well. First, it should keep exposure consistent across a full shoot. Second, it should let you soften or increase contrast depending on the item. Third, it should give you control over background brightness. Fourth, it should reduce editing time. Fifth, it should fit inside a realistic home office, warehouse corner, or small studio.
If you shoot glossy packaging, glass, metal, or beauty products, lighting control matters even more because reflections can make a product look premium or completely unusable. The same is true if you need close up photography lighting for texture shots or ingredient callouts. Store owners often focus on camera gear first, but lighting usually has a bigger impact on perceived quality.
If you are still comparing broad setup styles, our breakdown of the best lighting for photography can help you narrow down continuous lights, softboxes, and reflector-based options.
Lighting rules photographers use for tabletop (and how to apply them to products)
If you have searched for tabletop photography lighting, you have probably seen a few named “rules” come up again and again. Here is the thing. These rules are useful, but they are often explained in a way that feels more like a photography class than an ecommerce workflow.
For most Shopify store owners, the goal is not to master lighting theory. The goal is to get clean, repeatable product photos for product pages, plus a few more dimensional shots you can use in ads or banners.
What is the “3 lighting rule” for products?
You will hear this described as 3-point lighting. For tabletop, it usually means three jobs, not three expensive lights. Think of it this way: you need a key light to define the product, a fill to control shadow density, and a background or rim light to keep the background clean or to separate the product from it.
Now, when it comes to small catalogs, three lights can be overkill. If you only need clean packshots and your products are matte, a single large diffused key light plus a bounce card can get you most of the way there. Three lights become more valuable when you need a consistent pure white background, you are shooting reflective packaging, or you want a more “hero” feel without relying on heavy editing.
The 20-60-20 rule as a practical ratio, not a measurement exercise
The 20-60-20 rule is a simple way to think about lighting balance: about 60% of your look comes from your main light, about 20% from fill, and about 20% from an accent or background light. You do not need a light meter to use this. You can approximate it with distance and dimming.
From a practical standpoint, set your key light first and expose your camera for the product. Then introduce fill by moving a white foam board closer or turning on a second light at a lower brightness. Finally, add a background light or rim light only as needed. If you find the image starts to look flat, back the fill off. If the background goes gray, increase the background light or increase the distance between product and background so you can brighten the sweep without washing out product edges.
The 3/4 rule for tabletop: product angle plus light angle
The 3/4 rule is often talked about as a classic angle where you see the front and a side of the subject. For products, it is less about a “correct” angle and more about solving two ecommerce problems at once: showing form and keeping labels readable.
A simple way to apply it is to rotate the product about 30 to 45 degrees from camera, then position your key light about 30 to 45 degrees off to the side and slightly above. This tends to create a clean highlight and a shadow that shows depth without hiding important front-facing text. It is especially useful for bottles, jars, and boxes where a straight-on shot can look flat, but a hard side light can make labels hard to read.
Key features to evaluate before you buy
1. Light source type
For most ecommerce merchants, continuous LED lighting is the most practical place to start. You can see shadows and reflections in real time, which speeds up setup and makes product-to-product consistency easier. Flash can produce strong results, but it is often slower to learn if you are not already comfortable with manual exposure and modifiers.
2. Modifier size and softness
Small hard lights tend to create sharp reflections and defined shadows. That can work for dramatic product images, but it is less forgiving for catalogs. Larger modifiers like softboxes or diffused panels usually create better tabletop results because they wrap light around the product more evenly. This is especially useful for object photography lighting where the product has edges, labels, or reflective surfaces.
3. Color consistency
Mixed light is a common problem. If window light, ceiling bulbs, and LEDs all hit the same set, your white balance can shift from shot to shot. That makes editing slower and product colors less trustworthy. For beauty, skincare, and fashion accessories, accurate color reproduction matters because mismatched tones can increase customer hesitation and may contribute to returns.
4. Output control
Look for setups where you can adjust brightness without changing your entire camera setup. Dimming helps when moving between white background shots and moodier lifestyle scenes. It also helps when creating photography background lighting separately from the product light itself.
5. Space efficiency
Many Shopify merchants do not have a dedicated studio. A tabletop lighting setup needs to work in a small footprint and still allow room for tripods, sweep backgrounds, overhead arms, or a simple shooting table. If your space is tight, foldable modifiers and compact stands may matter more than raw power.
Once you understand these basics, compare how lighting angles affect shadow shape with our guide to top lighting photography, which is particularly relevant for flat lays, food, cosmetics, and small product arrangements.
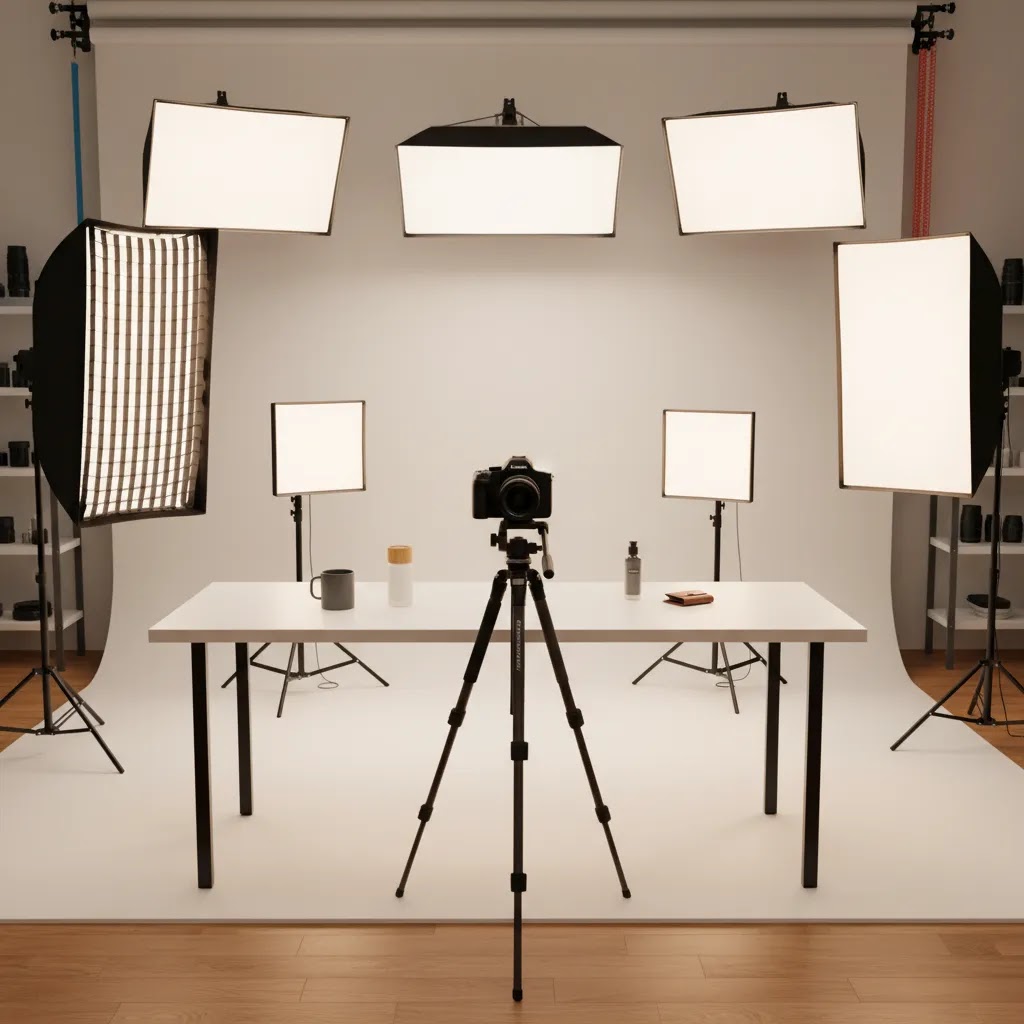
Tabletop lighting setups (1-light, 2-light, 3-light) you can copy
Most lighting problems in ecommerce come from vague setups. The light is “somewhere over there,” the background is “kind of white,” and then you are stuck fixing the same issues in editing across 50 SKUs.
Consider this. If you use copy-and-paste lighting recipes, you can get repeatability first, then adjust for style. Below are three setups that cover the most common outcomes for Shopify product photos.
1-light setup: clean catalog look with controlled shadow
Use it when: you have a lot of SKUs, your products are mostly matte, and you want a fast, repeatable setup that still looks professional.
Position: Place one large diffused light as your key, about 45 degrees to the side of the product and slightly above it, aimed down toward the product. On the opposite side, place a white foam board close to the product to act as fill. Your background sweep sits behind the product.
What to adjust first: If shadows feel harsh, make the light source bigger relative to the product. That usually means moving the softbox closer or using more diffusion. If the product looks flat, move the fill card farther away so the shadow side stays a little darker.
Quick troubleshooting: If you see hotspots on glossy packaging, the reality is your light is reflecting as a small bright shape. Increase diffusion, move the light more to the side, or raise it slightly so the reflection moves out of the label area. If the background goes gray, do not crank the key light. Increase the product-to-background distance and light the background separately, which is where the next setup helps.
2-light setup: cleaner white background without blowing out edges
Use it when: you need marketplace-style white backgrounds, you want faster cutouts, or you are shooting products where consistent background brightness matters more than dramatic shadows.
Position: Light one is your key, same as above: 45 degrees to the side and slightly above, diffused. Light two is for the background. Aim it at the sweep, not the product. If possible, place it behind the product line and angle it toward the background so it does not flare into your lens.
What to adjust first: Expose the product correctly with the key light first. Then turn on the background light and raise it until the background is white in-camera. If you start losing edge definition, either lower the background light slightly or move the product farther forward so less bounced light wraps around it.
Quick troubleshooting: If you get a gray background, your background light is either too weak, too far away, or blocked by the product. Move the background light closer to the sweep, widen it with diffusion, or shift it to hit the sweep more directly. If the product edges look hazy, you are likely getting background spill. Increase distance between product and background, and flag the background light with black foam board so it does not hit the subject.
3-light setup: more dimensional hero shots for ads and banners
Use it when: you want a packshot that feels more premium, you need better separation for dark products on light backgrounds, or you are shooting glossy items where reflection control is the difference between usable and unusable.
Position: Light one is your key, diffused, 45 degrees off to one side and slightly above. Light two is fill, either a dimmed diffused light on the opposite side or a bounce card if you want to keep it simple. Light three is either a background light (for pure white) or a rim light placed behind and to the side, aimed across the back edge of the product to create separation.
What changes first when switching styles: For clean catalogs, you typically keep fill relatively strong and keep contrast low. For hero shots, pull the fill back and increase background separation. That could mean moving the product farther from the sweep, reducing fill intensity, or using the rim to define edges. The key lever is often distance and diffusion size, not buying another light.
Quick troubleshooting: If you see a bright stripe reflection on bottles or jars, rotate the product slightly and adjust the key light angle until the highlight becomes a clean, controlled shape. If the rim light creates a blown edge, dim it or move it farther away. If you get uneven background brightness, move the background light farther back and aim it more evenly across the sweep.
Pros and Cons
Strengths
Considerations
Who this approach is for
Tabletop photography lighting is a strong fit for Shopify store owners and ecommerce teams shooting smaller products in-house. It makes sense if you want more control than phone snapshots give you, but you are not ready to invest in a full commercial studio workflow. It is also a good match for merchants who launch new SKUs often and need repeatable photography without relying on outside photographers for every update.
If your catalog includes beauty, wellness, supplements, candles, jewelry, handmade goods, or small home accessories, a tabletop setup is usually the most efficient format. If you are planning a more permanent shooting environment, it also helps to think in terms of a full product photography studio so your lighting, background, camera height, and storage all work together.
AcquireConvert recommendation
If you are choosing tabletop photography lighting for an ecommerce store, the smartest move is to optimize for repeatability first and creative flexibility second. That usually means starting with a simple two-light or three-light continuous setup, large enough modifiers for soft product light, and a background system you can keep assembled. Most store owners do better with a setup they will actually use weekly than with an advanced setup they only understand after a month of trial and error.
AcquireConvert focuses on practical decisions like this for merchants who need results they can implement themselves. Giles Thomas brings the perspective of a Shopify Partner and Google Expert, which matters because product imagery affects not just your product pages, but also paid traffic efficiency, Shopping click-through rates, and on-site conversion behavior. For more supporting guidance, explore the wider Product Photo Lighting section and related resources in Catalog Photography. If you are comparing options side by side, read the full breakdowns on AcquireConvert and use them to build a setup that fits your store, not just a photographer's ideal spec sheet.
How to choose the right tabletop lighting setup
1. Match the light to your product surfaces
Matte products are forgiving. Glossy ones are not. If you sell glass bottles, metallic lids, foil packaging, or reflective beauty jars, prioritize large diffused light sources and tools that let you block spill. If you sell textured handmade goods, a slightly more directional light may help show detail.
2. Decide whether speed or creative range matters more
For large catalogs, speed usually wins. A repeatable white background setup with fixed marks on your table may be enough. For social ads, hero banners, or launch campaigns, you may want a setup that can shift between bright catalog images and more sculpted, professional lighting photography. If you need both, consider building your setup in layers so the same base lights can support multiple shot styles.
3. Be realistic about your space
Lighting that works beautifully in a studio can become frustrating in a spare room. Measure your shooting area before buying. Make sure you have enough distance between the light and the product to get the softness you want. Also consider where the camera tripod, tethering laptop, reflectors, and background stand will go. Setting up photography lighting is often less about the light itself and more about whether you can position it properly.
4. Plan for editing time, not just capture time
A lower-cost setup can become expensive if it creates hours of extra retouching. Uneven shadows, color shifts, and bad reflections slow your workflow. If you can get cleaner source images, even a modest lighting system may save time across hundreds of SKU photos. This matters for growth-stage stores where the founder is also the merchandiser, marketer, and photo editor.
5. Separate catalog needs from brand-image needs
You may not need one lighting setup for every job. Many stores benefit from having a dependable white-background system for product pages and a secondary arrangement for more styled content. For example, photography natural lighting can look great for lifestyle content, but it may be too inconsistent for a full product catalog. Use each approach where it makes operational sense.
One final point: if you are tempted by very low-cost, improvised solutions for photography cheap lighting, think beyond the initial spend. If a setup is unstable, dim, or inconsistent, it may cost you more in reshoots and editing than a better-planned starter kit would have.
Practical tabletop workflow: table, background sweep, and product-to-background distance
What many store owners overlook is that lighting quality is often limited by the physical setup, not the lights themselves. You can have good LEDs and still get gray backgrounds, uneven shadows, or endless reflection issues if your tabletop studio is not controllable.
Build a simple tabletop studio you can actually repeat
Start with a stable table at a comfortable working height. If the table is too low, you end up shooting down at awkward angles or hunching over for hours. If it is too high, it is harder to place lights above the product without stands getting in your way.
Then add a background sweep. The key is the curve. A sweep gives you a clean transition from “floor” to “wall” so you do not get a visible horizon line behind the product. Keep the sweep secured so it does not shift between products.
Product-to-background distance is your main lever for white backgrounds
If you only remember one practical concept, make it this. The closer the product is to the background, the more background light bounces back onto the product. That can wash out edges, reduce label contrast, and create a hazy look.
For many tabletop products, moving the product forward even a small amount can make the background easier to keep white while keeping the subject properly exposed. This is also one of the simplest ways to reduce the “gray sweep” problem without buying stronger lights.
Background lighting vs subject lighting: what to move first
Light the product first. Set your key and fill until the product looks correct for color and detail. Only then should you brighten the background.
If the background is too dark, increase the background light or move it closer to the sweep. If the product edges start to lose definition, do not immediately lower the key light. Increase the product-to-background distance, flag the background light to reduce spill, or dim the background slightly until edges return.
Consistency tips for multi-SKU shoots
For most Shopify store owners, consistency is what makes the catalog look expensive. A few small habits can make your sessions faster and your product pages look more uniform.
Frequently Asked Questions
What is the best tabletop photography lighting for ecommerce?
For most ecommerce stores, a continuous LED setup with large diffusion is the most practical choice. It gives you real-time control over shadows and reflections, which is useful for product pages and repeat catalog shoots. The best option depends on product size, surface reflectivity, and your shooting space, not just price or brightness specs alone.
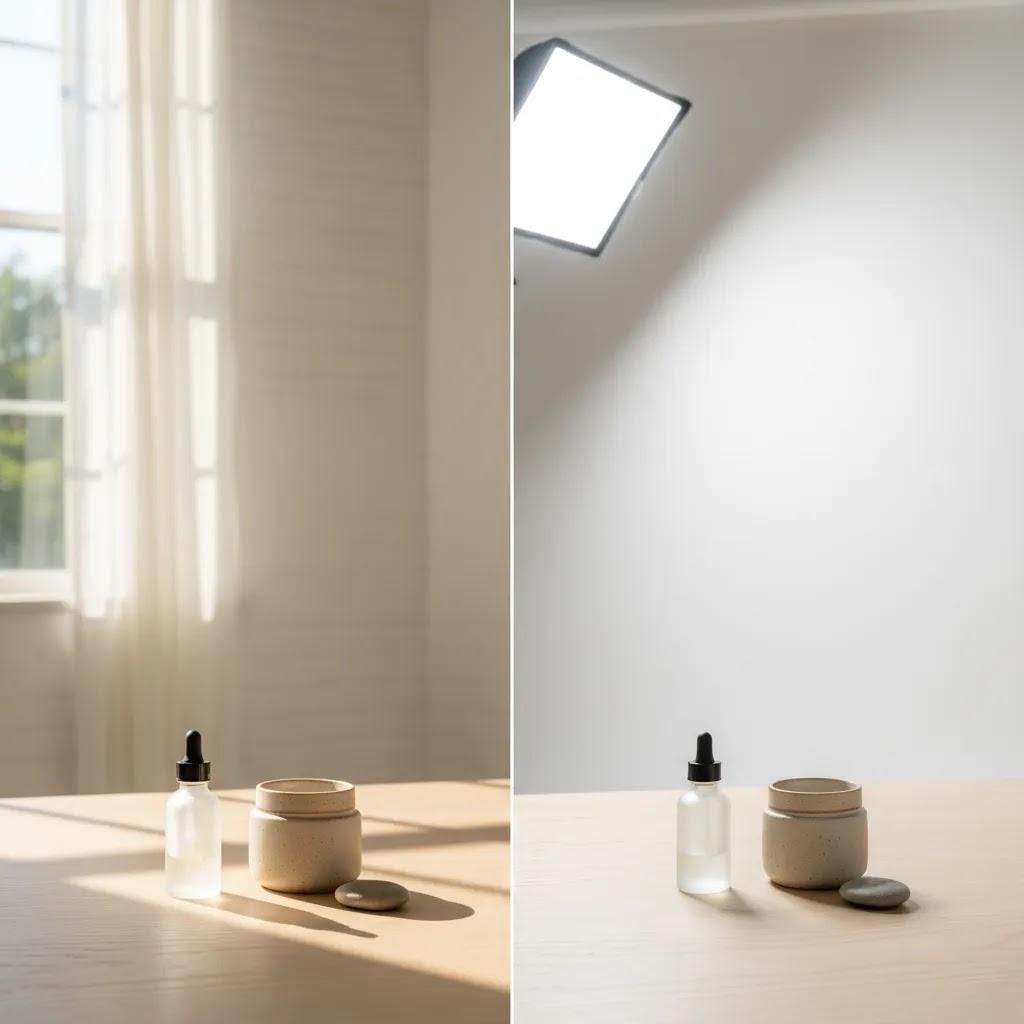
Is natural light good enough for tabletop product photography?
It can be, especially for test shoots, handmade products, or lifestyle content. But natural light is less predictable for full catalogs because weather and time of day change the look of your images. If consistency matters across dozens of SKUs, controlled artificial lighting is usually the safer choice for store owners.
How many lights do I need for tabletop photography?
Many merchants can start with two lights: one main light and one fill or background light. A third light can help separate the background or create more control over reflections. The exact number depends on whether you are shooting white backgrounds, dramatic product shots, or highly reflective objects.
What lighting works best for reflective products?
Reflective products usually need larger, softer light sources and careful diffusion. The goal is to shape reflections so they look intentional instead of messy. Flags, foam boards, and diffusers often matter as much as the light itself. For glossy packaging or glass, small undiffused lights tend to create harder-to-manage hotspots.
Should I use softboxes or light panels for object photography lighting?
Both can work. Softboxes often give more directional control and can create a flattering wrap around small products. Panels can be compact and convenient in tight spaces. The better choice depends on your room size, product surface, and whether you need flexibility for both catalog and creative shots.
How do I light a white background without overexposing the product?
Keep product lighting and background lighting separate if possible. Light the product for accurate detail first, then raise the background brightness gradually. If the background is too close to the item, light can bounce back and reduce edge definition. More distance between product and background usually gives you cleaner control.
Does tabletop lighting help conversion rates?
Better product imagery may improve shopper confidence, which can support stronger product page performance. But results depend on your traffic quality, pricing, offer strength, reviews, and page design too. Lighting is one part of the conversion picture, not a guaranteed fix by itself.
Can I build a tabletop setup in a small room?
Yes, many store owners do. The key is choosing lights and modifiers that fit the available space while still giving you enough distance to soften the light. Foldable stands, compact diffusers, and a dedicated tabletop can make a small-area setup much more workable for regular ecommerce shoots.
What is the difference between tabletop lighting and beauty photography lighting?
There is some overlap, especially when shooting cosmetics or skincare. Beauty photography lighting often aims for flattering highlights, glow, and polished surface detail. Tabletop lighting is broader and may prioritize consistency, packshot clarity, and efficient workflows. If you sell beauty products, you may want elements of both approaches.
What is the 20 60 20 rule in photography?
The 20-60-20 rule is a simple way to think about lighting balance: about 60% of the look comes from the main light, about 20% from fill, and about 20% from an accent or background light. For ecommerce product photography, it is best used as a practical guide, not a strict measurement. You can approximate it by setting your key light first, then adding a lower-powered fill (or a bounce card), and only adding background or rim light if you need cleaner whites or more separation.
What is the 3 lighting rule?
In product photography, the “3 lighting rule” is usually a reference to 3-point lighting: key light, fill light, and a background or rim light. It can be useful for reflective products or white background work, but it is not required for every Shopify catalog. Many stores can start with one main diffused light and a reflector, then add a dedicated background or rim light if they need more control.
What is the 3/4 rule in photography?
The 3/4 rule often refers to a classic product angle where you show the front and one side. For ecommerce, it is a practical way to show shape while keeping labels readable. A common approach is to rotate the product about 30 to 45 degrees from camera, then set your key light about 30 to 45 degrees off to the side and slightly above so you get dimension without hiding important text.
What is the best lighting setup for furniture photography?
Furniture photography is not tabletop, but store owners often end up cross-shopping lighting. The main difference is scale. For furniture, you typically need much larger light sources, more distance, and often a bigger space to control shadows and reflections. Tabletop lights and small softboxes can work for detail shots or small decor, but for full furniture pieces, you will usually get more consistent results with larger modifiers and a setup that can light the subject and background separately without spill. The best approach depends on room size, wall color, and the finish of the furniture, so expect some testing before you lock in a repeatable workflow.
Key Takeaways
Conclusion
Tabletop photography lighting is worth treating as a buying decision, not just a technical detail. The right setup can help you create cleaner product images, move through shoots faster, and keep your storefront more visually consistent as your catalog expands. For most store owners, the best choice is not the most advanced system. It is the one that fits your products, room, and weekly workflow without adding unnecessary complexity. If you want help comparing approaches, explore more lighting and catalog resources on AcquireConvert. Giles Thomas brings a Shopify Partner and Google Expert perspective to practical ecommerce decisions like this, so you can make smarter choices for both your store visuals and your broader conversion strategy.
This article is editorial content created for educational purposes and is not a paid endorsement unless explicitly stated otherwise. Pricing, product availability, and feature details for any third-party tools or services may change over time, so verify current information directly with the provider. Any performance outcomes discussed are illustrative only and are not guaranteed.

Hi, I'm Giles Thomas.
Founder of AcquireConvert, the place where ecommerce entrepreneurs & marketers go to learn growth. I'm also the founder of Shopify agency Whole Design Studios.