Flat Lay T Shirt Photography Ideas (2026 Guide)
You have a solid t-shirt product, a clean Shopify store, and traffic starting to land on your product pages, but your images still feel flat in the wrong way. The shirt looks wrinkled, the neckline sits awkwardly, and the overall shot does not help shoppers imagine owning it. That is a common problem for apparel brands, especially when you are trying to shoot a lot of SKUs without paying for full model photography every time.
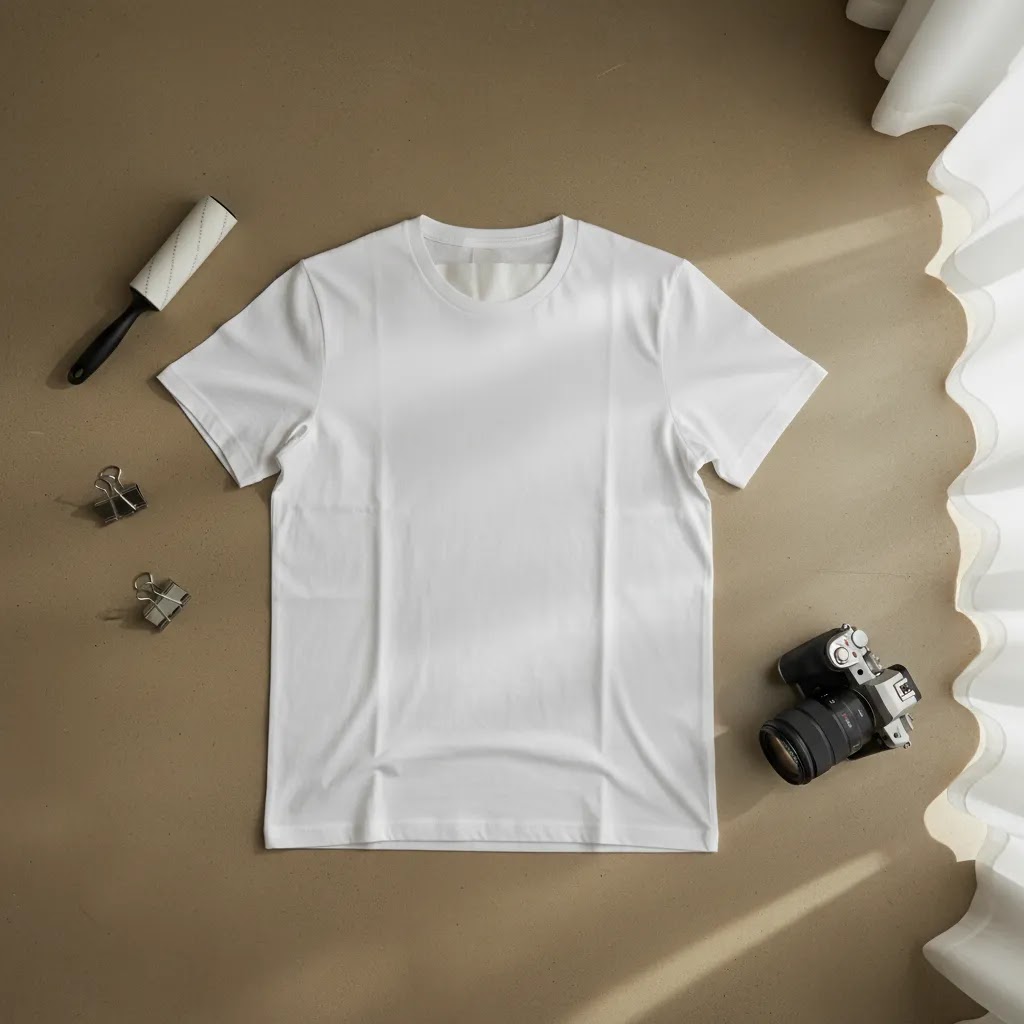
Flat lay t shirt photography can solve that, but only if the styling looks intentional. A good flat lay image makes shape, fit, fabric, and brand personality easier to read in a split second. A weak one can make even a premium shirt look forgettable. In this guide, you will find practical flat lay t shirt photography ideas you can use for ecommerce, social posts, and collection imagery, along with setup, background, lighting, and styling advice that works for real stores. If you want a broader starting point, AcquireConvert also has a useful guide to product photography fundamentals.
Contents
Why flat lay works for t-shirts
T-shirts are one of the easiest apparel products to shoot as flat lays, but that does not mean every flat lay performs well. The format works because it gives you control. You can show the front graphic clearly, keep the frame consistent across a collection, and create images that are faster to produce than many model shoots.
For most Shopify stores, that consistency matters almost as much as creativity. If your collection page shows ten shirts with different lighting, different angles, and different color temperatures, the store can feel disorganized. Flat lays help standardize the presentation while still giving you room to add brand style.
They also work well as part of a mixed image set. You might use a flat lay as a secondary image behind a white background product shot, or feature it in social content to add lifestyle context without hiring talent. If you want more inspiration beyond shirts, AcquireConvert has a related article on flat lay photography ideas that can help you think more broadly about layouts and product storytelling.
How to build a clean flat lay setup
Start with a surface large enough for the shirt to breathe
Your setup does not need to be expensive, but it does need to be controlled. A cramped board or uneven floor makes composition harder than it needs to be. Use a flat surface that gives you room around the shirt so the image does not feel boxed in.
In practice, this means a foam board, sweep surface, tabletop, or painted plywood panel that is larger than the garment itself. Leave enough negative space around the shirt so you can crop for your store, ads, and social posts without losing shape.
Use overhead shooting if you want cleaner geometry
The best flat lay shirt photography usually comes from a camera positioned directly above the product. That keeps the sleeves symmetrical and reduces distortion. A tripod with a boom arm helps, though some small brands start with a phone mounted securely above the setup.
The reality is that camera angle matters more than camera price in many cases. If your angle drifts even slightly, one sleeve may look longer and the body may appear twisted.
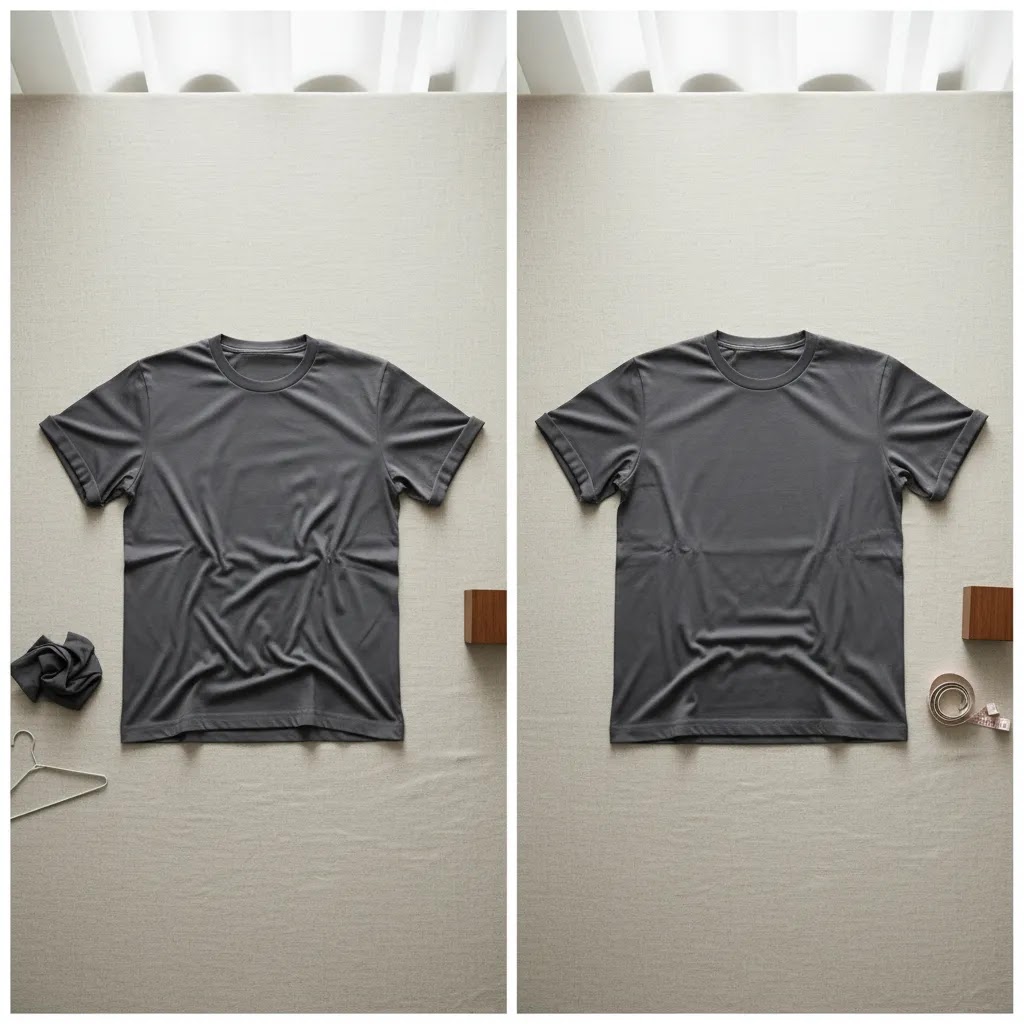
Prep the shirt before you place it down
Steam it first. Lint-roll it. Check the collar shape, hems, and sleeve edges. What many store owners overlook is how visible tiny flaws become once you shoot from above in high resolution.
A shirt that looks fine to your eye can look messy on the product page. Spending three extra minutes on prep often saves much more time in retouching later.

Stuffed vs unstuffed flat lay, how to make a tee look “full” (without a model)
Here is the thing, flat lay t-shirt photos usually fall into two styles: truly flat (unstuffed) and lightly shaped (stuffed). Both can work for ecommerce, but they communicate different things to a shopper, especially on mobile where the outline and neckline readability matter a lot.
Unstuffed flat lays: clean, graphic, and consistent
An unstuffed flat lay is the classic catalog approach. The shirt is steamed, smoothed, and laid as naturally as possible, with the fabric staying flat to the surface. This style is often best when:
From a practical standpoint, unstuffed shots can be faster to produce in volume. They are also less likely to create unrealistic expectations about structure if the shirt is meant to drape softly in real life.
Stuffed flat lays: more “premium” shape without a model
A lightly stuffed flat lay adds subtle volume so the tee looks fuller, closer to how it reads on a torso. This can work well for heavier cotton tees, oversized fits, boxy cuts, and shirts where the collar and shoulder line are part of the value. It is also useful when you want the shirt to feel less like a piece of fabric and more like a product with presence.
The key is subtlety. You are not trying to make it look inflated. You are trying to add a bit of structure so seams sit straight and the neckline does not collapse.
A simple shaping method that stays believable
The way this works in practice is to add small amounts of stuffing in targeted areas, then re-smooth the surface so the shirt still looks natural.
Think of it this way, you are building structure under the shirt, then styling the fabric on top of it. If your stuffing creates bumps, use less and spread it wider. Thin and even tends to look more natural than thick and localized.
Quick fixes for common “why does this look wrong?” problems
Most flat lay failures are small and fixable, but they are hard to ignore once you see them. Before you shoot, scan for these issues:
If you are shooting for Shopify, these tweaks matter because shoppers compare products quickly across a grid. Small distortions can make one SKU look like it fits differently, even when it does not.
Flat lay t shirt photography ideas that sell better
The straight-on catalog flat lay
This is the simplest and often the most commercially useful option. Place the shirt symmetrically, smooth the torso, keep the sleeves slightly angled outward, and shoot on a plain background. This approach works especially well for collection pages, marketplaces, and stores that need a clean browsing experience.
The lightly styled brand flat lay
Add one or two props that support the shirt's identity, not random filler. For a surf-inspired brand, sunglasses and a folded cap may work. For a premium basics brand, a minimal notebook or clean textile can help. Keep the shirt as the hero.
Think of it this way, props should explain the product story, not distract from it. If the customer remembers the mug, watch, or flower stem more than the shirt, the styling missed the mark.
The folded and stacked variation
If you sell several colors or prints of the same tee, try a neat folded stack with one shirt partially opened to reveal the design or collar detail. This can work well for promotional banners and collection spotlights. It also helps communicate range without forcing shoppers through many individual images.
The detail-led flat lay
Some shirts sell on print quality, embroidery, washed texture, or fabric weight. In that case, include a flat lay hero image and then tighter crops of the chest print, neckline, stitching, or hem tag. Flat lay t shirt photography ideas work best when the main shot and detail shots support each other.
For more apparel-specific inspiration, see AcquireConvert's guide to flat lay clothes photography ideas, which can help if you are building out a wider clothing catalog.
Flat lay inspiration sources and trend-proof styling (using Pinterest without copying)
Flat lay inspiration is everywhere, but the stores that look consistent are the ones with rules, not just references. Pinterest-style boards can help you find layouts quickly, but your job is to translate the idea into your brand system, not recreate someone else’s photo.
Use inspiration boards to define rules, not individual shots
Instead of saving 200 images and trying to copy your favorite one, use boards to identify repeatable patterns you want across your catalog. For most Shopify store owners, three simple rules are enough to keep things consistent:
What many store owners overlook is that consistency often reads as “premium,” even if the styling is simple.
Composition patterns you can adapt to t-shirts
If you want an idea bank that stays useful over time, these patterns tend to work across seasons because they keep the product readable.
Consider this, an inspiration idea is only useful if it can scale. If a layout looks great once but takes 30 minutes of prop hunting per SKU, it may not fit your workflow.
A practical filter: will it still read as a product photo on mobile?
Flat lays can drift into “editorial” fast, and sometimes that hurts conversion. Before committing to a new style, check three things:
For some stores, the cleanest path is a simple catalog flat lay for product pages, then more styled flat lays for social and email where context matters more than instant clarity.
Styling details that change the whole photo
Shape the sleeves with intention
Sleeves can make a shirt look crisp or lifeless. A very flat, straight sleeve may feel too clinical for some brands. A slight bend can add movement, but keep both sides balanced. You are aiming for natural structure, not a staged pose that looks forced.
Decide whether to tuck, pin, or leave natural drape
Different fabrics behave differently. Thick cotton holds shape. Lightweight blends may collapse or ripple. From a practical standpoint, hidden clips or small pieces of tape beneath the garment can help refine the outline. Just avoid over-styling, because shoppers may feel misled if the shirt looks too sculpted in photos and softer in reality.
Use wrinkles strategically, or remove them fully
For minimalist or premium brands, clean lines usually perform better. For vintage, washed, or workwear-inspired products, a little texture can add character. The difference between stores that look polished and stores that look improvised often comes down to whether the wrinkles seem intentional.
Keep branding visible but not oversized
If your tee has a small chest logo, make sure the lighting and camera height still allow shoppers to see it. If it has a large print, center the frame so it reads clearly on mobile. Your composition should answer the shopper's first question quickly: what exactly am I buying?
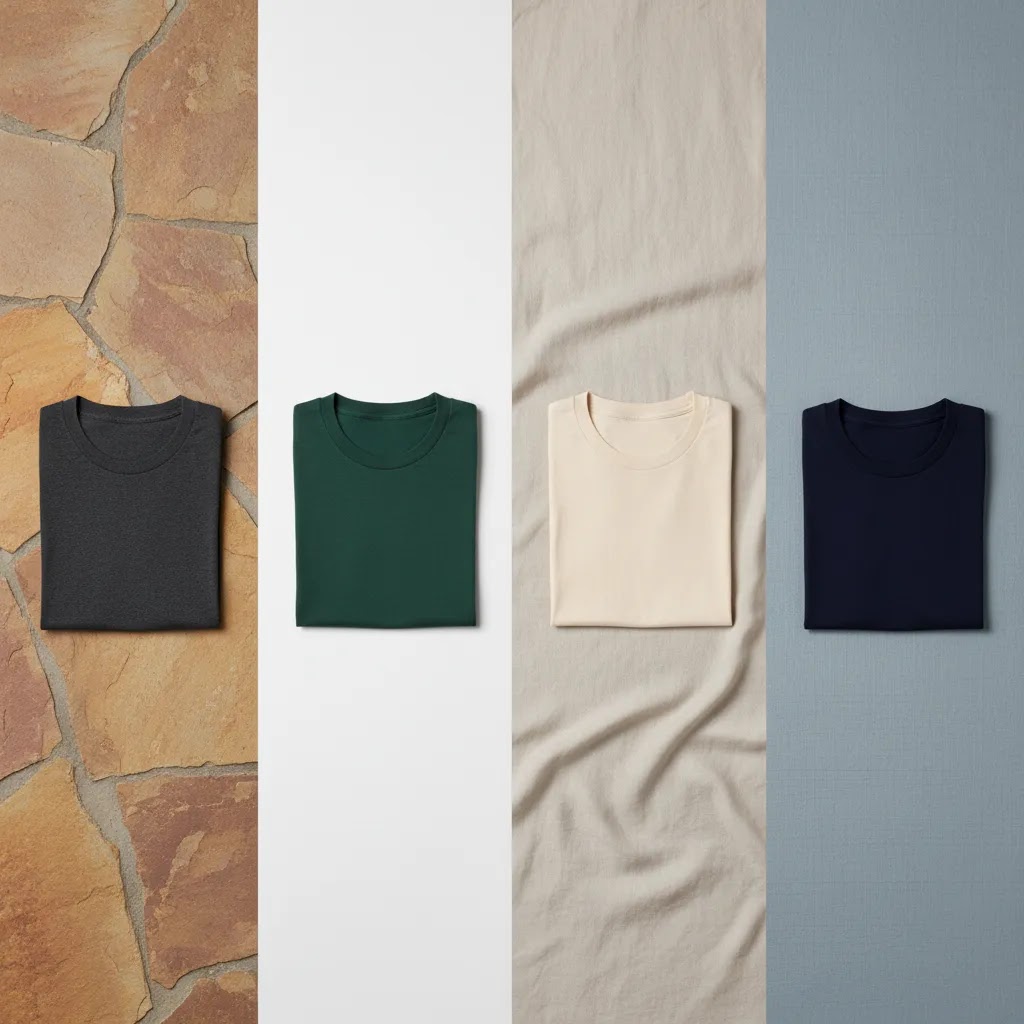
Backgrounds, lighting, and composition
Choose backgrounds that support the product, not compete with it
Most stores should begin with white, off-white, light gray, or muted textured surfaces. These keep the shirt easy to read and fit naturally into ecommerce layouts. If you are exploring more creative Product Photography Fundamentals, remember that background choice should match brand position and catalog consistency.
For fashion-forward brands, stone, wood, canvas, or tonal paper can work well. Bright patterns are harder to pull off and often reduce clarity, especially with graphic tees.
Use soft light from one consistent direction
Window light can work well if it stays steady. Position the setup near indirect natural light and use a white reflector or foam board to soften the opposite side. If you are shooting many SKUs, continuous studio lights may give you more reliable output.
Shadows should help define the shirt, not cover design elements. Soft, directional light tends to look better than flat overhead room lighting.
Compose for ecommerce crops
Leave enough room to crop square, portrait, and landscape versions from the same image. Shopify themes, collection grids, email modules, and paid social placements often require different aspect ratios. If your original frame is too tight, reuse becomes difficult.
Consider this before every shot: will this image still work as a thumbnail on mobile? That single question often improves composition decisions.
Know when a studio setup is worth it
If your team is shooting dozens of products every week, a more dedicated product photography studio setup may save time and improve consistency. You do not need a massive commercial space, but a repeatable environment with stable lighting, overhead support, and background control can reduce reshoots.
Camera settings and a repeatable shot workflow (so every SKU matches)
If you are shooting one shirt for Instagram, you can get away with improvising. If you are shooting 30 SKUs for a Shopify collection, consistency becomes the job. The goal is simple: every tee should look like it belongs in the same store.
Settings that reduce distortion and keep color consistent
You do not need a complicated technical setup, but a few choices make flat lays look more professional.
The reality is that most flat lay problems people blame on “camera quality” are really angle drift, wide-angle distortion, or shifting exposure.
A repeatable shot list you can run for every SKU
For most Shopify store owners, a simple shot list keeps production moving and reduces the “did we forget something?” problem. A typical set might include:
To keep framing consistent across days, mark your surface. Tape marks can define where the collar should sit and how far the hem should be from the bottom of frame. If your tripod height changes, your whole catalog can shift.
File handling for ecommerce: naming, exporting, and checks before upload
Once you are shooting at scale, file handling becomes part of the workflow. A clean naming convention makes your life easier in Shopify and helps prevent wrong-color uploads.
If you are running paid social or Google Ads to a product page, mismatched imagery can increase friction. Clean, consistent photography is not just a visual preference, it is part of conversion optimization.
Editing and using AI without overdoing it
Editing should make your shirt look accurate, clean, and store-ready. It should not change the product so much that it creates returns or disappointed customers. Correct exposure, white balance, dust spots, and minor distractions first. Then decide whether background cleanup or creative variations are useful for your workflow.
If you need help refining apparel images, tools like Free White Background Generator, AI Background Generator, and Increase Image Resolution can support post-production tasks. Features and availability may change, so verify current details directly with the provider.
Now, when it comes to AI, keep your standards grounded. AI can help clean backgrounds, extend formats, or generate alternate scenes, but apparel still needs color accuracy, realistic drape, and believable texture. Giles Thomas, through AcquireConvert's focus on practical ecommerce visuals, consistently frames AI as a tool to improve workflow rather than a substitute for product truth.
If backgrounds are central to your process, it may also help to explore AcquireConvert's category resources on Background Removal & Editing and Fashion & Apparel Photography.
How to use flat lay images on your store
A flat lay image works best as part of a broader image system. On a Shopify product page, you might lead with a white background front shot, follow with a flat lay for style context, then add detail crops and, if possible, a worn image. That sequence can help customers understand both product clarity and brand feel.
For most Shopify stores, flat lays are especially useful in these places:
AcquireConvert often approaches ecommerce content through both acquisition and conversion. That is a useful lens here. Better shirt imagery may improve click-through from ads or social content, but it can also reduce hesitation once shoppers land on the page. If you are still building your visual workflow, revisiting the site's product photography guide can help you standardize the rest of your catalog too.
The strategies and tools discussed in this article are based on current ecommerce best practices and publicly available information. Results will vary depending on your store, niche, and implementation. Always verify tool pricing, features, and platform compatibility directly with the relevant provider before making purchasing decisions.
Frequently Asked Questions
What is the best angle for flat lay t shirt photography?
The best angle is usually directly overhead. This keeps the shirt shape accurate and reduces distortion in the sleeves, collar, and torso. If you shoot at even a slight diagonal, the garment can look uneven, which matters on collection pages where consistency is important. A tripod with an overhead arm is ideal, but a securely mounted phone can also work for small stores. What matters most is repeatability, especially if you are photographing multiple SKUs in one session.
Should I use flat lay photos as my main Shopify product image?
That depends on your brand and product type. For many stores, a clean front-on product image on a plain background works best as the primary image because it is easiest to scan quickly. Flat lays often perform well as the second or third image, where they add style and context. If your brand identity is highly editorial or design-led, a flat lay may work as the hero image, but test it carefully and watch product page behavior before standardizing the approach.
What backgrounds work best for flat lay shirt photography?
White, off-white, light gray, and subtle textured surfaces are the safest starting points because they keep attention on the shirt. If your brand has a strong personality, natural materials like canvas, wood, or stone can also work, as long as they do not reduce contrast. The key is consistency. Your background should support the product and fit the rest of your catalog. If you want a wider visual framework, reviewing general flat lay photography ideas can help you choose a direction that matches your brand.
How do I keep a t-shirt looking structured in a flat lay photo?
Start by steaming the shirt and removing lint. Then adjust the sleeves, side seams, and collar so they look intentional. Some photographers use hidden tape or clips underneath the garment to refine shape, especially with soft fabrics. Be careful not to over-style the shirt into a shape it does not naturally hold. The goal is a polished image that still feels truthful. If your customer receives a shirt that looks much looser or differently shaped than the image suggested, trust can drop.
Can I shoot good flat lay t-shirt photos with a phone?
Yes, many store owners can get strong results with a modern phone if the setup is controlled. Focus on good light, an overhead angle, a clean background, and careful garment prep. Lock exposure if your camera app allows it, and keep enough distance so the frame does not distort the shirt shape. Phones are often more than capable for social, email, and even ecommerce use when the styling is right. The setup and consistency usually matter more than owning expensive camera gear.
How many flat lay variations should I shoot for each t-shirt?
For most stores, two to four useful variations are enough. One clean catalog flat lay, one styled version, and one or two detail crops will usually cover the essentials. If you are launching a hero product or seasonal campaign, you may want more creative versions for ads and social. Try to avoid producing endless variations that add workload without helping conversion. The difference between useful variety and clutter often comes down to whether each image answers a distinct shopper question.
Are props a good idea in flat lay clothing photography?
Props can work well if they support the product story. A cap, tote, sunglasses, or notebook might strengthen the visual context for certain brands. Random objects usually hurt more than help. Ask whether the prop makes the shirt more understandable to the target customer or simply fills empty space. For broader inspiration on styling garments, AcquireConvert's article on flat lay clothes photography ideas is a useful next read.
What lighting is best for flat lay apparel photography?
Soft, directional light tends to work best because it keeps colors accurate while adding enough shape to define the garment. Indirect window light can be excellent for smaller shoots. If you need consistency across many products, continuous lights may be more reliable. Avoid mixed lighting from different sources, because it can shift color and make editing harder. Your goal is not dramatic effect. It is accurate presentation with enough depth that the shirt does not look dull or washed out.
When should I move from DIY setup to a dedicated studio?
If you are photographing inventory regularly, struggling with inconsistent results, or spending too much time resetting each shoot, a more permanent setup may be worth it. A dedicated space with fixed lighting, overhead camera support, and repeatable surfaces can improve output and speed. That does not mean you need a large commercial operation. Many growing brands start small. If you are weighing that shift, reading about a product photography studio setup can help you assess what is practical for your catalog volume.
Can AI improve flat lay t-shirt photos for ecommerce?
AI can help with cleanup, background changes, and repurposing images into different formats, but it works best when the original photo is already solid. If the shirt is wrinkled, badly lit, or distorted, AI will not always fix those issues convincingly. Use AI to support efficiency, not to cover weak source images. For apparel brands especially, color accuracy and realistic fabric texture matter. Results can vary based on the product type, the tool used, and the quality of your starting image.
How do you photograph a t-shirt flat lay without wrinkles showing?
Steam the tee first, then smooth it in sections rather than dragging your hand across the whole shirt. Start at the collar and shoulders, then work down the torso, then finish with sleeves. If wrinkles keep returning, the fabric may be pulling because the shirt is slightly twisted, so reset it by lifting and laying it down again, then re-align the shoulder seams. Soft, directional light also helps, because harsh overhead room lighting can exaggerate small creases.
Should you stuff a t-shirt for flat lay photography?
You can, but only lightly and only when it supports the product. Stuffing can help heavier tees, oversized fits, and collars that collapse, because it adds a bit of structure. For lightweight tees and soft blends, stuffing can look lumpy and may feel less truthful. If you do stuff, keep it thin and even, mainly under the upper chest and lightly in sleeves, so it reads as shape rather than puffiness.
What lens (or focal length) is best for flat lay clothing photography?
Avoid very wide angles because they can bend lines and make sleeves look skewed. Many stores get cleaner results by stepping back and using a more “normal” perspective rather than shooting close with a wide lens. On phones, that often means using the standard camera mode instead of ultra-wide. On cameras, it usually means using a focal length that looks natural, then keeping the camera centered directly above the garment.
How do I keep flat lay photos consistent across an entire clothing collection?
Control the variables you can repeat: fixed camera position, consistent light direction, a defined background, and a simple shot list you follow every time. Mark where the collar and hem should sit in frame, lock exposure and white balance, and use gridlines to keep alignment straight. Before uploading to Shopify, scroll through the full set and look for the one-off problems, rotated frames, exposure shifts, or a tighter crop that breaks the pattern.
Key Takeaways
Conclusion
Strong flat lay t-shirt photography is less about fancy gear and more about decisions you can control: garment prep, camera angle, lighting, spacing, and styling discipline. If your shirt photos feel inconsistent right now, you do not need to rebuild everything at once. Start with one repeatable setup, define one background style, and create a simple shot list for each product. That alone can improve the look and usability of your catalog.
Here is the thing, the best flat lay images do two jobs at once. They make your store look more polished, and they help shoppers understand the product faster. That can support both acquisition and conversion, which is why visual consistency matters so much in ecommerce. If you want to keep refining your apparel imagery, explore AcquireConvert's Product Photography Fundamentals hub and related guides. Then test a few of these ideas on your next shirt shoot and see which style fits your brand best.
Disclaimer: Results from ecommerce strategies vary depending on store type, niche, audience, budget, and execution. Nothing in this article constitutes a guarantee of specific outcomes. Third-party tool features and pricing are subject to change: verify current details directly with each provider.

Hi, I'm Giles Thomas.
Founder of AcquireConvert, the place where ecommerce entrepreneurs & marketers go to learn growth. I'm also the founder of Shopify agency Whole Design Studios.