Product Photography Guide for Ecommerce (2026)
If you run an online store, product photography is not just a creative task. It is a conversion task. Your images help shoppers judge quality, scale, texture, and trust before they ever read your product copy. For Shopify merchants especially, stronger visuals can support better product pages, fewer pre-purchase questions, and a more credible brand presentation. This guide explains what good product photography looks like, how to choose between DIY, studio, and AI-assisted workflows, and where each approach fits. If you want a broader starting point, AcquireConvert’s Product Photography Fundamentals hub is a useful next stop. Throughout this guide, you will get practical advice built for ecommerce operators who need images that work in real storefronts, ads, social feeds, and marketplaces.
Contents
What product photography really does for your store
Good product photography helps customers answer the questions that keep them from buying. What does it really look like? How big is it? What material is it made from? Does it feel premium or generic? On an ecommerce product page, your images often carry more persuasive weight than your headline.
For most stores, there are three practical jobs product photos need to do. First, they need to document the item clearly with clean, accurate views. Second, they need to merchandise the product in a way that supports brand positioning. Third, they need to adapt across channels such as Shopify collections, paid social ads, Google Shopping assets, email campaigns, and organic social.
This is why product photography is rarely just about owning a nice camera. You need a repeatable process for backgrounds, lighting, framing, editing, file sizing, and consistency across your catalog. If you are building that process yourself, guides on best camera for product photography and diy photography lighting can help you avoid expensive guesswork.
There is also a growing middle ground between full professional shoots and fully manual DIY setups. AI editing tools can remove backgrounds, improve resolution, swap scenes, and create alternate compositions faster than older workflows. That can be useful for lean teams, but it still works best when the original image quality is sound.
The main types of product photography and tools
If you are evaluating your options, think in terms of workflows rather than isolated tools. Most ecommerce stores use a mix of photography methods depending on the product type, margin profile, and marketing channel.
1. Standard catalog photography
This is your clean, consistent product-on-white or product-on-neutral-background image set. It is the backbone of most ecommerce catalogs and often the safest choice for collection pages, marketplaces, and ads. AcquireConvert’s E Commerce Product Photography category covers this style well, especially for stores that need scalable image standards.
2. Lifestyle and contextual photography
These images show your product in use or in an environment that helps customers imagine ownership. This format is especially useful for home goods, apparel, beauty, and accessories. It may improve shopper understanding where plain cutout images are not enough.
3. Flat lay photography
Flat lays are popular for fashion, beauty, stationery, gift products, and curated bundle shots. They can work well for social, email, and editorial content. If that is relevant to your store, see AcquireConvert’s guides on flat lay photography and flat lay photography ideas.
4. Studio-based shooting
A dedicated setup gives you more control over repeatability, especially if you have many SKUs. That does not always mean renting a commercial space. For many small brands, a compact in-house setup is enough. If you are thinking about that route, this guide to a product photography studio is a practical next read.
5. AI-assisted editing and enhancement
AI tools can speed up common post-production tasks. Current tools available through AcquireConvert’s product data include AI Background Generator, Free White Background Generator, Increase Image Resolution, Remove Text From Images, Background Swap Editor, Place in Hands, Magic Photo Editor, and Creator Studio.
For ecommerce teams, these tools can help create cleaner catalog imagery, produce alternate formats for campaigns, and test visual angles without reshooting every asset. Still, they are best treated as workflow accelerators, not as a substitute for product accuracy. If you sell cosmetics or beauty products, adjacent use cases like an ai makeup generator may also shape how you approach editorial and campaign visuals.

Product photography setup: lighting, background, and a repeatable shot list
Here’s the thing: most Shopify stores do not struggle because they lack “pro” gear. They struggle because their setup is inconsistent. The same product gets photographed in mixed lighting, on a different surface, at a different distance, and your collection page ends up looking like a marketplace listing rather than a brand.
A minimum viable setup is about controlling three variables: light direction, light softness, and background consistency. Once those are stable, your images get easier to edit, your colors are more accurate, and your catalog looks like it belongs together.
A practical minimum viable setup for most Shopify merchants
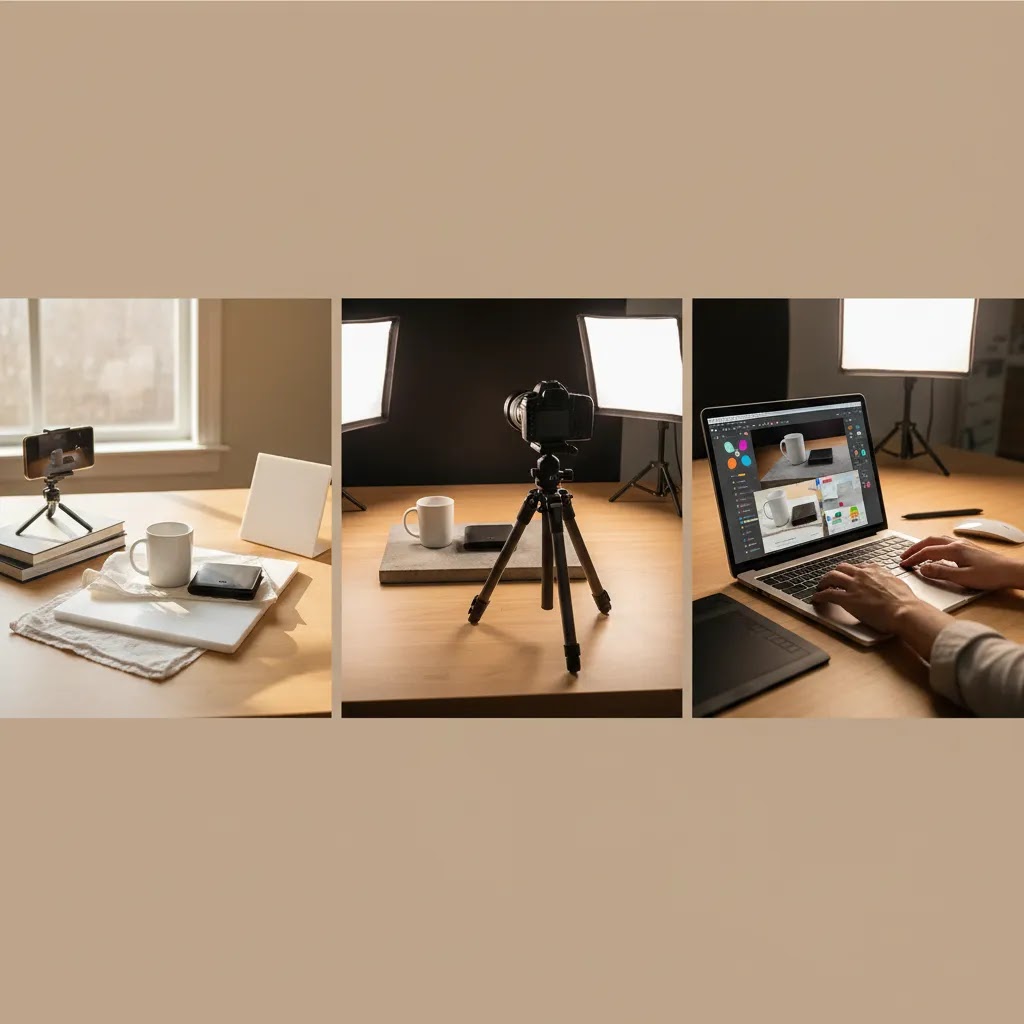
If you are starting from scratch, you typically have two workable paths: a window-light setup, or a basic continuous-light setup. Both can produce solid catalog photos if you keep them consistent.
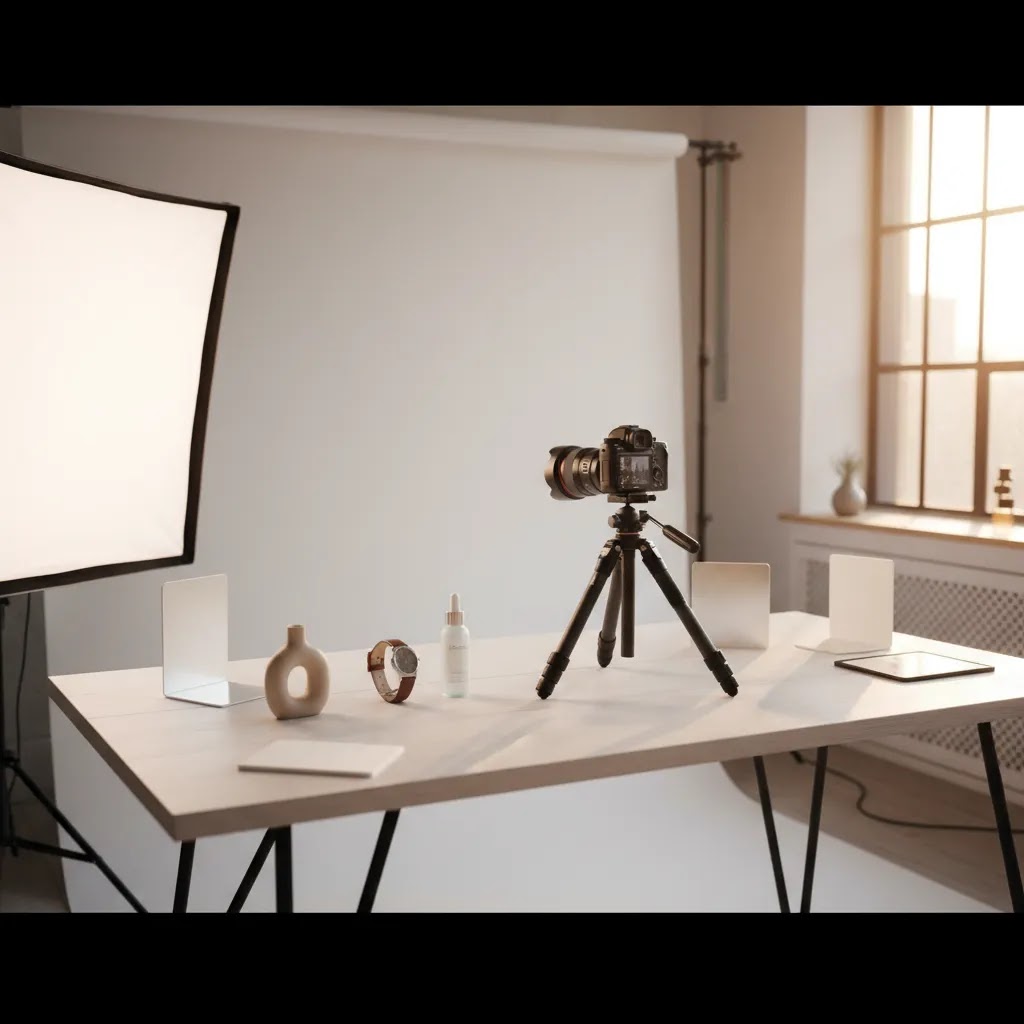
Window-light setup (good for small products and early-stage catalogs): Put a table near a large window and shoot with the window light coming from the side, not from behind the product. Add a diffusion layer if the sunlight is harsh. A thin white curtain can work, the goal is to soften the shadows. On the opposite side of the product, place a white foam board as a reflector to lift shadows and reduce contrast. This is the difference between “dim and gloomy” and “clean and commercial.”
Continuous-light setup (more repeatable across seasons and weather): Use one or two continuous lights with softboxes, positioned at about 45 degrees to the product. If you use two lights, you are usually aiming for a main light plus a fill light, not two equally strong lights that flatten everything. Continuous lighting is often easier than flash for store owners because you can see what you are getting as you adjust.
Backdrop and surface: A simple sweep background (a roll of white or neutral paper that curves from vertical to horizontal) is one of the highest leverage upgrades you can make. It removes hard horizon lines and makes background cleanup much easier. For darker products, a light gray or warm neutral background can sometimes show edges more clearly than pure white.
What each piece actually solves: diffusion softens harsh shadows and specular highlights, reflectors lift shadow detail, a sweep background creates a clean “infinite” look, and a consistent light position keeps your product edges, textures, and colors stable across the catalog.
A repeatable shot list you can use across your catalog
Most product pages do not fail because the hero image is bad. They fail because the rest of the image set leaves questions unanswered. A repeatable shot list helps you cover what shoppers need without reinventing the process for every SKU.
For many products, a solid baseline set looks like this: a straight-on hero, a 3/4 angle (often the most informative), side view, back view where relevant, top-down where relevant, and at least one close-up detail shot that shows texture, closures, labels, or materials. Then add functional shots based on category: scale reference, packaging, and in-use context.
Scale reference: include one image that makes size obvious. This could be the product in a hand, next to a common object, or on a person. It often reduces returns and “is this bigger than I expected?” complaints because the shopper stops guessing.
Packaging and what’s included: if your product comes with accessories, refills, cables, or multiple parts, show it clearly. Ecommerce friction often comes from uncertainty about what arrives in the box.
Keeping framing consistent across variants and new SKUs: mark your tripod position on the floor, keep the same focal length, and keep the product centered in the same part of the frame. If you sell variants, photograph them with the same camera height and angle so customers can compare colorways without their eyes working overtime. This also makes your collection pages look more premium because thumbnails align naturally.
Simple capture guidance without getting overly technical
From a practical standpoint, three rules cover most DIY product photography problems: stabilize the camera, avoid mixed lighting, and keep white balance consistent.
Stability: use a tripod, even for a smartphone. Motion blur is one of the most common reasons product photos look “cheap,” especially indoors.
Avoid mixed lighting: do not combine window light with yellow room lighting. Mixed light makes color correction harder, which matters a lot for apparel, cosmetics, and home textiles. Pick one light source type and commit to it for the shoot.
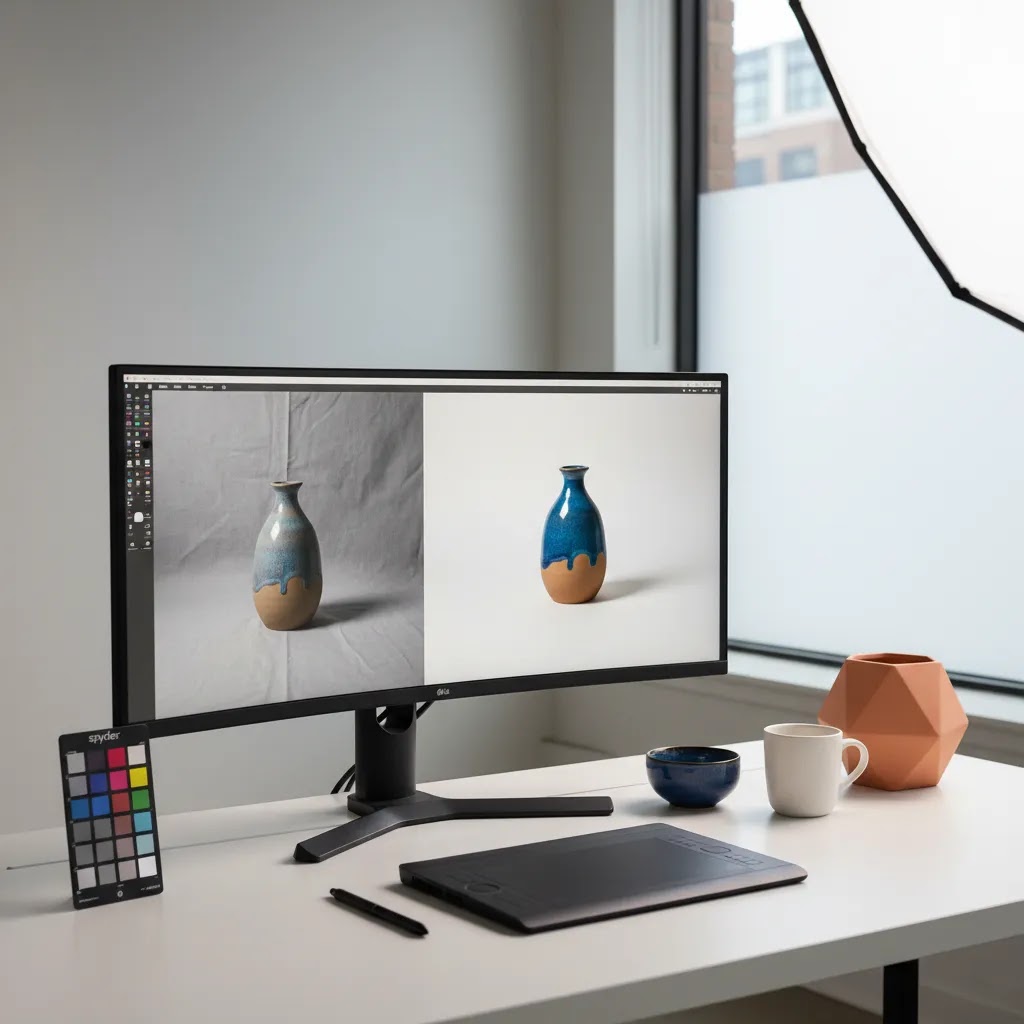
Keep color accurate: set a consistent white balance (or lock it on your phone camera app if possible), and do a quick review on a second screen before you shoot the whole catalog. If your products arrive and look different from your photos, it can create avoidable returns and support tickets. Color accuracy is not just a creative preference, it is a trust and operations issue.
Pros and Cons
Strengths
Considerations
Styling and post-production workflow: from raw photo to storefront-ready assets
Good shoots still need clean finishing. Most ecommerce “editing” is not about making an image look dramatic, it is about making it consistent and truthful across a product page, a collection grid, and a set of variants.
The way this works in practice is a simple checklist you run every time. If you do the same steps in the same order, your catalog stays coherent, and you do not lose hours chasing tiny differences SKU-by-SKU.
A simple editing checklist for ecommerce
Start with the fundamentals: crop and straighten first, then set exposure and contrast, then correct color, and only then do cleanup. If you retouch before you balance exposure and color, you often end up redoing work.
Most stores get the biggest gains from: consistent cropping, consistent brightness, accurate whites, dust and scratch removal, and background cleanup. That last one matters even if you are not doing pure white backgrounds, because edge halos and uneven gradients can make a product look pasted into the page.
When should you stop editing? When the product looks like it does in real life under normal light. Over-processed images can backfire. Skin and fabric can look waxy, metallic finishes can look fake, and heavy clarity can make packaging look damaged. Clean and credible is usually the goal for ecommerce.
File and export standards that work well on Shopify
Now, when it comes to Shopify, the most common mistake is not “low resolution,” it is inconsistent aspect ratios and inconsistent cropping. That is what makes collection pages feel messy.
Pick one primary aspect ratio for your catalog and stick to it. Square (1:1) is common for simplicity, and it tends to behave well in grids. Vertical ratios can work for apparel and on-model images, but you need a firm cropping rule so products do not jump around as customers scroll. The key is that a shopper can compare products quickly without being distracted by layout changes.
Compression is a tradeoff: you want fast loading, but you do not want visible artifacts on textures like knits, grain, or glossy packaging. Export a few test images, upload them, and check them on mobile. In many cases, the “right” file size is the smallest one that still preserves the texture cues shoppers use to judge quality.
File naming is not glamorous, but it is part of scale. Use a consistent naming convention that includes the SKU or handle, the view type, and the variant where relevant. It reduces mistakes when you reorder images, replace assets, or hand work to a contractor.
Using AI tools responsibly during editing
AI can speed up repetitive cleanup, but you still need to keep the product representation accurate. Safe automation usually includes background removal or replacement, creating clean white-background versions, increasing image resolution, and removing stray text or marks that came from the photo environment.
Where you need to be careful is anything that changes the product itself. If AI “improves” texture, changes color, alters labels, or invents details, you can create a customer expectation gap. For Shopify stores, that is not just a brand risk, it can become a returns and support problem. Treat AI outputs like a first draft, review them, and compare them to the real product before you publish.
Who this guide is for
This guide is for ecommerce store owners, Shopify merchants, and in-house marketers who need product images that are commercially useful, not just visually attractive. It is especially relevant if you are choosing between DIY photography, hiring a pro, building a small studio workflow, or introducing AI editing into your content process.
If you are early-stage, this guide will help you prioritize the basics. If you are already selling and need better conversion support from your visuals, it will help you spot workflow gaps. If your catalog is growing fast, it should also help you think more clearly about consistency, scalability, and where automation fits.
AcquireConvert’s practical recommendation
For most Shopify store owners, the best approach is not choosing between traditional photography and AI. It is using each where it adds the most value. Start with a dependable capture process so your images are accurate and consistent. Then use AI selectively for repetitive editing tasks, alternate backgrounds, resizing, or campaign-specific variations.
That balanced approach reflects how experienced ecommerce operators usually work. They protect the integrity of the product image first, then look for workflow gains second. AcquireConvert takes the same view across its educational content. Led by Giles Thomas, a Shopify Partner and Google Expert, the site focuses on practical decisions that help store owners improve merchandising without getting distracted by hype.
If you are comparing setup options, start with the foundational guides linked in this article, then branch into channel-specific needs. For example, clean catalog imagery may support your Shopify PDPs and Google Shopping assets, while more styled visuals may be better for social and retention campaigns. AcquireConvert’s specialist coverage is useful here because it connects photography decisions to how ecommerce stores actually sell.
How to choose the right setup
1. Start with your product type. Small reflective objects, beauty products, apparel, and home goods all need different lighting and styling decisions. A watch, for example, often needs more control over glare, detail, and close-up sharpness than a kraft-paper notebook. If you are researching product photography watch setups specifically, think first about reflection control and macro detail before you think about backgrounds or props.
2. Match the workflow to the channel. White-background images may be the priority for product pages, feeds, and marketplace compliance. Lifestyle images may do more work in paid social or email. Flat lays may suit promotional graphics and seasonal edits. One image style rarely handles every job well.
3. Decide what needs to be shot versus edited. This is where AI can be useful. If your base image is strong, tools like background generators, white-background editors, and resolution enhancers may help you produce variants more efficiently. If your base image is weak, AI usually exposes the weakness rather than fixing it completely. That is why editing product photography works best as the second half of the process, not the first.
4. Be realistic about internal resources. DIY is viable if someone on your team can own the workflow, maintain standards, and process assets consistently. Hiring a professional may be the better fit if your products are hard to shoot, your brand relies heavily on premium visuals, or you need launch-ready assets on a tight timeline. Asking whether product photography is profitable misses the more useful question: does the image investment support conversion, perceived value, and channel performance well enough to justify the spend?
5. Build for repeatability. Store owners often focus on the first shoot and forget the next 200 products. Document your lighting setup, angles, dimensions, background standards, crop rules, and file naming conventions. That makes future shoots faster and keeps your catalog from looking inconsistent six months later.
For many merchants, the right answer is a hybrid model: shoot core catalog images carefully, use AI tools for production efficiency, and reserve pro product photography for campaigns, hero assets, or high-value collections where visual polish can matter more.
Product photography ideas by category, plus common mistakes to avoid
Consider this: “product photography” is a broad term, but your customers are not judging you by a broad standard. They are comparing you to whatever else they have seen in your category. That is why a few category-specific rules of thumb can save a lot of trial and error.
Clothing and apparel: on-model, flat lay, and ghost mannequin
For apparel, customers are buying fit and drape as much as color. On-model photos often do the best job of showing proportion and how a garment sits when it moves, but they can be slower and more expensive to produce consistently.
Flat lays work well for drops, bundles, and email or social creatives, and they can be very consistent for catalog workflows. The tradeoff is that they do not show how the garment fits a body, so you may need extra detail shots for key areas like collars, cuffs, waistbands, and stretch.
Ghost mannequin style can be useful when you want a clean, “wearable” shape without always shooting on a model. It typically requires more setup and post-production, but it can create a scalable middle ground for stores that need a consistent apparel presentation.
Beauty and cosmetics: texture, swatches, and packaging accuracy
Beauty shoppers often want to see texture and finish. Macro detail shots can help, but they need to be sharp and well lit. If you show swatches, keep them honest. Lighting and white balance can change how a shade reads, so consistency matters more than making it look “extra vibrant.”
Packaging is also part of the purchase decision in beauty. If the product is small, include a scale reference. If the set includes multiple items or sizes, show them together in one clear image so customers understand what they get.
Reflective products: watches, jewelry, and glossy finishes
Reflective products tend to expose DIY setups. The product reflects your room, your camera, and any harsh light source. The fix is usually softer light and better reflection control. Diffusion helps, and so does adjusting angles so the main reflection falls where it looks clean rather than distracting.
Also, prioritize edge definition. A reflective product on a pure white background can lose its outline. A very light gray background, or a controlled shadow, can sometimes show the shape more clearly while still looking catalog-clean.
Common mistakes that hurt conversion, and quick fixes
Inconsistent lighting and shadows: your product grid looks messy, and variants look like different products. Fix this by locking light position and camera position, then using the same edit settings for the whole set.
Inaccurate color: this can create returns and trust issues. Fix it by avoiding mixed lighting, keeping white balance consistent, and checking a reference product shot at the start of each shoot.
No scale reference: customers guess, then hesitate. Fix it with one image that communicates size instantly, especially for small products or oversized items where expectations vary.
Too few angles: shoppers cannot “inspect” the product. Fix it with a baseline set of angles and one or two close-ups that answer category-specific questions.
Distracting props or styling: props should support context, not steal attention. Fix it by keeping your core catalog images clean, then using styled props for lifestyle shots where the goal is persuasion and brand story.
When lifestyle shots are worth it, and when catalog should dominate
For most Shopify store owners, catalog shots should be your foundation because they are the most versatile across collection grids, product pages, and marketplaces. Lifestyle shots are worth the effort when the product needs context to sell, such as apparel fit, home goods in a room, or items where scale is hard to judge.
Think of it this way: if customers mainly need to verify details and compare options quickly, prioritize clean catalog coverage. If customers need to imagine ownership to understand value, invest in a few strong contextual images that do that job.
Frequently Asked Questions
What is product photography in ecommerce?
Product photography is the process of creating images that present merchandise clearly and convincingly for online shoppers. In ecommerce, that usually includes clean catalog shots, detail images, scale references, lifestyle photos, and edited versions for different channels. The goal is to help customers understand the product well enough to buy with confidence.
Do I need a professional camera for product photography?
Not always. Many small stores start successfully with a modern smartphone, controlled lighting, and a stable setup. The more important factors are consistency, exposure, sharpness, and background control. A dedicated camera may become worthwhile when you need better lens options, closer detail, improved low-light performance, or more repeatable commercial results.
Can AI replace professional product photography?
Usually not completely. AI can help with background changes, cleanup, resolution enhancement, and alternate scene creation, but it still depends on the quality and accuracy of the original image. For hero images, high-end campaigns, or products where texture and detail are critical, professional photography often remains the safer choice.
How should Shopify store owners use AI product photography tools?
Use them to speed up production, not to avoid product accuracy. Good use cases include white-background creation, resizing, scene testing, and repurposing assets for ads or social. For Shopify merchants, the best practice is to keep PDP images truthful and consistent, then experiment more freely with campaign creatives and supporting content.
What makes a product photo convert better?
A useful product photo is clear, accurate, and aligned with shopper intent. Customers want to see shape, scale, material, finish, and use context. Conversion impact often comes from removing uncertainty, not from making the image look dramatic. Sharpness, consistent lighting, detail shots, and realistic color usually matter more than heavy effects.
Is product photography profitable for a small ecommerce business?
It can be, but it is better evaluated as an investment in merchandising and conversion support rather than a standalone profit center. Stronger product images may help increase trust, reduce confusion, and support better ad and PDP performance. The value depends on your margins, category, competitive standard, and how weak your current visuals are.
What is the best background for product photography?
White or neutral backgrounds are usually the most versatile starting point for ecommerce because they keep attention on the item and work well across storefronts and feeds. Styled backgrounds can still be valuable for brand storytelling, social, and promotional content. The right choice depends on whether the image is meant to document or persuade.
How many images should a product page have?
Most product pages benefit from multiple image types rather than a fixed number. A practical set often includes a clean hero image, alternate angles, close-up detail shots, scale reference, and at least one contextual image where relevant. The exact number depends on product complexity, but too few images usually creates more buying friction.
What is the difference between catalog photography and lifestyle photography?
Catalog photography is primarily descriptive. It presents the item clearly, often on white or a simple background. Lifestyle photography is more aspirational and contextual. It shows the product in use or within a scene. Most ecommerce stores need both, because each supports a different stage of customer decision-making.
What is product photography?
Product photography is commercial photography focused on presenting a product clearly and accurately. In ecommerce, the goal is to help a customer evaluate the item without touching it, so the images need to show shape, size, materials, details, and real-world context where relevant.
What is the 20-60-20 rule in photography?
The 20-60-20 rule is a practical planning idea some photographers use to balance a product image set. In many ecommerce shoots, it can mean aiming for around 20% clean “must-have” catalog shots, 60% standard supporting angles and detail images, and 20% creative or lifestyle shots for marketing. The exact mix varies by category, but the point is to avoid spending all your effort on hero images while neglecting the angles that answer buyer questions.
What is product photography AI?
Product photography AI refers to tools that use machine learning to speed up parts of the product image workflow. Common examples include background removal or replacement, white-background generation, resolution enhancement, and creating alternate scenes. It can be useful for production efficiency, but you still need to review outputs to make sure the product looks like the real item and that details like labels and colors stay accurate.
How do you photograph clothing products for ecommerce?
Start with consistent, well-lit catalog coverage, then add images that communicate fit and fabric. Many stores use a mix of on-model photos for proportion, flat lays for consistency and variety, and close-ups for details like seams, texture, and stretch. Keep your camera height and crop consistent across variants, avoid mixed lighting so colors stay accurate, and include at least one image that helps shoppers understand scale and drape.
Key Takeaways
Conclusion
Product photography is one of the clearest places where merchandising, brand presentation, and conversion optimization meet. If your images are inconsistent, unclear, or hard to scale, shoppers feel that friction immediately. The good news is that most stores do not need a massive studio budget to improve. They need a better process, clearer standards, and a smarter mix of capture and editing tools.
AcquireConvert is built for that kind of practical decision-making. If you want to keep improving, explore the related photography guides linked above and use the wider site as a specialist resource for Shopify growth, AI-assisted visuals, and ecommerce optimization. Giles Thomas’s experience as a Shopify Partner and Google Expert gives the advice a useful commercial lens for real store owners.
This content is editorial and intended for educational purposes. It is not a paid endorsement unless explicitly stated otherwise. Pricing, product availability, and tool features are subject to change, so verify current details directly with the provider. Any performance outcomes discussed are illustrative only and are not guaranteed.

Hi, I'm Giles Thomas.
Founder of AcquireConvert, the place where ecommerce entrepreneurs & marketers go to learn growth. I'm also the founder of Shopify agency Whole Design Studios.