Best Lights for Photoshoot by Budget (2026)
If you are choosing lights for photoshoot work, price matters, but matching the light to your shooting goals matters more. A clothing brand shooting flat lays at home needs a different setup than a Shopify store creating clean catalog images on a white backdrop. The good news is that you do not need to overspend to get sharp, usable ecommerce photos. What you do need is a practical buying framework that helps you avoid weak output, inconsistent color, and gear that does not fit your space. This guide breaks down the best lighting options by budget, the trade-offs at each tier, and what actually helps when you are shooting products for an online store. If you want supporting context on specific lighting styles, start with our guide to loop lighting photography.
Contents
How to choose lights by budget
The best lights for photography are not always the most expensive ones. For many ecommerce stores, a modest continuous lighting setup can be enough to produce consistent product images, especially if you are shooting small items, cosmetics, accessories, or tabletop scenes.
Your budget should follow three factors: what you sell, where you shoot, and how fast your team needs to work. A founder shooting ten SKUs a month in a spare room can often work with a basic softbox or LED panel kit. A store producing weekly campaigns, lifestyle scenes, and marketplace-ready product images may need stronger output, better modifiers, and tighter control over shadows.
Budget also affects reliability. Lower-cost lights can work well, but they often have weaker stands, less accurate color temperature, and lower power. That may be manageable for a home setup, but frustrating in a busy product photography studio. If you are still building your setup, our broader guide to photography lighting equipment can help you plan the rest of the kit around your lights.
Best lights for photoshoots by budget
Under $150: basic continuous lights for home sellers
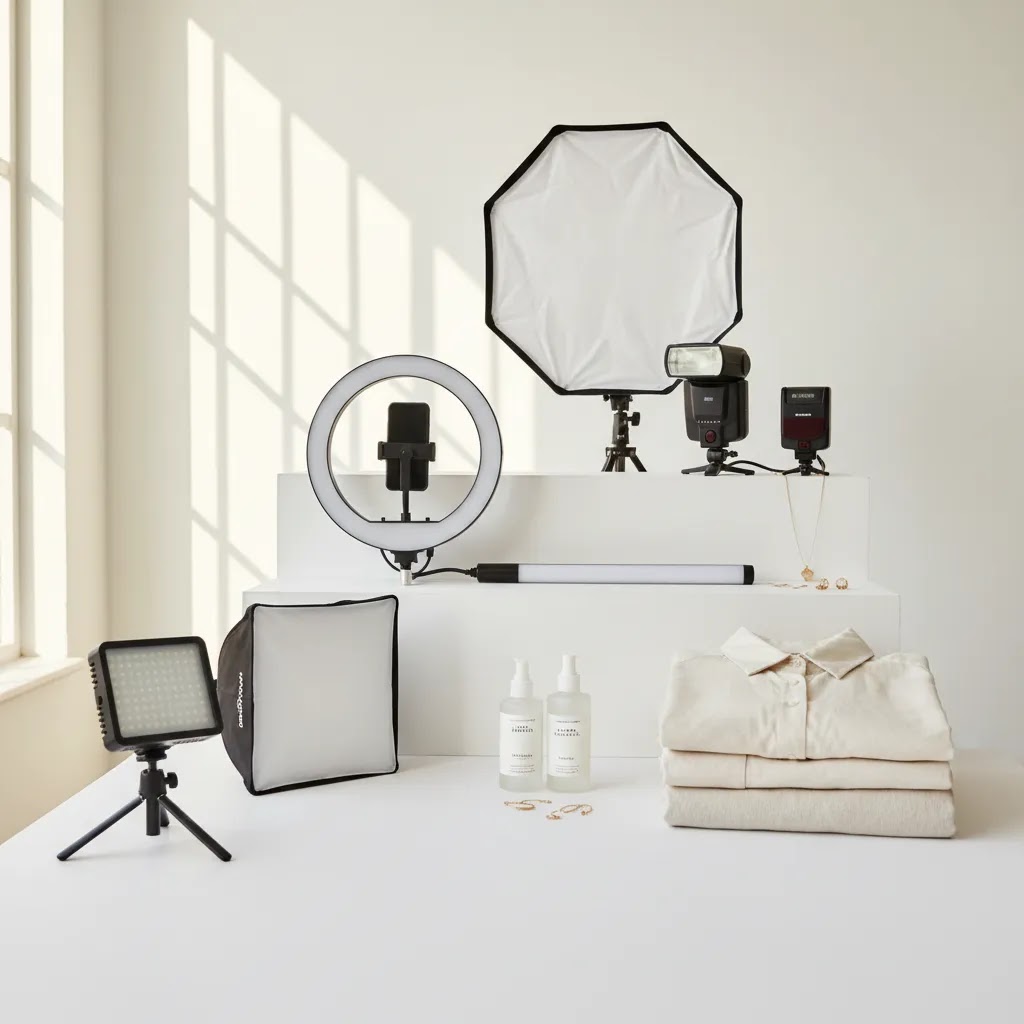
This range is best for new ecommerce sellers, Etsy shops, and small Shopify stores shooting simple product images at home. Typical options include entry-level LED panels, ring lights, or softbox kits. They are affordable and beginner-friendly, but output is limited. You may need to place lights close to the subject, which can be tricky for larger products or full-body apparel shots.
These lights can work well for photoshoot for online products if your items are compact and you are using a white background for photoshoot scenes. They are less ideal for reflective surfaces, glass, or clothing on models because those setups often need more power and better diffusion.
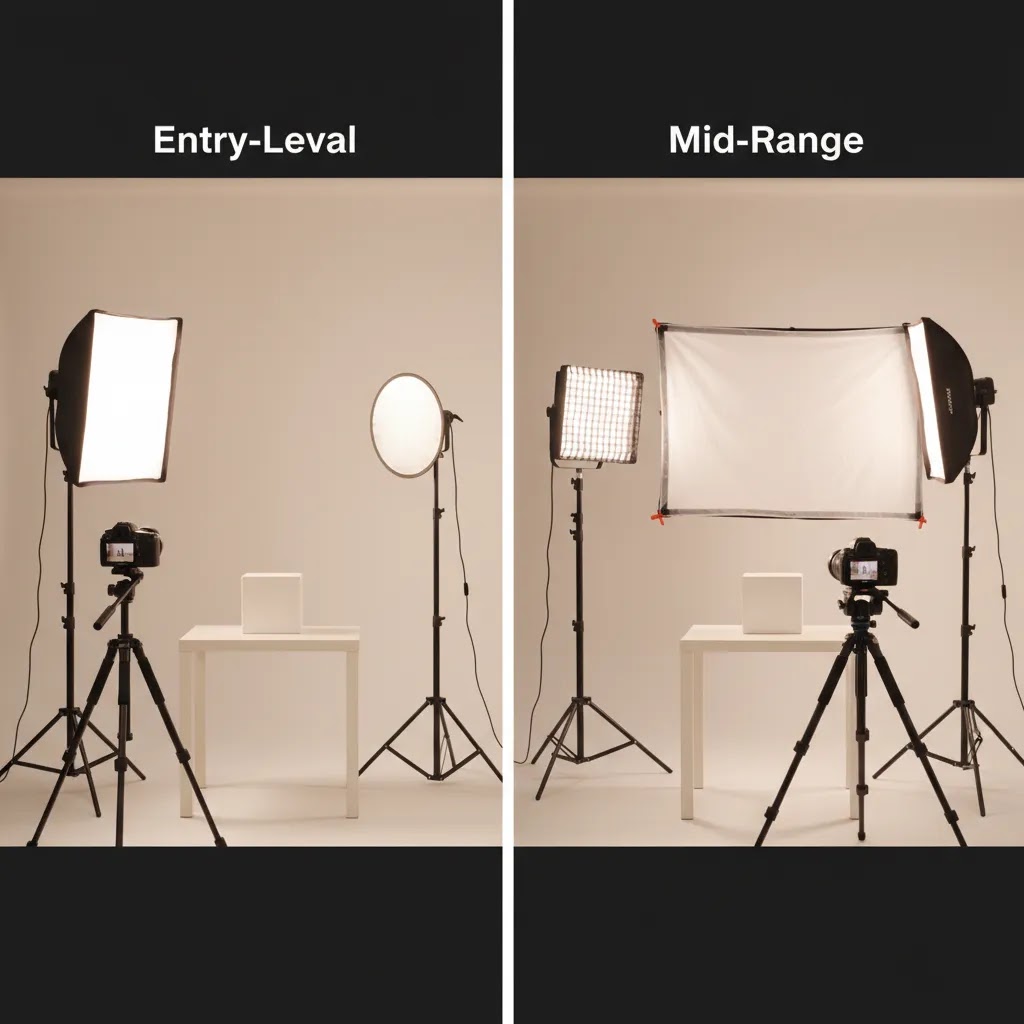
$150 to $400: the sweet spot for many ecommerce stores
This is usually the best value tier for growing brands. You can access stronger LED monolights or better continuous light kits with larger softboxes, dimming controls, and more stable stands. For many stores, this is the range where lighting starts to feel dependable instead of improvised.
If you are creating product pages, ads, social content, and some lifestyle imagery, this tier is often enough. It suits photoshoot for clothing brand work, medium-size product scenes, and cleaner white backdrop for photoshoot setups. This is also the range where you can start thinking about future expansion, like adding a second or third matching light.
$400 to $800: strong output and better consistency
At this level, you are paying for better build quality, more accurate color, stronger output, and more modifier compatibility. That matters if your team shoots often or needs repeatable results across collections. If you are listing products on Shopify, marketplaces, and paid ad channels, consistency matters because visual variation can make your store look less polished.
This tier is a strong choice for lights for product photography if you shoot larger items, need more separation from the background, or want faster workflows. Stronger lights also help when you want a bright background without blowing out the product itself.
$800 and up: advanced setups for serious in-house production
This range is usually right for brands doing frequent campaigns, lookbooks, larger set builds, or content for multiple channels. The advantages are not only brightness. You often get quieter operation, better control, stronger accessory ecosystems, and more durable gear that holds up under repeated use.
If you are shooting apparel, complex props for photoshoot scenes, or mixed content that includes stills and short-form video, this budget gives you more flexibility. It may not be necessary for every store, but it could save time and improve consistency for higher-volume teams.
What lights do you need for a photoshoot?
Here is the thing, most store owners are not stuck because they cannot find “the best” light. They are stuck because they do not know what a realistic starter kit looks like for their specific shoot style. The goal is to pick a minimal setup you can repeat across SKUs, not a complicated rig you only use once.
Starter kits by shoot type
Flat lay (top-down on the floor or a table)
A single diffused light can work, but it is easier with two matching lights so you can keep shadows even on both sides. If you only buy one light, plan to use a large diffuser and a reflector (or white foam board) on the opposite side to fill shadows.
Tabletop product photos (small to medium products on a table)
Two lights is the practical baseline for many Shopify stores. Use one as your key light with a softbox, then use a second light as fill (lower power) or as a background light if you are chasing a cleaner white. If you are photographing glossy packaging, diffusion matters more than raw brightness.
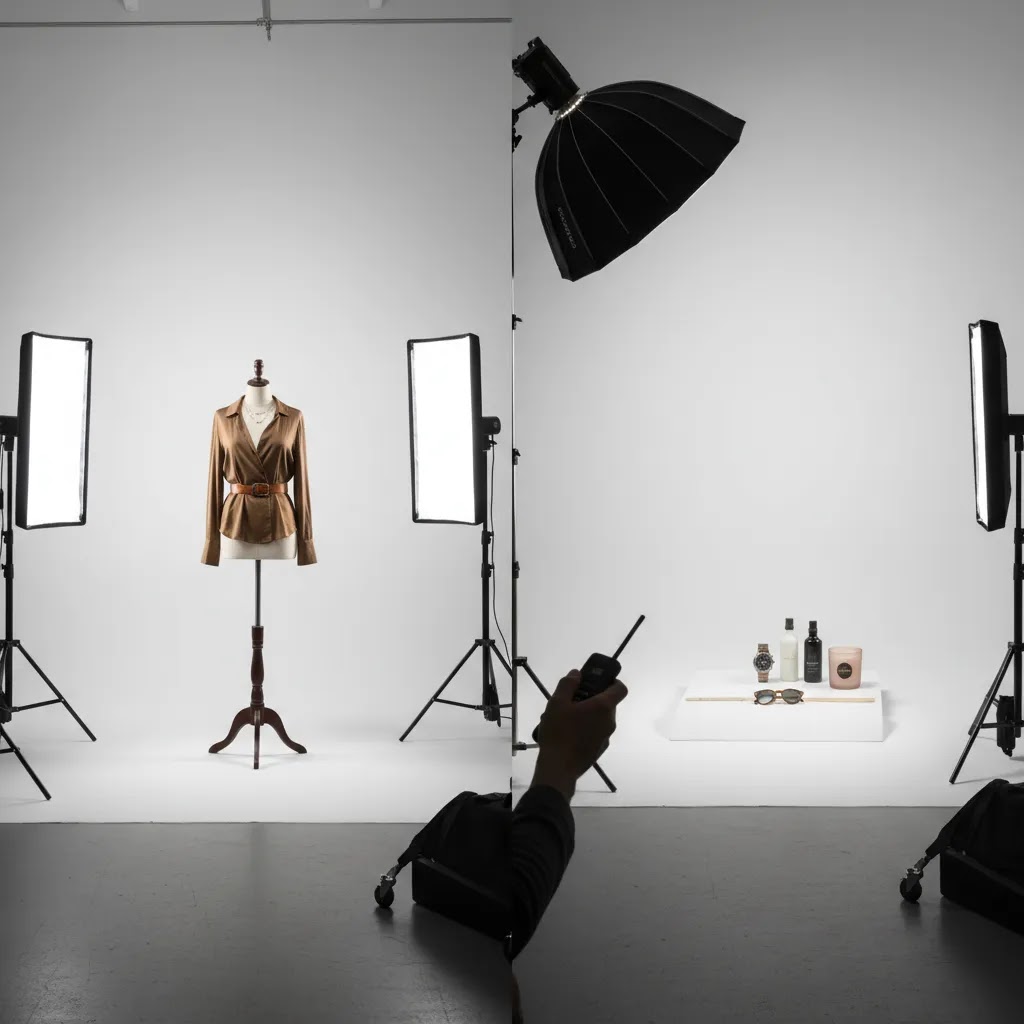
Apparel on a mannequin
Two lights is usually workable, three can make it cleaner. One key light shapes the garment, the second fills shadows and reduces contrast around folds. If you are shooting against white, the third light is often used to push the background brighter without flattening the clothing.
Apparel on a model
Plan for at least two lights. Full-body shots typically need more coverage, and the distance between the light and the subject is larger than in tabletop photography. A second light helps keep the face and the clothing evenly lit, especially if you are in a room with low ceilings or mixed ambient light.
White background catalog (clean PDP images)
The most repeatable setup is two lights minimum, with a third light being helpful in many cases. One light is your key on the product. The second is either fill or background, depending on where your shadows are landing. The third is used to light the background separately or create subtle separation on the product edge.
One light vs two lights vs three lights
Think of it this way, each extra light solves a specific problem.
One light is for simple product photos where you can control spill and shape shadows with diffusion and reflectors. It is a good starter choice if space is tight.
Two lights gives you control. Typically, you are using a key light and a fill light, or a key light and a background light. This is where most ecommerce workflows start to feel consistent instead of improvised.
Three lights is about speed and separation. You can keep your product lighting consistent while separately controlling the background or adding a rim light to define edges. This is useful for white background work and for darker products that disappear into shadows.
When a ring light helps, and when it becomes limiting
A ring light can be helpful for small items and creator-style content where you want quick setup, even light, and catchlights for face-forward video. It can also be fine for very small product shots where the camera is close.
The reality is that ring lights get limiting as products get larger or more reflective. Because the light source is centered around the lens, images can look flat, and circular reflections can show up on glossy packaging, glass, and shiny metal. For apparel and larger sets, you will usually get better shape and more control from a softbox or a larger diffused source placed off-axis.
What features matter most
When store owners compare lights, they often focus on wattage first. That matters, but it is only one part of the decision. Here are the features that usually have the biggest impact on ecommerce image quality and workflow.
Color accuracy
If your products need true-to-life color, especially fashion, beauty, or home goods, accurate light is essential. Poor color rendering can create extra editing work and increase the risk that products look different online than they do in person. That can affect trust and may contribute to returns.
Modifier compatibility
A light on its own is rarely enough. Softboxes, umbrellas, reflectors, grids, and diffusers shape the final image. If you are shooting products, modifier compatibility matters almost as much as the light body. A lower-cost light with poor modifier options may become limiting very quickly.
Continuous light vs flash
Continuous lights are easier for beginners because you can see the effect in real time. They are a practical choice for home studios, content teams, and hybrid photo-video workflows. Flash can deliver more power and sharpness, but it has a steeper learning curve. For many merchants, continuous setups are the better starting point for product photography lighting.
Space requirements
A compact room changes what will work. Large softboxes in a low-ceiling home office can create as many problems as they solve. If you are working with a background for photoshoot at home, check the full footprint of stands, modifiers, and shooting distance before buying.
Background control
If your goal is a clean white background for ecommerce, you may need separate control over your product light and background light. One light can work for basic setups, but two or three lights usually make the process easier. If that is your main goal, see our White Background Photography resources for setup ideas that fit smaller spaces.
Lighting rules that actually help ecommerce product photos
Most “lighting rules” you see online are written for portraits, not for a Shopify store trying to keep 50 SKUs looking consistent on a product grid. From a practical standpoint, you want a few simple principles you can repeat every time, even if your studio is a spare bedroom.
The 20-60-20 rule (a simple way to balance your frame)
The 20-60-20 rule is a composition idea that can be useful for ecommerce, especially lifestyle shots and branded product photos. The concept is simple: you aim for a frame where roughly 60% of the visual weight is the subject, and the remaining 40% supports it, often split into smaller areas of background and negative space.
For product photos, that usually means you avoid two common problems: the product is too small (it looks like a random snapshot), or the product is so tight that shoppers cannot read the shape and details. Use it as a quick check when you are shooting hero images for a collection, or when you are creating ads where the product still needs to be clear on a small screen.
The “three rules of light” that matter most for product photos
People talk about the “three rules of light” in different ways, but for ecommerce product work, these are the three that typically make the biggest difference:
Direction and quality are what make a product look premium or flat. Consistency is what makes your store look trustworthy at a glance.
Fast positioning guidance you can apply right away
If you need a simple starting point, place your key light at about a 45-degree angle to the product and slightly above it, then bring it in close enough that the light source feels big relative to the subject. That “big source” effect is what gives you softer shadows and smoother gradients.
If shadows are too deep, do not rush to add power. First, add diffusion (softbox, umbrella, or diffusion cloth) or add fill with a reflector. If you add a second light as fill, keep it lower power than the key so you do not flatten everything.
Practical caveats for Shopify product photos
Keep color consistent across SKUs. If you shoot one product under warm room light and the next under cooler LEDs, your product grid will look messy, even if each image is “good” on its own. Lock your camera white balance, turn off mixed room lighting where you can, and keep your lights at the same color temperature throughout the shoot.
Watch specular highlights on glossy packaging. Shiny labels, metallic finishes, and plastic pouches can pick up harsh reflections. The fix is usually not “change the exposure.” It is to increase diffusion and adjust the angle so reflections fall away from the camera.
Avoid mixed color temperature in small rooms. Overhead bulbs, window light, and LEDs can fight each other. If you are serious about repeatability, control ambient light. Close curtains, turn off ceiling lights, then build the scene using your photo lights as the only light source.
Pros and Cons
Strengths
Considerations
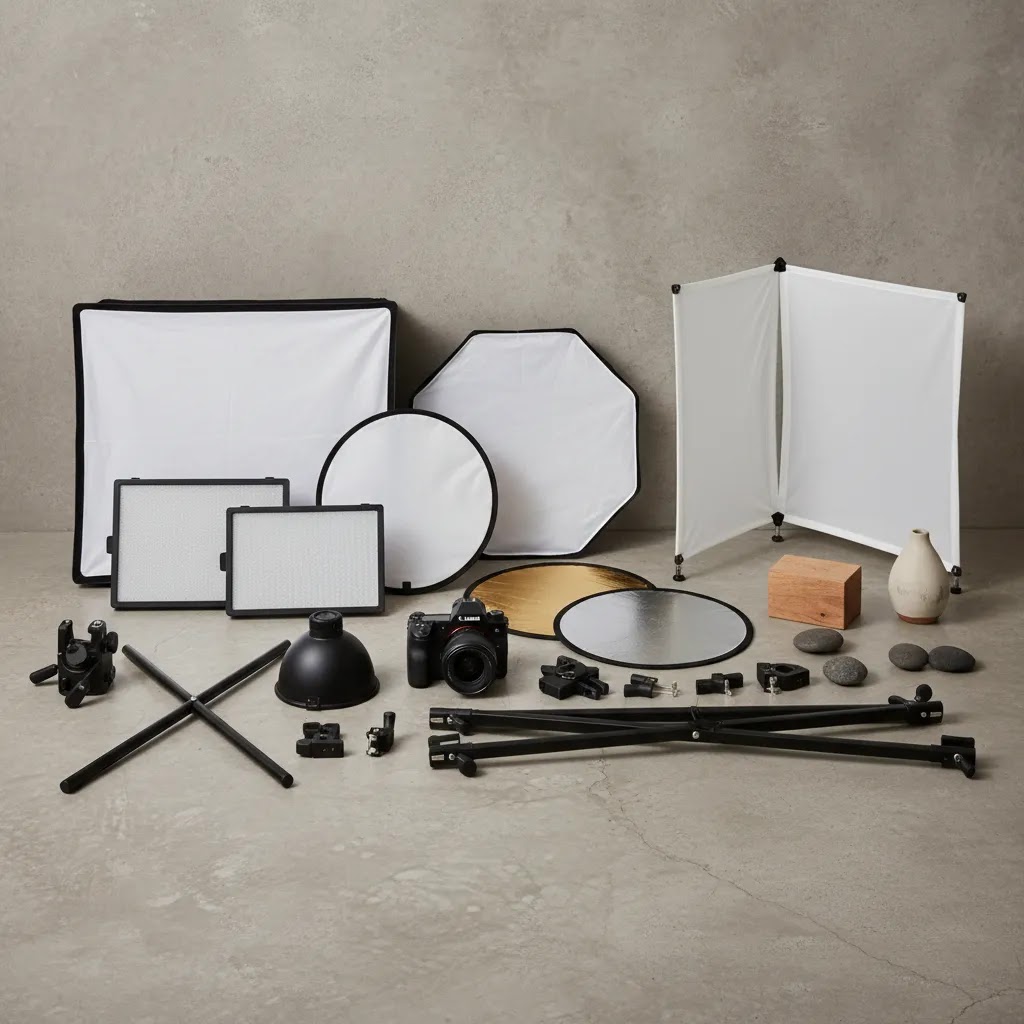
Types of lighting and when each is best
If you have been shopping for lights for photoshoot setups, you have probably noticed product listings throwing around terms like LED panel, COB LED, softbox kit, and ring light. Now, when it comes to ecommerce product photos, “best” usually means: controllable, diffused, color-consistent, and fast to work with in the space you actually have.
LED panels (flat panels)
LED panels are popular because they are compact and straightforward. They can work well for tabletop photography, small sets, and video, especially if you do not need huge output. The trade-off is that many panels are not as punchy as COB-style lights, so you may end up working closer to the subject, using higher ISO, or struggling to light larger scenes evenly.
Panels can also spill light around a room more easily unless you have barn doors or grids. If you are trying to keep a white background controlled, spill can make it harder to separate product from background lighting.
COB LED monolights (single-source LEDs)
COB LEDs are a common step up for store owners because they are brighter and work with a wider range of modifiers. They behave more like a traditional studio light, meaning you can put them into softboxes, add grids, and shape the light in a more intentional way.
For many Shopify stores shooting consistent catalog photos, COB LEDs are often a solid foundation because you can build a repeatable two-light or three-light setup and expand it later with matching units.
Softbox kits (modifier-focused bundles)
Some kits are sold as “softbox lighting” rather than as a specific light type. In practice, the softbox is doing most of the work by making the light source larger and softer. For products, that is usually what you want, especially for apparel, beauty, and anything reflective.
The limitation is that cheaper kits may come with weaker light heads and stands. If you are shooting every week, pay attention to stability and how easily the softbox mounts and holds position, because that affects your workflow more than it seems on day one.
Ring lights
Ring lights are designed for quick, front-facing lighting. They can be useful for small product demos and creator-style content, and they can help reduce shadows in tight spaces.
For classic ecommerce product photography, ring lights tend to be less flexible. They can produce flat lighting, and reflective items often show the ring shape. If you want your product to have shape and texture, an off-camera diffused light is usually easier to control.
Quick decision factors that matter for store owners
Portability: If you move your setup between rooms, panels and smaller softbox kits are easier to handle. COB setups can still be portable, but they often involve bigger modifiers and sturdier stands.
Space and spill control: If you are in a small room, being able to add a grid or control spill can save you hours in cleanup and retouching. COB lights with modifiers often give you more control.
Modifier ecosystem: A light that works with common softboxes, grids, and reflectors gives you room to grow without replacing everything. This matters once you start shooting more than one product category.
Stand stability: This is one of the least exciting specs, and one of the biggest day-to-day frustrations. If you are using larger softboxes, you need stands that do not drift or tip easily.
Indoor vs outdoor shoots
Indoor product shoots are all about controlling ambient light and creating repeatable conditions. Continuous lights work well here because you can see what is happening as you adjust angles and diffusion.
Outdoor shoots can work for lifestyle content, but they add variables. If you are using continuous lights outside, you may need battery power, and you will be competing with sun brightness. Wind is also a real issue, softboxes can turn into sails, so stability and sandbags matter. In many cases, outdoor product photography works best when you treat your lights as subtle fill rather than trying to overpower daylight.
Who this guide is for
This guide is for ecommerce operators who want to make a smart lighting decision before spending on gear. If you run a Shopify store, sell on marketplaces, or manage product content for a growing brand, your main concern is usually not photography theory. It is getting clear, consistent images that support sales.
It is especially useful if you are comparing lights for product photography, building a studio for photoshoot work at home, or upgrading from a basic ring light or window-light setup. If you need more detailed buying guidance across use cases, our best lighting for photography article is a helpful next step.
AcquireConvert recommendation
For most ecommerce stores, the safest decision is to buy lights that match your current workflow, not your aspirational studio setup. In practice, that usually means choosing a reliable mid-range continuous lighting kit before investing in advanced flash systems or oversized modifiers. If your store is focused on clean PDP imagery, catalog consistency, and manageable in-house production, start with enough output for one hero light and one support light.
At AcquireConvert, we look at these decisions through the lens of real store operations. Giles Thomas brings Shopify Partner and Google Expert experience to content that helps merchants make practical choices around conversion-focused visuals, product page assets, and scalable workflows. For more context, explore our Product Photo Lighting resources and supporting guides on lighting setups, white backgrounds, and studio planning.
Selection guide
1. Start with your product type
Small items like skincare, jewelry, supplements, and accessories are more forgiving. You can often get strong results with lower-output LEDs and a compact table setup. Larger products, apparel, and lifestyle scenes need more power and more control. If you are shooting a photoshoot for clothing brand campaigns, weak lighting usually shows up fast in muddy shadows and flat color.
2. Match the light to your publishing channels
If you only need simple product page images, your setup can stay lean. If you also create social ads, reels, UGC-style content, and marketplace assets, continuous lights become more useful because they support both stills and video. This is a common need for growth-stage brands trying to keep production in-house.
3. Think beyond the light body
Many disappointing purchases come from ignoring modifiers and support gear. A decent light with a poor softbox or unstable stand may slow your team down. If you are building a repeatable setup, list the full kit before buying: light, stand, modifier, background, clamps, and reflectors. This is especially important for white background for photoshoot work, where control matters more than raw brightness.
4. Choose for consistency, not just brightness
Brighter is not always better. For ecommerce, consistent output and color often matter more than peak power. Your goal is to make your store look trustworthy and visually consistent across collections. Shoppers may not know why one product page feels cleaner than another, but they notice the difference.
5. Build a setup you can actually use every week
The best lights for photoshoot work are the ones your team will use consistently. If setup takes too long, if the gear is awkward in a small room, or if it requires too much trial and error, production tends to stall. For many merchants, a simpler two-light setup beats a more advanced system that sits in the box. If you are planning a fuller home or warehouse setup, our guide to product photography studio planning can help you map the space realistically.
Frequently Asked Questions
What are the best lights for photoshoot work at home?
For home setups, continuous LED lights are usually the most practical place to start. They are easier to learn, work well in smaller rooms, and support both stills and short-form video. If you sell compact products, a two-light LED setup with softboxes is often enough to create clean ecommerce images without overcomplicating the workflow.
Are continuous lights better than flash for ecommerce products?
Continuous lights are often better for beginners and small store owners because you can see the lighting effect in real time. Flash may offer more power and sharper results in some cases, but it adds complexity. If your priority is speed, usability, and repeatability for in-house product shoots, continuous lighting is usually the safer starting point.
How many lights do I need for product photography?
Many ecommerce stores can start with one light and a reflector, but two lights give you much better control. A common setup uses one key light on the product and another light or reflector to soften shadows or brighten the background. For pure white backgrounds, a third light may help create cleaner separation and more consistent results.
What lights do I need for a photoshoot?
Most ecommerce photoshoots can be covered with a simple continuous lighting kit. For flat lays and small tabletop products, one diffused light plus a reflector can work, but two matching lights is usually more consistent. For white background catalog photos and apparel, two lights is a practical baseline, and a third light can help you control the background separately or add cleaner edge separation.
What is the 20-60-20 rule in photography?
The 20-60-20 rule is a simple framing guideline that helps you balance your subject and supporting space in the image. For ecommerce, it is most useful for lifestyle and branded product photos where you want the product to stay visually dominant without feeling cramped. Use it as a quick check that your product is clear, readable, and not getting lost in props or background.
What are the three rules of light for photography?
People define this differently, but for ecommerce product photos, the three that matter most are direction (where the light comes from), quality (how soft or hard it is), and consistency (keeping the same look across SKUs). If you can keep those three under control, your product pages will typically look more cohesive and require less corrective editing.
What type of lighting is best for photos?
For most Shopify store owners, continuous LED lighting is the most practical option because it is predictable and supports both photos and video. Within continuous lighting, COB LED monolights with softboxes often offer the best balance of output and control, while LED panels can be convenient for tight spaces. Ring lights can work for creator-style content and small items, but they can be limiting for larger products, apparel, and reflective surfaces.
What lighting works best for a white background for photoshoot setups?
A white background usually looks best when the subject and background are lit separately. If one light has to do everything, the background can turn gray or the product can lose detail. Soft, diffused lights with enough output make the process easier, especially if you are photographing products for your store rather than editorial portraits.
Do I need expensive lights for product pages?
No. Many stores can get solid product page images with mid-range lights, especially when shooting smaller products in a controlled setup. Higher-priced lights may improve speed, reliability, and modifier options, but they are not automatically necessary. The right choice depends on your product size, room, content volume, and how often your team shoots.
What is the best budget range for growing Shopify stores?
For many growing Shopify brands, the $150 to $400 range is the most practical starting point. It often delivers better output, more stable accessories, and fewer frustrations than entry-level kits. That makes it a sensible middle ground for brands that need regular product content but are not yet building a full commercial studio.
Can I use the same lights for product photos and video?
Yes, and that is one reason continuous LEDs are popular with ecommerce teams. If you shoot product pages, social clips, and behind-the-scenes content, one lighting setup can support all three. You still need to check output and color quality, but hybrid use is one of the strongest arguments for buying continuous lights first.
What should I buy before upgrading to stronger lights?
Before you buy more powerful lights, make sure your modifiers, stands, and backdrop setup are not the real bottleneck. Better diffusion, reflectors, and positioning often improve image quality more than extra power alone. Many merchants can improve results by refining the setup before replacing the light bodies themselves.
How does lighting affect conversion?
Lighting can influence how trustworthy and clear your product imagery feels, which may affect shopper confidence. It will not guarantee higher conversion on its own, but poor lighting can make products look inconsistent, low quality, or inaccurate in color. Stronger presentation typically supports a better shopping experience, especially on Shopify product pages.
Key Takeaways
Conclusion
The best lights for photoshoot setups depend less on the biggest spec sheet and more on what your store needs week to week. If you are shooting products at home, a simple, dependable kit may be enough. If your brand is growing and you need repeatable content across product pages, ads, and social, it often makes sense to invest in more stable mid-range lighting with room to expand. The goal is not to build the perfect studio on day one. It is to create a setup that helps you publish better visuals consistently. For more practical guidance, explore AcquireConvert’s lighting and photography resources, including product photography lighting and setup advice for ecommerce teams.
This article is editorial content created for educational purposes and is not a paid endorsement unless explicitly stated otherwise. Pricing, product availability, and specifications are subject to change and should be verified directly with the manufacturer or retailer before purchase. Any performance or conversion impact mentioned is illustrative only and not guaranteed.

Hi, I'm Giles Thomas.
Founder of AcquireConvert, the place where ecommerce entrepreneurs & marketers go to learn growth. I'm also the founder of Shopify agency Whole Design Studios.