Product Photography Natural Light (2026)

Product photography natural light is often the most practical starting point for ecommerce brands that want cleaner images without investing in a full studio. For many Shopify store owners, a simple window setup, a white reflector, and careful timing can produce product photos that look credible on collection pages, product pages, and social content. This approach is best for small catalogs, founders shooting in-house, and brands selling skincare, wellness, apparel accessories, or handmade products. It is less ideal when you need perfect consistency across hundreds of SKUs or when your products are highly reflective. At AcquireConvert, we look at these decisions through real store performance, with Giles Thomas bringing Shopify Partner expertise and a practical ecommerce lens. If you want a lower-cost setup that still supports conversion, natural light is usually a strong place to start.
Contents
Overview
Natural light product photography means using daylight, usually from a window or open doorway, as your main light source instead of relying on flash or a full artificial setup. For ecommerce brands, the appeal is obvious: lower upfront cost, simpler setup, and a softer look that often works well for lifestyle-oriented products.
The tradeoff is control. A studio lighting kit gives you repeatable output. Window light changes throughout the day, across seasons, and depending on weather. That means natural light works best when your shooting volume is manageable and you can dedicate time to consistency. If you are still building your in-house workflow, it can also help to review broader Product Photo Lighting resources and basic Product Photography Fundamentals.
For store owners comparing methods, natural light sits between phone snapshots and a professional product photography studio. It can look polished enough for many DTC brands if you control shadows, stabilize your camera, and keep editing consistent. If you are photographing cosmetics, candles, ceramics, supplements, or natural skincare, this approach often complements the brand aesthetic well.
It also helps to understand where natural light fits within the wider conversation about product photography lighting. It is not automatically better than artificial light. It is simply better suited to certain products, brand styles, and working conditions.
Pricing and Costs
There is no software subscription attached to a basic window-light setup, which is one reason ecommerce founders often start here. The core light source is free daylight. Your actual costs come from supporting gear and editing tools.
A minimal setup may include a foam board reflector, a background surface, clamps, and a tripod. If you want more control, add a diffuser curtain or scrim to soften harsh window light. You may also want a small table for tabletop products. Compared with buying multiple continuous lights, a ring light, or a dedicated product photography light box, natural light usually has the lower upfront cost.
That said, “lower cost” does not mean zero cost. You still need time, space, and consistency. If your product catalog is large, the hidden expense is reshoots. A shot taken on a bright morning may not match one taken on a cloudy afternoon. For stores adding products every week, that inconsistency can create more editing work and weaken the look of category pages.
For some brands, a hybrid setup makes more sense: use daylight for hero and lifestyle imagery, then use more controlled equipment for white-background catalog shots. If you are comparing setup choices, our guide to photography lighting equipment is the logical next read.
Trust and Credibility
Photography advice is only useful if it reflects real ecommerce constraints. Most store owners are not building a commercial studio from day one. They need methods that work in spare rooms, offices, or small warehouse spaces, and they need those methods to support conversions rather than just look artistic.
That is the standard AcquireConvert applies. Giles Thomas brings Shopify Partner experience to ecommerce decision-making, which matters here because product imagery affects product page clarity, perceived quality, and buyer confidence. Strong images can improve how shoppers interpret texture, size, finish, and value, but results will always vary by product type, theme layout, and image editing quality.
Natural light is credible as a method because it is widely used by small and mid-sized brands, especially early-stage Shopify stores. The limitation is repeatability. If your catalog demands identical lighting across many SKUs, you may outgrow it quickly. In that case, our review-style guide to the best lighting for photography can help you decide when to move beyond a window setup.
Key Features of a Window Light Setup
Soft directional light is the main advantage. A large window acts like a broad light source, which helps soften transitions between highlight and shadow. This usually flatters matte packaging, skincare jars, paper goods, apparel details, and handmade products.
Simple control with reflectors and diffusers is the next benefit. You do not need a complex rig to improve results. A white foam board can lift shadows. A thin curtain can reduce harsh sun. Small changes in angle often matter more than expensive gear when you are figuring out how to light product photography with natural light.
Flexible shooting styles also make this setup attractive. You can create clean catalog shots on a table near a window, then shift the same product into a more lifestyle-oriented composition. That makes natural light useful for brands that need both ecommerce product page images and social content from one session.
Good fit for brand warmth is another practical strength. Natural product photography often feels less clinical than light tent product photography or heavily lit setups. For natural skincare product photography in particular, daylight can support a softer, more organic brand feel, assuming white balance stays accurate and labels remain legible.
The weak point is precision. You cannot fully control intensity, color temperature, or weather. Highly reflective products, glossy packaging, and polished metal often expose these limits fast. If you are trying to replicate a more sculpted look, techniques such as loop lighting photography are useful to study, even if they are more often associated with portrait work. The underlying lesson is light direction, shadow shape, and consistency.
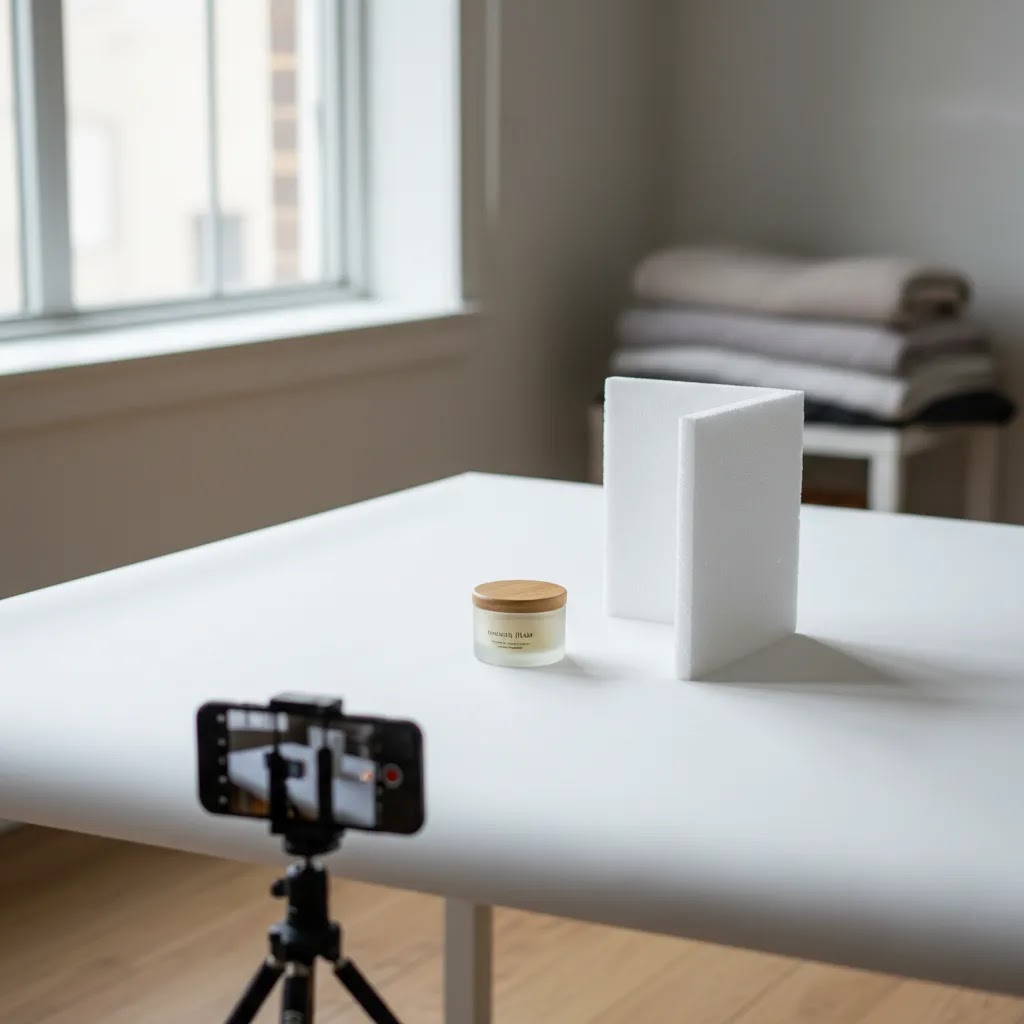
Product Photography Natural Light Setup (Step-by-Step)
Here’s the thing: most “natural light” product photos fail for one simple reason. The setup is not repeatable. You might get a great shot once, then the next SKU looks darker, warmer, or more contrasty, even though you are standing in the same room.
A reliable baseline setup is simple and works for most Shopify product catalogs:
Now, when it comes to shaping window light without studio lights, distance does most of the work. Move the product closer to the window to increase brightness and create faster highlight to shadow falloff. That can add depth, but it can also increase contrast. Move the product farther from the window to reduce contrast and make shadows feel more gradual. For many ecommerce catalog shots, the “farther from the window” position often looks more even and forgiving.
What many store owners overlook is that you can also add definition without adding lights. If your photo looks flat, use a dark card (even a piece of black foam board) on the shadow side to absorb spill light. This is called “negative fill,” and it can help labels and shapes read more clearly. If the shadow side is too dark, swap that dark card for a white reflector to lift detail back up.
For consistency across SKUs, build a quick routine you can repeat:
From a practical standpoint, this is how you get the “case study” style result competitors talk about, where you can replicate the same clean hero photo for a new SKU without rebuilding your entire setup each time.
Pros and Cons
Strengths
Considerations
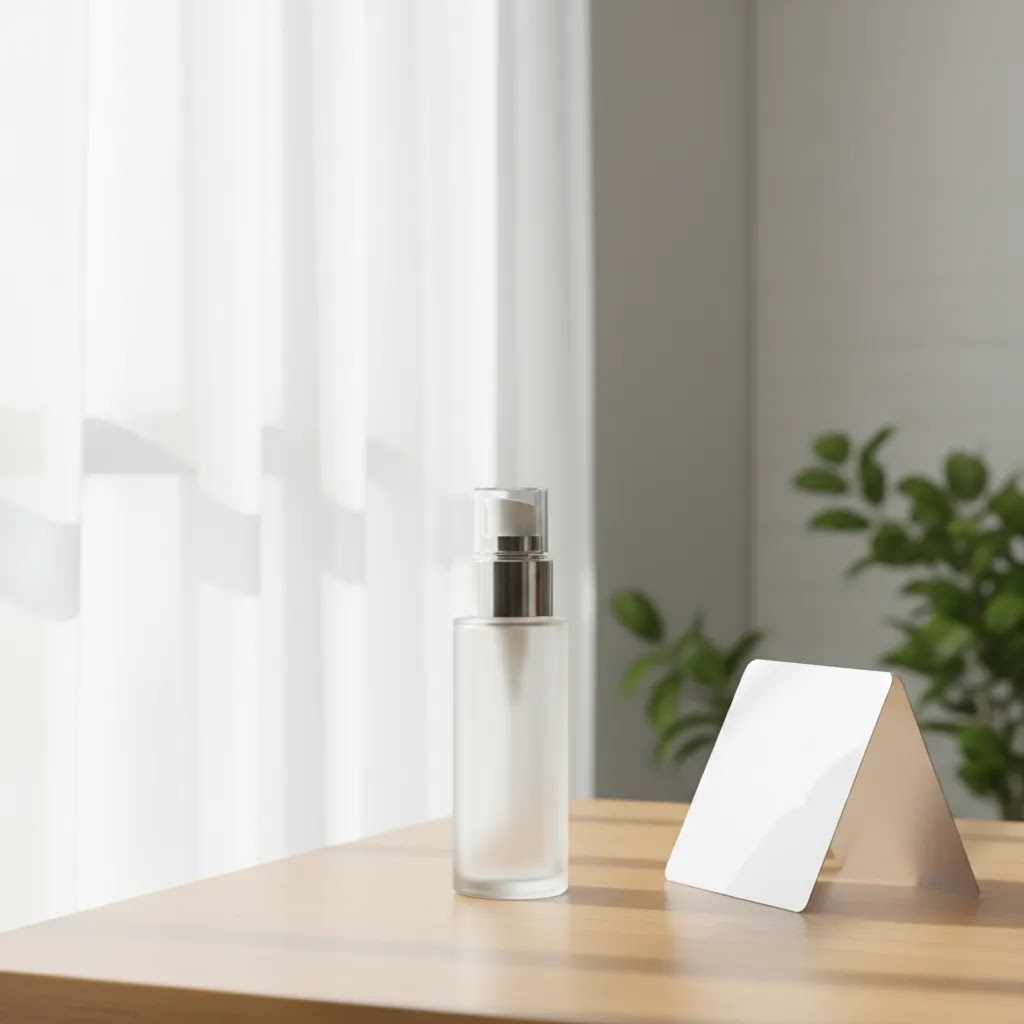
Diffusion and Reflection Control (When Natural Light Gets Tricky)
The reality is that “use a window” is only half the story. The moment you shoot glass, glossy packaging, or metal, you realize you are not photographing the product as much as you are photographing reflections of the room.
Diffusion is your first line of defense, especially if you are getting hard sun patches or sharp shadow edges. Common options that work well in real homes and small offices include a sheer curtain, a white shower curtain stretched flat, or a DIY scrim frame made from a simple frame and diffusion fabric. All of these soften shadows and improve highlight roll-off, which is the difference between “cheap glare” and “premium sheen” on packaging. The more you diffuse, the more even the light becomes, but you will also lose some contrast and may need a tripod to keep shutter speeds usable.
Now, when it comes to reflective products, angle beats editing. Consider this workflow before you start trying to fix problems in post:
Glass is usually the toughest because you are dealing with both reflection and transparency. Try placing a large white card behind the camera to give the product something clean to reflect. If the product needs more edge definition, introduce a black card to create a controlled dark line on the glass. For glossy boxes and labels, your goal is typically to move glare away from key text, not to eliminate shine completely. A little controlled shine can look premium, but uncontrolled glare reads as low quality.
When should you stop fighting the window? If you need strict white background output across dozens or hundreds of SKUs, or you are constantly shooting reflective packaging where every angle change creates a new problem, a more controlled light source may be the better system. That does not mean natural light is “bad,” it just means your catalog demands repeatability that daylight cannot always deliver.
Who It’s Best For
This approach is best for founders, lean ecommerce teams, and early-stage Shopify stores that want a practical image workflow without a major equipment investment. It suits brands with smaller catalogs, lower weekly shoot volume, and products that benefit from a soft, natural feel.
It is especially useful for skincare, candles, small home goods, stationery, and wellness products. If your business is scaling fast, adding new SKUs often, or needs highly standardized white-background imagery, you may reach the limits of natural light sooner. In those cases, start with a window setup for testing, then move toward more controlled lighting once volume justifies it.

How to Get Started
First, choose a large window with indirect daylight. North-facing light is often more stable, but any window can work if direct sun is softened with a curtain or diffuser. Place your shooting table next to the window, not directly in front of it, so the light comes from one side.
Second, set a simple background and stabilize your camera or phone on a tripod. Keep the camera height repeatable if you are shooting multiple SKUs. This matters more for product page consistency than most beginners expect.
Third, use a white reflector opposite the window to open shadows. Move it closer for a brighter, cleaner look. Move it farther away if you want more depth and contrast.
Fourth, test three to five angles before shooting the full set. Check label readability, shadow edges, and color accuracy on your Shopify product page templates. If the photos feel flat, compare your results with broader guidance on product photography lighting and refine from there.
Finally, edit in batches. Match exposure, white balance, and crop ratios across your product line. This is where natural light setups usually succeed or fail for ecommerce use.
Best Natural Light Conditions (Direction, Time of Day, and Window Orientation)
For product photography, “best natural light” usually means bright, indirect, and consistent. You want enough light to keep images clean and sharp, but not so much direct sun that you get blown highlights on labels or harsh shadows that make the product look messy.
Window orientation matters more than most people expect:
Weather also changes your output. Sunny days typically create more contrast and more defined shadows, which can look great if that is the brand style, but can be harder for consistent catalog work. Cloudy or overcast days can be ideal for ecommerce because the light becomes soft and even, which usually reduces retouching time and makes products look consistent across collection pages. If you are shooting multiple SKUs, it can be worth planning shoot blocks around the forecast so you are not constantly reshooting to match yesterday’s light.
White balance is the final consistency trap. Daylight color shifts across the day and can bounce off colored walls, floors, and even nearby trees. If you leave white balance on auto, your images may look slightly different from product to product, even if exposure is close. For ecommerce, a more reliable workflow is to set a custom white balance in-camera or use a gray card as a reference frame at the start of the session, then batch edit based on that reference. Human review still matters here, especially for products where color accuracy affects returns, like cosmetics, apparel, and supplements with color-coded labels.
Frequently Asked Questions
Is natural light good enough for Shopify product photos?
Yes, in many cases it is. Natural light can produce clean, trustworthy product photos for Shopify stores, especially when your catalog is small and your products are not highly reflective. The key is consistency. Use the same window, timing, background, and editing approach so collection pages look cohesive rather than mixed.
Do I need a light box for product photography if I have a good window?
Not always. A window, reflector, and diffuser may be enough for many products. A product photography light box becomes more helpful when you need stronger consistency, smaller shadows, or cleaner white-background shots. It is more useful for repetitive catalog work than for warm lifestyle-style brand photography.
What time of day is best for product photography using natural light?
Bright but indirect light is usually best. Mid-morning and early afternoon often work well, depending on window direction and weather. Direct sun can create harsh highlights and uneven shadows, so most ecommerce shoots benefit from diffused daylight rather than strong sunlight hitting the product directly.
Can I use a ring light instead of window light?
You can, but the results are different. A ring light may help for small content setups, but it often creates a flatter look and less natural shadow shape for products. Window light tends to look softer and more dimensional. If you are deciding between methods, review the broader options in our guide to best lighting for photography.
What products are hardest to shoot with natural light?
Glass, polished metal, glossy packaging, and reflective beauty containers are usually the most difficult. These materials pick up window reflections and room clutter quickly. You may still use daylight, but you will need tighter control over angle, background, and diffusion. For some stores, artificial lights become the more reliable option.
How can I make natural light product photos look more professional?
Focus on repeatability. Use a tripod, fixed shooting position, clean backgrounds, and a reflector. Keep editing consistent across all images. Most weak ecommerce photos are not caused by the window light itself. They come from inconsistent framing, mixed color temperature, poor cropping, or cluttered surfaces around the setup.
Should natural skincare brands use natural light for product photography?
Often, yes. Natural skincare product photography can benefit from the softer, less clinical feel of daylight. It tends to support earthy packaging, ingredient-led branding, and lifestyle positioning. Just make sure product labels stay crisp and your skin-tone or ingredient colors do not shift too warm in editing.
Is natural light good for product photography?
Yes, it can be a strong choice for product photography, especially for small Shopify catalogs and brands that want a softer, lifestyle-friendly look. Natural light tends to be flattering on matte surfaces and textured products, but it can be less predictable than artificial lighting. If you need consistent catalog output week after week, you will typically need a tighter setup routine, or you may eventually move to more controlled lights.
Which light is best for product photography?
The best light depends on what you are shooting and how consistent you need to be. For many ecommerce brands, diffused daylight from a window is a practical option for hero shots and small catalogs. For strict consistency, reflective products, or high SKU counts, controlled artificial lighting often becomes the more reliable choice. In many stores, a hybrid approach works well, daylight for lifestyle and controlled lights for catalog.
What is the best natural light for photography?
For products, the best natural light is usually bright, indirect daylight. Overcast conditions can be ideal because the clouds act like a giant diffuser, giving you soft shadows and fewer harsh highlights. If you are shooting near a window, you typically want light that is strong enough for clean images but not direct sun hitting the product, unless you are intentionally going for a harder, more dramatic look.
What is the 20 60 20 rule in photography?
The 20 60 20 rule is a composition guideline some photographers use to keep product images feeling balanced. The basic idea is to allocate roughly 60% of the frame to the main subject area, with the remaining 40% split into supporting space, often 20% on either side for breathing room or context. It is not a strict rule, but it can help ecommerce store owners keep framing consistent across a product line, which matters on Shopify collection pages where shoppers compare products quickly.
Key Takeaways
Conclusion
Product photography natural light is worth considering if you want a credible, lower-cost way to improve your ecommerce imagery without building a full studio from day one. For many Shopify merchants, a window setup is enough to create stronger product pages, better brand consistency, and more usable social content, especially in categories like skincare, wellness, and handmade goods. The main limitation is control. If your catalog is growing quickly or your products are reflective, you may outgrow natural light faster than expected. The practical next step is simple: test one repeatable window setup, shoot a small product batch, and compare the results on your store. If the images still feel inconsistent, move from natural light into a more controlled lighting workflow rather than forcing a setup that no longer fits.
Disclosure: AcquireConvert may receive affiliate compensation from some links to third-party tools or services, where applicable. This article is for educational purposes and reflects practical ecommerce considerations, not guaranteed outcomes. Results from product photography changes may vary based on your niche, product type, editing quality, store design, and implementation.

Hi, I'm Giles Thomas.
Founder of AcquireConvert, the place where ecommerce entrepreneurs & marketers go to learn growth. I'm also the founder of Shopify agency Whole Design Studios.