DIY Product Photography Table (2026 Guide)
If you sell physical products online, your photography table matters more than most store owners expect. A shaky surface, harsh shadows, or an awkward backdrop can make even a strong product look inconsistent on your product pages, ads, and marketplaces. The good news is that you do not need a commercial studio to get usable ecommerce images. A smart diy product photography table can give you a repeatable setup for clean white-background shots, lifestyle variations, and table top product photography. In this guide, I will walk you through what to build, what materials actually help, and where a DIY setup works well versus where a more formal product photography workflow may be worth the upgrade.
Contents
What a DIY product photography table needs to do
A diy product photography table is not just a surface to place your products on. It is the foundation of a repeatable image workflow. For ecommerce, repeatability is the real goal. You want the same framing, similar light falloff, predictable shadows, and a backdrop that is easy to keep clean across dozens or hundreds of SKUs.
At minimum, your table should do four things well. First, it must hold products securely without wobble. Second, it should support a backdrop sweep so you can avoid a hard horizon line behind the product. Third, it should work with your lighting setup, whether you use window light, LEDs, or softboxes. Fourth, it should fit the kind of products you sell, from jewelry and cosmetics to boxed goods and apparel accessories.
If you also create content for social and catalog pages, your setup may need to handle more than simple front-on product shots. That is where a flexible approach helps. A basic table can also support overhead work for flat lay photography, prop-based shots, and short-form product videos. For many Shopify merchants, one adaptable table beats buying several single-purpose surfaces.
Three build options to consider
There is no single best diy photography shooting table. The right build depends on your product size, storage space, and how often you shoot. Here are the three most practical options for ecommerce store owners.
1. Folding table with backdrop clamp system
This is the most practical choice for most stores. Start with a sturdy folding table, then add clamps or a simple frame behind it to hold poster paper, vinyl, or foam board. It packs away quickly and works well for soaps, supplements, cosmetics, accessories, and home goods.
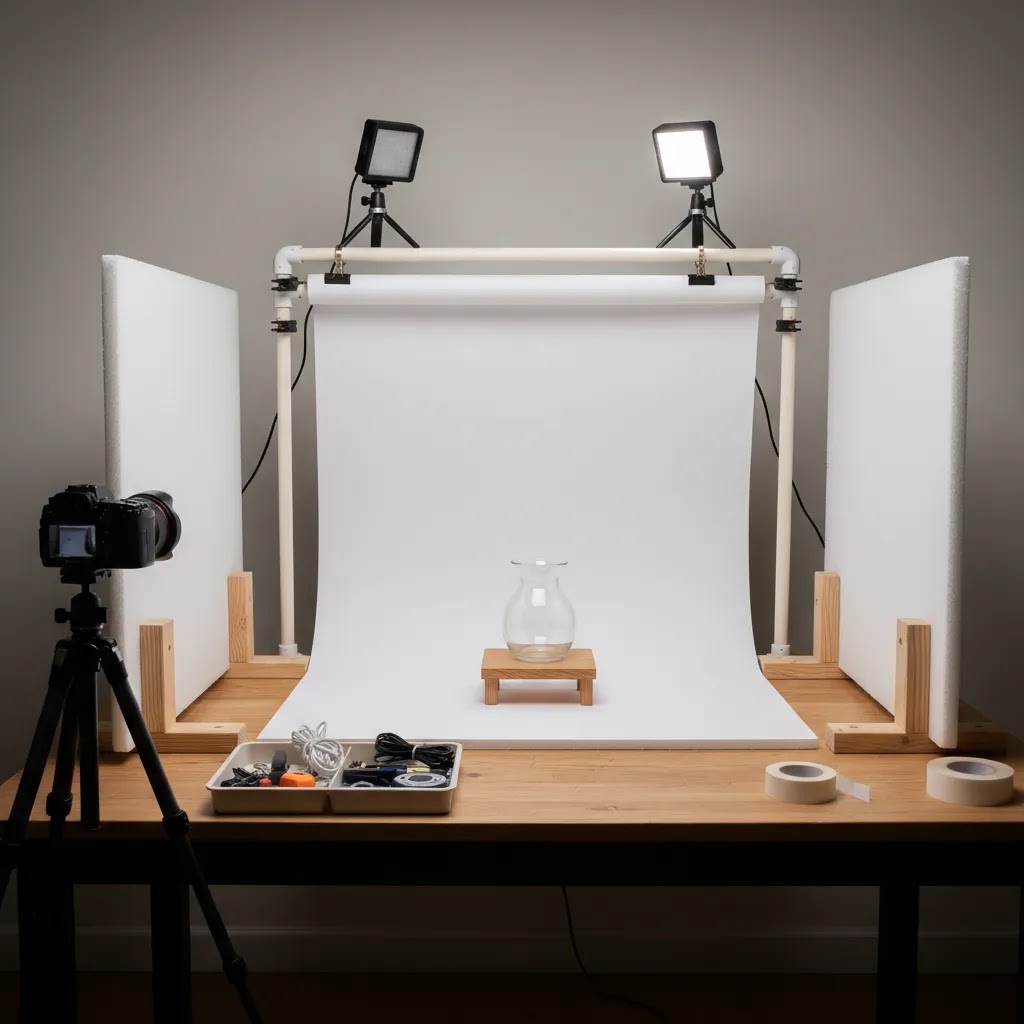
2. PVC frame shooting table
A PVC frame with a translucent sweep is useful when you want soft light wrapping around the product. This style is common in a diy product photography box or small studio setup. It works best for small items and can reduce harsh shadows, especially when paired with side lighting.
3. Permanent tabletop station
If you photograph new products every week, a dedicated table may save time. A fixed station lets you leave lighting stands, camera marks, and backdrop supports in place. That consistency can be valuable for growing stores building out a more standardized product photography studio process.
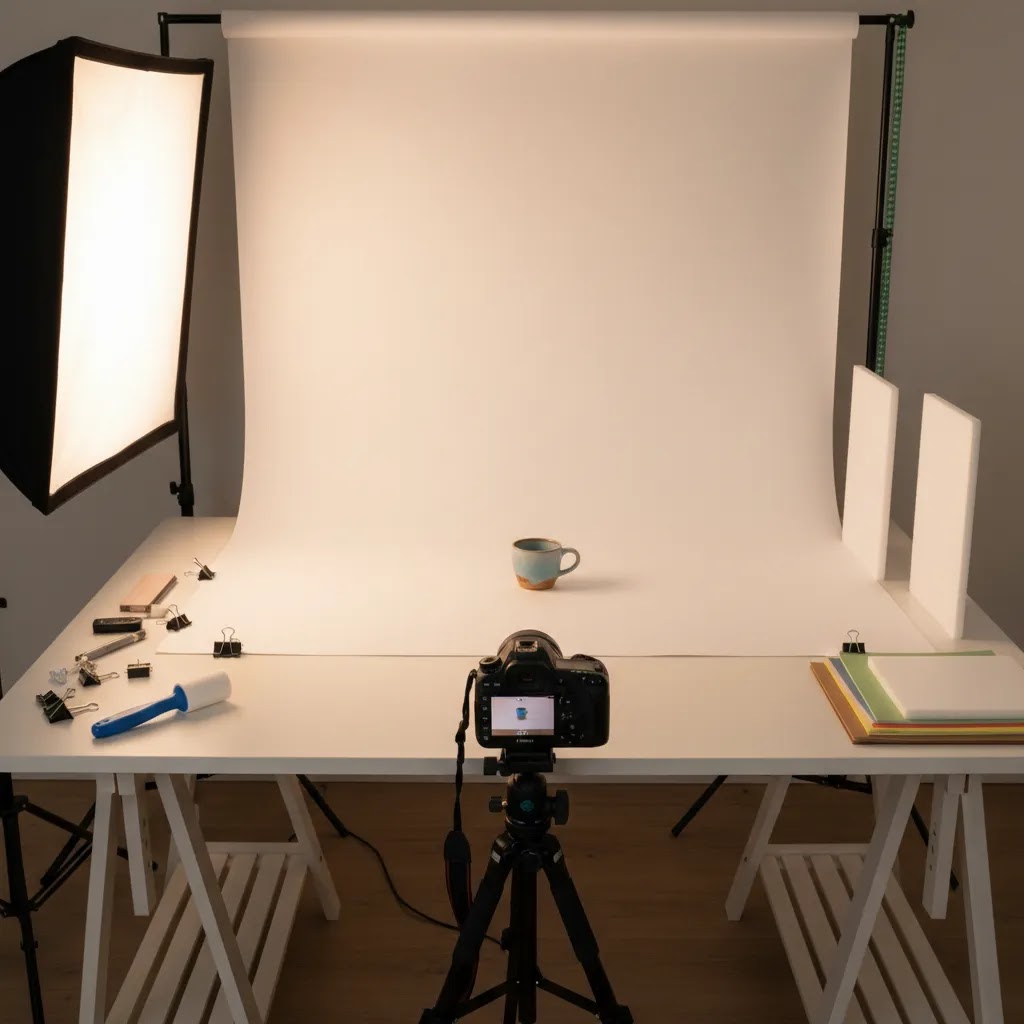
DIY IKEA-style table hack shooting table (a compact “table as a frame” build)
Here is the thing, many store owners want a setup that feels more “built” than a folding table, but they are not ready for a permanent station. A compact side-table style build can be a good middle ground. The concept is simple: the table is not just the surface, it is the frame you can clip diffusion to, hang a sweep from, and keep square from shoot to shoot.
This style is popular because it makes diffused top and side light easier. You can create a mini “light tent” around the product without having to build a full PVC cube, and you can keep it compact enough to live in a spare room or warehouse corner.
How the “table as a frame” concept works
Think of the table legs or side rails as mounting points. You use clamps to attach diffusion material on the sides, then you place a top diffusion panel above the product (a scrim). Your lights go outside that diffusion. The sweep curves down from a back support to the tabletop, just like a standard white sweep.
From a practical standpoint, this gives you two wins. First, it softens the light so you get cleaner shadows and less texture on packaging. Second, it gives you consistent attachment points, which makes your setup easier to repeat when you shoot new SKUs next week.
Materials checklist and size guidance (what to build for common products)
You do not need anything fancy, but you do want materials that stay flat and clip reliably. A typical materials list looks like this.
Size is where most DIY builds go wrong. You want enough room around the product for light to wrap, and you want enough sweep depth so the background stays clean in frame.
If your products are taller or wider than your usual range, swap the table for a wider top and add more height for the diffusion panels. A common tell that your build is too small is when you cannot keep the sweep curve smooth without it showing wrinkles or when the product feels crowded by the diffusion, which can create dull, flat lighting.
Step-by-step overview to assemble it
This is the basic build order that keeps it practical for ecommerce work.
Once it is built, take a few test shots and save them. In a Shopify workflow, you are often shooting batches across weeks, not one big catalog day. Having a reference photo for your “default” setup helps you return to the same look later.
Limitations to be realistic about
This style of diy product photography table is best as a compact station, not a forever solution for every catalog. Small tables can be surprisingly stable, but weight capacity and wobble matter. If you are shooting heavy items, stacked bundles, or anything that could tip, you may need a stronger table and a wider stance.
It also has a ceiling in terms of product size. Larger items need more distance from the sweep and larger diffusion, otherwise the background can go gray and reflections become harder to control. For many Shopify stores, this build is a great way to create consistent images for small to medium products, then graduate to a larger station if your catalog expands into bigger items or more reflective materials.
Key features that matter for ecommerce
Before you build anything, focus on the features that affect image quality and workflow, not just the table itself.
Stable surface and workable height
Your table should feel solid when you press on it or reposition a product. Even small vibrations matter if you are shooting with slower shutter speeds or trying to keep angle consistency across variants. Waist-height tables are usually the easiest for product styling and reduce strain during longer shoots.
Backdrop sweep support
A proper sweep is what makes a product photography table diy setup look more professional. Instead of placing a backdrop flat against a wall, curve it gently from vertical to horizontal. This removes the visible crease line and creates the clean look common on ecommerce product pages. White poster paper, matte vinyl, or acrylic sheets all work, depending on the products and how often you shoot.
Room for lighting control
Lighting matters at least as much as the table. If you are using daylight, place the table near a large window and diffuse the light if shadows get too strong. If you are using LEDs or softboxes, leave enough side and top clearance to position them correctly. AcquireConvert has a useful guide to diy photography lighting if you need help building the rest of the setup around your table.
Rotation and multi-angle flexibility
If you sell collectibles, beauty products, bottles, or tech accessories, adding a simple product photography rotating table can speed up multi-angle capture. A small manual turntable works for stills. For video, a motorized option can help, but make sure it rotates steadily and can handle the weight of your products. This is especially helpful for marketplaces and product detail pages where shoppers benefit from seeing shape and packaging from more than one side.
Surface adaptability
The best DIY setup is not locked into one look. Keep a white sweep for core product images, but also have a wood panel, stone-look board, or colored card on hand for campaigns and social assets. That gives you more flexibility without rebuilding the full station every time.
For store owners experimenting with visual enhancement after the shoot, tools like AI Background Generator, Free White Background Generator, and Increase Image Resolution can help refine image outputs. They may be useful for cleanup and consistency, but they work best when the original photo is already well lit and properly framed.
Lighting control for tabletop builds: diffusion, flags, and reflection control
What many store owners overlook is that tabletop photography is mostly about controlling what the product “sees.” If you sell glossy packaging, bottles, or anything metallic, the product is reflecting your room, your lights, and even your shirt. A DIY table can absolutely work, but you need a simple way to manage diffusion and reflections.
Diffusion positioning: top scrim vs side diffusion
Diffusion is just a material that spreads light out. The placement changes the look a lot, especially on a white sweep.
A top scrim is a diffusion panel above the product. This is most useful when you want soft top-down light that reduces hard shadows under caps, lids, and overhangs. It is also helpful when your main issue is harsh contrast between the top label and the front of the product.
Side diffusion is diffusion on the left and right of the product. This is where you can get that “wrap” effect that makes packaging look smoother. Side diffusion typically softens side shadows, and it can also reduce hotspots on curved bottles.
The way this works in practice is simple. If you are seeing a hard shadow under the product, start by making the main light bigger relative to the product. Move your light back a little and increase the diffusion area, or move the diffusion closer to the product while keeping the light outside it. If your product looks flat and lifeless, you may have too much diffusion too close on both sides. Pull one side back slightly to bring back shape.
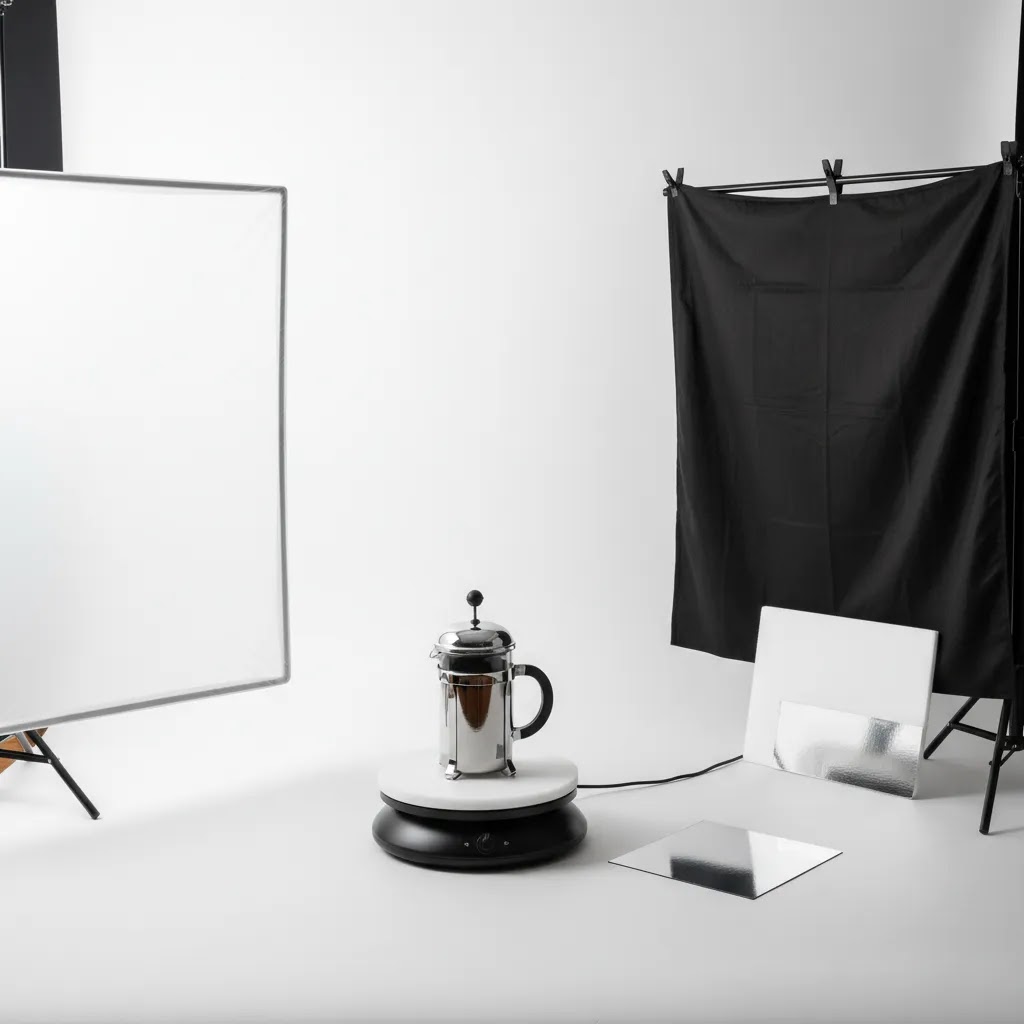
Reflection control for shiny packaging: black and white foam board
For glossy labels and reflective caps, foam board is one of the most reliable tools you can add to a diy product photography studio setup. White foam board acts as “fill,” it brightens shadows and can create clean white reflections. Black foam board acts as a “flag,” it creates a controlled dark reflection that adds shape and reduces that washed-out look.
Placement matters more than the board size. If you see a blown highlight stripe on a bottle, do not only change exposure. Move your light or diffusion, then use a black flag just outside the camera frame on the side that is blowing out. You are basically giving the product something darker to reflect. If your shadows look too heavy and your product feels underlit, bring a white board closer on the opposite side to lift the shadows without moving your main light.
Consider this, when you shoot on a white sweep, the sweep itself is a reflector. That is good for clean ecommerce looks, but it can also remove contrast. A small black flag near the product, especially for cosmetics and bottles, is often what brings back crisp edges.
Quick troubleshooting for common ecommerce photo problems
If your photos are close but not quite ecommerce-ready, these are the fixes I use most often on tabletop builds.
Once you can control these three, your product images usually become much easier to standardize across Shopify product pages. It also reduces editing time, because you are not trying to “fix” lighting problems later.

Pros and Cons
Strengths
Considerations
Who this setup is for
This approach is best for ecommerce store owners who need consistent product photos without committing to a full studio build right away. It suits Shopify merchants launching a new catalog, founders shooting content in-house, and small teams that update listings regularly. It is especially useful for products that fit comfortably on a tabletop, such as skincare, candles, packaged food, jewelry, stationery, and accessories.
If you sell large furniture, highly reflective metal products, or luxury items where fine detail is critical, a DIY setup may still help with testing and draft imagery, but a more advanced camera and lighting workflow is often the better long-term fit. If that is your next step, review this guide to the best camera for product photography before upgrading gear.
How to choose the right DIY table setup
Store owners usually make better photography decisions when they start with the workflow, not the materials. Here are the main criteria to use.
1. Match the table size to your real product range
Do not size the table around your smallest item. Size it around your most common hero product plus lighting and styling space. If you sell skincare bundles, gift boxes, or products with props, give yourself more room than you think you need.
2. Build for repeatability, not one-off creativity
Creative shots are useful, but your main ecommerce images need consistency. Mark camera position, table placement, and light stand locations with tape. Keep sample framing notes for key collections. This matters more than having expensive materials.
3. Prioritize lighting access
A table placed in the wrong corner of the room becomes frustrating fast. Make sure you can get light from at least two sides or from one large diffused source. If your lighting still feels inconsistent, browse the broader Product Photo Lighting resources for ways to control glare, softness, and shadow direction.
4. Think about image use across channels
Your product page may need a white background, but your ads and social posts may need more context. A good diy product photography backdrop system lets you swap surfaces without rebuilding the table every time. That gives you cleaner production across Shopify, marketplaces, email campaigns, and social content.
5. Decide when DIY is enough
DIY is often the right place to start, but not every store should stay there forever. Once volume increases, the time spent resetting lights, correcting inconsistencies, and editing around avoidable issues can outweigh the savings. At that point, a more structured setup or outsourced process may be worth testing. For broader learning on build-outs, workflows, and equipment, the main Product Photography Fundamentals hub is a helpful next stop.
As a practical rule, if your setup helps you produce consistent images that fit your brand and convert browsers into better-informed shoppers, it is doing its job. If it creates constant retakes and editing delays, it is time to simplify or upgrade.
AcquireConvert approaches these decisions from a real merchant perspective. Giles Thomas brings Shopify Partner and Google Expert experience to the broader ecommerce workflow, which matters because product imagery affects not just aesthetics but also click-through rate, merchandising clarity, and shopper trust. If you are improving your in-house photography process, it is worth exploring AcquireConvert’s related guides to compare setup options and see how other store owners structure their visual production.
Portability and workflow upgrades: wheels, adjustable height, and repeatable positioning
For most Shopify store owners, the hardest part is not taking one good product photo. It is taking 200 photos over a month that all look like they belong together. Portability and repeatability upgrades are what make a diy product photography table feel like a real production station instead of a one-time project.
When wheels and adjustable height actually help
If you shoot in a shared space, a garage, or a small warehouse, a “studio on wheels” setup can make sense. The goal is not to roll it around constantly. It is to move it into a consistent shooting position, lock it down, and keep your lights and camera workflow intact.
What to look for is pretty straightforward. Locking casters matter, you want the wheels to stop both rolling and swiveling. You also want a rigid top, because a flexible tabletop can introduce small shifts that show up in framing and focus. If you are building a permanent station, adjustable height can be useful for two cases: overhead or flat lay work where you want the surface lower, and bottle or box work where you want a comfortable standing height for styling and label alignment.
If you are considering casters, test stability before you commit. A setup that moves slightly when you touch the product is a setup that creates retakes.
Repeatable positioning beyond tape marks
Tape marks help, but they are not the whole system. When you want consistency across weeks, start measuring a few reference points and keep them the same.
Think of it this way, you are building a template. Once your template is stable, the creative work becomes styling and merchandising, not re-engineering the lighting every session.
A small-space storage plan that keeps your look consistent
If you cannot leave your table up full time, you can still keep consistency. The key is to break the setup down in a way that preserves the parts that create your “look.”
Store sweep material rolled, not folded, so you do not reintroduce creases. Keep clamps in a small bin with your diffusion so you are not hunting for gear. If you use foam board flags and fills, label them and store them flat so they do not warp.
It also helps to take a quick behind-the-scenes phone photo of your station when you get it dialed in. Capture where the lights sit relative to the table, where diffusion is clipped, and where the camera is placed. That reference photo saves time when you rebuild, and it reduces that frustrating “why does this batch look different?” moment when you upload to Shopify.
Frequently Asked Questions
What is the best surface for a diy product photography table?
A smooth, stable surface is usually best. Many store owners start with a folding table and add white poster paper, matte vinyl, or acrylic sheets depending on the look they need. The key is avoiding texture, dents, and reflections that distract from the product. For ecommerce, consistency across many SKUs usually matters more than using premium materials.
Can I build a diy product photography setup without studio lights?
Yes, in many cases you can start with natural window light and a diffuser or reflector. This often works well for small products if you shoot at the same time of day and keep the setup consistent. The trade-off is less control. If your product catalog is growing, artificial lighting may be easier to standardize over time.
Do I need a lightbox or is a table enough?
A table is enough for many products, especially if you need flexibility with angles, props, and larger items. A diy product photography box can help with very small products and softer light control, but it is more restrictive. If you want both options, build a main table first and add a compact box later for detail-heavy items.
Should I use white or colored backdrops?
White is usually the most practical starting point for ecommerce because it works across product pages, marketplaces, and comparison shopping environments. Colored or textured backdrops can support brand campaigns and social content. The best approach is to use white for core catalog images and test secondary backdrops for promotional assets.
Is a rotating table worth it for product photography?
It can be, especially if you need multiple angles of bottles, collectibles, or packaged goods. A manual turntable is often enough for still images. For video, a motorized turntable may save time if it rotates smoothly. Just check stability and weight limits before relying on it for regular production.
What products work best with a diy photography shooting table?
Small to mid-sized products usually fit best. Think cosmetics, supplements, candles, accessories, stationery, and similar items. These are easier to light and style in a compact space. Very large, glossy, or highly reflective products are harder to manage because they need more distance, larger modifiers, and tighter control over reflections.
Can I use this setup for flat lays and overhead content too?
Yes, if your table is wide enough and your camera can be mounted overhead safely. Many merchants use the same station for product shots and flat lay photography. It helps to keep spare backdrop boards and a simple top-down support solution ready so switching between shot types does not disrupt the workflow.
How do I make my DIY setup look more professional?
Focus on consistency before adding complexity. Use the same lens or focal length, mark product positions, diffuse your light, and keep your backdrop clean. Small improvements in alignment, exposure, and color accuracy usually make a bigger difference than buying more props. A neat, repeatable setup often looks more professional than a cluttered studio corner.
Do I need an expensive camera for a product photography table diy setup?
No. Camera choice matters, but lighting, stability, and composition often have a bigger impact at the start. Many store owners can get strong results from a smartphone or entry-level camera if the setup is controlled well. As your needs grow, better lenses and manual controls become more valuable than chasing the most expensive body.
How do you make a DIY product photography table with an IKEA table?
Use the table as both the surface and the frame. Clamp a white sweep to the back so it curves down onto the tabletop, then clamp diffusion to the sides and add a top diffusion panel above the product. Place your lights outside the diffusion. This can create soft, even light that is easier to repeat across product batches, especially for small packaged goods and cosmetics.
What is the best height for a product photography table?
Waist height is usually the most comfortable for styling and shooting front-on product photos, especially during longer sessions. If you shoot overhead flat lays, a slightly lower surface can make framing easier. The “best” height is the one that lets you work without strain and keeps your camera position stable and repeatable.
Can you put a tabletop product photography setup on wheels?
Yes, as long as stability is handled properly. Use locking casters and a rigid tabletop so the station does not shift when you adjust products or press the shutter. Many small teams do this in home or warehouse setups so they can roll the station into position, lock it, and keep a consistent workflow.
What is the best diffusion material for DIY product photography lighting?
White diffusion fabric and translucent white plastic sheets are common choices because they spread light evenly and can be clipped to a frame. The best option depends on your lights and how close you can place diffusion to the product. Whatever you use, test it for color cast and consistency, then keep it as part of your standard setup so your catalog photos match over time.
Key Takeaways
Conclusion
A well-built diy product photography table can be a smart move for ecommerce brands that want faster content production and more control over how products appear online. The main value is not that it is homemade. It is that it helps you create repeatable, usable images for your storefront, ads, and marketplaces without unnecessary complexity. Start simple, test what your products actually need, and refine the setup as your catalog grows. If you want more practical guidance, explore AcquireConvert’s photography resources, including tutorials on lighting, cameras, and studio planning. Giles Thomas’s Shopify and ecommerce background gives these guides a store-owner perspective that is especially useful when image quality needs to support real merchandising goals.
This article is editorial content created for educational purposes and is not a paid endorsement unless explicitly stated otherwise. Pricing, features, and tool availability are subject to change, so verify details directly with the provider before making a purchase decision. Any results from photography workflow changes may vary by product type, niche, and store setup.

Hi, I'm Giles Thomas.
Founder of AcquireConvert, the place where ecommerce entrepreneurs & marketers go to learn growth. I'm also the founder of Shopify agency Whole Design Studios.