Jewellery Packshot Photography (2026 Guide)
Jewellery packshot photography matters more than most store owners realize. Rings, earrings, necklaces, and bracelets are small, reflective, detail-heavy products, which means weak photos can make even premium pieces look flat or low value. If you sell online, your images need to do the job a customer would normally do in person: inspect finish, scale, color, sparkle, and craftsmanship. That is why good jewellery packshot photography is not just about aesthetics. It is about trust, conversion, and fewer pre-purchase questions. In this guide, you will see what packshot photography actually means, what makes jewellery harder than standard product photography, where AI can help, and how to choose the right workflow for your ecommerce store.
Contents
What jewellery packshot photography means
If you have asked, “what is packshot photography?” the short answer is this: it is clean, commercial product photography designed to present an item clearly and consistently for sale. A packshot photo usually shows the product isolated on a plain background, often white, with controlled lighting and minimal distraction.
For jewellery, that sounds simple, but it rarely is. Highly polished metals reflect everything around them. Gemstones can lose color accuracy under the wrong lights. Tiny clasps, prongs, engravings, and chain details disappear if the file is soft or underexposed. That is why jewellery packshot photography sits in a more demanding category than many other forms of commercial packshot photography.
For Shopify merchants, this work affects several parts of the funnel. Better image clarity can improve product page confidence. Cleaner backgrounds can make collection pages feel more premium. Consistent framing can also help you create stronger visual merchandising across PDPs, category pages, email campaigns, and ad creatives. If your catalog includes flat pieces such as chains, charms, or earrings, some products may also work well with flat lay photography alongside standard front-on packshots.
If you are comparing studio options, AI tools, or an in-house workflow, the goal is not to chase perfect art direction on every SKU. The goal is to create repeatable images that help customers understand what they are buying.
What makes jewellery photos sell
The best jewellery packshot product photography usually gets a few fundamentals right.
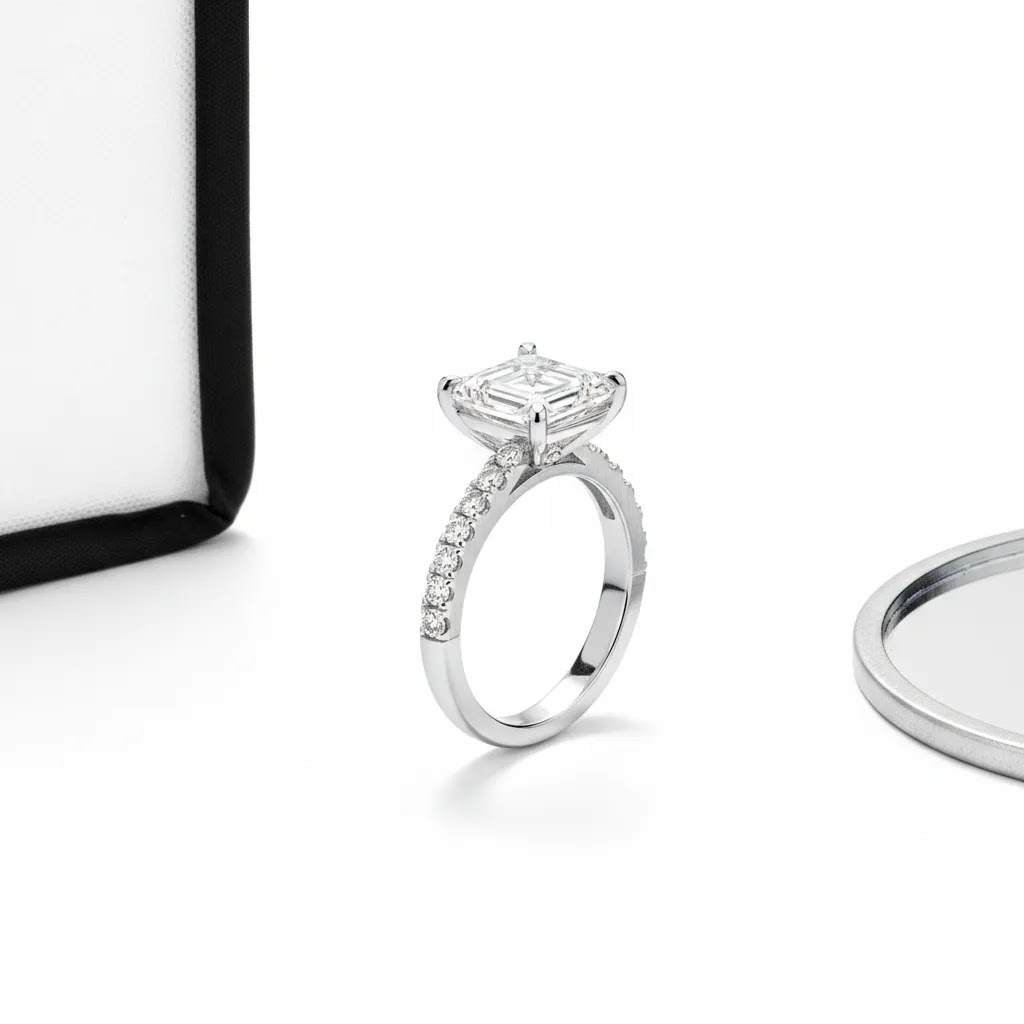
First, detail has to hold up under zoom. Shoppers expect to inspect the finish, stone setting, texture, and craftsmanship. If the original file is too soft, your product may look mass-produced even if it is not.
Second, lighting must be controlled very carefully. Small hotspots on silver or gold can make a piece look scratched or distorted. Diffused setups usually work best, especially if you are building a repeatable in-house system with diy photography lighting.
Third, consistency matters across the catalog. Customers often compare similar products side by side. If one ring is shot warmer, closer, or darker than the next, the assortment can feel uneven and less trustworthy.
That is also where editing becomes part of the workflow. AcquireConvert’s product and category resources around e commerce product photography are useful if you are building a broader visual system, not just solving one product shoot.
AI can help in specific areas. Based on the current tools available, ProductAI offers several image-editing options relevant to ecommerce teams:
These tools may help with post-production efficiency, especially for smaller brands that do not have a dedicated retoucher. Still, AI jewellery photography works best when the source image is already strong. It can support cleanup, consistency, and creative variations, but it will not reliably fix poor focus, inaccurate metal tone, or weak composition from the original capture.
If you are scaling a larger catalog, it can also be worth reviewing how your images fit into a broader catalog photography workflow, especially when multiple SKUs need the same crop, angle, and styling rules.
DIY jewellery packshot photography at home: a repeatable setup
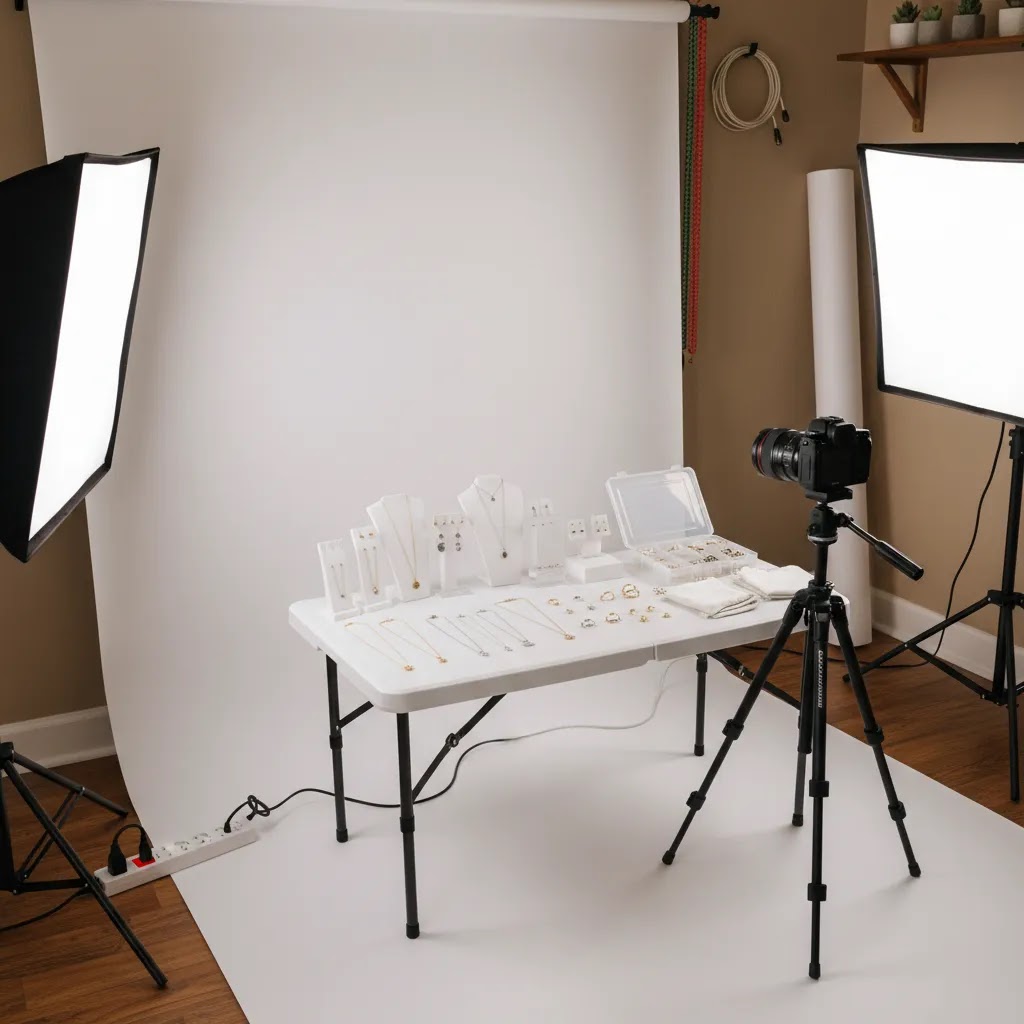
Here’s the thing, most “jewellery photo ideas at home” advice online stays at the inspiration level. What you actually need as a Shopify store owner is a repeatable packshot system. If you can set up a small station you can rebuild in 5 minutes, you can shoot new launches, restocks, and variations without your photo quality drifting over time.
A simple home packshot station that works for most SKUs
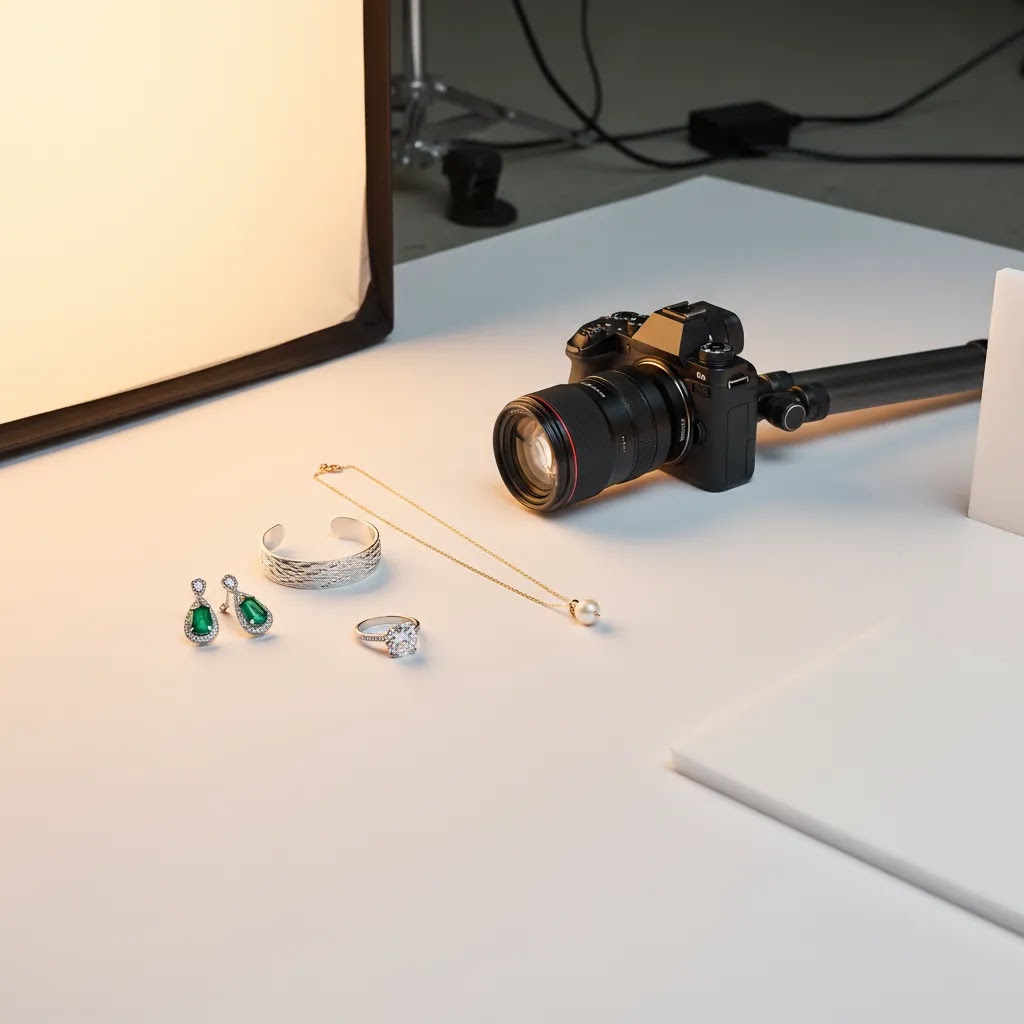
Start with a stable table near power and enough room to keep your background, lighting, and tripod in fixed positions. Consistency is the whole point.
For backgrounds, white is still the safest for packshots, but “white” can mean different things. A matte white sweep (paper or acrylic) tends to photograph more evenly than textured fabric, and it is easier to keep clean. For silver jewelry in particular, a pure white environment can sometimes make edges disappear, so you may want a slightly off-white background or a controlled soft shadow to keep shape definition.
Lighting is where jewellery goes wrong fast. The goal is not more brightness, it is more control. Diffusion is your best friend, because it turns harsh point light into a large, soft source that creates clean reflections instead of hot glare. A simple approach is to place your light outside a diffuser and bring the diffuser close to the piece. The larger the apparent light source relative to the jewelry, the smoother the reflections typically are.
Now, when it comes to reflective metals, you are not only lighting the product. You are lighting what the product reflects. That means your surroundings matter. A clean white “tent” effect, even if it is DIY, helps because the piece reflects a simple environment instead of your room, your camera, and random colors.
Camera technique that matters specifically for jewellery
For small products, stability and focus control are usually more important than the camera body itself. Use a tripod and keep the camera position locked. If you are hand-holding, you will fight blur, inconsistent framing, and missed focus all day.
For focus, do not assume your camera will pick the correct point automatically, especially with stones and reflective edges. Use a single focus point or manual focus and confirm sharpness by zooming in on your camera screen. If your store uses zoom on Shopify product pages, you want detail that holds up without turning into a mushy texture when shoppers pinch and zoom.
Aperture is a tradeoff. Too wide and you will get shallow depth of field, which can make parts of a ring sharp and the rest fall apart. Too narrow and you can run into diffraction softness. In practice, many jewelry packshots work well in the middle range, then you adjust based on the piece. Flat items like charms are easier, tall settings and stacked stones are harder. If you need everything sharp from front to back, consider shooting multiple focus points and combining them in editing, but only if you can keep the product perfectly still.
For color accuracy, keep your light temperature consistent. Mixed lighting is a silent killer of jewelry photography because it shifts metal tone. Gold can go greenish, silver can go blue, and gemstones can look wrong. Turn off other room lights and rely on one controlled light setup. If you have the option, set a custom white balance so your collection page does not look like it was shot in five different rooms.
Common mistakes that make home packshots look “DIY”, and quick fixes
What many store owners overlook is that small issues become big issues on jewelry because shoppers look closely.
If you get these right, you can build a simple in-house capture workflow and then use editing tools, including AI-assisted cleanup, for speed. That is usually the most realistic path for smaller teams that still want commercial-looking results.
Pros and Cons
Strengths
Considerations
Jewellery packshot inspiration and shot list: the images shoppers expect
Consider this, most conversion problems on jewelry PDPs are not because the hero image is “bad.” They happen because the shopper cannot answer basic questions quickly: what does it look like from the side, how thick is it, what does the clasp look like, how does the stone sit, what scale is it on a real person?
A practical way to fix that is to standardize a shot list per product type. That gives you consistent galleries across your collection, and it makes your shoots faster because you are not reinventing angles every time.
A practical baseline shot list (for most jewellery)
Now, when it comes to specific product types, here are extra angles that often reduce pre-purchase questions.
Rings
Earrings
Necklaces and pendants
Bracelets
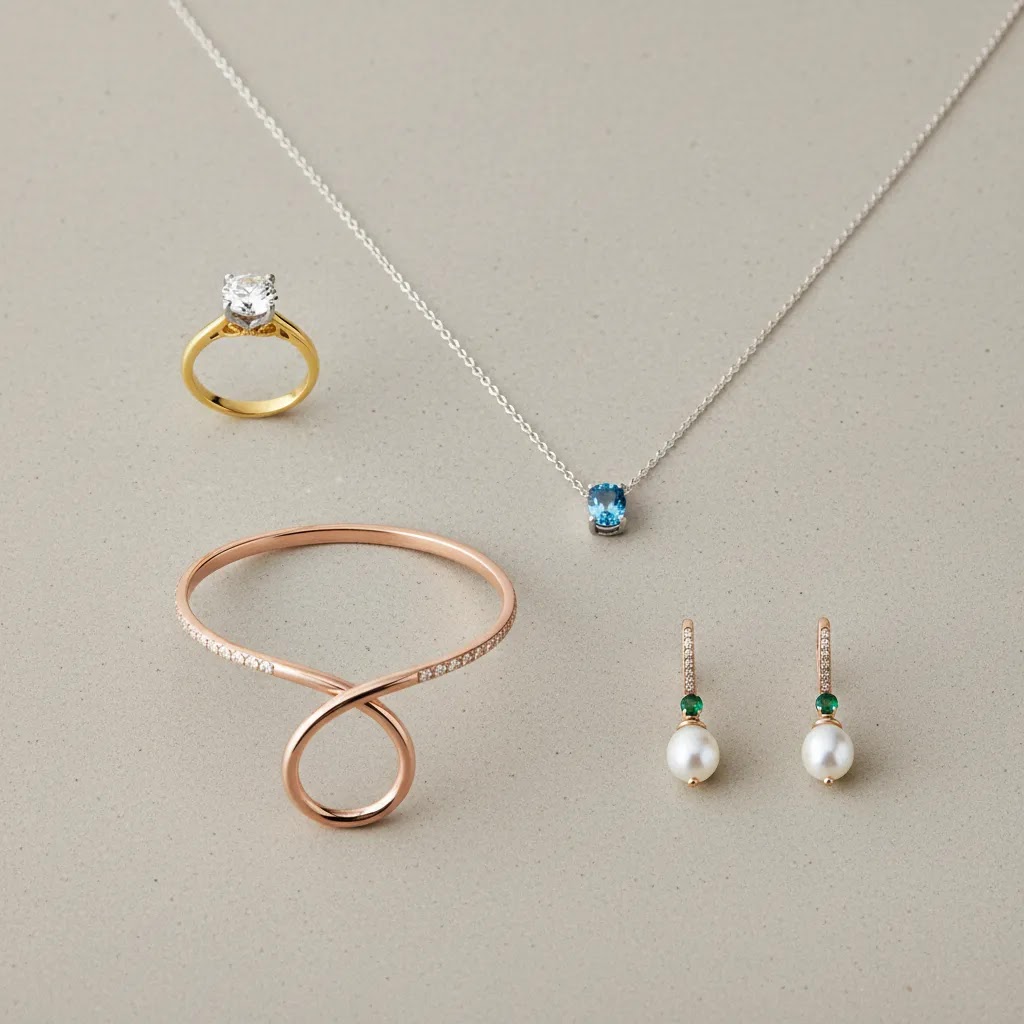
Packshot styling ideas that stay commercial
If you want your store to look premium, the biggest win is usually consistency across the collection page grid. Pick a crop ratio, a product size in-frame, and a consistent camera height, then stick to it for every SKU in that category. That alone can make a small Shopify brand look like it has a full studio team.
For background style, you typically have two “commercial” directions that both work:
Either can work, but mixing them within one collection can make your catalog feel inconsistent.
When to add creative variations, and how to keep them from hurting conversion
Creative images can help sell the feeling of the product, but they should support your packshots, not replace them. In practice, add creative variations once your baseline shot list is stable.
Still-life compositions, on-body, in-hand, and styled shots often work best when they follow the same rules as your packshots: similar color temperature, consistent retouching, and predictable cropping. That way, the customer gets inspiration without losing clarity or feeling like they are looking at a different product.
Who this approach is for
This approach is a strong fit for Shopify and ecommerce operators selling fine jewelry, fashion jewelry, handmade pieces, or customizable gift products. It is especially useful if your store relies on premium positioning and your customers want to inspect material finish before buying.
If you are early stage, you may start with a simple in-house setup and selective AI editing. If you are managing a larger assortment or higher average order value, a more structured product photography studio workflow may be the better option. The right choice depends on SKU count, margin, launch frequency, and how visually competitive your niche is.
How AcquireConvert recommends approaching it
AcquireConvert’s practical view is that most store owners should treat jewellery packshots as part of conversion optimization, not just brand presentation. Giles Thomas’s experience as a Shopify Partner and Google Expert is especially relevant here because product imagery affects both on-site buying confidence and how well creative assets perform across acquisition channels.
For most merchants, the smartest path is to build a minimum viable workflow first. Start with a consistent angle, controlled white background, basic retouching standards, and zoom-capable file quality. Then add variation shots such as on-body, in-hand, or styled images once your core PDP packshots are reliable. If you are still refining your setup, it helps to review related guidance on best camera for product photography so your source images are strong before you spend time editing.
AcquireConvert is a useful specialist resource if you want grounded advice on photography systems, AI photo tools, and ecommerce execution without getting lost in generic creative theory.
How to choose the right setup
If you are deciding between DIY, studio outsourcing, or an AI-assisted workflow, use these five criteria.
1. Start with your product complexity
Simple polished bands are still tricky, but gemstone pieces, layered chains, engraved products, and mixed-material items are harder again. The more reflective and detailed your products are, the more value there is in skilled lighting and retouching.
2. Match the workflow to your catalog size
If you launch a few pieces each month, a controlled in-house setup may be enough. If you manage dozens or hundreds of SKUs, repeatability matters more than creative experimentation. That is where templates, shooting guides, and consistent naming conventions become important.
3. Separate capture problems from editing problems
Many store owners try to fix weak originals in post. That rarely works well for jewellery. AI tools may help with background replacement, white background cleanup, or resolution support, but they usually cannot restore missing detail or solve harsh reflections convincingly. Good capture first, smart editing second.
4. Think about channel requirements
Your Shopify PDP may support galleries, zoom, and alternate angles. Marketplaces often prefer standardized white backgrounds. Paid social may need crop variations or more contextual creative. One master packshot can feed multiple channels, but only if you plan for that from the start.
5. Judge success by shopper clarity
The best image is not always the most artistic one. For ecommerce, the more useful question is whether a shopper can quickly understand color, scale, finish, and quality. If the answer is yes, your imagery is doing its job.
If you want to build out your system more broadly, the category resources on product photography fundamentals can help connect lighting, shooting, and catalog consistency into one process.
Jewellery packshot photography cost and pricing: what to expect
If you are searching for packshot pricing, you are usually trying to answer a more practical question: what will it cost me to get consistent, usable images for my store, not just one hero shot for Instagram.
Jewellery pricing varies a lot by location, studio, styling requirements, and how demanding your pieces are. Still, most Shopify merchants run into a handful of standard pricing models. Once you understand them, it gets easier to compare outsourcing vs. in-house capture vs. AI-assisted editing.
Common pricing models you will see
Per image: You pay for each final delivered photo. This can work well when you have a small launch and you know exactly how many images you need per SKU. It can get expensive if you end up needing extra angles later.
Per SKU set: You pay a bundled price per product for a defined shot list, for example 5 images per SKU. This is often the cleanest way to scope ecommerce packshots because you can map it directly to your Shopify product pages.
Day rate or half-day rate: You book a photographer or studio for time. This can be cost-effective if you have a lot of products ready, prepped, and styled, and you can move fast. If you show up unprepared, day rates can become an expensive way to discover you needed a shot list.
Monthly retainer: You pay a set amount for ongoing work, often used by brands with frequent launches. Retainers can make sense when you want consistent turnaround and a stable “look” across seasons, but you want to be clear about volume limits and revision policies.
What is usually included, and what is often extra
From a practical standpoint, the invoice surprises tend to come from post-production and special requirements. Ask what is included in the base scope and what triggers additional charges. In many cases, these items are treated as add-ons:
None of this is “bad.” It just means you want to scope your shoot like a system, not like a one-off creative project.
A simple way to estimate your cost per usable image
What many store owners overlook is that the best comparison is not “cost per photo.” It is cost per usable image that actually makes it onto Shopify and supports conversion.
To estimate it, start with three inputs:
Then factor in what happens after shooting. For in-house, that is usually your time, editing time, and occasional reshoots. For outsourcing, it is the delivered images plus any add-ons like advanced retouching and revisions. For AI-assisted editing, you are typically balancing time saved on background cleanup and variations against the need to keep material accuracy, which still benefits from human review.
If you want one quick formula to sanity-check options, try this: total monthly image cost divided by the number of images you actually publish that month. That number helps you compare very different workflows using one yardstick.
What pushes jewellery costs up, and how to reduce cost without tanking quality
Jewellery costs tend to rise when the products demand more control and more retouching. Macro-level detail requirements, highly reflective metals, stones that need accurate color, and complex pieces like chains can all slow down capture and editing. It is not only about “harder lighting,” it is also about keeping the piece clean, stable, and consistent across a set.
If you need to reduce cost, do it by improving standardization, not by cutting corners on the fundamentals shoppers notice. A few ways to keep quality while lowering time per SKU:
In many cases, the cheapest “fix” is just better planning. It lowers time per SKU whether you shoot in-house or hire a studio.
Frequently Asked Questions
What is packshot photography for jewellery?
It is a commercial product photography style that shows jewellery clearly, usually on a plain background, with controlled lighting and minimal distractions. The purpose is to help customers inspect details and compare products easily. For ecommerce, this usually means sharp files, consistent angles, and accurate color rather than heavy styling.
What is a packshot photography workflow for an online store?
A typical workflow includes planning angles, capturing the product under controlled light, retouching dust and reflections, exporting web-ready files, and uploading them consistently across your store. For Shopify merchants, it also helps to set standards for crop ratio, zoom quality, alt text, and collection page consistency before you shoot at scale.
Can AI jewellery photography replace a professional shoot?
Sometimes it can support smaller brands, but it is not a full replacement in every case. AI works best for editing, background cleanup, and creative variations after you have a good source image. For highly reflective or premium jewellery, professional capture may still be the better choice if accuracy and fine detail are critical to conversion.
How many photos should each jewellery product page have?
Most stores benefit from at least three to five useful images per SKU. That often includes a clean hero packshot, alternate angles, a close-up detail view, and one scale or contextual image. If the product has special craftsmanship, stones, or customization options, extra close crops may help answer buying questions before they become support tickets.
Do white background images still matter for Shopify stores?
Yes. White background packshots still work well for clean merchandising, comparison shopping, and a consistent catalog look. They are especially helpful for collection pages and paid feeds. Many brands pair them with styled or contextual images so customers get both clarity and inspiration rather than relying on one image type alone.
What camera setup is best for jewellery packshots?
A camera that produces sharp, detailed files matters, but lighting and stability usually matter just as much. A tripod, diffused light, and careful focus control often make a bigger difference than chasing the most expensive body. If you are comparing gear, start with the needs of small reflective products rather than general photography specs.
Should I outsource packshot photography in London or keep it in-house?
If you have a high SKU volume, premium price points, or limited time, outsourcing may make sense. If your line is smaller and you need frequent updates, an in-house setup can be more flexible. The right answer depends less on location terms like packshot photography london or packshot photography uk and more on consistency, turnaround, and cost per usable image.
How do I make jewellery look more premium in photos?
Focus on accurate light, clean surfaces, consistent framing, and sharp detail. Premium perception usually comes from precision, not visual effects. Dust, poor crop choices, muddy metal tones, and uneven backgrounds can undermine value fast. Keep the image clean first, then add supporting lifestyle shots if your brand needs more emotional context.
How much does jewellery packshot photography cost per image?
It depends on whether you are paying per image, per SKU set, a day rate, or a monthly retainer, and on how much retouching the final files need. Jewellery often costs more than simpler product categories because reflective metal, gemstones, and small details take longer to light, shoot, and retouch. To compare options, focus on cost per usable image, meaning the images you actually publish on Shopify, not just cost per delivered file.
Can I do jewellery packshot photography at home, and what setup do I need?
Yes, many Shopify merchants shoot jewelry at home successfully, as long as the setup is stable and repeatable. You typically need a tripod, diffused lighting to control reflections, a clean white or off-white background, and reliable focus control for small details. The key is keeping lighting and camera position consistent so your collection pages look cohesive as you add new SKUs.
What are the best lighting techniques to photograph reflective jewelry without harsh glare?
Diffusion is usually the best starting point. Reflective jewelry shows the light source itself, so a larger, softer light created through diffusion tends to produce smoother reflections and fewer hotspots. It also helps to control the environment the piece reflects, which is why tent-style setups and clean surrounding surfaces can improve results. Small changes in angle, distance, and diffusion placement can make a bigger difference than adding more lights.
What are the best angles for photographing rings, necklaces, and earrings for ecommerce?
Most stores benefit from a clean hero view, a 45-degree view for depth, and at least one profile or detail angle that answers common fit and construction questions. Rings often need a side profile to show setting height, necklaces benefit from clasp and length detail, and earrings typically need a back view for posts and closures. A simple scale shot, on-body or in-hand, often reduces uncertainty and improves shopper confidence.
Key Takeaways
Conclusion
Jewellery packshot photography that sells is usually less about flashy production and more about precision. Your customer needs to see detail, trust the finish, and compare pieces confidently across your catalog. That means controlled light, consistent framing, accurate color, and a workflow you can repeat as your store grows. AI can be useful, especially for editing and variation creation, but it works best as support rather than a substitute for good source images. If you want a practical next step, explore more of AcquireConvert’s specialist guidance on product photography, lighting, and ecommerce imagery. Giles Thomas’s Shopify and Google expertise brings a useful commercial lens to decisions that affect both conversion and acquisition.
This article is editorial content created for educational purposes and is not a paid endorsement unless explicitly stated otherwise. Pricing, product availability, and tool features are subject to change, so please verify details directly with the provider. Any performance outcomes discussed are illustrative only and not guaranteed.

Hi, I'm Giles Thomas.
Founder of AcquireConvert, the place where ecommerce entrepreneurs & marketers go to learn growth. I'm also the founder of Shopify agency Whole Design Studios.