Packshot Photography Studio Setup (2026 Guide)
If you sell physical products online, your images do a lot of the conversion work before a shopper reads a single line of copy. A well-planned packshot photography studio helps you create consistent, clean product photos for Shopify collections, product pages, ads, marketplaces, and email campaigns. The goal is not to build a complicated commercial space. It is to create a repeatable setup that produces reliable images with minimal friction. If you are still mapping the basics, start with this guide to product photography. In this article, I will walk through what a packshot studio actually needs, where store owners often overspend, when AI tools can help, and how to choose between a DIY setup, a professional packshot photography studio, or a hybrid workflow.
Contents
What a packshot photography studio needs
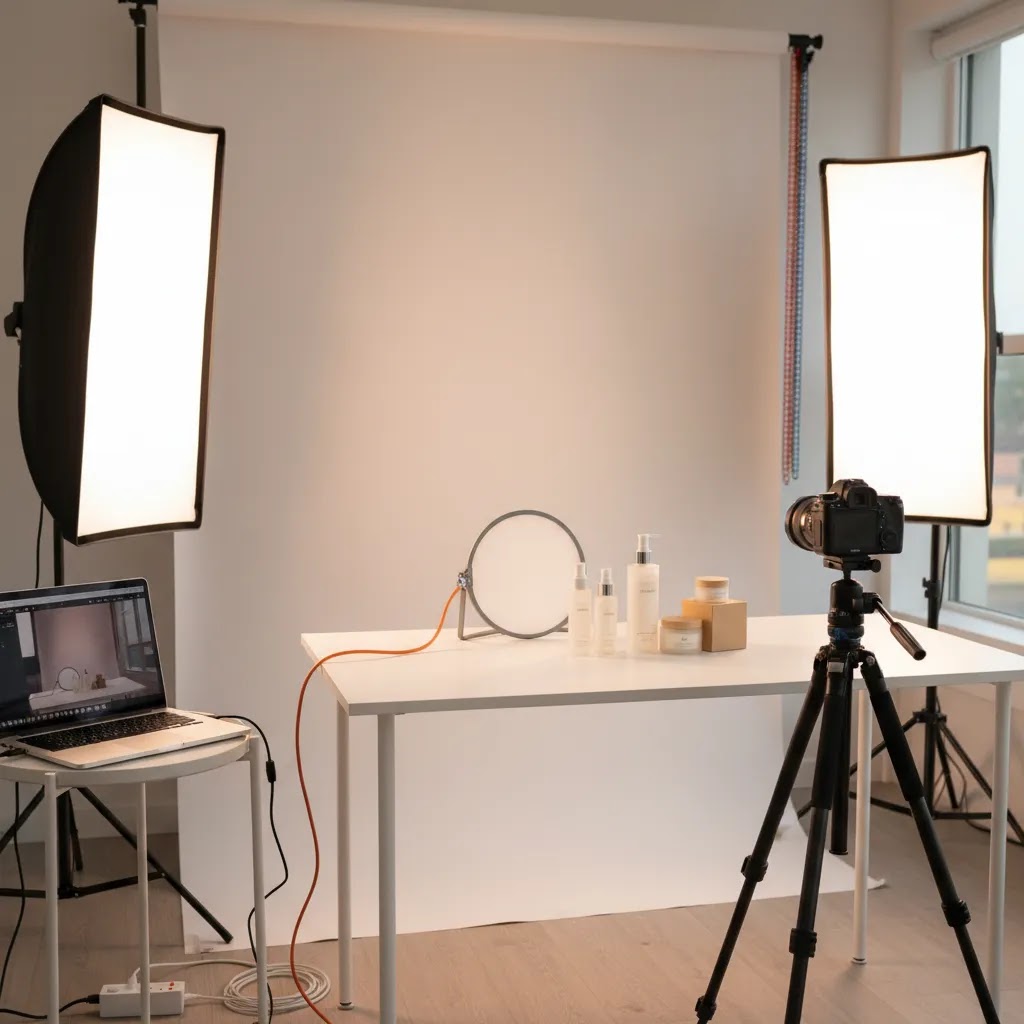
A packshot photography studio is built to produce clean, accurate, repeatable product images, usually on a white or neutral background. For ecommerce, that matters because consistency improves trust across collection pages and makes your catalog look more professional. It also makes batch editing faster.
For most Shopify merchants, a useful studio does not start with the camera. It starts with control. You need control over light, shadows, background, angles, and file output. That is why many small brands get better results from a modest indoor setup than from trying to shoot near a window whenever the weather cooperates.
A commercial packshot photography studio usually includes a dedicated shooting surface, fixed lighting, reflectors, a tripod, and post-production workflow. A smaller in-house setup can do the same job if your product range is manageable and dimensions are predictable. If you also shoot top-down compositions for social or bundles, this guide to flat lay photography will help you extend the setup.
For many brands, the best answer is a hybrid model: capture the cleanest original image you can, then use editing or AI tools to standardize output, speed up background cleanup, and create alternate versions for campaigns.
Core setup components and workflow
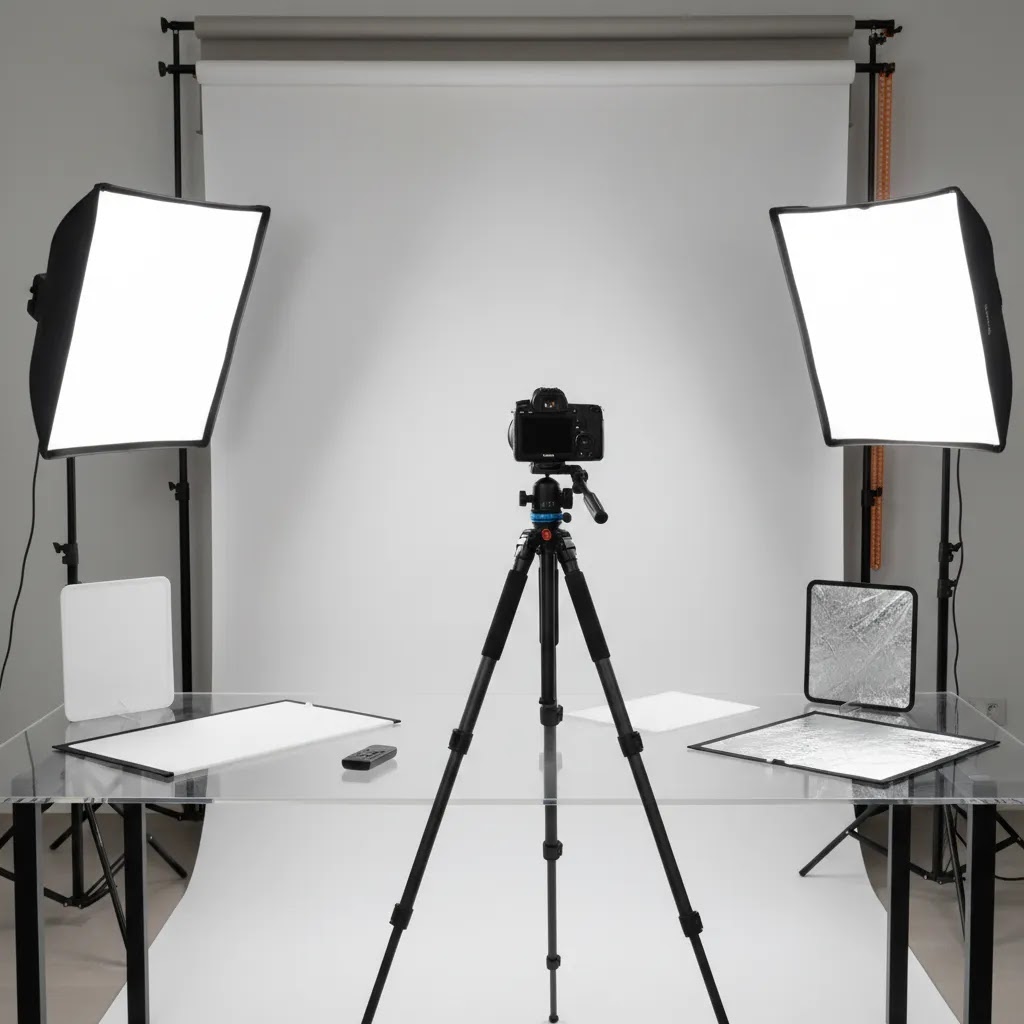
1. A consistent shooting area
Your studio can be a corner of an office, warehouse, or spare room. What matters is consistency. Use the same table height, backdrop position, tripod placement, and lens distance each time. That keeps your product framing uniform across SKUs.
2. Controlled lighting
Lighting is usually the biggest difference between amateur-looking packshots and sale-ready product imagery. Soft, diffused light reduces harsh reflections and keeps product color closer to reality. If you are building your own setup, this guide to diy photography lighting is the right next step.
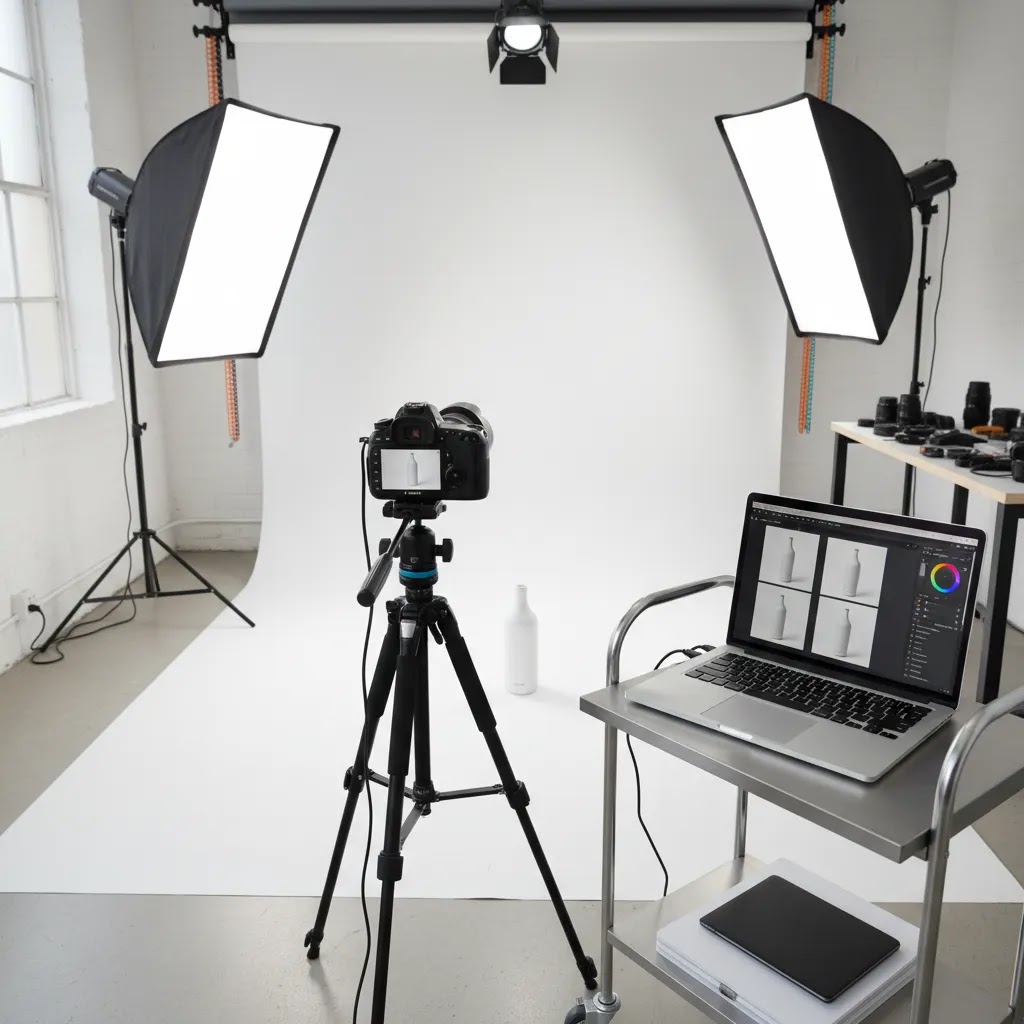
3. White or neutral backgrounds
White-background packshots remain the most flexible choice for ecommerce. They fit marketplace requirements, keep collection pages clean, and make retargeting creative easier to design. If this is your main use case, the White Background Photography category is worth bookmarking.
4. Camera and lens choices that match your catalog
You do not always need premium gear. Many merchants overspend on camera bodies and underinvest in lighting stability. A reliable tripod, fixed framing, and the right focal length often matter more. If you are choosing hardware from scratch, review these recommendations for the best camera for product photography.
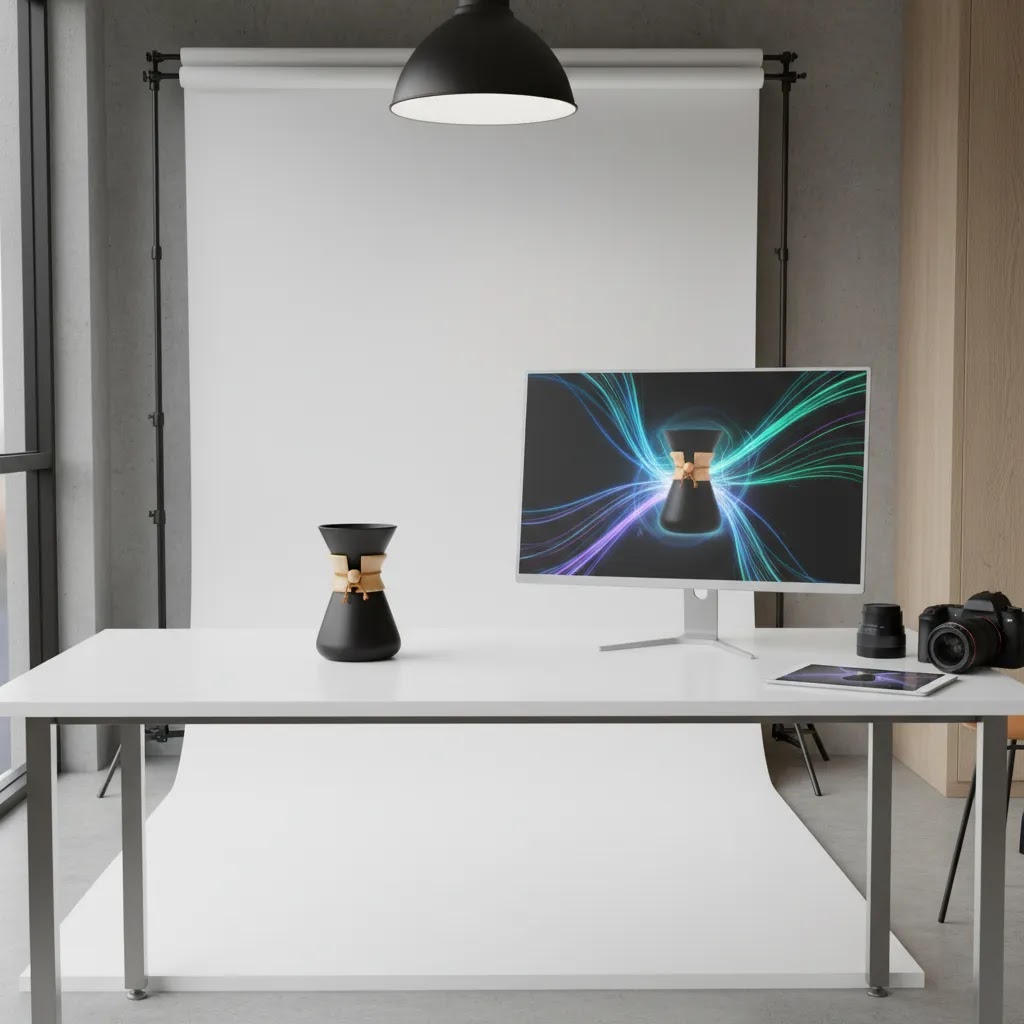
5. Editing and AI support
Post-production is where a lot of time disappears. This is also where AI tools can help, especially for background cleanup, shadow correction, and alternate scene creation. Based on the current product data available, helpful options include:
These tools are most useful when they support a solid source image, not when they are expected to rescue poor lighting, soft focus, or inaccurate product color. For broader planning, the product photography studio article can help you think about layout and workflow beyond individual packshots.
6. A repeatable asset workflow
Name files consistently, export to standardized sizes, and define where each image type will be used. For example, your hero packshot may need a white background for collection pages, while your paid social creative may use an AI-generated scene. A good studio setup supports both without creating extra confusion for your team.
Packshot photography studio cost and ROI for Shopify brands
Here is the thing: most store owners underestimate the real cost of packshots because they only price the gear. The bigger costs usually show up as inconsistency, reshoots, and editing time. The right way to think about spend is in ecommerce terms: cost per SKU, cost per launch, and turnaround time.
Typical cost drivers (what actually pushes the budget up)
In most packshot setups, the money tends to go to lighting and control. Lights, modifiers (softboxes and diffusion), stands, backdrops, clamps, and a shooting surface add up quickly. Then there is the cost you feel every week, which is time spent staging, shooting, and editing. If your workflow is not repeatable, your cost per image can rise even if your gear was inexpensive.
Practical setup levels (DIY vs in-house studio vs outsourcing)
For most Shopify brands, these are the realistic tiers:
ROI: how to judge whether in-house is worth it
Think of ROI as operational efficiency first, then performance second. In many cases, the payback comes from faster launches and fewer bottlenecks, not a direct conversion bump you can attribute to one photo change.
A simple “build vs buy vs hybrid” decision framework
From a practical standpoint, most Shopify stores land in one of these buckets:
ROI varies widely based on your category, your team capacity, and how disciplined your process is. The goal is to choose a setup that reduces friction and keeps your catalog moving.
Pros and Cons
Strengths
Considerations
Product-specific packshot setups (reflective, transparent, and jewelry)
What many store owners overlook is that “white background” is not the hard part. The hard part is controlling reflections, edge definition, and transparency so the product reads clearly on a Shopify product page and in small collection thumbnails.
Reflective and glossy products (metal, glossy packaging, coated bottles)
For reflective items, a light tent can help, but diffusion panels and carefully placed cards are often what make the product look premium. The goal is to create large, soft light sources so reflections look smooth, not speckled. Use white cards to brighten and fill, and black cards to add edge definition and prevent the product from blending into a white background. Small adjustments in card placement can change the whole look.
Transparent products (glass, clear plastic, liquids)
Transparent items need separation from the background. If you only blast light straight on, edges disappear. A common approach is to backlight the background to keep it clean, then use side lighting and negative fill (black cards) to create shape. You may also need to control internal reflections and labels, which is why glass packshots can take longer than store owners expect.
Jewelry and small high-detail items
Jewelry is a different game. You are balancing sparkle, sharpness, and dust control, which means more time on product prep and more precision with light placement. A tripod and consistent focusing matter a lot here, and many brands benefit from shooting tethered so they can check sharpness before moving on. If you need absolute consistency across metals and gemstones, this is one category where outsourcing hero images and retouching is often more efficient, while your in-house setup handles routine SKUs and basic updates.
When a turntable or specialized rig is worth it
If you regularly shoot multi-angle sets, variant angles, or short 360-style spins for ads, a turntable can reduce handling and speed up consistency. It is usually worth considering when you are doing repeatable volume work, not when you only shoot occasionally. The reality is that “standard packshot” often includes multiple angles and close-ups, so anything that reduces repositioning can reduce your cost per SKU.
Who this setup approach is for
This approach works best for ecommerce brands that need frequent product images and want more control over timing, consistency, and cost per shoot. It is especially useful for Shopify merchants with expanding catalogs, regular product drops, or ongoing ad creative needs.
If you sell straightforward products such as cosmetics, supplements, packaged goods, home accessories, or apparel add-ons, an internal packshot photography studio can be a practical move. If your products are highly reflective, luxury, oversized, or technically difficult to style, a professional packshot photography studio may still be the better fit for hero images, while your in-house setup handles day-to-day catalog updates.
AcquireConvert recommendation
For most store owners, the smartest move is not asking whether you need a professional packshot photography studio or an AI photography studio. It is asking which parts of the workflow should stay in-house and which should be supported by tools. That is the practical lens we use at AcquireConvert.
Giles Thomas approaches ecommerce content as a Shopify Partner and Google Expert, which matters because product images affect more than aesthetics. They influence merchandising, paid traffic performance, Shopping clicks, and conversion confidence. If you are building your visual workflow, start with the core fundamentals in our Product Photography Fundamentals content, then compare setup decisions against your SKU volume, team capacity, and merchandising goals. The best studio is the one you can use consistently every week, not the one that looks most impressive on paper.
How to choose the right studio setup
1. Start with product type
Small boxed items, bottles, and non-reflective products are much easier to manage in-house than transparent, glossy, or metallic items. Your category determines how much lighting control and post-production support you will need.
2. Map the images you actually need
Many brands think only about PDP hero shots. In practice, you may also need collection thumbnails, zoom images, Google Shopping assets, social creatives, comparison images, and seasonal campaign versions. Your studio should be designed around output requirements, not just the shoot itself.
3. Be honest about shooting frequency
If you update products every few months, outsourcing may be more efficient. If you launch new items weekly or run active retention and paid acquisition campaigns, an in-house setup could save time and reduce delays.
4. Decide where AI fits
AI studio photography tools are useful for repetitive production tasks. White background generation, background swapping, and resolution enhancement can all speed up catalog work. They are less dependable when the source image is poorly lit or when precise color accuracy is critical. Use AI to enhance workflow, not replace capture standards.
5. Separate hero-image standards from volume-image standards
One practical model is to outsource launch photography for hero assets and create an internal process for routine updates, line extensions, or marketplace compliance images. That gives you better control without forcing one workflow to do every job.
6. Keep Shopify merchandising in mind
Your final images should support collection page consistency, mobile cropping, and fast visual scanning. In many stores, the studio decision is really a conversion decision. Strong packshots make it easier for shoppers to compare variants, understand scale, and trust product presentation.
Packshot capture settings and post-production checklist
If you want consistent packshots, the biggest unlock is to stop “making it up per shoot.” Set baseline capture rules, then only adjust when a product truly needs it.
Baseline capture settings (a solid starting point for packshots)
These are not the only correct settings, but they are a reliable baseline for many catalog shoots:
How to keep framing consistent SKU-to-SKU
Consistency is usually a systems problem, not a creative problem. Mark tripod legs on the floor, lock your camera height, and keep the product position fixed on the table. If your products vary in size, define rules for how much “air” you want around the product in the frame and keep that consistent within a collection. This matters because Shopify collection pages punish inconsistency, especially on mobile where images display small.
Color accuracy workflow (and why it matters for returns and reviews)
Color is not just a photography detail, it is a customer expectation issue. If a product arrives looking different from the photos, it can increase complaints and returns in many categories.
At minimum, use a simple color reference workflow:
Export standards for ecommerce (Shopify-friendly output)
For Shopify, you want images that load fast, crop well, and stay consistent across collection grids.
Now, when it comes to AI editing tools, keep the same mindset: they are most valuable when they follow a consistent capture process. You still want human review before publishing, especially for color, edges, and any AI-generated shadows.
Frequently Asked Questions
What is a packshot photography studio?
A packshot photography studio is a controlled setup used to create clean, consistent product photos, usually on a white or simple background. For ecommerce, it is mainly used for product pages, collection images, marketplaces, and ads. The focus is on accuracy, repeatability, and efficient production rather than creative editorial styling.
Do I need a professional packshot photography studio for my Shopify store?
Not always. Many Shopify stores can produce strong results with a small in-house setup if lighting, framing, and editing are consistent. A professional studio may be worth it for difficult products, premium launches, or large campaigns where color accuracy and polish matter more. A hybrid workflow is often the most practical option.
What equipment is essential for a packshot photography studio?
The basics are a stable table, controlled lighting, diffusers, a clean background, a tripod, and a camera or phone that can produce sharp files consistently. Good lighting usually matters more than expensive camera gear. You also need a simple editing workflow so files are exported in the right sizes and formats for ecommerce use.
Can AI replace a physical packshot photography studio?
AI can help with editing, background removal, background generation, and resolution upgrades, but it does not fully replace the need for a solid source image in most ecommerce workflows. If your product needs accurate shape, texture, color, and reflection handling, capture quality still matters. AI is best used as workflow support, not a complete replacement.
Are white backgrounds still best for packshot photography?
In many ecommerce contexts, yes. White backgrounds are flexible, clean, and often compatible with marketplace standards. They also keep collection pages visually tidy. That said, some brands benefit from combining white-background packshots with lifestyle or AI-generated variants for ads and storytelling. It depends on where the image will be used.
How much space do I need for a packshot studio?
You can create a functional setup in a relatively small room if your products are compact. The real requirement is not square footage but control. You need enough room for lights, tripod placement, backdrop positioning, and safe movement around the product. Larger items obviously require more distance and more lighting flexibility.
Should I outsource or build an in-house studio?
If you shoot often and need fast turnaround, an in-house setup may make sense. If your products are difficult to photograph or your team lacks time, outsourcing could be more efficient. Many growing ecommerce brands do both: outsourcing high-priority campaign assets while using an internal setup for ongoing catalog maintenance.
What is the typical cost of a packshot?
The typical cost of a packshot depends on whether you are shooting in-house or outsourcing. In-house, your “cost” is usually a mix of time, gear, and editing, so it is best measured as cost per SKU or cost per image set. Outsourced pricing varies by product complexity, retouching requirements, and volume, so get a quote based on your specific shot list and quality requirements.
How much should a 2 hour product photoshoot cost?
It depends on how many products you can realistically complete in that time, and how much retouching is included. A two hour session might cover a small set of simple products, or it might barely cover setup and testing for reflective items. From an ecommerce standpoint, it is smarter to price photography based on deliverables, for example number of SKUs and required angles, rather than hours alone.
What is the 80/20 rule in photography, and how does it apply to product photos?
In product photography, the 80/20 rule usually shows up as this: a small number of inputs create most of the quality. For packshots, controlled lighting, stable framing, and consistent white balance typically drive the majority of the improvement. Once those are right, you can fine-tune styling, micro-adjust reflections, and do advanced retouching, but those steps tend to deliver smaller gains and can take much longer.
Is packshot photography the same as product photography?
Packshot photography is a subset of product photography. Packshots are usually clean, consistent, and designed for ecommerce catalogs, marketplaces, and ads where clarity matters most. Product photography can also include lifestyle images, creative campaigns, flat lays, and editorial-style shots. Many Shopify brands use both: packshots for catalog consistency, and lifestyle images for storytelling and acquisition creative.
How do I keep packshot photos consistent across hundreds of SKUs?
Document your process. Fix tripod position, camera height, lens choice, background, lighting placement, crop ratio, and file naming rules. Consistency usually comes from systems, not talent alone. This is especially important if more than one person handles photography or editing. A repeatable process saves time and protects catalog quality.
Can packshot photos affect conversion rates?
They can influence how confident shoppers feel about your products, especially on mobile and collection pages. Clear, consistent images may improve product understanding and reduce friction. Results vary by niche, traffic quality, and page design, so it is best to treat photography as one part of the broader conversion system rather than the only lever.
Key Takeaways
Conclusion
A packshot photography studio does not need to be large or expensive to be commercially useful. What it needs is a repeatable setup that matches your product type, SKU volume, and content workflow. For many ecommerce brands, the winning formula is simple: controlled lighting, a clean background, a documented process, and selective use of AI editing tools where they save time. If you want to make smarter decisions around studio setup, product imagery, and conversion-focused ecommerce content, AcquireConvert is a strong place to continue your research. Explore more of our practical guides, especially within Product Photography Fundamentals, to build a visual workflow that supports both merchandising and growth.
This article is editorial content for educational purposes and is not a paid endorsement unless explicitly stated otherwise. Pricing, product availability, and tool features are subject to change, so verify current details directly with the provider. Any performance or conversion impact discussed here is illustrative only and not guaranteed.

Hi, I'm Giles Thomas.
Founder of AcquireConvert, the place where ecommerce entrepreneurs & marketers go to learn growth. I'm also the founder of Shopify agency Whole Design Studios.