Product Staging Tips for Better Photos (2026)
Product staging is the difference between a photo that simply documents an item and one that helps sell it. If you run an ecommerce store, your images need to explain scale, quality, texture, and intended use within a second or two. Good staging does that without making the shot feel cluttered or misleading. Whether you sell on Shopify, Amazon, Etsy, or social channels, a thoughtful setup can make your products look more credible and easier to understand. This guide covers practical styling tips, common mistakes, and simple decisions around props, surfaces, backgrounds, and lighting. If you want a wider foundation before refining your setup, start with this guide to product photography for ecommerce.
Contents
What Product Staging Actually Does
Product staging is the way you arrange the subject, background, props, lighting, and composition to create a photo that supports a buying decision. For ecommerce, the goal is not just to make the image attractive. It is to make the product clearer, more trustworthy, and more relevant to the shopper.
A staged image can answer important questions fast. Is the product premium or playful? Small or oversized? Everyday or giftable? Minimal or luxurious? Those visual cues shape how people interpret value before they read product copy.
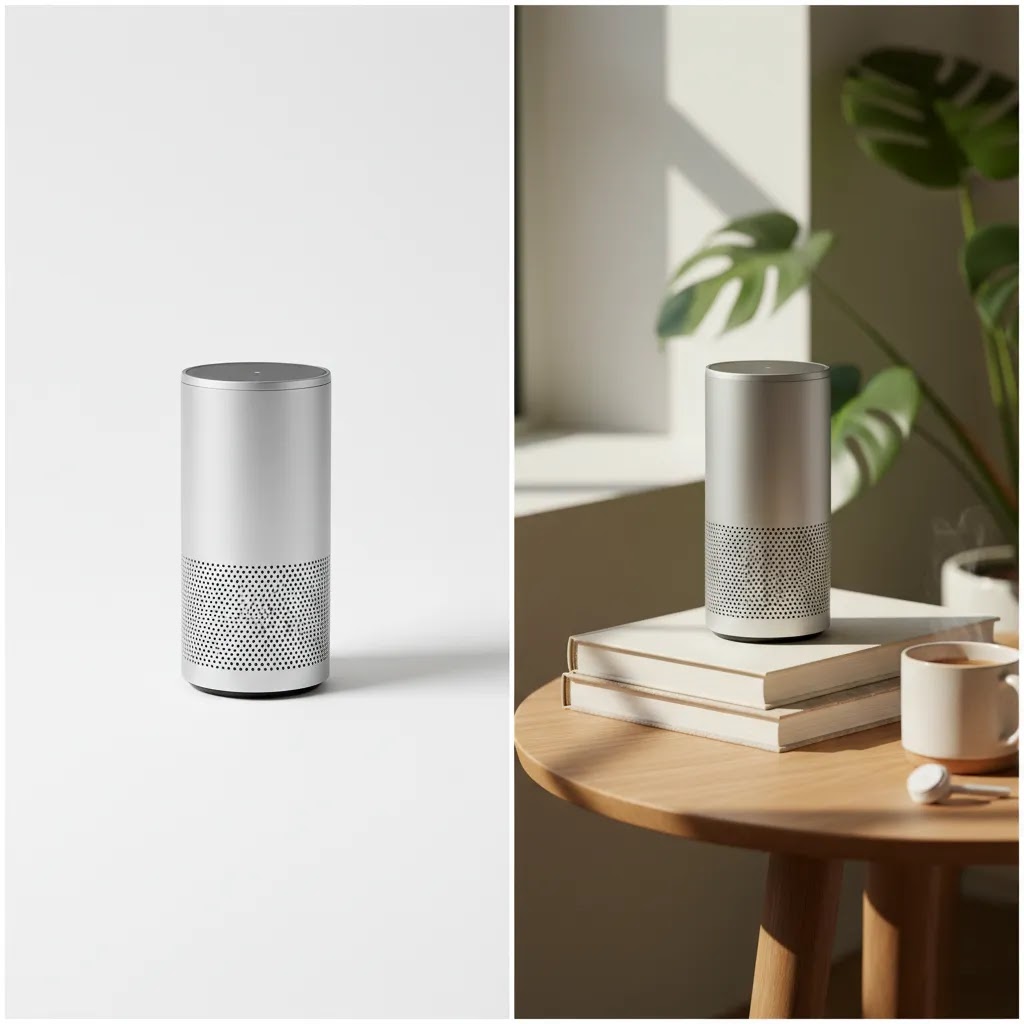
There is also a channel-specific side to staging. A marketplace hero image may need a clean white background photography approach, while your Shopify PDP, email campaign, or Instagram post may benefit from lifestyle props and stronger context. That is why experienced store owners usually build a shot list with multiple image types instead of relying on one setup for every channel.
Staging is especially useful when your product has tactile or design-led appeal. Home goods, beauty, apparel accessories, stationery, and gift items often need styling to communicate texture and use case. If you skip that layer, even a technically sharp photo can still feel flat.
Product Staging Tips That Improve Photos
Start with the selling angle, not the props. Before you place a single object on set, decide what the photo needs to communicate. If the product is handmade, stage for craftsmanship. If it solves a storage problem, stage for function. If it is meant to feel premium, use restraint and cleaner materials. Props should support the message, not compete with it.
Match the staging style to the channel. Amazon often needs consistency and compliance. Etsy may reward more personality. Social media product photography usually allows more motion, color, and lifestyle context. On your own store, the best mix is often a white-background hero image, 2 to 4 detail shots, and 1 to 3 styled images showing use or mood.
Keep color palettes controlled. A common mistake in staging product photos is using too many tones in one scene. Pick two or three complementary colors at most. Neutral surfaces tend to work well because they let the product remain the focal point. If the item itself is colorful, tone down everything around it.
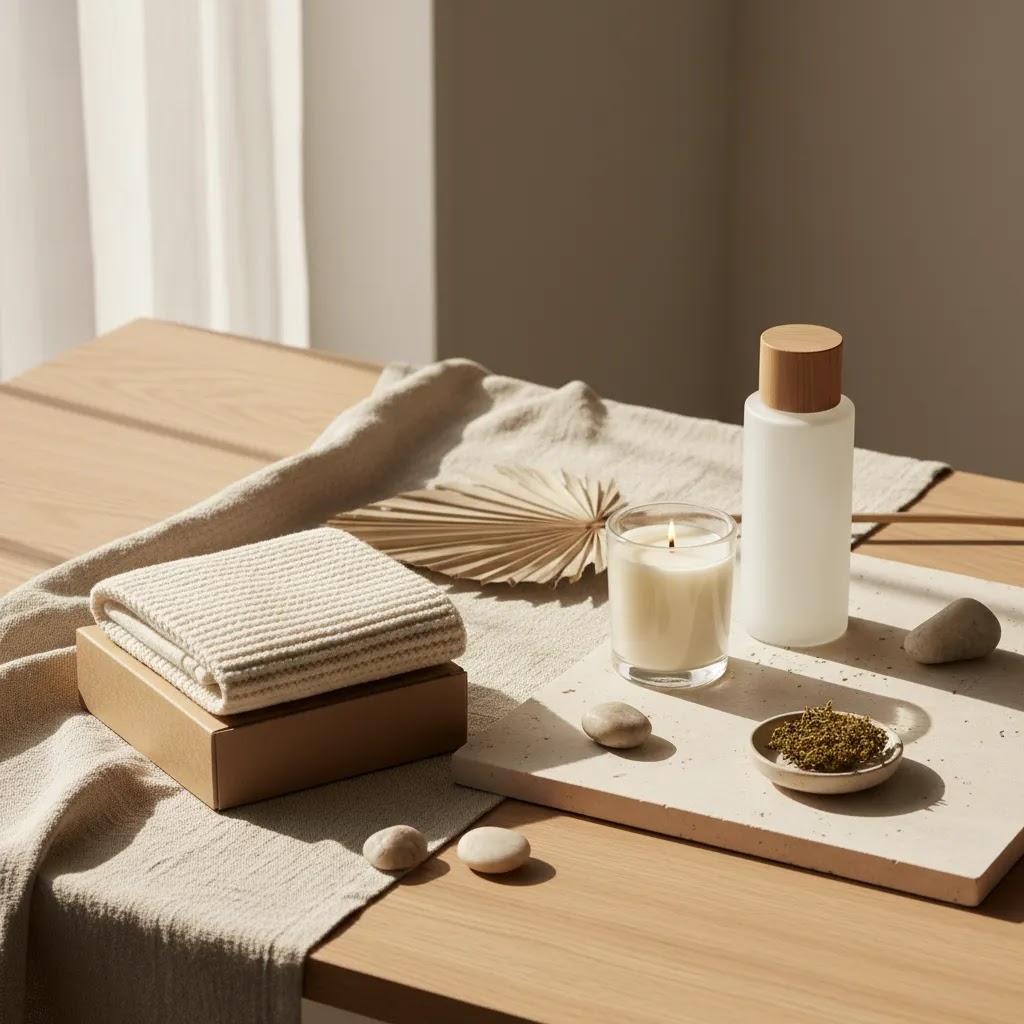
Use props with a clear job. Good props establish scale, category, or lifestyle. A skincare bottle beside a folded towel and tray tells a different story than the same bottle next to bright flowers and patterned fabric. One helps position the item as premium and clean. The other may confuse the visual hierarchy. If a prop does not explain something useful, remove it.
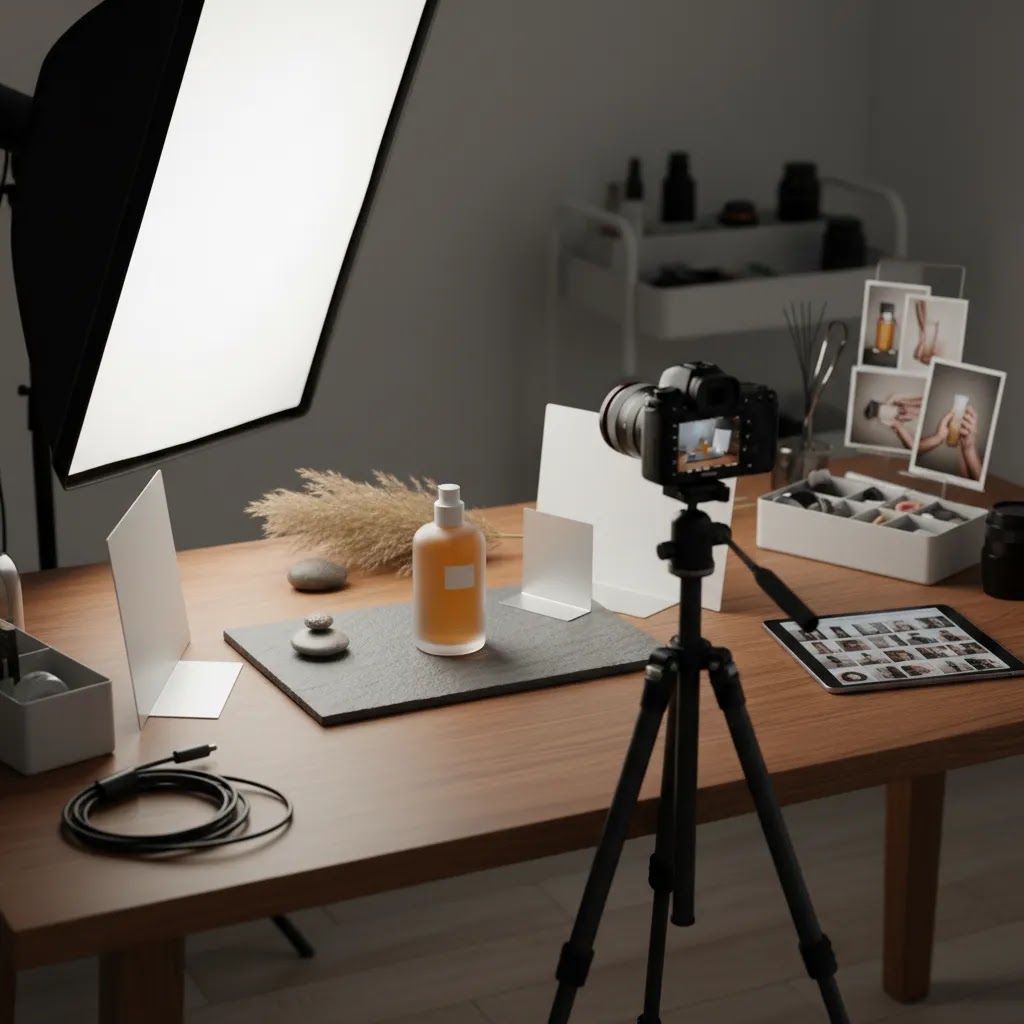
Think in layers and depth. Even simple tabletop shots improve when foreground, subject, and background are separated slightly. This creates dimension and can make the product feel less pasted onto the scene. A modest lighting setup for product photography can help here, especially if you position the light to create soft shadow falloff rather than flat front lighting.
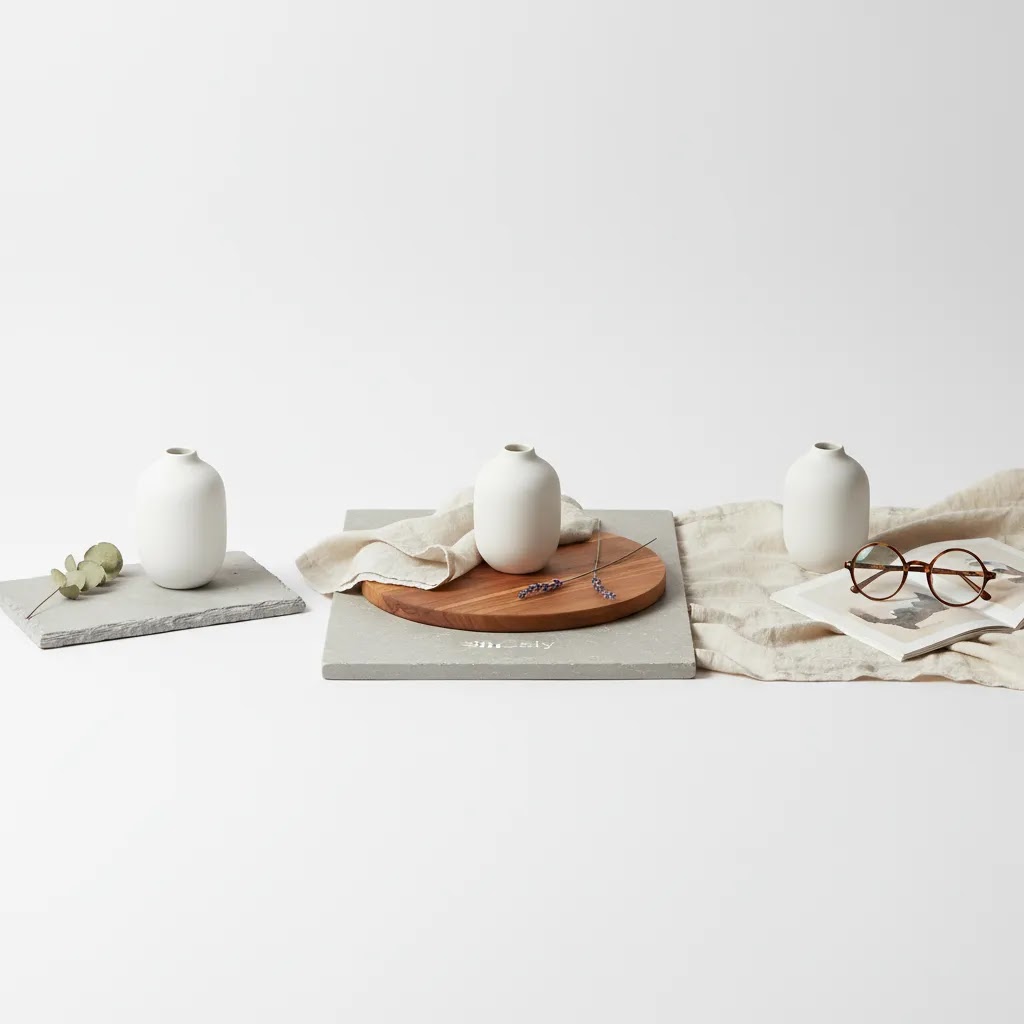
Build for consistency across SKUs. If you have a collection page with many products, staging should feel systemized. Use the same surface, similar crop, and a repeatable prop strategy. That consistency matters on Shopify collection pages because shoppers compare items side by side. If each product has a completely different visual language, your catalog can start to feel fragmented.
Plan around crop flexibility. Shoot wider than you think you need. A single staged scene may be reused for your product page, social posts, ads, and email banners. Leaving extra room helps you adapt the image without rebuilding the set. This is particularly useful for stores producing content in-house without a dedicated product photography studio.
Use lighting that supports texture. Flat overhead light can hide detail. Side light or a slightly angled soft light often works better for textured products like ceramics, apparel, candles, and packaging. If you are setting up at home, this primer on diy photography lighting can help you build a repeatable setup without overcomplicating the gear list.
Choose composition based on product shape. A top-down layout can work well for stationery, accessories, and bundled products, especially if you are testing flat lay photography. Taller products often benefit from straight-on or slight angle shots that preserve form and label readability.
Retouch lightly and consistently. Staging does not end when the camera stops. Editing should clean dust, smooth distracting wrinkles, and correct white balance without changing the product beyond recognition. If your workflow is growing, a product photography retouching service may save time, but your edits should still reflect what the customer will receive.
Product Staging Checklist (Shot List + Set Build)
Here is the thing. Most staging problems are not creative problems. They are process problems. If you treat staging like a repeatable checklist, you tend to get cleaner images, fewer reshoots, and better consistency across SKUs.
A simple pre-shoot checklist (before you touch the camera)
Product prep: Clean the product like a customer will see it. Wipe fingerprints, remove dust, and check labels for wrinkles or bubbles. If your product ships with protective film, decide whether it stays on for photos. Most of the time, you want the photo to reflect the unboxing experience, not a half-prepped sample.
Surface and backdrop prep: Iron fabric backdrops, level your surface, and check for scratches that will show once you add side light. If you are staging on wood, stone, or tile, look at it through your phone camera first. That is often enough to reveal distracting grain, seams, or glare.
Prop limits: Decide your prop limit per scene ahead of time and stick to it. If you do not set a limit, scenes tend to get “just one more thing” added until the product becomes secondary. For most Shopify product pages, one to three supporting props is plenty.
Consistency notes for multi-SKU shoots: If you are shooting variants or a collection, write down your repeatable rules. Camera height, lens choice, distance, crop, backdrop, and shadow direction should be consistent. This matters because Shopify collection grids punish inconsistency. Two products shot with different color temperatures or angles can look like they come from different brands.
A basic ecommerce shot list that covers what shoppers need
Competitors often do this implicitly, but it helps to systematize it. A practical shot list for most products looks like this:
You do not need all of these for every SKU, but having the structure makes it easier to decide what to skip and what must be included.
A quick QA pass: common staging mistakes to catch early
Before you start shooting, do a 30-second scan of the frame. You are looking for the small issues that become big problems on Shopify thumbnails and mobile product galleries:
From a practical standpoint, this QA step is one of the fastest ways to reduce retouching time and prevent a full reshoot later.
Pros and Cons
Strengths
Considerations
AI Product Staging for Ecommerce (When It Helps, When It Hurts)
Now, when it comes to AI, it helps to be clear about what we mean by “AI product staging.” In practice, this is usually a workflow where you cut out your product (or upload an existing product image), then place it into a generated lifestyle scene. That is different from traditional staging, and it is also different from a simple background swap on a white background image.
The appeal is obvious for Shopify store owners. You can create lifestyle variety without building a physical set every time. You can also test creative directions before committing to a full shoot.
Where AI staging can be genuinely useful
In many cases, AI staging is strongest when you treat it as a concepting and content-support tool, not your only source of truth:
Even then, you should assume human review is required. Check edges, check color, and check that the scene does not imply features your product does not have.
Where AI staging can hurt conversion or create risk
What many store owners overlook is that AI can introduce subtle trust issues. Shoppers may not be able to describe what feels “off,” but they often sense it, especially on higher-priced products.
Consider this safeguard for most Shopify stores: keep at least one highly truthful hero image for every SKU, plus accurate detail shots. Use AI-staged scenes as supporting creative where appropriate, not as a replacement for clarity.
Who Should Focus Most on Staging
Product staging matters most for store owners selling visually led products where context influences purchase confidence. That includes beauty, home decor, gifts, fashion accessories, candles, food packaging, and wellness products. If your item competes on design, material quality, or presentation, styling can help shoppers understand why it is worth the price.
It is also important for growth-stage Shopify merchants who already have traffic but need stronger merchandising. In many cases, the issue is not product-market fit. It is that the photos are not carrying enough of the conversion load. If that sounds familiar, staging is worth reviewing before you invest more in acquisition.
AcquireConvert's Practical Recommendation
At AcquireConvert, we generally recommend treating product staging as a merchandising decision, not just a photography task. Giles Thomas's background as a Shopify Partner and Google Expert is useful here because staged imagery affects more than visual polish. It can shape product page clarity, ad creative performance, and how shoppers interpret your offer across channels.
A smart approach is to standardize three image buckets for each SKU: a clean hero image, detail-focused angles, and a small set of lifestyle or styled shots. That gives you flexibility without creating an unmanageable workflow. If you are still refining your setup, it helps to review the broader Product Photography Fundamentals category and compare your current process against your growth goals.
If your next decision is equipment rather than styling, this guide to the best camera for product photography is a practical next read. The key point is simple: better staging often comes from stronger planning and consistency, not necessarily more expensive gear.
How to Choose the Right Staging Style
1. Start with the buying context. Ask where the image will be used first. If the shopper is comparing many products quickly, clarity should beat creativity. That usually means simpler backgrounds, obvious framing, and less prop usage. If the image is meant to inspire or stop the scroll, a more styled scene may be appropriate.
2. Consider your brand position. Minimal staging works well for premium, modern brands because it gives the product room to breathe. Richer styling may suit handmade, gift-focused, or seasonal brands where atmosphere matters. The right answer depends on your positioning, price point, and customer expectations.
3. Factor in operational reality. A staging style only works if you can repeat it. This is where many smaller brands struggle. A complex setup may look great for one launch but break down once you need 40 more SKUs photographed. Store owners usually benefit more from a simple system they can maintain than an elaborate concept they cannot scale.
4. Build around your lighting limitations. If you shoot in-house, your light setup for product photography should influence your staging choices. Dark, reflective, or highly textured props can become difficult to manage under basic lighting. Matte surfaces, neutral backdrops, and controlled shadows are usually more forgiving.
5. Review the images on actual storefront surfaces. Do not evaluate staging only in your camera preview. Upload test images into your Shopify theme, collection pages, and mobile PDP templates. A setup that feels balanced in editing software may look cramped once cropped into thumbnail grids. This step often reveals whether your staging is helping shoppers or just looking nice in isolation.
For most ecommerce teams, the best system is a blended one. Use a white-background image for consistency and clarity, then support it with staged shots that add texture, scale, and real-world context. That mix tends to serve both conversion and brand building more effectively than relying on a single image style.
How to Stage Products for Sale (By Category and Buying Intent)
Think of it this way. The “right” staging style is the one that reduces buyer uncertainty for the specific way someone is shopping. A shopper comparing options needs a different image than a shopper looking for a gift, and Shopify often has to serve both on the same product page.
Stage based on buying intent and channel behavior
Comparison shopping (clarity first): If shoppers are scanning collection pages, Google Shopping listings, or marketplace results, keep staging clean and consistent. Simple backgrounds, repeatable angles, and readable labels typically do more work than creative props. Your styled images can still exist, but they should not replace the clear “what is this” view.
Premium positioning (restraint and materials): Premium staging is often less about more props and more about better surfaces. Stone, matte texture, clean lines, and controlled highlights can support the price point. The key is to avoid anything that looks like a craft table unless “handmade” is the point.
Giftable products (context and bundling cues): If gifting is a major use case, show packaging, show what is included, and stage for presentation. A ribbon or card can work, but only if you are not implying it ships that way unless it actually does.
Problem-solution products (use-case cues): When you sell a functional benefit, show the benefit. Organizers should be shown organizing. Cleaning products should show the setting they are meant for. If you only stage “pretty,” you may miss the shopper who is trying to solve a specific problem quickly.
Category mini-playbooks you can adapt fast
Jewelry and accessories: Prioritize scale and macro detail. A clean hero shot plus close-ups of clasps, stones, texture, and finish helps reduce hesitation. A worn shot can help with scale, but keep it consistent so it does not look like a different product across SKUs.
Apparel accessories (hats, belts, bags): Shoppers want fit cues and proportion. Stage with a human model or a form that accurately represents size, then back it up with detail shots of materials, stitching, and hardware.
Home goods: Decide whether the product sells better in room context or tabletop context. Room scenes help shoppers imagine placement, while tabletop scenes can keep the product as the hero and still show texture. For many Shopify catalogs, a mix works best, but the hero image should stay consistent across the collection grid.
Beauty and skincare: Bathroom cues and clean styling tend to fit shopper expectations. Detail shots matter here, especially texture, applicator, and label readability. Be careful with reflective packaging and mixed lighting temperatures because it can make “white” products look yellow or gray.
Food packaging: Freshness cues are powerful, but they need to be believable. If you add steam, condensation, or “just baked” styling, keep it grounded in reality so it does not feel artificial. Packaging clarity still matters because shoppers often want to confirm size, count, or flavor quickly.
The 20/60/20 balance for ecommerce imagery
If you need a simple system to keep your catalog manageable, a “20/60/20” balance can help. It is not a strict rule, but it is a useful planning lens:
For large catalogs, you may skew heavier toward consistency so production stays repeatable. For smaller catalogs or launch collections, you can often afford more creative variation. The reality is that the best ratio is the one you can maintain without quality falling off after the first few SKUs.
Frequently Asked Questions
What is product staging in photography?
Product staging is the process of arranging a product, props, surfaces, background, and lighting so the photo communicates more than appearance alone. In ecommerce, it helps shoppers understand use case, size, mood, and quality quickly. Done well, it supports the sale without distracting from the item itself.
What does staging product mean?
Staging a product means setting it up intentionally for a photo so the shopper understands what it is, what it looks like, and how it fits into real life. That includes choices like the surface, background, props, lighting direction, and angle. For ecommerce, staging is less about decoration and more about reducing confusion and building trust.
How to stage products for sale?
Start by deciding what the image needs to help sell: clarity, premium feel, gifting context, or a specific use case. Then build a simple shot list: a clean hero image, a few detail shots, a scale or in-use image, and a packaging or variant shot if needed. Keep props minimal, keep lighting consistent, and always review images in your Shopify collection grid and mobile product page layout to make sure the staging still reads clearly at thumbnail size.
What is the 20 60 20 rule in photography?
In this ecommerce context, the 20/60/20 rule is a way to balance your product image set. Roughly 20% of images focus on clean hero clarity, 60% focus on supporting context like details, scale, and in-use, and 20% are more creative lifestyle variations. It is a planning tool to keep staging consistent and production realistic, not a hard rule that every store must follow.
Do I need staged photos if I already have white background images?
Usually, yes. White background photos are important for consistency, marketplaces, and clean hero shots, but they do not always show context or brand personality. Staged photos can complement them by showing texture, scale, and intended use. Most stores benefit from using both rather than choosing only one style.
How many props should I use in a product shot?
Use as few as possible while still telling the story. One to three props is often enough for a clean ecommerce image. If you add too many elements, the product can lose prominence, especially on mobile. Each prop should support category cues, scale, or lifestyle relevance in a clear way.
What backgrounds work best for product staging?
Neutral, non-reflective backgrounds tend to be the most versatile. White, soft gray, beige, stone, wood, and muted fabric often photograph well and keep attention on the subject. The best choice depends on your brand and product category, but background texture should support the item rather than become the focal point.
Is flat lay a good option for product staging?
Flat lay can work very well for products viewed from above, such as stationery, beauty sets, accessories, and curated bundles. It is especially useful for social media and editorial-style merchandising. The key is making sure the product shape and packaging still read clearly from a top-down perspective.
Do I need expensive equipment to improve product staging?
No. Better staging usually comes from planning, restraint, and consistency more than high-end gear. A controlled surface, simple backdrop, and repeatable lighting arrangement can produce strong results. If you are weighing gear upgrades, improve your set design and shot list first, then assess whether equipment is the real bottleneck.
How does staging affect Shopify product pages?
On Shopify product pages, staging can help explain the product faster and support perceived value. Styled images may also strengthen the page visually when paired with product benefits, reviews, and clear CTAs. The main caution is to avoid cluttered scenes that reduce image clarity or create confusion about what is included.
Should Amazon and Etsy product staging be different?
Often, yes. Amazon usually favors clean, compliant imagery with strong clarity and consistency. Etsy shoppers may respond well to more personality and handcrafted context, depending on the category. If you sell across both channels, create a structured shot list so your hero images stay compliant while your secondary images add brand character.
When should I use a retouching service?
If you are spending too much time removing dust, correcting color, or cleaning up repetitive imperfections, outsourcing retouching may make sense. It can also help when you need consistency across a large catalog. The important part is to keep edits realistic so the final image still matches the actual product customers receive.
Key Takeaways
Conclusion
Strong product staging helps shoppers understand what you sell faster, and that matters across Shopify stores, marketplaces, and social channels. The best setups are usually the simplest ones that match your brand, respect the product, and can be repeated across your catalog. If your images feel inconsistent or underwhelming, start by refining your shot purpose, props, and lighting before changing your entire workflow.
AcquireConvert focuses on practical ecommerce guidance for store owners making decisions like these every week. If you want the next step, explore our guides on product photography, lighting, and camera selection, or browse more resources in our photography fundamentals content. Giles Thomas's experience as a Shopify Partner and Google Expert shapes that advice around what store owners can realistically implement.
This article is editorial content created for educational purposes and is not a paid endorsement unless explicitly stated otherwise. Any tools, services, or workflows mentioned should be evaluated based on your store's needs. Results from photography changes may vary by product type, traffic quality, merchandising, and site experience. URLs and site structure were accurate at the time of writing but may change.

Hi, I'm Giles Thomas.
Founder of AcquireConvert, the place where ecommerce entrepreneurs & marketers go to learn growth. I'm also the founder of Shopify agency Whole Design Studios.