Smartphone Product Photography Tips (2026 Guide)
If you run an ecommerce store, your phone is probably the fastest way to improve weak product images without waiting on a studio shoot. Good smartphone product photography can help you publish cleaner listings, test new items faster, and keep your catalog consistent across Shopify, marketplaces, and social channels. The key is not owning the most expensive phone. It is understanding light, stability, framing, and editing choices that make products look accurate and trustworthy. If you want the broader fundamentals first, start with this guide to product photography. In this article, I’ll walk through a practical setup, what matters most for ecommerce listings, where smartphones work well, and where you may still want a more advanced camera or a dedicated production workflow.
Contents
Why smartphone product photography works for ecommerce
For many store owners, smartphone product photography is a sensible starting point because it lowers production friction. You can photograph new arrivals the same day they land, update seasonal collections quickly, and create marketplace-ready images without building a full studio from day one.
Modern phones handle exposure, focus, and color reasonably well in controlled conditions. That makes them especially useful for small to mid-sized products, simple apparel shots, beauty items, packaged goods, and home accessories. If your listing image is sharp, well-lit, and true to color, shoppers usually care more about clarity than what device captured it.
That said, a phone is only as good as the setup behind it. Poor window light, shaky hands, mixed color temperatures, and cluttered backgrounds still produce weak photos. This is why a repeatable workflow matters more than camera specs alone.
For independent merchants, the best approach is often to start with a smartphone, refine your lighting, then decide if you need more advanced gear later. If your products need overhead compositions for bundles, kits, or editorial layouts, this guide on flat lay photography is a useful next read.
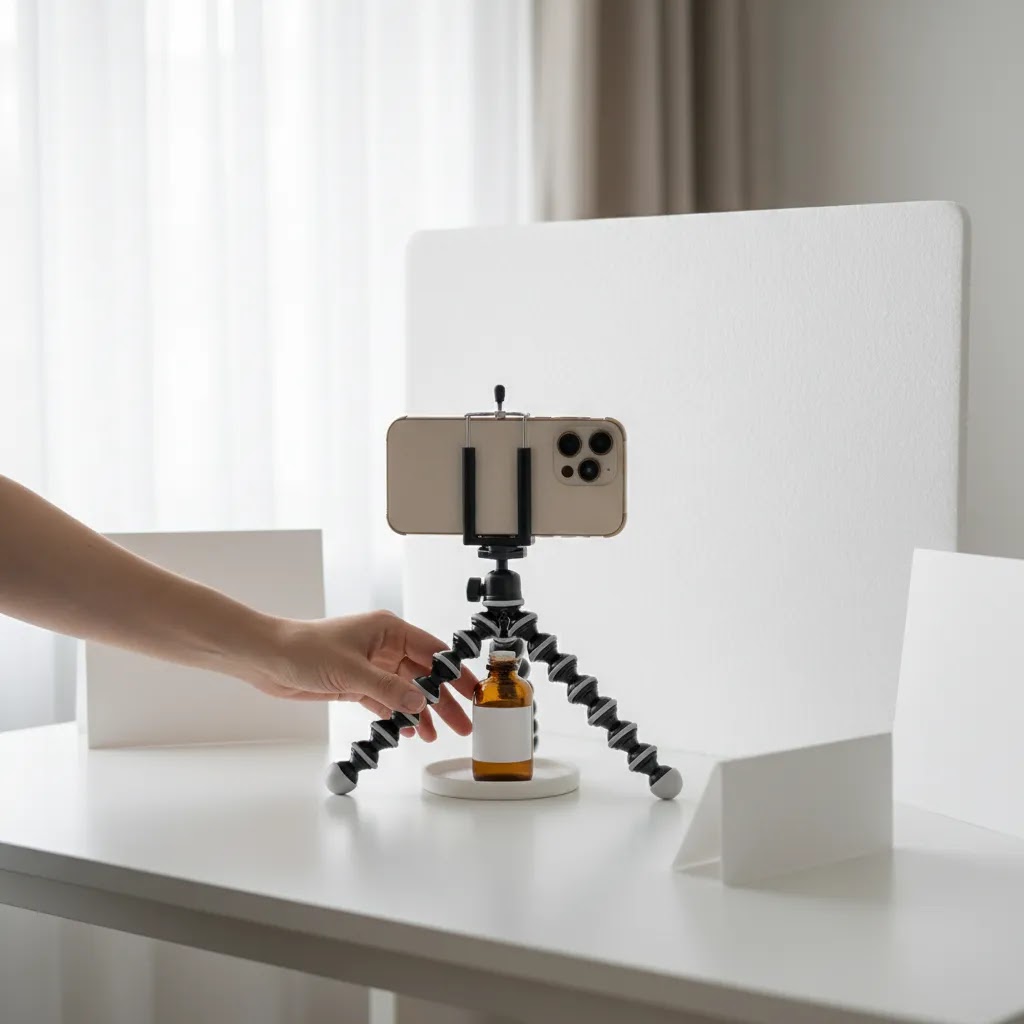
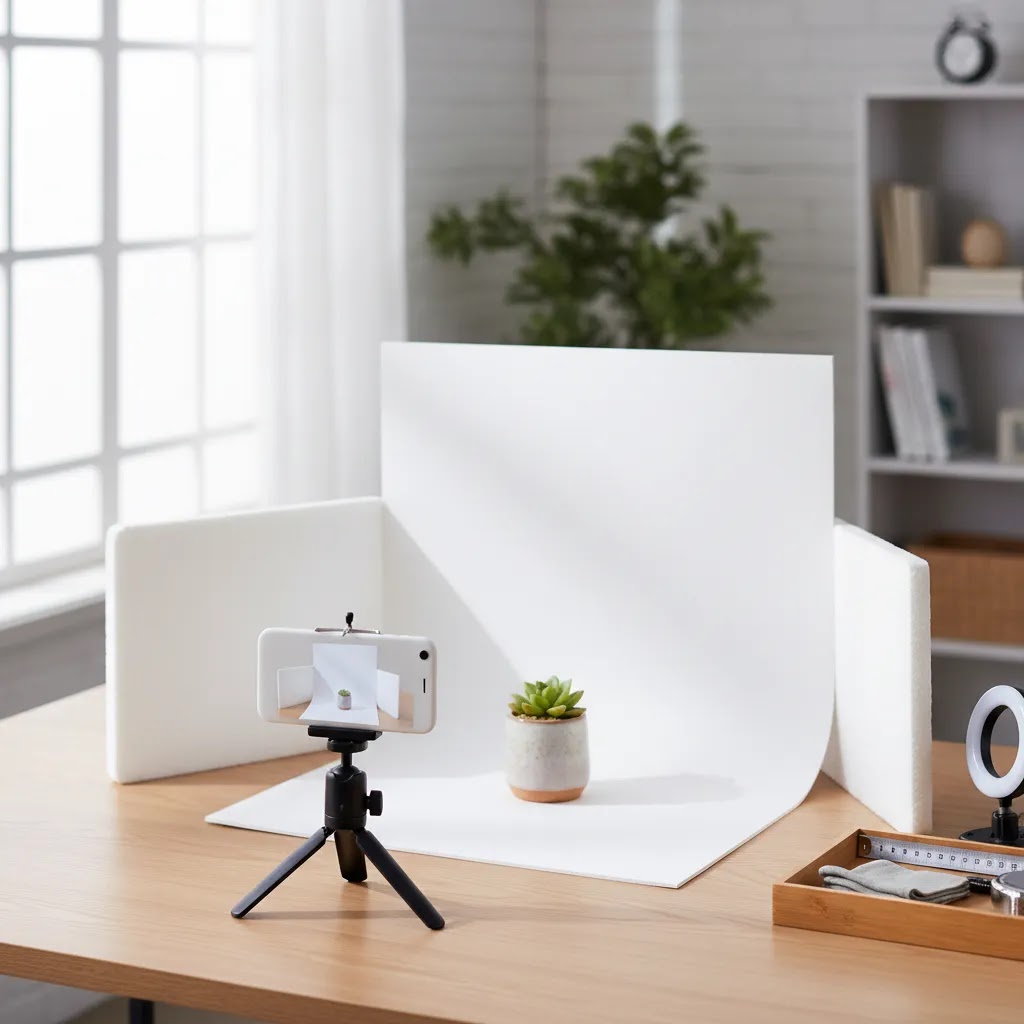
A simple smartphone product photography setup
A reliable smartphone product photography setup at home does not need to be complicated. What you need is consistency. If every image in your catalog looks like it came from a different room on a different day, the store feels less trustworthy.
Start with these essentials:
For ecommerce listings, your main image should show the product clearly against a distraction-free background. A smartphone product photography white background setup is often the safest choice for hero images because it keeps focus on the item and works across Shopify themes, ads, and product feeds.
If you need support with background cleanup, category resources like White Background Photography can help you standardize your image approach across a larger catalog.
A few practical “rules” and what they mean for product photos
What many store owners overlook is that a lot of photography advice online is written for travel, portraits, or street photography, not controlled product shots. That is why you’ll see “rules” mentioned that sound like they should solve your image problems, but they are often solving a different problem.
Here are two that come up a lot, and how they translate to smartphone product photography.
The “20/60/20 rule” in photography
People use “20/60/20” to mean different things, depending on the source. In practical terms, it is usually trying to communicate balance: one primary thing (your subject), one supporting thing (the context or secondary light), and one small accent (detail, prop, or highlight) without clutter.
For ecommerce product photos, think of it this way:
If your shots look “busy,” the fix is usually not a new camera. It is removing props, increasing the distance between your product and background, and using a simpler light setup so the product stays visually dominant.
The “400 rule” in photography
The “400 rule” is commonly referenced in low-light shooting. It is a rough guideline to avoid certain image-quality issues when you increase sensitivity or try to shoot handheld. The core idea is simple: if you push your phone too hard in low light, you get noise (grain), motion blur, or aggressive phone processing that makes your product look crunchy and inaccurate.
In controlled product photography, the best interpretation of the “400 rule” is this: keep ISO as low as possible, and do not rely on handheld shooting when your shutter speed drops.
Quick troubleshooting based on the goal behind these “rules”:
The reality is that ecommerce photos live side by side. You do not need “perfect” photography theory. You need repeatable inputs, same light, same angle, same crop, so every SKU looks like it belongs in the same store.
What makes a listing photo actually convert
Smartphone photography for ecommerce is not just about taking a decent picture. It is about reducing uncertainty for the shopper. Your images need to answer obvious buying questions quickly: What does it look like? What is the texture? How big is it? What details matter? Is the color accurate?
Here are the features that matter most in practice:
Phones are particularly strong when you need speed. They let you capture content for product pages, organic social, short-form video, and ad creative in one workflow. For stores balancing catalog efficiency with branding, that flexibility matters.
Still, there are limits. Large reflective items, glass, highly textured materials, and products requiring advanced depth control can expose the weaknesses of a phone camera. In those cases, compare your current workflow with a dedicated setup or read more about choosing the best camera for product photography.
Smartphone camera settings that actually matter for product photography
From a practical standpoint, most catalog shoots fail for a predictable reason: the phone keeps changing its mind. It shifts exposure, hunts for focus, and warms or cools the scene as you move slightly. That is fine for casual photos, but it creates inconsistency across a Shopify collection.
If your phone has a “Pro” mode (or manual controls in the native camera app), it is worth using for product photography. If it does not, you can still get most of the benefit by using the camera’s exposure and focus lock.
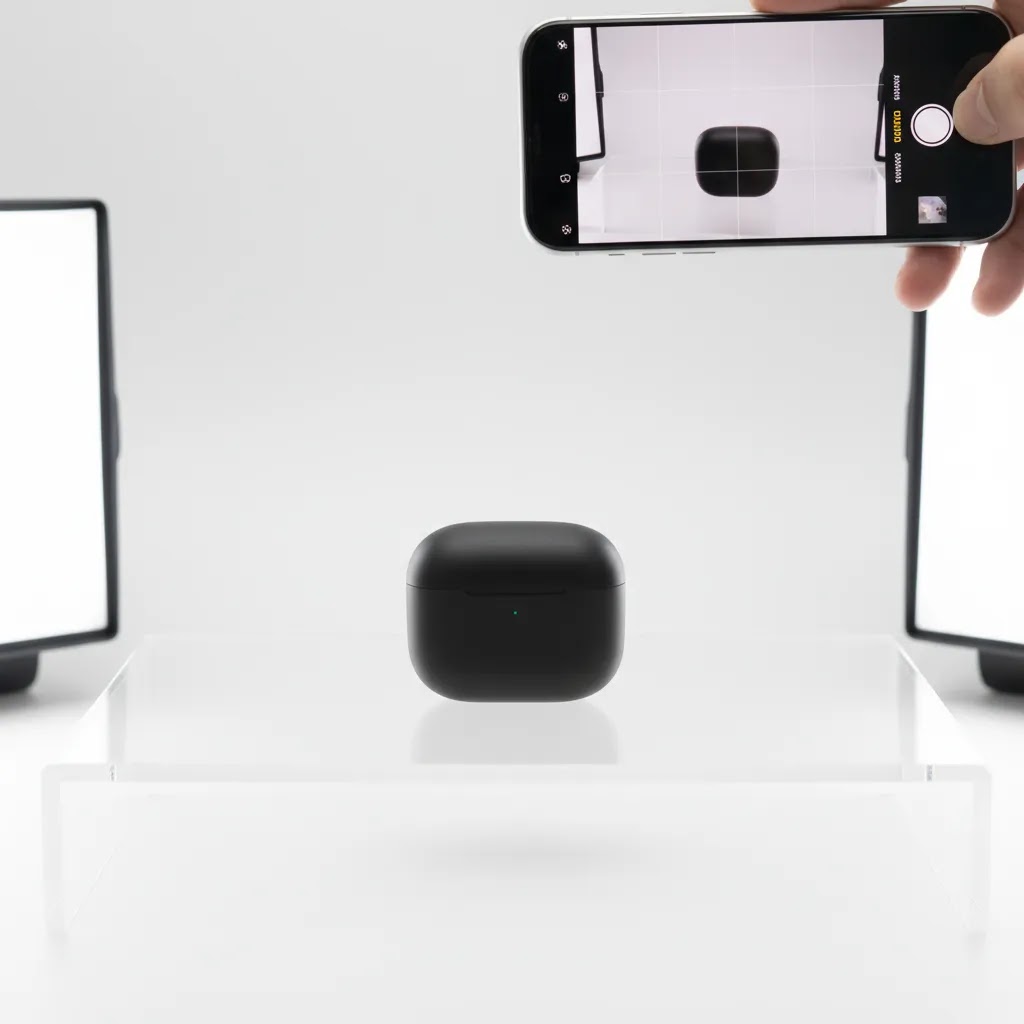
Auto vs Pro mode: what to lock first
Consider this: you do not need full manual control to get a big upgrade. You mainly need to stop constant changes between frames.
On many phones, you can tap and hold to lock focus and exposure (often shown as AE/AF Lock). If you are shooting a row of similar products, do this once, then keep your camera distance and lighting consistent while you work through the SKU list.
ISO and shutter speed: how to think about sharpness and noise
Two settings matter most for product clarity: ISO and shutter speed.
For ecommerce, a good default is to keep ISO as low as your lighting allows, then use stabilization to handle the shutter speed you need. This is where a tripod becomes more than a “nice to have.” If your shutter speed drops because you are using softer light, a tripod and a 2-second timer can keep images sharp without pushing ISO up and adding noise.
If your images look clean but slightly blurry, the fix is usually stabilization or more light. If your images look sharp but gritty, the fix is usually lower ISO, which again typically means you need more light or a steadier setup.
White balance: ecommerce accuracy beats “vibe”
White balance is the setting that decides what “white” looks like, which affects every product color you sell. Many store owners run into this when they shoot half a catalog near a window (cooler light), then shoot the rest under warm indoor bulbs. The result is a category page full of images that do not match.
For most Shopify stores, the simplest rule is: avoid mixed lighting. Turn off room lights when using window light, or block window light when using artificial lights. Pick one.
If your phone lets you set white balance in Kelvin, choose a value and keep it consistent across the shoot. If you cannot set Kelvin, use a consistent light source and correct white balance during editing, but do it in a repeatable way so you do not “fix” every image differently.
The goal is not making the photo look dramatic. The goal is making the product look like the product, so customers trust what they see, and your catalog looks like one cohesive brand system.
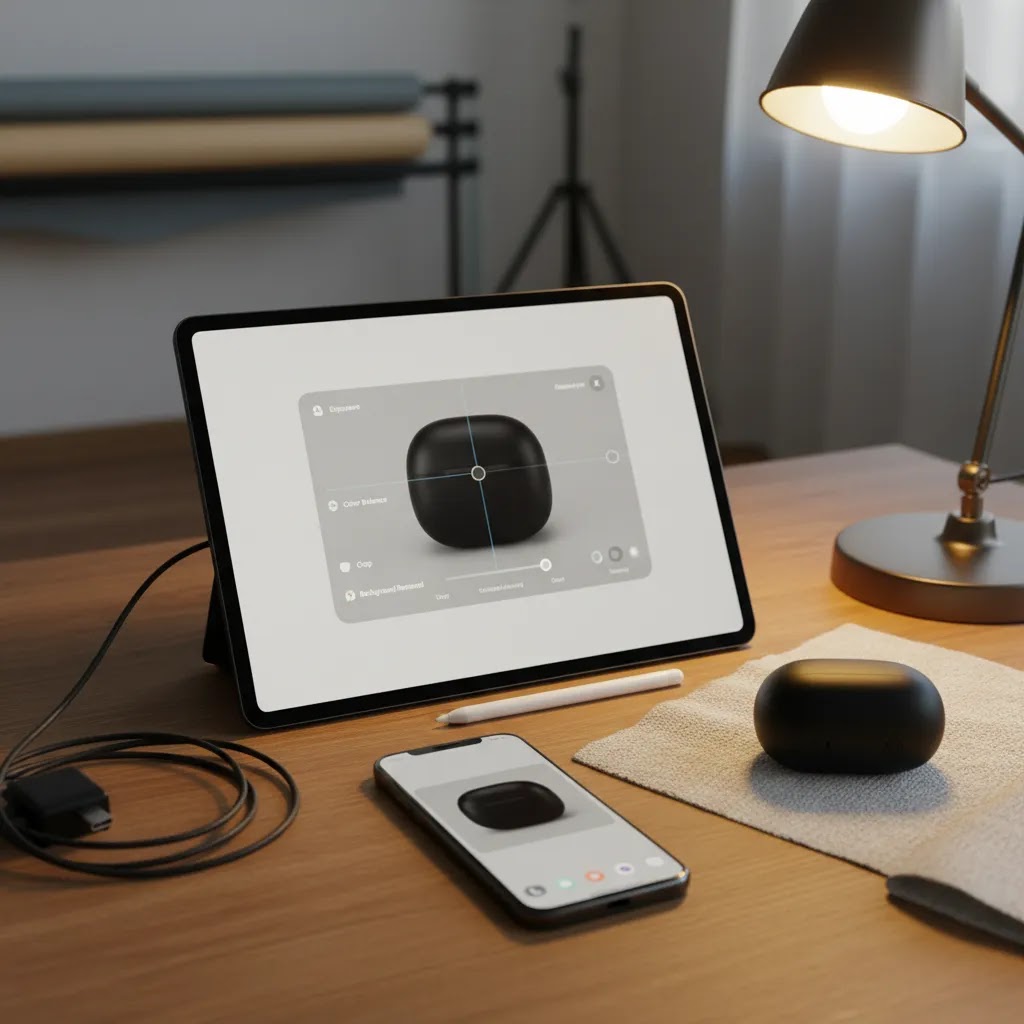
A practical smartphone product photo editing workflow (and export specs)
Here’s the thing: the shoot is only half the job. Editing is where you standardize a catalog. If you want your Shopify collection pages to look consistent, you need a simple checklist you run the same way every time.
A repeatable edit checklist for ecommerce listings
Try this workflow, in this order:
This is also where you should sanity-check details that impact returns: color accuracy, texture realism, and whether the product looks the right size relative to props or models.
Which app is best depends on what you need to fix
Competitors often recommend a single “best” app, but for most store owners, the better approach is choosing based on your workflow. In practice, editing apps fall into a few useful categories:
For most Shopify store owners, batch consistency is the real win. If you can apply the same crop ratio and similar exposure and white balance adjustments across a group of images, your catalog will look far more professional without spending hours per product.
Whatever you use, review the final images on a phone screen before uploading. Many edits that look fine while zoomed in can look too bright, too warm, or overly sharpened once viewed as a product grid.
Export standards for ecommerce (so Shopify uploads stay fast and sharp)
Export settings are where a lot of good work gets accidentally ruined. You want images that look crisp, but you also want pages that load quickly.
Think of export specs as part of conversion rate optimization. If images are too soft, customers hesitate. If pages load slowly, customers bounce. You want a sensible balance, then you adjust based on real store performance.
Pros and Cons
Strengths
Considerations
Who smartphone photography is best for
Smartphone product photography is best for ecommerce operators who need speed, consistency, and acceptable quality without building a full studio immediately. It is especially useful for Shopify merchants launching small catalogs, testing product-market fit, updating seasonal inventory, or creating frequent social-ready product content.
It also suits brands with lightweight products that do not demand advanced lighting control, such as cosmetics, packaged goods, accessories, stationery, and some apparel. If you are shooting furniture, jewelry with reflective surfaces, or premium products where micro detail drives conversion, a phone may still work for supporting content but not always for your final hero images.
AcquireConvert's practical recommendation
If you are a growing store owner, the smartest move is usually not asking, “What is the best smartphone for product photography?” first. Ask whether your workflow produces consistent, accurate, listing-ready images. In most cases, lighting, stabilization, and editing discipline have a bigger impact than upgrading from one recent phone model to another.
At AcquireConvert, the advice is grounded in how ecommerce operators actually work: publish quickly, keep visual standards tight, and improve the system before spending more on gear. That practical bias reflects Giles Thomas’s experience as a Shopify Partner and Google Expert, where product imagery affects not just your product page experience but also ad performance, click-through rate, and catalog presentation across channels.
If you want a broader resource hub, browse Product Photography Fundamentals. If your catalog volume is growing and you are considering a more controlled workflow, it is also worth reviewing what a product photography studio setup can offer before you invest in equipment.
How to decide if your phone is enough
Here is a practical way to judge whether product photography using smartphone equipment is still the right fit for your store.
1. Look at your catalog complexity
If your products are matte, small to medium sized, and easy to light, a smartphone may be completely fine. If they are reflective, translucent, oversized, or highly detailed, you may hit quality limits sooner.
2. Review where the photos will be used
For Shopify product pages, collection pages, email campaigns, and social content, smartphone images can often perform well if they are clean and consistent. If you need heavy cropping, print use, or advanced commercial campaigns, you may need more headroom than a phone can offer.
3. Check image consistency, not just individual quality
One strong image is not enough. Review 20 products side by side. Are backgrounds uniform? Are colors consistent? Are proportions and angles similar? Shoppers see your catalog as a system, not isolated files.
4. Measure operational speed
If your current phone workflow helps you launch products faster and maintain acceptable quality, that has real ecommerce value. Delayed publishing can cost more than minor image differences, especially for fast-moving inventory or trend-led products.
5. Decide whether the bottleneck is skill or equipment
Many merchants assume they need a new device when the real issue is light placement, unstable framing, or poor post-processing. Fix those first. Then compare results. If you still cannot achieve the level your brand needs, that is the point to consider camera upgrades or outside support.
This is usually the right order for growth-stage stores: standardize your smartphone setup, create a reusable shot list, improve editing, then invest based on actual limitations rather than guesswork.
Frequently Asked Questions
Can I use a smartphone for ecommerce product photography?
Yes, in many cases you can. A smartphone can produce listing-ready images if you control lighting, stabilize the phone, and keep backgrounds clean. For many Shopify stores, that is enough to launch products and maintain a credible storefront. More advanced gear may still help with reflective, luxury, or highly technical products.
What is the best smartphone product photography setup at home?
A practical home setup includes a smartphone with a strong rear camera, tripod, clean backdrop, consistent light source, and simple editing process. Window light can work, but it is less predictable across the day. A repeatable setup matters more than a large room or expensive gear.
Do I need a white background for product photography with smartphone?
For primary ecommerce listing images, a white or very clean neutral background is often the safest option. It keeps attention on the item and usually works well across collection pages and product feeds. Lifestyle backgrounds can still help, but they are usually better as supporting images rather than the main hero shot.
Is a tripod necessary for smartphone product photography?
A tripod is strongly recommended. It improves sharpness, keeps framing consistent across products, and helps you maintain the same angle for collection pages. For stores photographing multiple SKUs, a tripod also saves time because you can build a repeatable workflow instead of resetting each shot by hand.
What types of products are hardest to shoot on a phone?
Reflective surfaces, glass, jewelry, large products, and items where tiny texture details matter are often the hardest. Phones can struggle with glare control, precise depth handling, and color accuracy in these situations. You may still use a phone for supporting images, but not always for your final storefront hero shots.
How many product photos should I include on a listing?
There is no universal number, but most ecommerce listings benefit from a hero image, at least one alternate angle, a close-up detail shot, and a scale or lifestyle image where relevant. The right mix depends on how much explanation the product needs before a shopper feels confident buying it.
Should I edit smartphone product photos heavily?
No. Edit for clarity, not dramatic effect. Straighten the frame, correct white balance, crop consistently, and remove distractions. Heavy filters or aggressive retouching can make products look inaccurate, which may create mismatched expectations and higher return risk. The goal is truthful presentation with clean execution.
When should I upgrade from a phone to a camera setup?
You should consider upgrading when your phone setup is no longer meeting brand standards, slowing production, or failing to capture important product details. If the bottleneck remains after improving lighting and stabilization, it may be time to compare more advanced equipment or a more structured studio workflow.
How do I do product photography with a phone?
Use your phone’s rear camera, put it on a tripod, and shoot in consistent light against a clean backdrop. Tap and lock focus and exposure so your phone does not change brightness between shots. Keep ISO low by adding light rather than relying on low-light mode, and use a timer to prevent shake. Then edit with a repeatable checklist, straighten, crop to a consistent ratio, correct exposure and white balance, and clean up minor distractions before uploading to your store.
What is the 20 60 20 rule in photography?
It is a loosely used “balance” guideline that people apply in different ways, but the intent is usually composition and visual hierarchy. For ecommerce product photography, the practical interpretation is keeping the product as the clear priority, using limited supporting context, and avoiding extra props that distract. If the shopper cannot instantly understand what is being sold from the thumbnail, the composition is usually too busy.
What is the 400 rule in photography?
It is commonly referenced as a guideline to avoid low-light quality issues like noise and blur. For smartphone product photos, the useful takeaway is to avoid pushing ISO too high, and to stabilize the phone when shutter speed drops. In practice, better lighting and a tripod usually solve the problem more reliably than trying to “fix” low-light images after the fact.
Which app is best for product photography?
It depends on your workflow. If you mainly need consistent crop, exposure, and white balance, a solid general photo editor is usually enough. If you need clean cutouts for white backgrounds or marketplace standards, a background removal tool can help. If you are processing lots of SKUs, look for an app that supports batch edits or applying the same settings across multiple images, because catalog consistency is often more important than one perfect edit.
Key Takeaways
Conclusion
Smartphone product photography is a practical option for many ecommerce brands, especially if you need speed, low friction, and a setup you can manage yourself. The biggest wins usually come from better lighting, steadier shooting, cleaner backgrounds, and a repeatable shot list, not from overcomplicating the gear. If your images clearly show the product and stay consistent across your catalog, a phone may serve you well for longer than you expect. If you want more guidance, AcquireConvert is a useful next stop for specialist ecommerce content shaped by Giles Thomas’s experience as a Shopify Partner and Google Expert. Explore the related photography guides, compare equipment paths, and use what fits your current store stage rather than chasing a more complex setup too early.
This article is editorial content intended for educational purposes. It is not a paid endorsement unless explicitly stated otherwise. Product photography results may vary based on your products, lighting, setup, editing process, and storefront context. Pricing for any tools or services mentioned elsewhere on AcquireConvert is subject to change and should be verified directly with the provider before purchase.

Hi, I'm Giles Thomas.
Founder of AcquireConvert, the place where ecommerce entrepreneurs & marketers go to learn growth. I'm also the founder of Shopify agency Whole Design Studios.